DTE516 - CD Player Emerson - Free user manual and instructions
Find the device manual for free DTE516 Emerson in PDF.


| Product Type | Sing-Along CD Player with Headset Microphone |
| Brand | Emerson |
| Model | DTE516 |
| Power Source | 2 x AA batteries (not included) or AC adapter 4.5V DC, 500mA (positive center) |
| Battery Life | Approximately 4-6 hours with alkaline batteries |
| Disc Compatibility | Standard CD, 3-inch CD (no adapter needed) |
| Playback Modes | Normal, Repeat One, Repeat All, Intro (first 10s), Shuffle, Programmable (up to 20 tracks) |
| Anti-Shock | 45-second electronic anti-skip protection |
| Equalizer Modes | POP, ROCK, SRR (Surround), Off |
| Bass Boost | BBS switch with ON/OFF |
| Volume Limiter | ON/OFF switch to limit maximum volume |
| Hold Switch | ON/OFF to prevent accidental button presses |
| Microphone Jack | 3.5mm for headset microphone (red plug) |
| Headphone Jack | 3.5mm for included headset (blue plug) |
| Display | LCD showing track number, time, repeat, shuffle, program, intro, hold, bass boost, anti-shock, EQ mode, battery indicator |
| Dimensions (approx) | 5.1 x 5.1 x 1.5 inches (130 x 130 x 38 mm) |
| Weight (approx) | 0.5 lbs (230 g) without batteries |
| Safety Features | Laser safety (Class 1), small parts warning (not for under 8), auto power off after 30 seconds inactivity |
| Included Accessories | Headset with microphone (blue and red plugs), owner's manual |
| Maintenance | Clean with dry cloth; handle discs by edges; clean discs radially; avoid moisture and heat |
| Warranty | 90 days limited (labor and parts) with proof of purchase; $9 shipping fee (except CA) |
Frequently Asked Questions - DTE516 Emerson
User questions about DTE516 Emerson
0 question about this device. Answer the ones you know or ask your own.
Ask a new question about this device
Download the instructions for your CD Player in PDF format for free! Find your manual DTE516 - Emerson and take your electronic device back in hand. On this page are published all the documents necessary for the use of your device. DTE516 by Emerson.
USER MANUAL DTE516 Emerson
Sing-Along CD Player with Headset Microphone
OWNER'S MANUAL
DTE516
Copyright 2006 Viacom International Inc. All rights reserved. Nickelodeon, Nick Jr., Nicktronics, Dora the Explorer and all related titles, characters and logos are trademarks of Viacom International Inc.
SAFETY PRECAUTIONS

natural_image
Black triangular warning sign with white lightning bolt symbol (no text)CAUTION
RISK OF ELECTRIC SHOCK
DO NOT OPEN

natural_image
Black triangular warning symbol with exclamation mark (no text or numbers)CAUTION: TO REDUCE THE RISK OF ELECTRIC SHOCK, DO NOT REMOVE COVER (OR BACK). NO USER-SERVICEABLE PARTS INSIDE. REFER SERVICING TO QUALIFIED SERVICE PERSONNEL.

natural_image
Warning symbol: black lightning bolt inside a triangle (no text or numbers)DANGEROUS VOLTAGE:
The lightning flash with arrowhead symbol within an equilateral triangle is intended to alert the user to the presence of uninsulated dangerous voltage within the product's enclosure that may be of sufficient magnitude to constitute a risk of electric shock to persons.

natural_image
Warning symbol: black exclamation mark inside a triangle (no text or numbers)ATTENTION:
The exclamation point within an equilateral triangle is intended to alert the user to the presence of important operating and maintenance (servicing) instructions in the literature accompanying the appliance.

natural_image
Warning symbol with a black sunburst inside a triangle (no text or numbers)DANGER:
Invisible and hazardous laser radiation when open and interlock failed or defeated. Avoid direct exposure to beam.
LASER SAFETY: This unit employs a laser. Only qualified service personnel should attempt to service this device due to possible eye injury.
CAUTION: USE OF CONTROLS, ADJUSTMENTS OR PERFORMANCE PROCEDURE HEREIN MAY RESULT IN HAZARDOUS RADIATION EXPOSURE.
FCC WARNING:
This equipment may generate or use radio frequency energy. Changes or modifications to this equipment may cause harmful interference unless the modifications are expressly approved in the instruction manual. The user could lose the authority to operate this equipment if an unauthorized change or modification is made.
INFORMATION:
This equipment has been tested and found to comply with the limits for a Class B digital device, pursuant to Part 15 of the FCC Rules. These limits are designed to provide reasonable protection against harmful interference in a residential installation. This equipment generates, uses and can radiate radio frequency energy and, if not installed and used in accordance with the instructions, may cause harmful interference to radio communications. However, there is no guarantee that interference will not occur in a particular installation. If this equipment does cause harmful interference to radio or television reception, which can be determined by turning the equipment off and on, the user is encouraged to try to correct the interference by one or more of the following measures:
- Reorient or relocate the receiving antenna.
- Increase the separation between the equipment and receiver.
- Connect the equipment into an outlet on a circuit different from that to which the receiver is connected.
- Consult the dealer or an experienced radio/TV technician for help.
SAFETY INSTRUCTIONS
- Read these instructions.
- Keep these instructions.
- Heed all warnings.
- Follow all instructions.
- Do not use this unit near water.
-
Clean only with a dry cloth.
-
Do not block any ventilation openings. Install in accordance with manufacturer's instructions.
-
Do not install near any heat sources such as radiators, heat registers, stoves or other apparatus (including amplifiers) that produce heat.
-
Do not defeat the safety purpose of the polarized or grounding-type plug. A polarized plug has two blades with one wider than the other. A grounding-type plug has two blades and a third grounding prong. The wide blade or the third prong are provided for your safety. If the provided plug does not fit into your outlet, consult an electrician for replacement of the obsolete outlet.
- Protect the power cord from being walked on or pinched particularly at plugs, convenience receptacles, and the point where they exit from the unit.
- Only use attachments/accessories specified by the manufacturer.
- Unplug this unit during lightning storms or when unused for long periods of time.
- Refer all servicing to qualified service personnel. Servicing is required when the unit has been damaged in any way, such as the following: the power-supply cord or plug has been damaged; liquid has been spilled or objects have fallen into the unit; and/or the
unit has been exposed to rain or moisture, does not operate normally, has changed its performance or has been dropped.
- This unit should not be exposed to dripping or splashing water and no object filled with liquids such as vases should be placed on the unit.
- Do not overload wall outlet. Use only power source as indicated.
- Use replacement parts as specified by the manufacturer.
- The product may be mounted to a wall only if recommended by the manufacturer.
- Upon completion of any service or repairs to this product, ask the service technician to perform safety checks.
Emerson Radio Corp. has produced this audio product under license from Nickelodeon. We have taken great care to make sure your unit was in perfect working order when it left our factory.
It has been designed to give you many years of enjoyment and trouble-free operation. Read this manual before operating this unit to become familiar with its features. In the event you require technical assistance, please contact the Emerson Radio Customer Service hotline at 1-800-898-9020. Retain this manual for future reference.
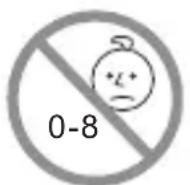

WARNING
Choking Hazard–Small Parts and Packaging Materials. Not for children under 8 years.
- All materials for fastening or packing purposes are not part of the unit and should be discarded for children's safety.
- Please keep all information for future reference.
- This is not a toy.
TOP OF UNIT
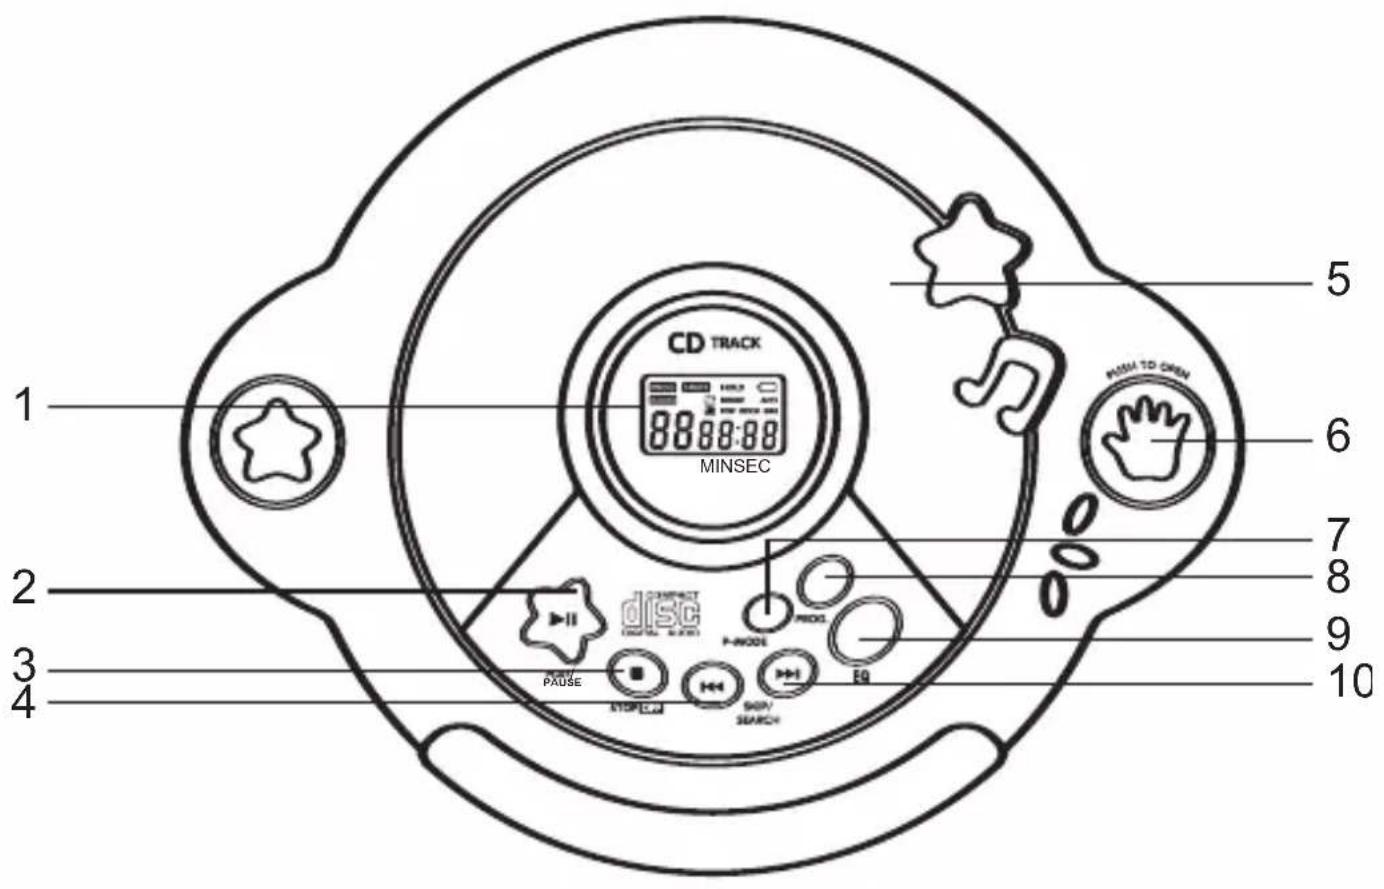
- Display (see page 7)
- PLAY/PAUSE ( ▶II) Button
- STOP/OFF ( ■) Button
- SKIP/SEARCH Button
- CD Compartment
- CD Door OPEN Button
- P-MODE (Playback Mode) Button
- PROG (Program) Button
- EQ (Equalizer) Button
- SKIP/SEARCH ▶Button
LOCATION OF CONTROLS (CONTINUED)
SIDE OF UNIT

- VOLUME LIMITER (ON/OFF) Switch
- BBS (Bass Boost System) (ON/OFF) Switch
- HOLD (ON/OFF) Switch
- VOLUME Control
- HEADPHONES Jack
- MIC Jack
- DC 4.5V IN Jack
LOCATION OF CONTROLS (CONTINUED)
DISPLAY

- Repeat 1/ALL Indicators
- SHUFF (Shuffle) Indicator
- PROG (Program) Indicator
- INTRO Indicator
- Track/Time Indicator
- HOLD Indicator
- BASS BOOST Indicator
- Battery Indicator
- ANTI-SHOCK Indicator
- EQ (Equalizer) (POP/ROCK/SRR [Surround]) Indicator
POWER SOURCES
This CD player requires either two (2) “AA” batteries (not included) or an AC adapter (not included).
BATTERY INSTALLATION
The battery indicator will blink when the batteries need replacing.
- Open the Battery Compartment door by removing the screw.
- Insert two (2) “AA” cell batteries (not included) according to the polarity diagram inside the battery compartment. Alkaline batteries are recommended for the longest playing time.
- Replace the Battery Compartment door and screw securely.

BATTERY PRECAUTIONS
* Replacement of batteries must be done by an adult.
* Do not mix old and new batteries.
* Do not mix alkaline, standard (carbon-zinc) or rechargeable (nickel-cadmium) batteries.
* The supply terminals are not to be short-circuited.
* Non-rechargeable batteries are not to be recharged.
* Exhausted batteries are to be removed.
* Only batteries of the equivalent type are to be used.
* Batteries are to be inserted with the correct polarity.
* Dispose of batteries properly.
Do not dispose of batteries in fire; batteries may explode or leak.
POWER SOURCES (CONTINUED)
AC OPERATION
To operate the unit using AC power, connect an AC adapter (not included) to an AC outlet having 120V AC, 60Hz only. Plug the small end into the DC 4.5V IN jack on the side of the unit and connect the other end into the AC outlet. The batteries are automatically disconnected when the AC adapter is used.

CAUTION: When not using AC power, disconnect the AC adapter from the wall outlet by pulling the plug (not the cord). Do not touch the AC adapter with wet hands. Fully insert the plug without exposing any part of the blade.
AC ADAPTER SPECIFICATIONS
4.5V DC, 500mA

(POSITIVE CENTER)
OPERATION
TO INSERT AND PLAY A CD
1

natural_image
Two open CD or DVD discs with a circular dial and mechanical components, shown in grayscale (no text or symbols visible)Open the CD compartment lid by pressing the CD Door OPEN button and then following the illustration above.
Insert a disc onto the center spindle (label side up) and push down gently to make sure it is securely on the spindle. Close the CD compartment lid.
2

Insert the blue plug from the headphones set into the HEADPHONES jack or just listen through the speaker.
Press the PLAY/PAUSE (▶II) button; “--” will blink briefly, then the total tracks and playing time will appear and playback will begin. The ASP feature will automatically be activated and “ANTI” will appear in the display.
3

Adjust the VOLUME control ① and BBS (Bass Boost System) switch ② as desired.
4
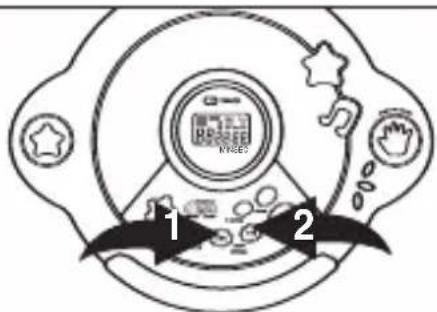
To skip forward or backward through the tracks on the disc, press and release the SKIP/SEARCH 🔊 ① or ➡ ② button.
To search forward or backward through the disc, press and hold the SKIP/SEARCH ◀◀ ① or ▶▶ ② button.
CONTINUED ON THE NEXT PAGE
OPERATION (CONTINUED)
5
6

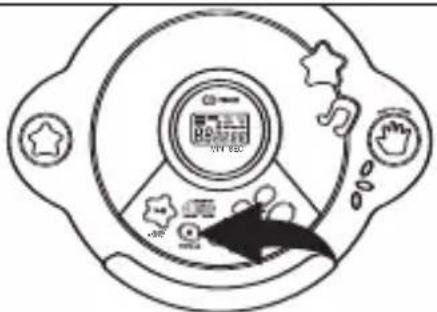
When the disc is through playing, it will stop. Press the STOP/OFF (■) button to stop the disc before it is finished.
To turn the unit off, press the STOP/OFF (■) button twice.
CD PLAYBACK NOTES:
- This unit is capable of playing standard CDs or 3" singles; no adapter is required.
- If a disc is inserted incorrectly, dirty, damaged or not present at all, "DISC" will appear in the display.
- If there is no activity for 30 seconds, the unit will turn itself off to save the batteries.
TO PAUSE PLAYBACK BASS BOOST
1

natural_image
Illustration of a children's play button with star buttons and musical notes (no text or symbols)1
natural_image
Diagram of a mechanical device with internal components and directional arrow (no text or symbols)Press the PLAY/PAUSE (▶II) button to pause playback; the Time indicator will flash and the disc will continue to spin. Press the PLAY/PAUSE (▶II) button to continue playback; the Time indicator will stop blinking and playback will continue.
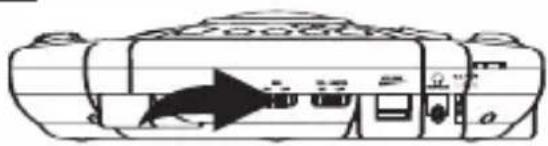
Slide the BBS (Bass Boost System) switch to set the bass. For a normal amount of bass, slide to the OFF position. To enhance the overall bass sound, slide the BBS switch to the ON position, "BOOST" will light in the display.
OPERATION (CONTINUED)
EQ BUTTON
1
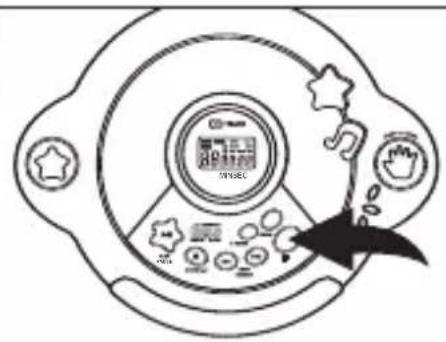
Repeatedly press the EQ (Equalizer) button to cycle through the following modes: POP, ROCK, SRR (surround) and off (normal).
HOLD SWITCH
1

natural_image
Diagram of a cylindrical device with internal components and an arrow indicating direction (no text or symbols)To prevent accidentally pressing a button while walking, etc., slide the HOLD switch to the ON position; "HOLD" will appear in the display. When you want to use these buttons again, slide the HOLD switch back to the OFF position.
VOLUME LIMITER SWITCH
1

natural_image
Diagram of a vehicle's internal structure with no visible text or symbolsSlide this switch to the ON position to limit the maximum sound level. This is useful to protect young children from putting the volume too loud. Slide to the OFF position to deactivate the Volume Limiter.
OPERATION (CONTINUED)
TO REPEATEDLY PLAY BACK ONE TRACK
1

2

Turn on the unit and insert a CD, then press the P-MODE button once; the Repeat 1 indicator (P) will appear in the display.
Press the SKIP/SEARCH ◀◀ ① or ▶▶ ② button to select a track and press the PLAY/PAUSE (▶▶) button ③ to start playback and the unit will play the track on the CD over and over until the STOP/OFF (■) button ④ is pressed.
TO REPEATEDLY PLAY BACK ALL TRACKS
1

2
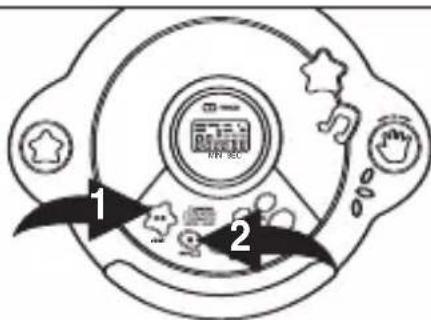
Turn on the unit and insert a CD, then press the P-MODE button twice; the Repeat ALL indicator ( ) will appear in the display.
Press the PLAY/PAUSE (▶II) button ① to start playback and the unit will then play all the tracks on the CD over and over until the STOP/OFF (■) button ② is pressed.
TO CANCEL OR STOP REPEAT PLAYBACK:
• TO STOP REPEAT PLAYBACK, press the STOP/OFF (■) button once.
- TO CANCEL REPEAT PLAYBACK, press the P-MODE button so that only the Track/Time indicator appears in the display. The unit will continue Normal playback.
OPERATION (CONTINUED)
INTRO PLAY
1

2
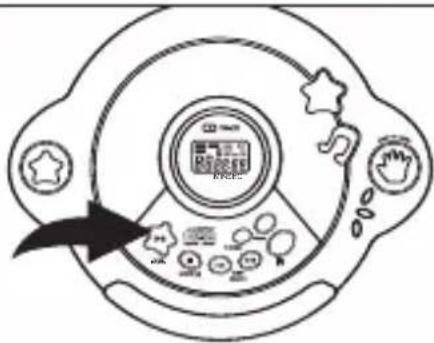
Turn on the unit and insert a CD, then press the P-MODE button three times; "INTRO" will appear in the display.
Press the PLAY/PAUSE (▶II) button to begin playback. The unit will play the first 10 seconds of each track.
TO RANDOMLY PLAY BACK A CD
1

2
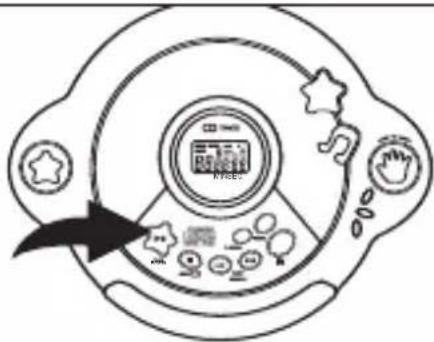
Turn on the unit and insert a CD, then press the P-MODE button four times; the "SHUFF" indicator will appear in the display.
Press the PLAY/PAUSE (▶II) button to begin playback. The unit will play all the tracks in random order. When all the tracks have been played, the unit will stop.
TO CANCEL OR STOP INTRO/RANDOM PLAYBACK:
• TO STOP INTRO/RANDOM PLAYBACK, press the STOP/OFF (■) button once.
• TO CANCEL INTRO/RANDOM PLAYBACK, press the P-MODE button so that only the Track/Time indicator appears appear in the display. The unit will continue Normal playback.
OPERATION (CONTINUED)
TO PROGRAM THE MEMORY
1

2

Turn on the unit and insert a CD, then press the PROG button; the PROG indicator and "00" will blink, then "01" (program number) will appear in the display.
Select the first track to be played back using the SKIP/SEARCH ◀◀ ① or ▶▶ ② button, then press the PROG button ③ again. Repeat this step to program additional tracks, up to 20 tracks.
3

4

Press the PLAY/PAUSE (▶II) button (on the top of the unit) to begin Programmed playback and adjust the VOLUME control ① and BBS switch ② as desired; the PROG indicator stops blinking.
To skip forward or backward through the programs, press the SKIP/SEARCH ◀◀① or ▶▶② button. When all the programmed tracks has been played, it will stop.
NOTES:
- Press the STOP/OFF ( ■) button to stop the disc before it is finished.
- Programming is the ability to preselect the order in which a series of tracks will be played.
- Press the P-MODE button before pressing the PLAY/PAUSE (▶III) button to activate Repeat One, All, Intro or Random playback.
- Open the door, or turn the power off by pressing the STOP/OFF ( ■) button twice, to clear the program.
OPERATION (CONTINUED)
This CD player has a built-in, 45-second Anti-Shock system that cuts down on CD skipping, which is useful when using the CD player in the car. Read the steps below to understand the Anti-Shock System.

natural_image
Diagram of two open discs with a circular aperture, showing mechanical components and a curved arrow indicating rotation (no text or symbols)Open the CD compartment lid by pressing the CD Door OPEN button and then following the illustration above.
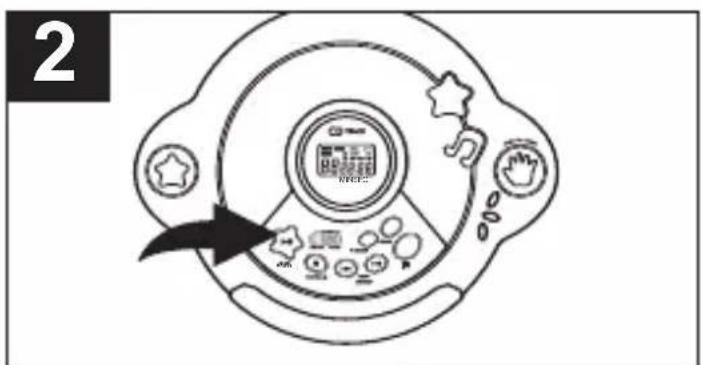
Insert a CD, then press the PLAY/PAUSE (▶II) button to turn the unit on.
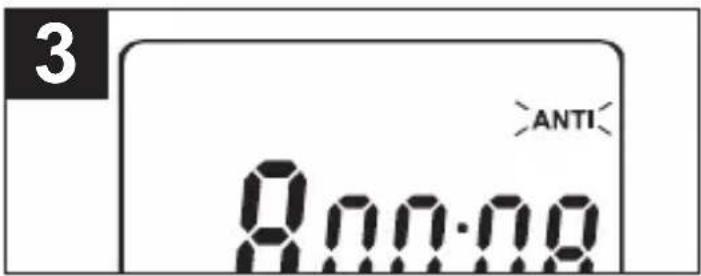
The Anti-Skip system will activate automatically. Within a few seconds, the “ANTI” indicator will indicate music signals are stored in memory. When the memory is full, “ANTI” will stop flashing and the disc rotation will drop to save power consumption.

If the CD player is subject to vibration during playback, “ANTI” will flash. During the vibration, the music should continue to play the signals stored in the memory until the CD player can read the music data properly from the disc.
NOTES:
- The Anti-Skip System provides for continuous sound output when the unit is subject to vibration, but it will not correct errors, such as a defective or dirty CD.
OPERATION (CONTINUED)
5
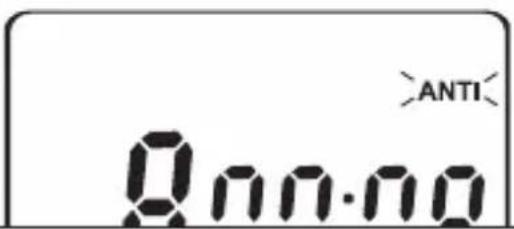
If the vibration continues for more than 45 seconds, the unit may skip.
If no more vibration occurs, the music signals are once again stored into the memory and "ANTI" will stop flashing indicating that the memory is full.
SINGING ALONG
This unit has a Microphone jack and a headset with a built-in microphone. This headset allows you to sing along with the CD as follows:
1

natural_image
Line drawing of a mechanical clamp device with attached wires (no text or symbols)Start playback as described on page 10. Insert the red plug from the headphones set (shown above) into the MIC jack and sing along!
CARE AND MAINTENANCE
Caring for Compact Discs
- Treat the compact disc carefully. Handle the compact disc only by its edges. Never allow your fingers to come in contact with the shiny, unprinted side of the compact disc.
- Do not attach adhesive tape, stickers, etc. to the compact disc label.
- Clean the compact disc periodically with a soft, lint-free, dry cloth. Never use detergents or abrasive cleaners to clean the compact disc. If necessary, use a CD cleaning kit.
- If a disc skips or gets stuck on a section of the compact disc, it is probably dirty or damaged (scratched).
- When cleaning the compact disc, wipe in straight lines from the center of the compact disc to the outer edge of the compact disc. Never wipe in circular motions.

natural_image
Line drawing of two hands holding a circular object (no text or symbols)
- This unit is designed to play only compact discs bearing the identification logo as shown here. Other discs may not conform to the CD standard and may not play properly.
- Compact Discs should be stored in their cases after each use to avoid damage.
- Do not expose compact discs to direct sunlight, high humidity, high temperatures or dust, etc. Prolonged exposure or extreme temperatures can warp the compact disc.
- Do not stick or write anything on either side of the compact disc. Sharp writing instruments, or the ink, may damage the surface.

TROUBLESHOOTING GUIDE
If you experience a problem with this unit, check the chart below before calling for service.
| SYMPTOM CAUSE SOLUTION | ||
| Unit will not Weak turn on. batteries. | or dead Replace batteries. | |
| Batteries not Insert correctly inserted correctly. | ||
| AC adapter Check AC adapter not connected. connection | ||
| Disc will not play. | CD compartment Close CD not closed. | compartment. |
| Disc inserted incorrectly. Reinsert disc correctly. | ||
| HOLD switch is set to ON. | Slide HOLD switch to OFF. | |
| Dirty or defective Try another disc. | ||
| Moisture Wipe disc with soft condensation cloth. on disc. | ||
| No sound from Blue headphones. | e plug from Reinsert blue headphones set not inserted correctly. | plug correctly. |
| VOLUME control Increase set to minimum. | volume. | |
| Weak batteries. | Replace batteries. | |
| Defective disc. | Try another disc. | |
| Erratic playback. | Dirty or defective disc. | Clean or replace disc. |
EMERSON RADIO CORP. LIMITED WARRANTY
Emerson Radio Corp. warrants manufacturing defects in original material, including original parts and workmanship, under normal use and conditions, for a period of ninety (90) days from the date of original purchase in the U.S. With your dated proof of purchase, we will provide repair service at no charge for labor and parts at an authorized Depot Repair Facility, or replace the product at our discretion. For repair or replacement, pack your unit in a padded box, enclose your check or money order payable to Emerson Radio Corp. in the amount of \$9.00 (not required by California residents) to cover shipping and handling costs, and enclose a copy of your proof of purchase. Send your unit to:
Emerson Radio Corp.
5101 Statesman Drive
Irving, TX 75063
This warranty does not cover damage from negligence, misuse, abuse, accident, failure to follow operating instructions, commercial use, rental, repairs by an unauthorized facility, or products purchased, used, serviced or damaged outside of the United States.
THIS WARRANTY GIVES YOU SPECIFIC LEGAL RIGHTS, AND YOU MAY ALSO HAVE OTHER RIGHTS WHICH VARY FROM STATE TO STATE.
AU898M
The serial number of your unit is located on a label on the bottom cabinet. Please take a moment now to locate the serial number and write the number in the space provided below. You may be asked to provide this number when calling for product service.
Model Number: DTE516
Serial Number:


- Sing-Along CD Player with Headset Microphone
- DTE516
- SAFETY PRECAUTIONS
- CAUTION
- RISK OF ELECTRIC SHOCK
- DO NOT OPEN
- DANGEROUS VOLTAGE:
- ATTENTION:
- DANGER:
- FCC WARNING:
- INFORMATION:
- SAFETY INSTRUCTIONS
- WARNING
- TOP OF UNIT
- LOCATION OF CONTROLS (CONTINUED)
- SIDE OF UNIT
- DISPLAY
- POWER SOURCES
- BATTERY INSTALLATION
- BATTERY PRECAUTIONS
- POWER SOURCES (CONTINUED)
- AC OPERATION
- AC ADAPTER SPECIFICATIONS
- OPERATION
- TO INSERT AND PLAY A CD
- CONTINUED ON THE NEXT PAGE
- OPERATION (CONTINUED)
- CD PLAYBACK NOTES:
- TO PAUSE PLAYBACK BASS BOOST
- EQ BUTTON
- HOLD SWITCH
- VOLUME LIMITER SWITCH
- TO REPEATEDLY PLAY BACK ONE TRACK
- TO REPEATEDLY PLAY BACK ALL TRACKS
- TO CANCEL OR STOP REPEAT PLAYBACK:
- INTRO PLAY
- TO RANDOMLY PLAY BACK A CD
- TO CANCEL OR STOP INTRO/RANDOM PLAYBACK:
- TO PROGRAM THE MEMORY
- NOTES:
- 5
- SINGING ALONG
- 1
- CARE AND MAINTENANCE
- Caring for Compact Discs
- TROUBLESHOOTING GUIDE
- EMERSON RADIO CORP. LIMITED WARRANTY
Brand : Emerson
Model : DTE516
Category : CD Player