DV3001e - Blu-ray player MARANTZ - Free user manual and instructions
Find the device manual for free DV3001e MARANTZ in PDF.


| Product Type | Blu-ray Player (DVD/CD Player) |
| Brand | Marantz |
| Model | DV3001e |
| Power Supply | AC 220-240V, 50Hz |
| Power Consumption | 25W |
| Weight | 2.2 kg |
| Dimensions (W x D x H) | 440 x 250 x 54 mm (excluding protrusions) |
| Signal System | PAL / NTSC |
| Disc Compatibility | DVD-Video (single/dual layer, 8/12 cm), CD-DA, CD-R/RW, DVD-R/RW, Video CD, Super VCD, DivX, MP3, JPEG, Picture CD |
| Video Outputs | HDMI, S-Video, SCART, Composite Video, Component (YUV/RGB) |
| Audio Outputs | Analog 2ch (RCA), 5.1ch discrete, Optical Digital, Coaxial Digital |
| HDMI Resolution | 720p / 1080i (selectable) |
| Built-in Decoders | Dolby Digital, MPEG2 Audio, Linear PCM (up to 96kHz/24bit) |
| Playback Features | Multi-angle, Multi-subtitle (up to 32 languages), Multi-audio (up to 8 languages), Parental Control, Program/Shuffle/Repeat, A-B Repeat, Zoom, GOTO |
| File Support | MP3, DivX (versions 3.11, 4.0, 5.0, 5.04, 5.11), JPEG |
| On-Screen Display Languages | English, German, Italian, Spanish, Portuguese, Danish, Swedish, French (selectable) |
| Operating Temperature | +5°C to +35°C |
| Operating Humidity | 5% to 90% (no condensation) |
| Remote Control Battery | 2 x AA (not rechargeable) |
Frequently Asked Questions - DV3001e MARANTZ
User questions about DV3001e MARANTZ
0 question about this device. Answer the ones you know or ask your own.
Ask a new question about this device
Download the instructions for your Blu-ray player in PDF format for free! Find your manual DV3001e - MARANTZ and take your electronic device back in hand. On this page are published all the documents necessary for the use of your device. DV3001e by MARANTZ.
USER MANUAL DV3001e MARANTZ
For warranty information, contact your local Marantz distributor.
RETAIN YOUR PURCHASE RECEIPT
Your purchase receipt is your permanent record of a valuable purchase. It should be kept in a safe place to be referred to as necessary for insurance purposes or when corresponding with Marantz.
IMPORTANT
When seeking warranty service, it is the responsibility of the consumer to establish proof and date of purchase. Your purchase receipt or invoice is adequate for such proof.
FOR U.K. ONLY
This undertaking is in addition to a consumer's statutory rights and does not affect those rights in any way.
FRANÇAIS
GARANTIE
The DV3001e is in conformity with the EMC directive and low-voltage directive.
Français
May we take this opportunity to thank you for purchasing this DVD/CD player.
We strongly recommend that you carefully study the operating instructions before attempting to operate the unit and that you note the listed precautions.
Safety information
- Note:
This unit can be used only where the power supply is AC 220-240V, 50Hz. It cannot be used elsewhere.
- CAUTION:
- DVD PLAYER IS A CLASS 1 LASER PRODUCT. HOWEVER THIS PLAYER USES A VISIBLE LASER BEAM WHICH COULD CAUSE HAZARDOUS RADIATION EXPOSURE IF DIRECTED. BE SURE TO OPERATE THE PLAYER CORRECTLY AS INSTRUCTED.
- WHEN THIS PLAYER IS PLUGGED TO THE WALL OUTLET, DO NOT PLACE YOUR EYES CLOSE TO THE OPENINGS TO LOOK INTO THE INSIDE OF THIS PLAYER.
• USE OF CONTROLS OR ADJUSTMENTS OTHER THAN THOSE SPECIFIED HEREIN MAY RESULT ON HAZARDOUS RADIATION EXPOSURE.
• DO NOT OPEN COVERS OR ATTEMPT TO REPAIR THIS PRODUCT BY YOURSELF. ALWAYS REFER SERVICING TO QUALIFIED PERSONNEL.
- WARNING:
• TO REDUCE THE RISK OF FIRE OR ELECTRIC SHOCK, DO NOT EXPOSE THIS EQUIPMENT TO RAIN OR MOISTURE.
• TO REDUCE THE RISK OF FIRE, ELECTRIC SHOCK OR PICTURE & SOUND INTERFERENCE, USE THE RECOMMENDED ACCESSORIES ONLY.
This product incorporates copyright protection technology that is protected by U.S. patents and other intellectual property rights. Use of this copyright protection technology must be authorized by Macrovision, and is intended for home and other limited viewing uses only unless otherwise authorized by Macrovision. Reverse engineering or disassembly is prohibited.
CONSUMERS SHOULD NOTE THAT NOT ALL HIGH DEFINITION TELEVISION SETS ARE FULLY COMPATIBLE WITH THIS PRODUCT AND MAY CAUSE ARTIFACTS TO BE DISPLAYED IN THE PICTURE. IN CASE OF 525 OR 625 PROGRESSIVE SCAN PICTURE PROBLEMS, IT IS RECOMMENDED THAT THE USER SWITCH THE CONNECTION TO THE 'STANDARD DEFINITION' OUTPUT. IF THERE ARE QUESTIONS REGARDING OUR TV SET COMPATIBILITY WITH THIS MODEL 525p AND 625p DVD PLAYER, PLEASE CONTACT OUR CUSTOMER SERVICE CENTER.
Manufactured under license from Dolby Laboratories. "Dolby" and the double-D symbol are trademarks of Dolby laboratories. Confidential Unpublished Works, © 1992-1997 Dolby laboratories, Inc. All rights reserved.
Precautions
Please read these precautions before operating this unit.
• Power cord protection
To avoid a malfunction of this product and to protect against electric shock, fire or personal injury, please observe the following.
- Hold the plug firmly when connecting or disconnecting the AC power supply to this unit.
- Do not connect or disconnect the AC power supply when your hands are wet.
- Keep the AC power cord away from heating appliances. Never put heavy objects on the power cord.
- Do not attempt to repair or reconstruct the power cord in any way.
- Placement
Avoid placing the unit in areas of:
- Direct sunlight.
- High temperature (over 35°C) or high humidity (over 90%)
- High levels of dust
The internal parts may be damaged as a result.
• Non-use Periods
- When not in use, switch off the unit.
- When left unused for a long period of time, the unit should be unplugged from the household AC supply.
- Foreign Objects
- Touching internal parts of this unit is dangerous and may damage the player. Never attempt to disassemble the unit.
- Do not put any foreign objects on the disc tray.
- Keep away from water / magnetic fields
- The apparatus shall not be exposed to dripping or splashing, and no objects filled with liquids, such as vases, shall be placed on the apparatus. If liquids are spilled into the unit, serious damage will occur.
- Do not place magnetic objects (such as speakers) close to this unit.
- Stacking
- Place the unit in a horizontal position. Do not place anything heavy on top of it.
- Do not place the unit on amplifiers or other appliances which may generate heat.
- Condensation
Moisture may form on the lens in the following conditions: -
- Immediately after a heater has been turned on.
- In a steamy or very humid room.
- When the unit is moved from a cold environment to a warm one. If moisture forms inside this unit, it may not operate properly. In this case, turn on the power and wait about one hour for the moisture to evaporate.
- If there is noise interference on your TV channels
Depending on the reception conditions of the broadcast, interference may appear on the TV while you are watching a channel with the DVD player on. This is not a malfunction of the unit or the TV. Should this occur, simply switch off the DVD player.
Features
• DVD: a completely new dimension in video entertainment
- Subtitles may be displayed in one of a maximum of 32 languages.
- The audio soundtrack can be heard in up to 8 languages.
- The multi-angle function allows you to choose the viewing angle of which scenes were shot from many different angles (limited to DVD discs recorded with multiple camera angles).
The number of the languages recorded is dependent on the software.
• High quality digital audio
- The Dolby Digital/MPEG2 audio/Linear PCM decoder is built into the player which makes it possible to enjoy Multi-Channel Surround sound.
- With linear PCM sound of a 48 kHz/16 bit through 96 kHz/24 bit, audio quality exceeding that of Audio CD becomes possible.
- The unit has a built-in MP3 audio file decoder
- Many convenient features
- Direct access of favorite scenes (title/chapter/time/track search).
- Programming of up to 3 scenes in memory (marker) DVD only
- Parental lock setting to prevent play of discs unsuitable for some audiences. DVD only
- Compatible with PAL DVD /and NTSC DVD
- This player can play discs recorded in either PAL or NTSC format. However, the player must be connected to a Multi-system TV to play both PAL DVD /and NTSC DVD.
The use of a Multi-system TV is recommended.
- Compatible with audio CDs as well as DVD.
Disc formats supported by this player: -
Selecting the type of disc compatible with your TV
DVD discs have material recorded in either PAL or NTSC format. Refer to the table below to select the disc type compatible with your TV.
| The type of Disc Connected TV | TV Monitor | |
| Multi-system PAL | Played in the PAL system. | |
| NTSC | Played in the NTSC system. | |
| NTSC | PAL | No clear images are showed on the screen. |
| NTSC | Played in the NTSC system. | |
| PAL | PAL | Played in PAL system. |
| NTSC | No clear images are showed on the screen. | |
| Usable disc | Mark (logo) | Recorded signals | Disc size | |
| DVDVideo(note 1)DVD-RDVD-RW(note 2, 3) |  |  | Digital video(MPEG2) | 12 cm |
| 8 cm | ||||
 |  | 12 cm | ||
| 8 cm | ||||
 |  | |||
| CDCD-RCD-RW(Note 4) |  |  | Digital AudioMP3Digital pictures(JPEG) | 12 cm |
 |  | 8 cm | ||
| Video CDSuper VCD |  |  | Sound and pictures | 12 cm |
| 8 cm | ||||
| DiVX(note 5) |  |  | Sound and pictures | 12 cm |
| Picture CD |  |  | JPEG | 12 cm |
Note 1: Some DVD-Video discs do not operate as described in this manual due to the intentions of the discs' producers.
Note 2: This unit can play DVD-RW discs recorded in DVD format or DVD video recording format. * The disc may not be played back due to recording or properties of the disc, dirt on the disc or the pickup or condensation on the pickup lens.
Note 3: Discs that have not been finalized cannot be played. Depending on the disc's recording status, the disc may be accepted or may not be played normally (the picture sound may not be smooth, etc.).
Note 4: Some of CD-R/CD-RW discs may be incompatible because of "scratch and stain of disc", "Recording condition", and "Characteristic of Recorder".
Note 5: This unit supports DivX versions 3.11, 4.0, 5.0, 5.04, 5.11. The unit may not play DivX discs which are out of the mentioned series.
Important:
Never playback the following discs:
- DVD-RAM
• CD-I - Photo CD
• DVD-ROM for personal computers
• CD-ROM for personal computers - Any other discs without compatibility indications
Table of contents
Getting Started:
Safety information 1
Precautions 1
Features 2
Selecting the type of disc compatible with your TV ..... 2
Table of contents 3
Control reference guide 4
Main unit 4
Remote control unit 4
Connection to TV & Audio Players (inc. Advanced Setup) .... 5
Audio connections. 6
Digital audio connections 7
Remote control preparation 8
Basic operation:
Basic play 9
Basic play 9
Stopping play 10
Skipping +/- 10
Fast FWD/RWD 10
Pause/Step picture 10
MENU and TITLE 10
Changing SUBTITLE language 11
Change audio soundtrack language 11
Viewing from another ANGLE 11
On screen DISPLAY....11
RETURN....12
RANDOM....12
REPEAT....12
PROGRAM 12
Repeat A-B 12
GOTO function 12
ZOOM picture 13
VOLUME CONTROL....13
720P/1080i button 13
RGB/YUV button 13
Playback of MP3 files 13
Playback of your DIVX Disc 14
Initial setting:
GENERAL SETUP 15
TV DISPLAY 15
ANGLE MARK 15
OSD LANG 15
SCREEN SAVER 15
AUDIO SETUP PAGE. 16
SPEAKER SETUP 16
DOWNMIX....16
SPDIF OUTPUT 16
LPCM OUT 16
DYNAMIC 16
Video Setup 17
Component 17
PREFERENCE SETTING 17
TV TYPE....17
AUDIO/SUBTITLE/DISC MENU 17
PARENTAL CONTROL....17
DEFAULT 17
PASSWORD SETUP 18
PASSWORD CHANGE....18
For your reference:
Disc handing and maintenance ..... 19
Troubleshooting 20
Definition of terms 22
Specifications 22
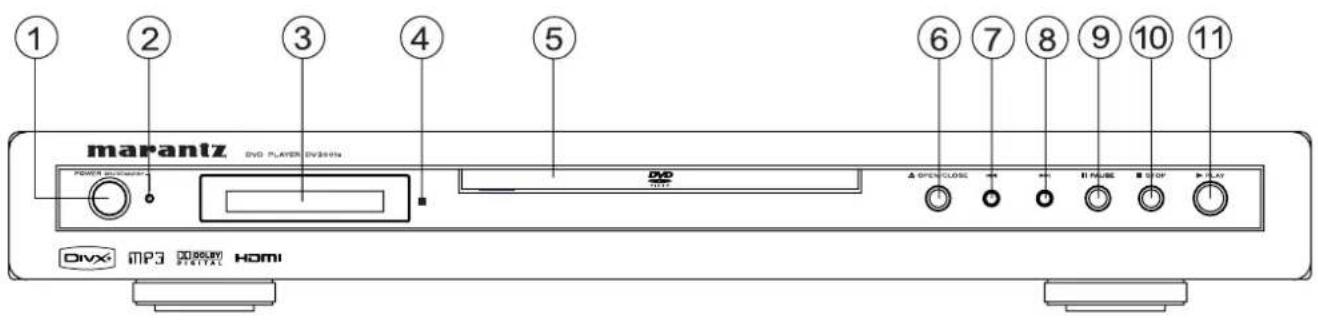
Main unit
(1) POWER ON/OFF BUTTON
(2) POWER ON INDICATOR
(3) DISPLAY WINDOW
(4) REMOTE CONTROL SIGNAL SENSOR
(5) DISC TRAY
(6) OPEN/CLOSE BUTTON
(7) PREVIOUS BUTTON
(8) NEXT BUTTON
(9) PAUSE BUTTON
(10) STOP BUTTON
(11) PLAY BUTTON
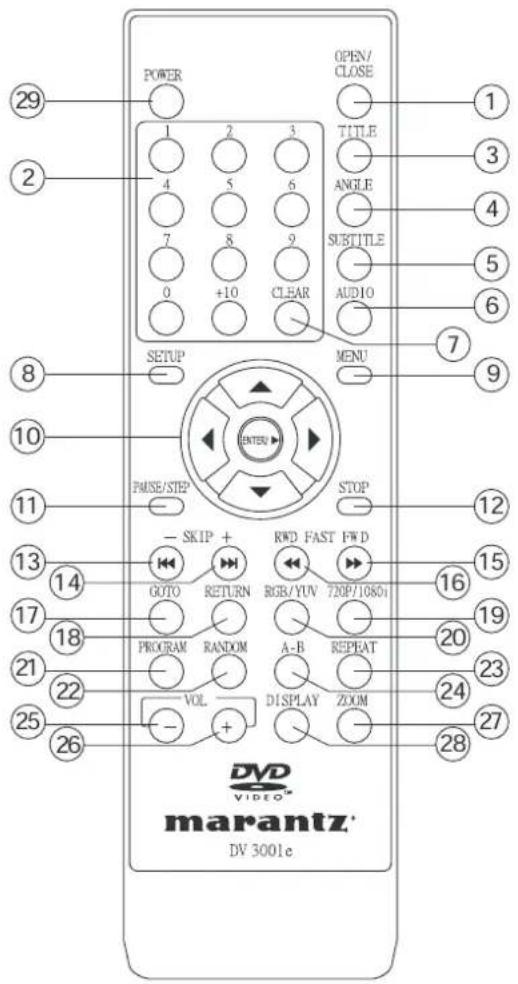
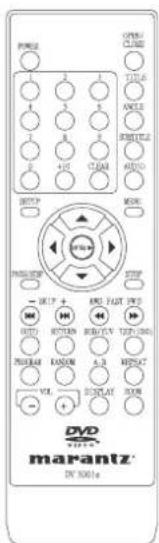
Remote control unit
(1) OPEN/CLOSE button
(2) NUMERIC buttons
(3) TITLE button
(4) ANGLE button
(5) SUBTITLE button
(6) AUDIO button
(7) CLEAR button
(8) SETUP button
(9) MENU button
(10) CURSOR/ENTER buttons
(11) PAUSE/STEP button
(12) STOP button
(13) PREVIOUS button
(14) NEXT button
(15) FAST FORWARD button
(16) FAST REVERSE button
(17) GOTO button
(18) RETURN button
(19) 720P/1080i button
(20) RGB/YUV button
(21) PROGRAM button
(22) RANDOM button
(23) REPEAT button
(24) A-B REPEAT button
(25) VOLUME- button
(26) VOLUME+ button
(27) ZOOM button
(28) DISPLAY button
(29) POWER button
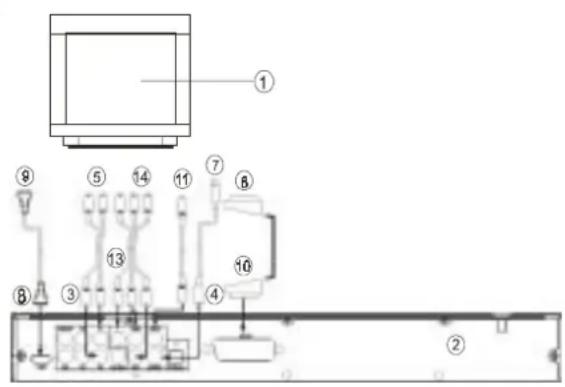
Connection to TV and Audio players
- IMPORTANT! Ensure that ALL equipment to be connected SWITCHED OFF before proceeding, especially by using HDMI or YUV connection.
- We also recommend that you consult with the connecting instructions of any equipment to be connected before you proceed.
Connecting to Stereo TV (configuration) A
- TV set
- DVD player
- L/R (Front) Audio Output (White / Red - RCA connectors)
- S-video Output (Video option 1)
- To Audio In on Stereo Amp (White / Red - RCA connectors)
- To 21 pin SCART input on TV (Video option 2)
- To S-video input connector on TV (Video option 1)
- HDMI Output
- To HDMI IN on TV (Video Option 5)
- 21 pin SCART connector on DVD (Video option 2)
- To RCA Video In on TV (Video option 3)
- RCA Type AV cord to Video Out on DVD (Video option 3)
- Y, Pb/Cb, Pr/Cr Output (Video option 4)
- To Y, Pb/Cb, Pr/Cr input connector on TV(Video option 4)
Note: There are five ways to connect the video out of this player to the TV set. Option 1: S-Video. Option 2: SCART to SCART. Option 3: RCA Video Out. Option 4: Y, Pb/Cb, Pr/Cr (If your TV has the P-SCAN or COMPONENT VIDEO INPUT function, you can select this option.). Option 5: HDMI digital video out
Use only one of the above options to avoid picture interference.
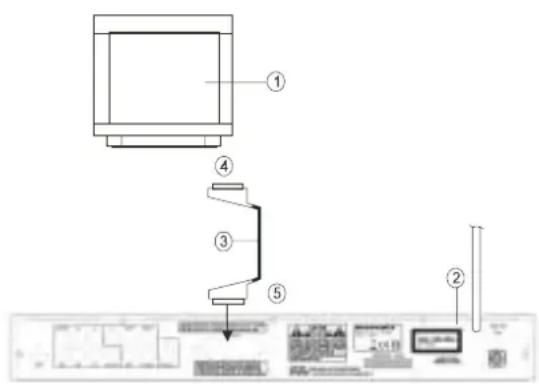
Connecting to monaural TV set B ]
- TV set
- DVD player
- 21 pin SCART to SCART cable (not supplied)
- To SCART connector on TV
- To SCART connector on DVD player
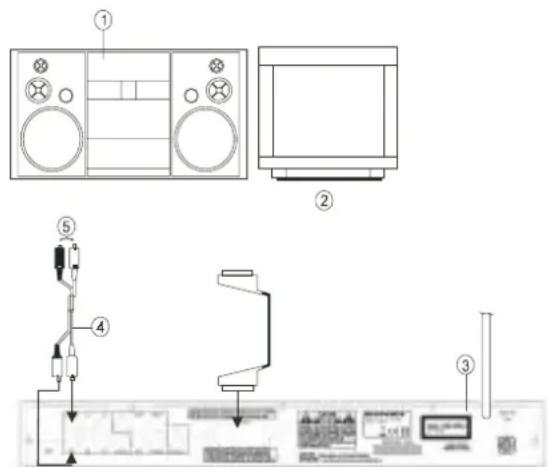
Connecting to audio equipment [C]
- Audio equipment (i.e. Hi-Fi system)
- TV set
- DVD player
- L/R (Front) Audio Output (White / Red - RCA connectors)
- To Audio In on Stereo Amp (White / Red - RCA connectors)
Note:
- When playing a DVD, the TV volume may be a different level to that of TV broadcasts, etc. If this is the case, simply adjust the volume on the remote control to the desired matching level.
- If this player is connected to the TV through a video cassette recorder, the picture may not be play back normally with some DVDs. If this is the case, do not connect the player via the VCR.
Note:
When the DVD player's video outputs is connect with the TV and the TV is broadcast normally. Please cut off the other connections from the DVD player's video outputs to the TV, in order to avoid the interference and insure the quality of the pictures.
A
B
C
Audio connections
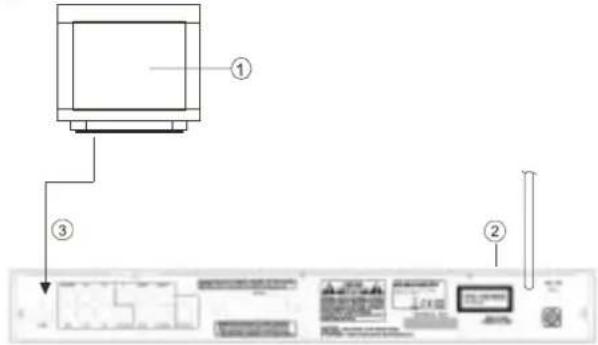
Connection to a TV via HDMI A ]
This player supports the full digital connection HDMI (High Definition Multimedia Interface).
When the player is connected via HDMI to the TV set you can experience best digital video and audio quality with one single wire. For the correct reproduction of the sound via your TV set speaker, please check setting in the setup of the player. Go to Audio Setup and check SPDIF OUTPUT is set to SPDIF PCM. If something else is selected you will not able to hear the sound via the speakers built into your TV set. HDMI video resolution you can select via the 720P/1080i button on the remote handset.
- TV set
2 DVD player - HDMI cable
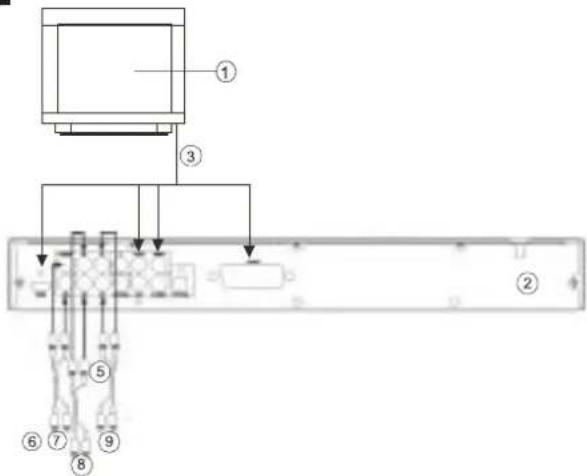
Connecting to a TV amplifier with 5.1ch input connector supporting Dolby Digital decoder B ]
This player contains Dolby Digital decoder. This enables the playback of DVDs recorded in Dolby Digital surround without the need for an external decoder with Dolby Digital processing.
When the player is connected to an AV amplifier with 5.1ch input connectors, you can enjoy theater quality audio right in your home when playing discs recorded in Digital Surround Sound.
- TV set
2 DVD player - S-video connector or 21 pin SCART connector or Y, Pb/Cb, Pr/Cr connector
- Amplifier with 5.1ch input connector
- Audio cords (optional)
- To audio input connector (CENTER)
- To audio input connector (SUBWOOFER)
- To audio input connector (SURROUND L.R)
- To audio input connector (FRONT L.R)
- Center speaker
- Front speaker (left)
- Front speaker(right)
- Subwoofer
- Surround speaker (left)
- Surround speaker (right) (all sold separately)
- The surround speakers should be installed at an equal distance to (or further away from) the front speakers relative to the listening position.
A
B
![MARANTZ DV3001e - Connecting to a TV amplifier with 5.1ch input connector supporting Dolby Digital decoder B ] - 3](/content/2026/05/956097/images/85dd2d917f91470ac03566f54d72f5061645e779f55534f32d325ef0e413d901.jpg)
flowchart
graph TD
    A["Central Device"] --> B["Device 4"]
    A --> C["Device 12"]
    A --> D["Device 10"]
    A --> E["Device 15"]
    A --> F["Device 13"]
    A --> G["Device 11"]
    A --> H["Device 14"]
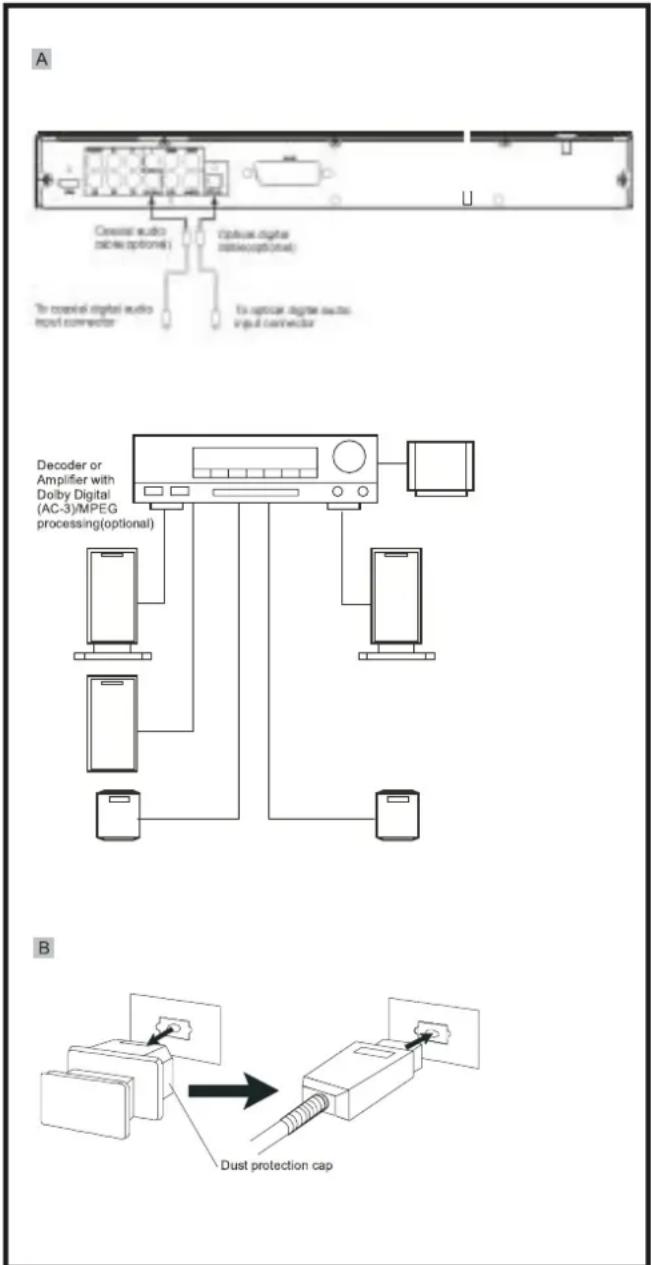
Connecting to a decoder with Dolby Digital processing or MPEG processing [A]
When DVDs recorded in Dolby Digital or MPEG audio are played, Dolby Digital bitstream or MPEG audio bitstream is sent to the player's OPTICAL digital audio output connector or COAXIAL digital audio output connector. When the player is connected to a Dolby Digital or MPEG audio decoder via one of these output sockets, you can enjoy theater-quality audio in your home. An optical digital cable or coaxial audio cable (both optional) is required when a Dolby Digital decoder or MPEG audio decoder is used.
Notes when connecting an optical digital cable: -
• (B) Remove the dust protection cap from the connector.
Ensuring both cable and socket are of the correct configuration, connect the cable firmly (the plug will 'click' into place).
- Keep the dust protection cap and always re-attach the cap when not in use to protect the optical socket from dust and dirt.
Audio output from the optical/coaxial digital audio output connectors: -
| Disc Sound recording Optical/coaxial digital audio format output from connector | |
| DVD Dolby Digital Dolby Digital bitstream (2-5.1ch) or PCM (2ch)(48kHz/16bit) | |
| Linear PCM Linear PCM(2ch) (48/96 kHz (48kHz sampling/16 bit only)* 2 16/20/24 bit ) or no output*1 | |
| MPEG1 MPEG2 | MPEG2 audio bitstream or PCM(2ch)(16 bit)*1 |
| CD Linear PMC Linear PCM (44.1 kHz sampling) | |
*1 The type of audio output from the connector can be selected by the initial settings.
*2 Audio having 96kHz sampling is converted into 48kHz sampling when it is output from the players optical/coaxial digital audio output connector.
For your reference:
- Dolby Digital is a digital sound compression technique developed by the Dolby Laboratories Licensing Corporation. Supporting 5.1-channel surround sound, as well as stereo (2-channel) sound, this technique enables a large quantity of sound data to be efficiently recorded on a disc.
- Linear PCM is a signal recording format used in CDs. While CDs are recorded in 44.1 kHz/16 bit, DVDs are recorded in 48kHz/16 bit up to 96kHz/24 bit.
- If you have a Dolby Pro Logic Surround decoder, you will obtain the full benefit of Pro Logic from the same DVD movies that provide full 5.1-channel Dolby Digital soundtracks, as well as from titles with the Dolby Surround mark.
Caution for the optical/coaxial digital audio output connector:
- Do not connect an amplifier (with an optical/coaxial digital input connector) which does not contain the Dolby Digital or MPEG audio decoder.
- An attempt to play DVDs through an amplifier without the correct or MPEG decoder, may produce extreme levels of noise. This could damage both your ears & your loudspeakers.
• Audio CDs can be played as normal.
Remote control preparation
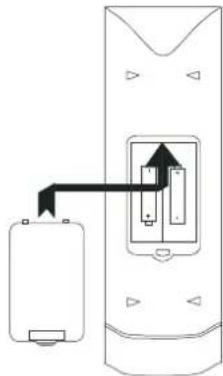
Battery installation [A]
Insert the batteries while observing the correct (+) and (-) polarities as illustrated.
Service life of batteries
- The batteries normally last for about one year although this depends on how often and for what operations the remote control is used.
- If the remote control unit fails to work even when it is operated near the player, replace the batteries.
- Use 2 x 'AA' type batteries.
Notes:
- Do not use rechargeable (Ni-Cd) batteries.
- Do not attempt to recharge, shot-circuit or disassemble batteries. Never place batteries close to a heat source such as radiators or heaters.
- Dispose of batteries in a responsible manner. Never throw batteries on a fire.
- Do not drop or step on the remote control unit. This may damage the parts or lead to malfunction.
- Do not mix old and new batteries.
- If the remote control unit is not going to be used for long time, always remove the batteries to prevent leakage.
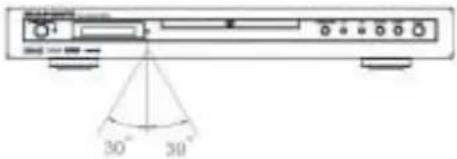
Remote control operation range B 1
Point the remote control unit no more than about 7 m from the remote control sensor and within 60o from the front of the unit.
- The operating distance may vary according to the brightness of the room.
Notes:
- Do not point bright lights at the remote control sensor.
- Do not place objects between the remote control unit and the remote control sensor.
- Do not use this remote control unit while simultaneously operating the remote control unit of any other equipment.
A
natural_image
Diagram showing a battery connected to a device with an arrow indicating direction (no text or symbols present)B
REMOTE CONTROL
SIGNAL SENSOR
Basic operation
Preparations
- Switch on the TV and select "Video" as the input source.
- Switch on the stereo system if the player has been connected to a stereo audio amplifier.
Basic play
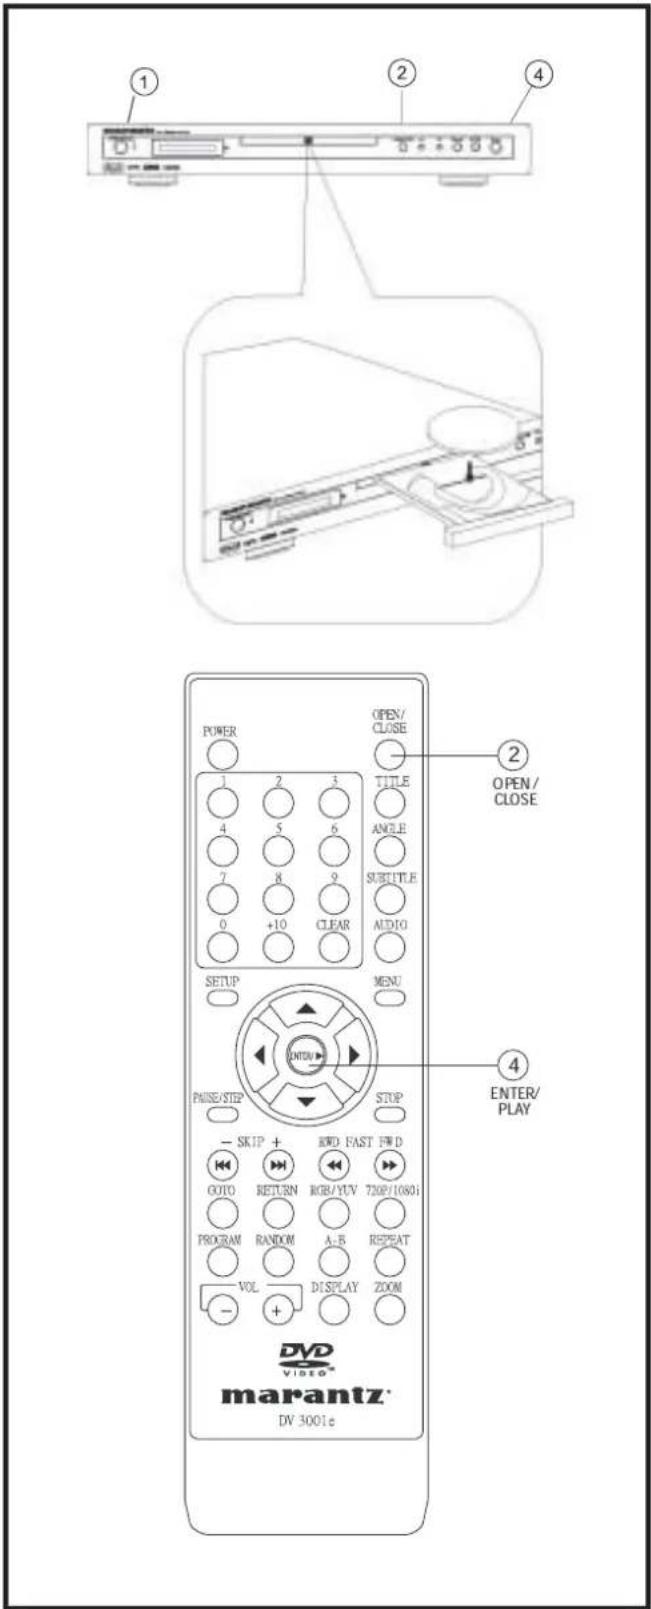
- Press POWER ON button on the main unit to switch on the power.
- Press OPEN/CLOSE by the main unit or remote control unit to open the disc tray.
- Place a disc onto the disc tray.
Hold the disc without touching either of its surfaces, position it with the printed side facing up, align it with the guides and place it on the disc tray.
(1) 8cm disc
(2) 12cm disc
- Press the OPEN/CLOSE button again or PLAY on the main unit or remote control will close the disc tray and display:
The player will automatically play.
When a menu screen appears on the TV monitor:- In case of interactive DVDs with playback control, a menu screen appears on the TV. With DVDs, you can use CURSOR to select which item you want to enjoy and press ENTER.
Note:
- The disc continues to rotate while the menu is displayed even after the player has finished playing a particular item. When no further selections are to be played, be sure to press the STOP button to clear the menu display.
- If the disc is placed in the tray upside down (and it is a single sided disc), the DVD display will indicate "NO DISC".
For your reference:
When appears while a button is being operated, it means that the corresponding operation is prohibited by the player or the disc.
Playing Audio CD's
- Press the Power button then the OPEN/CLOSE button to open the CD drawer. Place the audio CD on the tray with the label facing up. Press the OPEN/CLOSE button once again to close the CD drawer.
- The player will read the disc contents and automatically play.
- To view the CD information such as track number and track time on the TV (OSD), press the DISPLAY button on the remote control.
- You should use SKIP+/- to choose next or previous song, also you could use number key to select song directly.
Stopping play
Press STOP
For you convenience:
Memory Stop. DVDs can utilize a function called Memory Stop. This allows you to temporarily stop a movie and restart it from the same point later. While playing a disc, pressing STOP once will set the player into Memory Stop mode. At this point, pressing PLAY re-starts the movie from the same point. Pressing STOP a second time will stop the disc completely (i.e. the Stop Memory is lost). Note that some DVD discs will not allow the use of Memory Stop.
Skipping + or -
Skipping +
Press SKIP+ during play.
A chapter (DVD) or a track (CD) is skipped each time the button is pressed.
Skipping -
Press SKIP- during play.
A chapter (DVD) or a track (CD) is skipped each time the button is pressed.
Fast FWD/RWD
Using either the Remote Control or the Front Panel controls, press FAST FWD() or FAST RWD() during play.
For you reference:
Press FAST FWD or FAST RWD button once, the disc will be played forward or backward at double (x2) speed. With each subsequent press, the disc will be played back at x2, x4,x8 x16 or x32 speed and PLAY. Press PLAY button to return to normal play.
Pause/Step picture
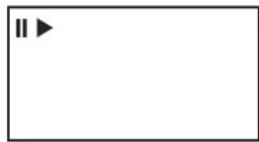
Press PAUSE/STEP during play.
For your reference:
When playing, pressing the PAUSE button pause playback. Press the PAUSE button again to enter step status. The picture will go ahead frame by frame. To return to normal play, press the PLAY button.
MENU and TITLE
Press MENU or TITLE by the remote control unit
- DVD discs usually are divided into several titles and subdivided into chapters. CD discs are divided into tracks.
- Press TITLE on the remote and the disc playing will automatically return to the title program. Press the CURSOR buttons on the remote to select the option, then press ENTER button to play it. Note it is possible that some DVD discs will not have this function.
- Press MENU button on the remote, the disc playing will automatically return to the chapter menu. Press CURSOR buttons on the controller to select chapter and then press the ENTER button to play.
Changing SUBTITLE language [DVDs only]
- It is possible to change the subtitle language from the one selected, if available. This operation works only with discs on which multiple subtitle languages have been recorded).
- Press the SUBTITLE button on the remote. The alternative language subtitle will appear with each press. (Different discs have different display.)
![MARANTZ DV3001e - Changing SUBTITLE language [DVDs only] - 1](/content/2026/05/956097/images/6988b57a701a750133a90f63d57bd9a803ce87627f3869abe7b1d0a6575a067b.jpg)
flowchart
graph LR
    A["SUBTITLE 01/03"] --> B["SUBTITLE 02/03"]
    B --> C["SUBTITLE 03/03"]
    C --> D["SUBTITLE OFF"]
    D -->|←| A
- When no subtitles are recorded, " will be displayed on the TV screen.
For your reference:
- If the power is reset or the disc is removed, subtitles will appear in the default language set by the DVD player. If this language is not recorded on the disc, they will appear in the disc's default language.
Changing the audio soundtrack language
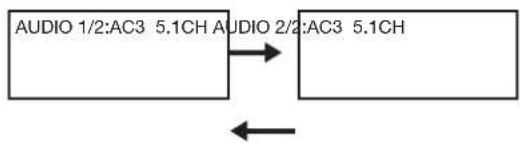
- It is possible to change the audio soundtrack language from the default standard to another, if available. This operation works only with discs on which different audio soundtrack languages are recorded. (Different discs have different display.)
• DVD:
Some DVDs have multi-audio output function. Pressing the AUDIO button on the controller repeatedly selects the available audio tracks.
flowchart
graph LR
    A["AUDIO 1/2:AC3 5.1CH"] --> B["AUDIO 2/2:AC3 5.1CH"]
    B --> C["←"]
When no audio soundtrack language are recorded, "will be displayed on the TV screen.
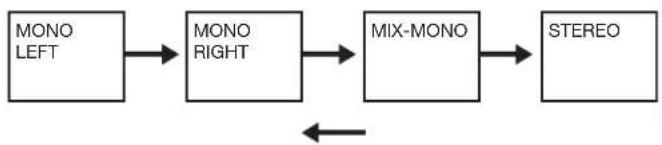
• CD:
For CD pressing the AUDIO button on the controller repeatedly selects the available audio tracks.
flowchart
graph LR
    A["MONO LEFT"] --> B["MONO RIGHT"]
    B --> C["MIX-MONO"]
    C --> D["STEREO"]
    D -->|Feedback| B
Viewing from another ANGLE [DVDs only]
- Some DVDs may contain scenes that have been shot simultaneously from a number of different angles. For these discs, the same scene can be viewed from each of these different angles using the ANGLE button. The recorded angles will differ depending on the disc being played.
- When playing a DVD with multi-angle viewing, for example, if the disc has three angles available, pressing the ANGLE button on the controller will step you through all available views. The screen OSD will show 1/3 then 2/3 then 3/3 and then back to 1/3 again.
![MARANTZ DV3001e - Viewing from another ANGLE [DVDs only] - 1](/content/2026/05/956097/images/56b2c9711e6907bafd55969d5895280a8e5dbfc1e5c510418e78d585a36e1829.jpg)
flowchart
graph LR
    A["Speaker 1/3"] -->|2/3 3/3| B["Speaker"]
    B --> C["Speaker"]
    C --> D["Speaker"]
- When no multi-angle are recorded, "will be displayed on the TV screen.
On screen DISPLAY
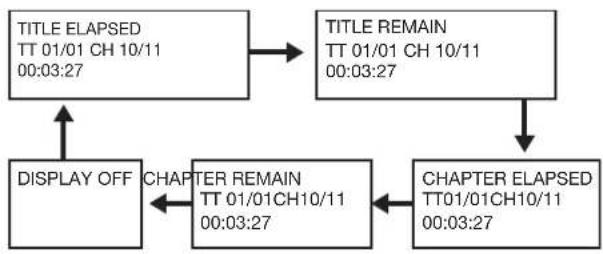
During playback, you can press the DISPLAY button on the remote to show the various information available.
- For DVDs, the DISPLAY function button will allow you to view:
flowchart
graph TD
    A["TITLE ELAPSED\nTT 01/01 CH 10/11\n00:03:27"] --> B["TITLE REMAIN\nTT 01/01 CH 10/11\n00:03:27"]
    B --> C["CHAPTER ELAPSED\nTT01/01CH10/11\n00:03:27"]
    C --> D["CHAPTER REMAIN\nTT 01/01CH10/11\n00:03:27"]
    D --> E["DISPLAY OFF"]
    E --> A
- For CD discs, the DISPLAY functions allows you to view the following:
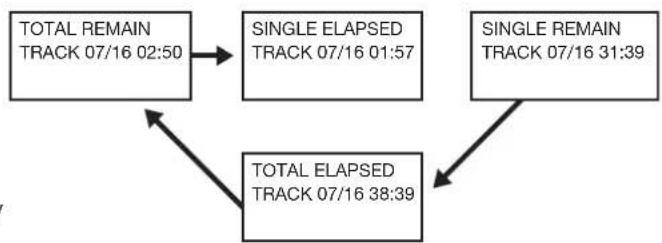
flowchart
graph TD
    A["TOTAL REMAIN TRACK 07/16 02:50"] --> B["SINGLE ELAPSED TRACK 07/16 01:57"]
    B --> C["TOTAL ELAPSED TRACK 07/16 38:39"]
    C --> A
    D["SINGLE REMAIN TRACK 07/16 31:39"] --> C
Elapsed play & remain times of the current program
RETURN
If you use the RETURN button on the remote control, the disc playing will automatically return to the root menu if available.
RANDOM
If you use this button you can paly the disc in shuffle mode:
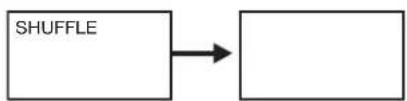
flowchart
graph LR
    A["SHUFFLE"] --> B[" "]
REPEAT
Press the REPEAT button during play
If you play a DVD disc, the screen will display:

flowchart
graph LR
    A["CHAPTER"] --> B["TITLE ALL"]
    B --> C[" "]
If you play a CD disc, the screen will display:

flowchart
graph LR
    A["TRACK ALL"] --> B
    B --> C
Repeat A-B (allows you to play a small section of the disc repeatedly)
- Press the A-B button on the remote at the point where you wish the repeat play to start. The display will show REPEAT A-. Press A-B button again at the point where you wish the repeat play to finish. The display will show REPEAT A-B SET. The A-B segment will now repeat continuously until the A-B button is pressed for a third time.

flowchart
graph LR
    A["a A B"] --> B
    B --> C
GOTO function
You may directly enter a time, title or chapter number to search fast on a disc, the player plays from that point.
- For DVD discs, press GOTO button on the remote, the display will show the following:-
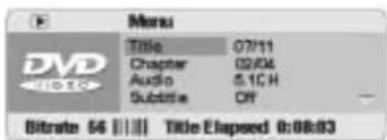
You can get some information in this menu.
- For DVD go to a title or a chapter.
(For example, go to chapter 2 in title 6)
Press GOTO on the remote, the screen show the menu above.
Then press ENTER/PLAY button to change the TITLE.
Press 06 to select title 6.
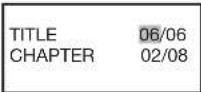
Repeat the steps above, select chapter 2.
- For CD discs, press GOTO button on the controller, the following will be displayed: -
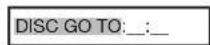
Press the GOTO button again you can see:
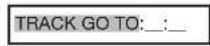
Press the GOTO button three times, you will see:
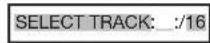
You can select the right sing you want by the numeric button.
Program
DVD
If you want to play the TITLE/CHAPTER that yourself like. press PROGRAM button on the remote, and then press numeric key to select.
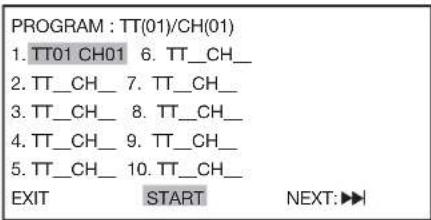
you can use CURSOR buttons to choose "START", and at last press ENTER to start program play.
CD
If you want to play songs such as 5, 6, 3, etc, press PROGRAM button on the remote control, and then press numeric button 5, 6, 3, you'll see on the TV screen like(right):
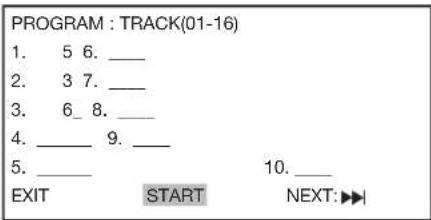
you can use CURSOR buttons to choose "START", and at last press ENTER to start program play.
CLEAR
If you enter a wrong number when selecting a track, title, etc., you can press CLEAR to delete them.
RETURN
You can select the Disc with up/down cursor you wanted. If you select disc 1, you may see the menu like :
If you use the RETURN button on the remote control, the disc playing will automatically return to the root menu if available.
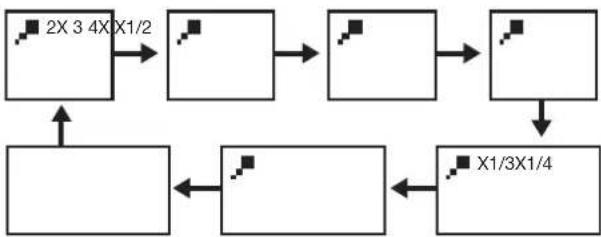
flowchart
graph TD
    A["2X 3 4X X1/2"] --> B[" "]
    B --> C[" "]
    C --> D[" "]
    D --> E["X1/3X1/4"]
    E --> F[" "]
    F --> G[" "]
    G --> H[" "]
    H --> I[" "]
    I --> J[" "]
    J --> K[" "]
    K --> L[" "]
    L --> M[" "]
    M --> N[" "]
    N --> O[" "]
    O --> P[" "]
    P --> Q[" "]
    Q --> R[" "]
    R --> S[" "]
- In the ZOOM mode, you can use CURSOR buttons to move the picture for optimum viewing.
VOLUME control
- Press VOLUME + on the remote control continuously to increase volume.
- Press VOLUME - on the remote control continuously to decrease volume.
720P/1080i button
You can select with the 720P/1080i button the resolution for the HDMI output. Chosen resolution will be displayed for a few seconds on the TV screen. Changing resolution is only possible while no disc is insert into the system. If your TV set doesn't support the selected resolution the screen might stay black or the displayed image is distorted. In this case press 720P/1080i button again until you will see a correct image.
RGB / YUV button
You can select the video output mode for scart and component video output between RGB or YUV by pressing this button. Chosen video format will be displayed on the screen. If you change to RGB the HDMI output will be automatically switched off.
Playback of MP3 Files
This unit is compatible for the reproduction of recorded pieces in MP3 format. Refer to the following instructions for a correct use:
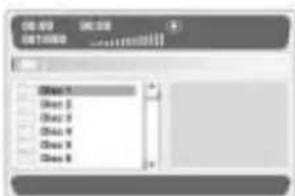
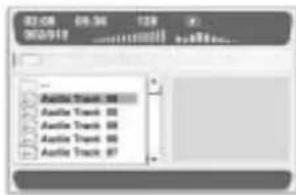
1) Press the Power button and then the OPEN/CLOSE button to open the drawer. Insert the disc containing the recorded passages in MP3 format with the label facing upwards. Press the OPEN/CLOSE button again to close the drawer. After some seconds, on the TV screen will appear a menu with all the directory in the disc like :
MENU 1
MENU 2
In this menu you can select the song you want. You also can get some information in the menu.
2) Press left button to go back to the menu 1, then you can select the disc you wanted.
3) Press [REPEAT] button time by time you can select the play mode. The all kinds of play mode will be displayed at the left bottom of the menu.
4) Press the DISPLAY button you can see some change in the menu in the menu 2. In the menu's first line the current playing sing's elapsed thime will changed into the song's remain time. Press the DISPLAY button again to go back.
5) When the song is playing you can use UP/DOWN button to select the song you want.
6) The other buttons such as FAST FWD/RWD, A-B, STOP also can be used as usual.
Playback of your DIVX Disc
When a DIVX disc is inserted, the TV screen will display a main menu (such as menu 1) automatically. You can use UP/DOWN CURSOR button to select the directory and the file you want in the disc.
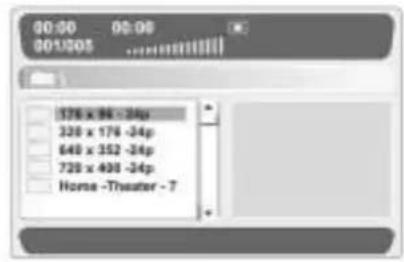
MENU 1
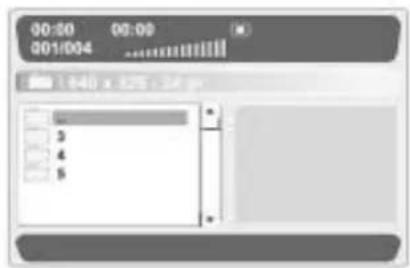
MENU 2
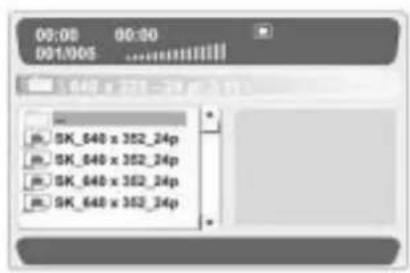
MENU 3
STOP button and MENU button
When a file is selected and start playing, if you press STOP or MENU button you can see the TV screen will go back to the menu like menu 3. You can select another file you want to continue.
DISPLAY button
When playing with a DIVX disc if you press DISPLAY button continually. You can see the TV screen will display:
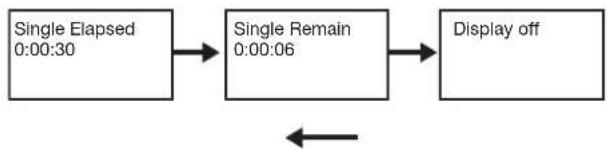
flowchart
graph LR
    A["Single Elapsed 0:00:30"] --> B["Single Remain 0:00:06"]
    B --> C["Display off"]
    C --> A
The other buttons such as: PAUSE/STEP, SKIP +/-, FAST RAW/FWD, CLEAR, A-B, ZOOM, VOL +/- also can be used as usual. They have the same operation which has already introduced in other pages of this manual.
NOTE :
Different Divx disc will has its own display menu. Above operation is just given you a reference. Please follow the actual Divx disc menu for proper operation.
Disc supported by this DVD player is : 3.11, 4.0,5.0,5.04 and 5.11. This DVD player may be not able to playback certain Divx movie if out of the series. A software up-date may be required.
Because MPEG 4 or DIVX disc is big in compressing, the time to read the disc may be relatively long. While broadcasting MPEG 4 or DIVX disc, if you press some buttons such as SKIP button, to some disc big in amount of information, the picture may be standstill temporary, it will return to normal after a while.
Initial settings
Once the initial setting have been set, the player will always operate with the same parameters. The setting will be retained in the memory even after switching off the power.
- Initial settings must be in the setup mode, but function can be set in all mode.
- Using the setup menu, you may choose the play mode setting, the various outputs, etc.
- During STOP mode, press SETUP button on the remote, you will see on the screen like picture 1. Press SETUP button again to quit the setup menu and return to the TV DISPLAY.
- Select the menu item desired by using up/down CURSOR button, and then press the ENTER button. You should see such as picture 2. In each menu page, the menu items are showed on the left. Use the right CURSOR button on the remote to the option list or setting on the right. Then use up/down CURSOR button on the option list, press ENTER to choose. Use the left CURSOR button to go back to the left menu item to change others.
- Use RIGHT/LEFT CURSOR button to select General Setup Page, Audio Setup Page, Video Setup Page, Preference Page, Password Setup Page. If you in the menu like picture 2, you must use left cursor first to go back to the menu like picture 1, then use RIGHT/LEFT CURSOR to select the Audio Setup Page and so on.
NOTE:
When you select the function on the Menu, the notation of the function is showed at left bottom. If you want to select the Preference Page the DVD must during the Stop mode.
GENERAL SETUP
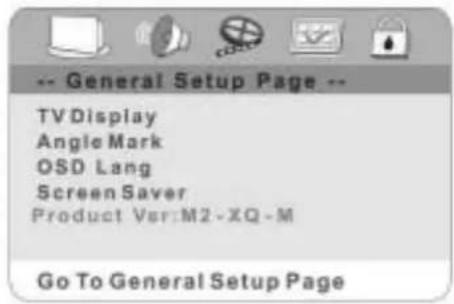
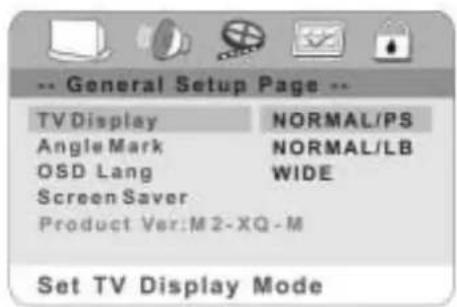
Press SETUP on the remote control, the screen shows GENERAL SETUP PAGE. You can use up/down CURSOR to select TV DISPLAY, ANGLE MARK, OSD LANG and SCREEN SAVER (picture 2)
TV DISPLAY
• NORMAL/PS—4X3Pan Scan
Choose this setting you will see the movie fill the entire screen of your TV. But you won't see part of the picture (particularly the right and left edge).
• NORMAL/LB—4x3Letterbox
Choose this setting if you want to see movies in their original aspect ratio. You will see the entire frame of the movie, but it will occupy a smaller portion of the screen.
• WIDE—16x9Wide screen
Choose this setting if your DVD player is connected to a widescreen TV.
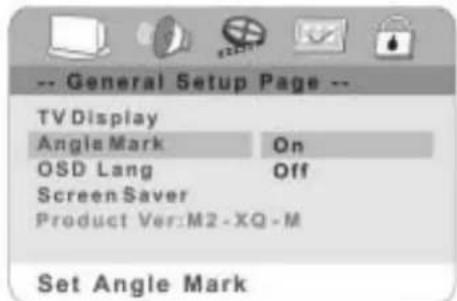
ANGLE MARK (picture 3)
You can see the DVD picture in various angle when this function is on.
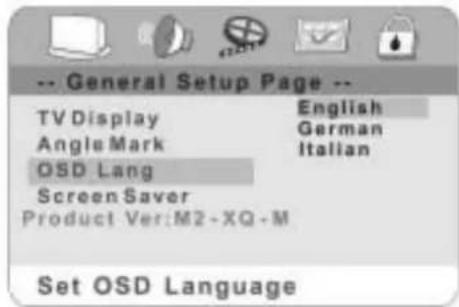
OSD LANG (picture 4)
The On Screen Display language can be English or other languages delegated by the factory's design.
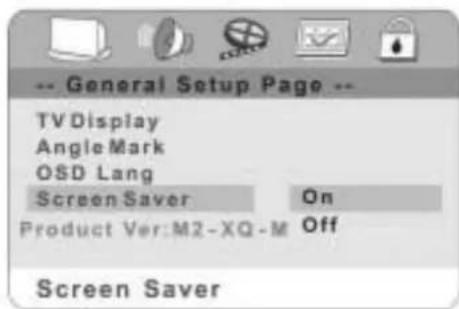
SCREEN SAVER (picture 5)
When this DVD player is idle, the screen saver can be activated to prolong the TV monitor's life. You can press any button on the remote to continue. If the DVD player is kept in the screen saver mode, it will be turn off automatic after a few minutes.
PICTURE 1
PICTURE 2
PICTURE 3
PICTURE 4
PICTURE 5
AUDIO SETUP
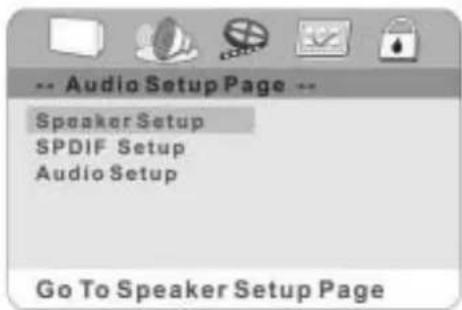
Speaker Setup (picture 6)
Press UP/DOWN CURSOR to select the items in the Speaker Setup
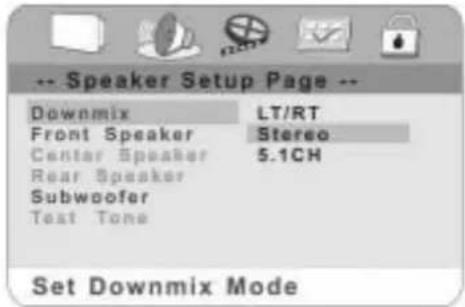
DOWNMIX (picture 7)
- LT/RT or STEREO: If you connect only two speakers, you should choose these.
- 5.1CH: When you play a disc with Dolby Digital, you should choose this best. When you select it, the left menu item CENTER SPEAKER and REAR SPEAKER will be selectable.
CENTER SPEAKER / REAR SPEAKER: The speaker could be turn large, small or off in their item.
FRONT SPEAKER
The speaker could be turn large or small in its item
SUBWOOFER/ Test Tone:
The speaker could be turn on or off in their item.
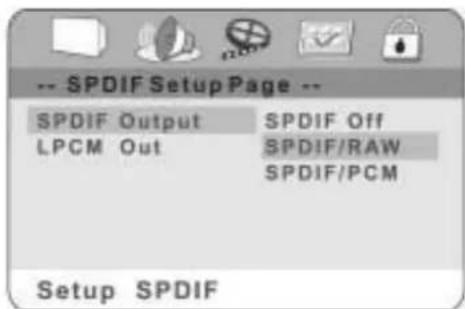
SPDIF OUTPUT (picture 8)
Press the LEFT button go back to the Audio Setup Page, then use up/down to select SPDIF setup.
- OFF: the output signal is Analog format, the default setting. You should select this when you are playing the disc through the SPDIF OUTPUT Right & Left jacks on your DVD player. No signal output from the coaxial port when selecting this function.
- SPDIF/RAW: Select this when the DVD player is connected with a power amplifier through DIGITAL OUT coaxial port. The power amplifier to be connected must have Dolby Digital decoding. Please choose this setting when you connect the player via HDMI to your multichannel AV-Receiver.
- SPDIF/PCM: Select this when the DVD player is connected with a 2-CHANNEL DIGITAL MODE OR STEREO AMPLIFIER. When a Dolby Digital or MPEG disc is played, the coaxial port will output in PCM 2-channel format. These program features an uncompressed digital stereo sound track for improved fidelity, when played, discrete stereo sound will be heard from the front right and left speakers. Please choose this setting if you connect your TV set directly via HDMI to get the sound be reproduced by the speakers built into the TV set.
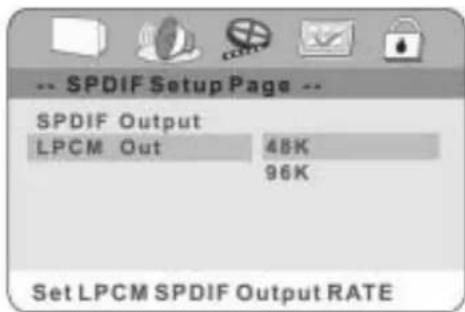
LPCM OUT (picture 9)
LPCM 48k: In the linear PCM setting,"48K" means "the digital audio output maximum sampling rate is 48KHz, therefore, when the title's encoding sampling rate* is 96KHz, the output will be forced conversion to 48KHz.
LPCM 96k: If "96k" is selected, then the maximum output sampling rate is 96k and no conversion will take place.
Audio Setup
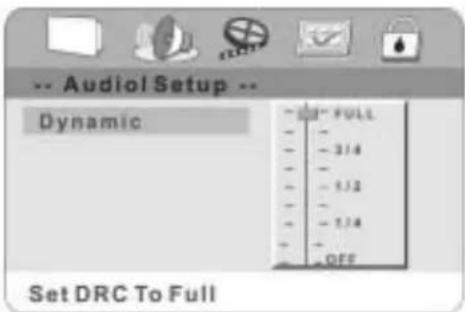
DYNAMIC: This function allows you to alter the dynamic sound output. High volume outputs(gunfire, explosions) are softened enabling you to watch your favorite movie without disturbing others. (picture 10)
PICTURE 6
PICTURE 7
PICTURE 8
PICTURE 9
PICTURE 10
Video Setup
Component
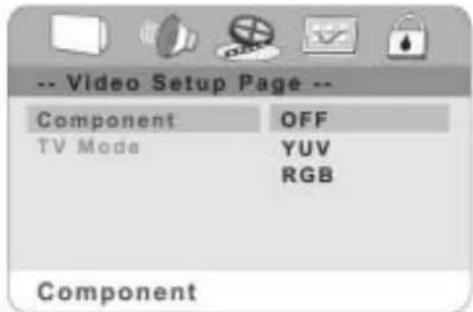
You will get OFF, YUV or RGB of Component signal if you choose different item like picture 11.
- OFF: The video frequency output has video and S-video.
- YUV: The video frequency output has video, S- video and YUV. In this function the TV MODE is effective. You can select INTER-LACE or P-SCAN.
- RGB: The video frequency output has video, S- video and RGB.
• HDMI: In this mode HDMI, YUV, S-Video and Video are available.
PREFERENCE SETTING
The DVD player must be in the stop mode or have the DVD door open to access the preference menu. To put the player in the stop mode, you must press the STOP button twice
TV TYPE
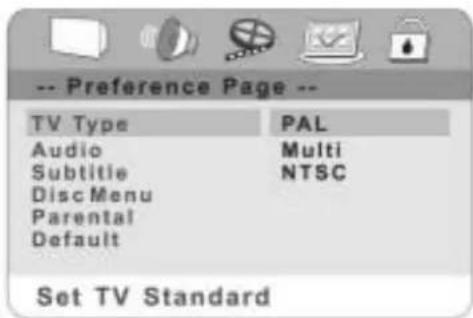
According to the system of TV to be connected, set the type of the video output to match the TV as picture 12
- If the TV used is PAL, select PAL output signal;
- Or select MULTI if TV is multi-system.
- If it is NTSC, select NTSC output signal;
Note:
To obtain the best DVD picture, it is strongly recommended to use Multi-system TV to play DVD movie at 'MULTI' mode.
AUDIO/SUBTITLE/DISC MENU
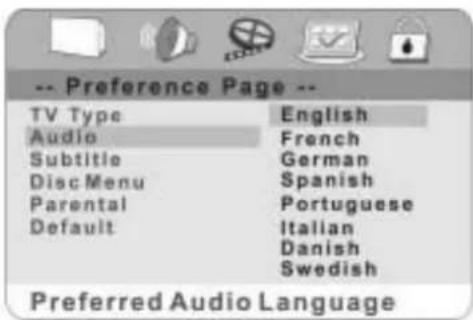
The DVD player will play with your selected language at the AUDIO, SUBTITLE or DISC MENU. If the disc not recorded your selected language, the player will use defaults of the disc. (picture 13)
Note:
Audio and Subtitle language is subject to the availability of the disc menu.
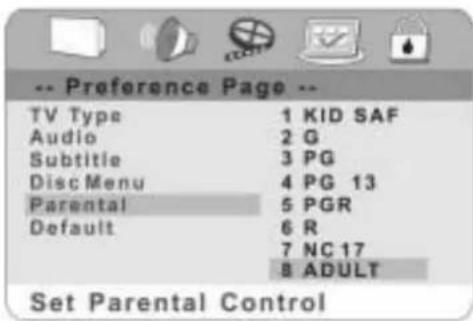
PARENTAL CONTROL (picture 14)
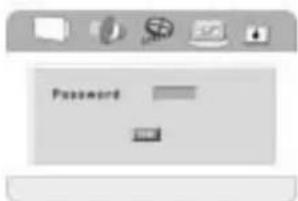
When selecting one of the PARENTAL items, the screen will be changed to the PASSWORD VERIFY PAGE.
When playing disc with parent
lock function, you may select an age control grade according to grade of disc and your desired. For example: Select PG-R, you Could see picture like right, input the password to set the parental level, and then you cannot play DVD video disc rate higher the PG-R grade. Parental control grades are listed from low too high, kids is lowest grade adults is the highest grade.
DEFAULT (picture 15)
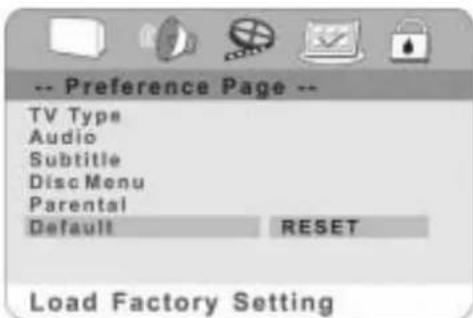
If you select the RESET, each function setting returns to the initial status setting by the factory.
Note:
It does not, however, reset either the password or the parental control level.
PICTURE 11
PICTURE 12
PICTURE 13
PICTURE 14
PICTURE 15
PASSWORD SETUP Picture(16)
PREFERENCE function works only with DVD discs.
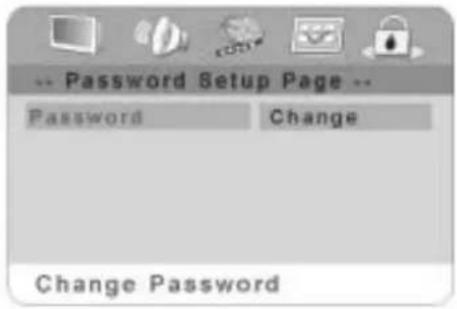
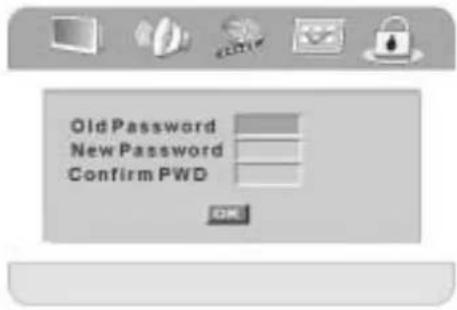
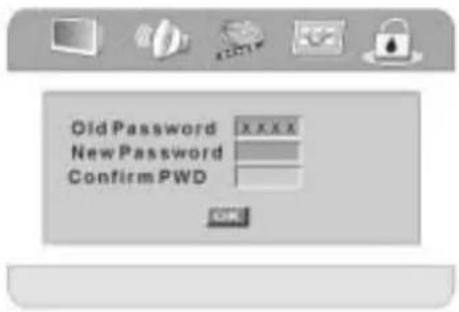
Select this to adapt the code, the screen shows: You may enter the old password You may enter the old password first (picture 17), then input new password (picture 18), at last enter new password again to confirm.
Notes:
The original password is 0000 when the unit is first time turned on.
PICTURE 16
PICTURE 17
PICTURE 18
For Your Reference:
Disc handling and maintenance
Handling precautions
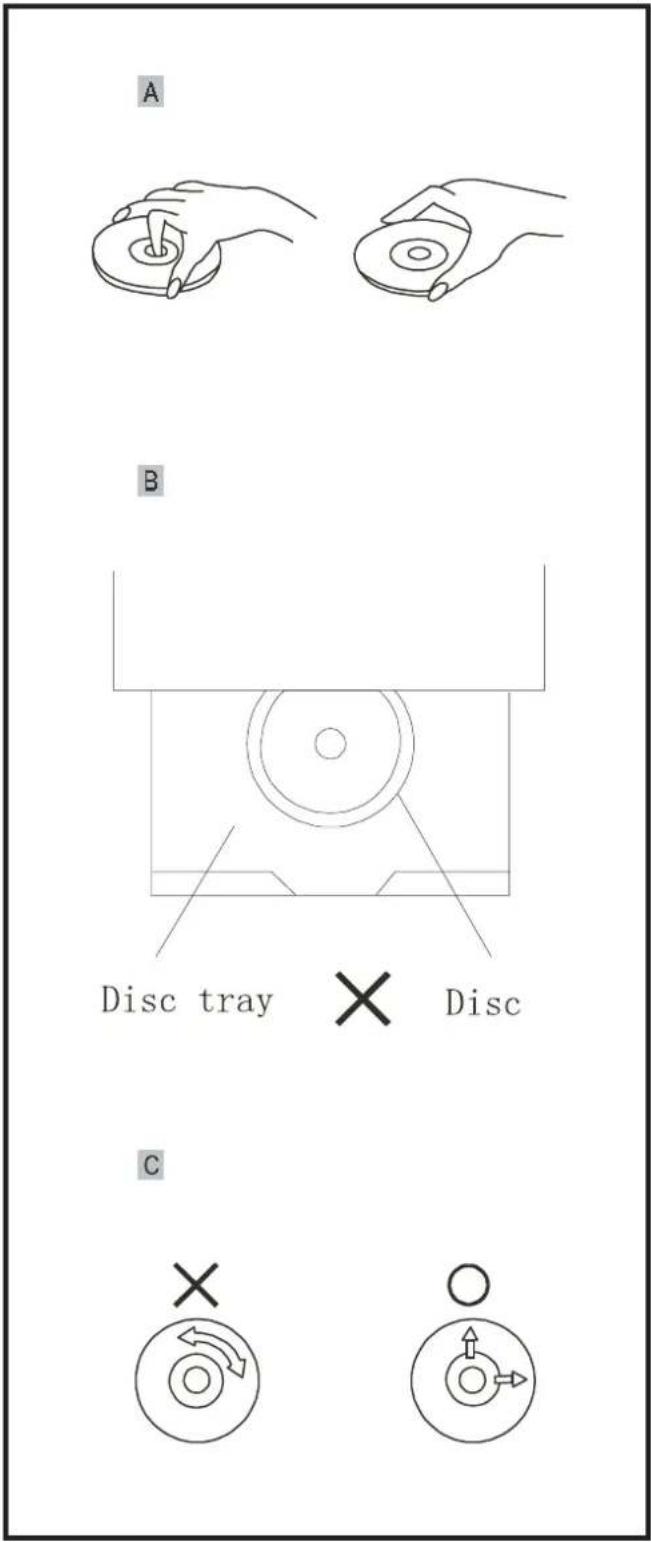
- Hold the disc by the edges so the surface will not be soiled with fingerprints. A Fingerprints, dirt and scratches can cause skipping and distortion.
- Do not write on the label side with a ballpoint pen or other writing utensils.
- Do not use record cleaning sprays, benzine, thinner, static electricity prevention liquids or any other solvent.
- Be careful not to drop or bend the disc.
- Do not install more than 1 disc on the disc tray.
- Do not try to close the disc tray when the disc is not installed properly. B
- Be sure to store the disc in its exclusive case when not in use.
If the surface is soiled C
Wipe gently with a soft, damp (water only) cloth.
When wiping discs, always move the cloth from the center hole toward the outer edge.
(If you wipe the discs using a circular motion, circular scratches are likely to occur, which will cause noise.)
If the disc is brought from a cold to a warm environment, moisture may form on the disc.
Wipe this moisture off with a soft, dry, lint-free cloth before using the disc.
Improper disc storage
You can damage discs if you store them in the following places:
- Areas exposed to direct sunlight
• Humid or dusty areas - Areas directly exposed to a heat outlet or heating appliance
Maintenance
- Be sure to turn the unit off and disconnect the AC power cord before maintaining the unit.
- Wipe this unit with a dry soft cloth.
If the surfaces are extremely dirty, wipe clean with a cloth, which has been dipped in a weak soap-and-water solution and wrung out thoroughly. Then wipe again with a dry cloth.
- Never use alcohol, benzine, thinner, cleaning fluid or other chemicals. Do not use compressed air to remove dust.
Troubleshooting
Before requesting service for this unit, check the chart below for a possible cause of the problem you are experiencing. Some simple checks or a minor adjustment on your part may eliminate the problem and restore proper operation.
| Symptom (Common) | Remedy |
| No power | Insert the power plug securely into the power outlet. |
| Play fails to start even when PLAY is pressed.Play commences but then stops immediately. | Condensation has formed: wait about 1 to 2 hours to allow the player to dry out.This player cannot play discs other than DVDs, CDs.This disc may be dirty and may require cleaning.Ensure that the disc is installed with the label side up. |
| No picture. | Ensure that the equipment is connected properly.Ensure that the input setting for the TV is correct. |
| No sound.Distorted sound. | Ensure that the equipment is connected properly.Ensure that the input settings for the TV and stereo system are proper.Adjust the master volume using the buttons on the remote control. |
| Picture is distorted during rapid advance or rapid reverse. | The picture will be somewhat distorted at times: this is normal. |
| No rapid advance (or rapid reverse) play. | Some discs may have sections, which prohibit rapid advance (or rapid reverse). |
| No 4:3 (16:9) picture. | Choose the correct setup “TV Aspect” item that matches the TV set used. |
| No on-screen display. | The “Off” setting is selected for “On-screen Messages”: select “On”. |
| No surround sound. | Choose the correct setup at the “Audio Output” which matches your stereo system. |
| No operations can be performed with the remote control. | Check the batteries are installed with the correct polarities(+/-)The batteries are depleted: replace them with new ones.Point the remote control unit at the remote sensor and operate.Operate the remote control unit at a distance of not more than 7 meters from the remote control sensor. |
| No key operation (either front panel and/or remote control). | Remove the obstacles between the remote control unit and remote control sensor.Turn the unit off and then back to on. Alternatively, turn off the unit, disconnect the AC power cord and then reconnect it. (The player may not be operating properly due to lightning, static electricity or some other external factor.) |
| OSD menu not displayed or only partially displayed on the TV Screen. | Select the appropriate TV screen type by consulting the operation manual of the TV. |
| Symptom (DVD) | Remedy |
| Play does not commence even when title is selected. | Confirm the “Ratings” setting. |
| Audio soundtrack and/or subtitle language is not the one selected at the initial settings. | If the audio soundtrack and/or subtitle language does not exist on the disc, the language selected at the initial settings will not be seen/heard. |
| The menu is displayed in French (for example). | The setup “Menus” of “Disc Languages” is set to French: select English. |
| No subtitles. | Subtitles appear only with discs, which contain them.Subtitles are cleared from the TV monitor. Press “SUBTITLES” button to display the subtitles. |
| Alternative audio soundtrack (or subtitle) languages fail to be selected. | An alternative language is not selected with discs, which do not contain more than one language.In the case of some discs, the alternative language cannot be selected by operating the AUDIO or SUBTITLE button. Try selecting it from the DVD menu if one is available. |
| Angle cannot be changed. | This function is dependent on software availability. Even if a disc has a number of angles recorded, these angles may be recorded for specific scenes only (when the ANGLE indicator on the unit lights up.) |
| No Image via HDMI. | Change via the 720P/1080i button on remote the resolution. Current resolution will be shown on the TV screen. If the image doesn't come up change connect the composite video to the TV set and check correct setup. |
| No audio out on TV via HDMI is connected. | Ensure in Audio Setup the SPDIF OUTPUT is set to SPDIF PCM. |
| No multichannel signal on AV receiver while connected via HDMI. | Ensure in Audio Setup the SPDIF OUTPUT is set to SPDIF RAW. |
| Red image via component video output | Ensure in Video Setup YUV is selected for the Setup Component field. |
| Pure picture quality via Scart output is bad or distorted | Ensure in Video Setup RGB is selected for the Setup Component field. These can be changed via button RGB / YUV on the remote as well. |
Angle
Recorded onto some DVD discs are scenes, which have been simultaneously shot from a number of different angles (the same scene is shot from the front, from the left side, from the right side, etc.). With such discs, the ANGLE button can be used to view the scene from different angles.
Chapter number
These numbers are recorded on DVD discs. A title is subdivided into many sections, each of which is numbered, and specific parts of video presentations can be searched quickly using these numbers.
DVD
This refers to a high-density optical disc on which high-quality pictures and sound have been recorded by means of digital signals. Incorporating a new video compression technology (MPEG) and high-density recording technology, DVD enables esthetically pleasing full-motion video to be recorded over long periods of time (for instance, a whole movie can be recorded).
Subtitle
These are the printed lines appearing at the bottom of the screen, which translate or transcribe the dialogue. They are recorded on DVD discs.
Time number
This indicates the playtime recorded on DVD discs. When a disc contains two or more movies, these movies are numbered as title 1, title 2, etc.
Track number
These numbers are assigned to the tracks which are recorded on CDs. They enable specific tracks to be located quickly.
Power Requirements: AC 220-240V, 50Hz Power Consumption: 25W
Signal system: PAL/NTSC
Weight 2.2kg
Dimensions: 440(W)x250(D)x54(H)mm (excluding protrusions)
Operating temperature range: +5 to +35°C
Operating humidity ranger: 5 to 90% (no condensation)
Discs played:
(1) DVD-VIDEO disc
12cm single-sided, single-layer
12cm single-sided, double-layer
12cm double-sided, double-layer (one layer per side)
8cm single-sided, single-layer
8cm single-sided, double-layer
8cm double-sided, double-layer (one layer per side)
(2) compact disc (CD-DA)
12cm disc
8cm disc
S-video output:
Output connector: S terminal (1 system)
Output connector: Pin jack (2 systems)
Audio output: Output level: 2 Vrms (1kHz, 0dB)
Output connector: Pin jack
5.1ch mixed output: 1 system (2ch)
5.1ch discrete output: 1 system (5.1ch)
Audio signal output characteristics:
(1) Frequency response:
• DVD (linear audio):
4Hz-22kHz (48kHz sampling)
4Hz-22kHz (96kHz sampling)
- CD audio:
2Hz-20kHz (EIAJ)
(2) S/N ratio:
• CD audio: 115dB (EIAJ)
(3) Dynamic range:
• DVD (linear audio): 102dB
• CD audio: 99dB (EIAJ)
(4) Total harmonic distortion:
• CD audio: 0.0025% (EIAJ)
Digital audio output:
Optical digital output: Optical connector
Coaxial digital output: Pin jack
Pickup: Wave length: 655nm
Laser power: CLASS 1
Specifications are subject to changer without notice.
Weight and dimensions are approximate.
- RETAIN YOUR PURCHASE RECEIPT
- IMPORTANT
- FOR U.K. ONLY
- FRANÇAIS
- GARANTIE
- Safety information
- - Note:
- - CAUTION:
- - WARNING:
- Precautions
- • Power cord protection
- - Placement
- • Non-use Periods
- - Foreign Objects
- - Keep away from water / magnetic fields
- - Stacking
- - Condensation
- - If there is noise interference on your TV channels
- Features
- Selecting the type of disc compatible with your TV
- Important:
- Table of contents
- Getting Started:
- Basic operation:
- Initial setting:
- For your reference:
- Main unit
- Remote control unit
- Connection to TV and Audio players
- Connecting to Stereo TV (configuration) A
- Connecting to monaural TV set B ]
- Connecting to audio equipment [C]
- Note:
- Audio connections
- Connection to a TV via HDMI A ]
- Connecting to a TV amplifier with 5.1ch input connector supporting Dolby Digital decoder B ]
- Connecting to a decoder with Dolby Digital processing or MPEG processing [A]
- Notes when connecting an optical digital cable: -
- Audio output from the optical/coaxial digital audio output connectors: -
- Caution for the optical/coaxial digital audio output connector:
- Remote control preparation
- Battery installation [A]
- Service life of batteries
- Notes:
- Remote control operation range B 1
- Basic operation
- Preparations
- Basic play
- Playing Audio CD's
- For you convenience:
- For you reference:
- MENU and TITLE
- Press MENU or TITLE by the remote control unit
- Changing SUBTITLE language [DVDs only]
- Changing the audio soundtrack language
- • DVD:
- • CD:
- Viewing from another ANGLE [DVDs only]
- On screen DISPLAY
- RETURN
- RANDOM
- REPEAT
- Repeat A-B (allows you to play a small section of the disc repeatedly)
- GOTO function
- Program
- DVD
- CD
- CLEAR
- VOLUME control
- 720P/1080i button
- RGB / YUV button
- Playback of MP3 Files
- Playback of your DIVX Disc
- STOP button and MENU button
- DISPLAY button
- NOTE :
- Initial settings
- GENERAL SETUP
- TV DISPLAY
- ANGLE MARK (picture 3)
- OSD LANG (picture 4)
- SCREEN SAVER (picture 5)
- AUDIO SETUP
- Speaker Setup (picture 6)
- DOWNMIX (picture 7)
- FRONT SPEAKER
- SUBWOOFER/ Test Tone:
- SPDIF OUTPUT (picture 8)
- LPCM OUT (picture 9)
- Video Setup
- Component
- PREFERENCE SETTING
- TV TYPE
- AUDIO/SUBTITLE/DISC MENU
- PARENTAL CONTROL (picture 14)
- DEFAULT (picture 15)
- PASSWORD SETUP Picture(16)
- Disc handling and maintenance
- Handling precautions
- If the surface is soiled C
- Improper disc storage
- Maintenance
- Troubleshooting
- Angle
- Chapter number
- Subtitle
- Time number
- Track number
- Discs played:
- S-video output:
- Audio signal output characteristics:
- Digital audio output:
Brand : MARANTZ
Model : DV3001e
Category : Blu-ray player