
EBS-I10 - Computer ASUS - Free user manual and instructions
Find the device manual for free EBS-I10 ASUS in PDF.
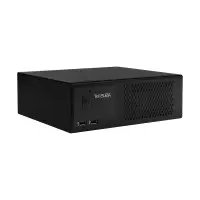


| Product Type | Embedded Computer |
| Brand | ASUS |
| Model | EBS-I10 |
| Power Input | 115/230Vac, 50/60Hz, 6A/3A (WW); 115Vac, 60Hz, 6A (China) |
| Operating Temperature | -20°C to 60°C (with extended tolerance peripherals); 35°C with 65W adapter |
| Display Outputs | 1 x HDMI, 2 x DisplayPort |
| USB Ports | 2 x USB 2.0 (front), 4 x USB 3.2 Gen1 (rear) |
| LAN Ports | 2 x RJ-45 Gigabit Ethernet |
| Serial Ports | 6 x RS-232/422/485 (COM) |
| Audio Ports | 1 x Microphone input, 1 x Headphone output |
| Expansion Slots | 1 x M.2 (SATA/PCIe), 1 x mSATA/mPCIe |
| Wireless Connectivity | Optional Wi-Fi (Wi-Fi SKU includes antenna and Bluetooth) |
| BIOS Type | AMI UEFI BIOS with advanced configuration options |
| Security Features | TPM 2.0, Secure Boot, Administrator/User passwords |
| Watchdog Timer | Yes, configurable (second or minute mode) |
| Cooling | Active fan (CPU and chassis fan speed monitoring) |
| Package Contents | EBS-I10 unit, accessory package, chassis bracket, screw pack, AC power cord, Wi-Fi antenna (Wi-Fi SKU only) |
| Regulatory Compliance | FCC (Class A), CE, UKCA, CAN ICES-3(A)/NMB-3(A), KC, Japan, India RoHS |
| Supported Operating Systems | Windows, Linux (typical embedded OS support) |
Frequently Asked Questions - EBS-I10 ASUS
User questions about EBS-I10 ASUS
0 question about this device. Answer the ones you know or ask your own.
Ask a new question about this device
Download the instructions for your Computer in PDF format for free! Find your manual EBS-I10 - ASUS and take your electronic device back in hand. On this page are published all the documents necessary for the use of your device. EBS-I10 by ASUS.
USER MANUAL EBS-I10 ASUS
E20874
First Edition
September 2022
COPYRIGHT INFORMATION
No part of this manual, including the products and software described in it, may be reproduced, transmitted, transcribed, stored in a retrieval system, or translated into any language in any form or by any means, except documentation kept by the purchaser for backup purposes, without the express written permission of ASUSTeK COMPUTER INC. ("ASUS").
ASUS PROVIDES THIS MANUAL "AS IS" WITHOUT WARRANTY OF ANY KIND, EITHER EXPRESS OR IMPLIED, INCLUDING BUT NOT LIMITED TO THE IMPLIED WARRANTIES OR CONDITIONS OF MERCHANTABILITY OR FITNESS FOR A PARTICULAR PURPOSE. IN NO EVENT SHALL ASUS, ITS DIRECTORS, OFFICERS, EMPLOYEES OR AGENTS BE LIABLE FOR ANY INDIRECT, SPECIAL, INCIDENTAL, OR CONSEQUENTIAL DAMAGES (INCLUDING DAMAGES FOR LOSS OF PROFITS, LOSS OF BUSINESS, LOSS OF USE OR DATA, INTERRUPTION OF BUSINESS AND THE LIKE), EVEN IF ASUS HAS BEEN ADVISED OF THE POSSIBILITY OF SUCH DAMAGES ARISING FROM ANY DEFECT OR ERROR IN THIS MANUAL OR PRODUCT.
Products and corporate names appearing in this manual may or may not be registered trademarks or copyrights of their respective companies, and are used only for identification or explanation and to the owners' benefit, without intent to infringe.
SPECIFICATIONS AND INFORMATION CONTAINED IN THIS MANUAL ARE FURNISHED FOR INFORMATIONAL USE ONLY, AND ARE SUBJECT TO CHANGE AT ANY TIME WITHOUT NOTICE, AND SHOULD NOT BE CONSTRUED AS A COMMITMENT BY ASUS. ASUS ASSUMES NO RESPONSIBILITY OR LIABILITY FOR ANY ERRORS OR INACCURACIES THAT MAY APPEAR IN THIS MANUAL, INCLUDING THE PRODUCTS AND SOFTWARE DESCRIBED IN IT.
Copyright © 2022 ASUSTeK COMPUTER INC. All Rights Reserved.
LIMITATION OF LIABILITY
Circumstances may arise where because of a default on ASUS' part or other liability, you are entitled to recover damages from ASUS. In each such instance, regardless of the basis on which you are entitled to claim damages from ASUS, ASUS is liable for no more than damages for bodily injury (including death) and damage to real property and tangible personal property; or any other actual and direct damages resulted from omission or failure of performing legal duties under this Warranty Statement, up to the listed contract price of each product.
ASUS will only be responsible for or indemnify you for loss, damages or claims based in contract, tort or infringement under this Warranty Statement.
This limit also applies to ASUS' suppliers and its reseller. It is the maximum for which ASUS, its suppliers, and your reseller are collectively responsible.
UNDER NO CIRCUMSTANCES IS ASUS LIABLE FOR ANY OF THE FOLLOWING: (1) THIRD-PARTY CLAIMS AGAINST YOU FOR DAMAGES; (2) LOSS OF, OR DAMAGE TO, YOUR RECORDS OR DATA; OR (3) SPECIAL, INCIDENTAL, OR INDIRECT DAMAGES OR FOR ANY ECONOMIC CONSEQUENTIAL DAMAGES (INCLUDING LOST PROFITS OR SAVINGS), EVEN IF ASUS, ITS SUPPLIERS OR YOUR RESELLER IS INFORMED OF THEIR POSSIBILITY.
SERVICE AND SUPPORT
Visit our multi-language web site at https://www.asus.com/support/.
Contents
About this manual....5
Conventions used in this manual....6
Typography....6
Package contents ....7
Chapter 1: Getting to know your Embedded computer
1.1 Features....10
1.1.1 Front view 10
1.1.2 Rear view.... 11
Chapter 2: Using your Embedded computer
2.1 Getting started....16
2.1.1 Connect the power connector to your Embedded computer....16
2.1.2 Connect a display panel to your Embedded computer....17
2.1.4 Connect the USB cable from keyboard or mouse.... 18
2.2 Turning your Embedded computer off....19
Chapter 3: BIOS Setup
3.1 BIOS setup program....22
3.1.1 BIOS menu screen....22
3.1.2 Menu bar.... 22
3.2 Main menu....23
3.2.1 System Date [Day MM/DD/YYYY] 23
3.2.2 System Time [HH:MM:SS] 23
3.3 Advanced menu 23
3.3.1 LVDS Configuration 23
3.3.2 PCH-FW Configuration 25
3.3.3 Trusted Computing 25
3.3.4 CPU Configuration 26
3.3.5 Graphics Configuration.... 27
3.3.6 PCI Express Configuration....28
3.3.7 CSM Configuration 29
3.3.8 Super IO Configuration 29
3.3.9 Serial Console Redirection 30 3.3.10 SATA Configuration 32 3.3.11 USB Configuration 33 3.3.12 Onboard Devices Configuration 34 3.3.13 NVMe Configuration 35 3.3.14 APM Configuration 36 3.3.15 EZ-Flash 36 3.3.16 Watchdog Timer 36 3.3.17 Miscellaneous 37 3.3.18 Network Stack Configuration 37
3.4 Hardware Monitor menu 38 3.5 Security menu 39
3.5.1 Administrator Password 39 3.5.2 User Password 40 3.5.3 Secure Boot 40
3.6 Boot menu 41 3.7 Exit menu 42
Appendix
Safety information 44
Setting up your system 44 Care during use 45
Regulatory notices 47
Service and Support 58
About this manual
This manual provides information about the hardware and software features of your Embedded computer, organized through the following chapters:
Chapter 1: Getting to know your Embedded computer
This chapter details the hardware components of your Embedded computer.
Chapter 2: Using your Embedded computer
This chapter provides you with information on using your Embedded computer.
Chapter 3: BIOS Setup
This chapter provides a detailed guide to navigating and setting up the BIOS.
Appendix
This section includes notices and safety statements for your Embedded computer.
Conventions used in this manual
To highlight key information in this manual, some text is presented as follows:
IMPORTANT! This message contains vital information that must be followed to complete a task.
NOTE: This message contains additional information and tips that can help complete tasks.
WARNING! This message contains important information that must be followed to keep you safe while performing certain tasks and prevent damage to your Embedded computer's data and components.
Typography
Bold text indicates a menu or an item to select.
Italic
This indicates sections that you can refer to in this manual.
Package contents
Your Embedded computer package contains the following items:

EBS-I10
Accessory package
Chassis bracket and screw pack x1
AC power cord x 1
Wi-Fi antenna x 1 (Wi-Fi SKU only)
NOTE:
- Some bundled accessories may vary with different models.
- The device illustration is for reference only. Actual product specifications may vary with models.
- If the device or its components fail or malfunction during normal and proper use within the warranty period, bring the warranty card to the ASUS Service Center for replacement of the defective components.
1
Getting to know your Embedded computer
1.1 Features
1.1.1 Front view

1

Power button
The power button allows you to turn the Embedded Computer on or off. You can use the power button to put your Embedded Computer to sleep mode or press it for four (4) seconds to force shutdown your Embedded Computer.
2

Microphone port
This port connects to a microphone.
NOTE: This port is not available in GPU SKU.
3

Headphone port
This port connects to a microphone.
NOTE: This port is not available in GPU SKU.
4

USB 2.0 ports
These Universal Serial Bus 2.0 ports connect to USB 2.0 devices such as a mouse, printer, scanner, camera, PDA, and others.
1.1.2 Rear view

1

Power connector
Plug the power cord to this connector.
RATING: 115/230Vac, 50/60Hz, 6A/3A (WW)
115Vac, 60Hz, 6A
220Vac, 50Hz, 3A (China)
2
ANT.
Antenna holes
The antenna hole allows you to connect a wireless antenna to enhance wireless signal reception.
NOTE: The Wi-Fi antenna is optional and may not come with the product.
3

Serial (COM) connector
The 9-pin RS232/422/485 serial (COM) connector allows you to connect devices that have serial ports such as bar code scanner, modem, or printers.

| Pin RS-232 RS-422 RS485 | ||
| 1 NA TX- D- | ||
| 2 RXD TX+ D | ||
| 3 TXD RX+ NA | ||
| 4 NA RX- NA | ||
| 5 GND GND GND | ||
| 6 NA NA NA | ||
| 7 RTS NA NA | ||
| 8 CTS NA NA | ||
| 9 NA NA NA | ||
4 HDMI HDMI port
The HDMI (High Definition Multimedia Interface) port supports a Full-HD device such as an LCD TV or monitor to allow viewing on a larger external display.
5 DisplayPorts
These ports are for DisplayPort-compatible devices
6 LAN ports
The 8-pin RJ-45 LAN port supports a standard Ethernet cable for connection to a local network.

| Activity Link LED | |
| Status Description | |
| Off No link | |
| Orange | Linked |
| Blinking | Data activity |
| Speed LED | |
| Status | Description |
| Off | 10 Mbps connection |
| Orange | 100 Mbps connection |
| Green | 1 Gbps connection |


USB 3.2 Gen 1 port
The USB 3.2 Gen 1 (Universal Serial Bus) port provides a transfer rate up to 5 Gbit/s and a maximum of 5V/0.9A output per port.


Microphone port
This port connects to a microphone.


Headphone port
This port connects to a microphone.

Expansion slot bracket
Remove the expansion slot bracket when installing an expansion card.
Using your Embedded computer
2
2.1 Getting started
2.1.1 Connect the power connector to your Embedded computer
To connect the power adapter to your Embedded Computer:
A. Connect the power cord to the power connector of the Embedded Computer.
B. Plug the power connector into a 100 V\~240 V power source.

IMPORTANT!
• We strongly recommend that you use a grounded wall socket while using your Embedded computer.
- The socket outlet must be easily accessible and near your Embedded computer.
- To disconnect your Embedded computer from its main power supply, unplug your Embedded computer from the power socket.
2.1.2 Connect a display panel to your Embedded computer
You can connect a display panel or projector to your Embedded computer that has the following connectors:
To connect a display panel to your Embedded computer:
- HDMI connector
Connect one end of an HDMI® cable to an external display, and the other end of the cable to your Embedded computer's HDMI port.

- DisplayPort connector
Connect one end of a DisplayPort cable to an external display, and the other end of the cable to your Embedded computer's HDMI port.

2.1.3 Connect the USB cable from keyboard or mouse
You can connect generally any USB keyboard and mouse to your Embedded computer. You can also connect a USB dongle for a wireless keyboard and mouse set.
To connect a keyboard and mouse to your Embedded computer:
Connect the USB cable from your keyboard and mouse to any of the USB ports of your Embedded computer.
NOTE:
• The keyboard varies with country or region. • The keyboard and mouse are purchased separately.

2.2 Turning your Embedded computer off
If your Embedded computer is unresponsive, disconnect the power from the Embedded computer to turn it off.
BIOS Setup
3
3.1 BIOS setup program
Use the BIOS Setup program to configure its parameters. The BIOS screens include navigation keys and brief online help to guide you in using the BIOS Setup program.
Entering BIOS Setup at startup
To enter BIOS Setup at startup:
Press <Del> or <F2> during the Power-On Self Test (POST). If you do not press <Del> or <F2>, POST continues with its routines.
Entering BIOS Setup after POST
To enter BIOS Setup after POST:
- Press <Ctrl> + <Alt> + <Delete> simultaneously.
- Press the reset button on the system chassis.
- Press the power button to turn the system off then back on. Do this option only if you failed to enter BIOS Setup using the first two options.
WARNING! Using the power button, reset button, or the <Ctrl> + <Alt> + <Delete> keys to reboot a running operating system can cause damage to your data or system. Always shut down the system properly from the operating system.
IMPORTANT:
- Visit the ASUS website at www.asus.com to download the latest BIOS file for this motherboard.
- The default BIOS settings for this motherboard apply to most working conditions and ensure optimal performance. If the system becomes unstable after changing any BIOS settings, load the default settings to regain system stability. Select the option Restore Defaults under the Exit Menu or press hotkey F3.
- The BIOS setup screens shown in this section are for reference purposes only, and may not exactly match what you see on your screen.
3.1.1 BIOS menu screen
3.1.2 Menu bar
The menu bar on top of the screen has the following main items:
Main For changing the basic system configuration.
Advanced: For changing the advanced system settings.
Hardware Monitor: For displaying the system temperature, power status, and changing the fan settings.
Security: For configuring the system security settings.
Boot: For changing the system boot configurations.
Exit: For selecting the save options and default settings.
To select an item on the menu bar, press the right or left arrow key on the keyboard until the desired item is highlighted.
3.2 Main menu
The Main menu provides you with an overview of the basic system information, and allows you to set the system date, time, language, and security settings.
3.2.1 System Date [Day MM/DD/YYYY]
Allows you to set the system date.
3.2.2 System Time [HH:MM:SS]
Allows you to set the system time.
3.3 Advanced menu
The Advanced menu items allow you to change the settings for the CPU and other system devices.
WARNING! Be cautious when changing the settings of the Advanced menu items. Incorrect field values can cause the system to malfunction.
3.3.1 LVDS Configuration
Switch to LVDS
Configuration options: [Disable] [Enable]
NOTE: The following item appears when you set Switch to LVDS to [Enable].
All-in-One Chassis
Allows you to select All-in-One (AiO) Chassis (if applicable) for simplified AiO configuration. Configuration options: [None] [1920*1080 LVDS1] [1920*1080 LVDS2] [1920*1080 LVDS3] [1600*900 LVDS4]
NOTES:
- Be cautious when selecting AiO chassis. Incorrect selection of AiO chassis can cause incorrect operation or potential damage to AiO chassis hardware. • The following items appear only when you set All-in-One Chassis to [None].
EDID Data Source
Configuration options: [Pre-Defined] [Flat Panel Display]
NOTE: The following item appears when you set EDID Data Source to [Pre-Defined].
LFP Panel Type
Allows you to select LFP panel used by Internal Graphics Device.
Configuration options: [VBIOS Default] [640x480] [800x600] [1024x768]
[1280x1024] [1400x1050 LVDS1] [1400x1050 LVDS2] [1600x1200]
[1366x768] [1680x1050] [1920x1200] [1440x900] [1600x900]
[1024x768] [1280x800] [1920x1080] [2048x1536]
Inverter Polarity
Configuration options: [Normal] [Inverted]
Channel Select
Configuration options: [Dual Channel] [Single Channel]
Mode Select
Configuration options: [JEIDA] [VESA 6bit] [VESA 8bit] [VESA 10bit]
DIGON enable to LVDS_ON enable (T2)
Configuration options: [0] ~ [50]
LVDS_ON enable to BLON enable (T3)
Configuration options: [0] ~ [1023]
BLON disable to LVDS_ON disable (T4)
Configuration options: [0] ~ [1023]
LVDS_ON disable to DIGON disable (T5)
Configuration options: [0] ~ [50]
Completion of power down to power up (T7)
Configuration options: [0] ~ [1023]
VARY_BL enable to BL_EN enable (T9)
Configuration options: [0] ~ [1023]
BL_EN disable to VARY_BL disable (T10)
Configuration options: [0] ~ [1023]
3.3.2 PCH-FW Configuration
This item allows you to configure Management Engine Technology parameters.
TPM Device Selection
Allows you to select TPM device.
[PTT] Enables PTT in SkuMgr.
[dTPM] Disables PTT in SkuMgr.
NOTE: When PTT is disabled, all data saved on it will be lost.
3.3.3 Trusted Computing
Security Device Support
Allows you to enable or disable BIOS support for security device.
Configuration options: [Disable] [Enable]
NOTE: The following items appear when a TPM device is installed on your motherboard.
SHA1 PCR Bank
Configuration options: [Disabled] [Enabled]
SHA256 PCR Bank
Configuration options: [Disabled] [Enabled]
Pending operation
Allows you to schedule an operation for security device.
Configuration options: [None] [TPM Clear]
NOTE: Your computer will reboot during restart in order to change the state of security device.
Platform Hierarchy
Configuration options: [Disabled] [Enabled]
Storage Hierarchy
Configuration options: [Disabled] [Enabled]
Endorsement Hierarchy
Configuration options: [Disabled] [Enabled]
TPM 2.0 UEFI Spec Version
Configuration options: [TCG_2] [TCG_1_2]
Physical Presence Spec Version
Allows you to select to tell O.S. to support PPI Spec Version 1.2 or 1.3.
Configuration options: [1.2] [1.3]
NOTE: Some HCK tests might not support 1.3.
3.3.4 CPU Configuration
The items in this menu show CPU-related information the BIOS automatically detects.
Intel (VMX) Virtualization Technology
This item, when set to [enabled], will allow a VMM to utilize the additional hardware capacities provided by Vanderpool Technology.
Configuration options: [Disabled] [Enabled]
Intel Trusted Execution Technology
Configuration options: [Disabled] [Enabled]
VT-d
Configuration options: [Disabled] [Enabled]
CPU - Power Management Control
This item allows you to manage and configure the CPU's power.
Intel® SpeedStep™
Allows your system to support more than two frequency ranges.
Configuration options: [Disabled] [Enabled]
Intel® Speed Shift Technology
Allows you to enable or disable Intel® Speed Shift Technology support.
When enabled, CPPC v2 interface allows hardware controlled P-state.
Configuration options: [Disabled] [Enabled]
NOTE: The following item appears only when Intel® SpeedStep or Intel® Speed Shift is available and enabled.
Turbo Mode
Configuration options: [Disabled] [Enabled]
C states
Allows you to enable or disable CPU Power Management.
Configuration options: [Disabled] [Enabled]
NOTE: The following item appears only when you set C states to [Enabled].
Enhanced C-states
Allows you to enable or disable C1E. CPU will switch to minimum speed when all cores enter C-state. Configuration options: [Disabled]
[Enabled]
3.3.5 Graphics Configuration
This item allows you to select a primary display from IGFX and PEG graphical devices.
Primary Display
Allows you to select which of the IGFX/PEG/PCI Graphics devices should be the primary display or select SG for switchable GFX.
Configuration options: [Auto] [IGFX] [PEG]
Internal Graphics
Configuration options: [Auto] [Disabled] [Enabled]
[Auto] Keeps IGFX enabled base on the setup options.
[Disabled] Disables internal graphics.
[Enabled] Enables internal graphics.
RC6 (Render Standby)
Allows you to enable or disable render standby support. Configuration options: [Disabled] [Enabled]
3.3.6 PCI Express Configuration
This item allows you to configure PCI Express settings.
PCIEX16 Slot
Allows you to configure the PCI Express Root Port settings.
Enable Root Port
Allows you to enable or disable the Root Port.
Configuration options: [Disabled] [Enabled]
Max Link Speed
Configuration options: [Auto] [Gen1] [Gen2] [Gen3]
Max Link Width
Configuration options: [Auto] [Force x1] [Force x2] [Force x4] [Force x8]
ASPM
Allows you to set the ASPM Level.
Configuration options: [Disabled] [Auto] [ASPM L0s] [ASPM L1] [ASPM L0sL1]
Detect Non-Compliance Device
Configuration options: [Disabled] [Enabled]
3.3.7 CSM Configuration
CSM Support
The item allows you to enable or disable CSM Support.
3.3.8 Super IO Configuration
NCT6116D Super IO Configuration
Serial Port 1 Configuration
This item allows you to set parameters of Serial Port 1 (COMA).
Serial Port
Allows you to enable or disable the serial port (COM).
Configuration options: [Disabled] [Enabled]
COM1 Control
Allows you to select COM1 mode.
Configuration options: [RS232] [RS422] [RS485]
Serial Port 2 Configuration
This item allows you to set parameters of Serial Port 2 (COMB).
Serial Port
Allows you to enable or disable the serial port (COM).
Configuration options: [Disabled] [Enabled]
COM2 Control
Allows you to select COM2 mode.
Configuration options: [RS232] [RS422] [RS485]
Serial Port 3 Configuration
This item allows you to set parameters of Serial Port 3 (COMC).
Serial Port
Allows you to enable or disable the serial port (COM). Configuration options: [Disabled] [Enabled]
Serial Port 4 Configuration
This item allows you to set parameters of Serial Port 4 (COMD).
Serial Port
Allows you to enable or disable the serial port (COM). Configuration options: [Disabled] [Enabled]
Serial Port 5 Configuration
This item allows you to set parameters of Serial Port 5 (COME).
Serial Port
Allows you to enable or disable the serial port (COM). Configuration options: [Disabled] [Enabled]
Serial Port 6 Configuration
This item allows you to set parameters of Serial Port 6 (COMF).
Serial Port
Allows you to enable or disable the serial port (COM). Configuration options: [Disabled] [Enabled]
3.3.9 Serial Console Redirection
COM1(\~6)
Console Redirection
Allows you to enable or disable the console redirection feature. Configuration options: [Enabled] [Disabled]
NOTE: The following item is accessible when you set Console Redirection to [Enabled].
Console Redirection Settings
The settings specify how the host computer and the remote computer (which the user is using) will exchange data. Both computers should have the same or compatible settings.
Terminal Type
Configuration options: [VT100] [VT100Plus] [VT-UTF8] [ANSI]
[VT100] ASCII char set.
[VT100Plus] Extends VT100 to support color, function keys, etc.
[VT-UTF8] Uses UTF8 encoding to map Unicode chars onto 1 or more bytes.
[ANSI] Extended ASCII char set.
Bits per second
Allows you to select serial port transmission speed. The speed must be matched on the other side. Long or noisy lines may require lower speeds. Configuration options: [9600] [19200] [38400] [57600] [115200]
Data Bits
Configuration options: [7] [8]
Parity
A parity bit can be sent with the data bits to detect some transmission errors. Configuration options: [None] [Even] [Odd] [Mark] [Space]
[None] Disables parity check.
[Even] Parity bit is 0 if the number of 1's in the data bits is even.
[Odd] Parity bit is 0 if the number of 1's in the data bits is odd.
[Mark] Parity bit is always 1.
[Space] Parity bit is always 0.
NOTE: Mark and Space Parity do not allow for error detection.
Stop Bits
Stop bits indicate the end of a serial data packet. The standard setting is 1 stop bit. Communication with slow devices may require more than 1 stop bit. Configuration options: [1] [2]
Flow Control
Flow control can prevent data loss from buffer overflow. When sending data, if the receiving buffers are full, a "stop" signal can be sent to stop the data flow. Once the buffers are empty, a "start" signal can be sent to re-start the flow. Hardware flow control uses two wires to send start/stop signals. Configuration options: [None] [Hardware RTS/CTS]
VT-UTF8 Combo Key Support
Allows you to enable or disable VT-UTF8 Combination Key Support for ANSI/VT100 terminals. Configuration options: [Disabled] [Enabled]
Recorder Mode
With this mode enabled only text will be sent. This is to capture Terminal data. Configuration options: [Disabled] [Enabled]
Resolution 100x31
Allows you to enable or disable extended terminal resolution. Configuration options: [Disabled] [Enabled]
Putty KeyPad
Allows you to select FunctionKey and KeyPad on Putty. Configuration options: [VT100] [LINUX] [XTERMR6] [SCO] [ESCN] [VT400]
3.3.10 SATA Configuration
This item allows you to configure SATA device options settings.
SATA Controller(s)
Allows you to enables or disables the onboard SATA device. Configuration options: [Disabled] [Enabled]
NOTE: The following item appears only when you set SATA Controller(s) to [Enabled].
SATA Mode Selection
Allows you to determine how SATA controller(s) operate. Configuration options: [AHCI]
SATA6G_1(\~2)
Port 1(\~2)
Allows you to enable or disable SATA Port. Configuration options: [Disabled] [Enabled]
Hot Plug
Allows you to designate this port as Hot Pluggable. Configuration options: [Disabled] [Enabled]
M.2
Configuration options: [Disabled] [Enabled]
MSATA_MPCIE
Configuration options: [Disabled] [Enabled]
3.3.11 USB Configuration
Legacy USB Support
[Enabled] Enables the support for USB devices on legacy OS.
[Disabled] USB devices are only available when running BIOS Setup.
[Auto] Allows the system to detect the presence of USB devices at startup. If detected, the USB controller legacy mode is enabled. If no USB device is detected, the legacy USB support is disabled.
XHCI Hand-off
This item functions as a workaround for OSes without XHCI hand-off support. The XHCI ownership change should be claimed by XHCI driver. Configuration options: [Enabled] [Disabled]
USB Mass Storage Driver Support
Allows you to enable or disable USB Mass Storage Driver Support. Configuration options: [Disabled] [Enabled]
LAN1_U31G1_E1
Allows you to enable or disable USB port. Once set to [Disabled], any USB devices plugged into the connector will not be detected by BIOS or OS. Configuration options: [Disabled] [Enabled]
LAN1_U31G1_E2
Allows you to enable or disable USB port. Once set to [Disabled], any USB devices plugged into the connector will not be detected by BIOS or OS. Configuration options: [Disabled] [Enabled]
LAN2_U31G1_E3
Allows you to enable or disable USB port. Once set to [Disabled], any USB devices plugged into the connector will not be detected by BIOS or OS. Configuration options: [Disabled] [Enabled]
LAN2_U31G1_E4
Allows you to enable or disable USB port. Once set to [Disabled], any USB devices plugged into the connector will not be detected by BIOS or OS. Configuration options: [Disabled] [Enabled]
U31G1_1(\~2)
Allows you to enable or disable USB port. Once set to [Disabled], any USB devices plugged into the connector will not be detected by BIOS or OS.
Configuration options: [Disabled] [Enabled]
USB_5(\~8)
Allows you to enable or disable USB port. Once set to [Disabled], any USB devices plugged into the connector will not be detected by BIOS or OS.
Configuration options: [Disabled] [Enabled]
3.3.12 Onboard Devices Configuration
Audio Controller
Allows you to control detection of the HD-Audio device.
Configuration options: [Enabled] [Disabled]
[Enabled] Enables the HD Audio Device unconditionally.
[Disabled] Disables the HD Audio Device unconditionally.
Intel LAN1 Controller
[Enabled] Enables the Intel LAN controller 1.
[Disabled] Disables the controller.
Intel LAN1 PXE OPROM
This item appears only when you set the previous item to [Enabled] and allows you to enable or disable the PXE Option ROM of the Intel LAN controller 1. Configuration options: [Disabled] [Enabled]
Intel LAN2 Controller
[Enabled] Enables the Intel LAN controller 2.
[Disabled] Disables the controller.
Intel LAN2 PXE OPROM
This item appears only when you set the previous item to [Enabled] and allows you to enable or disable the PXE Option ROM of the Intel LAN controller 2. Configuration options: [Disabled] [Enabled]
Wi-Fi Controller
[Enabled] Enables the Wi-Fi controller. [Disabled] Disables the controller.
Bluetooth Controller
[Enabled] Enables the Bluetooth controller. [Disabled] Disables the controller.
M.2 Configuration
[Auto] Auto-detects the M.2 device mode. [SATA Mode] Only supports M.2 SATA devices. [PCIE Mode] Only supports M.2 PCIE devices.
MSATA_MPCIE Configuration
[Auto] Auto-detects the M.2 device mode. [MSATA Mode] Only supports MSATA devices. [MPCIE Mode] Only supports MPCIE devices.
3.3.13 NVMe Configuration
The NVMe Configuration menu displays the NVMe controller and drive information of the devices connected and allows you to configure NVMe device options settings.
3.3.14 APM Configuration
ErP Ready
Allows BIOS to switch off some power at S5 to get the system ready for ErP requirement. When set to [Enabled], all other PME options will be switched off. Configuration options: [Enable] [Disabled]
Restore AC Power Loss
Allows you to select AC power state when power is re-applied after a power failure. Configuration options: [S5 State] [S0 State]
Power On By PCIE
Allows you to enable or disable the Wake-on-LAN function of the onboard LAN controller or other installed PCIe LAN cards. Configuration options: [Disabled] [Enabled]
Power On By RTC
Allows you to enable or disable the RTC (Real-Time Clock) to generate a wake event and configure the RTC alarm date. When enabled, you can set the days, hours, minutes, or seconds to schedule an RTC alarm date. Configuration options: [Disabled] [Single event] [Daily event] [Weekly event] [Monthly event]
3.3.15 EZ-Flash
This item allows you to enter EZ-Flash mode. After you press , a confirmation message appears. Use the left/right arrow key to select between [Yes] or [No], then press to confirm your choice.
3.3.16 Watchdog Timer
Watchdog Support
Configuration options: [Disabled] [Enabled]
NOTE: The following items appear when you set Watchdog Support to [Enable].
Watchdog Count mode
Allows you to select Watchdog Timer I count mode. Configuration options: [Second Mode] [Minute Mode]
Watchdog Timer
Allows you to set the Watchdog Timer I Time-out value.
3.3.17 Miscellaneous
DMI/OPI Configuration
PCI Express Configuration
DMI Link ASPM Control
Allows you to disable or control Active State Power Management on SA side of the DMI link. Configuration options: [Disabled] [L0s] [L1] [L0sL1] [Auto]
3.3.18 Network Stack Configuration
Network Stack
This item allows user to disable or enable the UEFI network stack. Configuration options: [Disabled] [Enabled]
NOTE: The following two items appear only when you set the previous item to [Enabled].
IPv4 PXE Support
This item allows user to disable or enable the IPv4 PXE Boot support. Configuration options: [Disabled] [Enabled]
IPv6 PXE Support
This item allows user to disable or enable the IPv6 PXE Boot support. Configuration options: [Disabled] [Enabled]
3.4 Hardware Monitor menu
The Hardware Monitor menu displays the system temperature/power status, and allows you to change the fan settings.
CPU / Motherboard Temperature
The onboard hardware monitor automatically detects and displays the CPU/motherboard temperatures.
CPU / Chassis Fan Speed
The onboard hardware monitor automatically detects and displays the CPU / chassis fan speeds in rotations per minute (RPM). If the fan is not connected to the motherboard, the field shows N/A. Select Ignore if you do not wish to display the detected speed.
CPU Core Voltage, 3.3V Voltage, 5V Voltage, 12V Voltage
The onboard hardware monitor automatically detects the voltage output through the onboard voltage regulators. Select Ignore if you do not want to detect this item.
Smart Fan Mode
Allows you to select the Smart Fan mode. Configuration options: [Disabled] [Normal] [Manual Mode]
NOTE: The following items appear when you set Smart Fan Mode to [Manual Mode].
Chassis Fan Setting
Temperature 1(\~4)
Allows you to set the value of temperature1(\~4).
FD/RPM 1(\~4)
Allows you to set the value of Fan Duty/PRM 1(\~4) when temperature is T1(\~4).
CPU Fan Setting
Temperature 1(\~4)
Allows you to set the value of temperature1(\~4).
FD/RPM 1(~4)
Allows you to set the value of Fan Duty/RPM 1(~4) when temperature is T1(~4).
3.5 Security menu
The Security menu allows a new password to be created or a current password to be changed. The menu also enables or disables the Secure Boot state and lets the user configure the System Mode state.
3.5.1 Administrator Password
If you have set an administrator password, we recommend that you enter the administrator password for accessing the system.
To set an administrator password:
- Select the Administrator Password item and press <Enter>.
- From the Create New Password box, key in a password, then press <Enter>.
To change an administrator password:
- Select the Administrator Password item and press <Enter>.
- From the Enter Current Password box, key in the current password, then press <Enter>.
- From the Create New Password box, key in a new password, then press .
- Confirm the password when prompted.
NOTE: To clear the administrator password, follow the same steps as in changing an administrator password, but press when prompted to create/confirm the password.
3.5.2 User Password
If you have set a user password, you must enter the user password for accessing the system.
To set a user password:
- Select the User Password item and press .
- From the Create New Password box, key in a password, then press .
- Confirm the password when prompted.
To change a user password:
- Select the User Password item and press .
- From the Enter Current Password box, key in the current password, then press .
- From the Create New Password box, key in a new password, then press .
- Confirm the password when prompted.
3.5.3 Secure Boot
Secure Boot feature is active when Secure Boot is set to [Enabled], Platform Key (PK) is enrolled and the system is running in User mode. Changing the mode requires platform reset. Configuration options: [Disabled] [Enabled]
Secure Boot Mode
Allows you to select Secure Boot Mode. When set to [Custom], Secure Boot Policy variables can be configured by a physically present user without full authentication. Configuration options: [Standard] [Custom]
Key Management
Allows you to modify Secure Boot Policy variables without full authentication.
Platform Key (PK)
Configuration options: [Update]
Key Exchange Keys / Authorized Signatures
Configuration options: [Update] [Append]
Forbidden Signatures
Configuration options: [Details] [Export] [Update] [Append] [Delete]
3.6 Boot menu
The Boot menu items allow you to change the system boot options.
Boot Configuration
Setup Prompt Timeout
Allows you to set the number of seconds to wait for setup activation key. 65535 (0xFFFF) means indefinite waiting.
Bootup NumLock State
Allows you to select the keyboard NumLock state. Configuration options: [On] [Off]
Quiet Boot
Configuration options: [Disabled] [Enabled]
Fast Boot
Allows you to enable or disable boot with initialization of a minimal set of devices required to launch active boot option. This has no effect for BBS boot options. Configuration options: [Disabled] [Enabled]
Boot mode select
Configuration options: [UEFI] [LEGACY]
FIXED BOOT ORDER Priorities
Boot Option #1(~5)
Allows you to set the system boot order. Configuration options: [Hard Disk] [NVME] [CD/DVD] [USB Device] [Network] [Disabled]
3.7 Exit menu
The Exit menu items allow you to load the optimal default values for the BIOS items, and save or discard your changes to the BIOS items. You can access the EZ Mode from the Exit menu.
Save Changes and Exit
Allows you to exit the system setup program after saving the changes.
Discard Changes and Exit
Allows you to exit the system setup program without saving the changes you made. When you select this option or if you press , a confirmation window appears. Select Yes to discard changes and exit.
Save Changes and Reset
Allows you to reset the system setup after saving the changes.
Discard Changes and Reset
Allows you to reset the system setup without saving the changes you made.
Save Options
Save Changes
Allows you to save changes done so far to any of the setup options.
Discard Changes
Allows you to discard changes done so far to any of the setup options.
Restore Defaults
Allows you to restore or load default values for all the setup options.
Save as User Defaults
Allows you to save the changes done so far as User Defaults.
Allows you to restore the User Defaults to all the setup options.
Appendix
Safety information
Your Embedded computer is designed and tested to meet the latest standards of safety for information technology equipment. However, to ensure your safety, it is important that you read the following safety instructions.
Setting up your system
- Read and follow all instructions in the documentation before you operate your system.
- Do not use this product near water or a heated source.
- Set up the system on a stable surface.
- Peripherals with extended temperature tolerance will allow this product to be used in environments with ambient temperatures between -20°C and 60°C.
- The product should be used in environments with an ambient temperature of 35°C when using the 65W adapter.
- If you use an extension cord, make sure that the total ampere rating of the devices plugged into the extension cord does not exceed its ampere rating.
- For your safety, only connect this device to a properly grounded electrical outlet.
- This equipment should be installed and operated with a minimum distance of 20cm between the radiator and your body.
- Restricted Access Location:
The equipment should only be installed in a Restricted Access Area where both these conditions apply:
- access can only be gained by USERS who have been instructed about the reasons for the restrictions applied to the location and about any precautions that shall be taken; and
- access is through the use of a TOOL or lock and key, or other means of security, and is controlled by the authority responsible for the location.
- This device shall not be connected to an Ethernet network with outside plant routing.
Care during use
- Do not walk on the power cord or allow anything to rest on it.
- Do not spill water or any other liquids on your system.
- When the system is turned off, a small amount of electrical current still flows. Always unplug the power cord from the power outlets before cleaning the system.
- Please use this product with care when operating this product at full load, as the product may reach temperatures of up to 60°C and the outer casing may reach temperatures of up to 72°C
- If you encounter the following technical problems with the product, unplug the power cord and contact a qualified service technician or your retailer.
- The power cord or plug is damaged. – Liquid has been spilled into the system.
- The system does not function properly even if you follow the operating instructions.
- The system was dropped or the cabinet is damaged.
- The system performance changes.
Lithium-Ion Battery Warning
CAUTION: Danger of explosion if battery is incorrectly replaced. Replace only with the same or equivalent type recommended by the manufacturer. Dispose of used batteries according to the manufacturer's instructions.
NO DISASSEMBLY
The warranty does not apply to the products that have been disassembled by users

DO NOT throw the Embedded computer in municipal waste. This product has been designed to enable proper reuse of parts and recycling. This symbol of the crossed out wheeled bin indicates that the product (electrical, electronic equipment, and mercury-containing button cell battery) should not be placed in municipal waste. Check local technical support services for product recycling.
Regulatory notices
COATING NOTICE
IMPORTANT! To provide electrical insulation and maintain electrical safety, a coating is applied to insulate the device except on the areas where the I/O ports are located.
Federal Communications Commission Statement
This device complies with Part 15 of the FCC Rules. Operation is subject to the following two conditions:
- This device may not cause harmful interference, and
- This device must accept any interference received, including interference that may cause undesired operation.
This equipment has been tested and found to comply with the limits for a Class A digital device, pursuant to part 15 of the FCC Rules. These limits are designed to provide reasonable protection against harmful interference when the equipment is operated in a commercial environment.
This equipment generates, uses, and can radiate radio frequency energy and, if not installed and used in accordance with the instruction manual, may cause harmful interference to radio communications. Operation of this equipment in a residential area is likely to cause harmful interference in which case the user will be required to correct the interference at his own expense.
IMPORTANT! Outdoor operations in the 5.15~5.25 GHz band is prohibited. This device has no Ad-hoc capability for 5250~5350 and 5470~5725 MHz.
WARNING! Any changes or modifications not expressly approved by the grantee of this device could void the user's authority to operate the equipment.
RF exposure warning
This equipment must be installed and operated in accordance with provided instructions and the antenna(s) used for this transmitter must be installed to provide a separation distance of at least 20 cm from all persons and must not be co-located or operating in conjunction with any other antenna or transmitter. End-users and installers must be provided with antenna installation instructions and transmitter operating conditions for satisfying RF exposure compliance.
End Product Labeling
This transmitter module is authorized only for use in devices where the antenna may be installed such that 20 cm may be maintained between the antenna and users. The final end product must be labeled in a visible area with the following:
Contains FCC ID: TX2-RTL8822CE and Contains IC: 6317A-RTL8822CE
ISED Radiation Exposure Statement for Canada
This equipment complies with ISED radiation exposure limits set forth for an uncontrolled environment. To maintain compliance with ISED RF exposure compliance requirements, please avoid direct contact with the transmitting antenna during transmitting. End users must follow the specific operating instructions for satisfying RF exposure compliance.
Operation is subject to the following two conditions:
• This device may not cause interference; and • This device must accept any interference, including interference that may cause undesired operation of the device.
Compliance Statement of Innovation, Science and Economic Development Canada (ISED)
This device complies with Innovation, Science and Economic Development Canada licence-exempt RSS standard(s). Operation is subject to the following two conditions: (1) this device may not cause interference, and (2) this device must accept any interference, including interference that may cause undesired operation of the device.
CAN ICES-3(A)/NMB-3(A)
Wireless Operation Channel for Different Domains
N. America 2.412-2.462 GHz Ch01 through CH11
Japan 2.412-2.484 GHz Ch01 through Ch14
Europe ETSI 2.412-2.472 GHz Ch01 through Ch13
KC: Korea Warning Statement
Class A:
User Notice
Japan RF Equipment Statement
Outdoor Use
Declaration of compliance for product environmental regulation
ASUS follows the green design concept to design and manufacture our products, and makes sure that each stage of the product life cycle of ASUS product is in line with global environmental regulations. In addition, ASUS discloses the relevant information based on regulation requirements.
Please refer to http://csr.asus.com/Compliance.htm for information disclosure based on regulation requirements ASUS is complied with:
EU REACH and Article 33
Complying with the REACH (Registration, Evaluation, Authorization, and Restriction of Chemicals) regulatory framework, we publish the chemical substances in our products at ASUS REACH website at http://csr.asus.com/english/REACH.htm
EU RoHS
This product complies with the EU RoHS Directive. For more details, see http://csr.asus.com/english/article.aspx?id=35
Japan JIS-C-0950 Material Declarations
Information on Japan RoHS (JIS-C-0950) chemical disclosures is available on http://csr.asus.com/english/article.aspx?id=19
India RoHS
This product complies with the “India E-Waste (Management) Rules, 2016” and prohibits use of lead, mercury, hexavalent chromium, polybrominated biphenyls (PBBs) and polybrominated diphenyl ethers (PBDEs) in concentrations exceeding 0.1% by weight in homogenous materials and 0.01% by weight in homogenous materials for cadmium, except for the exemptions listed in Schedule II of the Rule.
Vietnam RoHS
ASUS products sold in Vietnam, on or after September 23, 2011, meet the requirements of the Vietnam Circular 30/2011/TT-BCT.
ASUS recycling and takeback programs come from our commitment to the highest standards for protecting our environment. We believe in providing solutions for you to be able to responsibly recycle our products, batteries, other components as well as the packaging materials. Please go to http://csr.asus.com/english/Takeback.htm for detailed recycling information in different regions.
Ecodesign Directive
European Union announced a framework for the setting of ecodesign requirements for energy-related products (2009/125/EC). Specific Implementing Measures are aimed at improving environmental performance of specific products or across multiple product types. ASUS provides product information on the CSR website. The further information could be found at https://csr.asus.com/english/article.aspx?id=1555.
ENERGY STAR complied product
ENERGY STAR
ENERGY STAR is a joint program of the U.S. Environmental Protection Agency and the U.S. Department of Energy helping us all save money and protect the environment through energy efficient products and practices.
All ASUS products with the ENERGY STAR logo comply with the ENERGY STAR standard, and the power management feature is enabled by default. The monitor is automatically set to sleep within 10 minutes of user inactivity; the computer is automatically set to sleep within 30 minutes of user inactivity. To wake your computer, click the mouse, press any key on the keyboard, or press the power button.
Please visit http://www.energystar.gov/powermanagement for detail information on power management and its benefits to the environment. In addition, please visit http://www.energystar.gov for detail information on the ENERGY STAR joint program.
NOTE: Energy Star is NOT supported on FreeDOS and Linux-based products.
UK: The Radio Equipment Regulations 2017 (S.I. 2017/1206)
Simplified UKCA Declaration of Conformity
ASUSTek Computer Inc. hereby declares that this device is in compliance with the essential requirements and other relevant provisions of The Radio Equipment Regulations 2017 (S.I. 2017/1206). Full text of UKCA declaration of conformity is available at https://www.asus.com/support/..
The WiFi operating in the band 5150-5350MHz shall be restricted to indoor use for country listed below:
UK
UKCA RF Output table (The Radio Equipment Regulations 2017) RTK RTL8822CE
| Function Frequency Maximum Output Power (EIRP) | |
| WiFi | 2412 - 2472 MHz 19 dBm |
| 5150 - 5250 MHz 19 dBm | |
| 5250 - 5350 MHz 19 dBm | |
| 5470 - 5725 MHz 20 dBm | |
| Bluetooth 2402 - 2480 MHz 15 dBm | |
* Receiver category 1
UKCA RF Output table (The Radio Equipment Regulations 2017) Intel® AX200NGW
| Function Frequency Maximum Output Power (EIRP) | |
| WiFi | 2412 - 2472 MHz 19 dBm |
| 5150 - 5250 MHz 19 dBm | |
| 5250 - 5350 MHz 19 dBm | |
| 5470 - 5725 MHz 19 dBm | |
| 5725 - 5850 MHz 9 dBm | |
| Bluetooth 2402 - 2480 MHz 13 dBm | |
* Receiver category 1
EU: Radio Equipment Directive (Directive 2014/53/EU)
Simplified EU Declaration of Conformity
ASUSTek Computer Inc. hereby declares that this device is in compliance with the essential requirements and other relevant provisions of Directive 2014/53/EU. Full text of EU declaration of conformity is available at https://www.asus.com/support/.
The WiFi operating in the band 5150-5350MHz shall be restricted to indoor use for countries listed in the table below:
* Receiver category 1
CE RED RF Output table (Directive 2014/53/EU)
Intel® AX200NGW
| Function Frequency Maximum Output Power (EIRP) | |
| WiFi | 2412 - 2472 MHz 19 dBm |
| 5150 - 5250 MHz 19 dBm | |
| 5250 - 5350 MHz 19 dBm | |
| 5470 - 5725 MHz 19 dBm | |
| 5725 - 5850 MHz 9 dBm | |
| Bluetooth | 2402 - 2480 MHz 13 dBm |
* Receiver category 1
Service and Support
Visit our multi-language website at https://www.asus.com/support/.

| Manufacturer ASUSTeK Computer Inc. | |
| Tel: +886-2-2894-3447 | |
| Address: 1F., No. 15, Lide Rd., Beitou Dist., Taipei City 112 | |
| Authorised representative in Europe | ASUSTeK Computer GmbH |
| Address: Harkortstrasse 21-23, 40880 Ratingen, Germany | |
| Authorized Representative in United Kingdom | ASUSTEK (UK) LIMITED |
| 1st Floor, Sackville House, 143-149 Fenchurch Street, London, EC3M 6BL, England, United Kingdom | |

- E
- FIRST EDITION
- SEPTEMBER
- COPYRIGHT INFORMATION
- LIMITATION OF LIABILITY
- SERVICE AND SUPPORT
- CONTENTS
- CHAPTER 1: GETTING TO KNOW YOUR EMBEDDED COMPUTER
- CHAPTER 2: USING YOUR EMBEDDED COMPUTER
- CHAPTER 3: BIOS SETUP
- APPENDIX
- ABOUT THIS MANUAL
- CONVENTIONS USED IN THIS MANUAL
- TYPOGRAPHY
- PACKAGE CONTENTS
- ACCESSORY PACKAGE
- NOTE
- GETTING TO KNOW YOUR EMBEDDED COMPUTER
- FEATURES
- FRONT VIEW
- POWER BUTTON
- MICROPHONE PORT
- HEADPHONE PORT
- USB 2.0 PORTS
- REAR VIEW
- POWER CONNECTOR
- ANT
- ANTENNA HOLES
- SERIAL (COM) CONNECTOR
- HDMI HDMI PORT
- DISPLAYPORTS
- LAN PORTS
- USB 3.2 GEN 1 PORT
- EXPANSION SLOT BRACKET
- USING YOUR EMBEDDED COMPUTER
- GETTING STARTED
- CONNECT THE POWER CONNECTOR TO YOUR EMBEDDED COMPUTER
- IMPORTANT
- CONNECT A DISPLAY PANEL TO YOUR EMBEDDED COMPUTER
- TO CONNECT A DISPLAY PANEL TO YOUR EMBEDDED COMPUTER
- CONNECT THE USB CABLE FROM KEYBOARD OR MOUSE
- TO CONNECT A KEYBOARD AND MOUSE TO YOUR EMBEDDED COMPUTER
- TURNING YOUR EMBEDDED COMPUTER OFF
- BIOS SETUP
- BIOS SETUP PROGRAM
- ENTERING BIOS SETUP AT STARTUP
- TO ENTER BIOS SETUP AT STARTUP
- ENTERING BIOS SETUP AFTER POST
- TO ENTER BIOS SETUP AFTER POST
- BIOS MENU SCREEN
- MENU BAR
- MAIN MENU
- SYSTEM DATE [DAY MM/DD/YYYY]
- SYSTEM TIME [HH:MM:SS]
- ADVANCED MENU
- LVDS CONFIGURATION
- SWITCH TO LVDS
- ALL-IN-ONE CHASSIS
- NOTES
- EDID DATA SOURCE
- LFP PANEL TYPE
- INVERTER POLARITY
- CHANNEL SELECT
- MODE SELECT
- DIGON ENABLE TO LVDS_ON ENABLE (T2)
- LVDS_ON ENABLE TO BLON ENABLE (T3)
- BLON DISABLE TO LVDS_ON DISABLE (T4)
- PCH-FW CONFIGURATION
- TPM DEVICE SELECTION
- TRUSTED COMPUTING
- SECURITY DEVICE SUPPORT
- SHA1 PCR BANK
- SHA256 PCR BANK
- PENDING OPERATION
- PLATFORM HIERARCHY
- STORAGE HIERARCHY
- ENDORSEMENT HIERARCHY
- TPM 2.0 UEFI SPEC VERSION
- PHYSICAL PRESENCE SPEC VERSION
- CPU CONFIGURATION
- INTEL (VMX) VIRTUALIZATION TECHNOLOGY
- INTEL TRUSTED EXECUTION TECHNOLOGY
- VT-D
- CPU - POWER MANAGEMENT CONTROL
- INTEL® SPEEDSTEP™
- INTEL® SPEED SHIFT TECHNOLOGY
- TURBO MODE
- C STATES
- ENHANCED C-STATES
- GRAPHICS CONFIGURATION
- PRIMARY DISPLAY
- INTERNAL GRAPHICS
- RC6 (RENDER STANDBY)
- PCI EXPRESS CONFIGURATION
- PCIEX16 SLOT
- ENABLE ROOT PORT
- MAX LINK SPEED
- MAX LINK WIDTH
- ASPM
- DETECT NON-COMPLIANCE DEVICE
- CSM CONFIGURATION
- CSM SUPPORT
- SUPER IO CONFIGURATION
- NCT6116D SUPER IO CONFIGURATION
- SERIAL PORT 1 CONFIGURATION
- SERIAL PORT
- COM1 CONTROL
- SERIAL PORT 2 CONFIGURATION
- COM2 CONTROL
- SERIAL PORT 3 CONFIGURATION
- SERIAL PORT 4 CONFIGURATION
- SERIAL PORT 5 CONFIGURATION
- SERIAL PORT 6 CONFIGURATION
- SERIAL CONSOLE REDIRECTION
- COM1(\~6)
- CONSOLE REDIRECTION
- CONSOLE REDIRECTION SETTINGS
- TERMINAL TYPE
- BITS PER SECOND
- DATA BITS
- PARITY
- STOP BITS
- FLOW CONTROL
- VT-UTF8 COMBO KEY SUPPORT
- RECORDER MODE
- RESOLUTION 100X
- PUTTY KEYPAD
- SATA CONFIGURATION
- SATA CONTROLLER(S)
- SATA MODE SELECTION
- SATA6G_1(\~2)
- PORT 1(\~2)
- HOT PLUG
- M
- MSATA_MPCIE
- USB CONFIGURATION
- LEGACY USB SUPPORT
- XHCI HAND-OFF
- USB MASS STORAGE DRIVER SUPPORT
- LAN1_U31G1_E
- LAN2_U31G1_E
- U31G1_1(\~2)
- USB_5(\~8)
- ONBOARD DEVICES CONFIGURATION
- AUDIO CONTROLLER
- INTEL LAN1 CONTROLLER
- INTEL LAN1 PXE OPROM
- INTEL LAN2 CONTROLLER
- INTEL LAN2 PXE OPROM
- WI-FI CONTROLLER
- BLUETOOTH CONTROLLER
- M.2 CONFIGURATION
- MSATA_MPCIE CONFIGURATION
- NVME CONFIGURATION
- APM CONFIGURATION
- ERP READY
- RESTORE AC POWER LOSS
- POWER ON BY PCIE
- POWER ON BY RTC
- EZ-FLASH
- WATCHDOG TIMER
- WATCHDOG SUPPORT
- WATCHDOG COUNT MODE
- MISCELLANEOUS
- DMI LINK ASPM CONTROL
- NETWORK STACK CONFIGURATION
- NETWORK STACK
- IPV4 PXE SUPPORT
- IPV6 PXE SUPPORT
- HARDWARE MONITOR MENU
- CPU / MOTHERBOARD TEMPERATURE
- CPU / CHASSIS FAN SPEED
- CPU CORE VOLTAGE, 3.3V VOLTAGE, 5V VOLTAGE, 12V VOLTAGE
- SMART FAN MODE
- CHASSIS FAN SETTING
- TEMPERATURE 1(\~4)
- FD/RPM 1(\~4)
- CPU FAN SETTING
- FD/RPM 1(~4)
- SECURITY MENU
- ADMINISTRATOR PASSWORD
- TO SET AN ADMINISTRATOR PASSWORD
- TO CHANGE AN ADMINISTRATOR PASSWORD
- USER PASSWORD
- TO SET A USER PASSWORD
- TO CHANGE A USER PASSWORD
- SECURE BOOT
- SECURE BOOT MODE
- KEY MANAGEMENT
- PLATFORM KEY (PK)
- KEY EXCHANGE KEYS / AUTHORIZED SIGNATURES
- FORBIDDEN SIGNATURES
- BOOT MENU
- BOOT CONFIGURATION
- SETUP PROMPT TIMEOUT
- BOOTUP NUMLOCK STATE
- QUIET BOOT
- FAST BOOT
- BOOT MODE SELECT
- FIXED BOOT ORDER PRIORITIES
- BOOT OPTION #1(~5)
- EXIT MENU
- SAVE CHANGES AND EXIT
- DISCARD CHANGES AND EXIT
- SAVE CHANGES AND RESET
- DISCARD CHANGES AND RESET
- SAVE OPTIONS
- SAVE CHANGES
- DISCARD CHANGES
- RESTORE DEFAULTS
- SAVE AS USER DEFAULTS
- SAFETY INFORMATION
- SETTING UP YOUR SYSTEM
- CARE DURING USE
- LITHIUM-ION BATTERY WARNING
- NO DISASSEMBLY
- THE WARRANTY DOES NOT APPLY TO THE PRODUCTS THAT HAVE BEEN DISASSEMBLED BY USERS
- REGULATORY NOTICES
- COATING NOTICE
- FEDERAL COMMUNICATIONS COMMISSION STATEMENT
- RF EXPOSURE WARNING
- END PRODUCT LABELING
- ISED RADIATION EXPOSURE STATEMENT FOR CANADA
- COMPLIANCE STATEMENT OF INNOVATION, SCIENCE AND ECONOMIC DEVELOPMENT CANADA (ISED)
- WIRELESS OPERATION CHANNEL FOR DIFFERENT DOMAINS
- KC: KOREA WARNING STATEMENT
- JAPAN RF EQUIPMENT STATEMENT
- OUTDOOR USE
- DECLARATION OF COMPLIANCE FOR PRODUCT ENVIRONMENTAL REGULATION
- EU REACH AND ARTICLE
- EU ROHS
- JAPAN JIS-C-0950 MATERIAL DECLARATIONS
- INDIA ROHS
- VIETNAM ROHS
- ECODESIGN DIRECTIVE
- ENERGY STAR COMPLIED PRODUCT
- UK: THE RADIO EQUIPMENT REGULATIONS 2017 (S.I. 2017/1206)
- SIMPLIFIED UKCA DECLARATION OF CONFORMITY
- UK
- EU: RADIO EQUIPMENT DIRECTIVE (DIRECTIVE 2014/53/EU)
- SIMPLIFIED EU DECLARATION OF CONFORMITY
- CE RED RF OUTPUT TABLE (DIRECTIVE 2014/53/EU)
Brand : ASUS
Model : EBS-I10
Category : Computer