
Private Reserve CWC-800CEN - Wine cellar CUISINART - Free user manual and instructions
Find the device manual for free Private Reserve CWC-800CEN CUISINART in PDF.


| Product Type | Dual 8-Bottle Wine Cellar Set (two independent cooling units) |
| Model Numbers | CWC-800CENL (left unit), CWC-800SCENR (right unit) |
| Total Capacity | 16 standard wine bottles (8 per unit) |
| Temperature Range | 39°F to 68°F (4°C to 20°C), adjustable in 1° increments |
| Control Type | LED touchscreen display on each unit |
| Shelving | Slide-out, contoured chrome racks (4 per unit) |
| Door | Frameless full glass doors with triple pane thermal glass |
| Interior Light | LED interior light with on/off button |
| Air Filtration | Removable, washable air filters (clean every 3 months) |
| Power Supply | 120V AC, 15 amps; right unit has grounded 3-prong plug |
| Installation Type | Freestanding only (not designed for built-in) |
| Clearance Required | At least 2 inches (5 cm) from rear and sides for ventilation |
| Leveling | 4 adjustable leveling legs on each unit |
| Water Management | Integrated water trays for condensation collection (self-evaporating) |
| Cleaning | Baking soda solution with warm water; do not use harsh chemicals |
| Safety Features | Grounded power cord; child entrapment prevention; R600a flammable refrigerant |
| Warranty | 3-year limited warranty (U.S. household use) |
| Refrigerant Type | Thermoelectric (no compressor; ambient temperature dependent) |
Frequently Asked Questions - Private Reserve CWC-800CEN CUISINART
User questions about Private Reserve CWC-800CEN CUISINART
0 question about this device. Answer the ones you know or ask your own.
Ask a new question about this device
Download the instructions for your Wine cellar in PDF format for free! Find your manual Private Reserve CWC-800CEN - CUISINART and take your electronic device back in hand. On this page are published all the documents necessary for the use of your device. Private Reserve CWC-800CEN by CUISINART.
USER MANUAL Private Reserve CWC-800CEN CUISINART
Cuisinart® INSTRUCTION BOOKLET
natural_image
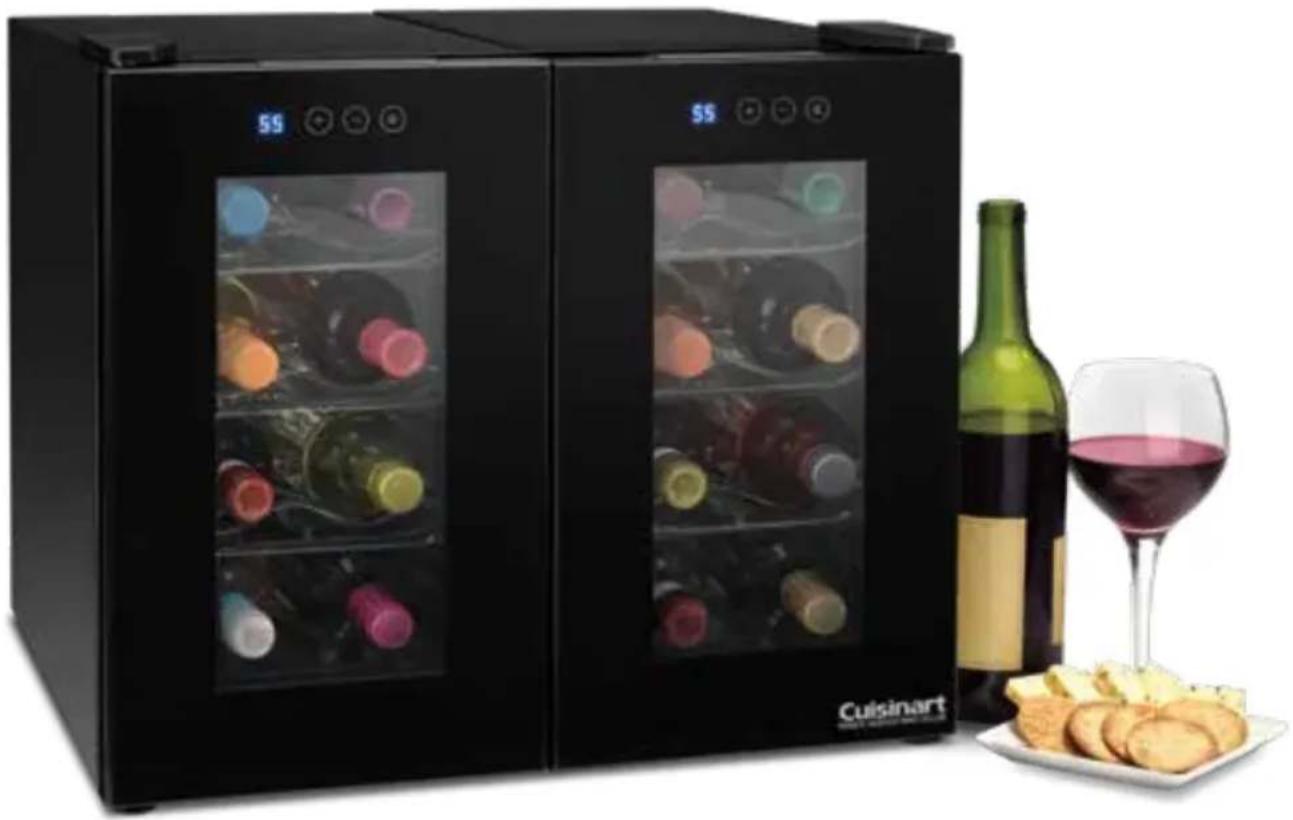
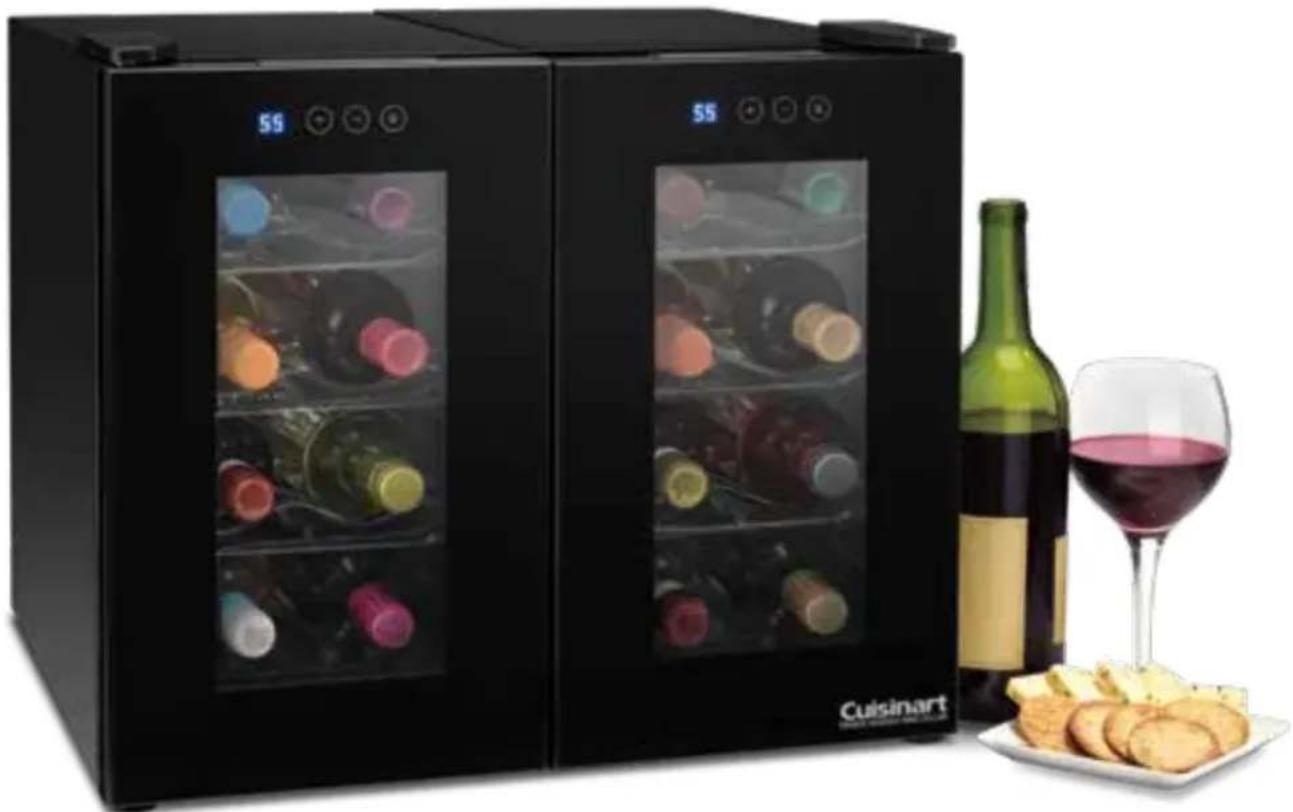
Two black Cuisinart refrigerant units with wine bottles displayed, alongside a wine bottle and glass of red wine (no visible text or symbols on main objects)CWC-800CENL CWC-800SCENR
Private Reserve® Dual 8-Bottle Wine Cellar Set
CWC-800CENS
IMPORTANT SAFEGUARDS
When using an electrical appliance, basic precautions should always be taken to reduce the risk of fire, electric shock, and personal injury, including the following:
- Use this appliance only as described in this manual. Other uses not recommended may cause fire, electric shock or personal injury.
- This product is intended for household use only.
- To protect against electric shock, do not immerse unit, plug or cord in water or spray with liquids.
- Close supervision is necessary when any appliance is used by or near children.
- Unplug from the outlet when not in use, when moving from one location to another, and before cleaning.
- To disconnect the wine cellars, grip the plug and pull it first from the socket located on the back of right-side unit and then from the wall outlet. Never pull by the cord.
- Do not operate the appliance in the presence of explosives and/or flammable fumes.
- Do not place the appliance or any of its parts near an open flame, or near a cooking or other heating appliance.
- Do not operate the appliance with a damaged cord or plug, if the product malfunctions, or if it is dropped or damaged in any manner.
- The use of attachments not recommended by the manufacturer may be hazardous.
- Place the unit on a dry, level surface.
- Do not operate if the housing is removed or damaged.
- A loose fit between the AC outlet (receptacle) and plug may cause overheating and a distortion of the plug. Contact a qualified electrician to replace loose or worn outlet.
- This appliance is designed to be freestanding only, and should not be recessed or built in (fully recessed).
- Locate the unit away from direct sunlight and sources of heat (stove, heater, radiator, etc.). Direct sunlight will affect/alter the outside color of the appliance.
- Do not operate your appliance in an appliance garage or under a wall cabinet. When storing in an appliance garage, always unplug the unit from the electrical outlet. Not doing so could create a risk of fire, especially if the appliance touches the walls of the garage or the door touches the unit as it closes.
- Be careful not to damage refrigeration circuits
or the unit's power cord. Any damage to the cord or plug may cause a short circuit and could potentially lead to electric shock or fire.
18. To avoid items falling and causing injury or damage to the appliance, do not overload the racks.
19. Caution: Flammable refrigerant used! When handling, moving and using the unit, be sure to avoid either damaging the refrigerant tubing, or increasing the risk of a leak.
20. This appliance is not intended for use by people (including children) who lack experience or knowledge, except under supervision or after receiving instruction regarding use of the appliance from a person responsible for their safety.
21. Use by children should be supervised to prevent them from playing with or otherwise misusing the appliance.
22. Keep packing materials out of reach of children. These materials are potentially hazardous. During unit disposal, observe local standards for this type of waste material.
23. Do not touch the hot compressor at the rear bottom of the appliance, as this may cause physical injury. Keep children away from the rear of appliance.
24. Never allow children to hang or stand on the doors, racks.
25. DANGER: Risk of child entrapment. Before you throw away your old unit: Take off the doors. Leave the shelves in place so that children may not easily climb inside.
26. To avoid the risks that are always present when using an electric appliance, we recommend that you follow the instructions.
27. Unpack the appliance and carefully check the interior and exterior. Should any damage be evident, do not plug the appliance in, but rather contact the store immediately from which you purchased it.
28. Do not use electrical appliances inside the food storage compartments of the appliance, unless they are of the type recommended by the manufacturer
29. If the SUPPLY CORD is damaged, it must be replaced by the manufacturer, its service agent or similarly qualified person in order to avoid a hazard.
30. Do not store explosive substances such as aerosol cans with a flammable propellant in this appliance.
31. The appliance shall not be exposed to rain.
WARNING:
- To reduce the risk of fire, electric shock or personal injury, unplug or disconnect the appliance from the power supply before servicing.
- Keep ventilation openings, in the appliance enclosure or in the built-in structure, clear of obstruction.
- Do not damage the refrigerant circuit.
- Removable parts cannot be put into the dishwasher.
SAVE THESE INSTRUCTIONS FOR HOUSEHOLD USE ONLY
ELECTRICAL REQUIREMENTS
Your wine cellar requires a power outlet (120V, 15 amps) with proper grounding. Avoid placing the unit where there may be electrical interference.
Do not plug unit into the same outlet as a refrigerator or microwave.
Avoid the use of 3-prong plug adapters. Do not cut off the grounding prong to accommodate a two-plug outlet; that could result in a shock hazard.
NOTE: Do not place heavy objects on top of the wine cellar.
To minimize the risk of rusting, leakage, and insulation damage, avoid placing the unit where heavy moisture is present. Under no circumstances should you apply or let water spill onto or into the unit.
SPECIAL CORD SET INSTRUCTIONS
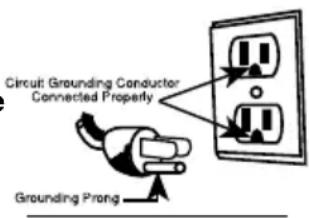
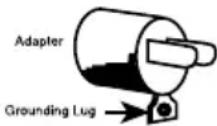
This product is comprised of two separate wine cellars that connect, creating two independent cooling units in one. There is a left-side unit and a right-side unit. For your protection, the right-side unit is equipped with a 3-conductor cord set that has a molded 3-prong grounding-type plug, and should be used in combination with a properly connected grounding-type outlet, as shown in Figure A. If a grounding-type outlet is not available, an adapter, shown in Figure B, may be obtained so that a 2-slot wall outlet can be used with a 3-prong plug.
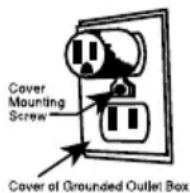
As shown in Figure C, the adapter must be grounded by attaching its grounding lug under the screw of the outlet cover plate.
NOTE: Do not remove the grounding prong.
CAUTION: Before using an adapter, it must be determined that the outlet cover plate screw is properly grounded. If in doubt, consult a licensed electrician. Never use an adapter unless you are sure it is properly grounded.
NOTE: Use of an adapter is not permitted in Canada.
DANGER
Risk of child entrapment. Before you throw away your old appliance, take off
the doors. Also, leave the shelves in place so that children may not easily climb inside.
CONTENTS
IMPORTANT SAFEGUARDS ....2
ELECTRICAL REQUIREMENTS ......2
SPECIAL CORD SET INSTRUCTIONS......3
FEATURES....4
UNPACKING YOUR WINE CELLARS......4
OPERATING INSTRUCTIONS ....4
Connecting Your Wine Cellars......4
Leveling Your Wine Cellar....5
Installation Limitations....5
Proper Air Circulation ....5
Installing & Maintaining Air Filters......6
Installing the Water Trays......6
Using Your Wine Cellar....6
Temperature Adjustments/Control......6
Dual Wine Cellar Operation 6
Interior Light Control......6
Power Interruptions....6
Vacation and Moving Care ....7
CLEANING AND MAINTENANCE ....7
General Cleaning....7
WINE TIPS AND HINTS.... 7
WINE STORAGE
TEMPERATURE CHART....8
WINE AND FOOD PAIRINGS....9
TROUBLESHOOTING 10
WARRANTY....11
A.
B.
C.
FEATURES
- LED Touchscreen Controls
- Slide-Out, Contoured Chrome Racks
- Triple Pane Thermal Glass
- Frameless Full Glass Doors
- Adjustable Feet
- Connecting Plug and Binding Connectors of CWC-800SCENR
- Water Trays (not shown)
- Filters (not shown)

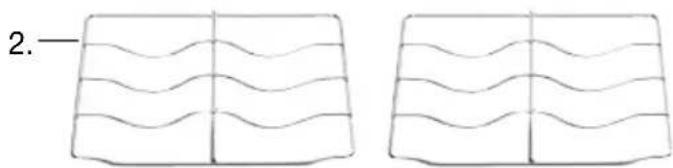
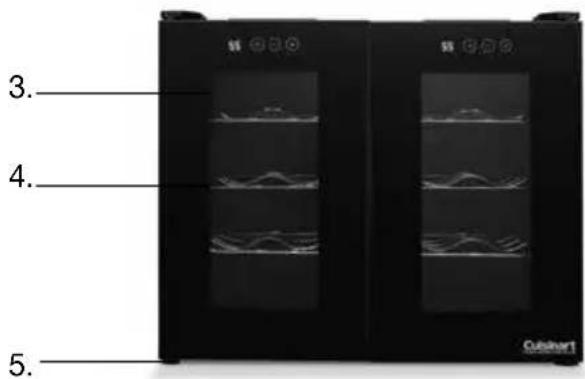
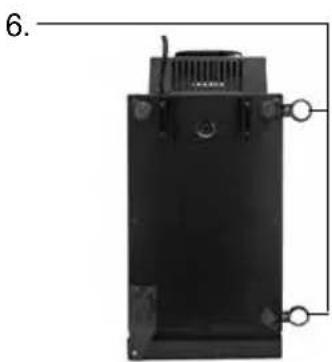
natural_image
Black rectangular electronic device with mounting holes and a ventilation grille (no visible text or symbols)UNPACKING YOUR WINE CELLARS
Open shipping box and remove each wine cellar and all packing materials. This includes all adhesive tape holding the wine cellar accessories inside and outside.
You may want to keep the box and packing materials for use at a later date. Before using your Cuisinart® Private Reserve® Dual 8-Bottle Wine Cellar Set for the first time, remove all protective paper and wrapping and wipe housing and internal chamber with a damp cloth to remove any dust from the warehouse or shipping.
OPERATING INSTRUCTIONS
Important: When using the wine cellar for the first time, allow at least 24 hours for the internal temperature to adjust properly. Once in use, make sure there are at least 3 to 5 bottles in each chamber.
CONNECTING YOUR WINE CELLARS
- On a flat surface, lay the right-side unit (CWC-800SCENR) on its side.
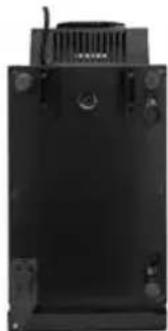
natural_image
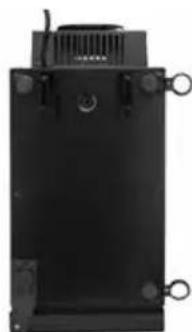
Black rectangular electronic device with ventilation grille and mounting feet (no visible text or symbols)- There are two circular connectors underneath the legs. Unscrew both legs just slightly to release each connector. Rotate each to a 90-degree angle. Turn unit back to upright position.
natural_image
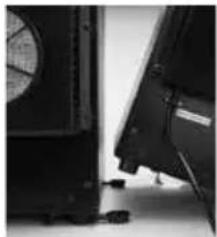
Black rectangular electronic device with ventilation grille and mounting feet (no visible text or symbols)- With both units in an upright position, lift up the left-side unit (CWC-800CENL) slightly, placing the two legs into the connectors on the right-side unit (CWC-800SCENR).
natural_image
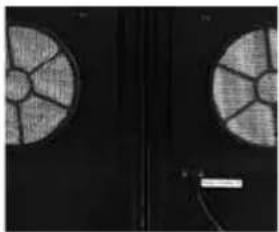
Close-up of mechanical components with no visible text or symbols- Align the left-side unit (CWC-800CENL) and the right-side unit (CWC-800SCENR) so they are as close together as possible. To secure the units into position, turn both front and rear legs of the left-side unit (CWC-800CENL) counterclockwise until tight.
natural_image
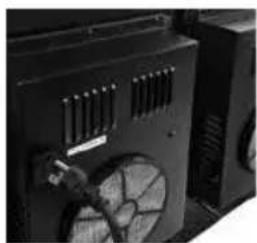
Close-up of two circular fan-like structures with radial segments, mounted on dark surfaces (no visible text or symbols)- Take connecting plug from back of the left-side unit (CWC-800CENL) and plug into back socket of the right-side unit.
natural_image
Close-up of a black industrial fan or vent with ventilation grilles and a small mechanical component (no visible text or symbols)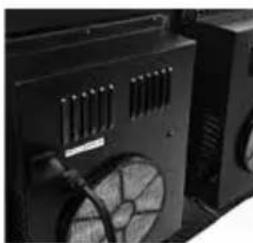
natural_image
Close-up of a black industrial fan or vent system with ventilation grilles (no visible text or symbols)- Plug the power cord from the right-side unit (CWC-800SCENR) into a standard electrical outlet and the unit will turn on automatically.
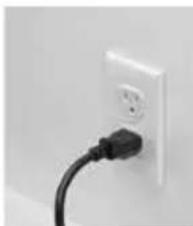
natural_image
Close-up of a black cable plugged into a white wall socket (no text or symbols visible)ALWAYS REMOVE ALL WINE BOTTLES BEFORE MOVING THE WINE CELLAR.
LEVELING YOUR WINE CELLAR
Each wine cellar has 4 leveling legs. After properly placing your wine cellar in its final position, you can level it. (Please note that the leg that stands on hinges is the shorter leg.) Leveling legs can be adjusted by turning them clockwise to raise the wine cellar, or by turning them counterclockwise to lower the cellar.
INSTALLATION LIMITATIONS
Do not place heavy objects on top of the unit. Do not place the unit in a moist area or in direct sunlight.
Do not place the unit next to a major appliance that emits large amounts of heat, such as a dishwasher, microwave, toaster oven, oven or barbecue, etc.
Do not install your wine cellar in any location not properly insulated or heated (garage, etc). Select a suitable location for the wine cellar on a hard, level and even surface, away from direct sunlight or heat source, e.g., radiators, baseboard heaters, cooking appliances, etc. Any surface unevenness should be corrected with the leveling legs located on the front and rear bottom corners of the wine cellar. Avoid placing unit where there may be electrical interference.
NOTE: To minimize the risk of rusting, leakage and insulation damage, avoid placing the unit where heavy moisture is present. Under no circumstances spill or directly apply water onto or into the unit.
PROPER AIR CIRCULATION
To assure that your wine cellar works at the maximum efficiency for which it was designed, you should install it in a location where there is proper air circulation and electrical connections.
NOTE: The wine cellar is designed for
CONTROL PANEL FOR EACH UNIT

freestanding operation. It is not made to be recessed or built-in (fully recessed).
To ensure proper internal air circulation, do not overfill your wine cellar.
INSTALLING & MAINTAINING AIR FILTERS
Your wine cellar has removable air filters that help keep the fans and motors free of dust and dirt. They are easy to install and remove, and should be cleaned every 3 months.
To Install:
Align the tabs on the air filter with the slots on the back of your Wine Cellar. Press the filter down until the filter retainers attach to the fan cover.
NOTE: The air filters are used to collect larger particles from being drawn into the ventilation fans, which could affect the unit's performance.
To Clean:
Remove the air filters and wash with warm, soapy water. Rinse thoroughly, dry completely, and reinstall in the back of the wine cellar.
INSTALLING THE WATER TRAYS
Each wine cellar contains a water tray. The purpose of the water tray is to collect the condensation drained from the interior. The collected water will evaporate, so there is no need to remove the water manually.
USING YOUR WINE CELLAR
Place your wine cellar on a flat surface that is strong enough to support it when fully loaded. Allow at least 2 inches between the rear of the unit and the wall. Gently place/slide the racks into the wine cellar. Connect the two wine cellars as previously mentioned on page 4-5. Plug the power cord into a standard electrical outlet and the unit will turn on automatically to the default setting. Place bottles inside the unit.
TEMPERATURE ADJUSTMENTS/CONTROL
Determine the best setting to use: Refer to the temperature guide for appropriate storing temperatures (see page 8).
Important Note: In order to operate efficiently, thermoelectric products should be in an environment with an ambient temperature of not more than 70^ F ( 21^ C).
Each wine cellar has its own electronic temperature control panel on the front. When initially turned on, the LEDs will show the default setting of 55^ F. You can set the temperature of each wine cellar at any setting from 39^ F to 68^ F. The LEDs will then display the set temperature.
NOTE: White wine is kept at a lower temperature than red wine. By pressing the Up or Down temperature button on the display panel, the wine cellar goes into temperature adjust mode. You can set the cavity temperature upward or downward by 1-degree intervals. An audbile beep will be heard for each degree when the button is pressed. When the desired temperature is reached, stop pressing the button. The temperature display will continue to flash for around 5 seconds, then stop flashing, and the unit will exit that mode automatically. The display will show the set cavity temperature. During the temperature setting, flashing on the display may be (or may not be) observed. It depends on the speed the button is pressed. Either way is normal. Please note that the actual cabinet temperature inside a thermoelectric unit is dependent on the outside ambient temperature. As a result, you may set the cabinet for a certain temperature, but the cabinet may not reach that temperature.
For this model, when the ambient temperature is 77^ F, the lowest temperature that can be reached is 46^ F– 48^ F. When ambient temperature is 70^ F, the cabinet temperature can reach approximately 39^ F– 41^ F.
INTERIOR LIGHT CONTROL
Your wine cellar has interior lights for your viewing pleasure. The interior display light option allows you to showcase your personal collection of wines. To activate this feature, press the display light button. This button is located on the control panel (see page 5). The interior light will remain on permanently until the display light button is pressed again. Under normal operation, it is best for the light to remain off.
POWER INTERRUPTIONS
Occasionally, there may be power interruptions due to thunderstorms or other causes.
Remove the power cord from the AC outlet when a power outage occurs. When power has been restored, replug the power cord into the AC outlet.
VACATION AND MOVING CARE
For long vacations or absences, unplug the units, empty contents from each wine cellar, and clean all door gaskets according to the instructions in the General Cleaning section. Prop doors open so air can circulate inside. When moving, always keep the wine cellar upright. Do not move the unit lying on its side.
CLEANING AND MAINTENANCE
WARNING: To avoid electric shock, always unplug both wine cellar plugs; the socket attached to the right-side unit and the wall socket before cleaning. Ignoring this warning may result in injury or death.
Caution: Before using cleaning products, always read and follow manufacturer's instructions and warnings to avoid personal injury or product damage.
GENERAL CLEANING
Always remove all bottles before cleaning the wine cellar. Prepare a cleaning solution of 3 to 4 tablespoons of baking soda mixed with warm water. Use a sponge or soft cloth, dampened with the cleaning solution, to wipe down the interior and exterior of your wine cellar as well as the door gaskets. Rinse with clean, warm water and dry with a soft cloth. Do not use harsh chemicals, abrasives, ammonia, chlorine bleach, concentrated detergents, solvents or metal scouring pads. Some of these chemicals may dissolve, damage and/or discolor your wine cellar.
WINE TIPS AND HINTS
When choosing wine, take advantage of the knowledge of the personnel in the wine store, as well as reviews of wines from wine publications. The price of a wine is not necessarily indicative of relative quality. Very good wines can be purchased inexpensively.
When you find a comfortably priced wine, purchase in quantity to have on hand as your "house wine." Keep it chilled in your Cuisinart® Private Reserve® Dual 8-Bottle Wine Cellar Set and be ready for any occasion.
Pairing wine with food has really become a matter of personal taste – the rules are no longer hard and fast that white wine is paired only with fish or light meats, and red wine is paired only with red meats. A Pinot Noir can complement a grilled fish just as well as it complements a grilled fillet of beef. What needs to be kept in mind is the personality of the wine itself, the preparation of the foods, and the tastes of those who will be enjoying them. You may want to open a bottle each of red and white and allow your guests to choose.
The wine should please the diner and never overpower or fight with the food with which it is served. Likewise, the food should not overpower or fight with the wine.
Wine is a part of healthy living – the USDA's amount guidelines are based upon the Mediterranean diet. They include wine in moderation – for women, this is one glass per day, and for men, two glasses a day. A glass size is 4 ounces. The difference in gender amount is based upon body size. As for cooking with wine – never cook with a wine that you would not drink!
WINE STORAGE TEMPERATURE CHART
| TEMPERATURE SETTING | WINE TYPE |
| 43°F-45°F | Dessert wine/Ice wineChampagne/Sparkling wine |
| 47°F-50°F | Light whites(e.g., Riesling, Chablis, Chardonnay) |
| 54°F | Beaujolais /Rosé |
| 50°F-55°F | General storage |
| 57°F | Juicy and fruity winesMadeira/Tawny Port |
| 59°F | Chianti, Zinfandel, Valpolicella |
| 61°F | Rioja, Pinot Noir |
| 63°F | Burgundy, Cabernet, Merlot |
| 64°F | Bordeaux/Shiraz |
| 66°F | Vintage Port |
WINE AND FOOD PAIRINGS
| CHEESE WINES | |
| Hard All reds | |
| Cheddar Cabernet Sauvignon | Shiraz, Burgundy, Merlot |
| Soft | Sparkling, Riesling, Gewürztraminer, Pinot Noir, Beaujolais Nouveau, light reds |
| Goat Cheeses Sauvignon Blanc | c, Sancerre, Riesling, dry Muscat |
| Blue Cheeses Zinfandel, Riesling | ng, Shiraz, Rhône reds |
| MEATS | |
| Beef, Venison | Shiraz, Cabernet Sauvignon, red Bordeaux, red Burgundy, Merlot, full Italian reds, Zinfandel |
| Ham Sparkling wine, Gewürztraminer | |
| Lamb All dry reds | |
| Pork Shiraz, Cabernet Sauvignon | on, Burgundy, Merlot, Rosé, Rioja |
| Veal Shiraz, Cabernet Sauvignon | on, Merlot, Pinot Noir |
| Chicken | White Burgundy, Chardonnay, Pinot Noir, Merlot, Chianti, Rioja, Rosé (light reds and full whites) |
| Game Birds Shiraz, Cabernet Sauvignon | Sauvignon, Merlot, red Burgundy |
| Turkey Riesling, Chardonnay, | Pinot Noir, Beaujolais |
| FISH | |
| Shellfish | Chablis, white Burgundy, Sauvignon Blanc, Chenin Blanc, Chardonnay |
| Salmon/Tuna/Trout | Sauvignon Blanc, Chardonnay, Chenin Blanc, Pinot Noir, Beaujolais Nouveau, light reds |
| Light Fish | Light Chardonnay, white Bordeaux, Sauvignon Blanc (Sancerre, Pouilly-Fumé), dry Rosé |
| OTHER FOODS | |
| Vegetarian Most dry or lighter | whites, Rosé |
| Pasta | Dry whites, Pinot Noir, Shiraz, Cabernet Sauvignon, Burgundy, Merlot, Barbera, Chianti, Montepulciano |
| Spicy Asian/Chinese | Riesling, Gewürztraminer, Sauvignon Blanc, Chablis, Chardonnay, white Burgundy, Chenin Blanc, Champagne, Merlot |
| Japanese All dry whites, sparkling wines | |
| DESSERTS | |
| Fruit Riesling, Chardonnay, white Burgundy | |
| Fruit Tart, Ice Cream, Nuts | Riesling, Muscat Blanc, Chenin Blanc, ice wine |
| Chocolate | Fruity reds, Cabernet, Shiraz, Merlot, sparkling wine, ice wine |
TROUBLESHOOTING
You can easily solve many common problems by trying the suggestions below.
| SYMPTOM POSSIBLE CAUSE/$OLUTION | |
| Vibrations. • Check to make sure | each wine cellar is on a level surface.• Make sure wine cellar is not touching a wall.• Adjust leveling legs if necessary. |
| The inside temperature does not seem correct. | • Make sure the cooling vents in back of wine cellar are not obstructed. Have at least 2 inches of space on the sides and in rear of unit.• The room may be too hot or cold. Ambient temperature extremes will affect performance.• When using the unit for the first time, it can take the unit up to 24 hours to reach the desired temperature. |
| Wine cellar does not operate. • Check if the left-side unit is properly plugged into the socket of the right-side unit.• Check if there is power at the AC outlet by checking the circuit breaker.• Make sure the right-side unit is plugged into the AC outlet. | |
| Wine cellar seems too warm. • Frequent door openings.• Allow time for recently added wine to reach desired temperature.• Check gasket for proper seal.• Adjust temperature control to colder setting.• The wine cellar may have recently been disconnected for a period of time. | |
| Wine temperature is too cold. • If temperature control setting is too cold, adjust to a warmer setting and allow several hours for the temperature to stabilize. | |
| Wine cellar motor runs too frequently. | • This may be normal to maintain constant temperature during high temperature and humid days.• Doors may have been opened frequently or left open for an extended period of time.• Check gasket for proper seal.• Check to see if doors are completely closed. |
| Moisture buildup on interior or exterior of the wine cellar. | • This is normal during high humidity periods.• Prolonged or frequent door openings.• Check door gasket for proper seal. |
| Wine cellar door does not shut properly. | • Level the wine cellar.• Check for blockages (wine bottles, shelves). |
WARRANTY Limited Three-Year Warranty
This warranty is available to U.S. consumers only. You are a consumer if you own a Cuisinart® Private Reserve® Dual 8-Bottle Wine Cellar Set that was purchased at retail for personal, family or household use. Except as otherwise required under applicable law, this warranty is not available to retailers or other commercial purchasers or owners. We warrant that your Cuisinart® Private Reserve® Dual 8-Bottle Wine Cellar Set will be free of defects in materials and workmanship under normal home use for 3 years from the date of original purchase. We recommend that you visit our website, https://cuisinart.registria.com, for a fast, efficient way to complete your product registration. However, product registration does not eliminate the need for the consumer to maintain the original proof of purchase in order to obtain the warranty benefits. In the event that you do not have proof of purchase date, the purchase date for purposes of this warranty will be the date of manufacture.
CALIFORNIA RESIDENTS ONLY
California law provides that for In-Warranty Service, California residents have the option of returning a nonconforming product (A) to the store where it was purchased or (B) to another retail store that sells Cuisinart products of the same type. The retail store shall then, according to its preference, either repair the product, refer the consumer to an independent repair facility, replace the product, or refund the purchase price less the amount directly attributable to the consumer's prior usage of the product. If neither of the above two options results in the appropriate relief to the consumer, the consumer may then take the product to an independent repair facility, if service or repair can be economically accomplished. Cuisinart and not the consumer will be responsible for the reasonable cost of such service, repair, replacement, or refund for nonconforming products under warranty. California residents may also, according to their preference, return nonconforming products directly to Cuisinart for repair or, if necessary, replacement by calling our Consumer Service Center toll-free at 1-800-726-0190. Cuisinart will be responsible for the cost of the repair, replacement, and shipping and handling for such nonconforming products under warranty.
HASSLE-FREE REPLACEMENT WARRANTY
Your ultimate satisfaction in Cuisinart products is our goal, so if your Cuisinart® Private Reserve® Dual 8-Bottle Wine Cellar Set should fail within the generous warranty period, we will repair it or, if necessary, replace it at no cost to you. To obtain a return shipping label, email us at https://www.cuisinart.com/customer-care/product-assistance/product-inquiry/. Or call our toll-free Consumer Service Center at 1-800-726-0190 to speak with a representative.
Your Cuisinart® Private Reserve® Dual 8-Bottle Wine Cellar Set has been manufactured to the strictest specifications and has been designed for use only in 120-volt outlets and only with authorized accessories and replacement parts. This warranty expressly excludes any defects or damages caused by attempted use of this unit with a converter, as well as use with accessories, replacement parts or repair service other than those authorized by Cuisinart. This warranty does not cover any damage caused by accident, misuse, shipment or other than ordinary household use. This warranty excludes all incidental or consequential damages. Some states do not allow the exclusion or limitation of these damages, so these exclusions may not apply to you. You may also have other rights, which vary from state to state.
Important: If the nonconforming product is to be serviced by someone other than Cuisinart's Authorized Service Center, please remind the servicer to call our Consumer Service Center at 1-800-726-0190 to ensure that the problem is properly diagnosed, the product is serviced with the correct parts, and the product is still under warranty.
©2022 Cuisinart Glendale, AZ 85307 Printed in China 22CE081555
IB-17491-ESP
Cuisinart® MANUAL DE INSTRUCCIONES
natural_image
Two black Cuisinart refrigerant cabinets with wine bottles displayed, alongside a wine bottle and glass on a plate (no visible text or symbols)CWC-800CENL CWC-800SCENR
natural_image
Black rectangular electronic device with ventilation slots and mounting feet, no visible text or symbolsINSTRUCCIONES DE DESEMBALAJE
natural_image
Black rectangular electronic device with ventilation grille and mounting feet (no visible text or symbols)natural_image
Black rectangular electronic device with ventilation grille and mounting feet (no visible text or symbols)natural_image
Close-up of mechanical components with no visible text or symbolsnatural_image
Close-up of two circular fan blades mounted on a dark surface, with a scale bar visible (no text or symbols)natural_image
Close-up of a black industrial fan or vent with visible blades and internal structure (no text or symbols)
natural_image
Close-up of a black electronic device with ventilation grilles and fan (no visible text or symbols)natural_image
Close-up of a black cable plugged into a white wall socket (no text or symbols visible)SIEMPRE SAQUE TODAS LAS BOTELLAS DEL APARATO ANTES DE MOVERLO.
- Cuisinart® INSTRUCTION BOOKLET
- IMPORTANT SAFEGUARDS
- WARNING:
- SAVE THESE INSTRUCTIONS FOR HOUSEHOLD USE ONLY
- ELECTRICAL REQUIREMENTS
- SPECIAL CORD SET INSTRUCTIONS
- DANGER
- CONTENTS
- FEATURES
- UNPACKING YOUR WINE CELLARS
- OPERATING INSTRUCTIONS
- CONNECTING YOUR WINE CELLARS
- ALWAYS REMOVE ALL WINE BOTTLES BEFORE MOVING THE WINE CELLAR.
- LEVELING YOUR WINE CELLAR
- INSTALLATION LIMITATIONS
- PROPER AIR CIRCULATION
- CONTROL PANEL FOR EACH UNIT
- freestanding operation. It is not made to be recessed or built-in (fully recessed).
- INSTALLING & MAINTAINING AIR FILTERS
- To Install:
- To Clean:
- INSTALLING THE WATER TRAYS
- USING YOUR WINE CELLAR
- TEMPERATURE ADJUSTMENTS/CONTROL
- INTERIOR LIGHT CONTROL
- POWER INTERRUPTIONS
- VACATION AND MOVING CARE
- CLEANING AND MAINTENANCE
- GENERAL CLEANING
- WINE TIPS AND HINTS
- TROUBLESHOOTING
- WARRANTY Limited Three-Year Warranty
- CALIFORNIA RESIDENTS ONLY
- HASSLE-FREE REPLACEMENT WARRANTY
- Cuisinart® MANUAL DE INSTRUCCIONES
- INSTRUCCIONES DE DESEMBALAJE
- SIEMPRE SAQUE TODAS LAS BOTELLAS DEL APARATO ANTES DE MOVERLO.
Brand : CUISINART
Model : Private Reserve CWC-800CEN
Category : Wine cellar