GMOS-08 - Kit voiture Axxess - Free user manual and instructions
Find the device manual for free GMOS-08 Axxess in PDF.


| Product Type | Vehicle Interface Module |
| Model | GMOS-08 |
| Brand | Axxess |
| Category | Car Kit |
| Dimensions (L x W x H) | 4.5 x 3 x 1 inches |
| Weight | 0.5 lbs |
| Power Supply | 12V DC |
| Main Functions | Retains OnStar, steering wheel controls, chimes, and warning tones; provides data bus interface |
| Compatible Vehicles | Select General Motors vehicles (2006-2012) |
| Installation | Plug-and-play with vehicle specific harnesses |
| Maintenance | Wipe with dry cloth; no special maintenance required |
| Safety | Fuse protected; follow installation instructions |
| Spare Parts | Not applicable; non-repairable module, replace if defective |
| Repairability | Not user-serviceable; professional installation recommended |
| General Information | Designed for aftermarket radio installations in select GM vehicles to retain factory features |
Frequently Asked Questions - GMOS-08 Axxess
User questions about GMOS-08 Axxess
0 question about this device. Answer the ones you know or ask your own.
Ask a new question about this device
Download the instructions for your Kit voiture in PDF format for free! Find your manual GMOS-08 - Axxess and take your electronic device back in hand. On this page are published all the documents necessary for the use of your device. GMOS-08 by Axxess.
USER MANUAL GMOS-08 Axxess
GM amplified OnStar Class II Data Bus Interface 2005-2006
APPLICATIONS
See inside front cover
KIT FEATURES
• Provides accessory (12-volt 10-amp)
• Retains R.A.P. (Retained Accessory Power)
• Used in amplified systems
- Retains chimes
- Provides NAV outputs (parking brake, reverse, mute, V.S.S.)
• ASWC harness included (ASWC not included)
• Retains OnStar/OE Bluetooth
• Adjustable volume for chimes and OnStar
• High level speaker input
- USB updatable
• Retains balance and fade
INTERFACE COMPONENTS
• GMOS-08 interface • 16-pin harness with stripped leads
• 18-pin harness to 12- and 24-pin GM harness with stripped leads
TOOLS REQUIRED
Cutting Tool • Crimping Tool • Tape • Connectors (example: butt-connectors, bell caps, etc.
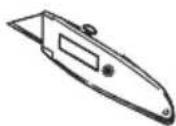
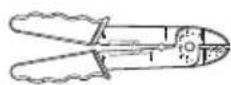

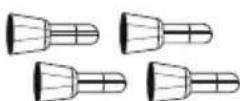
Applications
(Note: This interface will also work in vehicles listed below that are not equipped with OnStar)
CHEVROLET
Equinox 2005-2006
PONTIAC
Torrent 2006
Caution: Metra recommends disconnecting the negative battery terminal before beginning any installation. All accessories, switches, and especially air bag indicator lights must be plugged in before reconnecting the battery or cycling the ignition.
*NOTE: Refer also to the instructions included with the aftermarket radio.
Connections to be made
From the 16-pin harness:
- Connect the Red wire to the ignition wire of the aftermarket radio
- Connect the Orange/White wire to the illumination wire of the aftermarket radio. If the aftermarket radio has no illumination wire just tape off the Orange/White wire.
- Connect the White wire to the left front positive speaker output of the aftermarket radio
- Connect the White/Black wire to the left front negative speaker output of the aftermarket radio
- Connect the Gray wire to the right front positive speaker output of the aftermarket radio
- Connect the Gray/Black wire to the right front negative speaker output of the aftermarket radio
- Connect the Green wire to the radio's left rear positive speaker output.
- Connect the Green/Black wire to the radio's left rear negative speaker output.
- Connect the Purple wire to the radio's right rear positive speaker output.
- Connect the Purple/Black wire to the radio's right rear negative speaker output.
- Connect the Blue/White wire to the radio's amp turn on wire
- Connect the Brown wire to the mute wire of the aftermarket radio. If the aftermarket radio does not have a Mute wire, tape up the Brown wire.
- Connect the Light Green wire to the parking brake wire of the aftermarket navigation radio.
- Connect the Blue/Pink wire to the VSS or speed sense wire of the aftermarket navigation radio.
- Connect the Green/Purple wire to the reverse wire of the aftermarket navigation radio.
• Plug the 16-pin harness into the GMOS-08
Connections to be made
From the 12- and 24-pin harness:
- Connect the Yellow wire to the radio's 12-volt battery or memory wire.
- Connect the Black wire to the radio's ground wire.
• Plug the 14-pin harness into the GMOS-08 - The Black/Yellow wire is for the OnStar volume adjustment. This will be discussed in the OnStar Level Adjustment section of this instruction.
Installing the GMOS-08
- With all connections completed to the aftermarket radio, plug the 24- and 12-pin harnesses into the vehicles wiring harnesses.
• Reconnect the negative battery terminal. - Cycle the key, by turning the ignition on for 30 seconds. Then off and on again to test the radio.
Testing the GMOS-08
1) Turn the ignition on if not already, and then turn the radio on to verify that the radio works. Check balance and fader controls for proper operation.
2) Push the OnStar button (if equipped) to verify OnStar is working. The radio will shut off or mute, depending if the Brown wire on the 16-pin harness is connected, and OnStar will be heard through the front speakers. Turn off OnStar and the radio will turn back on.
Continued on next page
Chime Volume Adjustment
Note: If Y91 is present on the RPO list, refer to your owner's manual to adjust chimes.
1) With car on, shut off car and leave keys in ignition. Open the car door and leave it open. Chimes will be heard.
2) Wait 10 seconds, then with a small screwdriver adjust the potentiometer fully counterclockwise (all the way left), then clockwise to raise chime level and counterclockwise to lower the chime level.
3) When the volume is at the desired level, remove the keys from the ignition. This will lock the chime volume at its current level.
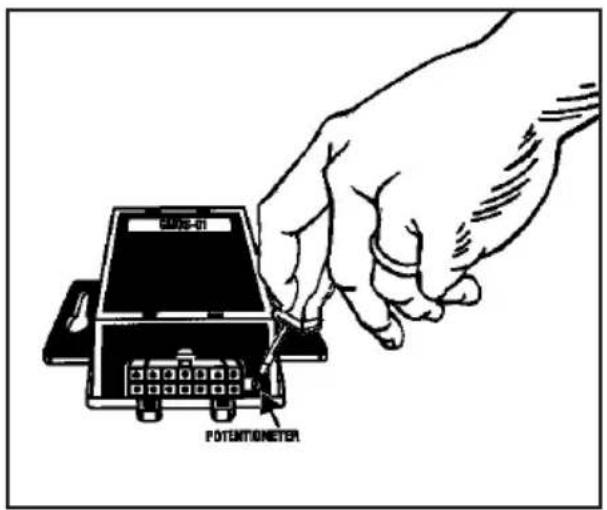
Potentiometer located on the 16 pin side of the interface
Audio Level Adjustment
1) Start your vehicle and turn on the radio having audio playing.
2) Turn your aftermarket radio's volume up 34 of the way.
3) With a small screwdriver adjust the potentiometer clockwise to raise the audio level and counterclockwise to lower the audio level.
4) Once at desired level your audio adjustment is complete.
OnStar Level Adjustment
To adjust the OnStar volume level find the Black/Yellow wire on the 16-pin harness. Push the blue OnStar button, while the voice is speaking tap the Black/Yellow wire to ground. There are 4 volume settings for OnStar; once the 4th setting is reached and the Black/Yellow wire is tapped to ground it will automatically go back to the first volume setting. Once the volume is set it will stay at that volume until the Black/Yellow wire is tapped to ground again. This can be set during installation and then left alone. If user adjustment is desired, the customer may also tap volume up or down on the steering wheel (if equipped) to adjust the OnStar level.
Notes
Notes
IMPORTANTWARNING
This product includes instructions for installation which must be carefully followed. The instructions are worded in such a manner to assume that the installer is capable of completing these type of electronic installations. If you are unclear as to what you are instructed to do or believe that you do not understand the instructions so as to properly and safely complete the installation you should consult a technician who does have this knowledge and understanding.
Failure to follow these instructions carefully and to install the interface as described could cause harm to the vehicle or to safety systems on the vehicle. Interference with certain safety systems could cause harm to persons as well. If you have any questions in this regard please call the Help line or Metra at 1-800-221-0932 for assistance.

KNOWLEDGE IS POWER
Enhance your installation and fabrication skills by
enrolling in the most recognized and respected mobile electronics school in our industry.
Log onto www.installerinstitute.com or call
800-354-6782 for more information and take steps toward a better tomorrow.

Metra recommends MECP certified technicians
GMOS-08

- GM amplified OnStar Class II Data Bus Interface 2005-2006
- APPLICATIONS
- KIT FEATURES
- INTERFACE COMPONENTS
- TOOLS REQUIRED
- CHEVROLET
- PONTIAC
- Connections to be made
- From the 16-pin harness:
- From the 12- and 24-pin harness:
- Installing the GMOS-08
- Testing the GMOS-08
- Chime Volume Adjustment
- Audio Level Adjustment
- OnStar Level Adjustment
- Notes
- IMPORTANTWARNING
- KNOWLEDGE IS POWER
- GMOS-08
Brand : Axxess
Model : GMOS-08
Category : Kit voiture