
S2920W-C0 - Soundbar VIZIO - Free user manual and instructions
Find the device manual for free S2920W-C0 VIZIO in PDF.


| Product Type | Soundbar System |
| Brand | VIZIO |
| Model | S2920W-C0 |
| Transducers | 2 x 2.75" High-Efficiency Full-Range |
| Sound Pressure Level | 95 dB |
| Frequency Response | 90 Hz - 19 kHz |
| Power Supply | 100-240 VAC, 50/60 Hz |
| Audio Inputs | 1 x 3.5mm Stereo, 1 x RCA Stereo, 1 x Optical (Toslink), 1 x Digital Coaxial, Bluetooth |
| Audio Output | 1 x Subwoofer Out (RCA) |
| Bluetooth Range | Up to 30 feet |
| Control | Remote control and top panel buttons (Power, Input, Bluetooth, Volume) |
| Special Features | DTS TruVolume, DTS TruSurround HD, Treble/Bass Adjustment |
| Wall Mountable | Yes (brackets and template included) |
| Included Accessories | Remote control with batteries, power adapter, stereo RCA to 3.5mm cable, coaxial audio cable, digital optical cable, wall mount brackets and screws, wall mount template |
| Compliance | FCC Class B, C-UL, UL, ENERGY STAR |
| Warranty | 1 Year Limited (parts and labor) |
| Cleaning | Dry cloth only; do not use liquid cleaners |
| Safety | Do not expose to moisture, unplug during storms, use only specified attachments |
| Dimensions (Approx.) | 29" W x 3" H x 3.5" D (based on typical 29-inch soundbar) |
Frequently Asked Questions - S2920W-C0 VIZIO
User questions about S2920W-C0 VIZIO
0 question about this device. Answer the ones you know or ask your own.
Ask a new question about this device
Download the instructions for your Soundbar in PDF format for free! Find your manual S2920W-C0 - VIZIO and take your electronic device back in hand. On this page are published all the documents necessary for the use of your device. S2920W-C0 by VIZIO.
USER MANUAL S2920W-C0 VIZIO
natural_image
Black rectangular electronic device with a remote control and 'V1210' branding on the side (no text or symbols on the device itself)QUICK START GUIDE
Model: S2920w-C0
IMPORTANT SAFETY INSTRUCTIONS
Your Unit is designed and manufactured to operate within defined design limits, and misuse may result in electric shock or fire. To prevent your Unit from being damaged, the following rules should be observed for its installation, use, and maintenance. Please read the following safety instructions before operating your Unit. Keep these instructions in a safe place for future reference.
- Read these instructions.
- Keep these instructions.
- Heed all warnings.
- Follow all instructions.
- Do not use this apparatus near water.
- Clean only with a dry cloth.
- Do not block any ventilation openings. Install in accordance with the manufacturer's instructions.
- Do not install near any heat sources such as radiators, heat registers, stoves, or other apparatus (including amplifiers) that produce heat.
- Do not defeat the safety purpose of the polarized or grounding-type plug. A polarized plug has two blades with one wider than the other. A grounding type plug has two blades and a third grounding prong. The wide blade or the third prong are provided for your safety. If the provided plug does not fit into your outlet, consult an electrician for replacement of the obsolete cullet.
- Protect the power cord from being walked on or pinched, particularly at plugs, convenience receptacles, and the point where they exit from the apparatus.
- Only use attachments/accessories specified by the manufacturer.
- Use only with the cart, stand, tripod, bracket, or table specified by the manufacturer, or sold with the apparatus. When a cart is used, use caution when moving the cart/apparatus combination to avoid injury from tip-over.
- Unplug this apparatus during lightning storms or when unused for long periods of time.
- Refer all servicing to qualified service personnel. Servicing is required when the apparatus has been damaged in any way, such as when the power supply cord or plug is damaged, liquid has been spilled or objects have fallen into the apparatus, the apparatus has been exposed to rain or moisture, does not operate normally, or has been dropped.
• To reduce the risk of electric shock or component damage, switch off the power before connecting other components to your Unit.
- Unplug the power cord before cleaning your Unit. A damp cloth is sufficient for cleaning. Do not use a liquid or a spray cleaner on your Unit. Do not use abrasive cleaners.
• Always use the accessories recommended by the manufacturer to insure compatibility.
- When moving your Unit from an area of low temperature to an area of high temperature, condensation may form in the housing. Wait before turning on your Unit to avoid causing fire, electric shock, or component damage.
- Slots and openings in the back and bottom of the cabinet are provided for ventilation. To ensure reliable operation of your Unit and to protect it from overheating, be sure these openings are not blocked or covered. Do not place your Unit in a bookcase or cabinet unless proper ventilation is provided.
- Never push any object into the slots and openings on your Unit enclosure. Do not place any objects on the top of your Unit. Doing so could short circuit parts causing a fire or electric shock. Never spill liquids on your Unit.
- When connected to a power outlet, power is always flowing into your Unit. To totally disconnect power, unplug the power cord.
- Do not overload power strips and extension cords. Overloading can result in fire or electric shock.
- The wall socket should be located near your Unit and be easily accessible
- Keep your Unit away from moisture. Do not expose your Unit to rain or moisture. If water penetrates into your Unit, unplug the power cord and contact your dealer. Continuous use in this case may result in fire or electric shock.
- Do not use your Unit if any abnormality occurs. If any smoke or odor becomes apparent, unplug the power cord and contact your dealer immediately. Do not try to repair your Unit yourself.
- Avoid using dropped or damaged appliances. If your Unit is dropped and the housing is damaged, the internal components may function abnormally. Unplug the power cord immediately and contact your dealer for repair. Continued use of your Unit may cause fire or electric shock.
- Do not install your Unit in an area with heavy dust or high humidity. Operating your Unit in environments with heavy dust or high humidity may cause fire or electric shock.
- Ensure that the power cord and any other cables are unplugged before moving your Unit.
- When unplugging your Unit, hold the power plug, not the cord. Pulling on the power cord may damage the wires inside the cord and cause fire or electric shock. When your Unit will not be used for an extended period of time, unplug the power cord.
- To reduce risk of electric shock, do not touch the connector with wet hands.
- Insert the remote control batteries in accordance with instructions. Incorrect polarity may cause the battery to leak which can damage the remote control or injure the operator.
• See the important note and rating located on the back of the unit.
- WARNING - This equipment is not waterproof. To prevent a fire or shock hazard, do not place any container filled with liquid near the equipment (such as a vase or flower pot) or expose it to dripping, splashing, rain, or moisture.
- CAUTION - Danger of explosion or fire if batteries are mistreated. Replace only with the same or specified type.
- Do not leave the batteries exposed to direct sunlight for a long period of time with doors and windows closed. Do not disassemble the batteries or dispose of it in fire.
WARNING: To reduce the risk of fire or electric shock, do not expose this apparatus to rain or moisture.
Explanation of WARNING symbols:

PACKAGE CONTENTS

High Definition Sound Bar

Remote Control with Batteries
This Quick
Start Guide
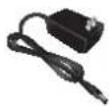
Power Adapter

Stereo RCA to 3.5mm
Audio Cable

Coaxial Audio Cable

Digital Optical Cable

2 x Sound Bar Wall
Mount Brackets

2 x Wall
Mount Screws
(Size: M4 x 10)

Wall Mount
Template
CONTROLS & CONNECTIONS
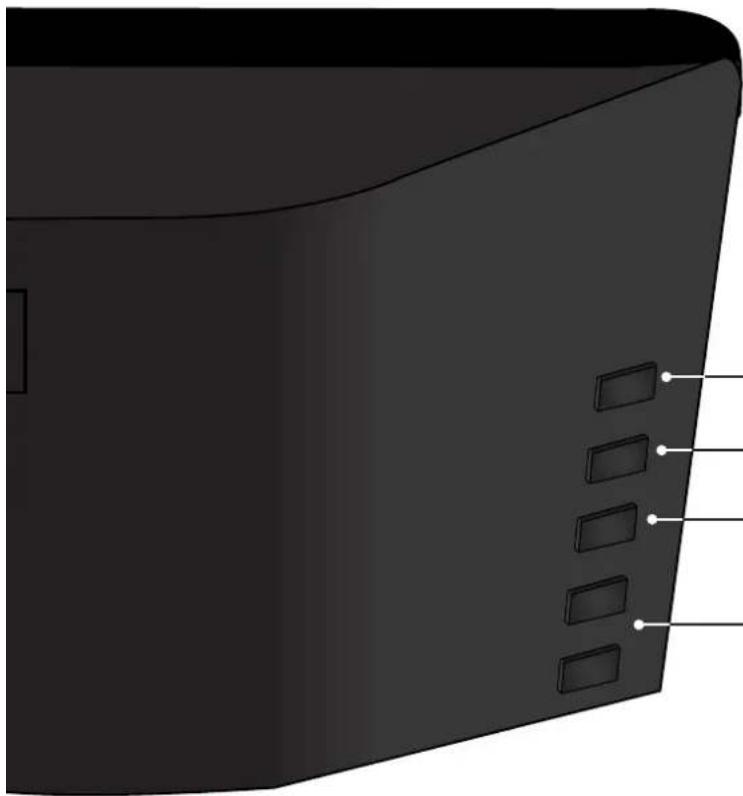
Back of Sound Bar
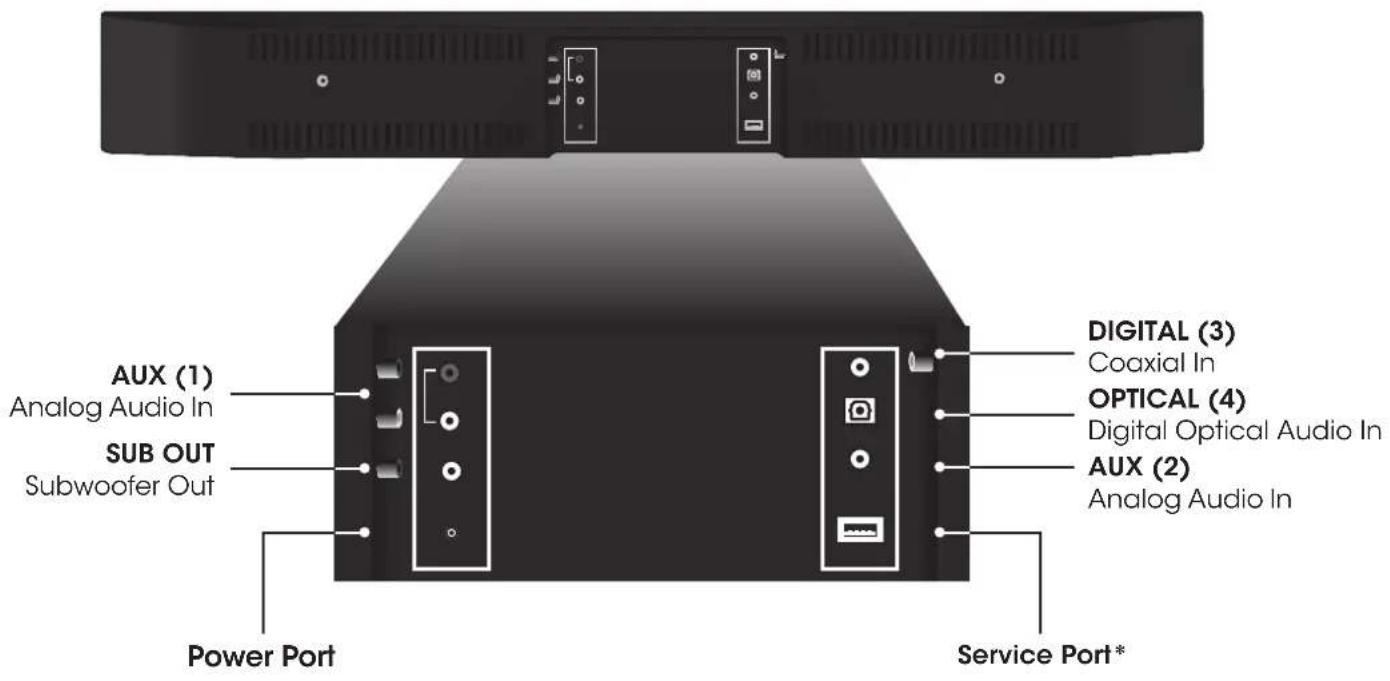
*For use by authorized service center only.
Back of Sound Bar

natural_image
3D rendering of a black rectangular object with four rectangular cutouts and a small square opening on the left side (no text or symbols)
Power

Input

Bluetooth Input
(Hold to force pair. See 'Bluetooth Pairing' for more information)

Volume
FIRST-TIME SETUP

flowchart
graph TD
    A["Back of Sound Bar"] --> B["GOOD"]
    A --> C["GOOD"]
    A --> D["BETTER"]
    A --> E["DIGITAL OPTICAL CABLE**"]
    B --> F["3.5MM TO RCA CABLE"]
    C --> G["3.5MM TO RCA CABLE"]
    D --> H["DIGITAL COAXIAL CABLE**"]
    E --> I["DIGITAL OPTICAL CABLE**"]
    style A fill:#f9f,stroke:#333
    note right of A Choose ONE CABLE:
        BETTER
        GOOD
        AND CONNECT IT TO YOUR TV
*Not all TVs have the audio outputs shown above. To connect the Sound Bar directly to your other devices (Blu-ray player, game system, etc) see your device's user manual.
**When using either of the Digital Inputs, if there is no audio: (A) try setting the TV output to PCM or (B) Connect directly to your Blu-ray/other source, some TVs do not pass through digital audio.


natural_image
Coiled black cable with a small connector, shown in 3D rendering (no text or symbols)Plug the Power Adapter into a power outlet.

4
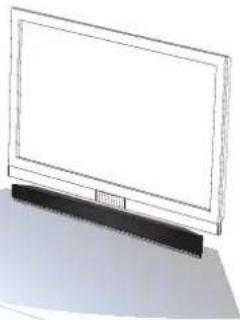
Sound Bar is centered below the TV.
natural_image
Line drawing of a flat-screen monitor with a black base (no text or symbols)
natural_image
Line drawing of a modern office or service counter with a person seated at the counter (no text or symbols)For the best surround sound experience, position the Sound Bar as shown. The Sound Bar should be close to ear level.
9
Top Top
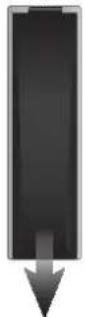
Remove the battery cover by gently sliding it away from the remote.
10

natural_image
Interior view of a black remote control unit showing battery and drive casing (no text or symbols visible)Insert the included batteries and gently slide the battery cover back into place.
11
Turn your TV on, then press the Power button on the remote to turn the Sound Bar on.
Press the Input button to switch between audio sources. For example, if you connected your TV to Input 1, set the Sound Bar to Input 1.
Hardware setup is complete.

USING THE REMOTE

LED INDICATORS

LED Indicators are located here:
The LED Indicators will behave differently with each button on the remote control.
| Function LED | Behavior Description | |
| Input | Analog Audio In - AUX (1)Analog Audio In - AUX (2)Coaxial In - Digital (3)Digital Optical Audio In - Optical (4)Bluetooth | Press the INPUT button on the remote to cycle through each available input:Analog Audio In - AUX (1)Analog Audio In - AUX (2)Coaxial In- Digital (3)Digital Optical Audio In - Optical (4)Bluetooth |
| Bluetooth Pairing | (When searching for device)Flash from Left to Right and back continuously. | Press and hold the ➕ button on the remote. The Sound Bar will be discoverable for 15 minutes. You can now search for the Sound Bar (VIZIO S2920w) using your Bluetooth Device. The sound bar will power down if no device is found.Note:Set your Bluetooth device into pairing mode prior to the Sound Bar. |
| DTS TruVolume On/Off | TruVolume On:TruVolume Off: | Press the TVOL button to enable/disable TruVolume. When enabled (On). TruVolume provides a consistent and comfortable volume level for a more enjoyable listening experience. |
| DTS TruSurround On/Off | TruSurround On:TruSurround Off: | Press the TSHD button to enable/disable DTS TruSurround. When enabled (On), all inputs will produce virtual surround sound. When disabled (Off), all sources will playback in stereo. |
| Treble Levels | Two center LEDs indicate Treble level 0. | Press the TREBLE button then press the Next/Previous button to increase/decrease the treble level. The LED indicators will move to the right with increasing levels and to the left with decreasing levels. |
| Bass Levels | Two center LEDs indicate Bass level 0. | Press the BASS button then press the Next/Previous button to increase/decrease the bass level. The LED indicators will move to the right with increasing levels and to the left with decreasing levels. |
BLUETOOTH PAIRING
To pair the Sound Bar with a Bluetooth device:
- Press and hold the Bluetooth button ✝ on the Sound Bar or the Bluetooth button ✝ on the remote for five (5) seconds. When the Sound Bar is in Bluetooth Pairing Mode, the LED Indicators on the Display Panel on the front of the Sound Bar will light sequentially from left to right and back again.
Once the device is paired, the LED Indicators will stop flashing.
-
You can now search for the Sound Bar (VIZIO S2920w) using your Bluetooth device. For more information, see the documentation that came with your device.
-
Play audio from your Bluetooth device. Volume can be controlled on your source device and the Sound Bar.
Back of Sound Bar

natural_image
Diagram showing a device with ventilation slots and an external smartphone connected to it (no text or symbols present)USING BLUETOOTH MODE
Your Sound Bar supports music streaming from smartphones, tablets, and computers with Bluetooth capability. Device compatibility will vary, see your device's documentation for more information. Once you have paired your source device to the Sound Bar, as long as you stay within range of the Sound Bar, your device should remain paired, even if you change the input on the Sound Bar.

Your Sound Bar is not equipped with a microphone, so it cannot operate as a hands-free device for a smartphone.
Maximizing Signal
A Bluetooth signal has a range of up to 30 feet. Keep in mind that Bluetooth is a compressed audio format, so streamed music may lose some integrity when compared to a wired connection.
Try the following if your sound quality is less than optimal:
- If you hear any break-up or disconnect while streaming music from your device, move the source device closer to the Sound Bar.
- Be sure that there are no solid obstructions in the line-of-sight between the Sound Bar and the source device.
- Other wireless devices can affect Bluetooth range, including wireless security cameras, wireless video baby monitors, cordless phones, and microwave ovens. Turning off or moving these devices may improve Bluetooth range.

Reduce the volume levels on your device and on the Sound Bar before pressing Play. High volume levels can damage your hearing.
ADVANCED SETUP
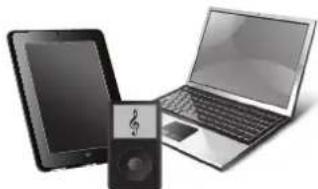
Connect up to four (4) different devices to the Sound Bar (devices shown are examples you can use any device).
To listen to a device, change the input source on the Sound Bar.
Optical, Coaxial, and 3.5mm cables transmit audio only. If connecting a video device, you will need a separate video connection from the device to your TV.


natural_image
Illustration of three electronic devices: a tablet, a CD player with musical note, and a laptop (no text or symbols visible)Game Console Network Media Player Tablet/MP3 Player/Laptop
CONNECTING A SUBWOOFER

* RCA subwoofer cable and subwoofer not included.
WALL MOUNTING THE SOUND BAR
1

Insert and tighten two Wall-Mount Screws with a Phillips-head screwdriver into the Wall-Mount Screw Holes.
2

Place the included wall mounting template against the wall under your TV. Mark the four bracket holes using a pencil.
3
Be sure your screws are attached to wood studs or drywall anchors (for drywall) or concrete anchors (for brick/concrete walls). Wall mounting hardware is not included.


If you are unfamiliar with power tools or the layout of electrical wiring in the walls of your home, consult a professional installer.
HELP & TROUBLESHOOTING
| There is no power. | Press the POWER button on the remote control or on the top of your Sound Bar.Ensure the power cord is securely connected.Plug a different device into the electrical outlet to verify that the outlet is working correctly. |
| There is no sound. | Increase the volume. Press Volume Up on the remote control or on the top of your Sound Bar.Press MUTE on the remote to ensure the Sound Bar is not muted.Press INPUT on the remote or on the top of your Sound Bar to select a different input source.When using either of the Digital Inputs, if there is no audio: (A) Try setting the TV output to PCM or (B) Connect directly to your Blu-ray/other source, some TVs do not pass through digital audio.On digital inputs, the input LEDs will flash rapidly if an unsupported format is present. Set the source to output PCM.Your TV may be set to variable audio output. Confirm that the audio output setting is set to FIXED or STANDARD, not VARIABLE. Consult your TV's user manual for more detailed information.If using Bluetooth, ensure that the volume on your source device is turned up and that the device is not muted. |
| I hear buzzing or humming. | Ensure all cables and wires are securely connected.Connect a different source device (TV, Blu-ray player, etc) to see if the buzzing persists. If it does not, the problem may be with the original device.Connect your device to a different input on the Sound Bar. |
| The remote isn't working. | Replace the remote batteries with new ones.Point the remote directly at the center of the Sound Bar when pressing a button.If using a Bluetooth connection, some of the buttons on the remote may not be supported by the streaming application. (e.g., Pandora doesn't support the Back button.) |
DO YOU HAVE QUESTIONS?
LET US HELP!
YOUR PRODUCT INCLUDES FREE LIFETIME TECH SUPPORT

The VIZIO support team is highly trained and is based in the United States.
We can help with:
- New Product Setup
- Connecting Your Devices
• Technical Problems - And More
Phone: (877) 878-4946 (TOLL-FREE)
Email: techsupport@VIZIO.com
Web: http://store.VIZIO.com/support
Hours of operation:
Monday - Friday: 5 AM TO 9 PM (PST)
Saturday - Sunday: 8 AM TO 4 PM (PST)
We speak English • Se habla Español • Nous parlons Français
VIZIO RECOMMENDS

Introducing the new E-series slim frame design. The VIZIO E-series LED TV is shattering the mold in a way only VIZIO can, with high-quality design and picture at the best value. With a stunningly slim outer frame design – and LED with 1080p Full HD for rich colors and vivid details, this HDTV gives you the best picture at the best value.
Available at www.VIZIO.com
This Product Sold Separately
VIZIO RECOMMENDS
natural_image
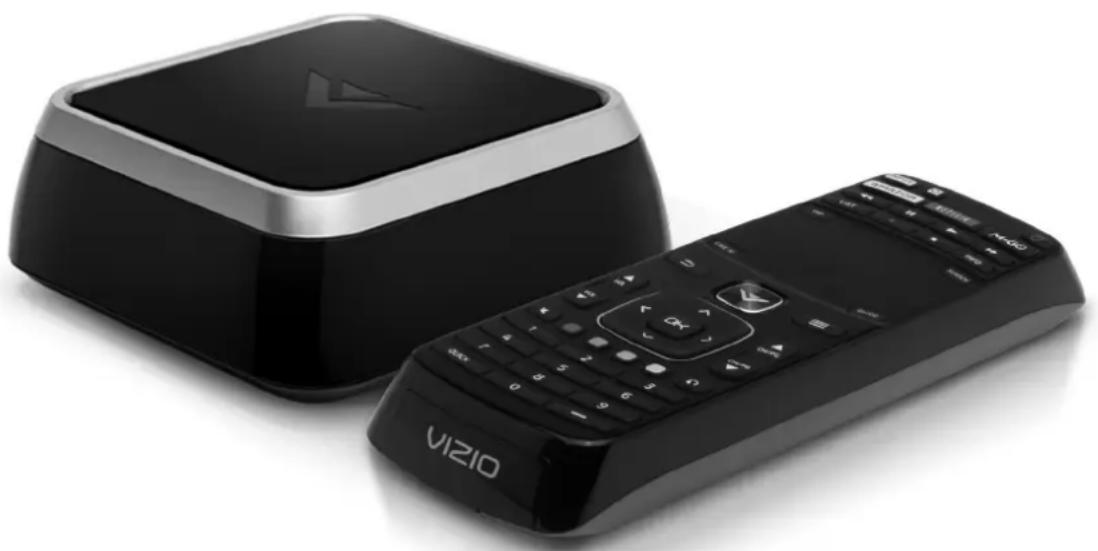
Black square TV and remote control device (VIZIO) shown in two different orientations, no text or symbols on the devices themselves.The VIZIO Co-Star™ Stream Player merges live TV and streaming entertainment into one experience, turning any HDTV into the ultimate smart TV. Using the latest version of Google TV™, Co-Star decks out your existing HDTV with apps, full-screen Web browsing and the best in streaming entertainment. And with 1080p Full HD resolution, built-in Wi-Fi, and 3D-readiness, VIZIO Co-Star is the ultimate entertainment upgrade for any high-definition television.
Available at www.VIZIO.com
This Product Sold Separately
ONE-YEAR LIMITED WARRANTY
ON PARTS AND LABOR
Covers units purchased as new in United States and Puerto Rico Only
VIZIO provides a warranty to the original purchaser of a new Product against defects in materials and workmanship for a period of one year of non-commercial usage and ninety (90) days of commercial use. If a Product covered by this warranty is determined to be defective within the warranty period, VIZIO will either repair or replace the Product at its sole option and discretion.
To obtain warranty service, contact VIZIO Technical Support via email: TechSupport@VIZIO.com or via phone at 877 MY VIZIO (877.698.4946) from 5:00AM to 9:00PM Monday through Friday and 8:00AM to 4:00PM Saturday and Sunday, Pacific Time, or visit www.VIZIO.com. PRE-AUTHORIZATION MUST BE OBTAINED BEFORE SENDING ANY PRODUCT TO A VIZIO SERVICE CENTER. Proof of purchase in the form of a purchase receipt or copy thereof is required to show that a Product is within the warranty period.
Parts and Labor
There will be no charge for parts or labor during the warranty period. Replacement parts and Products may be new or recertified at VIZIO's option and sole discretion. Replacement parts and Products are warranted for the remaining portion of the original warranty or for ninety (90) days from warranty service or replacement, whichever is greater.
Type of Service
Defective Products must be sent to a VIZIO service center to obtain warranty service. VIZIO is not responsible for transportation costs to the service center, but VIZIO will cover return shipping to the customer. PRE-AUTHORIZATION IS REQUIRED BEFORE SENDING ANY PRODUCT TO A VIZIO SERVICE CENTER FOR WARRANTY SERVICE.
Product returns to VIZIO's service centers must utilize either the original carton box and shipping material or packaging that affords an equal degree of protection. VIZIO Technical Support will provide instructions for packing and shipping the covered Product to the VIZIO service center.
Limitations and Exclusions
VIZIO's one-year limited warranty only covers defects in materials and workmanship. This warranty does not cover, for example: cosmetic damage, normal wear and tear, improper operation, improper voltage supply or power surges, signal issues, damages from shipping, acts of God, any type of customer misuse, modifications or adjustments, as well as installation and set-up issues or any repairs attempted by anyone other than by a VIZIO authorized service center. Products with unreadable or removed serial numbers, or requiring routine maintenance are not covered. This one year limited warranty does not cover Products sold "AS IS", "FACTORY RECERTIFIED", or by a non-authorized reseller.
THERE ARE NO EXPRESS WARRANTIES OTHER THAN THOSE LISTED OR DESCRIBED ABOVE. ANY IMPLIED WARRANTIES, INCLUDING ANY IMPLIED WARRANTY OF MERCHANTABILITY AND FITNESS FOR A PARTICULAR PURPOSE, SHALL BE LIMITED IN DURATION TO THE PERIOD OF TIME SET FORTH ABOVE. VIZIO'S TOTAL LIABILITY FOR ANY AND ALL LOSSES AND DAMAGES RESULTING FROM ANY CAUSE WHATSOEVER INCLUDING VIZIO'S NEGLIGENCE, ALLEGED DAMAGE, OR DEFECTIVE GOODS, WHETHER SUCH DEFECTS ARE DISCOVERABLE OR LATENT, SHALL IN NO EVENT EXCEED THE PURCHASE PRICE OF THE PRODUCT. VIZIO SHALL NOT BE RESPONSIBLE FOR LOSS OF USE, LOSS OF INFORMATION OR DATA, COMMERCIAL LOSS, LOST REVENUE OR LOST PROFITS, OR OTHER INCIDENTAL OR CONSEQUENTIAL DAMAGES. SOME STATES DO NOT ALLOW LIMITATIONS ON HOW LONG AN IMPLIED WARRANTY LASTS OR THE EXCLUSION OF INCIDENTAL OR CONSEQUENTIAL DAMAGES, SO THE ABOVE LIMITATIONS OR EXCLUSIONS MAY NOT APPLY TO YOU. THIS WARRANTY GIVES YOU SPECIFIC LEGAL RIGHTS, AND YOU MAY ALSO HAVE OTHER RIGHTS, WHICH VARY FROM STATE TO STATE. THIS WARRANTY IS SUBJECT TO CHANGE WITHOUT NOTICE. CHECK www.VIZIO.com FOR THE MOST CURRENT VERSION.
SPECIFICATIONS
Sound Bar: 2 x 2 3/4 " High-Efficiency Full-Range Transducers
Inputs: 1 x 3.5mm Stereo Audio
1 x RCA Stereo Audio
1 x Optical (Toslink)
1 x Digital Coaxial Audio
Bluetooth (Wireless)
Sound Pressure Level (System): 95 dB
Frequency Response (System): 90 Hz - 19 KHz
Voltage: 100-240 VAC, 50/60 Hz
Compliances: UL, C-UL, FCC
LEGAL & COMPLIANCE
FCC Class B Radio Interference Statement
NOTE: This equipment has been tested and found to comply with the limits for a Class B digital device, pursuant to Part 15 of the FCC Rules. These limits are designed to provide reasonable protection against harmful interference in a residential installation. This equipment generates, uses and can radiate radio frequency energy, and if not installed and used in accordance with the instructions, may cause harmful interference to radio communications. However, there is no guarantee that interference will not occur in a particular installation. If this equipment does cause harmful interference to radio or television reception, which can be determined by turning the equipment off and on, the user is encouraged to try to correct the interference by one or more of the following measures:
- Reorient or relocate the receiving antenna.
- Increase the separation between the equipment and receiver.
- Connect the equipment into an outlet on a circuit different from that to which the receiver is connected.
- Consult the dealer or an experienced radio/TV technician for help.
This device complies with Part 15 of the FCC Rules. Operation is subject to the following two conditions: (1) this device may not cause harmful interference, and (2) this device must accept any interference received, including interference that may cause undesired operation.
Notice:
- The changes or modifications not expressly approved by the party responsible for compliance could void the user's authority to operate the equipment.
- Shielded interface cables and AC power cord, if any, must be used in order to comply with the emission limits.
- The manufacturer is not responsible for any radio or TV interference caused by unauthorized modification to this equipment. It is the responsibilities of the user to correct such interference.
RF Exposure Information
This device meets the government's requirements for exposure to radio waves. This device is designed and manufactured not to exceed the emission limits for exposure to radio frequency (RF) energy set by the Federal Communications Commission of the U.S. Government. This device complies with FCC radiation exposure limits set forth for an uncontrolled environment.
IC Statement
Operation is subject to the following two conditions:
- This device may not cause interference, and
- This device must accept any interference, including interference that may cause undesired operation of the device.
IC Radiation Exposure Statement
This equipment complies with IC RSS-102 radiation exposure limits set forth for an uncontrolled environment. This equipment should be installed and operated with minimum distance 20cm between the radiator & your body.
Disposal and Recycling
You must dispose of this product properly, according to local laws and regulations. Because this product contains electronic components and a battery, it must be disposed of separately from household waste. Contact local authorities to learn about disposal and recycling options.
Other:
Image(s) used under license from Shutterstock.com

For DTS patents, see http://patents.dts.com. Manufactured under license from DTS Licensing Limited. DTS, the Symbol, & DTS and the Symbol together are registered trademarks, and DTS TruVolume is a trademark of DTS, Inc. © DTS, Inc. All Rights Reserved.

For DTS patents, see http://patents.dts.com. Manufactured under license from DTS Licensing Limited. DTS, the Symbol, & DTS and the Symbol together are registered trademarks, and DTS TruSurround is a trademark of DTS, Inc. DTS, Inc. All Rights Reserved.

This product qualifies for ENERGY STAR in the 'factory default' setting and this is the setting in which power savings will be achieved. Changing the factory default settings or enabling other features will increase power consumption that could exceed the limits necessary to qualify for ENERGY STAR rating.
We want to help you save energy.
© 2013 VIZIO INC. ALL RIGHTS RESERVED. 130429OC-NC


- QUICK START GUIDE
- IMPORTANT SAFETY INSTRUCTIONS
- PACKAGE CONTENTS
- CONTROLS & CONNECTIONS
- FIRST-TIME SETUP
- USING THE REMOTE
- LED INDICATORS
- LED Indicators are located here:
- BLUETOOTH PAIRING
- USING BLUETOOTH MODE
- Maximizing Signal
- ADVANCED SETUP
- CONNECTING A SUBWOOFER
- WALL MOUNTING THE SOUND BAR
- 3
- HELP & TROUBLESHOOTING
- DO YOU HAVE QUESTIONS?
- LET US HELP!
- YOUR PRODUCT INCLUDES FREE LIFETIME TECH SUPPORT
- VIZIO RECOMMENDS
- ONE-YEAR LIMITED WARRANTY
- ON PARTS AND LABOR
- Parts and Labor
- Type of Service
- Limitations and Exclusions
- SPECIFICATIONS
- LEGAL & COMPLIANCE
- FCC Class B Radio Interference Statement
- Notice:
- RF Exposure Information
- IC Statement
- IC Radiation Exposure Statement
- Disposal and Recycling
- Other:
Brand : VIZIO
Model : S2920W-C0
Category : Soundbar