
RCRH02BR - Controller RCA - Free user manual and instructions
Find the device manual for free RCRH02BR RCA in PDF.


| Product Type | Universal Remote Controller |
| Brand | RCA |
| Model | RCRH02BR |
| Compatible Devices | TV, DVD, Blu-ray, Streaming Box, Soundbar |
| Power Source | 2x AAA batteries (not included) |
| Battery Life | Approximately 6 months under normal use |
| Dimensions (L x W x H) | 6.5 x 2.0 x 0.8 inches |
| Weight | 3.5 oz (100 g) with batteries |
| Communication Technology | Infrared (IR) |
| Number of Keys | 40 |
| Backlight | No |
| Manufacturer Code | Pre-programmed for most major brands; supports manual code entry |
| Programming Method | Auto search, direct code entry, or learning mode |
| Warranty | 1-year limited warranty |
| Maintenance | Clean with a soft, dry cloth. Avoid liquids. |
| Safety | Keep away from water, heat sources, and children under 3 years. |
| Spare Parts | Batteries and user manual available online. |
| Repairability | Not user-serviceable. Contact support for replacement. |
Frequently Asked Questions - RCRH02BR RCA
User questions about RCRH02BR RCA
0 question about this device. Answer the ones you know or ask your own.
Ask a new question about this device
Download the instructions for your Controller in PDF format for free! Find your manual RCRH02BR - RCA and take your electronic device back in hand. On this page are published all the documents necessary for the use of your device. RCRH02BR by RCA.
USER MANUAL RCRH02BR RCA
2-Device Universal Remote Control User's Guide
Congratulations on your purchase of the RCRH02BR. This 2-Device Remote Control does just what a basic remote should: simplify! Made for streamlined 2-device TV and cable/satellite/digital TV converter setups, this remote is the ultimate in de-cluttering, leaving you just the buttons you need and none of the ones you don't. And with tactile cues on the channel and volume keys, all it takes is a touch to know what you're doing. Like all RCA remotes, this 2-Device Remote is easy to program, with support for over 210 brands* of TVs, satellite receivers, cable boxes and digital TV converter boxes.
* May not operate all models of all brands.
RCRH02BR
©2011 Audiovox Accessories Corporation
111 Congressional Blvd., Suite 350
Carmel, IN 46032
Made in China
Fabriqué en Chine
Hecho en China
RCRH02BR NA IB 01
UEI 16K Codes 2011 00
Trademarks ® Registered.
Marques ® déposées.
Marcas registradas ®.
www.rcaaudiovideo.com
ENGLISH
Step 1: Install Batteries
Your RCRI I02DR universal remote requires 2 new AAA alkaline batteries (sold separately).
To install the batteries:
-
Tum the unit over, remove screw and remove the battery door compartment cover.
-
Insert the batteries, matching the batteries to the (-) and (-) marks inside
the battery case
Battery Precautions:
- Do not mix old and new batteries.
- Do not mix alkaline, standard (carbon-zinc) or rechargeable (nickel-cadmium) batteries.
• Always remove old, week or worn-out batteries promptly and recycle or dispose of them in accordance with Local and National Regulations.
Step 2: Program the Remote
To use this universal remote with your home entertainment system, first you need to program it to control your devices. There are three ways you can program the universal remote to operate your devices:
- The Auto Code Search goes automatically through all the codes for the device you're trying to control. It's the basic method, but it can sometimes take longer than some of the other programming methods.
- The Direct Code Entry lets you enter a code from the accompanying code list for your brand of device. It's not as easy as the other methods, but it's potentially the fastest method.
- The Manual Code Search lets you manually go through all the codes for the device you're trying to control.
Auto Code Search
The Auto Code Search goes automatically through all the codes for the device you're trying to control. When you find the one that operates your device, you can stop the search and store that code.
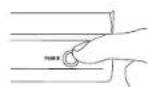
- Manually turn on the component you want to program the remote to operate.
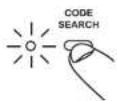
- Press and hold the CODE SEARCH key until the indicator light turns on.
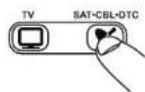
- Press the component key you want to program—TV or SAT-CBL-DTC. The indicator light blinks once and remains it. Important: Find the ENTER key on your remote (don't press if yet). You will need to press this key quickly in step 5 below.
- Press the component key you want to program—TV or SAT-CBL-DTC. The indicator light blinks once and remains it.
Important: Find the ENTER key on your remote (don't press it yet). You will need to press this key quickly in step 5 below.
ENGLISH
2
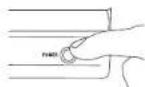
- Point the remote directly at the front panel of the device you want to control. Press the POWER key and wait for the indicator light to blink. Each time the indicator light binks, the remote is testing a code with the device. Make sure you keep the remote pointed at the device you want to operate.
- As soon as the component turns off, press the ENTER key within 4 seconds.
Note: If you wait longer than 4 seconds to press ENTER, the remote goes to the next code—you will need to start the code search from step 1 again.
The indicator light flashes 8 times and turns off when the remote has searched all the codes. If this happens, try one of the other programming methods.
- Test the remote with your component to make sure you can control most of the device's functions. If some features don't work, try the Direct Code Entry method.
Direct Code Entry
Direct Code Entry lets you enter a code from the code list at the end of this manual for your brand of device. It's not as easy as the other methods, but it's potentially the fastest method.
- Manually turn on the component you want to program the remote to operate.
- Find the four-digit code for your brand of TV, satellite receiver, cable box, or digital TV converter in the code list at the end of this manual.
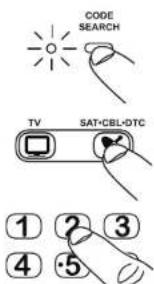
- Press and hold the CODE SEARCH key until the indicator light turns on.
- Press the component key you want to program—TV or SAT·CBL·DTC. The indicator light blinks and then remains it. Note: "DTC" stands for Digital TV Converter.
- Enter the four-digit code, using the numeric keypad. After the code is entered, the indicator light turns off.
Note: If the indicator light binds multiple times, you've ordered an invalid code. Start from step 2 again.

ENGLISH
3
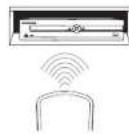
- Aim the remote at the component and
press the POWER key.
If the component turns off: The remote is programmed to operate this component.
If the component does NOT turn off: Try the next code for your brand.
Note: if no codes work, or if your brand is not listed, try the Auto Code Search or Manual Code Search.

Manual Code Search
The Manual Code Search lets you go one-by-one through all the codes for the device you're trying to control. When you find the one that operates your device, you can stop the search and store that code.
- Manually turn on the component you want to program the remote to operate.
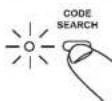
- Press and hold the CODE SEARCH key until the indicator light turns on.
- Press the component key you want to program—TV or SAT-CBL-DTC. The indicator light blinks once and remains lit. Important: Find the ENTER key on your remote (don't press it yet). You will need to press this key quickly in step 5 below.
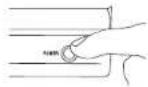
- Point the remote directly at the front panel of the device you want to control. Press the POWER key once every 2-3 seconds until your component turns off. Note: Since this remote has hundreds of codes, you may have to press the POWER key many (pamps hundreds of times using this method.
- As soon as the component turns off, press the ENTER key within 4 seconds. Note: If you wait longer than 4 seconds to press ENTER, the remote goes to the next code—you will need to start the code search from step 1 again. The indicator light flashes 8 times and turns off when the remote has searched all the codes, if this happens, try one of the other programming methods.
- Test the remote with your component to make sure you can control most of the device's functions. If some features don't work, try the Direct Code Entry method.

Accessing Menus
This remote supports menu access, navigation and selection for many mixes and models of TV and satellite receivers, cable boxes or digital TV converters. The amount of menu functionality varies from model to model and from brand to brand.
To use the Menu function:
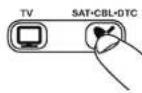
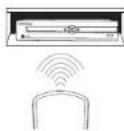
- Press the component button whose menu you wish to access (TV or SAT-CBL-DTC).
- Press the MENU key. The menu of the chosen component is shown. While in Menu Mode the Red LED will blink until you exit or Menu function times out, the keys on this remote function as follows:
Vol up/ down Ch +/-
Cursor moves right/left Cursor moves up/down
Note: Some functions of some brands may not be fully supported.
- To exit the menu mode press the corresponding component key on the remote (TV or SAT-CBL-DTC)
Accessing Digital Channels
The INPUT and - (dash) key lets you enter a digital sub-channel number, like 59.1, directly. Use the number keys to enter the main channel number (in this case, "59"). Then press the INPUT (-) key and press the subchannel number (in this case, "1"). When you're not entering channel numbers, the INPUT key toggles through all the video sources connected to your TV as well.
Programming Channel Control Lock
By default, in TV mode the remote control's channel-control capabilities are locked to the Cable Box or Satellite Receiver or Digital TV Converter. The affected keys are 1 through 0, Ch▲CH ▼No Go Back. This will guarantee that you do not inadvertently change a channel on your TV. However you can deactivate this feature to allow full access to these keys in TV mode.
Unlocking Channel Control
- On the remote Control, press SAT/CBL/DTC key and hold the key down. At the same time press and hold down the OH until the LED turns red and stays on. Then press the Enter key to unlock and save. Now the remote control will provide TV channel control capabilities while in the TV mode.
Locking Channel Control to SAT/CBL/DTC
- On the remote Control, press SAT/CBL/DTC key and hold the key down. At the same time press and hold down the Ch until the LED turns red and stays on. Then press the Enter key to lock and save. Now the remote control will provide channel control capabilities while in the SAT/CBL/DTC mode.
Retrieving Remote Codes
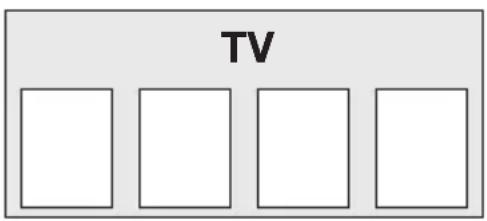
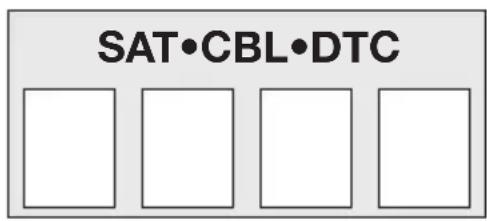
Once you've found the code that works best with your component, you might want to write it down so that you can use it if you ever need to program a remote for this component again. That's easy if you used the Direct Code Entry method—just write down the code you used from the list. However, if you used the Auto Code Search or Manual Code Search, you will need to go through the following steps to know exactly which code you're using.
- Press and hold the CODE SEARCH key until the indicator light turns on.
-
Press the component key that matches the component's code you are retrieving (TV, SAT•CBL•DTC). The indicator light blinks once and then remains it.
-
Press the CODE SEARCH key again. The indicator light turns off.
- Starting with 0 on the keypad, press the number keys in order (0-9) until the indicator light turns on. The number that causes the indicator light to light up is the first digit of your code. Write it down in the space provided below.
- Repeat step 4 until you have retrieved all four numbers of the code.
Limited Lifetime Warranty
Audiovox Electronics Corporation (the "Company") warrants to you the original retail purchaser of this product that should it, under normal use and conditions, be proven defective in material or workmanship during its lifetime while you own it, such defect(s) will be repaired or replaced (at the Company's option) without charge for parts and repair labor. To obtain repair or replacement within the terms of this Warranty, the product is to be delivered with proof of warranty coverage (e.g. dated bill of sale), specification of defect(s), transportation prepaid, to the Company at the address shown below. Do not return this product to the retailer.
This Warranty does not cover product purchased, serviced or used outside the United States or Canada. This Warranty is not transferable and does not extend to costs incurred for installation, removal or reinstallation of the product. This Warranty does not apply if in the Company's opinion, the product has been damaged through alteration, improper installation, mishandling, misuse, neglect, accident, or the simultaneous use of different battery types (e.g. alkaline, standard or rechargeable).
THE EXTENT OF THE COMPANY'S LIABILITY UNDER THIS WARRANTY IS LIMITED TO THE REPAIR OR REPLACEMENT PROVIDED ABOVE AND, IN NO EVENT, SHALL THE COMPANY'S LIABILITY EXCEED THE PURCHASE PRICE PAID BY PURCHASER FOR THE PRODUCT.
This Warranty is in lieu of all other express warranties or liabilities. ANY IMPLIED WARRANTIES, INCLUDING ANY IMPLIED WARRANTY OF MERCHANTABILITY OR FITNESS FOR A PARTICULAR PURPOSE SHALL BE LIMITED TO DURATION OF THIS WARRANTY. IN NO CASE SHALL THE COMPANY BE LIABLE FOR ANY CONSEQUENTIAL OR INCIDENTAL DAMAGES WHATSOEVER. No person or representative is authorized to assume for the Company any liability other than expressed herein in connection with the sale of this product.
Some states/provinces do not allow limitations on how long an implied warranty lasts or the exclusion or limitation of incidental or consequential damage so the above limitations or exclusions may not apply to you. This Warranty gives you specific legal rights and you may also have other rights, which vary from state/province to state/province.
U.S.A.: Audiovox Electronics Corporation, 150 Marcus Blvd., Hauppauge, New York 11788
CANADA: Audiovox Return Center, c/o Genco, 6685 Kennedy Road, Unit 3, Door 16, Mississauga, Ontario L5T 3A5
For more information, please visit www.rcaaudiovideo.com
Consumer Help Line: 1-800-420-7968
Care and Maintenance
- Keep the remote dry. If it gets wet, wipe it dry immediately.
- Use and store the remote only in normal temperature environments.
- Handle the remote gently and carefully. Don't drop it.
- Keep the remote away from dust and dirt.
- Wipe the remote with a damp cloth occasionally to keep it looking new.
- Modifying or tampering with the remote's internal components can cause malfunction and invalidate its warranty.
- 2-Device Universal Remote Control User's Guide
- RCRH02BR
- ENGLISH
- Step 1: Install Batteries
- To install the batteries:
- Battery Precautions:
- Step 2: Program the Remote
- Auto Code Search
- Direct Code Entry
- Manual Code Search
- Accessing Menus
- To use the Menu function:
- Vol up/ down Ch +/-
- Accessing Digital Channels
- Programming Channel Control Lock
- Unlocking Channel Control
- Locking Channel Control to SAT/CBL/DTC
- Retrieving Remote Codes
- Limited Lifetime Warranty
- Care and Maintenance
Brand : RCA
Model : RCRH02BR
Category : Controller