
Content Manager 2.0 - Browser MAGELLAN - Free user manual and instructions
Find the device manual for free Content Manager 2.0 MAGELLAN in PDF.


| Product Type | GPS Navigator with Content Manager Software |
| Brand | Magellan |
| Model | Content Manager 2.0 |
| Dimensions (approximate) | 5.1 x 3.1 x 0.7 inches (130 x 80 x 18 mm) |
| Weight (approximate) | 6.0 oz (170 g) |
| Power Source | Built-in rechargeable lithium-ion battery |
| Battery Life | Up to 3 hours continuous use |
| Display | 4.3-inch color touchscreen (480 x 272 pixels) |
| Map Storage | Internal memory, microSD card slot for expansion |
| Preloaded Maps | North America (or region-specific) |
| Key Features | Turn-by-turn navigation, points of interest, route planning, content manager software |
| Connectivity | USB 2.0 for data transfer and charging |
| Audio | Built-in speaker, voice prompts |
| Operating Temperature | 32°F to 113°F (0°C to 45°C) |
| Care and Cleaning | Wipe with soft dry cloth; avoid solvents and water |
| Safety | Use only approved charger; do not expose to extreme heat or moisture |
| Spare Parts and Repairability | Contact Magellan support for replacement parts and service |
Frequently Asked Questions - Content Manager 2.0 MAGELLAN
User questions about Content Manager 2.0 MAGELLAN
0 question about this device. Answer the ones you know or ask your own.
Ask a new question about this device
Download the instructions for your Browser in PDF format for free! Find your manual Content Manager 2.0 - MAGELLAN and take your electronic device back in hand. On this page are published all the documents necessary for the use of your device. Content Manager 2.0 by MAGELLAN.
USER MANUAL Content Manager 2.0 MAGELLAN
Magellan Content Manager 2.0
Installing the Magellan Content Manager.
-
Download the Magellan Content Manager from www.magellangps.com.
-
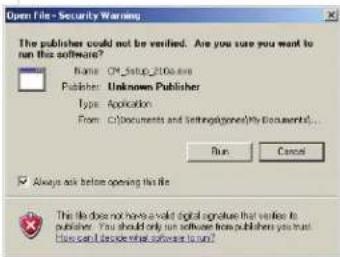
Double click the CM_Setup file that was downloaded.
-
Click "Run" to begin the installation.
-
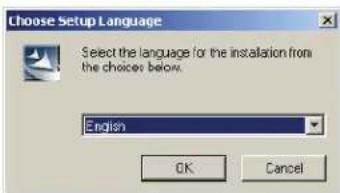
Select the desired language.
-
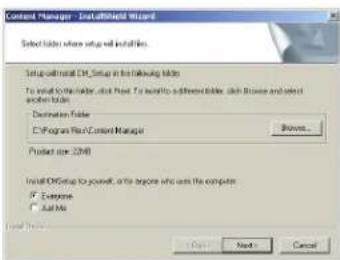
To continue with the default values, select "Next >"
-
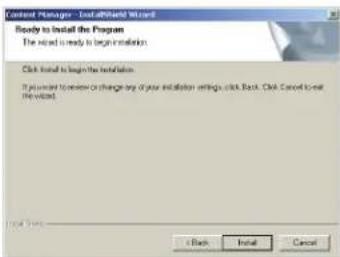
Select "Install".
-
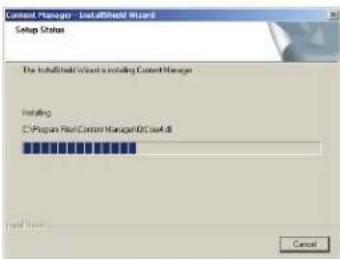
The installation process will begin. A status bar is displayed showing the progress of the installation.
-
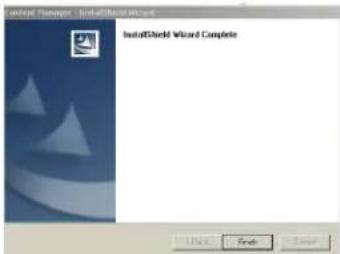
Select "Finish" when the installation is complete.

Using the Magellan Content Manager for the First Time
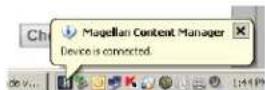
- Connect your Magellan receiver to your computer using a USB cable. Allow time for the receiver to connect to your computer.
-
If the Content Manager didn't start following the installation of the software, start the Content Manager by opening the Content Manager icon that was placed on your desktop.
-
Login: Enter your email address and the password you created when you created your account at www.magellangps.com. If you don't have an account, you can click on "Create your Account" to create one. If you want to continue without an account click Cancel.
-
You will be prompted to name the receiver that you have connected. Enter a name or use the default name supplied.
M Register Magellan® Maestro 4700
What would you like to name this device? (Can be changed later.)
Magellan® Maestro 4700
OK
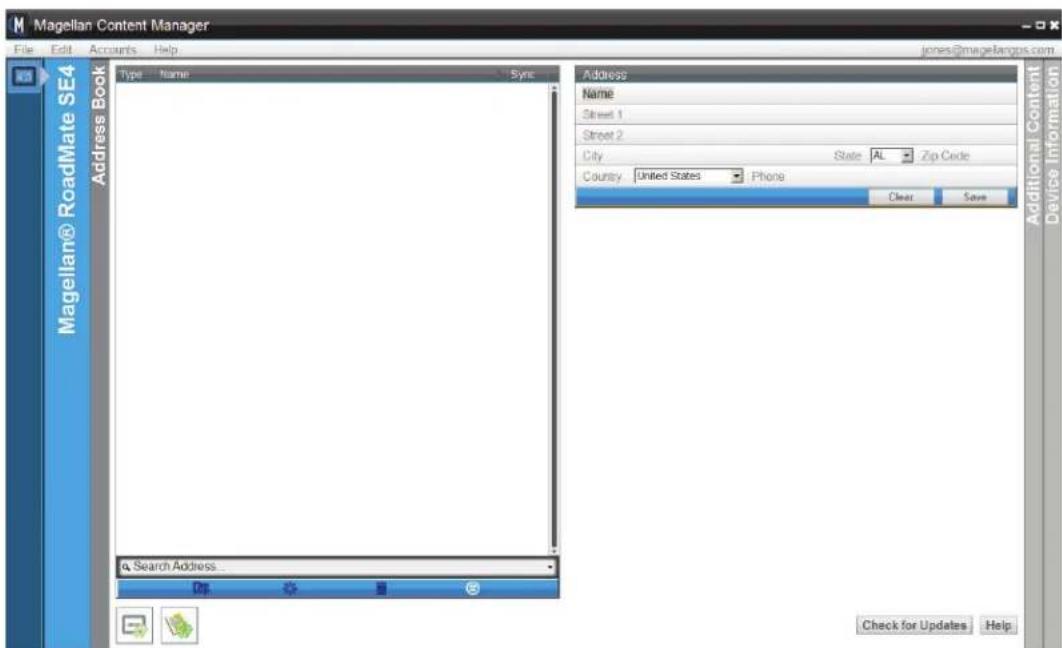
- The Content Manager will start displaying the address book.
The address book has space for all the addresses in your receiver. The tool bar below the address book provides a way to add an address, validate an address you enter, delete an address and sync the address book between your receiver and the Content Manager.
The icons below the addresses indicate if new firmware or maps are available for your receiver after you have checked for updates. If the icons are active, you can select them to install the updates.
- Select the Sync icon to begin syncing all the addresses currently in your receiver to the Content Manager.
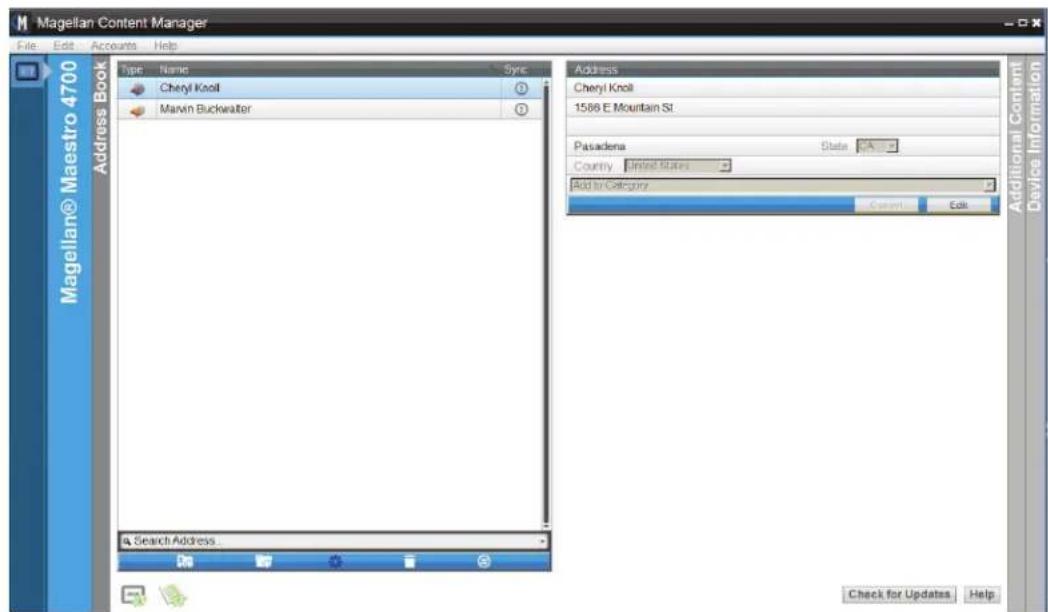
- The addresses contained in your receiver are now listed in the Address Book for the Content Manager.
Adding an Address (Do not use periods in the address. Addresses with periods, i.e., "St.", will not validate properly.)
-
You can add an address to the Address Book using Content Manager.
-
Select the Add Address icon

-
Fill out the information for the address in the Address information box and select Save.
-
The new address is created. Note the icons following the name. The Validate icon indicates that this is a new address and the needs to be validated before syncing to the receiver.
-
Select the Validation icon 📋 to validate this address. When the validation is successful, the validate icon is removed from the address.
-
The checkmark following the address indicates that this address needs to be synced to the receiver.
-
Select the Sync icon to sync the changes to your receiver.

Editing an Address (Do not use periods in the address. Addresses with periods, i.e., "St.", will not validate properly.)
- You can edit an address in the Address Book using Content Manager.
- Highlight the address you want to edit.
- The address box will popup in the upper right portion of the display.
- Select the "Edit" button.
- Make the required changes and select "Save".
Deleting an Address
- You can remove an address from the Address Book using Content Manager.
- Highlight the address you want to delete.
- Select the Delete Address icon.
- Confirm the deletion by selecting "OK".

Checking for Updates
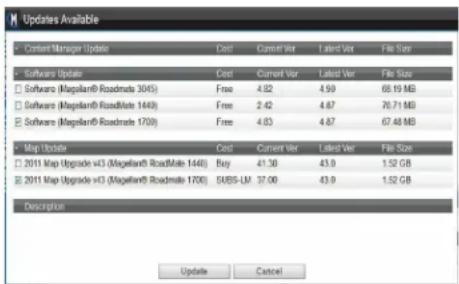
- With your receiver connected to your computer using a USB cable and your computer connected to the internet, select the "Check for Updates" button.
- The Content Manager will search for Magellan updates for your receiver. (Under preferences you can also tell the Content Manager to check for updates to your receiver and updates to Content Manager automatically.)
Updating the Receiver
- Select check for updates.
- Select update on the update window.
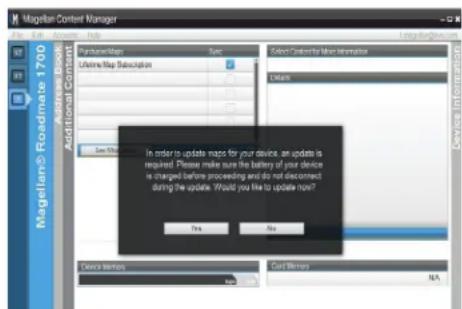
- Select OK on PND needs update message
- Select ok on battery charge and do not disconnect message.
-
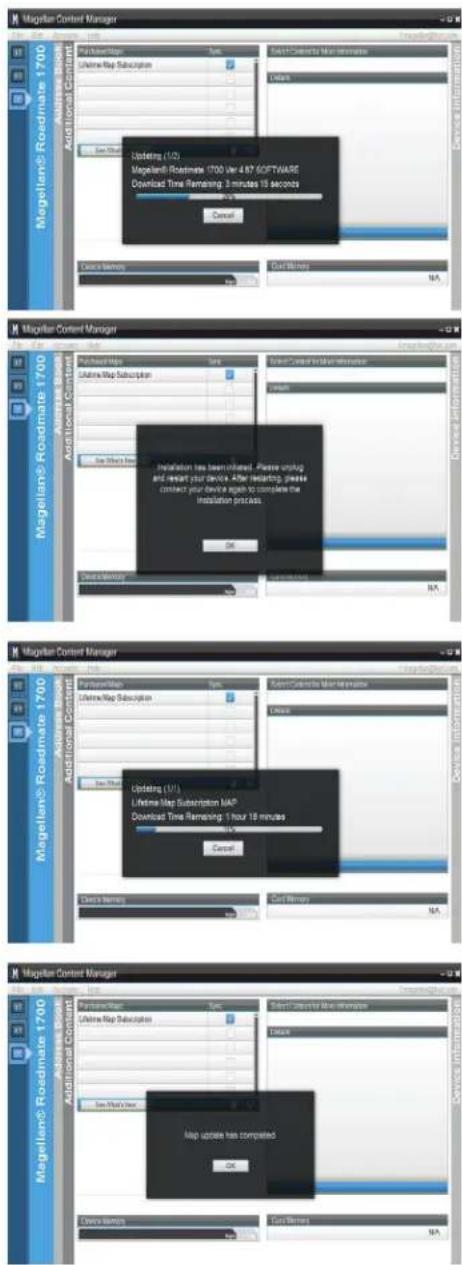
Software download progress bar appears.
-
Disconnect the receiver and select OK. Restart your receiver and connect it back to your PC.
-
Map update download progress bar appears.
-
When map update is completed select OK.
Addition Content Page
Access the Additional Content page by selecting the bar to the right of the window that says "Additional Content".
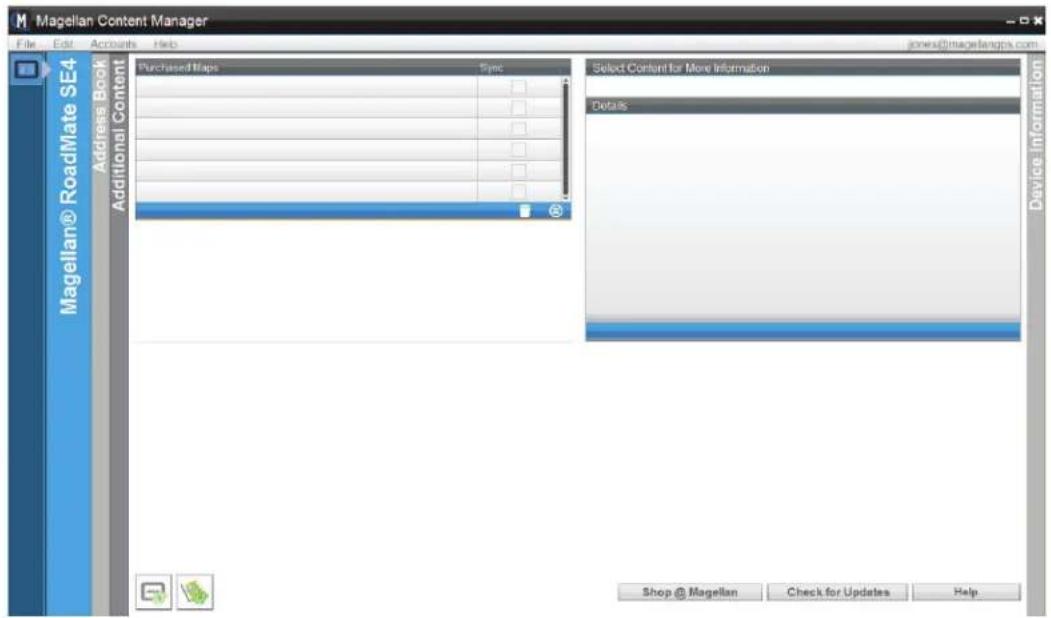
The Additional Content page will display any additional maps that you have purchased. Click on "See What's New" to view a list of new maps that are available for your receiver. When you highlight one of the maps in the list, the Details field will display information about that map.
If there is a map that you want to purchase (some maps are free for some Magellan receivers) click on the Shop @ Magellan button at the bottom of the screen. You can then navigate to the available map and see the price for the map. If you are logged in with the Content Manager, the newly purchased map will appear in the Purchased Maps field with a checkmark indicating that it needs to be synced to your receiver. Click the sync button to install the map into your receiver.
The Device Information Page
Access the Device Information page by selecting the bar to the right of the window that says "Device Information".
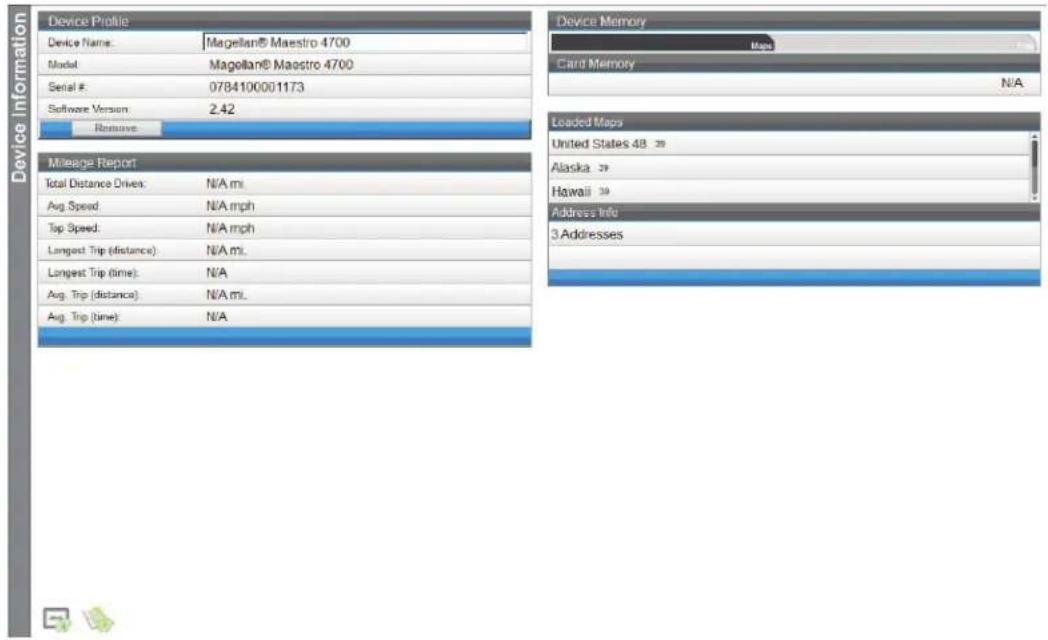
This page provides information on the model of your receiver, the serial number and what software version is installed.
Below the Device Profile is the Mileage Report. The Mileage Report is not supported by all receiver models.
To the right are graphical representations of the Device Memory and Card Memory if an SD card is installed.
Below that is a list of the maps that are currently loaded in your receiver. The small number following the region indicates what version map is currently loaded in your receiver. Also in this field is the number of addresses that are installed in your receiver.
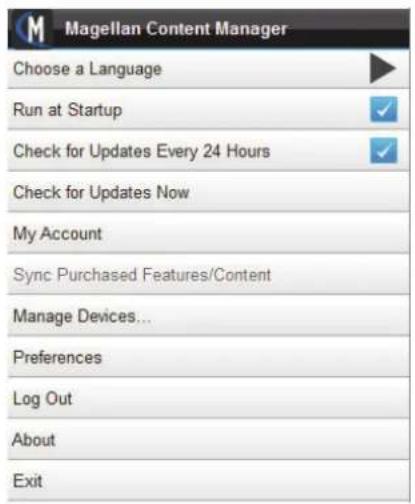
Magellan Content Manager Toolbar Application
You can also access functions of the Content Manager by using the Toolbar Application.Right click on the Content Manager Toolbar icon M.
Many of the functions of the Content Manager as well as setting up the Preferences can be done without opening the Content Manager application.
- Magellan Content Manager 2.0
- Installing the Magellan Content Manager.
- Using the Magellan Content Manager for the First Time
- M Register Magellan® Maestro 4700
- Deleting an Address
- Checking for Updates
- Updating the Receiver
- Addition Content Page
- The Device Information Page
- Magellan Content Manager Toolbar Application
Brand : MAGELLAN
Model : Content Manager 2.0
Category : Browser