PRO-110 - Video projector Steren - Free user manual and instructions
Find the device manual for free PRO-110 Steren in PDF.


| Product Type | Multimedia Mini Projector with TV Tuner |
| Brand | Steren |
| Model | PRO-110 |
| Dimensions (Approx.) | 20 x 15 x 8 cm |
| Weight (Approx.) | 1.2 kg |
| Power Supply | AC Adapter: Input 100-240V ~ 50-60Hz, 600mA; Output 12V --- 2A |
| Contrast Ratio | 500:1 |
| Supported Resolutions | Minimum 480x320, Maximum up to 4K |
| Projection Distance | 70 cm to 4.5 m |
| Lens | Manual focus |
| Input Connectivity | 2x HDMI, VGA, USB, SD Card, AV (RCA), Antenna (coaxial) |
| Output Connectivity | 3.5 mm audio output |
| TV Tuner | Digital TV (ATSC) with PAL-F adapter included |
| Multimedia Playback | Photo, Music, Movie, E-Book from USB/SD |
| Remote Control | Requires 2x AAA batteries (not included) |
| Warranty | 1 year against defects in workmanship and materials |
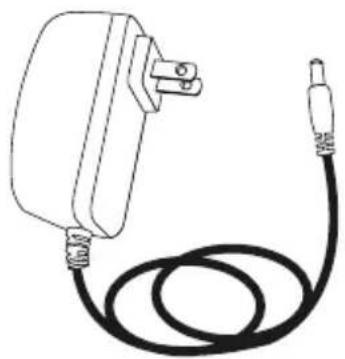
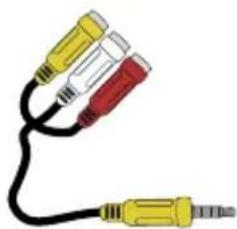
| Contents | Projector, Remote Control, AC Adapter, RCA Cable, PAL-F Adapter, Lens Cover |
| Cleaning Instructions | Use a soft dry cloth; do not use abrasive chemicals |
| Safety Precautions | Do not open the device; keep away from water; do not block vents; disconnect when not in use |
Frequently Asked Questions - PRO-110 Steren
User questions about PRO-110 Steren
0 question about this device. Answer the ones you know or ask your own.
Ask a new question about this device
Download the instructions for your Video projector in PDF format for free! Find your manual PRO-110 - Steren and take your electronic device back in hand. On this page are published all the documents necessary for the use of your device. PRO-110 by Steren.
USER MANUAL PRO-110 Steren
natural_image
Illustration of a black projector with a perforated grille and ventilation slots, set against a green geometric background (no text or symbols)natural_image
Line drawing of a projector with perforated glass and internal structure (no text or symbols)natural_image
Illustration of a white remote control with gray keypad and buttons (no text or symbols)Control remoto
natural_image
Line drawing of a mobile phone charger with cable and plug (no text or symbols)natural_image
Illustration of a multi-pin audio jack with color-coded wires (yellow, red, white) and a black cord (no text or symbols)Cable de audio y video RCA
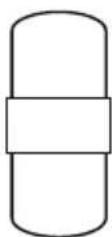
Adaptador PAL - F
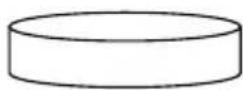
Cubierta para lente
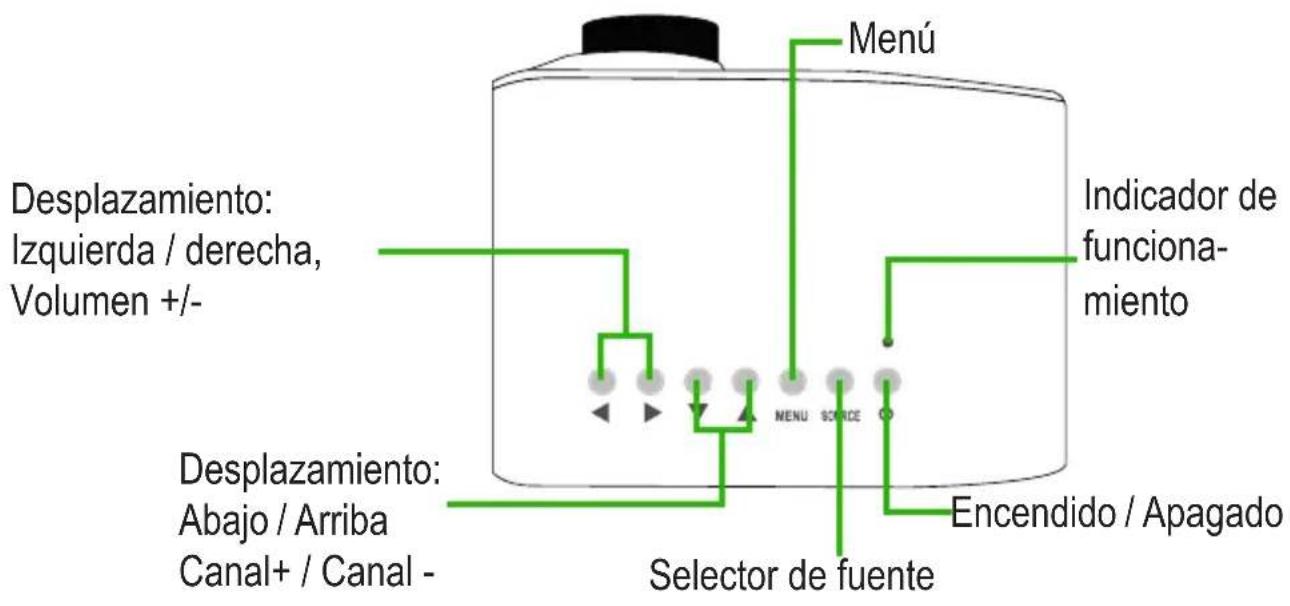
VISTA GENERAL DEL PROYECTOR
Parte superior
natural_image
Simple line drawing of a battery inside a casing (no text or symbols)INSTALACIÓN
natural_image
Line drawing of a cylindrical device emitting beams of light, no text or symbols presentnatural_image
Line drawing of a power cord connected to a cylindrical device (no text or symbols)CONEXIONES
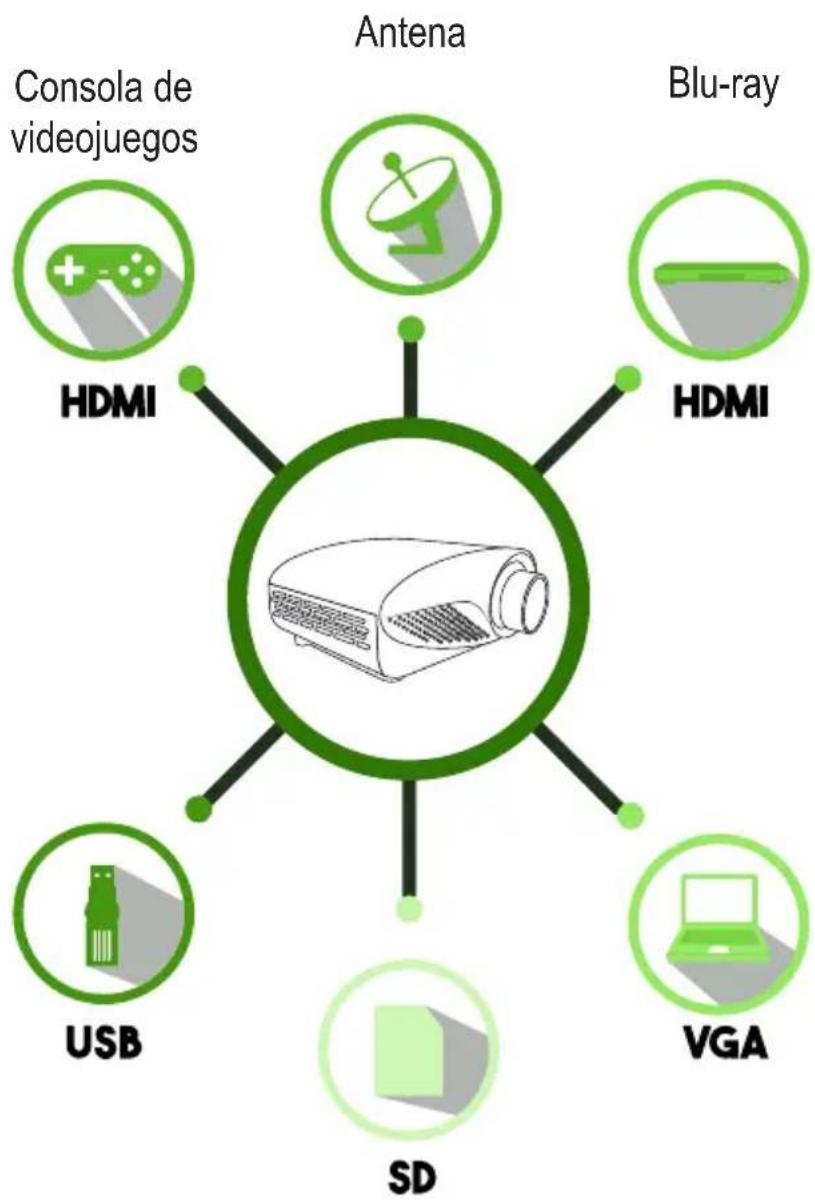
flowchart
graph TD
    A["Consola de videojuegos"] --> B["Antena"]
    C["HDMI"] --> B
    D["Blu-ray"] --> B
    E["USB"] --> B
    F["SD"] --> B
    G["VGA"] --> B
Laptop / PC
natural_image
Blue gradient rectangle with a white gear icon in the center (no text or symbols)
PICTURE - IMAGEN
STEREN PRODUCTO EMPACADO S.A. DE C.V.
natural_image
Illustration of a black projector with a perforated grille and ventilation slots, set against a green abstract background (no text or symbols)Before to use the product, please read carefully this manual to avoid any malfunction.
The info in this manual is shown as reference. Due to updates can exist differences. Consult our website www.steren.com to obtain the current version of this manual.
CAUTIONS

Don't try open the device

Do not place it near of water

Clean it with a soft and dry cloth

Do not clean it with abrasive chemicals

Do not block the lens and the vents
Place it in horizontal position

Place it in ventilated place

Disconnect the project when you not use it
INDEX
CONTENT......20
GENERAL VIEW OF THE PROJECTOR......21
REMOTE CONTROL FUNCTIONS....23
INSTALLATION....24
CONNECTIONS....25
WORKING AND SETTINGS......26
Start....26
Select the input source....26
Multimedia menu....27
TV tuner....28
Focus....29
General settings....29
CONTENT
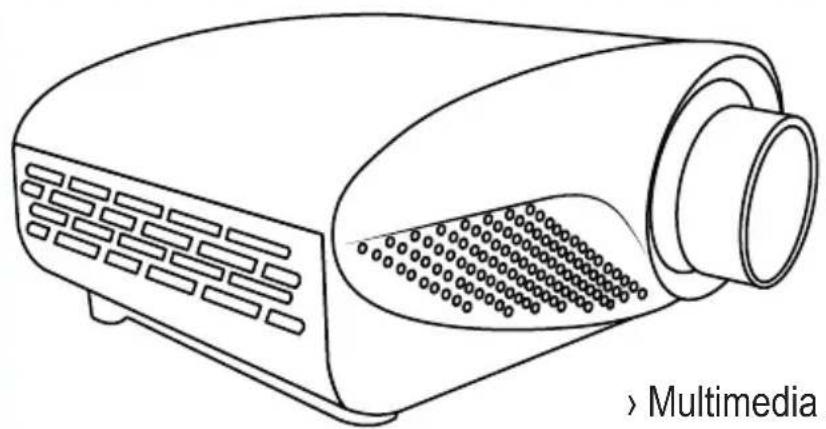
natural_image
Line drawing of a projector with ventilation grilles and a perforated lens, labeled 'Multimedia' (no other text or symbols)natural_image
Illustration of a white remote control with gray keys and a green scroll (no text or symbols)Remote control
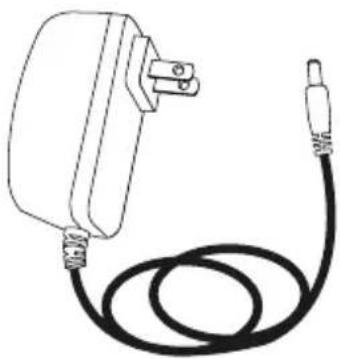
natural_image
Line drawing of a mobile phone charger with cable (no text or symbols)AC converter
natural_image
Illustration of a multi-pin audio jack with yellow, red, and black cables (no text or symbols)RCA audio and video cable
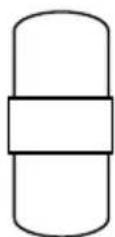
PAL - F adapter
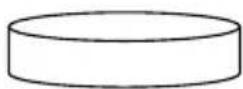
Lens cover
GENERAL VIEW OF THE PROJECTOR
Top side
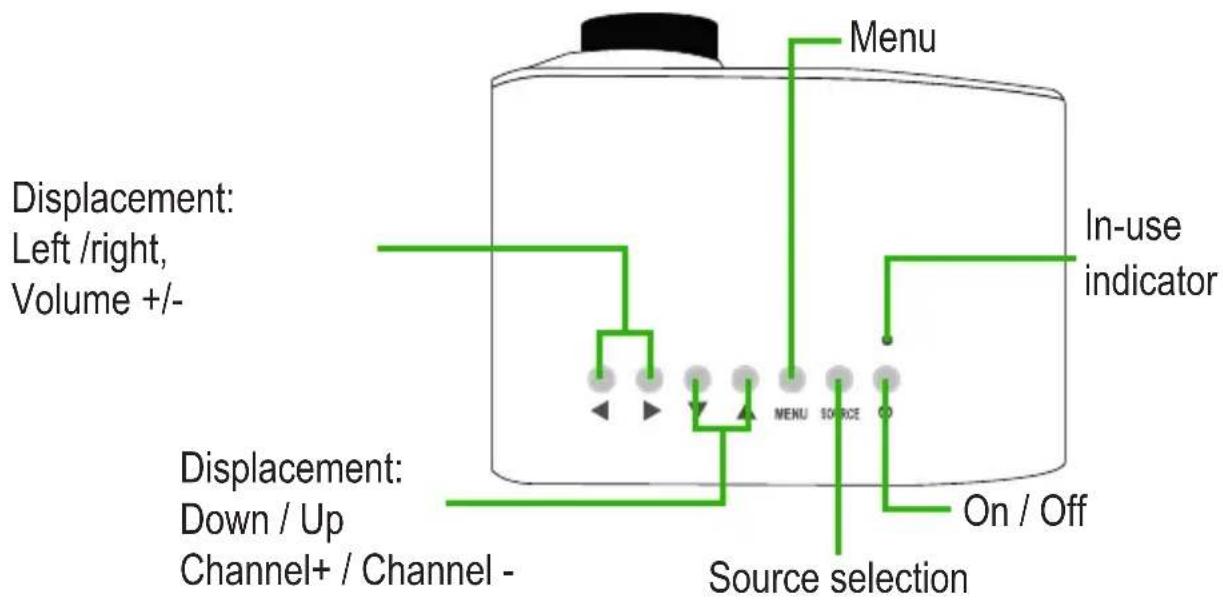
flowchart
graph TD
    A["Displacement: Left/right, Volume +/-"] --> B["In-use indicator"]
    B --> C["Menu"]
    C --> D["Source selection"]
    D --> E["On / Off"]
    D --> F["Down / Up Channel+ / Channel -"]
    F --> G["Displacement: Down / Up Channel+ / Channel -"]
    G --> H["In-use indicator"]
    H --> I["Menu"]
    I --> J["Source selection"]
Front side
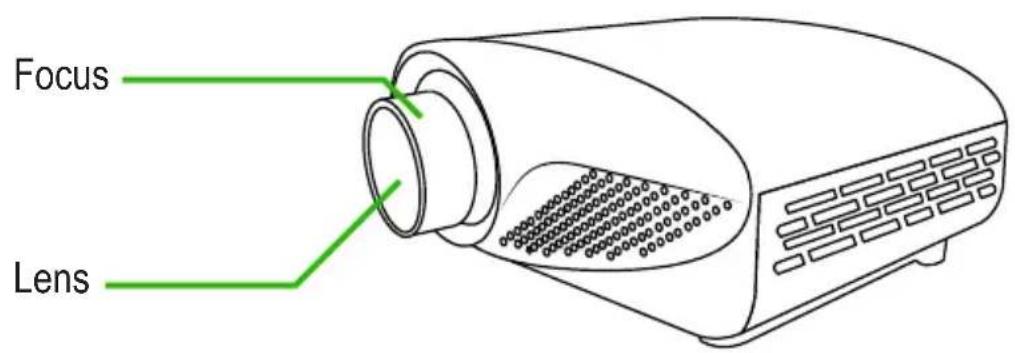
Side part
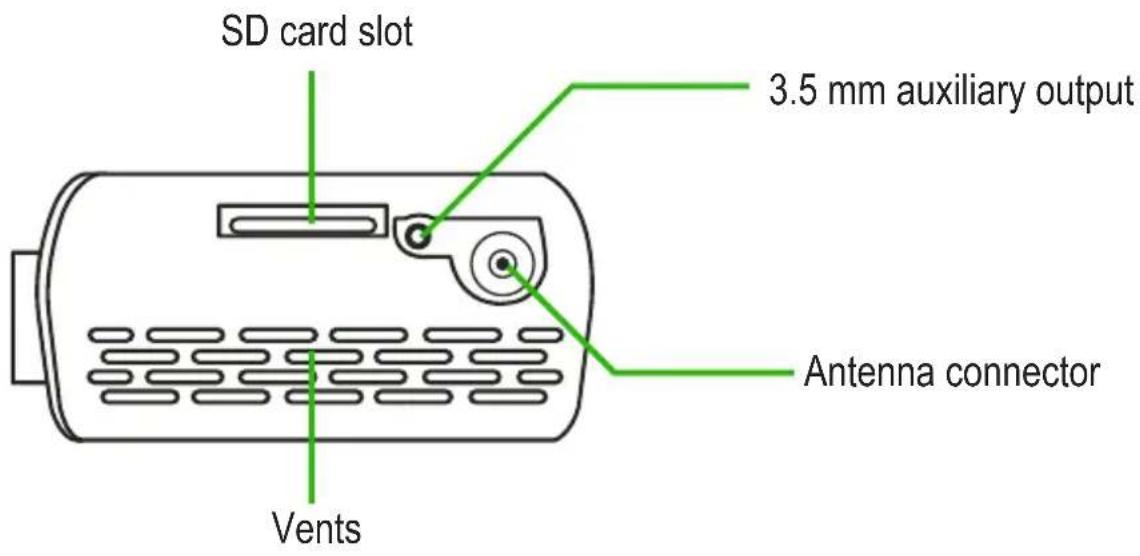
22
Rear part
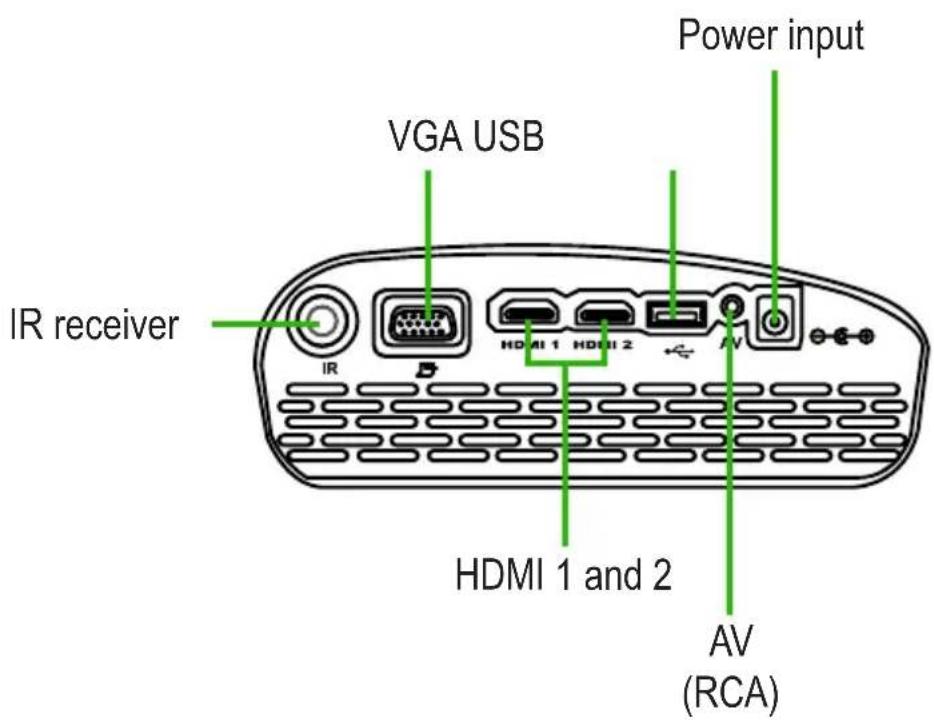
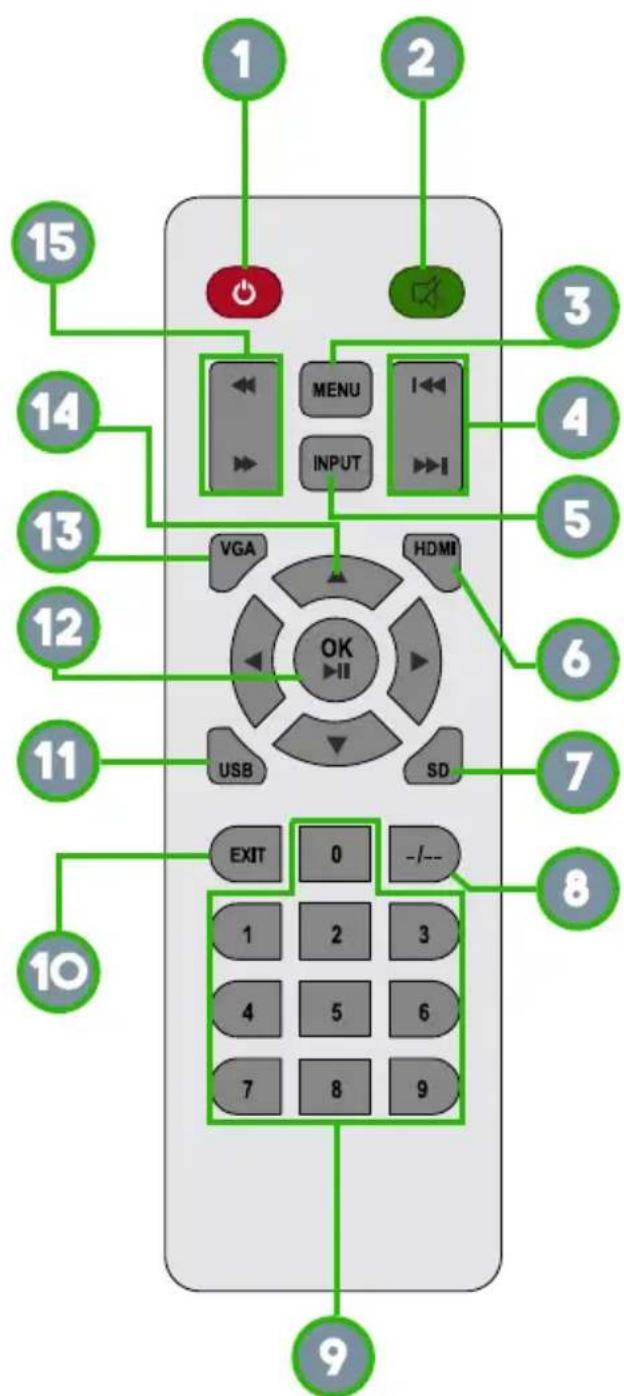
REMOTE CONTROL FUNCTIONS
- On / Off
- Mute
- Menu
- Backward / forward (Only for USB and SD)
- Source selection
- HDMI
- SD
- Space
- Numeric keyboard
- Exit
- USB
- Confirm and Play/Pause
- VGA
- Displacement keys, volume and channel (▲▶▼◀)
- Quick forward / backward
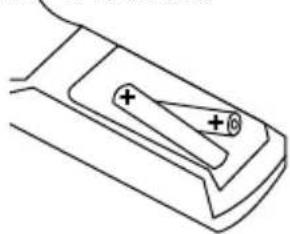
Insert 2 "AAA" batteries into compartment. Ensure that place it with the
correct polarity.
natural_image
Simple line drawing of a device handle with two positive charges and a switch (no text or symbols)INSTALLATION
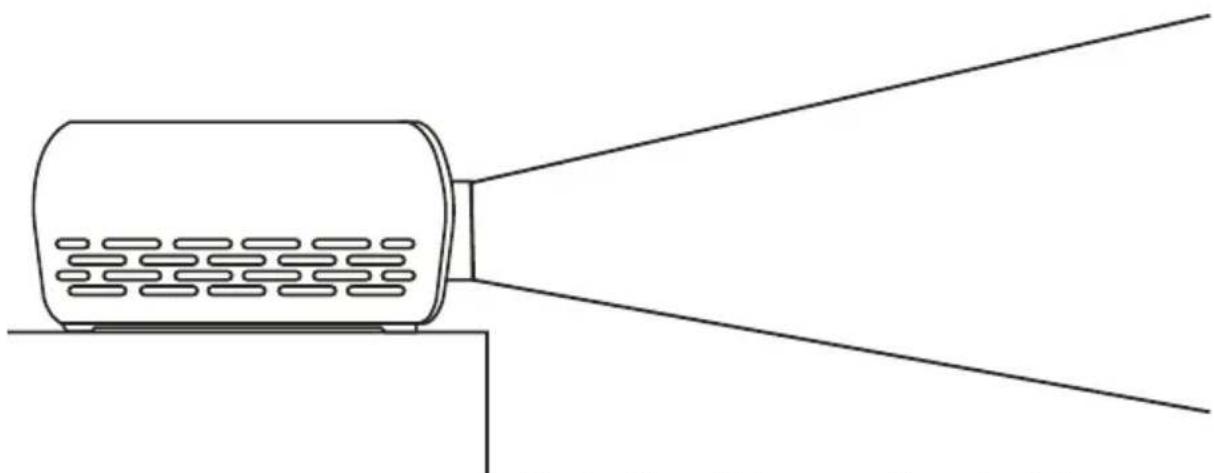
Select a leveled and stable surface to install the projector. Note that the projection area and the necessary connections.
natural_image
Line drawing of a cylindrical device emitting beams of light, no text or symbols presentProjection distance: 70 cm to 4.5 m
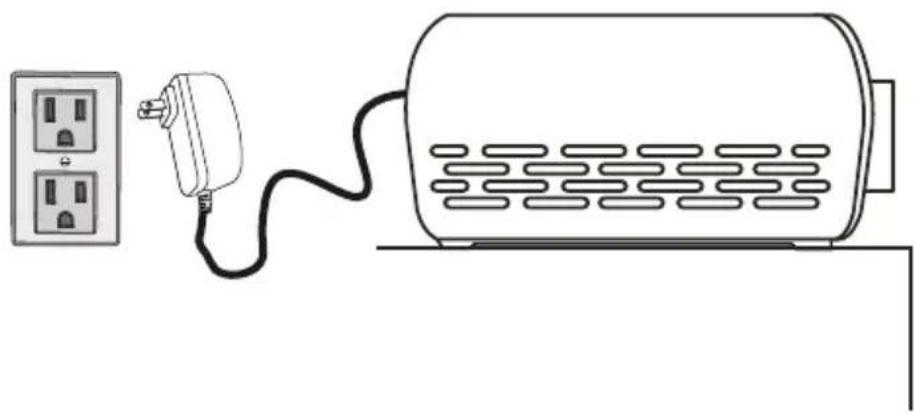
Connect the AC converter
natural_image
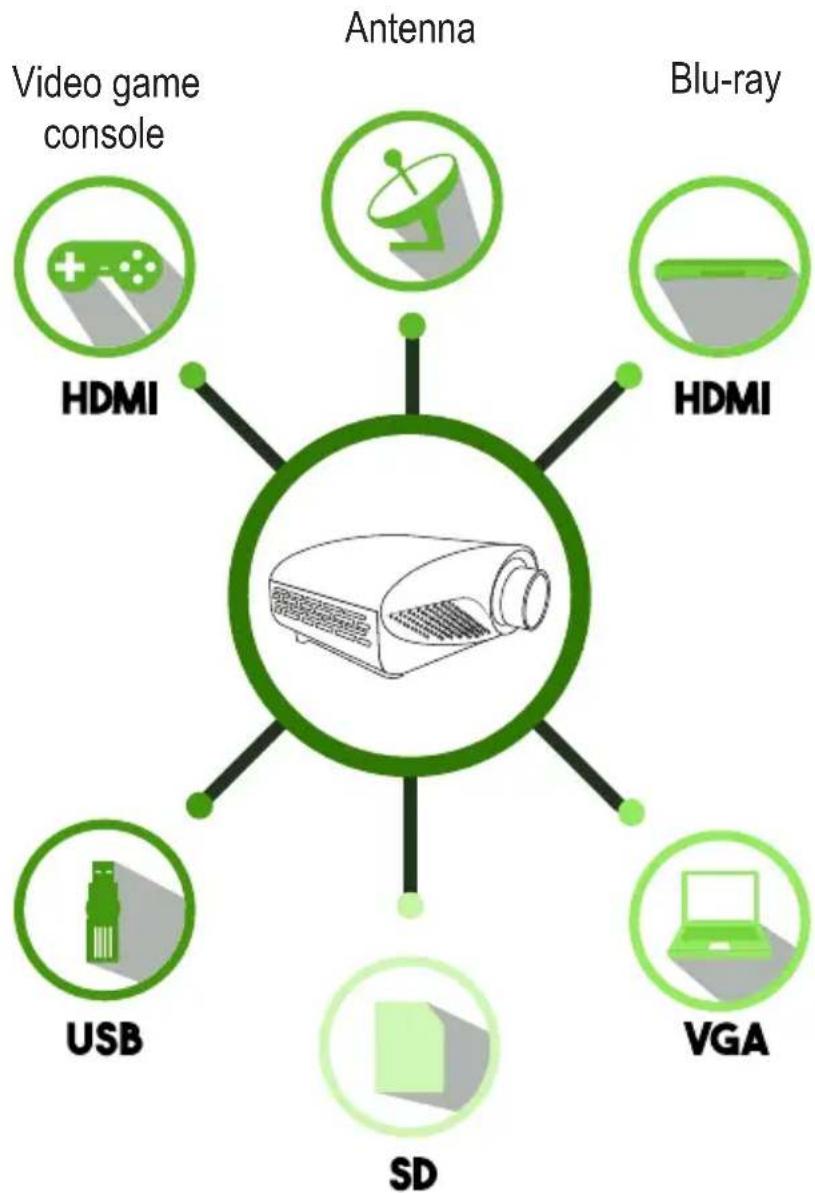
Line drawing of a portable air conditioner unit connected to a power outlet (no text or symbols)CONNECTIONS
flowchart
graph TD
    A["Antenna"] --> B["HDMI"]
    A --> C["Video game console"]
    A --> D["Blu-ray"]
    A --> E["USB"]
    A --> F["SD"]
    A --> G["VGA"]
Laptop / PC
WORKING AND SETTINGS
The show images in this manual are only reference. The interface may change by updates in the system.
Start
Press the On / Off button in the remote control or direct in the projector
Select the input source
Press the INPUT key in the remote control to enter to Input source.
Use the displacement ◀▲▶▼ buttons to select the option that correspond with the device that you have connected to projector. Then, press OK to confirm.
Also you can select the correspond button to select the source directly in the projector. VGA HOME USB SD
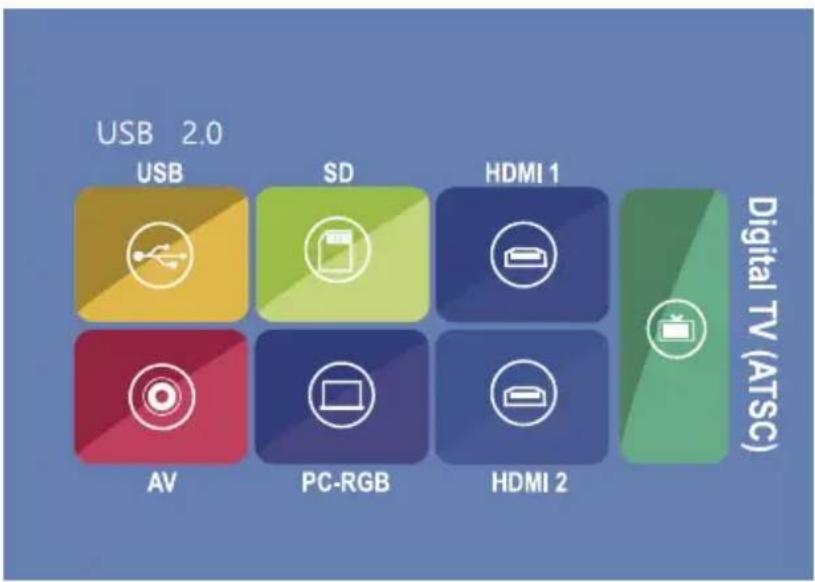
Multimedia Menu
If you connect a SD or USB memory, you can enter to this menu to manage the stored files. Select USB or SD in the input source.
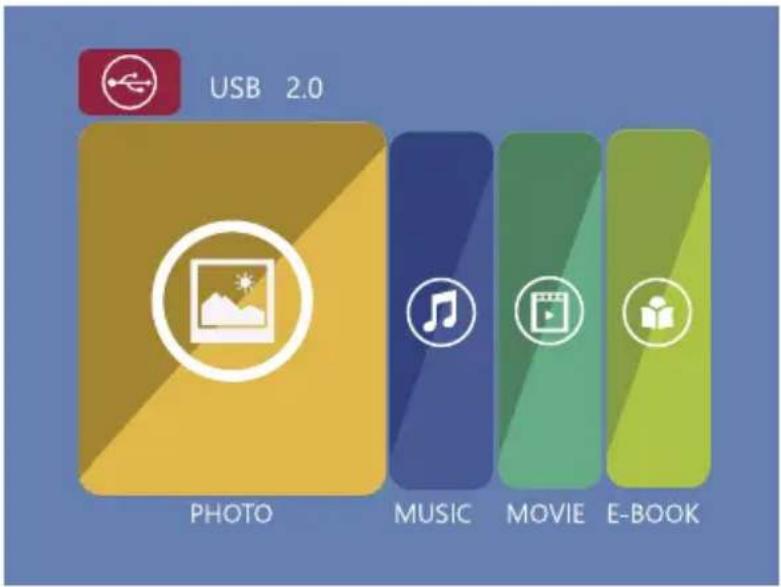
Photo: Images and photos
Music: Audio files
Movie: Video files
E-book: Text files
TV tuner
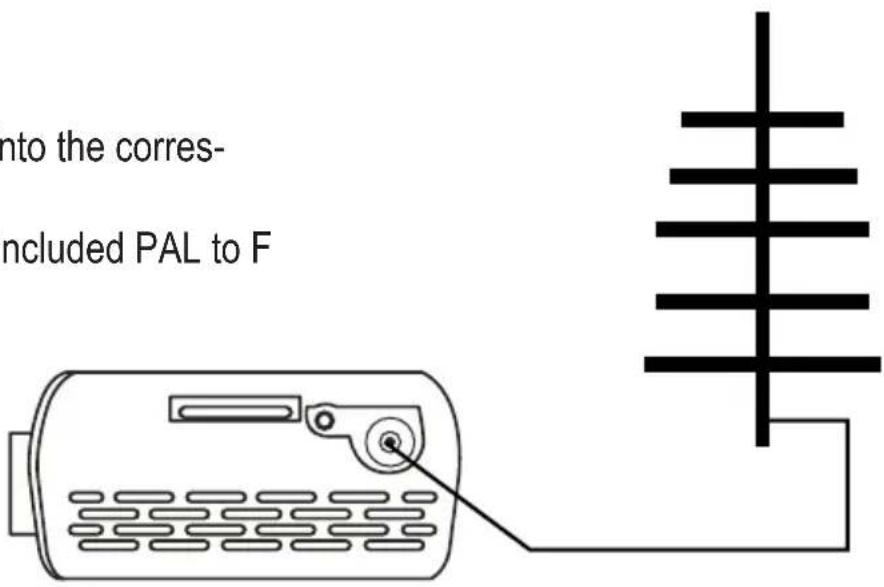
- Connect an antenna into the correspond input.
If is necessary, use the included PAL to F adapter.
- Press the MENU button.
3.Move with the ◀▶ buttons until the submenu Channel.
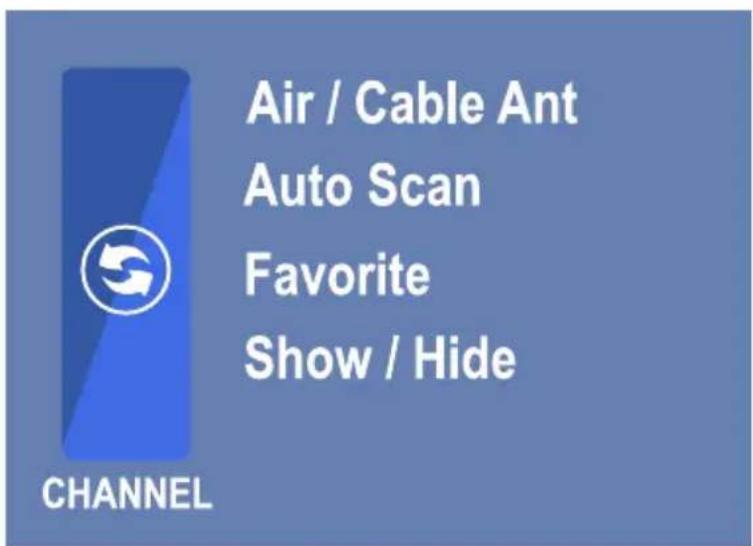
- in Air / Cable press OK (The Air option must be remains selected).
- Select the Auto Scan option. Press OK
- Press ▶ to start the channels scan, and wait until the search is over.
- The found channels will are stored automatically. Press the ▼▲ buttons to change the channel.
If the channels search is unsuccessful, move the antenna and repeat the same process.
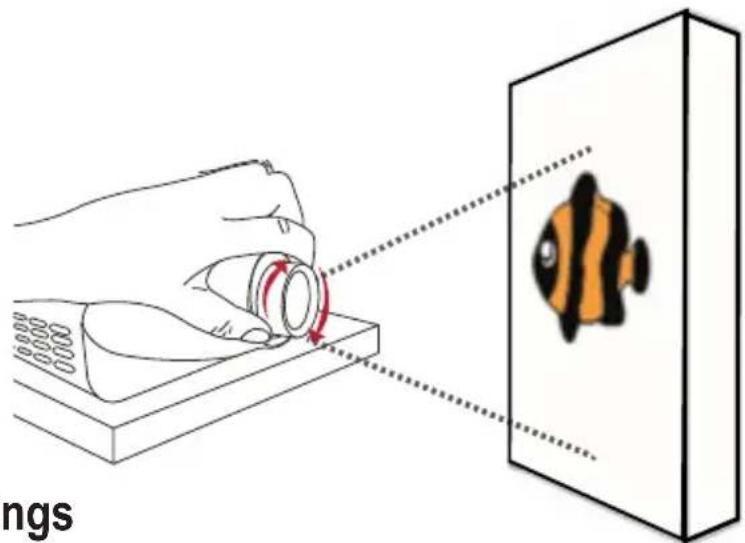
Focus
Turn the lens until the image will be clear.
natural_image
Illustration of a hand holding a small object with red rotation arrow, projecting onto a wall-mounted device (no text or symbols)General settings
Press the MENU button to enter to settings options of the projector.
Use the ◀▶ buttons to move through the submenus: picture, sound, options and channel.

natural_image
Blue gradient background with a white gear icon in the center (no text or symbols)
PICTURE
Mode / Color / Aspect / 3DNR / Background light / DLC

SOUND
Equalizer / Sound / AVC

OPTIONS
Language / Transparency / Titles off / Factory reset/ Rotation / Settings assistant / Software update

CHANNEL
Antenna or cable / Autoscan / Favorites / Show or hide
Inside of each submenu press ▲ ▼ to select an option, and press OK to enter
SPECIFICATIONS
Input: 12 ~V - 2 ~A
Contrast relation: 500:1
Minimum supported resolution: 480 X 320 P
Maximum supported resolution: 4 k
Projection distance: 70 cm to 4.5 m
Power converter
Input: 100 - 240 V \~ 50 - 60 Hz 600 mA
Output: 12 V --- 2 A
Remote control
Input: 3 V --- (2 x AAA)
Specifications may change without notice

STEREN
Product: Multimedia mini projector with tv tuner
Number part: PRO-110
Brand: Steren
This Steren product is warranted under normal usage against defects in workmanship and materials to the original purchaser for one year from the date of purchase.
CONDITIONS
- This warranty card with all the required information, invoice or purchase ticket, product box or package, and product, must be presented when warranty service is required.
- If the product is in the warranty time, the company will repair it free of charge.
- The repairing time will not exceed 30 natural days, from the day the claim was received.
- Steren sell parts, components, consumables and accessories to customer, as well as warranty service, at any of the addresses mentioned later.
THIS WARRANTY IS VOID IN THE NEXT CASES:
If the product has been damaged by an accident, acts of God, mishandling, leaky batteries, failure to follow enclosed instructions, improper repair by unauthorized personnel, improper safe keeping, among others.
a) The consumer can also claim the warranty service in the purchase establishment.
b) If you lose the warranty card, we can reissue it, if you show the invoice or purchase ticket.
RETAILER INFORMATION
Name of the retailer
Address
Product
Brand
Serial number
Date of delivery
In case your product fails or have questions, please contact your nearest dealer. If you
are in Mexico, please call to our Call Center.
01 800 500 9000

natural_image
Abstract green geometric logo with white horizontal stripes (no text or symbols)STEREN
Customer Service Center
01 800 500 9000
- VISTA GENERAL DEL PROYECTOR
- INSTALACIÓN
- CONEXIONES
- PICTURE - IMAGEN
- Before to use the product, please read carefully this manual to avoid any malfunction.
- CAUTIONS
- INDEX
- CONTENT
- GENERAL VIEW OF THE PROJECTOR
- Top side
- Front side
- Side part
- Rear part
- REMOTE CONTROL FUNCTIONS
- INSTALLATION
- CONNECTIONS
- WORKING AND SETTINGS
- Start
- Select the input source
- Multimedia Menu
- TV tuner
- Focus
- General settings
- PICTURE
- SOUND
- OPTIONS
- CHANNEL
- SPECIFICATIONS
- STEREN
- CONDITIONS
- THIS WARRANTY IS VOID IN THE NEXT CASES:
- RETAILER INFORMATION
Brand : Steren
Model : PRO-110
Category : Video projector