Reference R10SUB - Subwoofer SONANCE - Free user manual and instructions
Find the device manual for free Reference R10SUB SONANCE in PDF.


| Product Type | In-wall Subwoofer |
| Brand | Sonance |
| Model | Reference R10SUB |
| Driver Size | 10 inches |
| Enclosure Compatibility | Requires Sonance R10SUB ENC (sold separately) |
| Power Handling (RMS) | 200 W |
| Power Handling (Peak) | 400 W |
| Frequency Response | 30 Hz - 150 Hz ±3 dB |
| Impedance | 8 ohms |
| Sensitivity | 90 dB (2.83V/1m) |
| Magnet Type | Neodymium |
| Grille Attachment | Magnetic (powerful Neodymium magnets) |
| Grille Finish | Paintable (install after painting) |
| Mounting Type | In-wall (requires frame and enclosure) |
| Included Accessories | Driver, grille, mounting frame, 12x M3.5x25mm screws (single drywall), 12x M3.5x45mm screws (double drywall), 12x M5x18mm machine screws |
| Speaker Wire Connection | Internal, red (positive) and black (negative) |
| Number of Mounting Screws | 12 for driver, 12 for frame |
| Polarity Requirement | Critical (all subwoofers must have same polarity) |
| Installation Note | Install driver after drywall and paint; tighten screws evenly to minimize air leakage |
| Cleaning | Wipe with dry cloth; do not use liquids or abrasive cleaners |
| Repairability | Driver can be replaced; grille and frame are separate components |
Frequently Asked Questions - Reference R10SUB SONANCE
User questions about Reference R10SUB SONANCE
0 question about this device. Answer the ones you know or ask your own.
Ask a new question about this device
Download the instructions for your Subwoofer in PDF format for free! Find your manual Reference R10SUB - SONANCE and take your electronic device back in hand. On this page are published all the documents necessary for the use of your device. Reference R10SUB by SONANCE.
USER MANUAL Reference R10SUB SONANCE
(1) Quickstart Guide
(1) Reference NC driver (R10SUB or R12SUB)
(1) Grille mounting frame
(1) Grille
(12) M3.5 * 25mm Flat Head Phillips Wood Screws for mounting the frame
(12) M3.5 * 45mm Flat Head Phillips Wood Screws for mounting the frame
(12) M5 * 18mm Phillips Machine Screws for mounting the driver
NOTE: R10SUB AND R12SUB REQUIRE USE OF SONANCE R10SUB ENC AND R12SUB ENC, RESPECTIVELY.
Installing the Driver after Drywall and Paint
- Remove the four screws that attach the cover plate to the enclosure (see Figure 1).
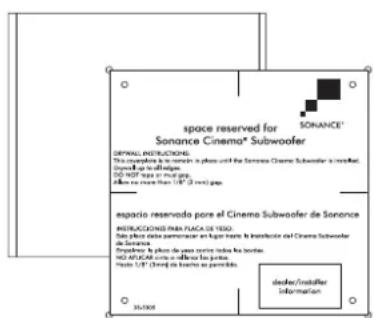
Figure 1: Removing the Cover Plate
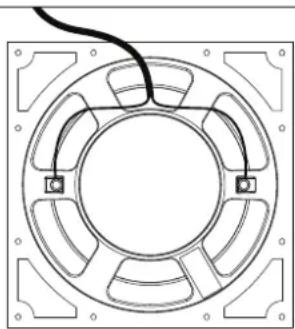
- Connect the internal speaker wire to the woofer driver. Connect the RED wire to the positive terminal and the BLACK wire to the negative terminal. If using multiple subwoofers it is critical that the polarity of all the woofers is the same (see Figure 2).
natural_image
Technical line drawing of a circular mechanical component with mounting flanges and a central hub (no text or symbols)Figure 2: Connecting the Wire
-
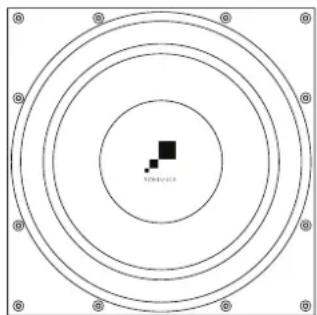
Attach the woofer driver to the enclosure using the twelve Phillips head screws.
-
Tighten all twelve screws evenly to minimize any air leakage that could occur (see Figure 3).
natural_image
Concentric circles diagram with a small black square at center, surrounded by eight corner dots (no text or symbols)Figure 3: Tighten All 12 Screws
Installing the Grille and Frame
-
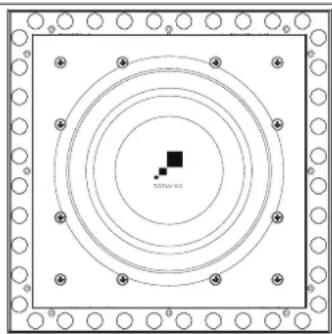
Attach the grille mounting frame to the enclosure using the twelve Phillips head screws (see Figure 4).
NOTE: SHORTER SCREWS ARE FOR SINGLE DRYWALL, LONGER SCREWS ARE FOR DOUBLE DRYWALL -
Tighten all the screws evenly so the grille mounting frame is flush with the wall at all points around the perimeter.
natural_image
Pure geometric diagram with concentric circles and a central square, no text or symbols presentFigure 4: Attaching the Grille Mounting Frame
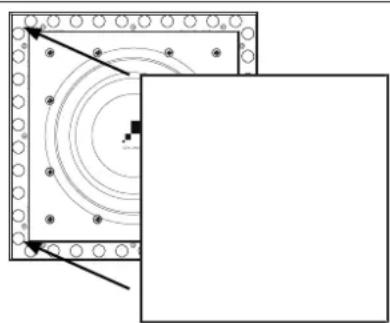
- Install the grille on to the grille mounting frame. The powerful Neodymium magnets will attract the grille very quickly. Care should be taken to align the grille correctly before placing it close to the grille mounting frame (see Figure 5).
natural_image
Pure geometric diagram with concentric circles and arrows, no text or symbols presentFigure 5: Grille Installation
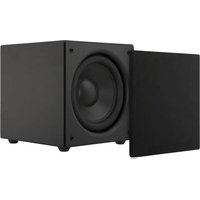
Brand : SONANCE
Model : Reference R10SUB
Category : Subwoofer