
Pro Custom 11 DLC-8S - Food processor CUISINART - Free user manual and instructions
Find the device manual for free Pro Custom 11 DLC-8S CUISINART in PDF.


| Product Type | Food Processor |
| Brand | Cuisinart |
| Model | Pro Custom 11 DLC-8S |
| Capacity | 11 cups (2.6 liters) |
| Motor Power | 720 watts |
| Dimensions (L x W x H) | Approx. 10.5 x 9.5 x 17.5 inches |
| Weight | Approx. 12.5 lbs (5.7 kg) |
| Power Supply | 120 V, 60 Hz, AC only |
| Main Functions | Chopping, slicing, shredding, mixing, dough kneading, pureeing |
| Included Accessories | Stainless steel chopping blade, slicing disc, shredding disc, dough blade, spatula |
| Control Type | On/Off pulse switch with off position |
| Bowl Material | BPA-free plastic |
| Blade Material | Stainless steel |
| Safety Features | Interlock system: bowl must be locked and cover secured before operation |
| Dishwasher Safe Parts | Bowl, cover, pusher, blades (top rack) |
| Non-Slip Feet | Yes, for stability |
| Cord Storage | Built-in cord wrap |
| Warranty | Limited 3-year warranty |
| Country of Origin | China |
Frequently Asked Questions - Pro Custom 11 DLC-8S CUISINART
User questions about Pro Custom 11 DLC-8S CUISINART
0 question about this device. Answer the ones you know or ask your own.
Ask a new question about this device
Download the instructions for your Food processor in PDF format for free! Find your manual Pro Custom 11 DLC-8S - CUISINART and take your electronic device back in hand. On this page are published all the documents necessary for the use of your device. Pro Custom 11 DLC-8S by CUISINART.
USER MANUAL Pro Custom 11 DLC-8S CUISINART
INSTRUCTION AND RECIPE BOOKLET
natural_image
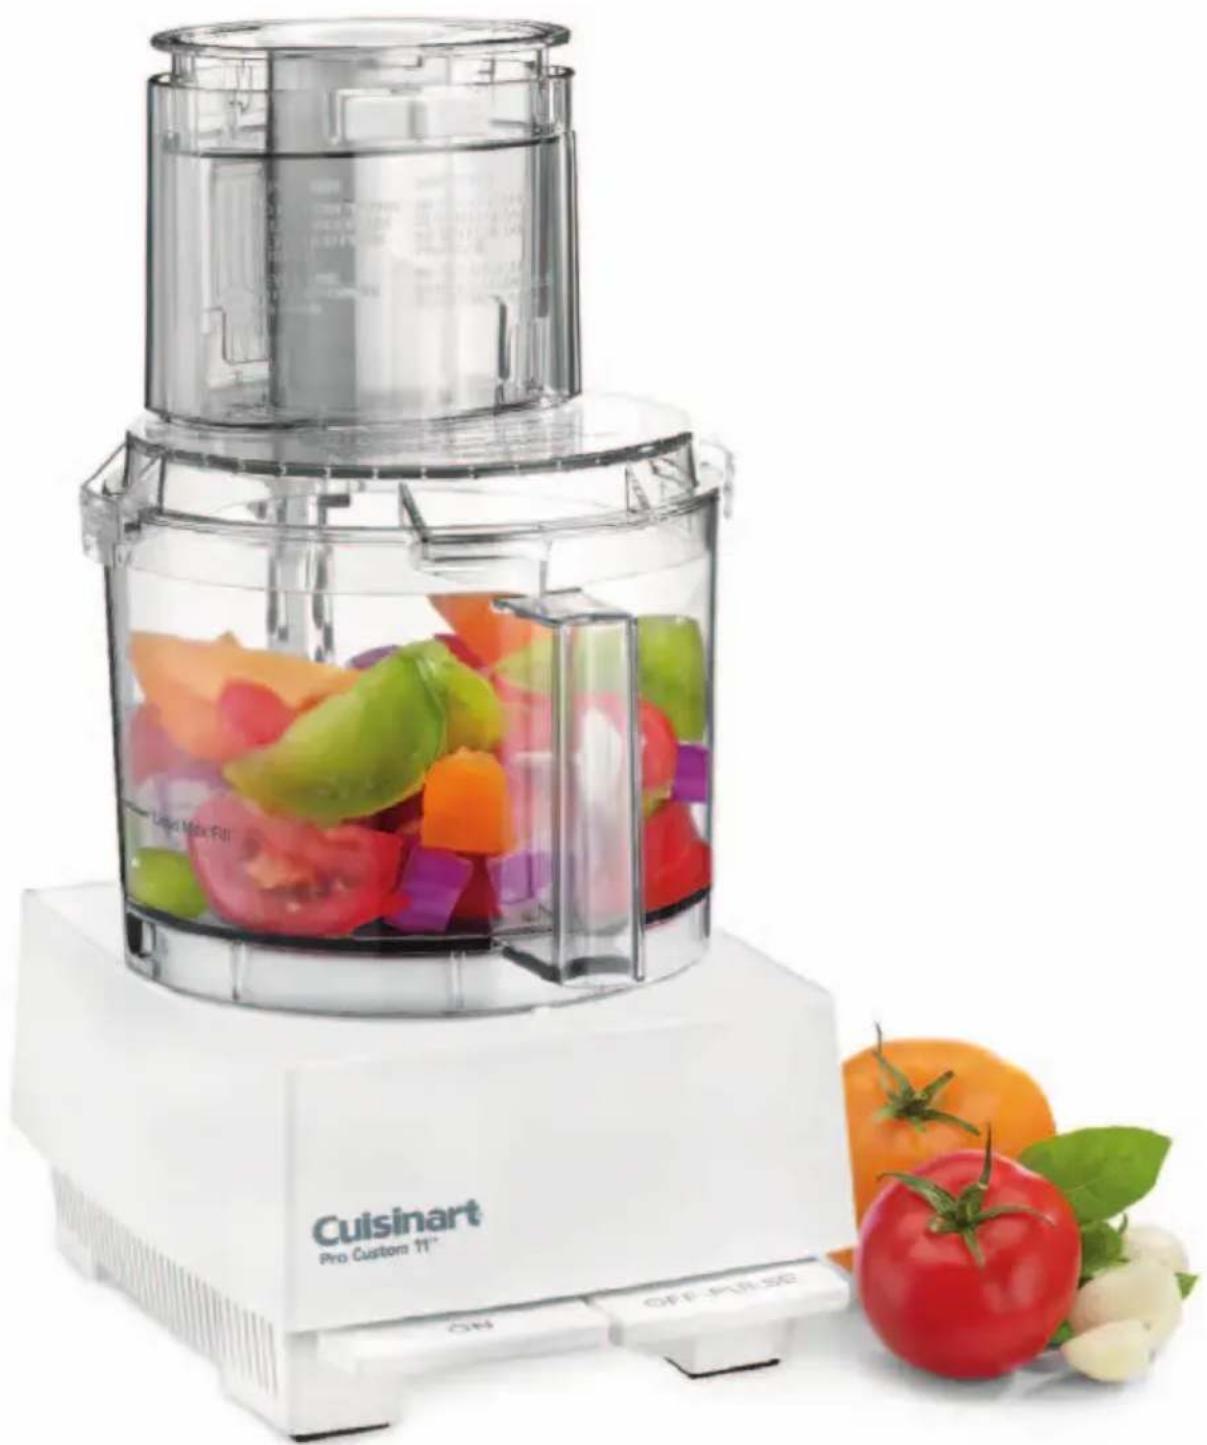
Cuisinart Pro Custom 11® kitchen blender with colorful fruit being mixed, accompanied by fresh tomatoes and garlic (no text or symbols on the main object)Pro Custom 11™ Food Processor
DLC-8S Series
IMPORTANT UNPACKING INSTRUCTIONS
This package contains a Cuisinart® Food Processor, and these standard parts for it: metal chopping blade, fl at baking cover, 2 slicing discs, shredding disc, detachable stem for discs and spatula, and instruction/recipe book.
CAUTION: THE CUTTING TOOLS HAVE VERY SHARP EDGES.
To avoid injury when unpacking the parts, please follow these instructions:
- Place the box on a low table or on the floor next to the kitchen counter or table where you plan to keep the food processor. Be sure the box is right-side up.
- Remove the cardboard panel and the instruction material.
- Remove the round cardboard insert and the thin slicing disc which is in a plastic bag inside a cardboard insert. THE BLADES ARE SHARP.
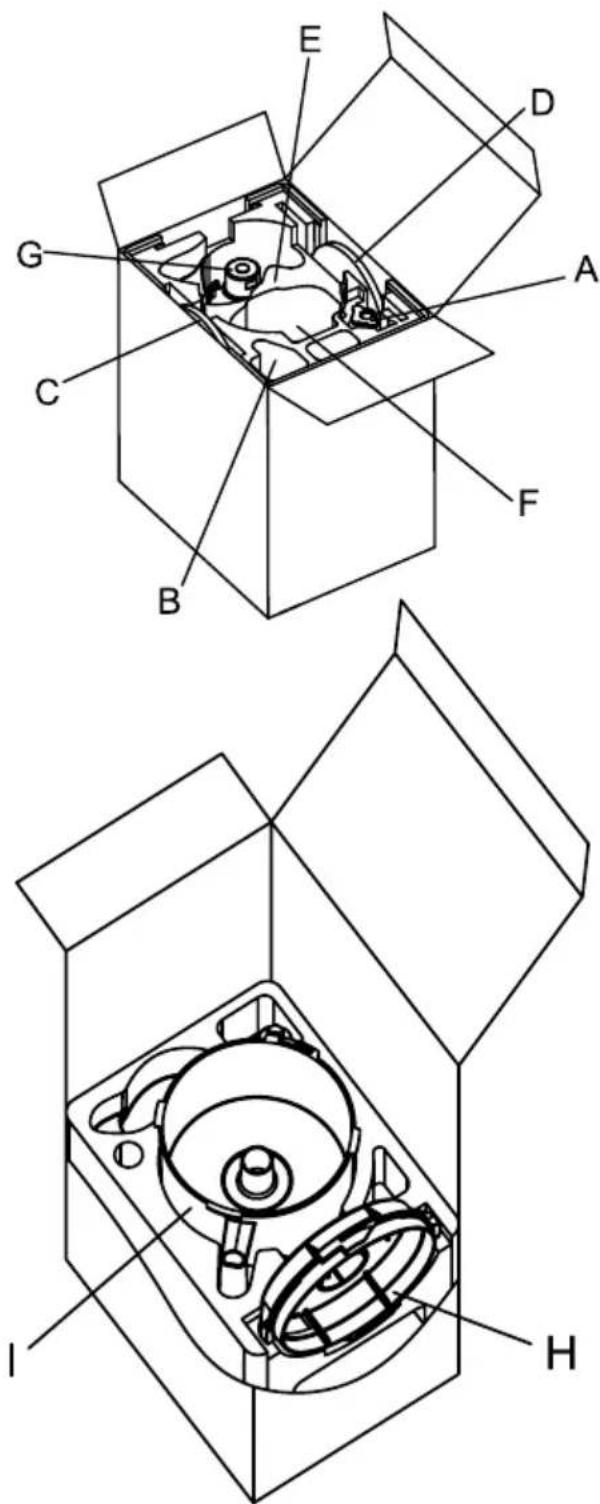
- You will see a rectangular upper plastic foam block that holds the processor parts, each fitted into a cavity in the foam. The detachable stem (A) and cup (B) for the fl at baking cover are in cavities at one short side of the foam block. Remove them first.
The slicing disc (C) is on the long side and shredding disc (D) on the other. Slide them out of their grooves WITH GREAT CARE; THE BLADES ARE SHARP. The work bowl cover (E) with pusher assembly (F) fitted on it is in the middle of foam block. Grasp an edge of the work bowl cover and lift them straight up. (The sleeve on the pusher may slide down as you lift them out.) Now only the metal chopping blade (G) remains in the foam block. CAREFULLY REMOVE THE METAL BLADE BY GRASPING THE CENTER WHITE HUB AND LIFT IT STRAIGHT UP. NEVER TOUCH THE BLADES, WHICH ARE RAZOR SHARP. - Lift out the upper plastic foam block.
- You will see a rectangular middle plastic foam block that holds fl at baking cover (H) and work bowl (I). Lift them straight up, one by one, from the foam block.
- Lift out the middle plastic foam block.
- The machine base is at the bottom of the box. Remove the base by grasping the base hous-
ing with both hands and lifting it straight up.
-
Place the processor on a counter or table and read the instructions thoroughly before using the machine.
-
Save the shipping cartons and plastic foam blocks. You may want to use them in shipping the processor at a later date.
We recommend that you visit our website, www.cuisinart.com, for a fast, effi cient way to complete your online registration.
IMPORTANT SAFEGUARDS
Always follow these safety precautions when using this appliance.
Getting Ready
- Read all instructions.
- Blades are sharp. Handle them carefully.
- Unplug from outlet when not in use, before putting on or taking off parts and before cleaning. To unplug, grasp plug and pull from electrical outlet. Never pull cord.
- Do not use outdoors.
- Do not let cord hang over edge of table or counter, or touch hot surfaces.
- Do not operate any appliance with a damaged cord or plug, or after appliance has been dropped or damaged in any way. Return appliance to the nearest authorized service facility for examination, repair or electrical or mechanical adjustment.
Operation
- Do not use pusher assembly if sleeve becomes detached from pusher.
- Keep hands as well as spatulas and other utensils away from moving blades or discs while processing food, to prevent possibility of severe personal injury or damage to food processor. A plastic scraper may be used, but must be used only when food processor motor is stopped.
-
Avoid contact with moving parts. Never push food down by hand when slicing or shredding. Always use pusher.
-
Make sure motor has completely stopped before removing cover. (If machine does not stop within 4 seconds when you turn cover, call 1-800-726-0190 for assistance. Do not use machine.)
-
Never store any blade or disc on motor shaft. To reduce the risk of injury, no blade or disc should be placed on the shaft except when the bowl is properly locked in place and the processor is in use. Store blades and discs, as you would sharp knives, out of reach of children.
-
Be sure cover is securely locked in place before operating food processor.
-
Do not try to override cover interlock mechanism.
Cleaning
To protect against risk of electrical shock, do not put base in water or other liquids.
General
- Close supervision is necessary when any appliance is used by or near children or individuals with certain disabilities.
- Do not operate this, or any other motor-driven appliance, while under the influence of alcohol or other substances that affect your reaction time or perception.
- The food processor is UL listed for household use. Use it only for food preparation as described in the accompanying recipe and instruction book.
- The use of attachments not recommended or sold by Cuisinart may cause fire, electrical shock, personal injury or damage to your food processor.
- To avoid possible malfunction of work bowl switch, never store processor with pusher assembly in locked position.
- Maximum rating of 5.2 amperes is based on attachment that draws greatest current. Other recommended attachments may draw significantly less current.
- Do not operate your appliance in an appliance garage or under a wall cabinet. When storing in an appliance garage, always unplug the unit from the electrical outlet. Not doing so could create a risk of fire, especially if the appliance touches the walls of the garage or the door touches the unit as it closes.
SAVE THESE INSTRUCTIONS
This appliance has a polarized plug (one blade is wider than the other). As a safety feature, this plug will fit in a polarized outlet only one way. If the plug does not fit fully in the outlet, reverse the plug. If it still does not fit, contact a qualified electrician. Do not attempt to defeat this safety feature.
Compact Cover
- Do not use the Compact Cover when mixing hot, thin liquids such as soups or sauces. If you do, it is possible that hot liquid may splash and injure you.
- DO NOT use any slicing, shredding, julienne, French fry-cut or fine grater discs with the Compact Cover. Doing so may expose the user to injury.
- Although the Cuisinart Compact Cover may seem compatible with machines from other manufacturers, using the cover with other machines may be dangerous and may expose the user to injury. We specifically caution you not to use the Compact Cover with other brand machines.
Contents
Important Unpacking Instructions ....2
Important Safeguards ....3
Parts ....5
Processor Guidelines ....6
Compact Cover......8
Techniques for Chopping and Puréeing with Metal Blade ....8
Techniques for Kneading Yeast Dough ....10
Troubleshooting Yeast Dough .....11
Problems and Solutions with Typical Sweet Doughs....12
Preparing Food for Slicing And Shredding ....12
Slicing and Shredding with the Slicing and Shredding Discs ....13
Removing Sliced or Shredded Foods.....13
Slicing and Shredding Techniques .....13
Slicing Meat and Poultry 14
Slicing and Shredding Cheese ....14
If You Have a Problem ....14
Cleaning, Storing and Maintenance .....15
For Your Safety 16
Some Technical Data ....16
Bowl Capacity ....18
Recipes....18
Warranty....33
Parts
Your Cuisinart® Pro Custom 11™ Food Processor is a compact and versatile appliance that chops, minces, shreds, grates, slices, blends, purées, emulsifies, mixes and kneads – all with great efficiency and speed. The large feed tube allows you to slice large fruits and vegetables like potatoes, tomatoes and apples.
The machine includes:
-
Motor base with a vertically projecting shaft and two large control levers
-
Work bowl
- Cover with a large feed tube
- Pusher assembly that slides over the feed tube
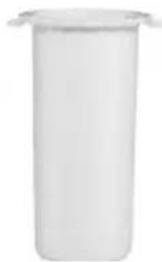
- Compact cover with cap for chopping ingredients for baking
- Sharp metal chopping blade
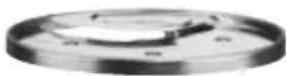
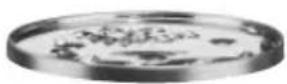
- Two serrated slicing discs: 1 medium and 1 thin
- Shredding disc
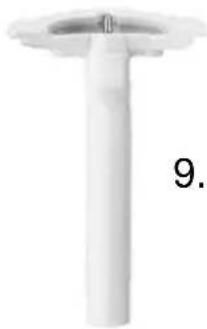
- Detachable stem that fits all discs
- Plastic spatula
- BPA free (not shown). All materials that come in contact with food or liquid are BPA free
6.
7.
7.
8.
4.
natural_image
White cylindrical object with a small protrusion on top (no visible text or symbols)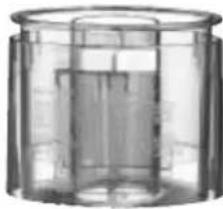
natural_image
Transparent cylindrical container with internal structure (no visible text or symbols)3.
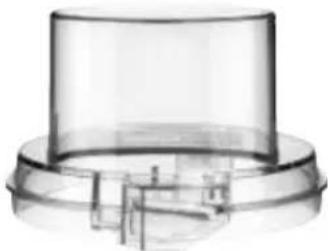
natural_image
Pure diagram of a transparent cylindrical component with internal structure, no text or symbols present5.
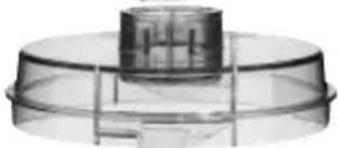
natural_image
Transparent cylindrical object with a central cylindrical component, possibly a filter or cover (no text or symbols visible)2.
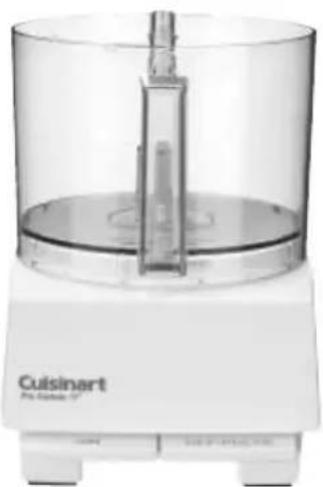
natural_image
Exterior view of a Cuisinart food appliance (no signage or text visible on the device itself)1.
natural_image
White cylindrical object with a circular top and a small protrusion, labeled '9.' (no text or symbols on the object itself)9.

natural_image
White plastic cleaver with a curved blade and handle (no text or symbols visible)10.
PROCESSOR GUIDELINES
The metal blade chops raw and cooked fruits, vegetables, meat, fish and cheese to the exact consistency you want – from coarse to fine, even to a purée. You control the texture. It chops nuts, makes nut butters, mayonnaise and sauces, and mixes tender, flaky pastry. The metal blade also mixes cakes, frosting, cookies, quick breads, muffins and biscuits, and kneads yeast dough.
The standard slicing disc makes beautiful whole slices. It slices whole fruits and vegetables, cooked meat, semi-frozen raw meat and thin loaves of bread.
The thin slicing disc is perfect for slicing cabbage, onions, radishes, mushrooms, celery, potatoes and cucumbers.
The medium shredding disc processes most firm and hard cheese into long, attractive shreds. It also shreds vegetables like potatoes, carrots and zucchini, and processes nuts and chocolate to a grated texture.
The detachable stem fits all discs, making storage easy in limited space.
The pusher assembly has 3 parts.
- The small removable white pusher fits into the small feed tube. This tube is for narrow food like carrots, for adding liquid, and for continuous feeding of small, hard food like garlic.
- The large pusher is permanently attached to the sleeve, but moves freely within it – except when the slide lock on the sleeve is locked in place over the large feed tube.
- The bottom sleeve has two descending tabs. One locks the sleeve to the work bowl (white lock); the other pushes down an activating rod at the back of the bowl, permitting the motor to start.
Try chopping some practice foods before you process food to eat. A zucchini or carrot is a good choice. First cut into 1-inch pieces.
Insert the metal blade and put the pieces in the work bowl. Put on the cover; press the pusher assembly down to lock it into place. Press and release the OFF/PULSE lever two or three times and see what happens. Each time the blade stops, let the pieces drop to the bottom of the bowl before you pulse again. That puts them in the path of the blade each time the motor starts.
Using the pulse/chopping technique, you can get an even chop without danger of over-processing. Check the texture frequently by looking through the cover of the work bowl. If you want a finer chop, press and release the OFF/PULSE lever until you achieve the desired texture. Onions and other food with a high water content will quickly end up as a purée unless examined through the work bowl after each pulse to make sure they are not over-processed.
Try chopping other food, like meat for hamburger or sausage. Then make mayonnaise, pastry or bread, as described in the recipes in this book. To obtain consistent results:
▶ Be sure all the pieces you add to the bowl are about the same size.
▶ Be sure the amount you process is no larger than recommended. (See page 18.)
Before you do anything, wait for the blade to stop spinning.
Once it does, remove the cover first. You can remove the cover and pusher assembly in one operation. Hold the pusher assembly with your fingers away from the descending tabs and turn it clockwise. Lift it off, and the cover will come with it.
Never try to remove the cover and the work bowl together; this may damage the work bowl.
Always remove the bowl from the base of the machine before removing the blade, as the blade creates a seal to prevent food from leaking. Turn the bowl clockwise to unlock it from the base, and lift it straight up to remove.
To prevent the blade from falling out of the work bowl onto your hand, use one of the three methods described. Be sure your hands are dry. (1) Remove the metal blade before tilting the bowl, using a spatula to scrape off any food. Or (2) insert your finger through the hole in the bottom of the work bowl, gripping the blade from the bottom, and grip the outside of the work bowl with your thumb. Or (3) hold the blade in place with your finger or a spatula while pouring out processed food.
To chop raw fruits and vegetables:
Cut the food into 1-inch pieces. You get a more even chop when all pieces are about the same size. Put no more than the recommended amount of food into the work bowl. (See page 18.) Lock
the cover in place. Press the OFF/PULSE lever at the rate of 1 second on, 1 second off until the food is coarsely chopped. Then hold down the OFF/PULSE lever, letting the machine run continuously until the food is chopped. Check frequently to avoid over-processing. Use the spatula to scrape down any pieces that stick to the sides.
To purée fruit and cooked vegetables:
Cut the food into 1-inch pieces. You get a smoother purée faster when all pieces are about equal in size. Put no more than the recommended amount of food in the work bowl. (See page 18.) Lock the cover in place. Pulse to chop coarsely, then press the ON lever and process continuously until the food is puréed. (NOTE: Cooked potatoes are an exception to this procedure. They develop a gluey texture when processed with the metal blade. See the recipe for mashed potatoes at the end of this book.)
When making soup, you will want to purée vegetables that have cooked in liquid. Don't add the liquid to the work bowl – just the cooked vegetables; remove them from soup with a slotted spoon. They will purée faster and smoother without liquid. Then add just enough liquid to make the purée pourable, return it to the soup liquid and stir to combine.
▶ Occasionally, a piece of food may become wedged between the blade and the work bowl. If this happens, remove the cover, lift the blade out carefully and remove the wedged piece. Empty the bowl, reinsert the blade and lock the cover into place, first removing the small pusher. Press the ON lever and drop the food pieces through the small feed tube while the machine is running.
After adding a cupful this way, add the remaining food to the bowl and process in the usual way.
To chop hard food like garlic, hard cheese:
Small foods like garlic can be dropped in whole. Larger foods, like hard cheese, should be cut into 1-inch pieces. Remove the small pusher, press the ON lever and drop the food through the small feed tube while the machine is running.
This method of processing minces garlic, shallots and onions. Hard cheese and coconut will have the same texture as if they had been hand grated.
IMPORTANT: Never try to process cheese that is too hard to cut with a knife. You may damage the blade or the machine.
To chop parsley and other fresh herbs:
The herbs, the work bowl and the metal blade must all be thoroughly clean and dry. Remove stems from herbs. Add leaves to bowl and process until they are chopped as fine as you want. The more herbs you chop at a time, the finer chop you can obtain. If completely dry when chopped, parsley and other herbs will keep for at least 10 days, stored in an airtight bag in the refrigerator. They may be frozen for months, stored in an airtight container or bag.
To chop meat, poultry, fish and seafood:
The food should be very cold, but not frozen. Cut it into 1-inch pieces to ensure an even chop. Process no more than the recommended amount at a time. (See page 18.) Press the OFF/PULSE lever 3 or 4 times at a rate of 1 second on, 1 second off. If the food is not chopped fine enough, let the processor run continuously for a few seconds. Check the texture often to avoid over-processing. Use a spatula to scrape food from the sides of the bowl as necessary.
To purée meat, poultry, fish and seafood:
Prepare the food as described above. Pulse until it is evenly chopped, then process continuously to the desired texture. Scrape the bowl with a spatula as needed.
Leave the purée in the work bowl and add eggs, cream and seasonings as called for by the recipe. Process to combine thoroughly.
Remember, you control the texture by the length of time you process.
To chop nuts:
Chop no more than the recommended amount at one time. (See page 18.) Press and release the OFF/PULSE lever and check frequently to avoid letting powdered nuts clump together in a nut butter.
When a recipe calls for flour or sugar, add some to the nuts before you chop them — about 12 cup for each cup of nuts. This allows you to chop the nuts as fine as you want without turning them into a nut butter.
You can also chop nuts with a shredding disc. The optional Fine Shredding Disc is particularly good for this task.
To make peanut butter and other nut butters:
Process up to the recommended amount of nuts. (See page 18.) Let the machine run continuously. After 2 or 3 minutes, the ground nuts will form a ball that will gradually smooth out. Scrape the sides of the bowl and continue processing until drops of oil are visible. Taste for consistency. The longer you process, the softer the butter will be. For chunk style, add a handful of nuts just after the ball of nut butter begins to smooth out. To make cashew butter, add a little bland vegetable oil. Processor nut butters contain no preservatives. Store in the refrigerator to keep them from separating.
To make flavored butter, spreads and dips:
All ingredients should be at room temperature and cut into 1-inch cubes, or added by tablespoonfuls. Cut room-temperature butter into tablespoon-size pieces and reserve. Process flavoring ingredients first—anchovies, cheese, herbs, etc.—chopping them fine. Be sure the work bowl is clean and dry. Then add small, hard ingredients like garlic and hard cheese through the feed tube while the machine is running. Next, add the butter pieces and process until smooth. Add any liquid ingredients last, while the processor is running, and process just long enough to blend. Process ingredients for spreads and dips in the same way.
To chop peel from citrus fruit (zest) or to chop sticky fruit like dates or raisins:
For citrus, remove only the peel (zest) with a vegetable peeler. Do not use the white pith, which is bitter tasting. Cut the peel into lengths of 2 inches or less and process with 12 cup of granulated sugar from the recipe until finely chopped. This may take 2 minutes or longer.
For sticky fruit like dates, raisins, prunes and candied fruit, first freeze the fruit for about 10 minutes. Add to it some of the flour called for in the recipe. Use no more than 12 cup of flour for each cup of fruit.
COMPACT COVER
Use the Compact Cover for added convenience when your recipe calls for chopping, mixing, puréeing or kneading. It is particularly useful when you are preparing baked goods such as cakes, cookies, pies and breads.
To assemble the Compact Cover:
Begin with the work bowl and the metal blade in place. Place the Compact Cover on the work bowl so that the Cuisinart logo written on the cover is face up and readable. Then turn cover
COUNTERCLOCKWISE to lock into place.
Make sure the small cap is in place before using.
To disassemble the Compact Cover:
Place one hand near the Cuisinart logo and one hand on opposite end of cover; turn cover CLOCKWISE. Lift cover up and off work bowl. Do not use the Compact Cover with any of the slicing or shredding discs. Use only with the metal blade.
TECHNIQUES FOR CHOPPING AND PURÉEING WITH THE METAL BLADE
To make mayonnaise:
You can make foolproof homemade mayonnaise with your Pro Custom 11 ^™ . The work bowl and metal blade must be clean and dry.
Foods prepared with raw eggs may contain salmonella or other potentially harmful bacteria. Because egg yolks are a fine growth medium for bacteria, we recommend that you cook them for use in mayonnaise, Hollandaise sauce, Caesar salad dressing, chilled soufflés, chilled chiffons, mousses and other recipes calling for raw egg yolks. For mayonnaise, we recommend using either the “cooked egg” mayonnaise recipe on page 26, or using the following method with pasteurized liquid eggs.
For a “one egg” batch of basic mayonnaise made with pasteurized liquid eggs, place 14 cup pasteurized liquid eggs, 2 tablespoons wine vinegar or lemon juice, 1 teaspoon dry mustard, 12 teaspoon kosher salt and a pinch of ground white pepper in the work bowl. With the machine running, add 12 cup of vegetable oil to the small pusher and allow to slowly drip into the mixture while processing. After all the oil has dripped through, add another 12 cup of vegetable oil to the small pusher and allow to drip through. The mixture will form a thick emulsion. For variation, you may experiment with using flavored vinegars, adding chopped, fresh herbs, dry herbs, or roasted garlic to taste. To make your mayonnaise a little lighter, add some well-drained plain, fat-free yogurt to taste.
To beat egg whites:
The work bowl and metal blade must be absolutely clean.
Add 3 or more egg whites and press the ON lever. Add about 1 teaspoon of lemon juice or vinegar for every egg white. Vinegar makes stiffer whites; its flavor is hardly detectable in cakes or soufflés. Continue processing until the egg whites hold their shape – about 112 to 212 minutes.
Egg whites may be folded into batters and baked. We do not recommend serving uncooked egg whites.
To whip cream:
Processor whipped cream holds its shape very well. It is good for decoration or as a topping for gingerbread, berries and other desserts.
Chill the cream well before starting. Using the metal blade, process continuously until it begins to thicken; add sugar as desired and continue processing. Watch carefully until the cream reaches the desired consistency.
Processor whipped cream does not whip to the light, fluffy consistency obtained by methods that beat in more air. Use the optional Whisk Attachment for the fluffiest whipped cream.
To make bread, cracker and cookie crumbs and crumb crusts:
Cut or break bread, crackers or cookies into 1-inch pieces and put them in the work bowl. Process continuously until they reach the desired texture. For seasoned crumbs, chop parsley or other fresh herbs with the crumbs. For buttered crumbs, process until the dry crumbs are of the desired texture, then dribble melted butter through the small feed tube while the machine is running.
For crumb crusts, process crackers or cookies as described above. Add sugar, spices and butter, cut into 1-inch pieces, as specified by your recipe. Process until well combined.
To make pastry:
This describes the general procedure. A recipe giving exact proportions is on page 27. Combine unbleached, all-purpose flour, salt and 1-inch pieces of very cold butter in the work bowl. Process to the consistency of cornmeal. While pulsing, pour ice water through the feed tube. Stop pulsing as soon as the dough begins to form a ball, to ensure tender, flaky pastry. Use the dough immediately or form it into a round disc about
1-inch thick. Wrap it in plastic wrap and refrigerate or freeze for later use.
To make quick breads, and cakes that use baking powder and/or baking soda:
The most important rule for success is not to over-mix after the flour is added.
If the recipe calls for chopped ingredients like lemon peel or nuts, chop them first while the work bowl is clean and dry. Then set them aside until needed. (Always use sugar when chopping lemon peel; see page 8.)
Put dry ingredients like flour, salt and leavening in the work bowl and process with the metal blade for 5 seconds to mix them. Remove and reserve the dry ingredients.
Add the eggs and sugar to the work bowl and process to mix, letting the machine run about 1 minute. Next, add 1-inch pieces of butter, at room temperature. Let the machine run continuously for a minute, until the butter is thoroughly mixed with the sugar and eggs. Then add flavoring and liquid – vanilla, spices, cocoa, etc. Process until mixed. Add the dry ingredients to the work bowl. Process by pulsing, inspecting after each pulse. Stop pulsing as soon as the dry ingredients have almost disappeared into the batter. Over-processing will cause quick breads and cakes to be tough. (If your recipe calls for ingredients that are to be coarsely chopped – like raisins or nuts – add them last with the mixed dry ingredients.)
To make cake mix:
Your food processor work bowl is large enough for the preparation of an 18.5-ounce packaged cake mix.
Insert the metal blade and add the cake mix to the work bowl. While the machine is running, add the eggs and liquid through the small feed tube and process for 5 seconds. Scrape down the side of the work bowl and process again for 1 minute for maximum volume. Remove the work bowl from the base, but do not remove the metal blade. Insert your finger into the underside of the blade from the bottom of the work bowl to hold the blade in place while emptying the batter.
Tip:
After emptying cake batter or puréed soup from the work bowl, replace the bowl on the motor base. Insert the metal blade and pulse once. Centrifugal force will spin the batter off the blade
onto the side of the work bowl. Remove the blade, and use the spatula to scrape any remaining batter from the bowl.
TECHNIQUES FOR KNEADING YEAST DOUGH
The Pro Custom 11 ^™ Food Processor can mix and knead dough in a fraction of the time it takes to do it by hand. You will get perfect results every time if you follow these directions. NEVER TRY TO PROCESS DOUGH THAT IS TOO STIFF TO KNEAD COMFORTABLY BY HAND.
There are two general types of yeast dough.
-
Typical bread dough is made with a flour mix that contains at least 50% white flour. It is uniformly soft, pliable and slightly sticky when properly kneaded. It always cleans the inside of the work bowl completely when properly kneaded.
-
Typical sweet dough contains a higher proportion of sugar, butter and/or eggs than typical bread dough. It is rich and sticky, and it may not clean the inside of the work bowl. It requires less kneading after the ingredients are mixed. Although 30 seconds is usually sufficient, 45 seconds gives better results if the machine does not slow down. Except for kneading, described below, the processing procedures are the same for both types of dough.
Machine capacity
Typical bread dough:
4 cups all-purpose flour
3 cups whole-grain flour
Typical sweet dough:
3 cups all-purpose flour
If a bread dough recipe calls for more than the recommended amount of flour, mix and knead it in equal batches.
Always push the blade down as far as it will go on the motor shaft.
Measuring the flour
It's best to weigh it. If you do not have a scale, or the recipe does not specify weight, measure by the "stir, scoop and sweep" method. Use a standard, graduated dry measure, not a cup for liquid ingredients. With a spoon or fork, stir the flour in its container. With the dry measure, scoop the flour so it overflows. With a spatula, knife or chopstick—being careful not to press down — sweep excess flour back into the container so the top of the measure is level.
Proofing the yeast
The expiration date is marked on the packages. To be sure your yeast is active, dissolve it in a small amount of warm liquid (about 1/3 cup for one package of dry yeast). The temperature of liquids used to dissolve and activate yeast must be between 105°F and 110°F. Yeast cells are not activated at temperatures lower than this, and they die when exposed to temperatures higher than 130°F. If the recipe includes a sweetener like sugar or honey, add a small amount with the yeast. If no sweetener is called for, add a pinch. The yeast proofs better with it. Allow the mixture to stand until it foams — up to 10 minutes.
Processing dry ingredients
Put the flour and other dry ingredients in the work bowl. If the recipe calls for herbs, oil or solid fats like butter, add them with the flour. Turn the machine on, and allow to run for about 20 seconds.
Adding liquids
All liquid should be added through the feed tube while the machine is running. Add liquid in a slow, steady stream, only as fast as dry ingredients absorb it. If liquid sloshes or splatters, stop adding it, but do not turn off machine. Wait until ingredients in bowl have mixed, then add remaining liquid slowly. Pour liquid onto dough as it passes under feed tube opening. Do not pour liquid directly onto bottom of work bowl.
Follow the recipe carefully. It is important to add enough liquid to make the dough soft enough to knead. Kneading dough that is too stiff can strain the machine. All liquid except that used to activate yeast should be cold, to minimize the possibility of overheating the dough. You must never knead a yeast dough to a temperature higher than 100^ F. Doing so will slow or even prevent the action of the yeast.
Kneading bread dough
Do not try to use the machine to knead dough that is too stiff to knead comfortably by hand. Doing so can strain the machine.
Kneading typical bread dough
After the dough starts to clean the inside of the work bowl completely and forms a ball, process it for 60 seconds to knead it. Stop the machine and test the dough to be sure it's properly kneaded. Typical bread dough should have a soft, pliable texture and it should feel slightly sticky. Stretch the dough with your hands to test it. If it feels
hard, lumpy or uneven, continue processing until it feels uniformly soft and pliable. Make sure that the blade is firmly pressed back into place after removing the dough to test it.
Kneading typical sweet dough
Process dough for at least 30 seconds after all the ingredients are incorporated. It will not clean the inside of the work bowl. If necessary, scrape the bowl and process for 5 more seconds.
Adding other ingredients
Cheese, nuts and raisins may be added with the dry ingredients or during the final kneading. To leave them almost whole, add them through the feed tube 5 seconds before you stop kneading. For a finer texture, add them with the dry ingredients.
Rising
Put the dough in a large, lightly floured plastic food storage bag. Squeeze out all the air and close the bag, allowing space for the dough to rise. Or put the ball of dough in a large bowl coated with soft butter or vegetable oil. Roll the dough around to coat its entire surface. Cover it with a damp towel or a piece of oiled plastic wrap. Allow to rise in a warm, draft-free place — about 80°F. The rising time is usually about 1½ hours, but will vary from 45 minutes to several hours, depending on the type of flour and the humidity of the air. To test if the dough has risen sufficiently, press your finger in it. An indentation should remain. If it doesn't, let the dough rise more and test again. When it has risen enough, punch the dough down. It is now ready to shape.
Shaping, finishing and baking
If you shape the dough in loaf pans, coat them with vegetable oil cooking spray and fill them only half full. Allow to rise until dough is just slightly above the top of the pan. If shaping free-form loaves, let them rise on an oiled baking sheet until at least doubled in bulk.
Making consecutive batches
You can make several batches of bread dough in a row. The motor in the Pro Custom 11 ^™ Food Processor is extremely efficient. Follow the recipe for White Bread, page 29.
TROUBLESHOOTING YEAST DOUGH
Blade doesn't incorporate ingredients
Always start processor before adding liquid. Add liquid in a slow, steady stream, only as fast as dry ingredients absorb it. If you hear liquid sloshing, stop adding it, but do not turn off machine. Instead, wait until ingredients in work bowl have mixed, then add remaining liquid slowly. Pour liquid onto dough as it passes under feed tube; do not pour liquid directly onto bottom of work bowl.
Butter or margarine, if not melted, must be cut into tablespoon-size pieces before being added to work bowl.
Blade rises in work bowl
Blade may not have been pushed down as far as it will go before processing started. Machine may be overloaded. Stop it, carefully remove half the dough and process in 2 batches. Excessively sticky dough can cause blade to rise even though it cleans inside of work bowl. If dough feels very sticky, reinsert blade and immediately add 2 tablespoons flour through feed tube while machine is running.
Dough doesn't clean inside of work bowl
- Amount of dough may exceed maximum capacity of your food processor. Remove half and process in 2 batches. See page 18 for machine capacity.
- Dough may be too dry. If it feels crumbly, add water – 1 tablespoon at a time – while machine is running, until dough becomes moist and cleans inside of work bowl. Wait 10 seconds between additions of water.
- Dough may be too wet. While machine is running, add 1 tablespoon of flour. If necessary, add more – 1 tablespoon at a time – until dough cleans inside of work bowl and forms a ball.
Nub of dough forms on top of blade and does not become uniformly kneaded
Stop machine, carefully remove dough, divide it into 3 pieces and redistribute them evenly in work bowl. Make sure that blade is firmly pressed back into place after removing the dough. Continue processing until dough is uniformly soft and pliable.
Dough feels tough after kneading
Divide dough into 2 or 3 pieces and redistribute evenly in bowl. Process 10 seconds or until uniformly soft and pliable.
Soft dough or liquid leaks onto base of food processor
Always start processor before adding liquid and add liquid only as fast as dry ingredients absorb it.
Motor stops
- If using large feed tube cover, the pusher assembly may have come unlocked. Push down pusher sleeve to lock it into place and continue processing.
- Cover may have come unlocked. Lock cover and continue processing.
- Power cord may be unplugged.
- Excessive strain may have caused motor to overheat and stop. Wait for the motor to cool, 5–10 minutes. A safety protector in the motor protects it against excessive overheating. If the motor stops, turn the machine off. After 5–10 minutes, divide dough into 2 batches and complete processing. Pinch dough to make sure it is not too stiff to knead comfortably by hand. If it is, add liquid – 1 tablespoon at a time – until dough is sufficiently moist to clean bowl.
Dough doesn't rise
We recommend that you always test activity of yeast before using it. See instructions for proofing yeast on page 10. Do not use dry yeast after expiration date on package.
Avoid killing yeast cells by dissolving yeast in water that is too warm. Dissolve yeast in about 1/3 cup of warm liquid at 105^ F– 110^ F. All other liquids should be cold.
Don't knead so long that dough becomes overheated. The ideal temperature for kneaded dough is 80^ ; it should never exceed 100^ .
Let dough rise in draft-free environment of about 80^ .
Dough containing whole-grain flour will take longer to rise than dough made of white flour only.
Baked bread is too heavy
Next time, feel dough to be sure it is uniformly soft, pliable and slightly sticky before setting it aside to rise. Let dough fully double in bulk in bowl or bag, punch it down, then let it double again after it is shaped.
PROBLEMS AND SOLUTIONS WITH TYPICAL SWEET DOUGHS
Motor slows down
- Amount of dough may exceed maximum capacity of your food processor. Remove half and process in 2 batches.
- Don't process too long after all the ingredients have been incorporated. These rich doughs will give you good results after only 30 seconds of kneading.
PREPARING FOOD FOR SLICING AND SHREDDING
Round fruits and vegetables
Before processing onions, apples and other large, round fruits and vegetables, trim them with a knife. Cut the bottom ends flat, to make the food lie stable on the disc.
Place the food in the feed tube, flat side down. Position it as far left as possible, to prevent it from tilting when being processed.
Choose fruits that are firm and not too ripe. Always remove large, hard pits and seeds from fruits before processing. Seeds from citrus fruits need not be removed. You may remove the rind before slicing or shredding, or leave the rind on.
Whole peppers are an exception
Remove the stem and cut the stem end flat. Remove the core and scoop out the seeds. Leave the end opposite the stem whole, to keep the structure stiff. This ensures round, even slices.
Large fruits like pineapple and cantaloupe
Cut them in half and remove the seeds or core. If necessary, cut the halves into smaller pieces to fit the feed tube. Remember to cut the ends flat.
Cabbage and iceberg lettuce
Turn the head on its side and slice off the top and bottom, leaving a center section about 3 inches deep. Remove the core and cut the center section into wedges to fit the feed tube. Remove the core from the bottom piece and cut it and the top piece into wedges to fit the feed tube. The 2mm Slicing Disc or the optional 1mm Slicing Disc are excellent for slicing cabbage for coleslaw.
If the fruit or vegetable doesn't fit
Try inserting it from the bottom of the feed tube. The opening there is slightly larger. Do not force any food into the feed tube.
Pack the feed tube for desired results
For long slices or shreds, cut the food into feed tube widths and pack the pieces horizontally.
For small, round slices or short shreds from carrots, zucchini and other long vegetables, cut them into feed tube heights and pack them tightly upright.
Food should fit snugly, but not so tight that it prevents the pusher from moving.
When slicing or shredding food, always use the pusher. Never put your fingers or a spatula into the feed tube.
Never push down hard on the pusher. Use light pressure for soft fruits and vegetables like bananas, mushrooms, strawberries and tomatoes, and for all cheeses. Use medium pressure for most food – apples, celery, citrus fruit, potatoes and zucchini. Use firm pressure for really hard vegetables like carrots and yams.
SLICING AND SHREDDING WITH THE SLICING AND SHREDDING DISCS
- Insert a slicing or shredding disc, put the cover with large feed tube on the work bowl and insert the prepared food in the feed tube.
- Prepare the pusher assembly. Lock the small pusher in place and unlock the slide lock on the sleeve, so the pusher can move up and down freely.
- Slide the pusher assembly over the feed tube and push the sleeve down to lock it into place. Apply pressure to the pusher while pressing down the OFF/PULSE lever. Release the lever as soon as the food is sliced or shredded.
- You can load the feed tube repeatedly without removing the work bowl cover. Simply grasp the pusher assembly with your fingers on the wide locking tab at the back of the sleeve. Press firmly on the tab and lift up. The pusher assembly will come off easily, leaving the cover and feed tube in place. Your other hand is free to reload the feed tube.
REMOVING SLICED OR SHREDDED FOOD
Before you do anything, wait for the disc to stop spinning.
When it does, remove the cover first. Hold the pusher assembly with your fingers away from the locking tabs on back and turn it clockwise. Lift, and the pusher assembly and cover will come off together.
Remove the slicing or shredding disc before removing the work bowl. Place two fingers under each side of the disc and lift it straight up. Then turn the bowl clockwise to unlock it from the base, and lift it straight up to remove it.
You can place the disc on top of the inverted work bowl cover, to minimize drips and spills.
SLICING AND SHREDDING TECHNIQUES
Small, round fruits and vegetables
For large berries, radishes and mushrooms, trim the ends flat with a knife. Insert the food through the feed tube, standing each piece on a flat end. You can fill the tube to about 1 inch from the top. The bottom layer gives you perfect slices for garnish. If you want all the slices to be perfect, it's best to process one layer at a time.
Long fruits and vegetables
Trim foods like bananas, celery and zucchini by cutting them into pieces a little shorter than the feed tube. Cut both ends flat. (Use a ruler as a guide, or the pusher assembly with the pusher pulled out as far as it will go.)
Fill the feed tube with the pieces, standing them vertically and adding enough pieces so they are solidly packed and cannot tilt sideways as they are sliced or shredded.
Small amounts of food
Use the small feed tube and the small pusher. Remove the small pusher from the pusher assembly. Slide the pusher assembly over the feed tube and press the sleeve down to lock it into place. Be sure the slide lock on the sleeve is locked. Cut the food into lengths a little shorter than the feed tube. If you are slicing one or two long, thin vegetables like zucchini, push them against the right. If you are slicing a few vegetables that are wide at one end and narrow at the other—carrots, celery or scallions—cut them in half and pack in pairs, one wide end up, one narrow end up.
French-cut green beans
Trim fresh green beans to feed-tube widths. Blanch them for 60 seconds in boiling, salted water. Plunge them immediately into cold water to stop the cooking. When they are cold to the touch, drain and dry them. Stack them in the feed tube horizontally to about 1 inch from the top. Use the standard 4mm Slicing Disc.
Be sure the small pusher is locked and the slide lock in the sleeve is unlocked. Apply light pressure to the pusher and press the lever down to PULSE until beans are sliced. To make long, horizontal slices or shreds of raw zucchini or carrots, use the same procedure.
Matchsticks or julienne strips
Process the food twice to “double-slice” it. Insert any large fruit or vegetable — potatoes, turnips, zucchini, apples — in the feed tube horizontally. Apply pressure to the pusher while pressing the lever down to PULSE until the food is sliced. You will get long slices. Remove the slices from the work bowl and reassemble them as described. Reinsert them in the feed tube, wedging them in tightly. Slice them again. You will obtain long julienne strips. With the optional Square Julienne Disc, you can make square julienne strips in one operation.
SLICING MEAT AND POULTRY
Cooked meat and poultry
The food must be very cold. If possible, use a chunk of food just large enough to fit the feed tube. To make julienne strips of ham, bologna or luncheon meat, stack slices of them. Then roll or fold them double and stand them upright in the feed tube, wedging in as many rolls as possible. This technique works better with square or rectangular pieces than with round ones.
Uncooked meat and poultry
Cut the food into pieces to fit the feed tube. Boned, skinned chicken breasts will usually fit when cut in half crosswise. Wrap the pieces in plastic wrap and put them in the freezer. They are ready to slice when they pass this “knife test.” They are easily pierced with the tip of a sharp knife although semi-frozen and hard to the touch. Stand them in the feed tube, cut side down, and slice them against the grain, using firm pressure on the pusher. Or lay them flat in the feed tube, as many as will fit, and slice with the grain, using firm pressure.
Frankfurters, salami and other sausages
If the sausage is soft, freeze it until it is hard to the touch, but easily pierced with the tip of a sharp knife. Hard sausages need not be frozen. If the sausage is thin enough to fit in the small feed tube, use that tube. Otherwise, cut the sausage into pieces to completely fit the large feed tube. Stand the pieces vertically, packing them in tightly so they cannot tilt sideways.
SLICING AND SHREDDING CHEESE
Firm cheeses like Swiss and Cheddar
Cut the cheese into pieces to fit the feed tube. Be sure that cheese is very well chilled – placing it in the freezer for 5 to 10 minutes helps. Stand the pieces in the feed tube and apply light pressure to the pusher.
IMPORTANT: Never try to slice soft cheese like mozzarella or hard cheese like Parmesan. You may damage the slicing disc or the food processor itself. You can successfully shred most cheeses except for the softer ones. The exception is mozzarella, which shreds well if thoroughly chilled. Hard cheeses like Parmesan shred well only at room temperature.
Therefore, attempt to shred mozzarella or Parmesan only when at the appropriate temperature; otherwise the cheeses will not shred well or damage to the machine could occur.
| TYPE OF CHEESE CHOP SHRED SLICE | |||
| Soft | yes | no | |
| Brie, Camembert, ricotta, cottage, cream | |||
| exception: mozzarella yes | yes | no | chill |
| Semi-Soft | yes | yes | |
| Blue, Fontina, Bel Paese | chill | ||
| chill | |||
| chill | |||
| Semi-Hard | yes | yes | |
| Cheddar, Monterey Jack | chill | chill | |
| Swiss, Jarlsberg, Edam, Gouda, Provolone | chill | chill | |
| chill | chill | ||
| chill | |||
| Hard | yes | yes | no |
| Parmesan, Romano, Pecorino, Asiago | room temp. | ||
IF YOU HAVE A PROBLEM
Most problems with the food processor are easily solved. Provided are some possible problems and their solutions.
Food is unevenly chopped
Do not process too much food at one time. Food should be in uniform pieces. Pulse several times and then run continuously.
Liquid leaks from bottom of bowl onto motor base
Remove bowl from base as soon as you finish processing. Do not remove metal blade first. When bowl and blade are removed together, blade drops down and forms an almost perfect seal against the bowl.
Liquid leaks out between bowl and cover when machine is running
You added too much liquid. Never use more than 2^3/4 cups thin or 5 cups thick liquid. The thicker the liquid, the more you can use. Examples of thick liquids include pancake or cake batter.
Slices are uneven or slanted
Pack feed tube more carefully, as described on pages 12 through 14. Maintain even pressure on pusher.
Carrots, or similar food, fall over in feed tube
Cut food into enough short pieces of equal height to fill feed tube. To slice one or two pieces, use small feed tube. Cut carrots in half and insert one piece point down and the other stem down.
Sliced or shredded food piles up on one side of work bowl
This is normal. Remove disc occasionally and even out food. When food gets close to bottom of disc, empty work bowl.
A few pieces of food remain on top of slicing or shredding disc
This is normal. In most cases, you can shred more of the food by moving the large pusher up and down, allowing the piece to be shredded, or by repositioning the piece in the feed tube and reshredding it.
Soft cheese like mozzarella spreads out and collects on top of shredding disc
The cheese was not cold enough, or the pressure on the pusher was too hard. To shred soft cheese, do not push – rather let the cheese go through by itself. Tap on the pusher to guide cheese through.
CLEANING, STORING AND MAINTENANCE
Keep your food processor ready to use on the kitchen counter. When not in use, leave unplugged. Don't leave the pusher assembly in locked position; this could damage the on-off mechanism.
Store the blade and discs as you would sharp knives — out of the reach of children. The Disc and Blade Holders (optional accessories) offer safe and convenient storage.
All parts except the motor base are dishwasher safe, and we recommend washing them in the dishwasher on the top rack. Due to intense water heat, washing the work bowl and work bowl cover on the bottom rack may cause damage over time. Insert the work bowl upside down. Remember where you place the sharp blade and discs, and be certain to unload the dishwasher carefully.
To simplify cleaning, rinse the work bowl, cover, pusher assembly and blade or disc immediately after use. Openings at the bottom of the large pusher provide drainage and make cleaning easy. If food lodges in the pusher, remove it by running water through pusher or using a bottle brush. If you wash the blade and discs by hand, do it carefully. Avoid leaving them in soapy water where they may disappear from sight. To clean the metal blade, fill the work bowl with soapy water, hold the blade by its plastic center and move rapidly up and down on the center shaft of the bowl. Use of a spray hose is also effective. If necessary, use a brush.
The work bowl is made of a plastic that is shatter resistant and heat resistant. It should not be placed in a microwave oven, as the tube at the back of the bowl houses the metal rod that activates the motor.
MAINTENANCE
Any other servicing should be performed by an authorized service representative.
Chopping certain foods may scratch or cloud the work bowl. Among them are ice, whole spices and oils, like wintergreen. If you like to prepare your own spice blends, you may want to keep a second bowl just for that purpose.
The base housing is made of a durable, high-impact-resistant plastic. Its smooth surface will look new for years. Keep a sponge handy as you work to wipe spills from the base.
Four rubber feet under the base help keep it stable on most work surfaces even when processing heavy loads. If the feet leave spots on the counter, spray them with a spot remover and wipe with a damp sponge. If any trace of the spot remains,
repeat the procedure and wipe the area with a damp sponge and nonabrasive cleaning powder. To clean the inside of the detachable stem, slide the stem release button up as far as it will go and hold as you run water through the stem.
IMPORTANT: Never store the blade or discs on the motor shaft. The blade or disc should not be placed on the shaft except when the processor is about to be used.
FOR YOUR SAFETY
Like all powerful electrical appliances, a food processor should be handled with care. Follow these guidelines to protect you and your family from misuse that could cause injury.
▶ Handle metal blade and discs carefully. Their cutting edges are very sharp.
▶ Always place discs on flat, stable surface before connecting detachable stem.
▶ Never put blade or disc on motor shaft until work bowl is locked in place.
▶ Always be sure that the blade or disc is down on motor shaft as far as it will go.
▶ Always insert metal blade in work bowl before putting ingredients in bowl.
▶ When slicing or shredding food, always use pusher. Never put your fingers or spatula into feed tube.
▶ Always wait for blade or disc to stop spinning before you remove pusher assembly or cover from work bowl.
▶ Be careful to prevent metal blade from falling out of work bowl when emptying bowl. Remove blade before tilting bowl, or hold it in place with your finger, a spatula or spoon.
▶ Never use pusher assembly if sleeve becomes detached from pusher. Call Cuisinart Consumer Service immediately at 1-800-726-0190.
SOME TECHNICAL DATA
The motor in your food processor operates on standard line operating current. The appropriate voltage and frequency for your machine are shown on a label under the base.
An automatic, temperature-controlled circuit breaker in the motor ensures complete protection against motor burnout. If the processor runs for an exceptionally long time when chopping, mixing or kneading a thick or heavy mixture in successive batches, the motor may overheat. If this happens, the processor will stop. Turn it off and wait for the motor to cool off before proceeding. It will usually cool off within 10 minutes. In extreme cases, it could take an hour.
Safety switches prevent the machine from operating when the work bowl or the cover is not locked into position. The motor stops within seconds when the motor is turned off, and a fast-stop circuit stops it instantly when the pusher assembly is unlocked.
NOTES:
BOWL CAPACITY
Recommended work bowl capacity
| FOODS | CUSTOM | ||
| Chopped and Puréed Fruits and Vegetables | 2 cups | ||
| Chopped or Puréed Meat, Poultry, Fish or Seafood | 1 | 34 pounds | |
| White Bread Dough | 2 pounds | (4 yielding 1-pound | cups two loa |
| Nuts for Nut Butters | 2 cups | ||
| Cream for Whipping | 2 cups | ||
| Sliced or Shredded Fruits, Cheeses or Vegetables | 11 cups | ||
| Cake Batter | 3 pounds | (four layers) | 8-inch |
| Cookie Dough | 2 | 34 pounds (65 | |
| Thin Liquid | 2 | 34 cups | |
| Thick Liquid | 5 cups | ||
Appetizers
Guacamole 19
Blue Cheese and Pecan Spread .....19
Cheese Coins 19
Soups
Chunky Gazpacho ....19
Leek and Potato Soup/Vichyssoise 20
Lentil Soup 20
Split Pea Soup 21
Meats and Fish
Meatloaf ....21
Chili 22
Chicken and Vegetable Stir-Fry 22
Crab Cakes 23
Vegetables
Mashed Potatoes 23
Potatoes au Gratin....23
Shredded Carrots and Zucchini 24
Salads
Sliced Tomatoes on Shredded Lettuce .....24
Creamy Coleslaw 25
Shredded Carrot Salad 25
Sauces
Pesto 25
No-Cook Cranberry-Orange Relish 26
Salsa....26
Raspberry Sauce 26
Mayonnaise 26
Pacities Cream....27
Chocolate Sauce 27
Pastry
Basic Pastry 27
Quick Breads, Yeast Bread and Pizza
Cornbread 28
Coffee Cake....28
White Bread....29
Basic Pizza Dough 29
Pizza in a Hurry 30
Tomato Pizza Sauce 30
Desserts
Apple Pie 30
Fudgy Brownies ....31
Chocolate Chip Oatmeal Cookies....31
Carrot Cake 32
Cream Cheese Frosting 32
Pear Frozen Yogurt 32
Banana-Apple Sherbet 33
Warranty 33
Guacamole
Serve with tortillas or crisp vegetables.
For a less pungent taste, use flat-leaf parsley instead of cilantro.
Yield: 2 ^1/4 cups
1 large garlic clove, peeled
1 jalapeño, halved and seeded
12 cup tightly packed cilantro leaves
1 medium scallion, white part and
2 inches of green, cut into 1-inch pieces
3 ripe medium avocados, peeled, halved and pitted
3 tablespoons fresh lemon juice
Pinch cumin
14 teaspoon kosher salt
14 teaspoon chili powder
1 medium tomato, quartered, seeds removed
Use metal blade to chop garlic, jalapeño pepper, cilantro, and scallion until minced, about 15 seconds; scrape work bowl. Add avocados and all remaining ingredients, except tomato. Process until smooth, about 1 minute, scraping bowl as necessary. Add tomato and pulse about 6 to 8 times, until finely chopped. Adjust salt if necessary.
Blue Cheese and Pecan Spread
You can substitute cottage cheese for all or part of the cream cheese, and you can substitute walnuts for pecans.
Yield: 1½ cups
13 cup shelled pecans
8 ounces cream cheese, cut in
1-inch pieces
3 tablespoons blue cheese
Process nuts with metal blade until finely chopped, about 10 seconds. Add cream cheese and blue cheese. Process until well mixed and smooth, about 10 seconds. (If substituting cottage cheese, process until smooth, about 90 seconds.)
Cheese Coins
These tender and flavorful appetizers are easy to make, convenient to serve, and they can be refrigerated or frozen.
Yield: 100 cheese coins
8 ounces Cheddar, cut into
1-inch pieces
4 ounces unsalted butter, at room temperature, cut into 1-inch pieces
^1/_4 teaspoon kosher salt
^1/_4 teaspoon hot sauce
1 cup unbleached, all-purpose fl our Nonstick cooking spray
Use metal blade to chop cheese until it resembles coarse meal, about 30 seconds. Add butter, salt and hot sauce. Process until smooth, about 60 seconds; scrape bowl. Add flour and process until just mixed in. Chill dough until firm, about 1 hour.
Divide dough into 3 equal parts and roll each into a cylinder about 1 12 inches in diameter. Chill until firm, about 2 hours.
Preheat oven to 400^ F and coat baking sheets with vegetable oil cooking spray. Cut dough into 18 -inch slices and place 112 inches apart on baking sheets. Bake until lightly colored, about 10 minutes; do not brown. Transfer to wire rack to cool.
Unbaked, plastic-wrapped cylinders keep for about a week in the refrigerator. Cooked cheese coins can be frozen and reheated for 6 to 8 minutes in a 300°F oven.
Chunky Gazpacho
This refreshing, cold soup can be ready in less than 10 minutes. You may serve it at once, but it improves with chilling.
Yield: 4½ cups
1 small garlic clove, peeled
12 small jalapeño, halved and seeded
4 scallions, trimmed and cut into 1-inch pieces
1 celery stalk, cut into 1-inch pieces
12 medium bell pepper, cut into 3 pieces
2 tomatoes, seeded
2 cups tomato or vegetable juice
1 medium cucumber, peeled, halved lengthwise and seeded
2 tablespoons fresh lemon juice
1 teaspoon kosher salt
14 teaspoon freshly ground black pepper
Use metal blade to process garlic and jalapeño pepper until finely chopped. Add scallions, celery and bell pepper. Pulse/chop to medium chop. Put in large mixing bowl. Pulse/chop one tomato until coarsely chopped. Add to mixing bowl. Purée remaining tomato until smooth, about 1 minute. With machine running, pour in 12 cup of tomato juice and process until smooth. Add to mixing bowl with remaining tomato juice and stir.
Insert thin slicing disc, stand cucumber pieces upright in feed tube and slice, using light pressure. Add to mixing bowl with remaining ingredients and stir to combine. Cover and chill before serving.
Leek and Potato Soup/ Vichyssoise
Louis Diat, longtime chef at the New York Ritz Hotel, transformed the everyday Leek and Potato Soup into a cold soup suitable for parties.
Yield: 4 cups Leek and Potato Soup or 6 cups Vichyssoise
2 medium leeks, white part only, thoroughly cleaned
1 small onion, halved
1 tablespoon unsalted butter
2 medium, all-purpose potatoes, peeled
1½ cups chicken stock
1 cup water
Salt and freshly ground black pepper, to taste
1 cup milk
14 cup heavy cream Chopped chives for garnish
Cut leeks to fit feed tube. Use standard slicing disc to slice leeks and onion. Melt butter in large saucepan over medium heat. Add leeks and onion; sauté, stirring often, until soft but not brown, about
10 minutes.
Cut potatoes in half crosswise, and use standard slicing disc to slice them. Add potatoes, stock and water to saucepan. Bring to boil over medium-high heat. Reduce heat to low, cover and simmer gently, stirring occasionally until vegetables are very tender, about 25 minutes. Adjust seasoning and serve hot as Leek and Potato Soup, or proceed as follows for cold Vichyssoise.
Strain liquid into large saucepan and set aside. Use metal blade to purée vegetables, stopping once to scrape bowl. Whisk puréed vegetables into reserved liquid, add milk and bring to a boil over moderate heat, stirring constantly. Remove from the heat and stir in cream. Season to taste with salt and pepper. Refrigerate until thoroughly chilled. Taste again for seasoning and sprinkle with chopped chives.
Lentil Soup
This hearty winter soup is a meal on its own, accompanied by crusty bread and a salad.
Yield: 6 cups
8 ounces lentils
1 garlic clove, peeled
1 / 2 small onion, halved
12 medium celery stalk, cut into 1-inch pieces
12 medium carrot, peeled, cut into 1-inch pieces
2 medium tomatoes, quartered
2½ cups beef broth
2½ cups water
2 teaspoons white wine vinegar
1 / 2 teaspoon paprika
12 teaspoon kosher salt*
18 teaspoon freshly ground black pepper Pinch dried thyme
12 pound Polish kielbasa or other smoked sausage
Wash lentils under cold, running water, drain and put them in a large saucepan.
Use metal blade, pulse/chop garlic, onion, celery and carrot until finely chopped. Put in pot with lentils. Add tomatoes to work bowl, and chop into fine pieces. Add to pot with all remaining ingredi-
ents, except sausage. Cover and cook over medium heat for about 1 hour.
Freeze sausage until hard to the touch, but easily pierced with tip of a sharp knife, about 30 minutes.
Drain and reserve soup liquid. Purée solids with metal blade. Return purée to broth and stir to combine. Use standard slicing disc to slice sausage. Add sausage to soup and reheat gently over medium-low heat until sausage is heated through, stirring occasionally, about 20 minutes.
*Optional; omit salt if using salty sausage.
Split Pea Soup
A perfect family lunch or supper.
Yield: 6 cups
^3/4 pound split green peas
1 garlic clove, peeled
^3/4 large onion, quartered
1 pound smoked ham hocks
5 ^1/4 cups water
2 medium carrots, peeled
1 large celery stalk
1 medium potato, peeled
Kosher salt
Freshly ground black pepper
Rinse peas and place in a large saucepot. Use metal blade to chop garlic fine, about 10 seconds. Add onion and pulse until coarsely chopped, about 6 to 8 pulses. Transfer to saucepot with peas. Add ham hocks and water. Bring to a boil over medium-high heat. Reduce heat, cover and simmer for 1 hour, stirring occasionally. Uncover and simmer until hocks are tender, about 30 to 40 minutes. Stir occasionally and add more water if necessary. Remove hocks and let them cool while preparing vegetables.
Cut carrots into feed-tube lengths, then halve lengthwise. Cut celery into feed-tube lengths, then halve lengthwise. Cut potato in half crosswise, then quarter halves lengthwise. Insert standard slicing disc. Stand vegetables upright in feed tube and slice with medium to firm pressure. Reserve. Purée soup with metal blade until smooth, about 15 seconds. Return to saucepot. Remove meat from hocks and pulse until coarsely chopped, 4 to 6 pulses. Add to pot with vegetables. Cover and simmer over medium-low heat until tender, stirring occasionally to prevent sticking. This will take about 20 minutes. Season to taste.
MEATS AND FISH
Meatloaf
For a spicier meatloaf, add a few drops of hot sauce and a teaspoon of Worcestershire sauce.
Yield: 1½ pounds of meatloaf
1 small onion, quartered
^1/_3 cup loosely packed parsley leaves
1½ slices day-old bread, broken into pieces
1½ pounds boneless chuck, cut into
1-inch pieces*
3 tablespoons milk*
1 teaspoon kosher salt
18 teaspoon dried thyme
1 large egg
Preheat oven to 375^ F. Put all ingredients except egg in work bowl and pulse/chop 4 to 6 times. Then process continuously until chopped fine. Add egg and pulse 4 or 5 times or until desired consistency is reached, watching carefully to avoid over-processing. Pack mixture into loaf pan and bake at 375^ F until cooked through, about 40 to 50 minutes.
*You can vary these ingredients by using a mixture of beef, veal and pork, or by replacing the milk with tomato juice.
Meatball Variation: Instead of making a meatloaf, shape mixture into balls of 2 tablespoons each, arrange them in a single layer in baking dish and bake at 375^ F for about 25 minutes.
Chili
Kids love chili and it's a versatile dish. Serve it on hot dogs, fill tacos or eat it plain. It freezes well for about 6 months.
Yield: 4½ cups
3 garlic cloves, peeled
1 medium onion, quartered
1 pound boneless beef chuck, chilled, trimmed, cut into 1-inch cubes
1^1/2 teaspoons whole cumin seeds
2 tablespoons vegetable oil
2 tablespoons chili powder
2 tablespoons paprika
1 teaspoon kosher salt
18 teaspoon crushed red pepper
1 can (8 ounces) whole tomatoes
1 cup water
2 cups red kidney beans
Process garlic and onion with metal blade until finely chopped, about 15 seconds. Reserve.
Process beef cubes until coarsely chopped, about 10 to 12 pulses.
Brown cumin seeds in medium saucepot over medium heat. Shake pan constantly and cook until cumin begins to smoke, about 1 minute. Reserve.
Heat vegetable oil in same saucepot over medium heat. Add garlic and onion; cook for 2 minutes. Add beef and cook, stirring often, until no pink color remains, about 5 minutes.
Reduce heat to low. Stir in cumin, chili powder, paprika, salt and crushed red pepper; cook uncovered for 5 minutes, stirring occasionally.
Use metal blade to coarsely chop tomatoes. Add to saucepot with water and bring to boil, covered, over medium-high heat. Reduce heat to low and simmer, partially covered, for 45 minutes, stirring occasionally. Stir in the beans and cook until heated through.
Garnish with shredded Cheddar or Monterey Jack cheese if desired.
Chicken and Vegetable Stir-Fry
Stir-frying and the food processor are a most effective combination for putting a meal on the table in no time.
Yield: 8 servings
fat 3 pounds boneless/skinless chicken breasts
2 red peppers, cored, seeded and cut vertically into 3 strips
8 scallions, cut to fi t feed tube horizontally
3 zucchini, cut to fi t feed tube horizontally
1 yellow squash, cut to fi t feed tube horizontally
12 cup water
3 tablespoons dry sherry
1 tablespoon sesame oil
^1/_4 teaspoon freshly ground black pepper
1 tablespoon cornstarch
1 garlic clove, peeled
1 1-inch piece fresh ginger
^1/_4 cup vegetable oil
Split chicken breasts lengthwise. Tuck ends under to form compact shapes of uniform thickness. Wrap individually in plastic wrap and freeze on baking sheet until firm to the touch, but easily pierced with the tip of a sharp knife.
Insert standard slicing disc. Stand peppers on long ends and slice, using light pressure. Lay scal-lion pieces in feed tube horizontally and slice into slivers, using light pressure.
Insert shredding disc. Shred zucchini and squash, using light pressure. Remove and reserve vegetables.
Use metal blade to mix water, sherry, soy sauce, sesame oil, black pepper and cornstarch until smooth, about 15 seconds. Reserve.
Use metal blade to finely chop garlic and ginger. Do not empty work bowl. Insert standard slicing disc. Unwrap chicken pieces and cut to fit feed tube vertically. Stand chicken pieces tightly in feed tube and slice, using firm pressure. Leave in work
bowl. Heat vegetable oil in skillet over medium heat. Add chicken mixture and cook, stirring vigorously, until chicken is opaque, about 3–5 minutes.
Add vegetable mixture and stir-fry until crisp-tender, about 2 minutes. Add soy sauce mixture, cook, stirring, until sauce thickens, about 1 minute. Serve over brown or white rice.
Crab Cakes
These delicate seafood cakes are perfect with drinks. If you're feeling festive, substitute cooked lobster meat for half of the crabmeat.
Yield: 54, 12 -ounce crab cakes
4 slices white bread, lightly toasted
1 garlic clove, peeled
1 small onion, quartered
1 tablespoon unsalted butter
1 tablespoon parsley leaves
1 pound lump crabmeat, picked over to
remove
cartilage
1/4
cup
mayonnaise
1
large
egg
1 tablespoon fresh lemon juice
^1/_4 teaspoon kosher salt
Tartar Sauce (see recipe on page 27)
Preheat oven to 375^ F. Break bread slices in quarters and process with metal blade to fine crumbs, about 40 seconds. Reserve 14 of crumbs and put remainder in pie plate.
With machine running, drop garlic through feed tube and process until finely chopped, about 10 seconds. Add onion and chop fine, about 10 seconds. Melt butter in a medium skillet over medium heat. Add garlic/onion mixture and cook until golden brown, stirring, about 10 minutes.
Using metal blade, chop parsley fine, about 5 seconds. Add cooked onion mixture, crabmeat, mayonnaise, egg, lemon juice, salt and reserved bread crumbs; pulse until combined, about 8 times.
Form mixture into 1½ -inch cakes. (About ½ ounce each.) Coat them with crumbs in pie plate and place on buttered baking sheet. (Recipe may be prepared ahead to this point and refrigerated up
to 4 hours.) Bake in preheated oven until golden brown, about 10 to 15 minutes. Serve with Tartar Sauce.
Mashed Potatoes
The shredding disc processes cooked potatoes to the right texture. Be careful not to over-process when you mix them with the other ingredients.
Yield: 4 servings
1 / 4 cup hot milk
2 tablespoons butter, cut into 1-inch pieces
12 teaspoon kosher salt
Freshly ground black pepper
Pinch of nutmeg (optional)
3 large potatoes, peeled, boiled
and
drained
Put all ingredients except potatoes in work bowl and insert shredding disc. Place potatoes in large feed tube and process. Leave in work bowl. Remove shredding disc and carefully insert metal blade. Pulse 2 or 3 times, until liquid is absorbed. Potatoes will become gluey if you over-process.
Wonderfully light, fluffy mashed potatoes can also be made with the optional Whisk Attachment (DLC-855).
Potatoes au Gratin
You can use baking or boiling potatoes for this elegant dish.
Yield: 8 servings
3 ounces Gruyère cheese, cut into
1-inch
cubes
2 garlic cloves, peeled
1 medium onion, quartered
2½ cups milk or half-and-half
1 teaspoon kosher salt Ground white pepper
3 large potatoes (about 10 ounces each), peeled and cut flat at ends
Preheat oven to 400^ F and butter an 2-quart baking dish. Process cheese with metal blade until it is finely grated. Reserve. With machine running, drop garlic and onion through feed tube and process until finely chopped. Put garlic/onion mixture in a medium saucepan with milk, salt and pepper.
Insert shredding disc and shred potatoes, one at a time, using firm pressure on pusher. Add shredded potatoes to saucepan and bring mixture to a boil over medium-high heat, stirring continuously to prevent scorching.
Spread potato mixture in prepared baking dish and sprinkle with reserved cheese. Bake for 25 minutes, or until potatoes are tender and cheese is golden. Let stand for 10 minutes before serving.
Shredded Carrots and Zucchini
Because shredded vegetables cook so quickly, all their natural flavor and crispness are preserved.
Yield: 4 servings
3 medium carrots, peeled
2 medium zucchini
14 cup unsalted butter
Kosher salt
Freshly ground black pepper, to taste
12 teaspoon chopped fresh tarragon (or 14 teaspoon dried)
Cut carrots and zucchini to fit feed tube horizontally. Process with shredding disc.
Melt butter in large skillet over medium-high heat. Add shredded vegetables, salt and pepper. Cover and cook until crisp, about 2 or 3 minutes.
Season with tarragon.
SALADS
Sliced Tomatoes on Shredded Lettuce
You can prepare all the elements of this salad in the work bowl.
Yield: 6 servings
^1/_4 cup loosely packed parsley leaves
1 medium shallot, peeled
1^1/2 tablespoons red wine vinegar
4½ tablespoons vegetable oil
^1/_2 teaspoon Dijon mustard
12 teaspoon granulated sugar
^1/_2 teaspoon kosher salt
Freshly ground black pepper
4 fi rm, ripe, medium tomatoes, cored and cut fl at at ends
1 medium head romaine lettuce, washed
Use metal blade to finely chop parsley and shallot. Add vinegar, oil, mustard, sugar, salt and pepper through the feed tube while the machine is running. Leave in work bowl. Remove metal blade and insert standard slicing disc. Slice tomatoes, using light pressure.
Cut lettuce into sections to fit feed tube. Use slicing disc with medium pressure.
Transfer contents of work bowl to platter, arranging tomatoes over lettuce in an attractive pattern.
TIP: When preparing a meal, make the dishes with the least amount of wet ingredients first. In many cases, wiping the work bowl with a paper towel between recipes is sufficient.
Creamy Coleslaw
Coleslaw only takes minutes to prepare when you don't have to slice the cabbage by hand.
Yield: 5 cups
14 cup loosely packed parsley leaves
1 1-oz. piece peeled onion
13 cup mayonnaise
12 tablespoon red wine vinegar
14 teaspoon kosher salt
14 teaspoon freshly ground black pepper
12 large carrot
12 medium head green cabbage
Process parsley with metal blade until minced. Add onion and process until minced. Add all remaining ingredients, except carrot and cabbage; process 5 seconds to combine. Remove metal blade.
Cut carrot in half crosswise. Core cabbage and cut it into wedges. Insert shredding disc and shred carrot, using firm pressure. Insert thin slicing disc and slice cabbage, using firm pressure. Add contents of work bowl to mixing bowl and toss to combine. Adjust seasoning. Serve immediately or refrigerate for up to 24 hours. Before serving, drain excess liquid and adjust seasoning. Serve chilled.
Shredded Carrot Salad
The brilliant colors of carrots and peas make this fresh and simple salad a welcome addition to a party buffet table.
Yield: 8 servings
2 pounds young carrots
3 large scallions, trimmed and cut into 1-inch pieces
14 cup fresh lemon juice
14 cup vegetable oil
1 teaspoon kosher salt
1 teaspoon granulated sugar
Pinch ground allspice
Pinch ground cinnamon
Freshly ground black pepper
12 cup cooked peas, fresh or frozen (thawed)
Cut carrots to fit feed tube horizontally. Parboil them in salted water until you can just pierce them with the tip of a sharp knife, about 3 to 5 minutes. Drain and rinse under cold water. When cool, blot dry with paper towels.
Process scallions with metal blade until they are finely chopped. Add lemon juice, oil, salt, sugar, allspice, cinnamon, and pepper; process for about 3 seconds. Leave the dressing in the work bowl.
Insert shredding disc. Pack carrots horizontally in feed tube and shred, using medium pressure. Transfer contents of work bowl to serving bowl. Add peas and toss gently to coat all ingredients with dressing. Serve cold or at room temperature. Adjust seasoning just before serving.
SAUCES
Pesto
A classic pasta sauce from Italy. One cup is enough for 1 pound of pasta. It's also good on boiled potatoes or in soups.
Yield: 1½ cups
4 ounces imported Parmesan, room temperature, cut into 1-inch (2.5cm) pieces
4 small garlic cloves, peeled
2 ^2/3 cups tightly packed, fresh basil leaves
1 / 3 cup pine nuts
^3/_4 teaspoon kosher salt
1 / 3 cup olive oil
Use metal blade to chop cheese and garlic, about 30 seconds. Add remaining ingredients, except oil, and process until combined, about 8 pulses. With machine running, pour oil through feed tube. Process until combined, about 10 seconds. Scrape bowl and continue processing until smooth, about 20 seconds.
Pesto keeps for up to 5 days in the refrigerator and it also freezes well. Some people prefer to omit the cheese when freezing pesto and add it just before serving.
No-Cook Cranberry-Orange Relish
Only 1 cup of sugar sweetens 1 pound of cranberries. Most cooked relishes call for 2 cups of sugar.
Yield: 1 ^3/4 cups
2 cups fresh cranberries
12 navel orange, unpeeled and quartered
12 cup granulated sugar
Use metal blade to coarsely chop fruit, about 8 to 10 pulses. Add sugar and process to combine, about 20 seconds. Store in refrigerator.
Salsa
Serve this sauce as a topping for tacos, or with grilled fish or chicken. It is best when fresh; it may become slightly bitter after standing a day.
Yield: 2 ^2/3 cups
2 jalapeños, halved and seeded
13 cup packed cilantro leaves*
1 tablespoon fresh lime juice
18 teaspoon kosher salt
5 medium tomatoes, cored and quartered
1 medium onion
Use metal blade to process peppers and cilantro until finely chopped, about 20 seconds. Scrape bowl. Add lime juice and salt; pulse twice to combine.
Add tomatoes and onion; pulse until coarsely chopped, about 10 to 12 times.
Transfer to serving dish. Stir and serve within 1 or 2 hours.
* Substitute flat-leaf parsley if cilantro is not available.
Raspberry Sauce
A fine finish for ice cream, sherbet or cake. You can substitute strawberries for the raspberries.
Yield: 1 cup
1 10-ounce package frozen raspberries, thawed
1 tablespoon honey
Use metal blade to purée raspberries and honey for 30 seconds. Transfer to fine sieve placed over a mixing bowl. Press solids through the sieve with back of spoon and discard seeds. Serve at room temperature or warm slightly to serve over ice cream.
Mayonnaise
Adding oil very slowly is essential for the mayonnaise emulsion – the hole in the pusher adds the oil at just the right speed for success. Flavored vinegar or fresh or dried herbs can be added for a flavored mayonnaise.
Yield: 1¼ cups mayonnaise
Recipe may be doubled
2 large egg yolks
2 tablespoons white wine vinegar or fresh lemon juice
2 tablespoons water
1 teaspoon granulated sugar
1 teaspoon dry mustard powder
^1/_2 teaspoon kosher salt
1 / 8 teaspoon ground white pepper
1 cup fl avorless vegetable oil
Have a shallow pan of ice water ready. In a small skillet, use a whisk to stir together the egg yolks, vinegar or lemon juice, sugar, dry mustard, salt, and pepper until completely blended. Cook over very low heat, stirring constantly, until the mixture bubbles in 1 or 2 places – do not allow eggs to scramble. Remove from the heat and place in the ice water bath, stir to cool down.
Insert the metal blade. Place the egg mixture in the work bowl. Cover and insert the pusher. Turn the machine on and add half the oil to the pusher; the oil will run through the pusher very slowly into the work bowl to create the emulsion. When it has totally run through, add the remaining oil to the pusher. As the emulsion is made, the sound of the machine will become deeper. Transfer mayonnaise to a container, cover and chill until ready to use. Will keep for 2 to 3 days in the refrigerator.
Herb Mayonnaise: Add 14 cup tightly packed fresh green herbs when you put the egg in the work bowl. Recommended herbs are parsley, dill and tarragon, with stems removed.
Tarter Sauce: Triple the amount of lemon juice. When mayonnaise is finished, add these ingredients: 3 small gherkins, 14 small onion, 1 tablespoon capers, 1 tablespoon bottled horseradish and 3 drops hot sauce. Process until gherkins and onion are chopped fine, about 10 seconds.
Pastry Cream
Spread about one cup of this cream in a cooked, 9-inch tart shell and arrange sliced, fresh fruit on top.
Yield: 1½ cups
1 14 cups milk
2 large egg yolks
14 cup granulated sugar
12 teaspoon pure vanilla extract
3 tablespoons unbleached, all-purpose fl our
2 tablespoons unsalted butter, softened
Bring milk to a boil in small saucepan over medium heat. Insert metal blade and add egg yolks, sugar, vanilla and flour. Process until just combined. With the machine running, pour hot milk through feed tube in a steady stream. Return mixture to saucepan and whisk over medium heat until it boils. Reduce heat to low and simmer for 2 minutes, whisking constantly. Remove from heat and stir in butter. Cool to lukewarm before using.
Chocolate Sauce
You can make a delicious chocolate sauce in 1 minute! No more worries about melting chocolate on top of the stove.
Yield: about 1 cup
5 ounces semisweet chocolate, broken into 12 -inch pieces
14 cup superfi ne sugar
13 cup very hot water
Use the metal blade to coarsely chop chocolate with sugar, about 6 pulses. Then process continuously until chopped to a fine powder, about 60 seconds. With machine running, slowly pour hot water through feed tube. Process until chocolate melts, about 45 seconds, stopping once to scrape bowl.
Mint Variation: Add 1 tablespoon of peppermint extract, crème de menthe or peppermint schnapps to water after it is heated.
PASTRY
Basic Pastry
This is the basic dough for pies, tarts and quiches.
Yield: three 9-inch pie shells
2 ^2/3 cups unbleached, all-purpose fl our
2 sticks very cold, unsalted butter, cut into 1-inch pieces
1 teaspoon kosher salt
12 cup ice water
Use metal blade to process flour, butter and salt until mixture is like coarse meal, about 8 seconds. Add ice water a tablespoon at a time and pulse until dough begins to clump together. Do not let it form a ball. Divide dough into three equal parts and put each in a plastic food storage bag. Work through bag to press dough together into a ball, then flatten into a disk. Refrigerate dough for at least 1 hour.
Roll each disk of dough on lightly floured surface into a circle about 18 inch thick. Press into place in pie pan. Use kitchen shears to trim dough, leaving 1-inch overlap beyond pan. Fold overlap under and pinch crust to form decorative edge. Prick bottom and sides with fork and refrigerate crust for 30 minutes, or until firm.
Preheat oven to 400^ F, 15 minutes before baking.
Line pie shell with parchment paper and fill it with uncooked beans or rice. Bake for 12 minutes. Remove paper, beans or rice. Prick shell again and bake it 6 minutes longer, or until it is lightly browned. Let cool on wire rack.
Fruit Tart Variation:
Use a 9-inch tart pan instead of a pie pan. Bake shell according to above directions. When cooked shell is thoroughly cool, remove shell from pan, fill with about 1 cup of pastry cream (see recipe on page 27). Arrange sliced, fresh fruit (kiwi, peach-es, raspberries, etc.) decoratively on top.
QUICK BREADS, YEAST BREAD AND PIZZA
Cornbread
This is a particularly moist and flavorful cornbread which is best served warm.
4 tablespoons unsalted butter
1 cup yellow cornmeal
1 cup unbleached, all-purpose fl our
2 tablespoons granulated sugar
13 tablespoon baking powder
14 teaspoon baking soda
14 teaspoon kosher salt
1^1/3 cups buttermilk
2 large eggs
12 cup fresh, frozen or canned corn kernels
Preheat oven to 425°F. Melt butter in a 9 x 9-inch baking pan. Coat sides and bottom of pan with melted butter. Reserve.
Use metal blade to process dry ingredients until combined, about 10 seconds. Add melted butter, buttermilk and eggs; process until mixed, about 5 seconds. Scrape work bowl and gently stir in corn kernels.
Pour into prepared pan and bake until a toothpick inserted in center comes out clean, about 25 minutes.
Muffin Variation: For corn muffins, pour batter into greased, standard-size muffin tins. Fill them 34 full. Bake in preheated 425^ F oven for about 25 minutes. Makes 8 muffins.
Coffee Cake
This makes an excellent breakfast or brunch cake. Also serve as a sweet addition to lunch or supper.
Dough
1 package (spoons) active dry yeast
2 tablespoons granulated sugar, divided
^1/_4 cup warm water (105°F–110°F)
1 / 3 cup sour cream
^1/_4 cup cold milk
1 large egg
1 teaspoon pure vanilla extract
3 cups unbleached, all-purpose fl our
4 tablespoons butter, cold and cut into 1-inch pieces
1 / 2 teaspoon kosher salt
2 tablespoons unsalted butter, melted and divided
Filling
1 / 2 cup packed light brown sugar
12 cup dates, cut into 1-inch pieces
1 / 2 cup pecan halves
1 teaspoon ground cinnamon
In a 2-cup liquid measure dissolve yeast and 1 tablespoon sugar in warm water. Let stand until foamy. Stir together the sour cream, milk, egg and vanilla extract and add to the yeast mixture.
Using the metal blade, process flour, cold butter, salt and remaining sugar for 10 seconds. With machine running, add yeast mixture through feed tube in a steady stream as fast as flour absorbs it. After dough cleans inside of work bowl, continue processing 40 seconds more to knead it.
Shape dough into a ball and place it in a lightly floured plastic food storage bag. Squeeze out air and close top with wire twist. Let rise in a warm place until doubled in size, about 1 hour.
Roll dough on lightly floured surface into 20 x 12-inch rectangle. Brush with 1 tablespoon of melted butter. With remaining butter, brush inside of a 9 x 13-inch pan.
Use metal blade to combine brown sugar, dates, pecans and cinnamon until coarsely chopped, about 45 seconds. Spread filling over dough. Roll dough up, jelly-roll fashion, from long side.
Use sharp knife to cut rolled dough into 34 -inch slices. Place slices in buttered pan, cut side up, and let rise until doubled in size.
Preheat oven to 375^ F, 15 minutes before baking. Bake coffee cake until golden and bubbly, about 20 to 25 minutes. Serve warm.
White Bread
We used unbleached, all-purpose flour and had great results.
Yield: two 1-pound loaves
1 package (2 spoons) active dry yeast
13 cup warm water (105°F–110°F)
2 teaspoons granulated sugar
4 cups unbleached, all-purpose fl our
3 tablespoons 1-inch pieces
1½ teaspoons kosher salt
1 cup ice water Vegetable oil for pans
Stir yeast and sugar into warm water in 2-cup measure and let stand until foamy, 5 to 10 minutes. Use metal blade to process flour, butter and salt for 20 seconds. Add ice water to yeast mixture.
With machine running, pour liquid through feed tube in a steady stream, only as fast as flour absorbs it. Continue processing until dough cleans inside of work bowl and forms a ball. Then let machine run for 60 seconds to knead dough.
Shape dough into a ball and place in a lightly floured plastic storage bag. Squeeze out air and close end with wire twist, allowing space for dough to rise. Let rise in a warm place until dough has doubled in size, about 1 to 1 12 hours.
Punch dough down and shape into 2 loaves. Place each in an oiled 6-cup loaf pan. Cover with oiled plastic wrap and let rise in a warm place until dough just rises above top of pan, about 45 minutes. Preheat oven to 375°F, 15 minutes before baking. Bake until top is browned, about 35–40 minutes. Remove from pan and cool on wire rack.
Whole Wheat Variation: Replace half of all-purpose flour with an equal amount of whole wheat flour.
Basic Pizza Dough
With this dough, you can make large pizza crusts to serve several, or small ones to serve a few.
Yield: one 14-inch pizza crust or two 9-inch pizza crusts
1 package (spoons) active dry yeast
1 teaspoon granulated sugar
^2/3 cup warm water (105°F–110°F)
1^2/3 cups unbleached, all-purpose fl our
^3/_4 teaspoon kosher salt
2 teaspoons olive oil
Vegetable oil for pan
1^1/2 tablespoons cornmeal for pan
Stir yeast and sugar into warm water and let stand until foamy, about 5 to 10 minutes. Insert metal blade, put flour and salt in work bowl and turn on machine. Pour yeast mixture through feed tube and process about 45 seconds, until dough pulls away from sides of bowl. Add olive oil through feed tube and process 60 seconds longer.
If dough sticks to sides of bowl, add more flour, 1 tablespoon at a time, processing 10 seconds after each addition, until dough leaves sides of bowl, but remains soft.
Roll dough on floured surface into a circle, rotating and turning dough often and using enough flour so it doesn't stick. If dough resists rolling, let it rest for a few minutes and try again. Roll dough into a 15-inch circle for a flat 14-inch pizza pan, or into a 10-inch circle for a flat 9-inch pizza pan.
Oil pan(s) lightly and sprinkle with cornmeal. Fold rolled dough in half loosely, then in half again. Position point at center of pan and gently unfold. Press into place from center outward, turn under the 1-inch overhang and shape it into a rim. Crust(s) is now ready to bake and fill.
Pizza in a Hurry
It takes no longer to make this pizza than to wait for one you order to take out.
Yield: One 14-inch pizza
1 14-inch pizza crust
(previous recipe)
4 ounces Parmesan, at room temperature
2 ounces pepperoni, cut into 3 pieces
12 ounces mozzarella, very cold
1 small onion, peeled, ends cut fl at
1 medium green pepper, cored, seeded and cut fl at at stem
1 medium tomato, cored and cut fl at at ends
1 cup Tomato Pizza Sauce (recipe follows)
Pinch granulated sugar Freshly ground black pepper
12 teaspoon dried basil
12 teaspoon dried oregano
Preheat oven to 425^ F and place rack in lower third. Bake pizza crust for 6 minutes. In the meantime, prepare filling.
Use metal blade to process Parmesan and pepperoni until coarsely chopped. Reserve.
Insert shredding disc and process mozzarella. Reserve.
Insert standard slicing disc and slice onion. Reserve. Slice green pepper and reserve. Slice tomato, using light pressure. Set aside on paper towels to drain.
Use rubber spatula to spread Tomato Pizza Sauce evenly over pre-baked crust, leaving rim exposed. Separate onion slices into rings and distribute them over sauce. Distribute shredded mozzarella over onions. Arrange tomato slices over cheese and sprinkle with a pinch of sugar and pepper.
Distribute Parmesan and pepperoni mixture, then green pepper slices, over tomatoes. Sprinkle evenly with basil and oregano. Return pizza to oven and bake for 18 minutes, or until rim of crust is golden and bottom is deep brown.
Tomato Pizza Sauce
When this sauce stands, liquid may accumulate on the surface. Pour off all but 2 tablespoons, then stir well before using.
Yield: 2 cups
2 large tomatoes, peeled, seeded and quartered
1 cup canned tomato sauce
14 cup tomato paste
^3/_4 teaspoon dried oregano
^3/_4 teaspoon dried basil
1 teaspoon granulated sugar
Kosher salt and freshly ground black
Use metal blade to coarsely chop tomatoes, about 6 pulses. Add remaining ingredients and pulse 4 times to mix.
DESSERTS
Apple Pie
Yield: One 9-inch pie
Pastry for two 9-inch pie shells (see Basic Pastry recipe, page 27)
12 cup granulated sugar
3 tablespoons unbleached, all-purpose fl our
^3/_4 teaspoon ground cinnamon
^1/_8 teaspoon ground nutmeg
2 pounds apples, peeled and cored
Preheat oven to 375^ F. Roll out 2 pastry shells as directed in Basic Pastry recipe (page 27). Place one in a 9-inch pie plate and reserve remaining pastry shell.
Use the metal blade to process the sugar, flour, cinnamon and nutmeg, about 5 seconds. Leave in work bowl.
Insert the standard slicing disc. Slice apples using medium pressure. Transfer apple/spice mixture to the pie plate. Place second crust over apples.
Pinch crust edges together and form a decorative edge. With a sharp knife, make 6–8 small cuts in top crust to allow steam to escape. Place pie on a baking sheet and bake until juices bubble, about 45 minutes.
Fudgy Brownies
These easy-to-make brownies are always a favorite in lunchboxes or for after-school snacks.
Yield: 24 brownies
Nonstick cooking spray
4 ounces unsweetened chocolate
1^1/2 cups packed light brown sugar, divided
12 cup unsalted butter, melted
4 large eggs
1½ teaspoons pure vanilla extract
1 cup unbleached, all-purpose fl our
14 teaspoon kosher salt
1 12 teaspoons baking powder
^3/_4 cup pecan halves
Preheat oven to 350^ F. Spray a 9 x 9-inch square pan with nonstick cooking spray.
Use metal blade to coarsely chop chocolate with half the sugar, about 6 to 8 pulses. Then process continuously until finely chopped, about 20 seconds.
With machine running, pour hot butter through feed tube. Process until smooth, about 30 seconds. Add remaining sugar, eggs and vanilla extract. Pulse twice, then process 10 seconds more. Add dry ingredients and nuts. Pulse/chop until just mixed, about 6 to 8 times. Spread in prepared pan.
Bake until outside is slightly crusty and inside is still moist, about 20 minutes. Cool completely and cut into squares.
Chocolate Chip Oatmeal Cookies
Toasted nuts and oats make these cookies good for you as well as delicious.
Yield: 48, 2½ -inch cookies
^3/_4 cup quick-cooking oats
1 cup pecan halves
1 cup unsalted butter, cut into 1-inch pieces
1 / 2 cup granulated sugar
^3/_4 cup packed light brown sugar
2 large eggs
1 teaspoon pure vanilla extract
1^1/2 cups unbleached, all-purpose fl our
1 teaspoon baking soda
^3/_4 teaspoon kosher salt
9 ounces semisweet chocolate chips Nonstick cooking spray
Preheat oven to 350^ F and place rack in center. Toast oats and pecans on baking sheet until lightly browned, about 10 minutes. Remove and reserve. Raise oven temperature to 375^ F.
Use metal blade to process butter and both sugars until smooth, about 2 minutes. Scrape work bowl as necessary. Add eggs and vanilla extract; pulse until just mixed, about 6 times.
Add toasted pecans, flour, baking soda, salt and half the toasted oats. Pulse until mixed, about 8 times. Remove to large bowl, add remaining oats and chocolate chips and stir to mix. Drop by rounded teaspoonfuls onto greased baking sheets 1 inch apart and bake until golden brown, about 11 minutes.
Carrot Cake
To make this delicious, moist cake look really professional, place a marzipan carrot in the center. You can buy them at many pastry or candy shops.
Yield: 8 to 10 servings
Softened butter for pans
Fine, dry breadcrumbs for dusting pans
12 pound carrots, peeled
12 cup granulated sugar
12 cup packed dark brown sugar
2 large eggs
12 cup corn oil
1 teaspoon pure vanilla extract
34 cup walnut pieces
1 cup unbleached, all-purpose fl our
12 tablespoon unsweetened cocoa
1 teaspoon baking powder
1 teaspoon ground cinnamon
12 teaspoon baking soda
12 teaspoon kosher salt
12 cup raisins
Cream Cheese Frosting (recipe follows)
Preheat oven to 350^ F. Butter two 8-inch round cake pans, line bottoms with parchment paper and butter paper. Dust pans with breadcrumbs.
Cut carrots into lengths to fit tube horizontally. Use shredding disc to shred carrots; reserve.
Process sugars, eggs, oil and vanilla extract with metal blade until smooth, about 15 seconds. Add walnuts and dry ingredients; pulse until combined, about 6 times, stopping once to scrape down work bowl. Use spatula to stir in raisins and carrots.
Divide batter between prepared pans and bake in preheated oven until a cake tester inserted in the center comes out clean, about 35 to 40 minutes. Cool in pans for 2 to 3 minutes and turn out onto wire racks to cool completely. Remove paper.
Spread frosting between layers and on top and sides of cake.
Cream Cheese Frosting
This quick, easy frosting is delicious on carrot cake, but it is also good on many other cakes.
Frosts two 8-inch layers
12 pound (two standard packages) cream cheese, room temperature, and cut in 1-inch pieces
^1/_2 stick unsalted butter, room temperature and cut into 1-inch pieces
1 cup confectioners' sugar
^1/_2 teaspoon pure vanilla extract
Use metal blade to process cream cheese and butter until combined, about 10 seconds. Add sugar and process until smooth, about 5 seconds. Add vanilla extract and process until smooth, about 15 seconds.
Pear Frozen Yogurt
Yield: Six 1-cup servings
4 medium pears, peeled and cored
^1/_3 cup confectioners' sugar
^2/_3 cup yogurt
1^1/2 tablespoons fresh lemon juice
At least 5 hours before serving, prepare fruit by cutting it into 1-inch pieces. Freeze all the fruit in a single layer on baking sheet.
A few minutes before serving, process frozen fruit and sugar with metal blade, pulsing about 8 times. Then process continuously until fruit is finely chopped, scraping work bowl and cover as necessary.
Add yogurt and lemon juice; process just until mixture becomes smooth and creamy, scraping down work bowl as necessary. Taste for sweetness, adding more sugar if necessary.
Serve immediately, or freeze for later use. To prepare frozen mixture for serving, cut into 1-inch chunks. Process with metal blade just until mixture becomes smooth and creamy.
Banana-Apple Sherbet
Yield: 5 servings
3 medium Golden Delicious apples, peeled and cored
3 small bananas
1½ tablespoons confectioners' sugar
2 tablespoons fresh lemon juice
At least 5 hours before serving, prepare fruit by cutting it into 1-inch pieces. Freeze 34 of fruit in a single layer on baking sheet and refrigerate remaining fruit.
A few minutes before serving, process frozen fruit and sugar with metal blade, pulsing about 8 times. Then process continuously until fruit is finely chopped, scraping work bowl and cover as necessary.
Add refrigerated fruit and lemon juice; process just until mixture becomes smooth and creamy, scraping down work bowl as necessary. Taste for sweetness, adding more sugar if necessary.
Serve immediately, or freeze for later use. To prepare frozen mixture for serving, cut into 1-inch chunks. Process with metal blade just until mixture becomes smooth and creamy.
Limited Three-Year Warranty (U.S. and Canada ONLY)
This warranty is available to consumers only. You are a consumer if you own a Cuisinart® Pro Custom 11™ Food Processor that was purchased at retail for personal, family or household use. Except as otherwise required under applicable law, this warranty is not available to retailers or other commercial purchasers or owners. We warrant that your Cuisinart® Pro Custom 11™ Food Processor will be free of defects in materials and workmanship under normal home use for 3 years from the date of original purchase.
We recommend that you visit our website, www.cuisinart.com for a fast, efficient way to complete your product registration. However, product registration does not eliminate the need for the consumer to maintain the original proof of purchase in order to obtain the warranty benefits. In the event that you do not have proof of purchase date, the purchase date for purposes of this warranty will be the date of manufacture.
CALIFORNIA RESIDENTS ONLY
California law provides that for In-Warranty Service, California residents have the option of returning a nonconforming product (A) to the store where it was purchased or (B) to another retail store that sells Cuisinart products of the same type. The retail store shall then, according to its preference, either repair the product, refer the consumer to an independent repair facility, replace the product, or refund the purchase price less the amount directly attributable to the consumer's prior usage of the product. If neither of the above two options results in the appropriate relief to the consumer, the consumer may then take the product to an independent repair facility, if service or repair can be economically accomplished.
Cuisinart and not the consumer will be responsible for the reasonable cost of such service, repair, replacement, or refund for nonconforming products under warranty. California residents may also, according to their preference, return nonconforming products directly to Cuisinart for repair or, if necessary, replacement by calling our Consumer Service Center toll-free at 1-800-726-0190. Cuisinart will be responsible for the cost of the repair, replacement, and shipping and handling for such nonconforming products under warranty.
BEFORE RETURNING YOUR CUISINART PRODUCT
If your Cuisinart® Pro Custom 11™ Food Processor should prove to be defective within the warranty period, we will repair or, if we think necessary, replace it. To obtain warranty service, please call our Consumer Service Center toll-free at 1-800-726-0190 or write to: Cuisinart, 7475 North Glen Harbor Blvd., Glendale, AZ 85307. To facilitate the speed and accuracy of your return, enclose \$10.00 for shipping and handling. (California residents need only supply proof of purchase and should call 1-800-726-0190 for shipping instructions.) Please be sure to include your return address, daytime phone number, description of the product's defect, product serial number, and any other information pertinent to the return. Please pay by check or money order made payable to Cuisinart. NOTE: For added protection and secure handling of any Cuisinart product that is being returned, we recommend you use a traceable, insured delivery service. Cuisinart
cannot be held responsible for in-transit damage or for packages that are not delivered to us. Lost and/or damaged products are not covered under warranty. Your Cuisinart® Pro Custom 11™ Food Processor has been manufactured to the strictest specifications and has been designed for use only in 120 volt outlets and only with authorized accessories and replacement parts. This warranty expressly excludes any defects or damages caused by attempted use of this unit with a converter, as well as use with accessories, replacement parts or repair service other than those authorized by Cuisinart. This warranty does not cover any damage caused by accident, misuse, shipment or other than ordinary household use. This warranty excludes all incidental or consequential damages. Some states do not allow the exclusion or limitation of these damages, so these exclusions may not apply to you. You may also have other rights, which vary from state to state.
Important: If the nonconforming product is to be serviced by someone other than Cuisinart's Authorized Service Center, please remind the servicer to call our Consumer Service Center at 1-800-726-0190 to ensure that the problem is properly diagnosed, the product is serviced with the correct parts, and to ensure that the product is still under warranty.
NOTES:
© 2016 Cuisinart
150 Milford Road
East Windsor, NJ 08520
Printed in China
16CE019155
G 18-4274-ESP
16CE019155
Impereso en China
East Windsor, NJ 08520
150 Million Road
© 2016 Cuisineant
pizza (receita a continuation)
natural_image
Product photo of a Cuisiara food processor with fresh tomatoes and vegetables, no visible text or symbols on the main components.Size: 210X148MM Number of Page:72PP Saddle Stitched
Material: 105gsm gloss art paper for whole book
Coating: Gloss Varnishing In Cover
Color(Front): Cover:4C(black)+1C(black)
(Back): Inside:1C(black)+ 1C(black)
Date: 29-Jan-2016 Co-ordinator Astor You/Linda Ouyang
Hugo Description
PDF version: IB-4274-ESP(0.0)
Hugo Code: SMT 0401 IB-1-1 Operator:CW
Hugo Diecut: IRP:BBJ
Hot Stamping: Spot UV: Embossing:
Remark: Quality Request(1)

natural_image
Color palette grid with grayscale squares (no text or symbols)



- IMPORTANT UNPACKING INSTRUCTIONS
- CAUTION: THE CUTTING TOOLS HAVE VERY SHARP EDGES.
- IMPORTANT SAFEGUARDS
- Getting Ready
- Operation
- Cleaning
- General
- SAVE THESE INSTRUCTIONS
- Compact Cover
- Contents
- Parts
- PROCESSOR GUIDELINES
- Before you do anything, wait for the blade to stop spinning.
- To chop raw fruits and vegetables:
- To purée fruit and cooked vegetables:
- To chop hard food like garlic, hard cheese:
- To chop parsley and other fresh herbs:
- To chop meat, poultry, fish and seafood:
- To purée meat, poultry, fish and seafood:
- To chop nuts:
- To make peanut butter and other nut butters:
- To make flavored butter, spreads and dips:
- To chop peel from citrus fruit (zest) or to chop sticky fruit like dates or raisins:
- To assemble the Compact Cover:
- To disassemble the Compact Cover:
- TECHNIQUES FOR CHOPPING AND PURÉEING WITH THE METAL BLADE
- To make mayonnaise:
- To beat egg whites:
- The work bowl and metal blade must be absolutely clean.
- To whip cream:
- To make bread, cracker and cookie crumbs and crumb crusts:
- To make pastry:
- To make quick breads, and cakes that use baking powder and/or baking soda:
- The most important rule for success is not to over-mix after the flour is added.
- To make cake mix:
- Tip:
- TECHNIQUES FOR KNEADING YEAST DOUGH
- Machine capacity
- Measuring the flour
- Proofing the yeast
- Processing dry ingredients
- Adding liquids
- Kneading bread dough
- Kneading typical bread dough
- Kneading typical sweet dough
- Adding other ingredients
- Rising
- Shaping, finishing and baking
- Making consecutive batches
- TROUBLESHOOTING YEAST DOUGH
- Blade doesn't incorporate ingredients
- Blade rises in work bowl
- Dough doesn't clean inside of work bowl
- Nub of dough forms on top of blade and does not become uniformly kneaded
- Dough feels tough after kneading
- Soft dough or liquid leaks onto base of food processor
- Motor stops
- Dough doesn't rise
- Baked bread is too heavy
- PROBLEMS AND SOLUTIONS WITH TYPICAL SWEET DOUGHS
- Motor slows down
- PREPARING FOOD FOR SLICING AND SHREDDING
- Round fruits and vegetables
- Whole peppers are an exception
- Large fruits like pineapple and cantaloupe
- Cabbage and iceberg lettuce
- If the fruit or vegetable doesn't fit
- Pack the feed tube for desired results
- SLICING AND SHREDDING WITH THE SLICING AND SHREDDING DISCS
- REMOVING SLICED OR SHREDDED FOOD
- Before you do anything, wait for the disc to stop spinning.
- SLICING AND SHREDDING TECHNIQUES
- Small, round fruits and vegetables
- Long fruits and vegetables
- Small amounts of food
- French-cut green beans
- Matchsticks or julienne strips
- SLICING MEAT AND POULTRY
- Cooked meat and poultry
- Uncooked meat and poultry
- Frankfurters, salami and other sausages
- SLICING AND SHREDDING CHEESE
- Firm cheeses like Swiss and Cheddar
- IF YOU HAVE A PROBLEM
- Food is unevenly chopped
- Liquid leaks from bottom of bowl onto motor base
- Liquid leaks out between bowl and cover when machine is running
- Slices are uneven or slanted
- Carrots, or similar food, fall over in feed tube
- Sliced or shredded food piles up on one side of work bowl
- A few pieces of food remain on top of slicing or shredding disc
- Soft cheese like mozzarella spreads out and collects on top of shredding disc
- CLEANING, STORING AND MAINTENANCE
- MAINTENANCE
- FOR YOUR SAFETY
- SOME TECHNICAL DATA
- NOTES:
- BOWL CAPACITY
- Recommended work bowl capacity
- Appetizers
- Soups
- Meats and Fish
- Vegetables
- Salads
- Sauces
- Pastry
- Quick Breads, Yeast Bread and Pizza
- Desserts
- Guacamole
- Blue Cheese and Pecan Spread
- Cheese Coins
- Chunky Gazpacho
- Leek and Potato Soup/ Vichyssoise
- Lentil Soup
- Split Pea Soup
- Meatloaf
- Chili
- Chicken and Vegetable Stir-Fry
- Crab Cakes
- Tartar Sauce (see recipe on page 27)
- Mashed Potatoes
- Potatoes au Gratin
- Shredded Carrots and Zucchini
- Sliced Tomatoes on Shredded Lettuce
- Creamy Coleslaw
- Shredded Carrot Salad
- Pesto
- No-Cook Cranberry-Orange Relish
- Salsa
- Raspberry Sauce
- Mayonnaise
- Pastry Cream
- Chocolate Sauce
- Basic Pastry
- Fruit Tart Variation:
- Cornbread
- tablespoons unsalted butter
- Coffee Cake
- Dough
- Filling
- White Bread
- Basic Pizza Dough
- Pizza in a Hurry
- Tomato Pizza Sauce
- Apple Pie
- Fudgy Brownies
- Chocolate Chip Oatmeal Cookies
- Carrot Cake
- Softened butter for pans
- Cream Cheese Frosting
- Pear Frozen Yogurt
- Banana-Apple Sherbet
- medium Golden Delicious apples, peeled and cored
- small bananas
- Limited Three-Year Warranty (U.S. and Canada ONLY)
- CALIFORNIA RESIDENTS ONLY
- BEFORE RETURNING YOUR CUISINART PRODUCT
- G 18-4274-ESP
- Hugo Description
Brand : CUISINART
Model : Pro Custom 11 DLC-8S
Category : Food processor