
C355 - Elliptical bike Master - Free user manual and instructions
Find the device manual for free C355 Master in PDF.


| Product Type | Elliptical Bike |
| Brand | Master |
| Model | C355 |
| Dimensions (L x W x H) | 180 x 70 x 170 cm |
| Net Weight | 82 kg |
| Max User Weight | 120 kg |
| Power Supply | Batteries (2 x AAA) for console |
| Resistance System | Magnetic with 8 levels |
| Display | LCD screen showing time, distance, speed, calories, pulse |
| Pulse Monitoring | Hand grip sensors |
| Pedal Type | Oversized with anti-slip surface |
| Stride Length | 40 cm |
| Transport Wheels | Yes, front mounted |
| Leveling Feet | Adjustable rear stabilizers |
| Frame Material | Steel with powder coating |
| Manual Language | English |
| Warranty | 2 years on frame and parts |
| Maintenance | Regular cleaning and lubrication of moving parts |
| Safety Features | Emergency stop, stable base |
| Spare Parts Available | Pedals, handles, console, resistance motor |
Frequently Asked Questions - C355 Master
User questions about C355 Master
0 question about this device. Answer the ones you know or ask your own.
Ask a new question about this device
Download the instructions for your Elliptical bike in PDF format for free! Find your manual C355 - Master and take your electronic device back in hand. On this page are published all the documents necessary for the use of your device. C355 by Master.
USER MANUAL C355 Master
natural_image
Exterior view of a modern stationary exercise bike with visible arms and legs (no text or symbols)MASTER C355
MANUAL
LÄS IGENOM DENNA MANUAL FÖRE ANVÄNDNING!
natural_image
Illustration of a threaded bolt with hexagonal head (no text or symbols)119. 3/8"×2"
Sexkantsbult (1st)
Steg 2

75. 5/16"× 15m/m
Bult (6st)
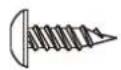
84. ∅3.5 × 12m/m
Skruv (6st)

70. 5/16"× 15m/m
Bult (2st)

97. 5/16"×23×1.5T
Bricka (2st)

101.∅17
Bricka (2st)
Steg 3

71. 5/16" × 32m/m
Sexkantsbult (2 st)

105. 5/16"× 7T
Mutter (2 st)

89. 3/8" × 7T
Mutter (2 st)
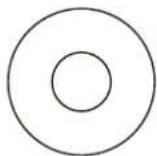
98. 5/16"×20×1.5T
Bricka (2 st)
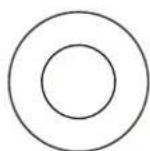
94. 3/8"× 19× 1.5T
Bricka (2 st)

114. 3/8"× 23× 2T
Böjd bricka (4 st)

natural_image
Technical line drawing of a bolt with threaded end (no text or symbols)76. 3/8" × 2-1/4"
Bult (6 st)
Steg 4
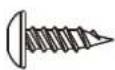
84. ∅3.5 × 12m/m
Skruv (8 st)

79. M5 × 15m/m
Skruv (12 st)
Verktyg

natural_image
Line drawing of a L-shaped tool with a pointed tip (no text or symbols)108. Kombinerad M5 Insexnyckel & Skruvmejsel (1 st)

natural_image
Simple line drawing of a wrench (no text or symbols)natural_image
Simple line drawing of a double-ended wrench (no text or symbols)111. 13/14m/m Skiftnyckel (1 st)
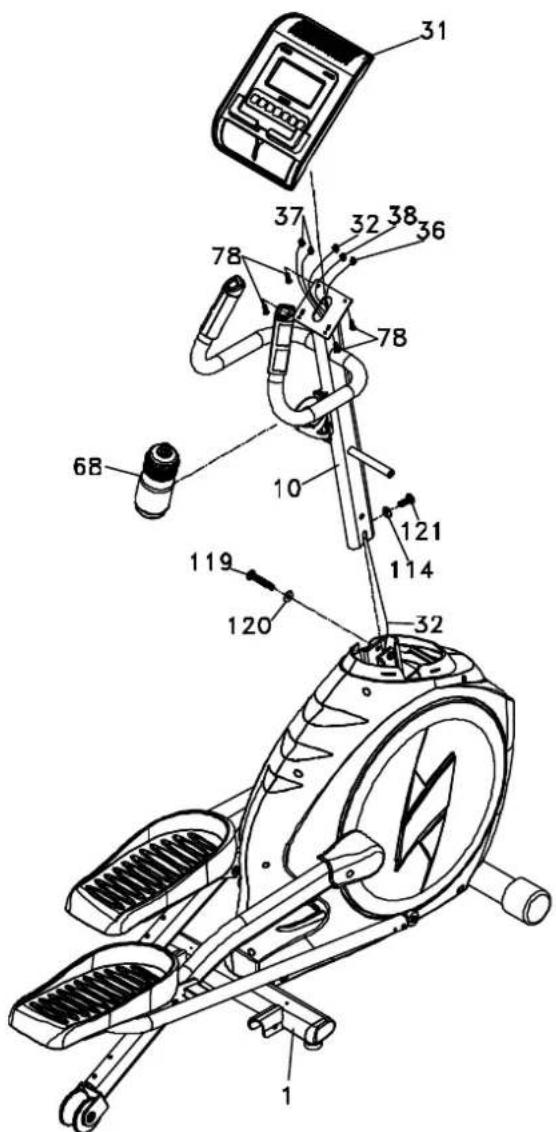
STEG 1: RAMSTOLPE
STEG 2: HANDTAG
STEG 3: KOPPLINGSSKENOR
STEG 4: PLASTKÅPOR
natural_image
Close-up of a hand holding a small object near a car seatbelt (no visible text or symbols)■SMÖRJNING
natural_image
Empty white image with a small black square icon in the top-left corner (no text or symbols)■TRANSPORT
Watt control program(P14)
Programprofil

natural_image
Front view of a human torso with a bandage labeled 'ECCC' on the chest (no text or symbols beyond label)


HRC- 55% TARGET H.R= 55% of (220-ÅLDER)
HRC - 65% TARGET H.R= 65% of (220-ÅLDER)
HRC - 75% TARGET H.R= 75% of (220-ÅLDER)
HRC - 85% TARGET H.R= 85% of (220-ÅLDER)
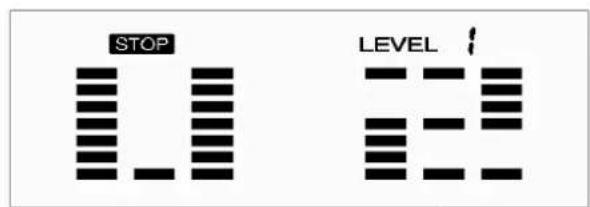

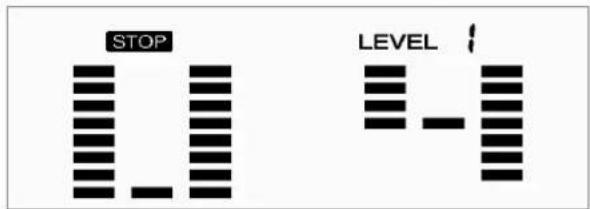
flowchart
graph TD
    A["Download Icon"] --> B["Upload Icon"]
Välj App Store
iPhone 3GS*, iPhone 4, iPhone 4S, iPhone 5, iPod touch 3^rd gen*, iPod touch 4^th gen, iPod touch 5^th gen, iPad 1^* , iPad 2, iPad 3^rd gen, iPad 4^th gen, iPad mini
Step 1 Go to Settings

Step 2 Click on the Bluetooth tab

Step > Turn on Bluetooth
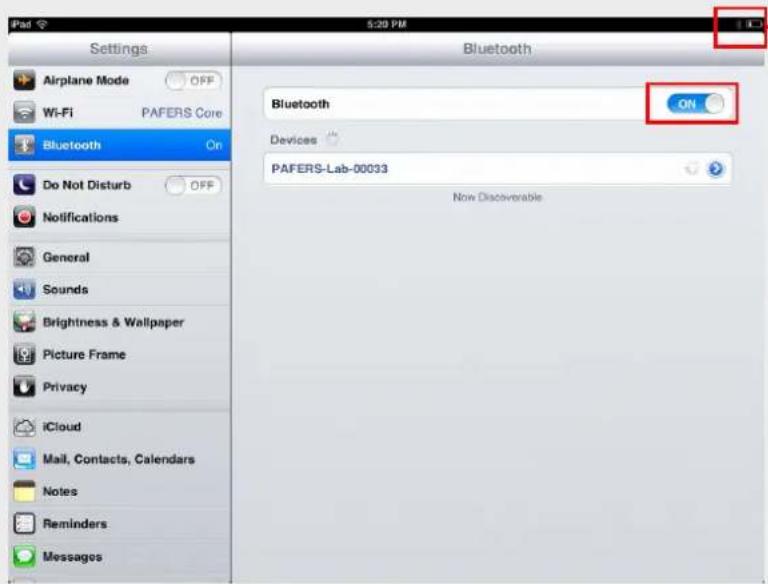
Bluetooth icon will appear in gray after you turn it on
Step 4
Look for the name of your fitness machine in the list of Bluetooth devices and tap on it to connect
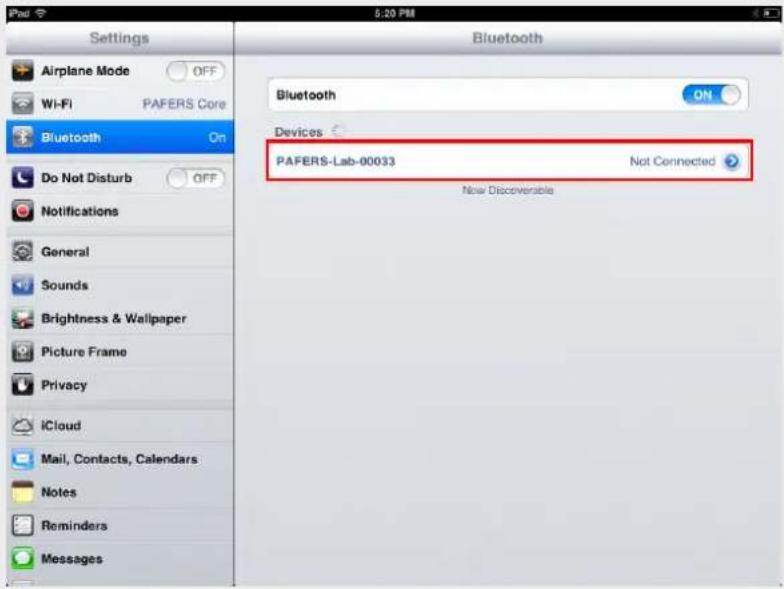
Step 5
Wait until the iOS device connects to the fitness machine

Bluetooth icon will turn to white when successfully connected to the fitness machine
Step 6
Open up the Run on Earth app


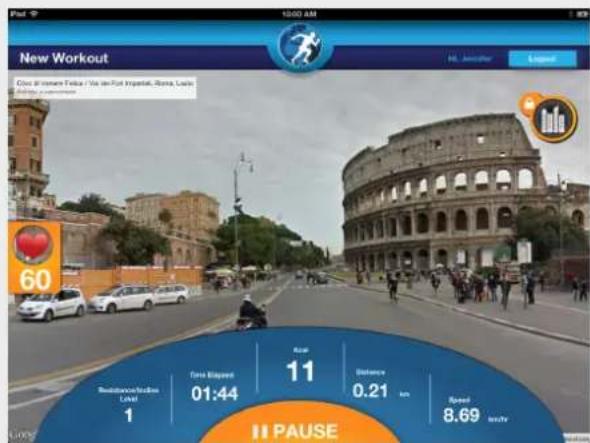
Selecting a Default Start Point
- You will go to the Start Screen when you open Run on Earth
- The "S" indicates the start point
-
Start point is chosen when you first open the app and is one of either three points - your current location, the previous start point of your last route or Taipei, Taiwan
-
To set the start point as your current location, first go to Privacy Setting in your iOS device and turn on location services. Then open the app and allow it to access your location. This will set your current location as the app's default location
- If you don't have location services on then it will automatically search for the start point of your last workout
- If the app can't get current location or find the start point of your last workout it will default to Taipei
— Follow this path to turn on Location Services
- Settings -> Privacy -> Turn on Location Services
Turn/on/Location/Services/and/allow/app/to/access/your/location

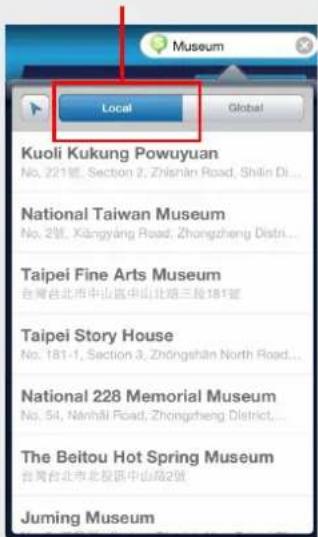
Searching for a Start Point
Go/back/to/your current/location
• Search anywhere in the world and use it as your start point
- Global: Can be used to search places around the world
- Local: Can be used to search places nearby to your present location

Local/SearchGlobal/Search
Setting up a Route
- First move the "S" icon to the place you want to start - Then tap on the place you want to end and an "E" will appear
— If you tap on the wrong place, just hit the "reset" button and the select the correct end point
• After your route is selected, you can adjust the path by tapping on the place(s) you want to go
- You can add up to 8 route changes

Selecting Bluetooth connection in app
• After deciding the route, select Bluetooth connection ( 2^nd from top)
- Wait until the connection is successful
• Once successful, you will see a preview of your workout. Confirm and you can begin a workout


Choosing a Language
- Run on Earth supports 9 languages
— English, Spanish, French, German, Italian, Portuguese, Simplified Chinese, Traditional Chinese, Japanese
- You can see the list of supported languages in the "More" tab in the "Choose Language" setting
— To change the language in Run on Earth, you must change the language in your iOS device settings
— Follow this path to change the language
- Settings -> General -> International -> Language -> Select your desired language

Tracking Workout Results
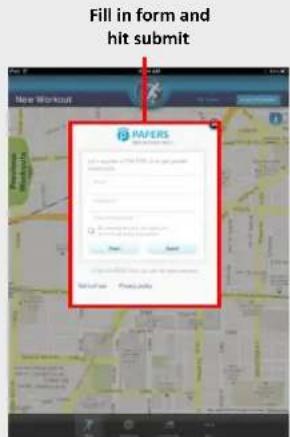
- To track workout results, first register a PAFERS ID by following the steps below
- Tap "Login/Register" -> Tap "Register" -> Fill in details on form -> Tap submit
— You will be able to see previous history and important workout stats - Multiple people can use the app with different login IDs to track their individual workout stats


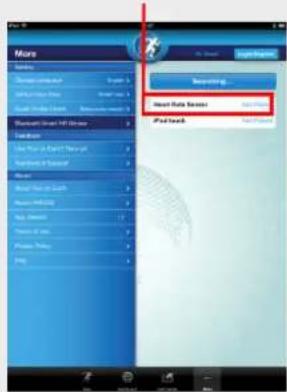
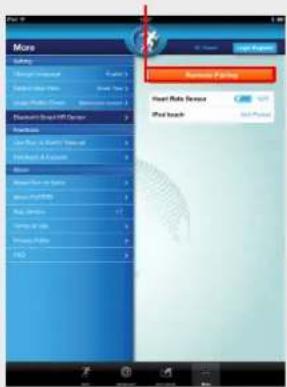
Setting up a Bluetooth Smart Heart Rate Sensor
• To set up a Bluetooth Smart heart rate sensor, follow these steps
— First hit the "More" button on the bottom of the app
- Click on the "Bluetooth Smart HR Sensor" tab on the left
— Tap on the Search Sensors button to search for your heart rate sensor
- Look for your heart rate sensor to be listed and then tap on it to pair it to the app
— After it has paired, you are now ready to use the app with your heart rate sensor
Search/Sensor/Button

Heart/Rate/Sensor/HR/Sensor/is/paired
Changing the Default View
- Run on Earth has three excellent viewing modes
- Street/view:/Lets you experience lifelike outdoor runs around the world
- Map/view: Makes it easy to track the location of where you are on the map
- Satellite/mode:/Provides an excellent bird's eye view of roads and terrain you are running through
- Can set a default viewing mode in the "More" section
— Every time you start a new route it will open in the default view you selected
Change/Default/
View/Here
Choose/between/Map,/ Street/and/Satellite/Views

User Guide for Pedal Monitor APP
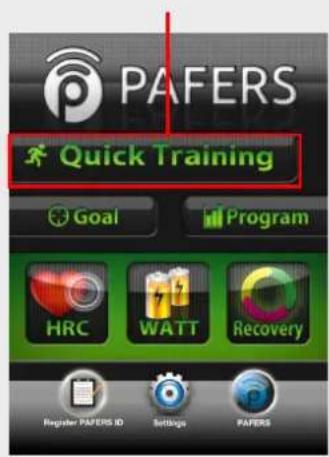
Quick Training Mode – Start/Stop
Press/Quick/Training/to/begin/quick/training/mode

Start/Pedaling/to/begin/workout

Stop/pedaling/and/press/the/Finish/to/end


PAFERS
Riglia Tech Better Sports
Goal Mode
Press/Goal/to/begin/Goal/mode


Press/Go/to/start/workout
Tap/on/the/goals/you/want/to/change


PAFERS
Right Tech Better Sports
Goal Model – Changing Goals
Change/the/time/here/and/then/press/Done

Change/the/Distance/here/ and/then/press/Done

Change/the/Calories/here/ and/then/press/Done


PAFERS
Rigia Tech Better Sports
Goal Mode – Start/Stop
Start/Pedaling/to/begin/workout
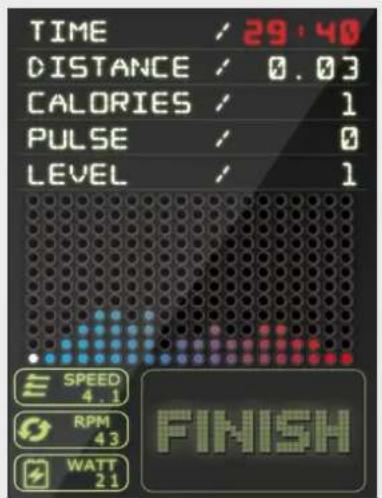

Stop/pedaling/and/press/Finish/to/end


PAFERS
Rigita Tech Better Sports
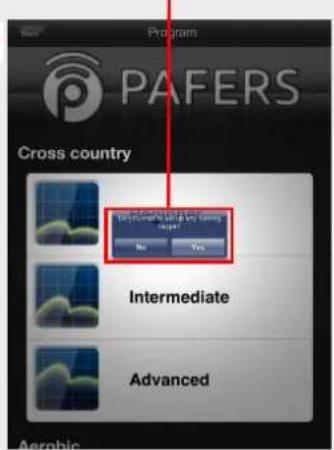
Program Mode – Selecting a Program
Press Program to begin program mode
Select the program and level you want
Choose to set up training targets (Yes will take you to Changing Goals in slide 4 and No will begin workout)



PAFERS
Riglin Tech Better Sports
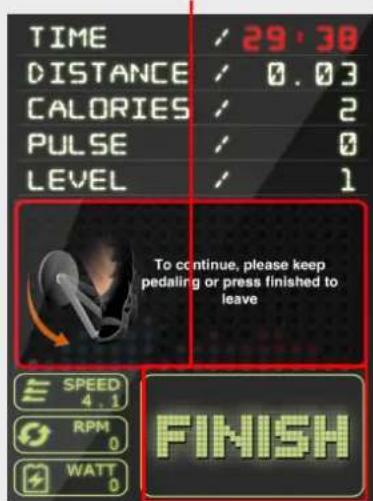
Program Mode – Start/Stop
Start Pedaling to begin workout

Stop pedaling and press Finish to end

PAFERS
Rugla Tech Better Sports
HRC Mode - Setup


PAFERS
Rogin Tech Better Sports
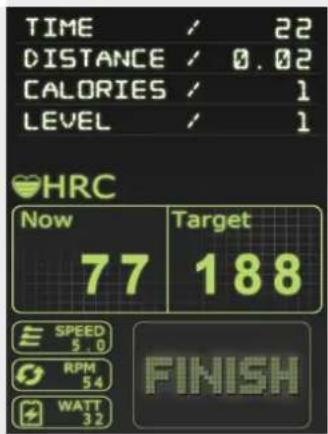
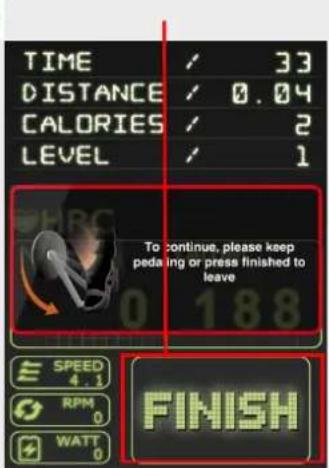
HRC Mode – Start/Stop
Make/sure/to/use/a/HR/device/or/grip/the/machine/sensors

Start/Pedaling/to/begin/workout

Stop/pedaling/and/press/Finish/to/end



PAFERS
Right Tech Better Sports
Watt Mode – Start/Stop
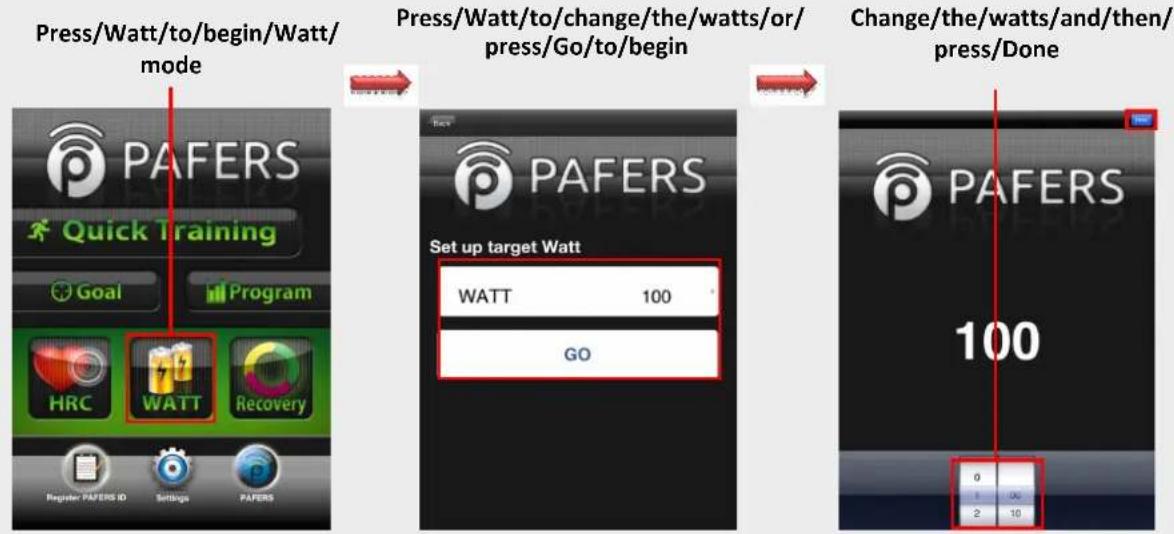

PAFERS
Rugin Tech Better Sports
Watt Mode – Start/Stop
Start/Pedaling/to/begin/workout
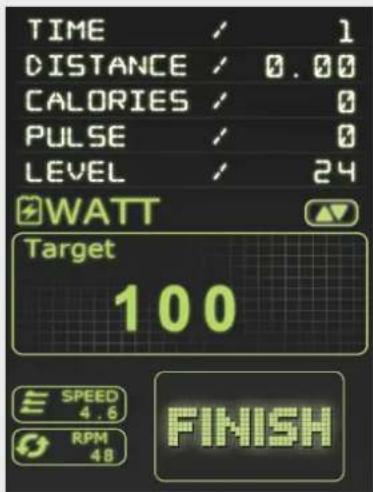

Stop/pedaling/and/press/Finish/to/end
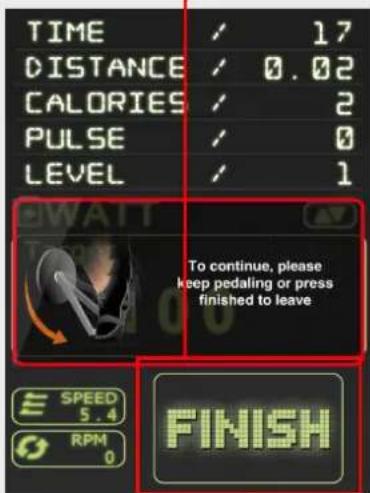

PAFERS
Rigitta Tech Better Sports
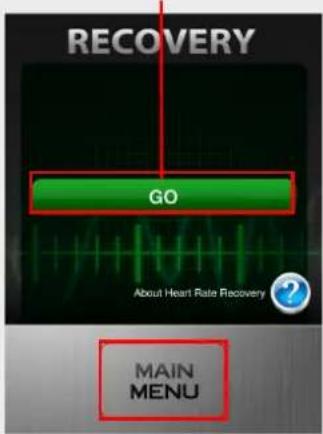
Recovery Mode — Setup
Press the Recovery to begin recovery mode

Press Done to continue or Main Menu to return to main menu

Press Go to start Recovery or Main Menu to return to main menu


PAFERS
Rugin Tech Better Sports
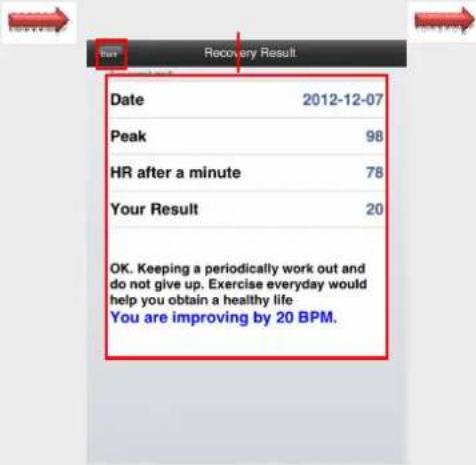
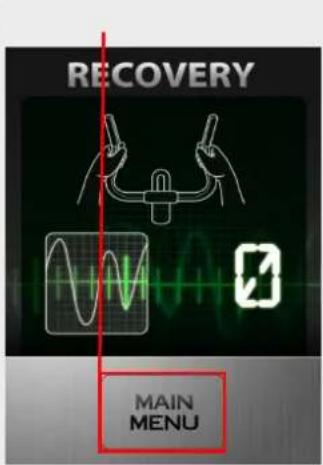
Recovery Mode – Start/Finish
Grip machine sensors or use an HR device to begin 60 second recovery mode

After 60 seconds you will receive results and press Back to return to main menu
Press Main Menu to return to main menu

PAFERS
Rigita Tech Better Sports

| NR. | BESKRIVNING | ANTAL |
| 1 | Main Frame 1 | |
| 2 | Pedal Arm (L) 1 | |
| 3 | Pedal Arm (R) 1 | |
| 4 | Lower Handle Bar (L) 1 | |
| 5 | Lower Handle Bar (R) 1 | |
| 6 | Bushing Housing, Pedal Arm 2 | |
| 7 | Connecting Arm (L) 1 | |
| 8 | Connecting Arm (R) 1 | |
| 9 | Cross Bar 2 | |
| 10 | Console Mast 1 | |
| 11 | Idler Wheel Assembly 1 | |
| 12 | Crank Axle 1 | |
| 13 | Swing Arm (L) 1 | |
| 14 | Swing Arm (R) 1 | |
| 15 | Rail Assembly 1 | |
| 16 | Rail Tube 2 | |
| 17 | Axle for Pedal | 2 |
| 18 | Axle for Slide Wheel | 2 |
| 19 | Rod End Sleeve | 3 |
| 20 | 6005_Bearing | 2 |
| 21 | 6203_Bearing | 6 |
| 22 | 6003_Bearing | 8 |
| 23 | Rod End Bearing | 2 |
| 24 | ∅31 × ∅25.5 × ∅19 × 16+3T_Bushing | 4 |
| 25 | Steel Cable | 1 |
| 26 | Drive Belt | 1 |
| 27 | Drive Pulley | 1 |
| 28 | Flywheel | 1 |
| 29 | Magnet | 1 |
| 30 | 25 × 7 × 7m/m_Woodruff Key | 2 |
| 31 | Console Assembly | 1 |
| 32 | 1400m/m_Computer Cable | 1 |
| 33 | 850m/m_DC Power Cord | 1 |
| 34 | Gear Motor | 1 |
| 35 | 500m/m_Sensor W/Cable | 1 |
| 36 | 800m/m_Resistance Connecting Cable(White) | 1 |
| 37 | 700m/m_Handpulse W/Cable Assembly | 2 |
| 37~4 | ∅3 × 20m/m_Tapping Screw | 4 |
| 38 | 800m/m_Resistance Connecting Cable(Black) | 1 |
| 39 | Slide Wheel , Urethane | 2 |
| 40~1 | 3/8" × 2" Flat Head Socket Bolt | 2 |
| 40~2 | Rubber Foot | 2 |
| 41 | Console Mast Cover(L) | 1 |
| 41~1 | Console Mast Cover(R) | 1 |
| 42 | Side Case (L) | 1 |
| 43 | Side Case (R) | 1 |
| 44 | Round Disk | 2 |
| 45 | Round Disk Cover 2 | |
| 47 | Pedal Arm Cover (L) 1 | |
| 48 | Pedal Arm Cover (R) 1 | |
| 50 | Pedal (L) 1 | |
| 51 | Pedal (R) 1 | |
| 52 | Slide Wheel Cover 2 | |
| 53 | Button Head Plug 2 | |
| 54 | Front Handle Bar Cover (L) 1 | |
| 55 | Front Handle Bar Cover (R) 1 | |
| 56 | Rear Handle Bar Cover (L) 1 | |
| 57 | Rear Handle Bar Cover (R) 1 | |
| 58 | 32 × 2.5T_Round Cap 2 | |
| 59 | Connecting Arm Cover (L) 2 | |
| 60 | Connecting Arm Cover (R) 2 | |
| 61 | Middle Stabilizer Cover 2 | |
| 62 | Rear Stabilizer Cover (L) | 1 |
| 63 | Rear Stabilizer Cover (R) | 1 |
| 64 | Oval End Cap | 2 |
| 65 | Transportation Wheel | 2 |
| 66 | Handgrip Foam | 2 |
| 67 | Rubber Foot | 2 |
| 68 | Drink Bottle | 1 |
| 68~1 | Drink Bottle Holder | 1 |
| 69 | Spacer Bushing | 1 |
| 70 | 5/16" × 15m/m_Hex Head Bolt | 14 |
| 71 | 5/16" × 32m/m_Hex Head Bolt | 2 |
| 72 | 1/4" × 3/4"_Hex Head Bolt 4 | |
| 73 | 3/8" × 2-1/4"_Socket Head Cap Bolt | 2 |
| 74 | M8 × 30m/m_Socket Head Cap Bolt | 2 |
| 75 | 5/16" × 15m/m_Button Head Socket Bolt | 6 |
| 76 | 3/8" × 2-1/4"_Button Head Socket Bolt | 6 |
| 78 | M5 × 10m/m_Phillips Head Screw | 8 |
| 79 | M5 × 15m/m_Phillips Head Screw | 12 |
| 80 | 5 × 16m/m_Tapping Screw | 7 |
| 81 | 5 × 25m/m_Tapping Screw | 2 |
| 82 | 4.8 × 38m/m_Sheet Metal Screw | 1 |
| 83 | 5 × 16m/m_Tapping Screw | 12 |
| 84 | ∅3.5 × 12m/m_Sheet Metal Screw | 14 |
| 86 | ∅17_C Ring | 1 |
| 87 | M8 × 7T_Nyloc Nut | 1 |
| 88 | 1/4"_Nyloc Nut | 4 |
| 89 | 3/8" × 7T_Nyloc Nut | 2 |
| 90 | 3/8" -UNF26 × 4T_Nut | 2 |
| 91 | 3/8" -UNF26 × 11T_Nut | 2 |
| 92 | 3/8" × 7T_Nut | 4 |
| 94 | 3/8" × 19 × 1.5T_Flat Washer | 9 |
| 96 | 5/16" × 35 × 1.5T_Flat Washer | 2 |
| 97 | 5/16" × 23 × 1.5T_Flat Washer | 10 |
| 98 | 5/16" × 20 × 1.5T_Flat Washer | 6 |
| 99 | 1/4" × 19m/m_Flat Washer 13 | |
| 100 | J Bolt 1 | |
| 101 | ∅17_Wave Washer 6 | |
| 103 | M8 × 20m/m_Carriage Bolt 1 | |
| 104 | ∅17 × ∅23.5 × 2T_Flat Washer 2 | |
| 105 | 5/16" × 7T_Nyloc Nut 2 | |
| 106 | 3.5 × 16m/m_Tapping Screw 3 | |
| 108 | Combination M5 Allen Wrench & Phillips Head Screw Driver 1 | |
| 110 | 12m/m_Wrench | 1 |
| 111 | 13/14m/m_Wrench 1 | |
| 112 | 5 × 19m/m_Tapping Screw 2 | |
| 114 | 3/8" × 23 × 2T_Curved Washer 5 | |
| 119 | 3/8" × 2"_Hex Head Bolt 2 | |
| 120 | 3/8" × 2T_Split Washer 2 | |
| 121 | 3/8" × 3/4"_Hex Head Bolt 1 | |
| 133 | M5 × 10m/m_Phillips Head Screw 8 | |
| 135 | M8 × 9T_Nyloc Nut | 1 |
| 137 | 3/8" × 11T_Nyloc Nut | 2 |
| 138 | 3.5 × 16m/m_Sheet Metal Screw | 8 |
| 139 | M8 × 6.3T_Nut | 4 |
| 144 | 3/8" -UNF26 × 6T_Nut | 1 |
| 145 | Axle Stopper | 1 |
| 146 | M5 × 5m/m_Slotted Set Screw | 2 |
| 147 | Handgrip Resistance Button W/Cable | 2 |
| 148 | Handgrip End Cap | 2 |
| 149 | Handgrip Resistance Label (UP) | 1 |
| 150 | Handgrip Resistance Label (DOWN) | 1 |
- MASTER C355
- MANUAL
- 3/8"×2"
- 5/16"× 15m/m
- ∅3.5 × 12m/m
- 5/16"× 15m/m
- 5/16"×23×1.5T
- 101.∅17
- 5/16" × 32m/m
- 5/16"× 7T
- 3/8" × 7T
- 5/16"×20×1.5T
- 3/8"× 19× 1.5T
- 3/8"× 23× 2T
- 3/8" × 2-1/4"
- M5 × 15m/m
- Kombinerad M5 Insexnyckel & Skruvmejsel (1 st)
- 13/14m/m Skiftnyckel (1 st)
- STEG 1: RAMSTOLPE
- STEG 2: HANDTAG
- STEG 3: KOPPLINGSSKENOR
- STEG 4: PLASTKÅPOR
- ■SMÖRJNING
- ■TRANSPORT
- Watt control program(P14)
- Programprofil
- Step > Turn on Bluetooth
- Step 4
- Step 5
- Wait until the iOS device connects to the fitness machine
- Step 6
- Open up the Run on Earth app
- Selecting a Default Start Point
- Searching for a Start Point
- Setting up a Route
- Selecting Bluetooth connection in app
- Choosing a Language
- Tracking Workout Results
- Setting up a Bluetooth Smart Heart Rate Sensor
- Changing the Default View
- User Guide for Pedal Monitor APP
- Quick Training Mode – Start/Stop
- Goal Mode
- Goal Model – Changing Goals
- Goal Mode – Start/Stop
- Program Mode – Selecting a Program
- Program Mode – Start/Stop
- HRC Mode - Setup
- HRC Mode – Start/Stop
- Watt Mode – Start/Stop
- Recovery Mode — Setup
- Recovery Mode – Start/Finish
Brand : Master
Model : C355
Category : Elliptical bike