DPM1081 - Tablet Cello - Free user manual and instructions
Find the device manual for free DPM1081 Cello in PDF.


| Product Type | Tablet |
| Brand | Cello |
| Model | DPM1081 |
| Operating System | Android 4.4.2 KitKat |
| Processor | MTK8127 Quad Core Cortex A7 @ 1.3 GHz |
| RAM | 1 GB DDR3 |
| Internal Storage | 16 GB flash |
| Expandable Storage | microSDHC up to 32 GB |
| Display | 10.1" TFT capacitive multi-touch, 1024x600 resolution |
| Front Camera | 0.3 MP |
| Rear Camera | 2.0 MP |
| Wi-Fi | 802.11 b/g/n |
| Bluetooth | Yes |
| GPS | Supported |
| USB | micro USB 2.0 with OTG |
| HDMI | Yes (HDMI slot) |
| Headphone Jack | 3.5 mm |
| Battery | Built-in Li-Poly 5000 mAh |
| Charging | DC 5V via included adapter; USB charging (slower) |
| Package Contents | Tablet, USB cable, OTG adapter, power adapter, warranty card, user manual |
| Sensors | G-sensor (360°) |
| Audio | Built-in speaker and microphone |
| Languages Supported | Multiple languages |
| Cleaning | Use a clean, dry cloth; do not use liquid cleaners |
| Safety Precautions | Use only the supplied charger; avoid water and moisture; do not disassemble |
Frequently Asked Questions - DPM1081 Cello
User questions about DPM1081 Cello
0 question about this device. Answer the ones you know or ask your own.
Ask a new question about this device
Download the instructions for your Tablet in PDF format for free! Find your manual DPM1081 - Cello and take your electronic device back in hand. On this page are published all the documents necessary for the use of your device. DPM1081 by Cello.
USER MANUAL DPM1081 Cello
1. INTRODUCTION....3
1.1 Package Contents....3
1.2 Tablet Features ....3
1.3 Buttons and Connections....4
1.4 Charging the Tablet....5
1.5 Memory Expansion with Micro SDHC Memory Card......6
2. GETTING STARTED....7
2.1 Power On and Off....7
2.2 Locking and Unlocking the Screen ....7
2.3 About the Touch Screen 8
2.4 Display Orientation....9
2.5 Home Screen ....10
2.5.1 Customise Home Screen ....11
2.6 Applications Menu....12
2.6.1 How to Access the Device Applications .....12
2.6.2 Preinstalled Applications .....13
2.6.3 Installing Applications....14
2.7 Status Bar/Notification Window....15
2.8 Entering Text....17
3. CONNECTING TO THE INTERNET ....17
3.1 Connections ......17
3.2 Browsing the Web....18
- MANAGING APPLICATIONS ......21
- OPTIONAL CONNECTIONS......23
5.1 Connect to a Computer ....23
5.2 Using a USB (OTG) Full-size Adapter ....23
-
SYSTEM SETTINGS ....23
-
GENERAL INFORMATION......25
1. INTRODUCTION
1.1 Package Contents
Please make sure that the items below are included in the package. If an item is missing, please contact the local retailer from whom you purchased this product.
- Tablet
- USB Cable
- USB OTG Adaptor
- Power adapter
- Warranty Card
- User Manual
1.2 Tablet Features
Your tablet is a capacitive, touch screen tablet PC designed for use both at home and on the move.
Running the intuitive Android 4.4 (Kit Kat) operating system, this tablet is well equipped for Internet browsing, social networking, gaming, e-mail checking, e-book reading, video watching and much more.
1.3 Buttons and Connections
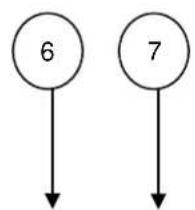
flowchart
graph TD
    A["6"] --> B
    C["7"] --> D

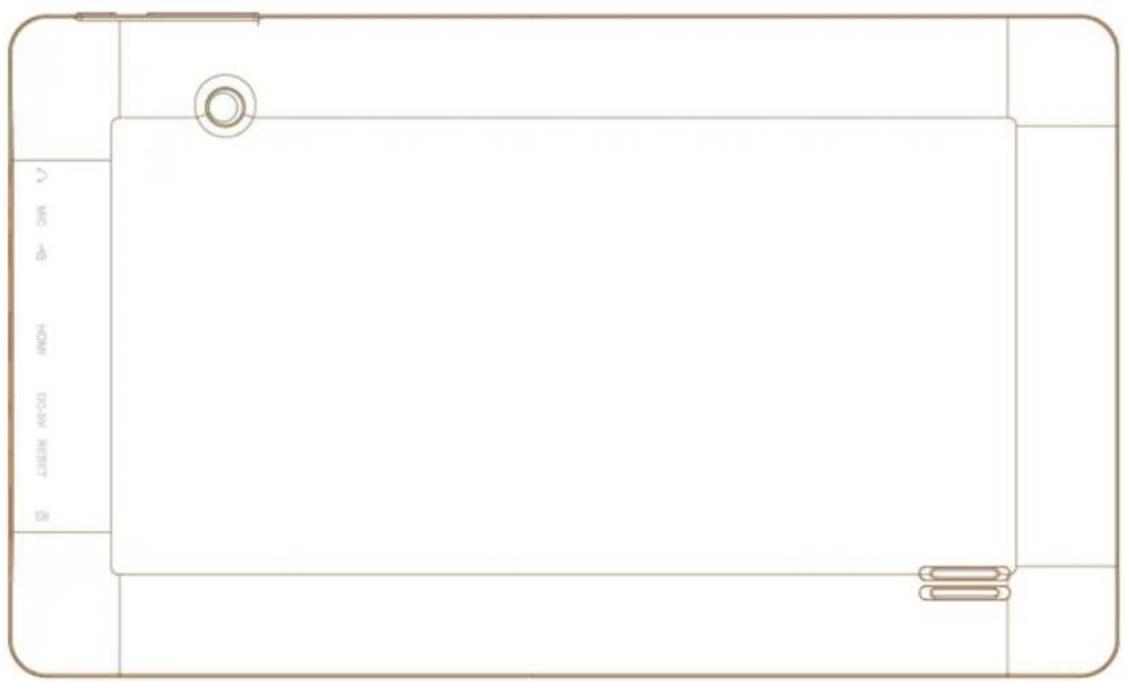
| Button | Description |
| 1. Headphone jack | Audio output connection for headphones.Note: Speaker output is automatically disabled when headphones are connected to the Tablet. |
| 2. Micro USB 2.0 (OTG Host) | Connect to a computer to transfer data (e.g., music, videos, photos, and files). Use the OTG adaptor to connect mouse or keyboard. |
| 3.HDMI slot | Connect your tablet to the TV. |
| 4.Power slot | Connect your power supply to charge the tablet. |
| 5. mSDHC Memory Card slot | Load external microSDHC memory cards. |
| 6. Power key | Press and hold to turn the Tablet on. Press to turn the screen on and off. Press and hold to access the Power off menu. |
| 7.Volume Key | Increase or decrease the volume |
1.4 Charging the Tablet
The Tablet comes with a built-in rechargeable lithium-polymer battery. It is recommended to fully charge the battery before first use.
Charge the Battery
- Connect the power adapter to an electrical socket.
- Insert the DC jack end to the power slot on the Tablet.
- Disconnect the power adapter when the Tablet is fully charged.
- If the Tablet is powered off, it will charge until the battery is full.
- If the Tablet is powered on, the battery charge status will be indicated on the screen by the battery meter.

- When the Tablet is connected to a computer via the USB cable, the battery will charge via the USB socket, but at a much slower rate than via the DC 5V power adapter.
Do not use any other power adapters than the one supplied. Using an incompatible power adapter could damage the Tablet and poses the potential risk of fire.
1.5 Memory Expansion with Micro SDHC Memory Card
Your tablet features a 8 GB built-in flash memory, which can be expanded using a Micro SD card (not included). You may use any Micro SD or Micro SDHC card, up to 32GB capacity.
To use the memory card as media storage, transfer media files (videos, music and photos) from your computer to your micro SD card in the usual way, and then insert it into the Tablet as described below.
To insert and use a Micro SD card
- Align the memory card with the card slot. The metal contacts of the memory card should face up towards the LCD screen.
- Slide the card into the spring-loaded slot. Push the card in, until it clicks into place.
Do not attempt to insert objects other than a micro SDHC memory card into the card slot. A compatible memory card should fit easily into the card slot. If you encounter resistance, check the alignment of the card. Do not attempt to force the card in.
To Remove a Memory Card
- UNMOUNT the memory card.
a. From the Home screen, tap the Menu key, and then tap Setting/Storage to go to the storage menu.
b. Tap Unmount SD card to prepare the memory card for safe removal.
- Push the card further into the slot until you hear a click. The card will spring out of the slot.
- Grasp the card by its edge to remove it.
To avoid damage and data corruption, do not remove a memory card while data is being written to or read from the card. For example, do not remove a card while playing a music file stored on the card.
2. GETTING STARTED
2.1 Power On and Off
To turn the Tablet on
- Press and hold the Power key ⏻ until the LCD screen turns on. Wait until the Home screen appears. The Tablet is now ready to use.
To turn the Tablet off
- Press and hold the Power key ⏻ until the “power off” menu appears.
- Choose OK to turn off the Tablet.
2.2 Locking and Unlocking the Screen
When the Tablet's Android operating system starts up you will be presented with a “locked” screen.
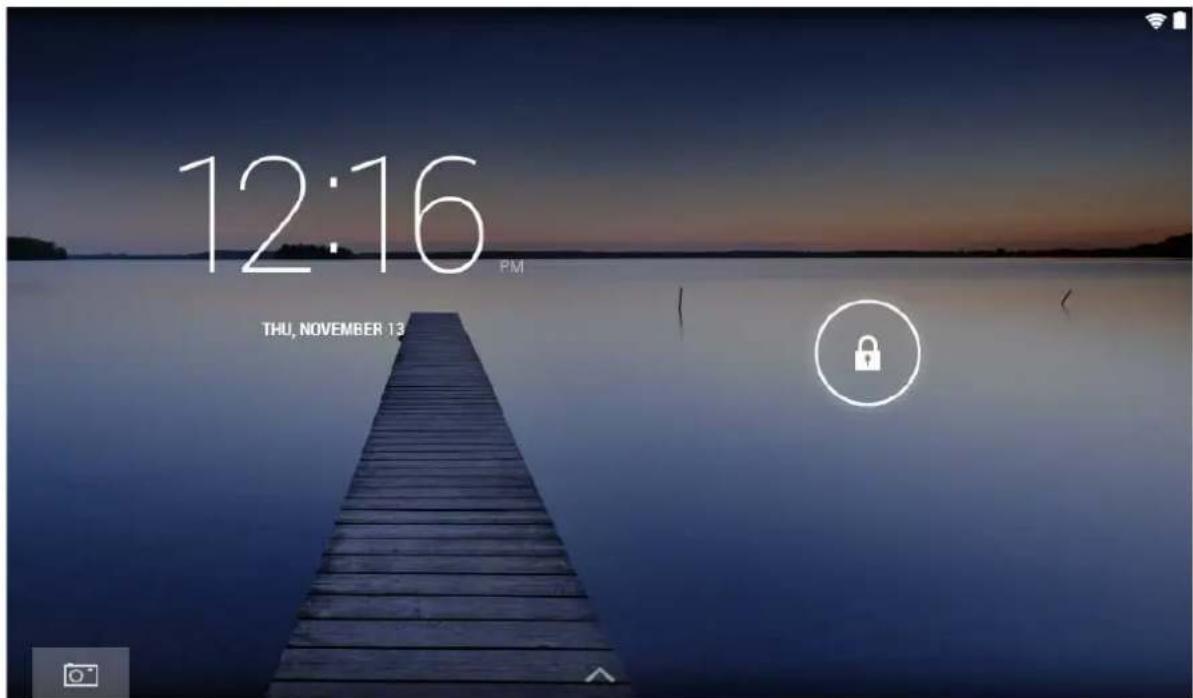
Unlocking
- If the screen is currently blank (the Tablet is on, but in standby mode), press the button (short press, do not hold). The screen will turn on.
- Touch and drag the padlock icon over to the open padlock symbol.
Locking
- Press the power button (short press, do not hold).
• The screen will go blank to conserve battery power.
Note: If a password has been set, enter the password to finish unlocking the screen.
2.3 About the Touch Screen
TheTablet comes equipped with an easy-to-use touch screen.
The capacitive multi-touch screen requires gentle fingertip touch to activate the Tablet's functions.
Multiple fingers may be used to perform actions (e.g. 2-finger picture zoom).
Protective Film
A thin film has been applied to the touch screen to protect it during shipping. It is recommended to remove the protective film before using the touch screen. To remove it, simply take a corner of the film and peel it away from the screen.
Touch Screen Actions
You can control all the functions of the Tablet by using the touch screen in combination with the three touch keys located at the bottom of the screen.
To control the Tablet's touch screen, use your finger to select the icons, buttons, menu items, on-screen keyboard, and other items displayed on the screen.
You can perform the following actions with your finger.
A. Touch an option to select it.
B. "Touch and drag" to move items or to scroll through lists by touching and holding, then gliding your finger over the screen.
C. Use a finger and thumb to "pinch zoom" on-screen items such as photographs and web pages.

2.4 Display Orientation

This Tablet features a built-in G-Sensor which monitors the Tablet's current orientation and automatically adjusts the display to match.
Simply turn the Tablet to either the portrait or landscape position, and the display will rotate to match.
The sensor works best when the tablet is rotated perpendicular to the ground (i.e., when the Tablet is held upright and not flat on its back).
2.5 Home Screen

The home screen is the starting point for all your Tablet's features.
The home screen can contain shortcuts to your most-used applications and widgets.
- Touch the Search icon to quickly search the World Wide Web using Google.
• The ⚙️ icon will launch the Applications menu.
- The status bar displays system information, such as current time, wireless connectivity and battery level. Touch to expand the status bar for more detailed information.
- The ← button moves back one step to the previous menu / page.
- The button goes to the Android home screen.
- The button displays a menu of recently opened applications.
- The 📋 buttons decrease and increase the volume.
- The button displays a menu of options (differs depending on the application).
2.5.1 Customise Home Screen
Adding Shortcuts
You can add shortcuts to the desktop for quick access to your favourite applications. Shortcuts can be placed anywhere on the desktop, so you can organize them in whatever way you like.
To place a Shortcut on the Desktop
- Open the Applications menu.
- Touch and hold your desired application's icon.
- The Applications menu will close and you will be returned to the desktop on the Home screen.
- Drag the shortcut anywhere on the grid, and then release it to place it in that position.
Removing Shortcuts from Home Screen
If you need to remove an application shortcut from the Home screen, you can do it as follows:
- Touch and hold the shortcut icon you would like to remove. A message stating X Remove will appear at the top of the screen.
- Drag the icon over this message. Once it turns red, release the icon and the shortcut will be removed.
Change the Desktop Wallpaper
You can change the Home screen wallpaper by doing the following:
- Press and hold at a blank spot on the home screen. A pop-up menu will appear. Choose the wallpaper.
- Tap to select the wallpaper from the gallery pictures or from the preinstalled android wallpapers.
2.6 Applications Menu
The Tablet supports a wide variety of applications. A small selection is pre-installed on the Tablet and available from the Applications menu, but many more can be downloaded from various websites.
2.6.1 How to Access the Device Applications
To open the Applications menu, touch the icon 😊

- Use the Selection menu to choose between viewing installed applications and widgets.
- If you have more applications that can not fit onto one page, slide your finger from right to left across the screen to view the next page.
Applications
Applications provide expanded functionality to the Tablet. A selection of applications is pre-loaded onto your Tablet, and more can be downloaded from various websites.
Widgets
Widgets give enhanced functionality to the Home screen by providing live updates such as news headlines, e-mail notifications, the current time, and much more. Some widgets are preinstalled, and others are installed along with their application counterparts.
Note: The screen shown above is for illustrative purposes only. We reserves the right to modify and improve the final list of applications available on the Tablet.
2.6.2 Preinstalled Applications
Some applications have been pre-installed on your Tablet for your convenience. These applications include:

Clock: View the current time, or set an alarm.

Calendar: Display the calendar or record events and appointments.

Browser: Browse the web.
Calculator: Perform simple mathematical operations.
Camera: Take pictures or videos.

Email: Check your e-mail.
File Manager: View and manage files stored on the Tablet.

Gallery: View photos and play videos.

Music: Play music.
Settings: Access the Settings menu to adjust the Tablet's options.
2.6.3 Installing Applications
You can download and install additional applications from the device applications marketplace, the web browser, or other sources.
Note: Your tablet may include access to, or information on, content, products, applications and services from third parties.
Your use of such third party content, products, applications and services is at the discretion of such third party and expressly governed by such third party's terms of use, including any such third party's privacy policies, for such content, products, applications and services.
We are not responsible for and expressly disclaims all warranties of any kind with respect to all such third party content, products, applications and services.
We will not be responsible for any loss, costs, or damages incurred due to your access to or use of third party content, products, applications or services.
2.7 Status Bar/Notification Window
Notification Area
The icons that appear in the Notification area of the screen alerts you when new messages arrive or when alarms or other application events occur.
You may view and respond to the notifications, by opening the full Notification panel.
- Touch the notification area of the screen to open the Notifications panel. Then touch the notification to open it.

To respond to a notification
Touch a notification in the list; the Notifications panel will close and the application associated with the notification will launch.
To clear all notifications
Drag the notification to the right and the notification will be cleared.
To close the Notifications panel
Touch a clear area on the panel or press the Back/Home key.
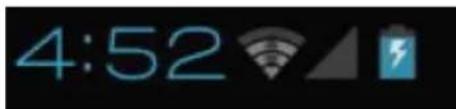
Status area / Time area
Displays status icons to show the current state of your device, such as battery power, charging progress, alarms set, network connections, and so on.
2.8 Entering Text
You can type text using the Android on-screen keyboard. The keyboards automatically rotate to either portrait or landscape mode based on the device orientation.
3. CONNECTING TO THE INTERNET
The vast majority of applications support some kind of networking / Internet functionality. The way to connect to the Internet using the tablet is by using your wireless router (access point).
3.1 Connections
Connect to a Wireless Access Point
Your tablet features standard wireless Broadband Gateway Node (b/g/n) capabilities, meaning it can connect to any router which is compatible with the 802.11b/g/n standard. Check your router's documentation to confirm compatibility.
To enable Wireless Networking and Connect to your Router
- Go to Settings- Wireless & Networks WI-Fi and slide the Wi-Fi switch to the right to enable it.


- After a few seconds, Wi-Fi will be enabled and a list of available wireless network names (SSID) will appear. Locate your wireless network on the list and touch to select it.
- You will be asked for the password. Type it in using the keyboard which automatically appears on screen.
- Touch the Connect option to complete the setup of your wireless connection.
An icon will be displayed in the status bar to show the wireless connection status:

Full signal

Moderate signal

Weak signal
Once you are connected to a wireless network, you can select it on the list, to view the connection details (e.g. signal strength, link speed and IP address). You can use the Forget option to disconnect from the network and remove the stored password.
3.2 Browsing the Web
With the Browser application you can visit webpages and find information on the web, keep up with the news, connect with your friends, or enjoy video from YouTube™.
To use the Browser, the tablet must be connected to the Internet, as described above. To open the Browser, touch the Browser icon on the Home screen or in the application menu.
Some common Browser actions are described below.
• To go to a Webpage
| 1. Touch the Address bar at the top of the Browser screen. The keyboard will open automatically.(If the Address bar is not visible, drag the page down to return to the top of the Browser screen.) | 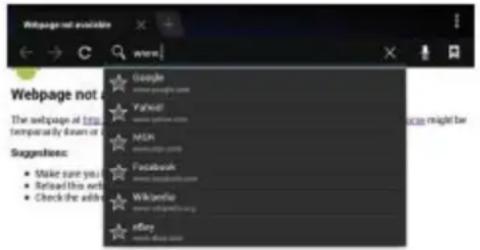 |
| 2. Use the keyboard to enter the address (URL) of the webpage (e.g. www.youtube.com) |  |
| 3. Touch Enter to go to the webpage. |
- Bookmark a Webpage
Bookmark your favourite webpages in order to visit them quickly without entering a URL.
| 1.Go to the webpage that you want to bookmark | ||
| 2. Touch the 3 dots icon and select Save to Bookmarks. |  | |
| 3. Touch Add tile. If desired, you can modify the name of the bookmark or its location (URL address). Otherwise, touch OK to add the bookmark. | ||
• To go to a Bookmarked Webpage
| 1. Touch the 3 dots icon and selectBookmarkfrom the drop down menu. |  |
| 2. Touch a bookmark tile to open it. |  |
• To delete a Bookmarked Webpage
| 1. Touch the Bookmark icon. | 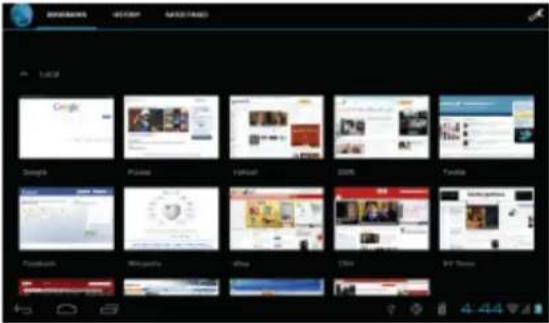 |
| 2. Touch and hold a bookmark tile to open the option menu. | 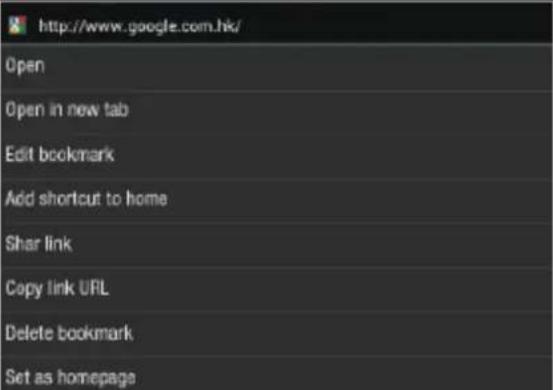 |
| 3. Touch Delete bookmark. |  |
| 4. Touch OK to confirm. |
. Browser Menu
| While viewing a webpage, touch the dot icon to open the Browser Menu. The icon is located on the top right-hand corner of the screen. The options are: |  |
Refresh: Refresh the current webpage.
Forward: Go to the next webpage.
Bookmarks: A list of saved webpage's for quick access
Save to bookmarks: Save a webpage and add it to bookmark list
Share page: Use email to send the webpage URL.
Request desktop site: Force the browser to open the desktop versions of all sites.
Never sleep when browsing: Screen will not go off while browsing the internet.
Find on page: Search for content on the current page.
Save for offline reading: Save this page to read it when the internet connection is disabled.
Settings: Customize the browser.
4. MANAGING APPLICATIONS
Downloading and installing new applications to your tablet can extend its functionality.
You can download and install applications from the pre-installed Market.
When installing an application, the particular application will advise you what functions of the Tablet it needs to control and if it needs access to your data. Make sure you review these access requirements carefully before completing the installation.

Note: Be especially cautious with applications that request access to too many functions or to a significant amount of your data. You are responsible for the results of applications installed on your Tablet.
Some developers allow you to download and install applications directly from their website.
Note: Your Tablet may include access to, or information on, content, products, applications and services from third parties. Your use of such third party content, products, applications and services is at the discretion of such third party and expressly governed by such third party's terms of use, including any such third party's privacy policies, for such content, products, applications and services. We are not responsible for and expressly disclaims all warranties of any kind with respect to all such third party content, products, applications and services. We will not be responsible for any loss, costs, or damages incurred due to your access to or use of third party content, products, applications or services. We will not be responsible for the content of the 1 mobile market application.
To Uninstall an Application
-
From the Home screen, tap the Menu key.
-
Touch Settings to open the Settings menu.
-
Touch Applications, and then touch All applications to show a list of all the applications installed on the Tablet.
-
Touch the name of the application you want to uninstall; the Application Info screen will open.
- Touch Uninstall. The Tablet will prompt you to confirm.
- Touch OK to uninstall the application.
5. OPTIONAL CONNECTIONS
5.1 Connect to a Computer
The Tablet can be connected to a computer running Microsoft Windows for file transfer via a USB cable.
To Connect to a Computer
- Windows may present you with a “New Hardware Wizard”. Please click the “Cancel” option to close this.
- Your device will be shown under Computer or My Computer as a Media Device under the Media Transfer Protocol (MTP).
- Your tablet will be recognized by the computer as a Removable Storage drive. You will be able to copy files to and from this device as you would any other media device connected to your PC by dragging and dropping them.
Note: When your tablet is connected, a USB icon will appear in the Notification bar.

5.2 Using a USB (OTG) Full-size Adapter
The USB full-size adapter can be used to connect and use the USB plug and play devices with the Tablet. The adapter converts the micro USB port on the Tablet into a USB On-the-Go (OTG) connector.
6. SYSTEM SETTINGS
The Settings menu allows you to adjust the system configuration.
To change the settings:

- Touch the Settings menu icon on the Applications menu. The Settings menu will open.
- Glide your finger up or down the left side of the screen to scroll through the list of available categories.
- Touch a category title to view further options on the right-hand side of the screen.
| ITEM ICON DESCRIPTION | |||
| Wi-Fi |  | Connect to / disconnect from wireless networks, view connection status, etc | |
| Data usage |  | Enable / disable mobile data, view current usage, set mobile data limit, etc | |
| More... | Airplane mode, 3G information, etc | ||
| Sound |  | Change volume, touch sounds, screen lock sounds, etc | |
| Display |  | Change brightness, wallpaper, sleep settings, font size, etc | |
| Storage |  | Manage NAND and Micro SD card, view available capacity, etc | |
| Battery |  | See battery status and powered-on time | |
| Apps |  | Manage applications, running services, etc | |
| Location services |  | Change approximate location detection, improve search results | |
| Security |  | Change screen lock type, encryption, passwords, credential storage, etc | |
| Language & input |  | Select language, add to the dictionary, edit on-screen keyboard settings, etc | |
| Backup & reset |  | Backup and restore data, perform factory reset, etc | |
| Add account |  | Add / remove accounts, change account synchronization settings, etc | |
| System |  | Date & time | Set date, time zone, time, clock format, etc |
| Accessibility |  | Set up large text, auto-rotate screen, speak passwords, etc | |
| Developer options |  | Advanced functions for Android developers – debugging, HDCP check, etc | |
| About tablet |  | Information about your Android^TM device | |
Some options will have a simple checkbox, while others will have a list of further settings to choose from. You should take time to become familiar with the options in these categories.
For more detailed information, please visit:
http://www.android.com/
7. GENERAL INFORMATION
Safety Instructions
- Cleaning: Do not charge the Tablet when cleaning. Do not use liquid cleaners or aerosol cleaners. Use a clean cloth.
- Water and Moisture: Do not use this product near water (e.g., near a bath tub, washbowl, kitchen sink, laundry tub, in wet basements, or near a swimming pool).
- Ventilation: Slots and openings on the Tablet are provided for ventilation to ensure reliable operation of the product and to protect it from overheating. These openings should never be blocked by placing the product on a bed, sofa, rug, or other similar surface. This product should not be placed in a built-in installation such as a bookcase or rack unless proper ventilation is provided or the manufacturer's instructions have been adhered to. Do not put the Tablet in high temperature environments, especially not in a car with its windows closed in summer or in dirty, humid or wet places. Do not leave the device on
your lap or any part of the body for long periods of time as the unit may become warm during use.
- Power Sources: This product should be operated only with the type of power source indicated on the rating label. If you are not sure of the type of power supply to your home, consult your product dealer or local power company. For products intended to operate from battery power or other sources, refer to the operating instructions. ONLY USE the power supply provided with this device.
- TouchScreen: DO not use excessive force on the touch screen and do not use any tools that may cause damage to the screen.
- Servicing: Do not attempt to service this product yourself. Opening or removing covers may expose you to dangerous voltage or other hazards. Refer all servicing to qualified service personnel.
- Damage Requiring Service: Unplug this product from the wall outlet and refer to qualified service personnel under the following conditions: a) When the power-supply or plug is damaged; b) If liquid has been spilled or if objects have fallen into the product; c) If the product has been exposed to rain or water; d) If the product does not operate normally by following the operating instructions; e) If the product has been dropped or damaged in any way.
- Heat: The product should be placed away from heat sources such as radiators, heat registers, stoves, or other products (including amplifiers) that produce heat.
Legal and Trademark Notices
- Android is a trademark of Google Inc. Use of this trademark is subject to Google permissions.
- Portions of the artwork used for this package are modifications based on work created and shared by Google and used according to terms described in the Creative Commons 3.0 Attribution License.
- microSD is a registered trademark of the SD Card Association.
- USB is a registered trademark of USB Implementers Forum, Inc.
All other trademarks and logos are property of their respective owners unless otherwise indicated.
Specifications
| LCD Display | Size | 10.1 TFT Capacitive multi-touch panel 16:9 |
| Resolution | 1024*600 | |
| CPU | MTK8127 Quad Core Cortex A7@1.3 GHz | |
| RAM | 1GB DDR3 | |
| Built-in Flash | 16GB | |
| Camera | 0.3MP (front), 2.0MP (back) | |
| Wi-Fi/Bluetooth | 802.11 b/g/n, Bluetooth | |
| GPS | Support | |
| USB Port | micro USB 2.0 High Speed OTG | |
| Memory Slot | Support micro SDHC Card, max 32GB | |
| A/V Connections | 3.5mm headphone out | |
| Battery/ Power Supply | Built-in rechargeable Li-Poly 5000mAh | |
| OS | Android 4.4.2 | |
| Languages | Multiple languages | |
| Others | G-sensor 360 support, speaker, built-in microphone | |
- INTRODUCTION....3
- GETTING STARTED....7
- CONNECTING TO THE INTERNET ....17
- INTRODUCTION
- Package Contents
- Tablet Features
- Buttons and Connections
- Charging the Tablet
- Charge the Battery
- Memory Expansion with Micro SDHC Memory Card
- To insert and use a Micro SD card
- To Remove a Memory Card
- GETTING STARTED
- Power On and Off
- To turn the Tablet on
- To turn the Tablet off
- Locking and Unlocking the Screen
- Unlocking
- Locking
- About the Touch Screen
- Protective Film
- Touch Screen Actions
- Display Orientation
- Home Screen
- Customise Home Screen
- Adding Shortcuts
- To place a Shortcut on the Desktop
- Removing Shortcuts from Home Screen
- Change the Desktop Wallpaper
- Applications Menu
- How to Access the Device Applications
- Applications
- Widgets
- Preinstalled Applications
- Installing Applications
- Status Bar/Notification Window
- Notification Area
- To respond to a notification
- To clear all notifications
- To close the Notifications panel
- Status area / Time area
- Entering Text
- CONNECTING TO THE INTERNET
- Connections
- Connect to a Wireless Access Point
- To enable Wireless Networking and Connect to your Router
- Browsing the Web
- • To go to a Webpage
- - Bookmark a Webpage
- • To go to a Bookmarked Webpage
- MANAGING APPLICATIONS
- To Uninstall an Application
- OPTIONAL CONNECTIONS
- Connect to a Computer
- To Connect to a Computer
- Using a USB (OTG) Full-size Adapter
- SYSTEM SETTINGS
- GENERAL INFORMATION
- Safety Instructions
- Legal and Trademark Notices
Brand : Cello
Model : DPM1081
Category : Tablet