
Grace BL40A - Sewing machine BABY LOCK - Free user manual and instructions
Find the device manual for free Grace BL40A BABY LOCK in PDF.


| Product Type | Sewing machine |
| Brand | Baby Lock |
| Model | Grace BL40A |
| Dimensions (approx.) | 15.5 x 7.5 x 11.8 inches (39.4 x 19 x 30 cm) |
| Weight (approx.) | 13.2 lbs (6 kg) |
| Power Supply | 120V, 60Hz, 85W |
| Stitch Types | Built-in stitches: utility, decorative, stretch, and buttonhole |
| Buttonhole Style | 1-step automatic buttonhole |
| Needle Threader | Automatic needle threader |
| Bobbin Winding | Independent bobbin winder with stop |
| Free Arm | Yes, convertible |
| Adjustable Stitch Length | Up to 4 mm (varies by stitch) |
| Adjustable Stitch Width | Up to 5 mm (varies by stitch) |
| Max Sewing Speed | 820 stitches per minute |
| Presser Foot Types | 7 snap-on feet included (general, zipper, buttonhole, etc.) |
| Lighting | LED light |
| Maintenance | Clean bobbin area regularly; oil as per manual |
| Safety Features | Needle safety stop, automatic shut-off after idle |
| Warranty | 25-year limited warranty |
| Included Accessories | Foot controller, power cord, accessory box, dust cover |
Frequently Asked Questions - Grace BL40A BABY LOCK
User questions about Grace BL40A BABY LOCK
0 question about this device. Answer the ones you know or ask your own.
Ask a new question about this device
Download the instructions for your Sewing machine in PDF format for free! Find your manual Grace BL40A - BABY LOCK and take your electronic device back in hand. On this page are published all the documents necessary for the use of your device. Grace BL40A by BABY LOCK.
USER MANUAL Grace BL40A BABY LOCK
Grace
A-LINE SERIES
Model BL40
Instruction and Reference Guide

FOR THE LOVE OF SEWING
Baby Lock Consumer Helpline: 800-313-4110
www.babylock.com
CONGRATULATIONS ON CHOOSING OUR MACHINE
Your machine is the most advanced computerized household sewing machine. To fully enjoy all the features incorporated, we suggest that you study the manual.
PLEASE READ BEFORE USING THIS MACHINE
For safe operation
-
Be sure to keep your eye on the needle while sewing. Do not touch the handwheel, thread take-up lever, needle, or other moving parts.
-
Remember to turn off the power switch and unplug the cord when:
• Operation is completed
- Replacing or removing the needle or any other parts
• A power failure occurs during use
- Maintaining the machine
• Leaving the machine unattended.
-
Do not store anything on the foot controller.
-
Plug the machine directly into the wall. Do not use extension cords.
For a longer service life
- When storing this machine, avoid direct sunlight and high humidity locations. Do not use or store the machine near a space heater, iron, halogen lamp, or other hot objects.
- Use only neutral soaps or detergents to clean the case. Benzene, thinner, and scouring powders can damage the case and machine, and should never be used.
- Do not drop or hit the machine.
- Always consult the operation manual when replacing or installing any assemblies, the presser feet, needle, or other parts to assure correct installation.
For repair or adjustment
In the event a malfunction occurs or adjustment is required, first follow the troubleshooting table in the back of the operation manual to inspect and adjust the machine yourself. If the problem persists, please consult your local authorized Baby Lock retailer.
The contents of this manual and specifications of this product are subject to change without notice.
For additional product information and updates, visit our web site at www.babylock.com
Important Safety Instructions
Please read these safety instructions before attempting to use the machine. This machine is intended for household use.
DANGER - To reduce the risk of electric shock:
1 Always unplug the machine from the electrical outlet immediately after using, when cleaning, when making any user servicing adjustments mentioned in this manual, or if you are leaving the machine unattended.
WARNING - To reduce the risk of burns, fire, electric shock, or injury to persons.
2 Always unplug the machine from the electrical outlet when removing covers, lubricating, or when making any adjustments mentioned in the instruction manual:
- To unplug the machine, switch the machine to the symbol "O" position to turn it off, then grasp the plug and pull it out of the electrical outlet. Do not pull on the cord.
- Plug the machine directly into the electrical outlet. Do not use an extension cord.
• Always unplug your machine if the power is cut.
3 Never operate this machine if it has a damaged cord or plug, if it is not working properly, if it has been dropped or damaged, or water is spilled on the unit. Return the machine to the nearest authorized retailer or service center for examination, repair, electrical or mechanical adjustment. While the machine is stored or in use if you notice anything unusual, such as an odor, heat, discoloration or deformation, stop using the machine immediately and unplug the power cord. When transporting the sewing machine, be sure to carry it by its handle. Lifting the sewing machine by any other part may damage the machine or result in the machine falling, which could cause injuries.
When lifting the sewing machine, be careful not to make any sudden or careless movements, otherwise you may injure your back or knees.
4 Always keep your work area clear:
- Never operate the machine with any air openings blocked. Keep ventilation openings of the sewing machine and foot control free from the build up of lint, dust, and loose cloth.
- Do not store objects on the foot controller.
- Do not use extension cords. Plug the machine directly into the electrical outlet.
- Never drop or insert any object into any opening.
- Do not operate where aerosol (spray) products are being used or where oxygen is being administered.
- Do not use the machine near a heat source, such as a stove or iron; otherwise, the machine, power cord or garment being sewn may ignite, resulting in fire or an electric shock.
- Do not place this sewing machine on an unstable surface, such as an unsteady or slanted table, otherwise the sewing machine may fall, resulting in injuries.
5 Special care is required when sewing:
• Always pay close attention to the needle. Do not use bent or damaged needles.
- Keep fingers away from all moving parts. Special care is required around the machine needle.
- Switch the sewing machine to the symbol "O" position to turn it off when making any adjustments in the needle area.
- Do not use a damaged or incorrect needle plate, as it could cause the needle to break.
- Do not push or pull the fabric when sewing, and follow careful instruction when freehand stitching so that you do not deflect the needle and cause it to break.
6 This machine is not a toy:
- Your close attention is necessary when the machine is used by or near children.
- The plastic bag that this sewing machine was supplied in should be kept out of the reach of children or disposed of. Never allow children to play with the bag due to the danger of suffocation.
- Do not use outdoors.
7 For a longer service life:
- When storing this machine, avoid direct sunlight and high humidity locations. Do not use or store the machine near a space heater, iron, halogen lamp, or other hot objects.
- Use only neutral soaps or detergents to clean the case. Benzene, thinner, and scouring powders can damage the case and machine, and should never be used.
- Always consult the operation manual when replacing or installing any assemblies, the presser feet, needle, or other parts to assure correct installation.
8 For repair or adjustment:
- If the Light unit (light-emitting diode) is damaged, it must be replaced by authorized retailer.
- In the event a malfunction occurs or adjustment is required, first follow the troubleshooting table in the back of the operation manual to inspect and adjust the machine yourself. If the problem persists, please consult your local authorized Baby Lock retailer.
Use this machine only for its intended use as described in this manual.
Use accessories recommended by the manufacturer as contained in this manual.
Save these instructions.
The contents of this manual and specifications of this product are subject to change without notice.
For additional product information, visit our web site at www.babylock.com
Contents
Important Safety Instructions ....1
Contents 4
Introduction 6
Names of Machine Parts and Their Functions ....6
Machine 6
Needle and presser foot section 7
Operation buttons 7
Operation panel 8
Flat bed attachment 8
Accessories 9
Included accessories 9
Optional accessories 10
- GETTING READY ....11
Turning the Machine On/Off 11
Power supply precautions 11
Turning on the machine 12
Turning off the machine 12
Preparing for Upper and Lower Threading ....13
Winding the bobbin 13
Installing the bobbin 16
Threading the upper thread 18
Using the twin needle 23
Replacing the Needle 25
Needle precautions 25
Needle types and their uses 26
Checking the needle 27
Replacing the needle 27
Replacing the Presser Foot 29
Presser foot precautions 29
Replacing the presser foot 29
Removing the presser foot holder 30
Using the optional walking foot 31
Useful Functions ....33
Changing the needle stop position 33
Changing the initial needle position 34
Sewing Cylindrical or Large Pieces 35
Stitching cylindrical pieces 35
Sewing large pieces of fabric 35
- SEWING BASICS ......37
Starting to Sew 37
Sewing procedure 37
Selecting a stitch 38
Adjusting the stitch length and width 38
Positioning the fabric 39
Starting to sew 40
Securing the stitching 42
Cutting the thread 44
Automatically sewing reverse/reinforcement stitches 44
Adjusting the thread tension 45
Useful Sewing Tips 46
Trial sewing 46
Changing the sewing direction 46
Sewing curves 46
Sewing thick fabrics 46
Sewing thin fabrics 47
Sewing stretch fabrics 47
Pulling up the bobbin thread 48
3. UTILITY STITCHES ....49
Overcasting 49
Sewing overcasting stitches using zigzag foot "J" 50
Sewing overcasting stitches using overcasting foot "G" 50
Basic Stitching 51
Blind Hem Stitching 52
Buttonhole Stitching 54
Button sewing 59
Zipper Insertion 61
Inserting a centered zipper 61
Inserting a side zipper 62
Sewing Stretch Fabrics and Elastic Tape 65
Stretch stitching 65
Elastic attaching 65
Appliqué, Patchwork and Quilt Stitching 67
Appliqué stitching 68
Patchwork (crazy quilt) stitching 68
Piecing 69
Quilting 69
Free-motion quilting 70
Reinforcement Stitching 72
Triple stretch stitching 72
Bar tack stitching 73
Decorative stitching 75
Fagoting 76
Scallop stitching 76
Smocking 77
Shell tuck stitching 77
Joining 78
Heirloom stitching 78
Using the side cutter (optional) 81
4. APPENDIX ....85
Stitch settings 85
Utility stitches 85
Maintenance 89
Cleaning the machine surface 89
Cleaning the race 89
Removing the needle plate 90
Troubleshooting 91
Error messages 95
Operation beep 96
Canceling the operation beep 96
Index 97
Introduction
Thank you for choosing this product.
Before using this sewing machine, carefully read "Important Safety Instructions", and then study this manual for the correct operation of the various functions.
In addition, after you have finished reading this manual, store it where it can quickly be accessed for future reference.
Names of Machine Parts and Their Functions
Machine
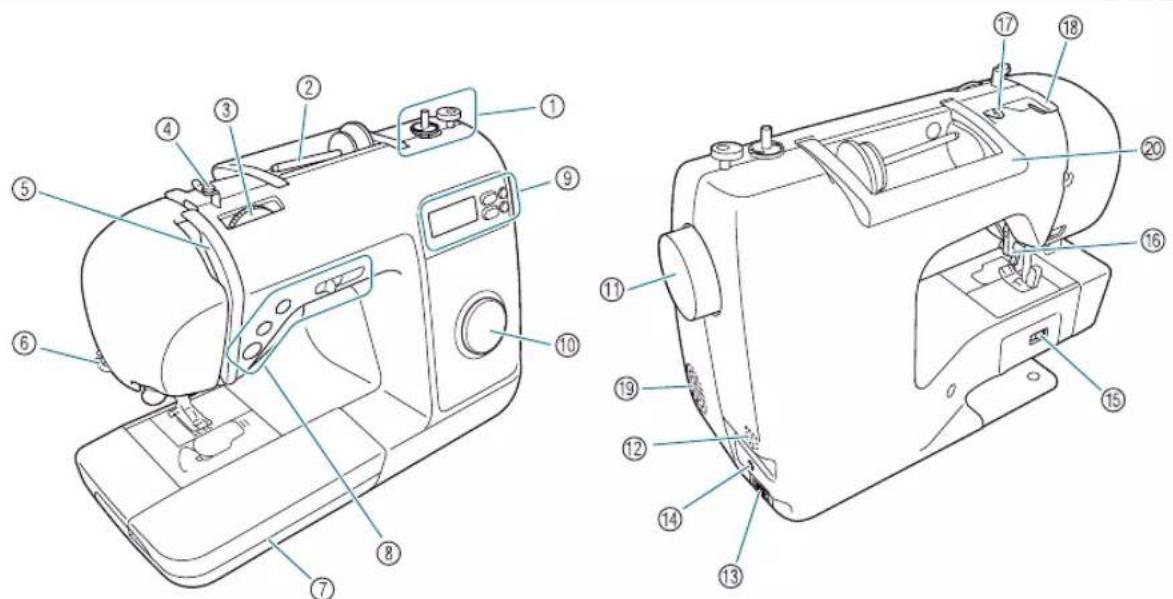
① Bobbin winder (page 13)
Use the bobbin winder when winding the bobbin.
② Spool pin (page 13, 18)
Place a spool of thread on the spool pin.
③ Thread tension dial (page 45)
Use the thread tension dial to adjust the tension of the upper thread.
④ Bobbin-winding thread guide and pretension disc (page 13)
Pass the thread under this thread guide and around the pretension disc when winding the bobbin thread.
⑤ Thread take-up lever (page 21)
Slide the thread into the thread take-up lever from the right side of slot to the left side of slot.
⑥ Thread cutter (page 44)
Pass the threads through the thread cutter to cut them.
⑦ Flat bed attachment (page 8, 9, 35)
Store presser feet and bobbins in the flat bed attachment. Remove the flat bed attachment when sewing cylindrical pieces such as sleeve cuffs.
⑧ Operation buttons and sewing speed controller (page 7)
Use these buttons and the slide to operate the sewing machine.
⑨ Operation panel (page 8)
Use to select stitches and various other stitch settings.
⑩ Pattern selection dial (page 38)
Use to select the pattern to sew.
⑪ Handwheel
Turn the handwheel toward you to sew one stitch or to raise or lower the needle.
⑫ Main power switch (page 12)
Use this switch to turn the sewing machine on and off.
⑬ Power supply jack (page 12)
Insert the plug on the power cord into the power supply jack.
⑭ Foot controller jack (page 41)
Insert the plug on the end of the foot controller cable into the foot controller jack.
⑮ Feed dog position switch (page 71)
Use this switch to lower the feed dogs.
⑯ Presser foot lever (page 18)
Raise and lower this lever to raise and lower the presser foot.
⑰ Thread guide (page 14)
Pass the thread under this thread guide when winding the bobbin thread and threading the machine.
⑱ Thread guide cover (page 14)
Pass the thread under this thread guide when winding the bobbin thread and threading the machine.
⑲ Air vent
This vent allows the air surrounding the motor to circulate.
⑳ Handle
Carry the sewing machine by its handle when transporting the machine.
Needle and presser foot section

① Needle threader lever
Use the needle threader to thread the needle.
② Buttonhole lever
Lower the buttonhole lever when sewing buttonholes and bar tacks.
③ Presser foot holder
The presser foot is attached to the presser foot holder.
④ Presser foot holder screw
Use the presser foot holder screw to hold the presser foot holder in place.
⑤ Presser foot
The presser foot applies pressure to the fabric during sewing. Attach the appropriate presser foot for the selected stitch.
⑥ Needle plate cover
Remove the needle plate cover to clean the bobbin case and race.
⑦ Feed dogs
The feed dogs feed the fabric.
⑧ Quick-set bobbin
Begin sewing without pulling up the bobbin thread.
⑨ Bobbin cover
Remove the bobbin cover and then insert the bobbin into the bobbin case.
⑩ Needle plate
The needle plate is marked with guides to help sew straight seams.
⑪ Needle bar thread guide
Pass the upper thread through the needle bar thread guide.
⑫ Presser foot lever
Raise and lower this lever to raise and lower the presser foot.
⑬ Needle clamp screw
Use the needle clamp screw to hold the needle in place.
Operation buttons
The operation buttons help you to easily perform various basic sewing machine operations.
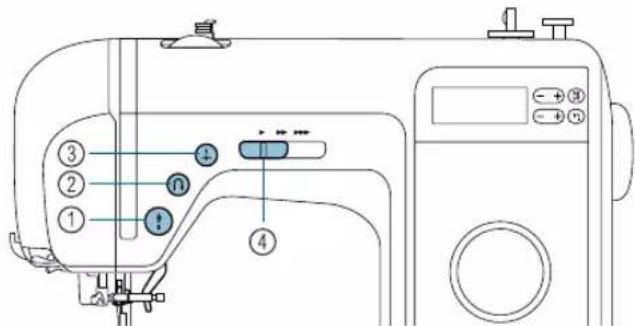
① Start/stop button
Press the start/stop button to start or stop sewing. The machine sews at a low speed at the beginning of sewing while the button is continuously pressed. When sewing is stopped, the needle is lowered into the fabric. For details, refer to "Starting to sew" (page 40).
② Reverse/reinforcement stitch button
Press the reverse/reinforcement stitch button to sew reverse stitches or reinforcement stitches. Reverse stitches are sewn by keeping the button pressed down to sew in the opposite direction. Reinforcement stitches are sewn by sewing 3 to 5 stitches on top of each other. For details, refer to "Securing the stitching" (page 42).
③ Needle position button

Press the needle position button to raise or lower the needle. Pressing the button twice sews one stitch.
④ Sewing speed controller
Slide the sewing speed controller to the left or right to adjust the sewing speed.
Slide the sewing speed controller to the left to reduce the sewing speed, or slide the speed controller to the right to increase the sewing speed.
Operation panel
The operation panel, located on the front of the sewing machine, allows you to select a stitch and specify how the stitch will be sewn.

① LCD (liquid crystal display)
The number of the selected stitch (1), the presser foot to be used (2), the stitch length (mm) (3), and the stitch width (mm) (4) are displayed here.
② Stitch length key (page 38)
Use to adjust the length of the stitch. (Press the “−” side for a shorter stitch length, or press the “+” side for a longer stitch length.)
③ Stitch width key (page 39)
Use to adjust the width of the stitch. (Press the “−” side for a more narrow stitch width, or press the “+” side for a wider stitch width.)
④ Automatic reverse/reinforcement stitch key (page 44)
The sewing machine can be set to automatically sew reverse or reinforcement stitches at the beginning and end of the stitching.
⑤ Needle mode selection key (single/twin) (page 23)
Press this key to select the twin needle sewing setting. Each time this key is pressed, the setting switches between that for single needle sewing and for twin needle sewing.
Flat bed attachment
The accessories are stored in the storage space in the flat bed attachment.
1 Swing the lid of the flat bed attachment toward you to open the storage space.

① Flat bed attachment
② Accessory compartment
The bag of accessories is in the storage space.

Note
●Place the accessories in the bag before storing them in the flat bed attachment. If the accessories are not placed in the accessory bag when stored in the flat bed attachment, accessories may fall out and be lost or damaged.
Accessories
After opening the box, check that the following accessories are included. If any item is missing or damaged, contact your retailer.
Included accessories
The following items should also be included in the box.

natural_image
Diagram of a hand inserting a device into a car compartment with a blue arrow indicating rotation (no text or symbols present)
Note
(For U.S.A. only)
● Foot controller: Model T
This foot controller can be used on this machine model BL40.
● The screw for the presser foot holder is available through your authorized retailer.
(Part code: XA4813-051)
1.2.3.4.5.6.7.8.9.




10.* 11.12.13.14.15.16.17.18.


-
-
-
-
-
- 25.
-
-
-
-




- 27.

27.

* 75/11 2 needles
90/14 2 needles
90/14 2 needles: Ball point needle (gold colored)
| No. | Part Name | Part Code | No. | Part Name | Part Code |
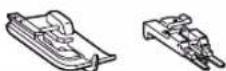
| 1 | Buttonhole foot “A” | XC2691-033 | 15 | Screwdriver (small) | X55648-051 |
| 2 | Overcasting foot “G” | XC3098-031 | 16 | Spool cap (large) | 130012-054 |
| 3 | Monogramming foot “N” | XD0810-031 | 17 | Spool cap (medium) | XE1372-001 |
| 4 | Zipper foot “I” | X59370-021 | 18 | Spool cap (small) | 130013-154 |
| 5 | Zigzag foot “J” (on machine) | XC3021-051 | 19 | Extra spool pin | XE2241-001 |
| 6 | Blind stitch foot “R” | X56409-051 | 20 | Spool net | XA5523-020 |
| 7 | Button fitting foot “M” | 130489-001 | 21 | Foot controller | XC8816-021 |
| 8 | Seam ripper | X54243-051 | 22 | Operation manual | XE4568-001 |
| 9 | Bobbin (4) | X52800-120 | 23 | Quick reference guide | XE2429-001 |
| 10 | Needle set | X58358-021 | 24 | Accessory bag | XC4487-021 |
| 11 | Twin needle | X59296-121 | 25 | Disc-shaped screwdriver | XC1074-051 |
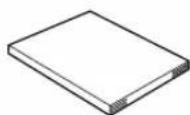
| 12 | Cleaning brush | X59476-021 | 26 | Soft cover | XC1103-022 |
| 13 | Eyelet punch | 135793-001 | 27 | Power cord | XC6052-021 |
| 14 | Screwdriver (large) | XC8349-051 |
Optional accessories
The following are available as optional accessories.
1.2.3.


natural_image
Simple line drawing of a mechanical component with a curved top and base (no text or symbols)4.5.6.7.


8.9.10.11.


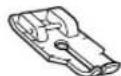
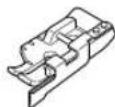
| No. | Part Name Part Code No. Part | Name Part Code | |||
| 1 | Side cutter FA10 7 Non stick foot | FA8 | |||
| 2 | Quilting guide FA11 8 Open toe | foot FA7 | |||
| 3 | Extension table BL40-ET 9 Stitch | guide foot “P” FA6 | |||
| 4 | Walking foot | BLG-WF | 10 | 1/4 inch quilting foot | FA1 |
| 5 | Quilting foot | FA2 | 11 | 1/4 inch quilting foot with guide | ESG-QGF |
| 6 | Adjustable zipper/piping foot | FA9 |

Memo
● All specifications are correct at the time of printing. The part codes are subject to change without notice.
- Visit your Baby Lock retailer for a complete listing of optional accessories available for your machine.
1GETTING READY
Turning the Machine On/Off
This section explains how to turn the sewing machine on and off.
Power supply precautions
Be sure to observe the following precautions concerning the power supply.

WARNING
- Use only regular household electricity for the power source. Using other power sources may result in fire, electric shock, or damage to the machine.
● Make sure that the plugs on the power cord are firmly inserted into the electrical outlet and the power supply jack on the machine. - Do not insert the plug on the power cord into an electrical outlet that is in poor condition.
●Turn off the main power and remove the plug in the following circumstances: - When you are away from the machine
• After using the machine - When the power fails during use
- When the machine does not operate correctly due to a bad connection or a disconnection
• During electrical storms

CAUTION
- Use only the power cord included with this machine.
- Do not use extension cords or multi-plug adapters with many other appliances plugged in to them. Fire or electric shock may result.
- Do not touch the plug with wet hands. Electric shock may result.
- When unplugging the machine, always turn off the main power first. Always grasp the plug to remove it from the outlet. Pulling on the cord may damage the cord, or lead to fire or electric shock.
- Do not allow the power cord to be cut, damaged, modified, forcefully bent, pulled, twisted, or bundled. Do not place heavy objects on the cord. Do not subject the cord to heat. These things may damage the cord and cause fire or electric shock. If the cord or plug is damaged, take the machine to your authorized dealer for repairs before continuing use.
- Unplug the power cord if the machine is not to be used for a long period of time. Otherwise a fire may result.
Turning on the machine
Prepare the included power cord.
1 Make sure that the sewing machine is turned off (the main power switch is set to “ Ⓞ, and then plug the power cord into the power supply jack on the right side of the machine.
2 Insert the plug of the power cord into a household electrical outlet.

① Main power switch
② Power cord
3 Press the right side of the main power switch on the right side of the machine (set it to "|").
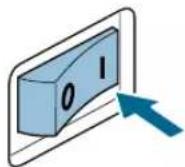
The sewing lamp and the LCD come on when the machine is turned on.
Turning off the machine
When you are finished using the sewing machine, turn it off. In addition, before transporting the sewing machine to another location, be sure to turn it off.
1 Make sure that the machine is not sewing.
2 Press the left side of the main power switch on the right side of the machine (set it to “①
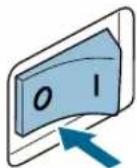
The sewing lamp and the LCD go off when the machine is turned off.
3 Unplug the power cord from the electrical outlet.
Grasp the plug when unplugging the power cord.
4 Unplug the power cord from the power supply jack.

Note
- If a power outage occurs while the sewing machine is being operated, turn off the sewing machine and unplug the power cord. When restarting the sewing machine, follow the necessary procedure to correctly operate the machine.
(For U.S.A. only)
●This appliance has a polarized plug (one blade wider than the other). To reduce the risk of electrical shock, this plug is intended to fit in a polarized outlet only one way. If the plug does not fit fully in the outlet, reverse the plug. If it still does not fit, contact a qualified electrician to install the proper outlet. Do not modify the plug in any way.
Preparing for Upper and Lower Threading
Winding the bobbin
Wind the thread onto the bobbin.
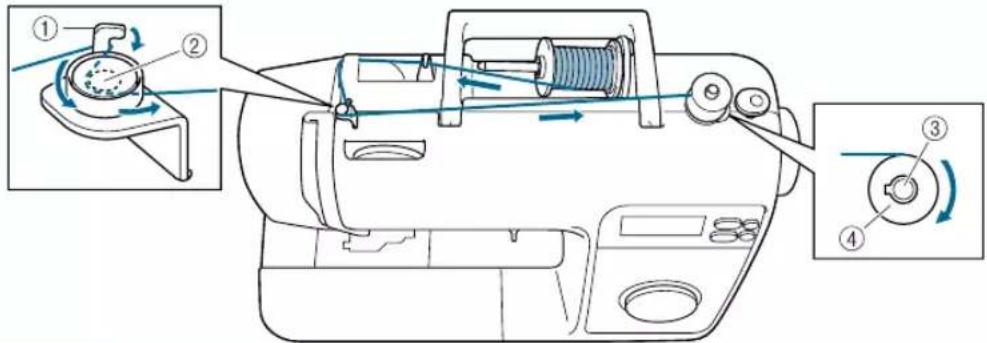
① Hook of the bobbin-winding thread guide
② Pretention disk
③ Bobbin winder shaft
④ Bobbin

CAUTION
● The included bobbin was designed specifically for this sewing machine. The machine will not operate correctly if older model bobbins, which have a different thickness, are used. Use only the enclosed bobbin or bobbins of the same type. Using a bobbin other than the one designed specifically for this machine may result in injuries or damage to the machine.

①

②
① This model
② Other model
③ 11.5 mm (7/16 inch)
(actual size)

Turn on the sewing machine.


Place the bobbin on the bobbin winder shaft so that the spring on the shaft fits into the notch in the bobbin.

① Notch
② Bobbin winder shaft spring

Slide the bobbin winder shaft to the right until it snaps into place.


Swing up the spool pin, and then remove the spool cap.
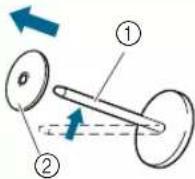
① Spool pin
② Spool cap

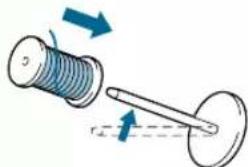
Fully insert the spool of thread for the bobbin onto the spool pin.
Slide the spool onto the pin so that the spool is horizontal and the thread unwinds to the front at the bottom.
natural_image
Diagram of a mechanical assembly with a spring and rod, showing motion direction (no text or symbols)
CAUTION
- If the spool is not positioned so that the thread unwinds correctly, the thread may become tangled around the spool pin.
Slide the spool cap onto the spool pin.
With the slightly rounded side of the spool cap positioned toward the left, slide the spool cap onto the spool pin as far as possible to the right so that the spool is moved to the right end of the spool pin.


Memo
- When sewing with fine, cross-wound thread, use the small spool cap, and leave a small space between the cap and the spool.

① Spool cap (small)
② Spool (cross-wound thread)
③ Space
- When using thread that winds off quickly, such as transparent nylon thread or metallic thread, place the spool net over the spool before placing the spool of thread onto the spool pin.
If the spool net is too long, fold it to fit the size of the spool.
When the spool net is used, the tension of the upper thread will slightly increase. Be sure to check the thread tension. For details, refer to "Adjusting the thread tension" (page 45).

flowchart
graph TD
    A["①"] --> B["②"]
    B --> C["③"]
    C --> D["④"]
    D --> E["⑤"]
① Spool net
② Spool
③ Spool cap
④ Spool pin
7 Pull some thread off the spool, and then pass the thread under the thread guide.
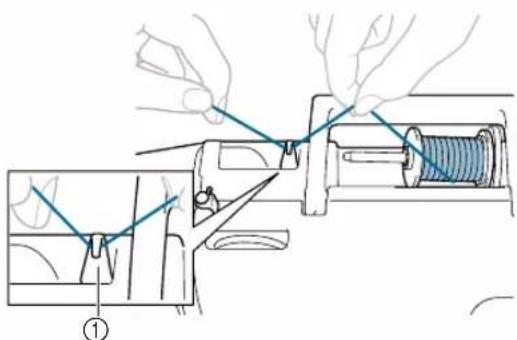
① Thread guide
8 Pass the thread under the thread guide cover from the back to the front.
Hold the thread with your right hand so that there is no slack in the thread that is pulled out, and then pass the thread under the thread guide cover with your left hand.

① Thread guide cover
9 Pull the thread, pass it under the hook of the bobbin-winding thread guide, and then wind the thread counterclockwise between the discs, pulling it in as far as possible.

① Hook of the bobbin-winding thread guide
② Pretension disk
10 While using your left hand to hold the thread that was passed through the bobbin-winding thread guide, use your right hand to wind the end of the thread clockwise around the bobbin five or six times.

natural_image
Mechanical assembly diagram showing a spring-loaded component with a curved arrow indicating rotation (no text or symbols)11 Pass the end of the thread through the slit in the bobbin winder seat, and then pull the thread to the right to cut it.

① Slit in bobbin winder seat (with built-in cutter)
The thread is cut to a suitable length.
!
CAUTION
- Be sure to cut the thread as described. If the bobbin is wound without cutting the thread using the cutter built into the slit in the bobbin winder seat, the bobbin may not be wound correctly. In addition, the thread may become tangled in the bobbin or the needle may bend or break when the bobbin thread starts to run out.
12
Slide the sewing speed controller to the right to increase the bobbin winding speed and slide to left to decrease.

① Sewing speed controller
13
Press (start/stop button) once.
The bobbin starts spinning and the thread is wound around the bobbin.

① Start/stop button
14
When the bobbin winding becomes slow, press (start/stop button) once to stop the machine.
!
CAUTION
- When the bobbin winding becomes slow, stop the machine, otherwise the sewing machine may be damaged.
15
Cut the thread, slide the bobbin winder shaft to the left, and then remove the bobbin from the shaft.
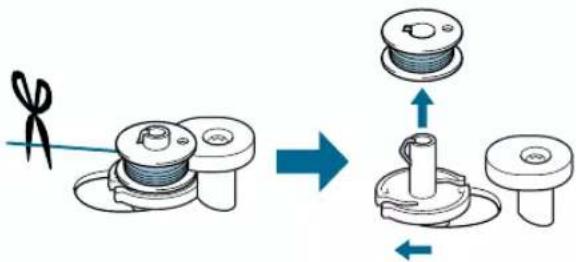

Memo
- When the sewing machine is started or the handwheel is turned after winding the thread around the bobbin, the machine will make a clicking sound; this is not a malfunction.
●The needle cannot move (sewing is not possible) while the bobbin winder shaft is moved to the right.
Installing the bobbin
Install the bobbin wound with thread.

CAUTION
●Use a bobbin that has been correctly wound, otherwise the needle may break or the thread tension will be incorrect.
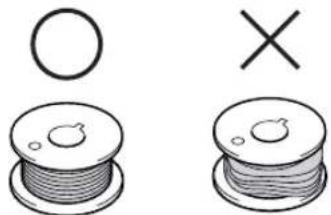
●The included bobbin was designed specifically for this sewing machine. The machine will not operate correctly if older model bobbins, which have a different thickness, are used. Use only the enclosed bobbin or bobbins of the same type. Using a bobbin other than the one designed specifically for this machine may result in injuries or damage to the machine.

① This model
② Other model
③ 11.5 mm (7/16 inch) (actual size)
●Before installing the bobbin or replacing the needle, be sure to turn off the sewing machine, otherwise injuries may occur if the start/stop button is accidentally pressed and the machine starts sewing.

Press (needle position button) once or twice to raise the needle, and then raise the presser foot lever.

① Needle position button

Turn off the sewing machine (set it to "○).


Slide the latch on the right side of the bobbin cover to the right, and then remove the bobbin cover.

① Bobbin cover
② Latch

Insert the bobbin with your right hand so that the thread unrolls to the left side, and then pull the thread firmly under the tab with your left hand.
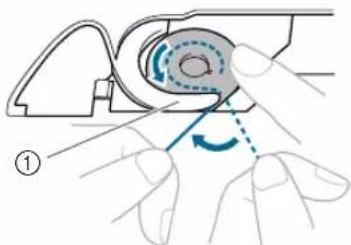
① Tab

CAUTION
●Be sure to hold down the bobbin with your finger and install the bobbin so that the thread unwinds in the correct direction, otherwise the needle may break or the thread tension will be incorrect.
5 Lightly hold down the bobbin with your right hand, and guide the thread through the slot, and then pull it toward you to cut it with the cutter.
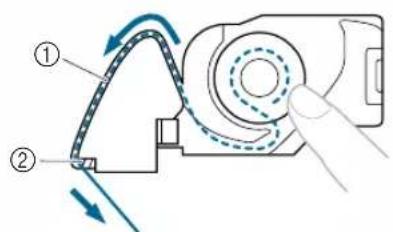
① Slot
② Cutter
The cutter cuts the thread.
- Make sure that the thread is correctly passed through the flat spring of the bobbin case. If it is not inserted correctly, reinstall the bobbin.

natural_image
Mechanical assembly diagram showing hand operating a component with a magnified inset of the internal structure (no text or symbols)① Flat spring

Memo
● The direction for feeding the bobbin thread is indicated by marks around the needle plate cover. Be sure to thread the machine as indicated.

natural_image
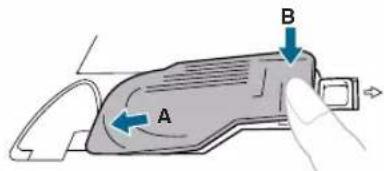
Technical line drawing of a mechanical device with no visible text or symbolsReattach the bobbin cover.
Insert the tab in the lower-left corner of the bobbin cover (A), and then press down on the right side (B).

Memo
- You can begin sewing without pulling up the bobbin thread. If you wish to pull up the bobbin thread before starting to sew, finish threading the machine, and then pull up the thread according to the procedure in "Pulling up the bobbin thread" (page 48).
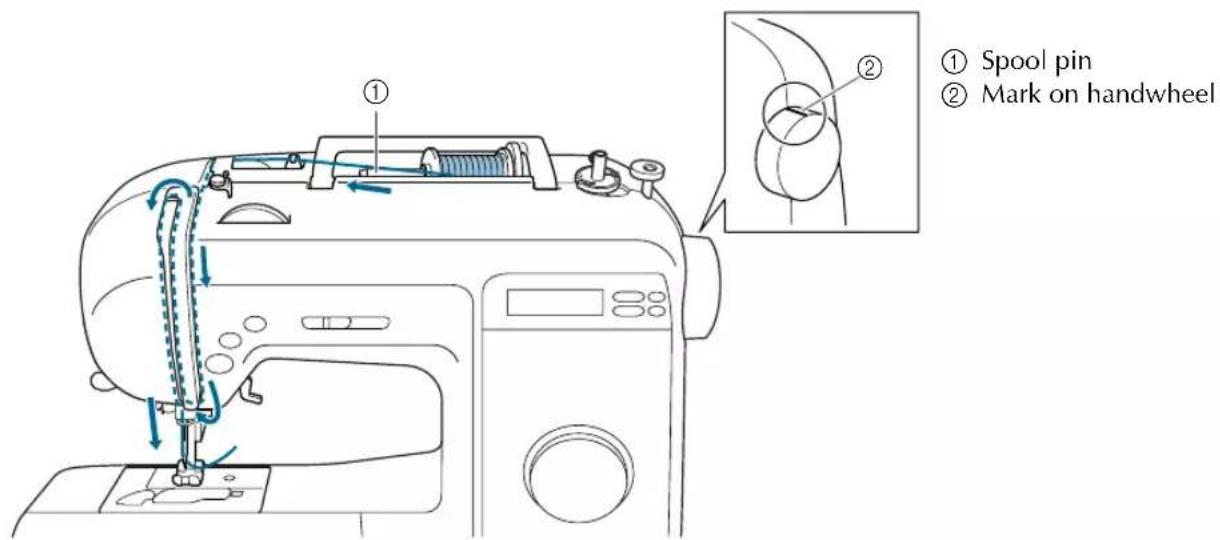
Threading the upper thread
In this section, the procedures for installing the spool for the upper thread and threading the needle are described.

CAUTION
- When threading the machine, carefully follow the instructions. If the upper threading is not performed correctly, the thread may become tangled and the needle may bend or break.
● The needle threader can be used with sewing machine needles 75/11 through 100/16. - Use appropriate thread and needle combinations. For details on appropriate needle and thread combinations, refer to "Needle types and their uses" (page 26).
● Thread with a thickness of 130/20 or thicker cannot be used with the needle threader.
● The needle threader cannot be used with the wing needle or the twin needle. - If the needle threader cannot be used, refer to "Manually threading the needle" (page 22).

Turn on the sewing machine.

Raise the presser foot lever.

① Presser foot lever

CAUTION
- If the presser foot is not raised, the sewing machine cannot be threaded correctly.

Press (needle position button) once or twice to raise the needle.

① Needle position button
- If the needle is not correctly raised, the sewing machine cannot be threaded. Check that the mark on the handwheel points up as shown in the illustration below. If the handwheel is not in this position, be sure to press the needle position button to raise the needle before continuing the procedure.

① Mark on handwheel

Swing up the spool pin, and then remove the spool cap.

① Spool pin
② Spool cap

Fully insert the spool for the upper thread onto the spool pin
Slide the spool onto the pin so that the spool is horizontal and the thread unwinds to the front at the bottom.

natural_image
Diagram of a mechanical assembly with a spring and rod, showing motion direction (no text or symbols)
CAUTION
- If the spool is not positioned so that the thread unwinds correctly, the thread may become tangled around the spool pin and the thread or needle may break.
- If the spool cap that is used is smaller than the spool, the thread may catch, for example, on the notch in the spool, or the needle may break.


Slide the spool cap onto the spool pin.


Memo
- When sewing with fine, cross-wound thread, use the small spool cap, and leave a small space between the cap and the spool.

① Spool cap (small)
② Spool (cross-wound thread)
③ Space
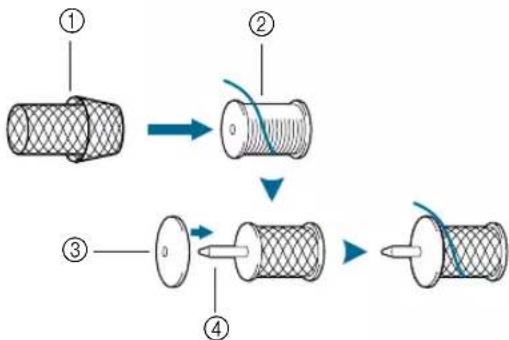
- When using thread that winds off quickly, such as transparent nylon thread or metallic thread, place the spool net over the spool before placing the spool of thread onto the spool pin.
If the spool net is too long, fold it to fit the size of the spool.
When the spool net is used, the tension of the upper thread will slightly increase. Be sure to check the thread tension. For details, refer to “Adjusting the thread tension” (page 45).
flowchart
graph TD
    A["①"] --> B["②"]
    B --> C["③"]
    C --> D["④"]
    D --> E["⑤"]
① Spool net
② Spool
③ Spool cap
④ Spool pin
7 Pull some thread off the spool, and then pass the thread under the thread guide.

① Thread guide
8 Pass the thread under the thread guide cover from the back to the front.
Hold the thread with your right hand so that there is no slack in the thread that is pulled out, and then pass the thread under the thread guide cover with your left hand.

① Thread guide cover
9 Thread the machine by guiding the thread along the path indicated by the number on the machine.

natural_image
Diagram of a mechanical assembly with arrows indicating motion or force directions (no text or symbols)10 Slide the thread into the thread take-up lever from the right to the left.
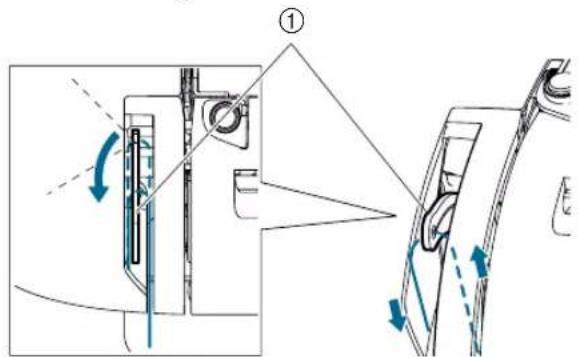
① Thread take-up lever

Memo
- If the needle is not raised, the thread take-up lever cannot be threaded. Be sure to press the needle position button to raise the needle before threading the thread take-up lever.
11 Pass the thread behind the needle bar thread guide.
The thread can easily be passed behind the needle bar thread guide by holding the thread in your left hand, then feeding the thread with your right hand.
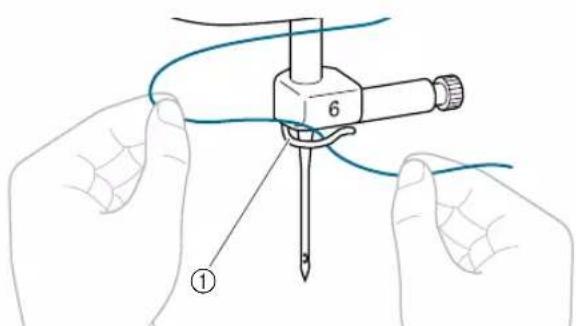
① Needle bar thread guide
12 Lower the presser foot lever.
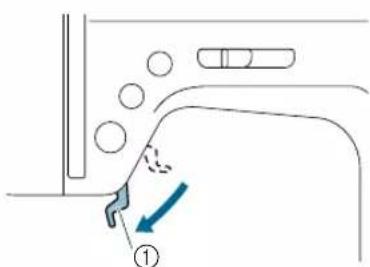
① Presser foot lever
While lowering the needle threader lever, hook the thread onto the guide.
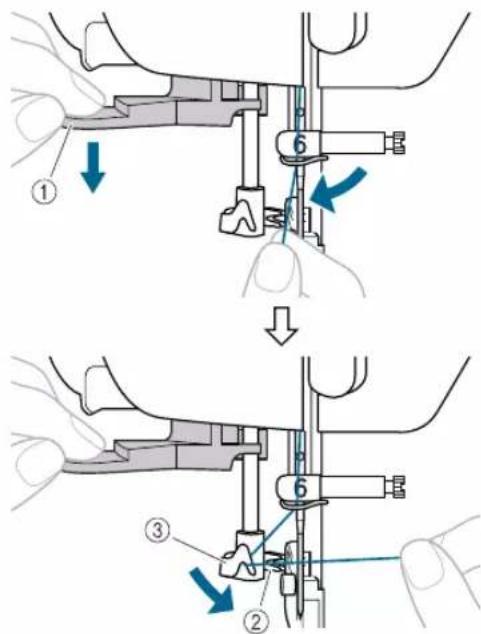
① Needle threader
② Thread
③ Guide
14 Catch the thread on the hook as shown below.

① Needle threader lever
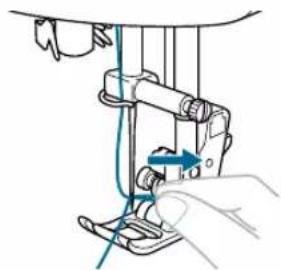
15 Raise the needle threader lever, and then pull the end of the thread which passed through the eye of the needle.
natural_image
Illustration of a sewing machine needle with a hand adjusting the base (no text or symbols)
CAUTION
●Be careful not to pull on the thread with force or it may bend the needle.
16 Raise the presser foot lever, pass the end of the thread through the presser foot, and then pull out about 5 cm (2 inches) of thread toward the rear of the machine.

natural_image
Technical line drawing of a sewing machine's foot and arm assembly (no text or symbols)① 5 cm (2 inches)
The upper threading is finished.
■Manually threading the needle
If the needle threader cannot be used, thread the needle as described below.
Thread the machine to the needle bar thread guide, as described in steps ① through ⑪ of "Threading the upper thread", and then lower the presser foot lever.
2 Turn off the sewing machine.

CAUTION
●Be sure to turn off the sewing machine, otherwise injuries may occur if the start/stop button is accidentally pressed and the machine starts sewing.
3 Manually pass the thread through the eye of the needle from front to back.

natural_image
Line drawing of a sewing machine needle and handle assembly (no text or symbols)4 Raise the presser foot lever.
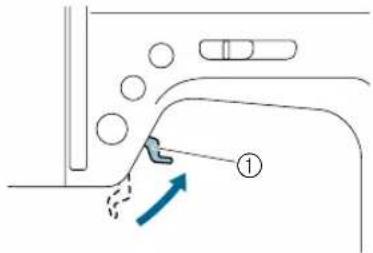
① Presser foot lever
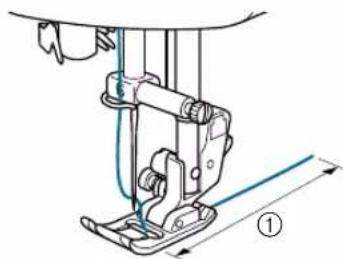
5 Pass the end of the thread through the presser foot, and then pull out about 5 cm (2 inches) of thread toward the rear of the machine.
natural_image
Technical line drawing of a sewing machine's foot and arm assembly (no text or symbols)① 5 cm (2 inches)
Using the twin needle
With the twin needle, you can sew two parallel lines of the same stitch with two different threads. Both upper threads should have the same thickness and quality. Be sure to use the twin needle and the extra spool pin.
For details on the stitches that can be sewn with the twin needle, refer to "Stitch settings" (page 85).
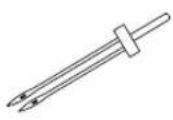
①

②
① Twin needle
② Extra spool pin

CAUTION
●Only use the twin needle (part code: X59296-121). Use of any other needle may bend the needle or damage the machine.
●Never use bent needles. Bent needles can easily break, possibly resulting in injuries.
●The needle threader cannot be used with the twin needle. If the needle threader is used with the twin needle, the sewing machine may be damaged.
Install the twin needle.
- For details on installing a needle, refer to "Replacing the needle" (page 27).
Thread the upper thread for the left needle.
- For details, refer to steps 1 through 10 of "Threading the upper thread" (page 18).
3 Manually thread the left needle with the upper thread.
Pass the thread through the eye of the needle from the front to the back.

natural_image
Pure mechanical diagram showing a clamp or bracket with a blue wire and cable, no text or symbols present.4 Insert the extra spool pin onto the end of the bobbin winder shaft.

① Bobbin winder shaft
② Extra spool pin
③ Thread spool

5 Install the thread spool and thread the upper thread.

Memo
- When setting the thread spool, set it so that the thread winds off from the front of the spool.
6 Thread the upper thread for the right side in the same way that the upper thread for the left side was threaded.

① Thread guide cover
- For details, refer to step 1 through 10 of "Threading the upper thread" (page 18).
7 Without passing the thread through the needle bar thread guide, manually thread the right needle.
Pass the thread through the eye of the needle from the front to the back.

natural_image
Pure mechanical diagram showing a clamp or bracket with wires, no text or symbols present
Attach zigzag foot "J".
- For details on changing the presser foot, refer to "Replacing the presser foot" (page 29).

CAUTION
- When using the twin needle, be sure to attach zigzag foot "J", otherwise the needle may break or the machine may be damaged.

Turn on the sewing machine.

The LCD comes on.

Select a stitch.
- For details on selecting a stitch, refer to "Selecting a stitch" (page 38).
- For details on the stitches that can be sewn with the twin needle, refer to "Stitch settings" (page 85).

CAUTION
●After adjusting the stitch width, slowly turn the handwheel toward you (counterclockwise) and check that the needle does not touch the presser foot. If the needle hits the presser foot, the needle may bend or break.

Press Needle mode selection key).

The twin needle can now be used.
- To return to single needle sewing, press (Needle mode selection key).
- Even after the sewing machine is turned off, the twin needle setting is not cancelled.

CAUTION
- When using the twin needle, be sure to select the twin needle setting, otherwise the needle may break or the machine may be damaged.

Start sewing.
- For details on starting to sew, refer to "Starting to sew" (page 40).
▶ Two lines of stitching are sewn parallel to each other.

natural_image
Abstract wavy line patterns in blue and white, no text or symbols present
Note
- When using the twin needle, the stitches may become bunched together, depending on the types of thread and fabric that are used. If this occurs, increase the stitch length. For details on adjusting the stitch length, refer to "Adjusting the stitch length and width" (page 38).

CAUTION
- When changing the sewing direction, press ⚠️ (needle position button) to raise the needle from the fabric, and then raise the presser foot lever and turn the fabric. Otherwise the needle may break or the machine may be damaged.
●Do not try turning the fabric with the twin needle left down in the fabric, otherwise the needle may break or the machine may be damaged.
Replacing the Needle
This section provides information on sewing machine needles.
Needle precautions
Be sure to observe the following precautions concerning the handling of the needle. Failure to observe these precautions is extremely dangerous, for example, if the needle breaks and fragments are dispersed. Be sure to read and carefully follow the instructions below.

CAUTION
- Only use home sewing machine needles. Use of any other needle may bend the needle or damage the machine.
● Never use bent needles. Bent needles can easily break, possibly resulting in injuries.
Needle types and their uses
The sewing machine needle that should be used depends on the fabric and thread thickness. Refer to the following table when choosing the thread and needle appropriate for the fabric that you wish to sew.
| Fabric Type/Application | Thread | Size of Needle | ||
| Type Weight | ||||
| Medium weight fabrics | Broadcloth Cotton thread | 60–80 | 75/11–90/14 | |
| Taffeta Synthetic thread | ||||
| Flannel, Gabardine | Silk thread 50 | |||
| Thin fabrics | Lawn Cotton thread | 60–80 | 65/9–75/11 | |
| Georgette Synthetic thread | ||||
| Challis, Satin Silk thread 50 | ||||
| Thick fabrics | Denim Cotton thread 30–50 | 90/14–100/16 | ||
| Corduroy Synthetic thread | 50–60 | |||
| Tweed | Silk thread | |||
| Stretch fabrics | Jersey | Thread for knits | 50–60 | Ball point needle (golden colored) 75/11–90/14 |
| Tricot | ||||
| Easily frayed fabrics | Cotton thread | 50–80 | 65/9–90/14 | |
| Synthetic thread | ||||
| Silk thread 50 | ||||
| For top-stitching | Synthetic thread | 50–60 | 90/14–100/16 | |
| Silk thread | ||||

Memo
●The smaller the thread number, the thicker the thread, and the larger the needle number, the thicker the needle.
- Use the ball point needle when sewing on stretch fabrics or fabrics where skipped stitches easily occur.
●Use a 90/14 to 100/16 needle with transparent nylon threads, regardless of the fabric being sewn.
●A 75/11 needle is already installed when the sewing machine is purchased.

CAUTION
●The appropriate fabric, thread and needle combinations are shown in the table above. If the combination of the fabric, thread and needle is not correct, particularly when sewing thick fabrics (such as denim) with thin needles (such as 65/9 to 75/11), the needle may bend or break. In addition, the stitching may be uneven or puckered or there may be skipped stitches.
Checking the needle
Sewing with a bent needle is extremely dangerous since the needle may break while the machine is being operated.
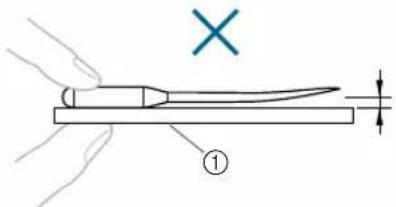
Before using the needle, place the flat side of the needle on a flat surface and check that the distance between the needle and the flat surface is even.

① Flat side
② Needle type marking

① Flat surface
If the distance between the needle and the flat surface is not even, the needle is bent. Do not use a bent needle.
① Flat surface
Replacing the needle
Replace the needle as described below. Use the screwdriver and a correct needle, as described in "Checking the needle".
1 Press (needle position button) once or twice to raise the needle.

① Needle position button
2 Turn off the sewing machine.
! CAUTION
●Before replacing the needle, be sure to turn off the sewing machine, otherwise injuries may occur if the start/stop button is accidentally pressed and the machine starts sewing.
3 Lower the presser foot lever.

① Presser foot lever
! CAUTION
●Before replacing the needle, place fabric or paper under the presser foot to prevent the needle from falling into the hole in the needle plate.
4 Loosen the needle clamp screw and remove the needle.
Hold the needle with your left hand, and then turn the screwdriver counterclockwise with your right hand.

① Needle clamp screw
② Screwdriver
- Do not apply extreme force when loosening or tightening the needle clamp screw, otherwise damage to the machine may result.

natural_image
Diagram of a tool with a screwdriver and directional arrow indicating motion (no text or symbols)5 With the flat side of the needle toward the rear of the machine, insert the needle until it touches the needle stopper.
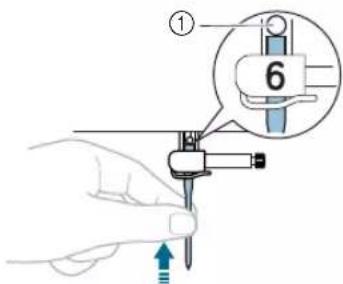
① Needle stopper
6 While holding the needle with your left hand, tighten the needle clamp screw.
Turn the screwdriver clockwise.

natural_image
Illustration of a hand holding a screwdriver with a blue arrow indicating rotation (no text or symbols)Install the twin needle in the same way.

natural_image
Hand holding a tool with a screwdriver and adjustment knob (no text or symbols visible)! CAUTION
●Be sure to insert the needle until it touches the needle stopper and securely tighten the needle clamp screw with the screwdriver, otherwise the needle may break or damage may result.
Replacing the Presser Foot
Presser foot precautions
Be sure to observe the following precautions concerning the presser feet.

CAUTION
- Use the presser foot appropriate for the type of stitch that you wish to sew, otherwise the needle may hit the presser foot, causing the needle to bend or break.
- Only use presser feet designed specifically for this sewing machine. Use of any other presser foot may result in injuries or damage to the machine.
Replacing the presser foot
Replace the presser foot as described below.

Press (needle position button) once or twice to raise the needle.

① Needle position button

Turn off the sewing machine.


CAUTION
● Before replacing the presser foot, be sure to turn off the sewing machine, otherwise injuries may occur if the start/stop button is accidentally pressed and the machine starts sewing.
● Make sure that the presser foot is installed in the correct direction, otherwise the needle may strike the presser foot, causing it to break and cause injuries.

Raise the presser foot lever.

① Presser foot lever

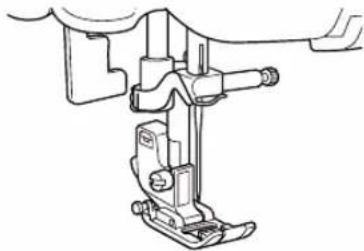
Press the black button at the back of the presser foot holder to remove the presser foot.

① Black button
② Presser foot holder
5 Place the presser foot to be installed below the holder so that the presser foot pin is aligned with the notch in the holder.
Position the presser foot so the letter indicating the presser foot type (J, A, etc.) is positioned to be read.
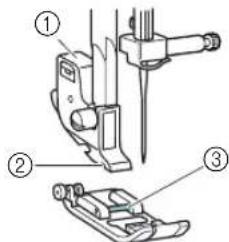
① Presser foot holder
② Notch
③ Pin

Memo
●The code for the presser foot to be used with each stitch appears in the LCD. For details on selecting a stitch, refer to "Selecting a stitch" (page 38).
6 Slowly lower the presser foot lever so that the presser foot pin snaps into the notch in the presser foot holder.

flowchart
graph TD
    A["Step ①"] --> B["Step ②"]
    B --> C["Step ③"]
    C --> D["Step ④"]
① Presser foot lever
② Presser foot holder
③ Notch
④ Pin
The presser foot is attached.
7 Raise the presser foot lever to check that the presser foot is securely attached.
natural_image
Technical line drawing of a sewing machine (no text or symbols)Removing the presser foot holder
Remove the presser foot holder when cleaning the sewing machine or when installing the optional walking foot.
Remove the presser foot.
- For details, refer to "Replacing the presser foot" (page 29).
2 Loosen the presser foot holder screw, and then remove the presser foot holder.
Turn the screwdriver counterclockwise.

① Screwdriver
② Presser foot holder
③ Screw
■Attaching the presser foot holder
1 Align the presser foot holder with the presser bar.
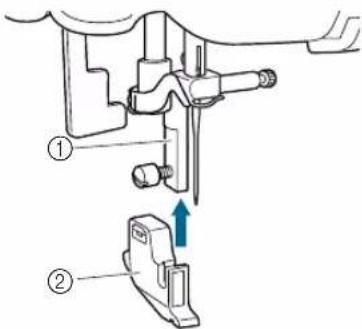
① Presser bar
② Presser foot holder
2 Hold up the presser foot holder with your right hand, and tighten the screw.
With your left hand, turn the screwdriver clockwise.

natural_image
Mechanical assembly diagram showing a tool inserted into a bracket with a blue arrow indicating rotation (no text or symbols present)
Note
- If the presser foot holder is not correctly installed, the thread tension will be incorrect.

CAUTION
●Be sure to securely tighten the presser foot holder screw, otherwise the presser foot holder may fall off and the needle may strike it, causing the needle to bend or break.
Using the optional walking foot
With the optional walking foot, both pieces of fabric are fed evenly by the feed dogs and the teeth on the presser foot. This is useful when sewing fabrics that are hard to feed such as vinyl and leather and when sewing fabrics that easily slip such as velvets or when quilting.
Use the screwdriver to attach the walking foot.
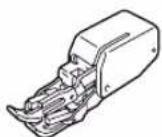
■Attaching the walking foot
Remove the presser foot holder.
- For details, refer to "Removing the presser foot holder" (page 30).
② Hook the connecting fork of the walking foot onto the needle clamp screw.

① Connecting fork
② Needle clamp screw
③ Lower the presser foot lever, insert the presser foot holder screw, and then tighten the screw with the screwdriver.

① Presser foot holder screw
! CAUTION
●Be sure to securely tighten the screw with the screwdriver, otherwise the needle may touch the presser foot, causing it to bend or break.
●Before starting to sew, slowly turn the handwheel toward you (counterclockwise) and check that the needle does not touch the presser foot. If the needle hits the presser foot, the needle may bend or break.

Note
●When sewing with the walking foot, sew at a speed between slow and medium.
■Removing the walking foot
① Press (needle position button) once or twice to raise the needle.

① Needle position button The needle is raised.
② Turn off the sewing machine.
Raise the presser foot lever.
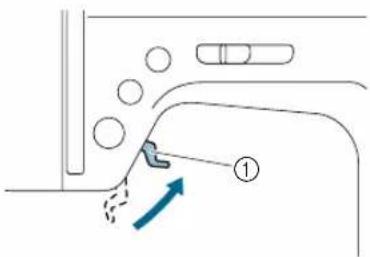
① Presser foot lever ▶ The presser foot is raised.
④ With a screwdriver, loosen the presser foot holder screw, and then remove the walking foot.

① Presser foot holder screw
Attach the presser foot holder.
- For details, refer to "Removing the presser foot holder" (page 30).

Memo
- Only the straight stitch (with reinforcement stitching) and the zigzag stitch can be used with the walking foot. For details on the stitches, refer to "Stitch settings" (page 85).
●The optional walking foot is available through your brother dealer.
Useful Functions
Functions useful in improving sewing efficiency are described below.
Changing the needle stop position
Normally, the sewing machine is set to leave the needle in the fabric when sewing is stopped. Instead, the machine can be set to leave the needle raised when sewing is stopped.

Turn off the sewing machine.


While pressing (automatic reverse/ reinforcement stitch key), turn on the sewing machine.
When machine beeps twice, release the automatic reverse/reinforcement stitch key.


① Automatic reverse/reinforcement stitch key The needle stop position changes to the raised position.

Memo
●Perform the same operation to change the needle stop position to the lowered position.
■When the needle stops in the raised position The needle stops in the raised position when sewing ends.

natural_image
Simple diagram showing a test tube partially submerged in liquid, with no text or symbols present.
Memo
●After sewing is finished, the fabric can be pulled out.
■When the needle stops in the lowered position
The needle stops in the lowered position when sewing ends.

natural_image
Simple line drawing of a vertical line intersecting a horizontal bar with a labeled point '0' (no text or symbols beyond the label)
Memo
- Use this position to change the sewing direction ("Changing the sewing direction" (page 46)) or to stop while sewing.
Changing the initial needle position
Normally, the straight stitch (left needle position) is automatically selected when the sewing machine is turned on. The machine can be set so that the straight stitch (center needle position) is automatically selected when it is turned on.

Turn off the sewing machine.


While pressing (needle mode selection key), turn on the sewing machine.
When the machine beeps twice, release the needle mode selection key.
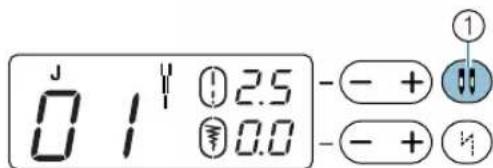

① Needle mode selection key (single/twin)
The initial needle position is changed to the center needle position.

Memo
●The specified initial needle position is maintained even after the machine is turned off.
●Perform the same operation to change the initial needle position to the left needle position.
Sewing Cylindrical or Large Pieces
When sewing cylindrical or large pieces of fabric, remove the flat bed attachment.
Stitching cylindrical pieces
Removing the flat bed attachment makes it easier to sew cylindrical pieces such as cuffs and pant legs.
1 Pull the flat bed attachment off to the left.

natural_image
Diagram of a hand holding a blue plastic bag with a handle, showing internal components and a blue arrow indicating direction (no text or symbols)With the flat bed attachment removed, free-arm sewing is possible.
2 Slide the part that you wish to sew onto the arm, and then sew from the top.

natural_image
Line drawing of a sewing machine needle being adjusted, showing fabric and metal components (no text or symbols)3 When you are finished with free-arm sewing, install the flat bed attachment back in its original position.

natural_image
Illustration of a hand holding a blue plastic bag with a handle, showing mechanical components and an arrow indicating direction (no text or symbols)Sewing large pieces of fabric
The optional extension table makes sewing large pieces of fabric easier.

natural_image
Isometric line drawing of a mechanical component with a curved slot and base plate (no text or symbols)1 Open up the legs at the bottom of the extension table.
Pull out the four legs until they snap into place.
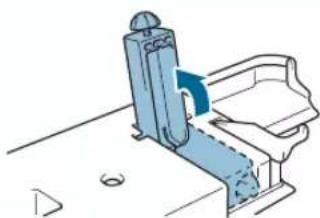
natural_image
Technical line drawing of a mechanical device with no visible text or symbols2 Pull the flat bed attachment off to the left.
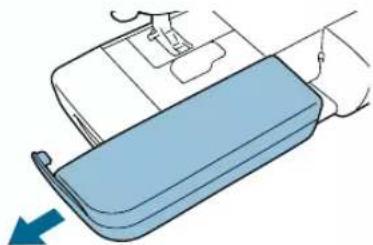
natural_image
Illustration of a sewing machine's side panel with a blue handle and arrow indicating left motion (no text or symbols)
Install the extension table.
Keeping the extension table level, fully slide it into place. The lower right corner section of the extension table extends over the front section of the sewing machine bed.

① Lower right corner
② Sewing machine bed

Note
●The optional extension table is available through your Baby Lock retailer.

Turn the screw at the bottom of each leg to adjust their height so the extension table will be level with the sewing machine bed.

natural_image
Line drawing of a mechanical device with a circular component and base plate (no text or symbols)
CAUTION
●Do not move the sewing machine while the extension table is attached, otherwise damage or injuries may occur.

When you are finished using the extension table, remove it.
While slightly lifting up the extension table, pull it off to the left.

natural_image
Diagram of a mechanical device with a blue base and internal components, showing motion arrows (no text or symbols)
Install the flat bed attachment back in its original position.
2 SEWING BASICS
Starting to Sew
Basic sewing operations are described below.
Before operating the sewing machine, read the following precautions.

CAUTION
● While the machine is in operation, pay special attention to the needle. In addition, keep your hands away from all moving parts such as the needle, handwheel, and thread take-up lever, otherwise injuries may occur.
- Do not pull or push the fabric too hard while sewing, otherwise injuries may occur or the needle may break.
● Never use bent needles. Bent needles can easily break, possibly resulting in injuries.
- Use the correct presser foot for the type of stitch that you wish to sew, otherwise the needle may hit the presser foot, causing the needle to bend or break.
- When sewing, make sure that the needle does not strike basting pins, otherwise the needle may break or bend.
- Before replacing the presser foot, be sure to turn off the sewing machine, otherwise injuries may occur if the start/stop button is accidentally pressed and the machine starts sewing.
Sewing procedure
The basic sewing procedure is shown below.
| 1 | Turn on the machine. | Turn on the sewing machine.For details, refer to “Turning on the machine” (page 12). |
| ↓ | ||
| 2 | Select a stitch. | Select a stitch appropriate for the application.For details, refer to “Selecting a stitch” (page 38). |
| ↓ | ||
| 3 | Attach the presser foot. | Attach the presser foot that is appropriate for the type of stitch that you wish to sew.For details, refer to “Replacing the presser foot” (page 29). |
| ↓ | ||
| 4 | Start sewing. | Position the fabric, and then start sewing. When sewing is finished, cut the threads.For details, refer to “Positioning the fabric” (page 39), “Starting to sew” (page 40), and “Cutting the thread” (page 44). |
Selecting a stitch
Select each stitch by using the pattern selection dial.
1 Turn on the sewing machine.

2 Turn the pattern selection dial to select the stitch to be sewn. Turn the dial to the right to increase the number, or turn the dial to the left to decrease the number.
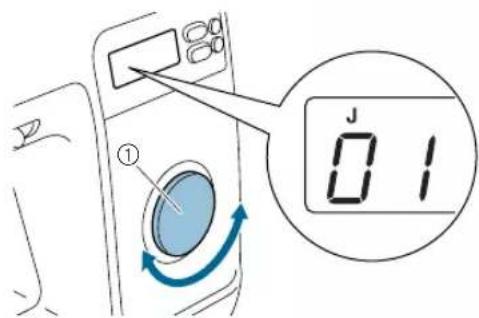
① Pattern selection dial
The stitch appears in the LCD.
3 Attach the presser foot indicated in the LCD.
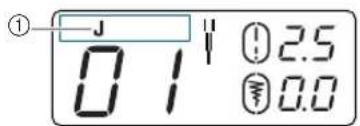
① Presser foot type
- For details, refer to "Replacing the presser foot" (page 29).

Memo
●The presser foot to be used is indicated by the letter (J, A, etc.) that appears above the stitch number.
4 If necessary, adjust the stitch width and stitch length.
- For details on making adjustments, refer to the next section, "Adjusting the stitch length and width"
Adjusting the stitch length and width
■Example: To select stitch

1 Turn the pattern selection dial until "05" appears in the LCD.
2 Press "+" or "-" side of (stitch length key) to adjust the stitch length.

① Stitch length key
② Stitch length
③ Fine
④ Coarse

Press "+" or "-" side of (stitch width key) to adjust the stitch width.

① Stitch width key
② Stitch width
③ Narrow
④ Wide

Memo
- When the stitch length or stitch width is changed from the default setting, around ① or ② disappears from the LCD. When the stitch length or stitch width is reset back to the default setting, reappears around ① or ② in the LCD.
- If the stitch width of the selected stitch cannot be adjusted, “--” appears to the right of in the LCD.

CAUTION
●After adjusting the stitch width, slowly turn the handwheel toward you and check that the needle does not touch the presser foot. If the needle hits the presser foot, the needle may bend or break.
- If the stitches become bunched together, increase the stitch length. Continuing to sew with the stitches bunched together may result in the needle bending or breaking.
Positioning the fabric
Be sure that the fabric pieces are sewn in the correct order and that the right and wrong sides of the fabric are aligned correctly.

Turn on the sewing machine.
The straight stitch (left needle position) is automatically selected.


Press (needle position button) once or twice to raise the needle.

① Needle position button

Place the fabric under the presser foot.
- If the seam allowance is positioned on the right side, sewing in a straight line is easier and the extra fabric does not get in the way.
4 While holding the end of the thread and the fabric with your left hand, turn the handwheel toward you (counterclockwise) with your right hand to lower the needle to the starting point of the stitching.
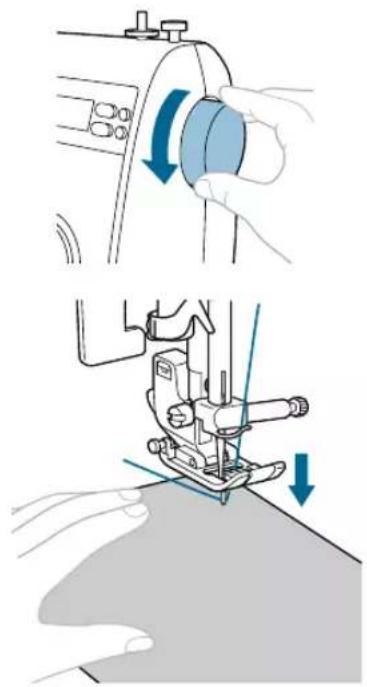
natural_image
Illustration of a sewing machine needle stitching fabric, showing two steps with blue arrows indicating rotation (no text or symbols present)5 Lower the presser foot lever.
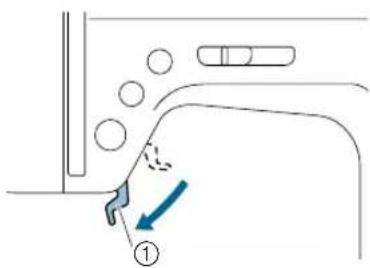
① Presser foot lever
The fabric is now positioned to be sewn.

natural_image
Line drawing of a sewing machine needle stitching fabric (no text or symbols)Starting to sew
Once you are ready to start sewing, you can start the sewing machine. The sewing speed can be adjusted using either the sewing speed controller or the foot controller.

Note
Important:
- When the foot controller is plugged in, (start/stop button) cannot be used to start sewing.
■Using the operation buttons
Sewing can be started and stopped using the operation button (start/stop button).
① Slide the sewing speed controller to the left or right to select the desired sewing speed.
Slide the sewing speed controller to the left to sew at a slower speed, or slide the speed controller to the right to sew at a faster speed.

① Sewing speed controller

Press (start/stop button) once.
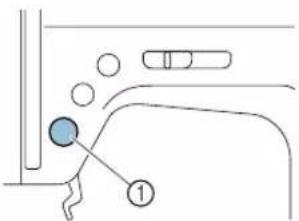
① Start/stop button The machine starts sewing.
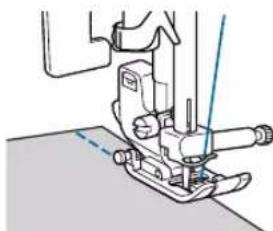
natural_image
Line drawing of a sewing machine needle and fabric (no text or symbols)- If you continue pressing the (start/stop button) immediately after the sewing starts, the machine will sew at a slow speed.

When the end of the stitching is reached, press (start/stop button) once.
The machine stops sewing with the needle down (in the fabric).

When you are finished sewing, raise the needle, and then cut the threads.
For details, refer to "Cutting the thread" (page 44).
■Using the foot controller
Sewing can be started and stopped using the foot controller.

natural_image
Line drawing of a portable electronic device with a coiled cable (no text or symbols)
Turn off the sewing machine.
When connecting the foot controller, be sure to turn off the sewing machine in order to prevent the machine from accidentally being started.
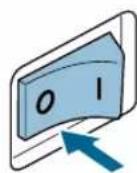

Insert the foot controller plug into its jack on the side of the sewing machine.

① Foot controller jack

Turn on the sewing machine.


Slide the sewing speed controller to the left or right to select the desired sewing speed.
Slide the sewing speed controller to the left to sew at a slower speed, or slide the speed controller to the right to sew at a faster speed.

① Sewing speed controller
- The speed set using the sewing speed controller will be the foot controller's maximum sewing speed.
⑤ Once you are ready to start sewing, slowly press down on the foot controller.
Pressing down on the foot controller increases the sewing speed; releasing the pressure on the foot controller decreases the sewing speed.
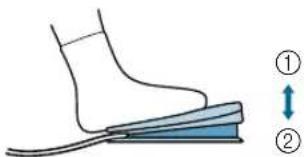
① Slower
② Faster
- Slowly press down on the foot controller. Pressing it down hard starts sewing too quickly.
The machine starts sewing.
⑥ When the end of the stitching is reached, completely release the foot controller.
The machine stops sewing with the needle lowered (in the fabric).
⑦ When you are finished sewing, raise the needle, and then cut the threads.
- For details, refer to "Cutting the thread" (page 44).

Memo
- When the foot controller is plugged in, (start/stop button) cannot be used to start sewing.
- When sewing is stopped, the needle remains lowered (in the fabric). The machine can be set so that the needle will stay up when sewing is stopped. For details on setting the machine so that the needle stays up when sewing is stopped, refer to "Changing the needle stop position" (page 33).

CAUTION
●Do not allow thread or dust to accumulate in the foot controller, otherwise a fire or an electric shock may occur.
●Do not place objects on the foot controller, otherwise damage to the machine or injuries may occur.
- If the machine is not to be used for a long period of time, unplug the foot controller, otherwise a fire or an electric shock may occur.
Securing the stitching
When sewing with the straight stitch, for example, at the end of an opening or where seams do not overlap, use reverse stitching or reinforcement stitching to secure the end of the thread.
1 Lower the needle into the fabric at the beginning of the stitching, and then lower the presser foot lever.

natural_image
Illustration of a sewing machine needle stitching fabric, with a blue arrow indicating downward motion (no text or symbols)2 Press (start/stop button) or press down on the foot controller.
At this time, if (start/stop button) is held down, the machine sews at a low speed.
① Start/stop button
- For details, refer to "Starting to sew" (page 40).
The machine starts sewing.
3 After sewing 3 to 5 stitches, press ⏻ (reverse/reinforcement stitch button).
Keep ⓝ (reverse/reinforcement stitch button) held down until you reach the beginning of the stitching.

① Reverse/reinforcement stitch button
While Ⓞ (reverse/reinforcement stitch button) is held down, reverse stitches are sewn.
4 After sewing back to the beginning of the stitching, release (reverse/reinforcement stitch button).
The machine stops sewing.
5 Press (start/stop button), or press down on the foot controller.
The machine starts sewing in the normal sewing direction.
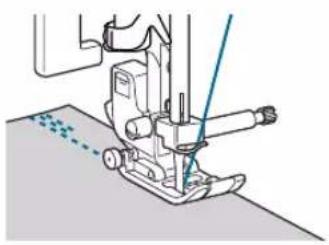
natural_image
Mechanical sewing machine needle stitching fabric (no text or symbols visible)6 When the end of the stitching is reached, press (reverse/reinforcement stitch button).
Keep ⓗ (reverse/reinforcement stitch button) held down until 3 to 5 reverse stitches are sewn.
▶ While (reverse/reinforcement stitch button) is held down, reverse stitches are sewn.
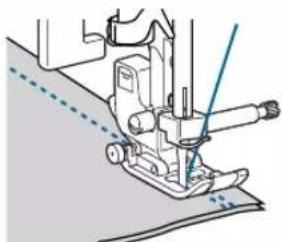
natural_image
Technical line drawing of a sewing machine needle and base (no text or symbols)7 After 3 to 5 reverse stitches have been sewn, release ⓘ (reverse/reinforcement stitch button).
The machine stops sewing.
8 Press (start/stop button), or press down on the foot controller.
At this time, if (start/stop button) is held down, the machine sews at a slow speed.
The machine starts sewing in the normal sewing direction.
9 After sewing to the end of the stitching, stop the sewing machine.
Press (start/stop button) or release foot controller.

flowchart
graph TD
    A["①"] --> B["②"]
    B --> C["③"]
    C --> D["④"]
    D --> E["⑤"]
    E --> F["⑥"]
    style A fill:#fff,stroke:#000
    style B fill:#fff,stroke:#000
    style C fill:#fff,stroke:#000
    style D fill:#fff,stroke:#000
    style E fill:#fff,stroke:#000
    style F fill:#fff,stroke:#000
① Beginning of stitching
② End of stitching
■Sewing reinforcement stitches
When sewing stitches other than straight or zigzag stitches that are secured with reverse stitching, pressing ⓝ (reverse/reinforcement stitch button) sews reinforcement stitches, 3 to 5 stitches on top of each other.
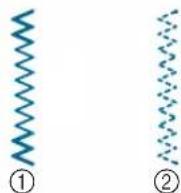
① Reverse stitching
② Reinforcement stitching
Memo
●Whether reverse stitches or reinforcement stitches are sewn depends on the stitch that is selected. For details, refer to "Stitch settings" (page 85).
Cutting the thread
When you wish to finish the stitching and the sewing machine is stopped, press (needle position button) once to raise the needle.

① Needle position button
The needle is raised.
2 Raise the presser foot lever.

① Presser foot lever
3 Pull the fabric to the left side of the machine, and then pass the threads through the thread cutter to cut them.

① Thread cutter
Automatically sewing reverse/reinforcement stitches
The sewing machine can be set to automatically sew reverse or reinforcement stitches at the beginning and end of the stitching. With straight stitches and zigzag stitches, reverse stitches, not reinforcement stitches, are automatically sewn.
Select a stitch.
- For details, refer to "Selecting a stitch" (page 38).
2 Press 1 (automatic reverse/reinforcement stitch key).

① Automatic reverse/reinforcement stitch key
appears in the LCD.
- This step is not necessary if a stitch such as those for sewing buttonholes and bar tacks is selected where reinforcement stitches are automatically sewn.
- Press (automatic reverse/reinforcement stitch key) again to cancel automatic reverse/reinforcement stitching.
3 Position the fabric under the presser foot, and turn the handwheel toward you to insert the needle into the fabric.

natural_image
Hand holding a blue circular button with an arrow indicating rotation (no text or symbols)4 Press (start/stop button) once.
① Start/stop button
After reverse/reinforcement stitches are sewn, the machine starts sewing.

After reaching the end of the stitching, press the reverse/reinforcement stitch button once.

① Reverse/reinforcement stitch button
- This step is not necessary if a stitch such as those for sewing buttonholes and bar tacks is selected where reinforcement stitches are automatically sewn.
After reverse/reinforcement stitches are sewn, the sewing machine stops.
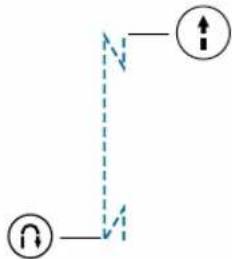
flowchart
graph TD
    A["○"] --> B["↓"]
    B --> C["↑"]

Memo
- Reverse/reinforcement stitches WILL NOT be sewn until (reverse/reinforcement stitch button) is pressed. (start/stop button) may be pressed to stop stitching when needed such as for pivoting corners.
Adjusting the thread tension
The tensions of the upper thread and of the bobbin thread (thread tension) should be adjusted so that they are equal.
If the thread and needle combination is correct for the type of fabric being sewn (according to "Needle types and their uses" (page 26)), the thread tension will automatically be adjusted to the appropriate setting. However, if the preset thread tension does not give the desired result or if you are sewing with special thread or on special fabric, use the thread tension dial to increase or decrease the tension of the upper thread.
■Correct thread tension
The upper thread and the bobbin thread should cross near the center of the fabric. Only the upper thread should be visible from the right side of the fabric, and only the bobbin thread should be visible from the wrong side of the fabric.
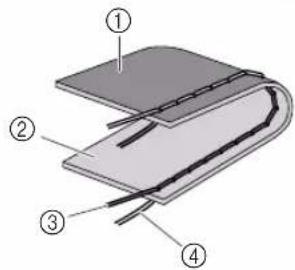
① Wrong side of fabric
② Right side of fabric
③ Upper thread
④ Bobbin thread
■Upper thread is too tight
If the bobbin thread is visible from the right side of the fabric, the upper thread is too tight.

① Wrong side of fabric
② Right side of fabric
③ Upper thread
④ Bobbin thread
⑤ The bobbin thread is visible from the right side of the fabric.
Turn the thread tension dial to the left to loosen the upper thread.
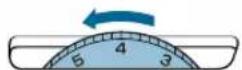
■Upper thread is too loose
If the upper thread is visible from the wrong side of the fabric, the upper thread is too loose.

① Wrong side of fabric
② Right side of fabric
③ Upper thread
④ Bobbin thread
⑤ The upper thread is visible from the wrong side of the fabric.
Turn the thread tension dial to the right to tighten the upper thread.
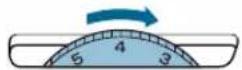
Useful Sewing Tips
Various ways to achieve better sewing results are described below. Refer to these tips when sewing.
Trial sewing
After a stitch is selected, the machine automatically sets the stitch width and length for the stitch that was selected.
However, a trial piece of fabric should be sewn since, depending on the type of fabric and stitching being sewn, the desired results may not be achieved. For the trial sewing, use a piece of fabric and thread that are the same as those used for your project, and check the thread tension and stitch length and width. Since the results differ depending on the type of stitching and the number of fabric layers sewn, perform the trial sewing under the same conditions that will be used with your project.
Changing the sewing direction
When stitching reaches a corner, stop the sewing machine.
Leave the needle lowered (in the fabric). If the needle remained up when the machine stopped sewing, press (needle position button).
2 Raise the presser foot lever, and then turn the fabric.
Turn the fabric using the needle as a pivot.

natural_image
Illustration of a sewing machine needle stitching fabric, with arrows indicating fabric direction (no text or symbols)3 Lower the presser foot lever and continue sewing.
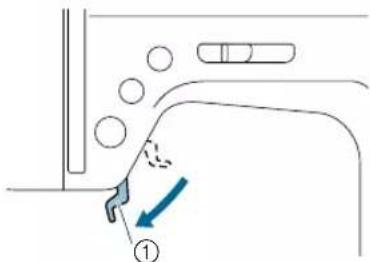
① Presser foot lever
Sewing curves
Stop sewing, and then slightly change the sewing direction to sew around the curve.

natural_image
Technical line drawing of a sewing machine needle and stitching (no text or symbols)When sewing along a curve while using a zigzag stitch, select a shorter stitch length in order to obtain a finer stitch.
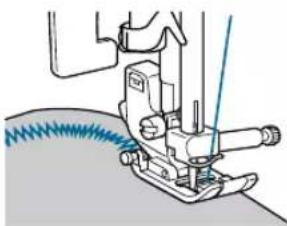
natural_image
Illustration of a sewing machine needle stitching fabric (no text or symbols)Sewing thick fabrics
■If the fabric does not fit under the presser foot
Raise the presser foot even higher to bring the presser foot to its highest position. (At this time, the presser foot lever is not secured.)

natural_image
Line drawing of a sewing machine needle stitching fabric, with a hand adjusting the seam (no text or symbols)CAUTION
●The thickness of fabric differs depending on the fabric type. If the fabric is forcefully pushed, the needle may break or bend.
■ If thick seams are being sewn and the fabric does not feed at the beginning of stitching
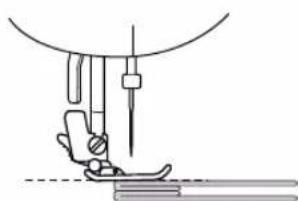
Zigzag foot "J" is equipped with a feature that keeps the presser foot level.

① Sewing direction
② Misalignment
① When starting sewing with a seam that is too thick for the fabric to be fed, raise the presser foot lever.
② Using the index finger press the black button (presser foot holding pin) on the left side of the zigzag foot "J", then use left thumb to level the presser foot by gently pushing down on the front of the presser foot. You will hear a "click"; continue pressing the presser foot holding pin while lowering the presser foot.
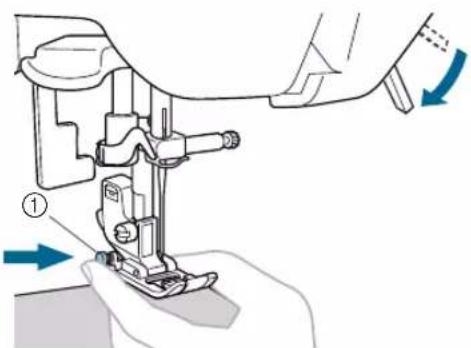
natural_image
Line drawing of a sewing machine with hands operating it, showing mechanical components and a blue directional arrow (no text or symbols)① Black button
③ The presser foot remains level, enabling the fabric to be fed.
natural_image
Line drawing of a sewing machine needle and foot (no text or symbols)• After the seam is sewn, the presser foot will return to its normal operation.

CAUTION
● The thickness of fabric differs depending on the fabric type. If the fabric is forcefully pushed, the needle may break or bend.
Sewing thin fabrics
When sewing thin fabrics, the stitching may become misaligned or the fabric may not feed correctly. If this occurs, place thin paper or stabilizer material under the fabric and sew it together with the fabric. When you have finished sewing, tear off any excess paper.
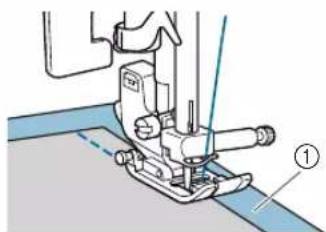
natural_image
Mechanical sewing machine diagram showing needle and base components (no text or labels)① Stabilizer material or paper
Sewing stretch fabrics
First, baste the pieces of fabric together, and then sew without stretching the fabric. In addition, a better result can be achieved by using thread for knits or a stretch stitch.

natural_image
Technical line drawing of a sewing machine needle and base (no text or symbols)① Basting
Pulling up the bobbin thread
When making gathers, first pull up the bobbin thread as described below.
1 Pass the bobbin thread through the slot. Do not cut the thread with the cutter.

natural_image
Illustration of hands holding a mechanical component with a blue arrow indicating rotation (no text or symbols)- Leave the bobbin cover removed.
Lightly hold the end of the upper thread.

① Upper thread
3 With the needle raised, press (needle position button) twice.
① Needle position button
4 Carefully pull the upper thread upward to pull out the end of the bobbin thread.
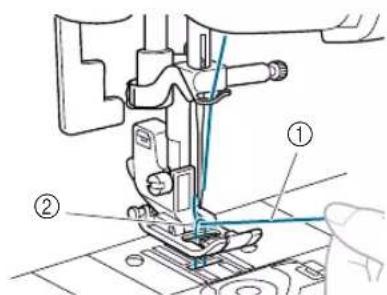
① Upper thread ② Bobbin thread
5 Pull out about 10 to 15 cm (4-5 inches) of the bobbin thread under the presser foot toward the rear of the machine.

① Upper thread
② Bobbin thread
Reattach the bobbin cover.
Insert the tab in the lower-left corner of the bobbin cover (A), and then press down on the right side (B).

3 UTILITY STITCHES
Overcasting
Sew overcasting along the edges of cut fabric to prevent them from fraying. Six stitches are available for overcasting.
| Stitch Name | Pattern | Presser Foot | Application | Stitch Width [mm (inch)] | Stitch Length [mm (inch)] | Twin Needle | Walking Foot | Reverse/ Reinforcement Stitching | ||
| Auto Manual | Auto Manual | |||||||||
| Zigzag stitch | 05 | J | Overcasting and attaching appliqués | 3.5(1/8) | 0.0–7.0(0–1/4) | 1.4(1/16) | 0.0–4.0(0–3/16) | Yes(J) | *1Yes | Reverse |
| 3-point zigzag stitch | 06 | J | Overcasting on medium weight or stretch fabrics, attaching elastic, darning, etc. | 5.0(3/16) | 1.5–7.0(1/16–1/4) | 1.0(1/16) | 0.2–4.0(1/64–3/16) | Yes(J) | No Reinforcement | |
| Overcasting stitch | 07 | G | Overcasting on thin or medium weight fabrics | 3.5(1/8) | 2.5–5.0(3/32–3/16) | 2.0(1/16) | 1.0–4.0(1/16–3/16) | No | No Reinforcement | |
| 08 | G | Overcasting on thick fabrics | 5.0(3/16) | 2.5–5.0(3/32–3/16) | 2.5(3/32) | 1.0–4.0(1/16–3/16) | No | No Reinforcement | ||
| 09 | G | Preventing fraying in thick fabrics and fabrics that fray easily | 5.0(3/16) | 3.5–5.0(1/8–3/16) | 2.5(3/32) | 1.0–4.0(1/16–3/16) | No | No Reinforcement | ||
| 10 | J | Overcasting on stretch fabrics | 5.0(3/16) | 0.0–7.0(0–1/4) | 2.5(3/32) | 0.5–4.0(1/32–3/16) | Yes(J) | No Reinforcement | ||
^*1 Do not use reverse stitching.
The values below "Auto" are set when the pattern is selected. The setting can be adjusted to any value within the range indicated below "Manual".
Observe the following precautions while stitching.

CAUTION
- Before replacing the presser foot, be sure to turn off the sewing machine, otherwise injuries may occur if a button is accidentally pressed and the machine starts sewing.
Sewing overcasting stitches using zigzag foot "J"
1 Turn on the machine.
2 With the pattern selection dial,

Attach zigzag foot "J".
- For details, refer to "Replacing the presser foot" (page 29).
4 Sew along the edge of the fabric with the needle dropping off the edge at the right.

① Needle drop point
CAUTION
● After adjusting the stitch width, slowly turn the handwheel toward you and check that the needle does not touch the presser foot. If the needle hits the presser foot, the needle may bend or break.
Sewing overcasting stitches using overcasting foot "G"
1 Turn on the machine.
With the pattern selection dial,
select 07, 08 or 09.
Attach overcasting foot "G".
- For details, refer to "Replacing the presser foot" (page 29).
4 Position the fabric with the edge of the fabric against the guide of the presser foot, and then lower the presser foot lever.
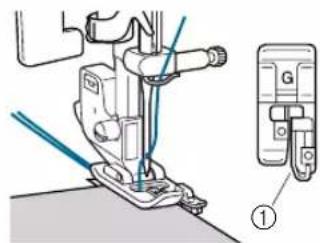
natural_image
Mechanical sewing machine diagram showing needle insertion and component assembly (no text or symbols)① Presser foot guide
5 Slowly turn the handwheel toward you and check that the needle does not touch the presser foot.
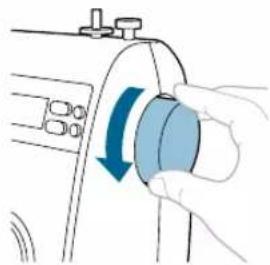
natural_image
Hand holding a blue circular button with an arrow, pointing to a control panel (no text or symbols visible)6 Sew with the edge of the fabric against the presser foot guide.

① Needle drop point
Basic Stitching
Straight stitches are used for sewing plain seams. Three stitches are available for basic stitching.
| Stitch Name | Pattern | Presser Foot | Application | Stitch Width [mm (inch)] | Stitch Length [mm (inch)] | Twin Needle | Walk-ing Foot | Reverse/ Reinforcement Stitching | |||
| Auto Manual | Auto Manual | ||||||||||
| Straight stitch | Left | 01 | J | Basic stitching, sewing gathers or pintucks, etc. | 0.0(0) | 0.0–7.0(0–1/4) | 2.5(3/32) | 0.2–5.0(1/64–3/16) | Yes(J) Yes | *1 | Reverse |
| Center | 02 | J | Attaching zippers, basic stitching, and sewing gathers or pintucks, etc. | 3.5(1/8) | 0.0–7.0(0–1/4) | 2.5(3/32) | 0.2–5.0(1/64–3/16) | Yes(J) Yes | *1 | Reverse | |
| Triple stretch stitch | 03 | J | Attaching sleeves, sewing inseams, sewing stretch fabrics and decorative stitching | 0.0(0) | 0.0–7.0(0–1/4) | 2.5(3/32) | 1.5–4.0(1/16–3/16) | Yes(J) | No Reinforcement | ||
*1 Do not use reverse stitching.
The values below "Auto" are set when the pattern is selected. The setting can be adjusted to any value within the range indicated below "Manual".

CAUTION
● Before replacing the presser foot, be sure to turn off the sewing machine, otherwise injuries may occur if a button is accidentally pressed and the machine starts sewing.
1 Baste or pin together the fabric pieces.
Turn on the machine.
With the pattern selection dial,

Attach zigzag foot "J".
- For details, refer to "Replacing the presser foot" (page 29).
5 If reverse stitches are to be sewn, lower the needle into the fabric 3 to 5 stitch lengths in front of the point where the stitching will begin, and then sew the reverse stitches.
- For details, refer to "Securing the stitching" (page 42).
Start sewing.
- For details, refer to "Starting to sew" (page 40).
7 If reverse stitches are to be sewn at the end of stitching, sew 3 to 5 reverse stitches.
- For details, refer to "Securing the stitching" (page 42).
8 When sewing is finished, cut the thread.
■Changing the needle position
The needle position can be adjusted with the straight stitch (left needle position) and the triple stretch stitch by adjusting the stitch width. Press the “-” side of the stitch width key for a left needle position, or press the “+” side for a right needle position.


① Stitch width
② Stitch width key
③ Moves the needle position to the left
④ Moves the needle position to the right
Blind Hem Stitching
The bottoms of skirts and pants are hemmed. Two stitches are available for blind hem stitching.
| Stitch Name | Pattern | Presser Foot | Application | Stitch Width [mm (inch)] | Stitch Length [mm (inch)] | Twin Needle | Walking Foot | Reverse/ Reinforcement Stitching | ||
| Auto Manual | Auto Manual | |||||||||
| Blind hem stitch | 11 | R | Blind hem stitching on medium weight fabrics | 0(0) | -3 - 3 | 2.0(1/16) | 1.0–3.5(1/16–1/8) | No | No Reinforcement | |
| 12 | R | Blind hem stitching on stretch fabrics | 0(0) | -3 - 3 | 2.0(1/16) | 1.0–3.5(1/16–1/8) | No | No Reinforcement | ||
The values below "Auto" are set when the pattern is selected. The setting can be adjusted to any value within the range indicated below "Manual".

Memo
●When stitch 11 or 12 is selected
Press the “-” side of the stitch width key so that “0”, “-1”, “-2” or “-3” appears in the LCD to move the needle drop point to the left.
Press the "+" side of the stitch width key so that "0", "1", "2" or "3" appears in the LCD to move the needle drop point to the right.
Sew a blind hem according to the following procedure.

CAUTION
● Before replacing the presser foot, be sure to turn off the sewing machine, otherwise injuries may occur if a button is accidentally pressed and the machine starts sewing.

Fold the fabric along the desired edge of the hem, and then baste it about 5 mm (3/16 inch) from the edge of the fabric. After basting, fold back the fabric along the basting, and then position the fabric with the wrong side facing up.

① Wrong side of fabric
② Basting stitching
③ Desired edge of hem
④ 5 mm (3/16 inch)
⑤ Edge of hem

Turn on the machine.

With the pattern selection dial,


Attach blind hem foot "R".
- For details, refer to "Replacing the presser foot" (page 29).

Position the fabric with the edge of the folded hem against the guide of the presser foot, and then lower the presser foot lever.

① Wrong side of fabric
② Fold of hem
③ Presser foot guide

Press the “-” side of the stitch width key to adjust the stitch width until the needle slightly catches the fold of the hem, and then sew with the edge of the fabric against the presser foot guide.

① Needle
② Needle drop point
③ Fold of hem

CAUTION
●Slowly turn the handwheel toward you and check that the needle does not touch the presser foot. If the needle hits the presser foot, the needle may bend or break.

Memo
If the needle is incorrectly positioned, the stitching results will be as shown below. Correct each result as described below.
- If the needle catches too much of the hem fold
The needle is positioned too far to the left. Press the "+" side of the stitch width key to adjust the needle position so that the needle slightly catches the fold of the hem.

① Wrong side of fabric
② Right side of fabric
- If the needle does not catch the hem fold The needle is positioned too far to the right. Press the “-” side of the stitch width key to adjust the needle position so that the needle slightly catches the fold of the hem.

① Wrong side of fabric
② Right side of fabric
- For details, refer to "Adjusting the stitch length and width" (page 38).

Remove the basting stitching.

① Wrong side of fabric
② Right side of fabric

Buttonhole Stitching
Buttonholes can be sewn. Five stitches are available for sewing buttonholes.
| Stitch Name | Pattern | Presser Foot | Application | Stitch Width [mm (inch)] | Stitch Length [mm (inch)] | Twin Needle | Walking Foot | Reverse/ Reinforcement Stitching | ||
| Auto Manual | Auto Manual | |||||||||
| Buttonhole stitch | [weat] | A | Horizontal button-holes on thin and medium weight fabrics | 5.0(3/16) | 3.0-5.0(1/8-3/16) | 0.5(1/32) | 0.2-1.0(1/64-1/16) | No | No | Automatic Reinforcement |
| [weat] | A | Secured button-holes for fabrics that have backings | 5.0(3/16) | 3.0–5.0(1/8-3/16) | 0.5(1/32) | 0.2–1.0(1/64-1/16) | No | No | Automatic Reinforcement | |
| [weat] | A | Buttonholes for stretch or knit fabrics | 6.0(15/64) | 3.0–6.0(1/8-15/64) | 1.0(1/16) | 0.5–2.0(1/32-1/16) | No | No | Automatic Reinforcement | |
| [weat] | A | Buttonholes for stretch fabrics | 6.0(15/64) | 3.0–6.0(1/8-15/64) | 1.5(1/16) | 1.0–3.0(1/16-1/8) | No | No | Automatic Reinforcement | |
| [weat] | A | Keyhole button-holes for thick or furry fabrics | 7.0(1/4) | 3.0–7.0(1/8-1/4) | 0.5(1/32) | 0.3–1.0(1/64-1/16) | No | No | Automatic Reinforcement | |
The values below "Auto" are set when the pattern is selected. The setting can be adjusted to any value within the range indicated below "Manual".
Buttonholes with a maximum length of 30 mm (1-3/16 inches) (diameter + thickness of the button) can be sewn. Buttonholes are sewn as shown below.

flowchart
graph TD
    A["Step ①"] --> B["Step ①"]
    B --> C["Step ①"]
    C --> D["Step ①"]
    D --> E["Step ①"]
    E --> F["Step ①"]
    F --> G["Step ①"]
    G --> H["Step ①"]
    H --> I["Step ①"]
    I --> J["Step ①"]
    J --> K["Step ①"]
    K --> L["Step ①"]
    L --> M["Step ①"]
    M --> N["Step ①"]
    N --> O["Step ①"]
    O --> P["Step ①"]
    P --> Q["Step ①"]
    Q --> R["Step ①"]
    R --> S["Step ①"]
    S --> T["Step ①"]
    T --> U["Step ①"]
    U --> V["Step ①"]
    V --> W["Step ①"]
    W --> X["Step ①"]
    X --> Y["Step ①"]
    Y --> Z["Step ①"]
① Reinforcement stitching

CAUTION
● Before replacing the presser foot, be sure to turn off the sewing machine, otherwise injuries may occur if a button is accidentally pressed and the machine starts sewing.
The names of parts of buttonhole foot "A", which is used for sewing buttonholes, are indicated below.

① Button guide plate
② Presser foot scale
③ Pin
④ Marks on buttonhole foot
⑤ 5 mm (3/16 inch)
1 Use chalk to mark on the fabric the position and length of the buttonhole.

① Marks on fabric
② Finished stitching
2 Pull out the button guide plate of buttonhole foot "A", and then insert the button that will be put through the buttonhole.
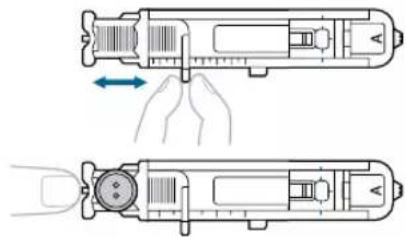
natural_image
Technical line drawing of a mechanical device with hand operating a tool (no text or symbols)■If the button does not fit in the button guide plate
Add together the diameter and thickness of the button, and then set the button guide plate to the calculated length. (The distance between the markings on the presser foot scale is 5 mm (3/16 inch).)
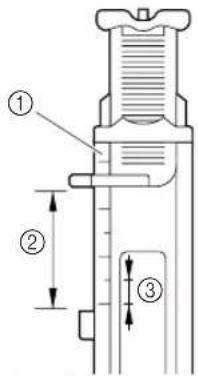
① Presser foot scale
② Length of buttonhole (diameter + thickness of button)
③ 5 mm (3/16 inch)
Example: For a button with a diameter of 15 mm (9/16 inch) and a thickness of 10 mm (3/8 inch), the button guide plate should be set to 25 mm (1 inch) on the scale.
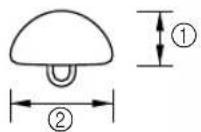
① 10 mm (3/8 inch)
② 15 mm (9/16 inch)
The size of the buttonhole is set.
3 Turn on the machine.
4 With the pattern selection dial, select a stitch.
Attach buttonhole foot "A".
- For details, refer to "Replacing the presser foot" (page 29).
6 Pass the upper thread down through the hole in the presser foot, and then pull it under the presser foot, as shown.

natural_image
Mechanical assembly diagram showing a sewing machine needle inserted into a base plate (no text or symbols visible)7 Position the fabric with the front end of the buttonhole mark aligned with the red marks on the sides of the buttonhole foot, and then lower the presser foot lever.
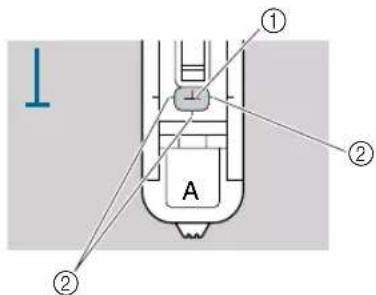
① Mark on fabric (front)
② Red marks on buttonhole foot

Note
- When lowering the presser foot, do not push in the front of the presser foot, otherwise the buttonhole will not be sewn with the correct size.

8 Pull down the buttonhole lever as far as possible.

① Buttonhole lever The buttonhole lever should be positioned behind the bracket on the buttonhole foot.

① Buttonhole lever
② Bracket
9 Gently hold the end of the upper thread in your left hand, and then start sewing.

natural_image
Illustration of a sewing machine needle stitching a seam, with no visible text or symbolsOnce sewing is completed, the machine automatically sews reinforcement stitches, then stops.
10 Cut the threads, raise the presser foot lever, and then remove the fabric.
11 Raise the buttonhole lever to its original position.
12 Insert a pin along the inside of one bar tack at the end of the buttonhole stitching to prevent the stitching from being cut.

① Pin
13 Use the enclosed seam ripper to cut towards the pin and open the buttonhole.

① Seam ripper
For keyhole buttonholes ( ) use the enclosed eyelet punch to make a hole in the rounded end of the buttonhole, and then use the seam ripper to cut open the buttonhole.
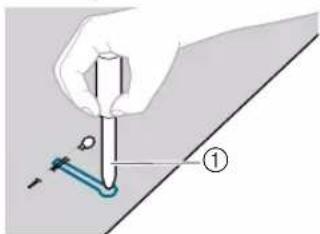
① Eyelet punch
- When using the eyelet punch, place thick paper or some other protective sheet under the fabric before punching the hole in the fabric.
! CAUTION
- When opening the buttonhole with the seam ripper, do not place your hands in the cutting path, otherwise injuries may result if the seam ripper slips. Do not use the seam ripper in any other way than how it is intended.
■Changing the stitch length
Press the "+" or "-" side of the stitch length key to adjust the stitch length.

① Stitch length key
② Stitch length
③ Fine
④ Coarse
- If the fabric does not feed (for example, if it is too thick), increase the coarseness of the stitching.
■Changing the stitch width
Press the "+" or "-" side of the stitch width key to adjust the stitch width.

① Stitch width key
② Stitch width
③ Narrow
④ Wide

Memo
●Before sewing buttonholes, check the stitch length and width by sewing a trial buttonhole on a scrap piece of fabric.
■Sewing buttonholes on stretch fabrics
When sewing buttonholes on stretch fabrics, use a gimp thread.
① Hook the gimp thread onto the part of buttonhole foot "A" shown in the illustration so that it fits into the grooves, and then loosely tie it.

② Turn on the sewing machine.
③ Select stitch or .
④ Attach buttonhole foot "A".
- For details, refer to "Replacing the presser foot" (page 29).
⑤ Adjust the stitch width to the thickness of the gimp thread.
⑥ Lower the presser foot lever and the buttonhole lever, and then start sewing.
⑦ When sewing is finished, gently pull the gimp thread to remove any slack.

natural_image
Illustration of two hands holding a pen-like tool with blue and black components, no text or symbols present⑧ Use a handsewing needle to pull the gimp thread to the wrong side of the fabric, and then tie it.
⑨ With a seam ripper, cut the middle part of the gimp thread remaining at the top end of the buttonhole.
Trim off any excess of the gimp thread.
Button sewing
Buttons can be sewn on with the sewing machine. Buttons with 2 or with 4 holes can be attached.
1 Measure the distance between the holes in the button to be attached.

2 Raise the presser foot lever, and then slide the drop feed lever, located at the rear of the machine on the base, to 10 the left as seen from the rear of the machine).

① Drop feed lever (as seen from the rear of the machine) The feed dogs are lowered.
3 Turn on the sewing machine.
4 Select stitch 05
5 Attach button fitting foot "M".

- For details, refer to "Replacing the presser foot" (page 29).
6 Adjust the stitch width so that it is the same as the distance between the holes in the button.
7 Place the button into button fitting foot "M".
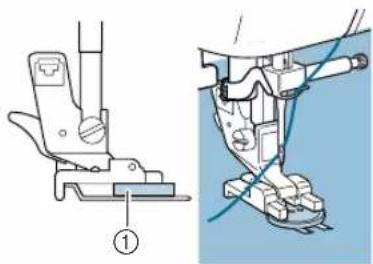
natural_image
Technical diagram showing a mechanical assembly with a numbered component and a close-up of the component (no text or symbols present)① Button
The button is held in place.
- When attaching four-hole buttons, first sew the two holes closest to you. Then, slide the button so that the needle goes into the two holes toward the rear of the sewing machine, and then sew them in the same way.

8 Turn the handwheel toward you (counterclockwise) to check that the needle correctly goes into the two holes of the button.
If it seems as if the needle will hit the button, remeasure the distance between the holes in the button. Adjust the stitch width to the distance between the button holes.

natural_image
Hand holding a circular button with an arrow indicating rotation (no text or symbols)! CAUTION
- When sewing, be sure that the needle does not touch the button, otherwise the needle may bend or break.

Start sewing.
Set the sewing speed controller to the left (so that the speed will be slow).

natural_image
Mechanical assembly diagram showing a tool interacting with a base (no text or symbols visible)The sewing machine automatically stops after sewing reinforcement stitches.
- If additional strength is needed to secure the button, perform the button-sewing operation twice.

Use scissors to cut the upper thread and the bobbin thread at the beginning of the stitching.
Pull the upper thread at the end of the stitching to the wrong side of the fabric, and then tie it with the bobbin thread.
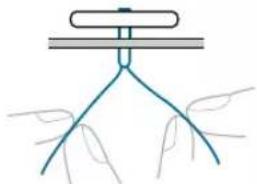
natural_image
Simple line drawing of a hand holding two curved lines, with no text or symbols present.
When you are finished attaching the button, slide the drop feed lever to (to the right as seen from the rear of the machine) to raise the feed dogs.

① Drop feed lever (as seen from the rear of the machine)

Memo
●The feed dog position switch is normally set to the right side (as seen from the rear of machine).
●The feed dogs come up when you start sewing again.
■Attaching a shank to a button
To sew the button with a shank, attach the button with space between it and the fabric, and then wind the thread by hand. This attaches the button securely.

Place the button into button-sewing foot "M", and then pull the shank lever toward you.

natural_image
Mechanical assembly diagram showing a clamping mechanism with labeled parts (no text or symbols present)① Shank lever

After sewing is finished, cut the upper thread with plenty of excess, wind it around the thread between the button and the fabric, and then tie it to the upper thread at the beginning of the stitching.
Tie together the ends of the bobbin thread at the end and at the beginning of the stitching on the wrong side of the fabric.

natural_image
Diagram showing two stages of a mechanical or biological process, with no visible text or symbols
Cut off any excess thread.
Zipper Insertion
A zipper can be sewn in place.
| Stitch Name | Pattern | Presser Foot | Application | Stitch Width [mm (inch)] | Stitch Length [mm (inch)] | Twin Needle | Walking Foot | Reverse/ Reinforcement Stitching | |||
| Auto Manual | Auto Manual | ||||||||||
| Straight stitch | Center | 02 | J | Attaching zippers, basic stitching, and sewing gathers or pintucks, etc. | 3.5(1/8) | 0.0–7.0(0–1/4) | 2.5(3/32) | 0.2–5.0(1/64–3/16) | Yes(J) Yes | *1 | Reverse |
*1Do not use reverse stitching.
The values below "Auto" are set when the pattern is selected. The setting can be adjusted to any value within the range indicated below "Manual".
There are many methods for attaching zippers. Therefore, only the procedures for inserting a centered zipper and a side zipper are described below.

CAUTION
● Before replacing the presser foot, be sure to turn off the sewing machine, otherwise injuries may occur if a button is accidentally pressed and the machine starts sewing.
Inserting a centered zipper
Stitching is sewn on both pieces of fabric butted against each other.

① Right side of fabric
② Stitching
③ End of zipper opening

Turn on the machine.

Attach zigzag foot "J" and sew straight stitches up to the zipper opening.
With the right sides of the fabric facing each other, sew reverse stitches after reaching the zipper opening.
- For details on basic stitching, refer to "Basic Stitching" (page 51).

Baste the two pieces up to the edge of the fabric.

① Basting stitching
② Reverse stitching
③ Wrong side of fabric
④ End of zipper opening

Press open the seam allowance from the wrong side of the fabric.
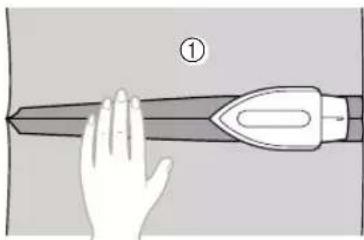
natural_image
Illustration of a hand holding a long, pointed tool with a handle, labeled with number 1 (no text or symbols on the tool itself)① Wrong side of fabric
5 Align the seam with the center of the zipper, and then baste the zipper in place.

① Wrong side of fabric
② Basting stitching
③ Zipper
6 With the pattern selection dial,
select stitch 02
7 Attach the presser foot holder to the right side of the pin of zipper foot "I".

① Right side of the pin
② Needle drop point
- For details, refer to "Replacing the presser foot" (page 29).
CAUTION
- When using zipper foot "I", be sure to use a center needle position, and slowly turn the handwheel toward you to check that the needle does not touch the presser foot. If a different stitch is selected and the needle hits the presser foot, the needle may bend or break.
8 Topstitch around the zipper.
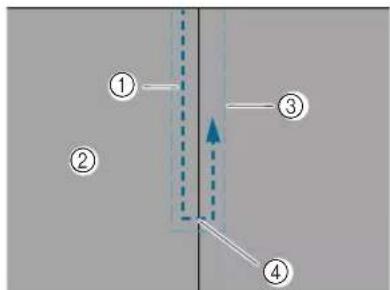

natural_image
Mechanical sewing machine diagram showing needle and base components (no text or labels)① Stitching
② Right side of fabric
③ Basting stitching
④ End of zipper opening
! CAUTION
- When sewing, be sure that the needle does not touch the zipper, otherwise the needle may bend or break.
9 Remove the basting stitching.
Inserting a side zipper
Stitching is sewn on only one piece of fabric. Use this type of zipper for side openings and back openings.

① Stitching
② Right side of fabric
③ End of zipper opening
The following procedure will describe how to stitch on the left side, as shown in the illustration.
1 Turn on the machine.
2 Attach zigzag foot "J" and sew straight stitches up to the zipper opening.
- With the right sides of the fabric facing each other, sew reverse stitches after reaching the zipper opening.
- For details on basic stitching, refer to "Basic Stitching" (page 51).
Baste the two pieces up to the edge of the fabric.
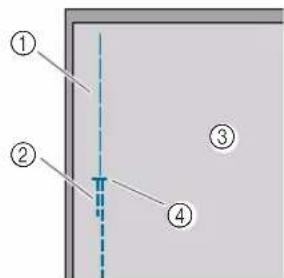
① Basting stitching
② Reverse stitching
③ Wrong side of fabric
④ End of zipper opening
4 Press open the seam allowance from the wrong side of the fabric.

natural_image
Illustration of a hand holding a pen or stylus with a handle, no text or symbols present① Wrong side of fabric
5 Press the seam allowance so that the right side (the side that will not be stitched) has an extra 3 mm (1/8 inch).

natural_image
Diagram of a layered structure with numbered annotations (① and ②) showing directional arrows, no readable text or symbols.① Wrong side of fabric
② 3 mm (1/8 inch)
6 Align the zipper teeth with the pressed edge of the fabric having the extra 3 mm (1/8 inch), and then baste or pin the zipper in place.

① Zipper teeth
② Basting stitching
With the pattern selection dial,
select stitch 02
8 Attach the presser foot holder to the right side of the pin of zipper foot "I".
If the stitching will be sewn on the right side (opposite side of this example), attach the presser foot holder to the left side of the zipper foot pin.
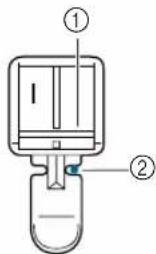
① Right side of the pin
② Needle drop point
- For details, refer to "Replacing the presser foot" (page 29).
! CAUTION
- When using zipper foot "1", be sure to use a center needle position, and slowly turn the handwheel toward you to check that the needle does not touch the presser foot. If a different stitch is selected and the needle hits the presser foot, the needle may bend or break.
UTILITY STITCHES
9 Sew the zipper to the piece of fabric with the extra 3 mm (1/8 inch), starting from the base of the zipper.

natural_image
Diagram of a vertical pressure vessel with a downward arrow indicating force or pressure direction (no text or symbols)
CAUTION
- When sewing, be sure that the needle does not touch the zipper, otherwise the needle may bend or break.
10 When you are about 5 cm (2 inches) from the end of the zipper, stop the sewing machine with the needle down (in the fabric), raise the presser foot lever, and then open the zipper and continue sewing.

natural_image
Mechanical sewing machine needle stitching a metal sheet (no text or symbols visible)11 Close the zipper, turn over the fabric, and then baste the other side of the zipper to the fabric.
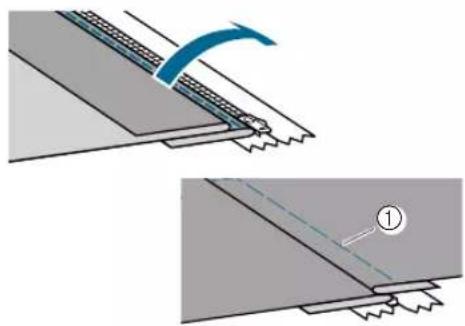
natural_image
Technical diagram showing a mechanical assembly with a blue curved arrow indicating motion, and a close-up of a component labeled ① (no text or symbols present)① Basting stitching
12 Attach the presser foot holder to the other side of the pin of zipper foot "I".
If the presser foot holder was attached to the right side of the pin in step Ⓠ, change it to the left side of the pin.

① Left side of the pin
② Needle drop point
- For details, refer to "Replacing the presser foot" (page 29).
Topstitch along the zipper.
Sew reverse stitches at the end of the zipper opening and align the zipper teeth with the side of the presser foot.

flowchart
graph TD
    ① --> ②
    ② --> ③
    ③ --> ④
    ④ --> ⑤
    ⑤ --> A
    style ③ stroke-dasharray: 5 5
    style ② stroke-dasharray: 5 5
    style ④ stroke-dasharray: 5 5
    style ⑤ stroke-dasharray: 5 5
① Right side of fabric
② End of zipper opening
③ Reverse stitching
④ Beginning of stitching
⑤ Basting stitching
14 When you are about 5 cm (2 inches) from the end of the zipper, stop the sewing machine with the needle down (in the fabric), and then raise the presser foot lever.
15 Remove the basting stitching, open the zipper, and then continue sewing.
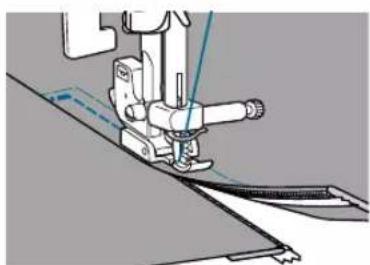
natural_image
Mechanical sewing machine needle stitching a fabric edge (no text or symbols visible)Sewing Stretch Fabrics and Elastic Tape
Stretch fabrics can be sewn and elastic tape can be attached.
| Stitch Name | Pattern | Presser Foot | Application | Stitch Width [mm (inch)] | Stitch Length [mm (inch)] | Twin Needle | Walking Foot | Reverse/ Reinforcement Stitching | ||
| Auto Manual | Auto Manual | |||||||||
| Stretch stitch | 04 | J | Sewing stretch fabrics and decorative stitching | 1.0(1/16) | 1.0–3.0(1/16–1/8) | 2.5(3/32) | 1.0–4.0(1/16–3/16) | Yes(J) | No Reinforcement | |
| 3-point zigzag stitch | 06 | J | Overcasting on medium weight or stretch fabrics, attaching elastic, darning, etc. | 5.0(3/16) | 1.5–7.0(1/16–1/4) | 1.0(1/16) | 0.2–4.0(1/64–3/16) | Yes(J) | No Reinforcement | |
The values below "Auto" are set when the pattern is selected. The setting can be adjusted to any value within the range indicated below "Manual".
Observe the following precautions while stitching.

CAUTION
● Before replacing the presser foot, be sure to turn off the sewing machine, otherwise injuries may occur if a button is accidentally pressed and the machine starts sewing.
Stretch stitching
1 Turn on the machine.
With the pattern selection dial, 04
select stitch

Attach zigzag foot "J".
- For details, refer to "Replacing the presser foot" (page 29).
4 Sew without stretching the fabric.
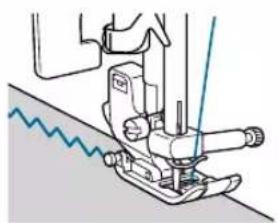
natural_image
Line drawing of a sewing machine needle stitching fabric (no text or symbols)Elastic attaching
When elastic tape is attached to the cuff or waist of a piece of clothing, the finished dimensions will be that of the stretched elastic tape. Therefore, it is necessary that a suitable length of the elastic tape be used.
1 Pin the elastic tape to the wrong side of the fabric.
Pin the elastic tape to the fabric at a few points to make sure that the tape is uniformly positioned on the fabric.

① Elastic tape
② Pin

Turn on the machine.
With the pattern selection dial, 06
select stitch

Attach zigzag foot "J".
- For details, refer to "Replacing the presser foot" (page 29).
5 Sew the elastic tape to the fabric while stretching the tape so that it is the same length as the fabric.
While pulling the fabric behind the presser foot with your left hand, pull the fabric at the pin nearest the front of the presser foot with your right hand.
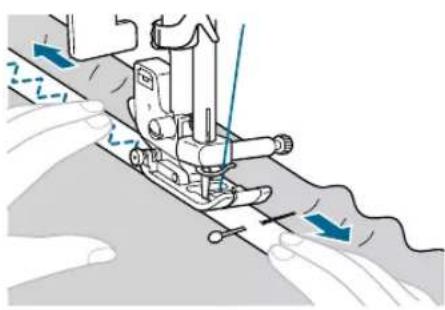
natural_image
Illustration of a sewing machine needle stitching fabric, with no visible text or symbols
natural_image
Diagram showing a vertical seam with a patterned edge, no text or symbols presentCAUTION
- When sewing, make sure that the needle does not touch any pins, otherwise the needle may bend or break.
Appliqué, Patchwork and Quilt Stitching
Eight stitches are available for sewing appliqués and patchwork quilts.
| Stitch Name | Pattern | Presser Foot | Application | Stitch Width [mm (inch)] | Stitch Length [mm (inch)] | Twin Needle | Walking Foot | Reverse/Reinforcement Stitching | ||
| Auto Manual | Auto Manual | |||||||||
| Zigzag stitch | 05 | J | Overcasting and attaching appliqués | 3.5(1/8) | 0.0–7.0(0–1/4) | 1.4(1/16) | 0.0–4.0(0–3/16) | Yes(J) | *1Yes | Reverse |
| Appliqué stitch | 13 | J | Appliqué stitching | 3.5(1/8) | 2.5–7.0(3/32–1/4) | 2.5(3/32) | 1.6–4.0(1/16–3/16) | Yes(J) | No Reinforcement | |
| Piecing straight stitch | 15 | J | Piecing straight stitching (with a seam allowance of 6.5 mm(1/4 inch) from the right edge of the presser foot) | 5.5(7/32) | 0.0–7.0(0–1/4) | 2.0(1/16) | 0.2–5.0(1/64–3/16) | No | No Reinforcement | |
| Joining stitch | 19 | J | Patchwork stitching and decorative stitching | 4.0(3/16) | 0.0–7.0(0–1/4) | 1.2(1/16) | 0.2–4.0(1/64–3/16) | Yes(J) | No Reinforcement | |
| 20 | J | Patchwork stitching, decorative stitching and sewing overcasting on both pieces of fabrics, such as with tricot | 5.0(3/16) | 2.5–7.0(3/32–1/4) | 2.5(3/32) | 1.0–4.0(1/16–3/16) | Yes(J) | No Reinforcement | ||
| 21 | J | Patchwork stitching and decorative stitching | 5.0(3/16) | 0.0–7.0(0–1/4) | 1.2(1/16) | 0.2–4.0(1/64–3/16) | Yes(J) | No Reinforcement | ||
| Hand-look quilt-ing | 16 | J | Straight stitch quilt-ing that looks hand-sewn | 0.0(0) | 0.0–7.0(0–1/4) | 2.5(3/32) | 1.0–4.0(1/16–3/16) | No | No Reinforcement | |
| Quilting stitch (for stippling) | 17 | J | Quilting back-ground stitching (stippling) | 7.0(1/4) | 1.0–7.0(1/16–1/4) | 1.6(1/16) | 1.0–4.0(1/16–3/16) | No | No Reinforcement | |
*1 Do not use reverse stitching.
The values below "Auto" are set when the pattern is selected. The setting can be adjusted to any value within the range indicated below "Manual".

CAUTION
- Before replacing the presser foot, be sure to turn off the sewing machine, otherwise injuries may occur if a button is accidentally pressed and the machine starts sewing.
Appliqué stitching
1 Cut out the appliqué, leaving a seam allowance of between 3 and 5 mm (1/8 and 3/16 inch).

natural_image
Simple heart-shaped outline with a numbered label pointing to the bottom right corner (no text or symbols on the shape itself)① Seam allowance
2 Place a pattern made of thick paper on the back of the appliqué, and then fold over the seam allowance using an iron.

natural_image
Simple line drawing of a heart shape with a small object attached (no text or symbols)3 Turn the fabric over, and then baste, glue or pin it onto the fabric that it will be attached to.
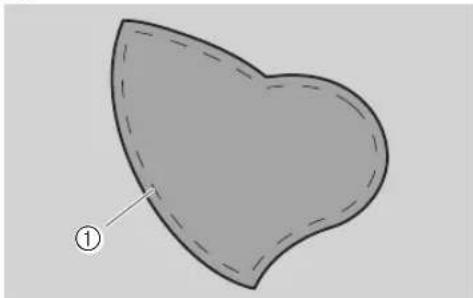
natural_image
Gray heart-shaped outline with dashed outline and label (①) pointing to one side, no text or symbols present.① Basting stitching
4 Turn on the machine.
With the pattern selection dial, 05 13
select stitch or .
6 Attach zigzag foot "J". For details, refer to "Replacing the presser foot" (page 29).
7 Turn the handwheel toward you, and then begin sewing around the edge of the appliqué, making sure that the needle drops just outside of the appliqué.

natural_image
Diagram of a sewing machine needle and fabric cutting process (no text or symbols)- When sewing around corners, stop the machine with the needle in the fabric just outside of the appliqué, raise the presser foot lever, and then turn the fabric as needed to change the sewing direction.

Patchwork (crazy quilt) stitching
Fold the edge of the top piece of fabric and place it over the lower piece.
2 Sew the two pieces of fabric together so the pattern spans over both pieces.

natural_image
Mechanical sewing machine needle stitching fabric (no text or symbols visible)Piecing
Sewing together two pieces of fabric is called "piecing". The fabric pieces should be cut with a 6.5 mm (1/4 inch) seam allowance. Sew a piecing straight stitch 6.5 mm (1/4 inch) from the right side of the presser foot.
1 Baste or pin along the seam allowance of the fabric that you wish to piece together.
2 Turn on the machine.
3 Select stitch 15
- For details, refer to "Selecting a stitch" (page 38).
4 Attach zigzag foot "J".
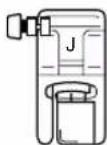
- For details, refer to "Replacing the presser foot" (page 29).
5 Sew with the side of the presser foot aligned with the edge of the fabric.
■For a seam allowance on the right side Align the right side of the presser foot with the edge of the fabric, and sew using stitch

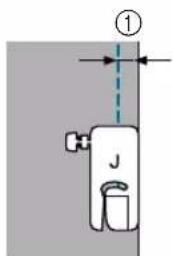
① 6.5 mm (1/4 inch)

Memo
●To change the width of the seam allowance (the needle position), adjust the stitch width.
Quilting
Sandwiching batting between the top and bottom layers of fabric is called "quilting". Quilts can easily be sewn using the optional walking foot and the optional quilting guide.
1 Baste the fabric to be quilted.
Attach the walking foot.
- For details, refer to "Using the optional walking foot" (page 31).
Select a stitch.
- For details, refer to "Selecting a stitch" (page 38).
4 Place one hand on each side of the presser foot, and hold fabric taut while sewing.

natural_image
Illustration of a sewing machine needle being adjusted, with hands operating the mechanism (no text or symbols visible)
Note
●When sewing with the walking foot, sew at a speed between slow and medium.
■Using the optional quilting guide
Use the quilting guide to sew parallel stitches that are equally spaced.

① Insert the stem of the quilting guide into the hole at the rear of the walking foot or presser foot holder.
□ Walking foot
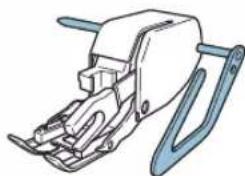
natural_image
Illustration of a mechanical sewing machine with blue handle and metal frame (no text or symbols)□ Presser foot holder

② Adjust the stem of the quilting guide so that the guide aligns with the seam that has already been sewn.

natural_image
Illustration of a sewing machine needle stitching fabric (no text or symbols)
Note
●The optional quilting guide is available through your retailer.
Free-motion quilting
With free-motion quilting, lower the feed dogs (using the feed dog position switch) so that the fabric is not fed.
The optional quilting foot is needed for free-motion quilting.

1 Turn off the sewing machine.
2 Remove the presser foot and the presser foot holder.
- For details, refer to "Removing the presser foot holder" (page 30).
3 Attach the quilting foot to the presser foot holder screw.
The pin on the quilting foot should be positioned over the needle clamp screw.

① Pin on quilting foot
② Presser foot holder screw
③ Needle clamp screw
4 Hold the quilting foot in place with your right hand, and then tighten the presser foot holder screw using the enclosed screwdriver in your left hand.

natural_image
Illustration of a mechanical device with a hand operating a tool, showing a blue arrow indicating rotation (no text or symbols present)
CAUTION
●Be sure to securely tighten the screw with the enclosed screwdriver, otherwise the needle may touch the presser foot, causing it to bend or break.

Slide the feed dog position switch, located at the rear of the machine on the base, to the position shown below to lower the feed dogs.

① Feed dog position switch (as seen from the rear of the machine)

Turn on the machine.

With the pattern selection dial,
select stitch or . 02 05

Use both hands to stretch the fabric taut, and then move the fabric to follow the pattern. Reinforcement stitches are sewn at the beginning and end of stitching.

① Pattern
- Reverse stitches cannot be sewn when the feed dogs are lowered.

After sewing is finished, slide the feed dog position switch to its original position to raise the feed dogs.
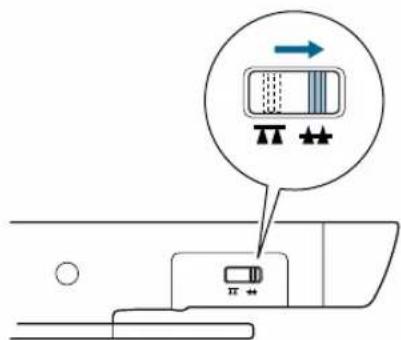
• The feed dogs are normally left raised.

Memo
●Turn the handwheel to raise the feed dogs.
Reinforcement Stitching
Reinforce points that will be subject to strain, such as sleeve holes, inseams and pocket corners.
| Stitch Name | Pattern | Presser Foot | Application | Stitch Width [mm (inch)] | Stitch Length [mm (inch)] | Twin Needle | Walking Foot | Reverse/ Reinforcement Stitching | ||
| Auto Manual | Auto Manual | |||||||||
| Triple stretch stitch | 03III | J | Attaching sleeves, sewing inseams, sewing stretch fabrics and decorative stitching | 0.0(0) | 0.0–7.0(0–1/4) | 2.5(3/32) | 1.5–4.0(1/16–3/16) | Yes | No Reinforcement | |
| Bar tack stitch | 35 | A | Reinforce openings and areas where the seam easily comes loose | 2.0(1/16) | 1.0–3.0(1/16-1/8) | 0.4(1/64) | 0.3–1.0(1/64-1/16) | No | No | Automatic Reinforcement |
The values below "Auto" are set when the pattern is selected. The setting can be adjusted to any value within the range indicated below "Manual".

CAUTION
- Before replacing the presser foot, be sure to turn off the sewing machine, otherwise injuries may occur if a button is accidentally pressed and the machine starts sewing.
Triple stretch stitching
With each stitch, three overlapping stitches are sewn.
1 Turn on the machine.
With the pattern selection dial, 03
select stitch

Attach zigzag foot "J".
- For details, refer to "Replacing the presser foot" (page 29).
4 Start sewing.
■Changing the needle position
The needle position can be adjusted with the straight stitch (left needle position) and the triple stretch stitch by adjusting the stitch width. Press the “−” side of the stitch width key for a left needle position, or press the “+” side for a right needle position.

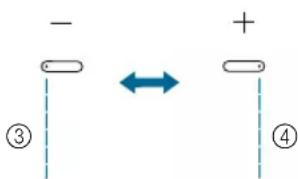
① Stitch width
② Stitch width key
③ Moves the needle position to the left
④ Moves the needle position to the right
Bar tack stitching
Bar tacks are one type of reinforcement stitching used to strengthen points subject to strain, such as pocket corners and openings.
As an example, the procedure for sewing bar tacks at pocket corners is described below.

1 Determine the desired length of the bar tack. Set the button guide plate on buttonhole foot "A" to the desired length. (The distance between the markings on the presser foot scale is 5 mm (3/16 inch).)

① Presser foot scale
② Length of bar tack
③ 5 mm (3/16 inch)
2 Turn on the machine.
With the pattern selection dial,
select stitch 35
4 Attach buttonhole foot "A". For details, refer to "Replacing the presser foot" (page 29).
5 Pass the upper thread down through the hole in the presser foot, and then pull it under the presser foot, as shown.

natural_image
Mechanical assembly diagram showing a sewing machine with no visible text or symbols6 With the opening of the pocket toward you, position the fabric so that the needle drops 2 mm (1/16 inch) in front of the pocket opening, and then lower the presser foot lever.

① 2 mm (1/16 inch)
Note
- When lowering the presser foot, do not push in the front of the presser foot, otherwise the bar tack will not be sewn with the correct size.

natural_image
Diagram of a syringe with internal components and a blue X mark indicating a warning or mark (no text or symbols present)7 Pull down the buttonhole lever as far as possible.

natural_image
Illustration of a hand using a tool to adjust or install a mechanical component (no text or symbols visible)① Buttonhole lever
The buttonhole lever should be positioned behind the metal bracket on the buttonhole foot.

① Buttonhole lever
② Bracket
8 Gently hold the end of the upper thread in your left hand, and then start sewing.
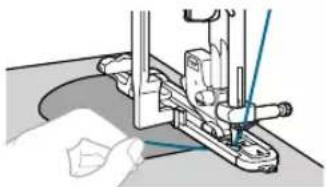
natural_image
Close-up of a sewing machine needle stitching fabric (no text or symbols visible)Once sewing is completed, the machine automatically sews reinforcement stitches, then stops.
9 Raise the presser foot lever, cut the threads, and then remove the fabric.
10 Raise the buttonhole lever to its original position.

Memo
- If the fabric does not feed, for example, because it is too thick, increase the stitch length. For details, refer to "Adjusting the stitch length and width" (page 38).
Decorative stitching
Various decorative stitches can be sewn with this sewing machine.
| Stitch Name | Pattern | Presser Foot | Application | Stitch Width [mm (inch)] | Stitch Length [mm (inch)] | Twin Needle | Walk-ing Foot | Reverse/Reinforcement Stitching | ||
| Auto Manual | Auto Manual | |||||||||
| Fagoting stitch | 22 | J | Fagoting, smocking and decorative stitching | 5.0(3/16) | 0.0-7.0(0-1/4) | 2.5(3/32) | 1.0-4.0(1/16-3/16) | Yes(J) | No | Reinforcement |
| 23 | J | Fagoting, smocking and decorative stitching | 5.0(3/16) | 2.5-7.0(3/32-1/4) | 2.5(3/32) | 1.0-4.0(1/16-3/16) | Yes(J) | No | Reinforcement | |
| Joining stitch | 19 | J | Patchwork stitching and decorative stitching | 4.0(3/16) | 0.0-7.0(0-1/4) | 1.2(1/16) | 0.2-4.0(1/64-3/16) | Yes(J) | No | Reinforcement |
| 20 | J | Patchwork stitching, decorative stitching and sewing overcasting on both pieces of fabrics, such as with tricot | 5.0(3/16) | 2.5-7.0(3/32-1/4) | 2.5(3/32) | 1.0-4.0(1/16-3/16) | Yes(J) | No | Reinforcement | |
| 21 | J | Patchwork stitching and decorative stitching | 5.0(3/16) | 0.0-7.0(0-1/4) | 1.2(1/16) | 0.2-4.0(1/64-3/16) | Yes(J) | No | Reinforcement | |
| Shell tuck stitch | 14 | J | Shell tuck stitching | 4.0(3/16) | 0.0-7.0(0-1/4) | 2.5(3/32) | 0.2-4.0(1/64-3/16) | Yes(J) | No | Reinforcement |
| Satin scallop stitch | 18 | N | Scallop stitching | 5.0(3/16) | 2.5-7.0(3/32-1/4) | 0.5(1/32) | 0.1-1.0(1/64-1/16) | Yes(J) | No | Reinforcement |
| Decorative stitch | 24 | J | Decorative stitching | 4.0(3/16) | 0.0-7.0(0-1/4) | 3.0(1/8) | 2.0-4.0(1/16-3/16) | No | No | Reinforcement |
| 25 | J | Decorative stitching | 4.0(3/16) | 0.0-7.0(0-1/4) | 2.5(3/32) | 1.0-4.0(1/16-3/16) | Yes(J) | No | Reinforcement | |
| 26 | N | Decorative stitching and elastic-attaching | 5.0(3/16) | 1.5-7.0(1/64-1/4) | 1.0(1/16) | 0.2-4.0(1/64-3/16) | Yes(J) | No | Reinforcement | |
| 27 | N | Lace sewing, decorative hemming, heirloom stitching, etc. | 3.5(1/8) | 1.5-7.0(1/16-1/4) | 2.5(3/32) | 1.6-4.0(1/16-3/16) | No | No | Reinforcement | |
| 28 | N | Decorative hemming, heirloom stitching, etc. | 6.0(15/64) | 1.5-7.0(1/16-1/4) | 3.0(1/8) | 1.5-4.0(1/16-3/16) | No | No | Reinforcement | |
Fagoting
Stitching across an open seam is called "fagoting". It is used on blouses and children's clothing. This stitch is more decorative when thicker thread is used.
1 Use an iron to fold the two pieces of fabric along their seams.
2 Baste the two pieces of fabric, separated by about 4.0 mm (3/16 inch), onto thin paper or a sheet of water-soluble stabilizer.

① Thin paper or water soluble stabilizer
② Basting stitching
③ 4 mm (3/16 inch)
3 Turn on the machine.
4 Select stitch or .
5 Attach zigzag foot "J".
6 Set the stitch width to 7.0 mm (1/4 inch).
- For details, refer to "Selecting a stitch" (page 38).
7 Sew with the center of the presser foot aligned along the center of the two pieces of fabric.

natural_image
Technical illustration of a sewing machine with a clamping mechanism (no text or symbols)8 After sewing is finished, remove the paper.
Scallop stitching
The wave-shaped repeating pattern that looks like shells is called "scalloping". It is used on the collars of blouses and to decorate the edges of handkerchiefs.
1 Turn on the machine.
2 Select stitch . 18
Attach monogramming foot "N".
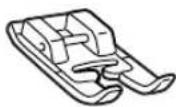
4 Stitch along the edge of the fabric, making sure not to sew directly on the edge of the fabric.
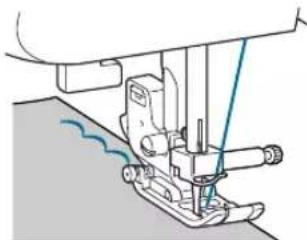
natural_image
Illustration of a sewing machine needle stitching fabric (no text or symbols)- For better results, apply spray starch onto the fabric and press with a hot iron before it is sewn.
5 Trim along the stitches.

natural_image
Illustration of a hand holding a pen or tool interacting with a curved surface, no text or symbols present- Be careful not to cut the stitches.
Smocking
The decorative stitch created by stitching or embroidering over gathers is called "smocking". It is used to decorate the front of blouses or cuffs. The smocking stitch adds texture and elasticity to fabric.
1 Turn on the machine.
2 Select the straight stitch, and then adjust the stitch length to 4.0 mm (3/16 inch) and loosen the thread tension.
- For details, refer to "Selecting a stitch" (page 38) and "Adjusting the thread tension" (page 45).
3 Attach zigzag foot "J".
4 Sew parallel stitching at intervals of 1 cm (3/8 inch).

natural_image
Diagram showing parallel lines with arrows and a numbered label (1), no readable text or symbols present.① 1 cm (3/8 inch)
- Do not sew reverse/reinforcement stitches or cut the thread.
5 Pull the bobbin threads to create gathers. Smooth the gathers by ironing them.

natural_image
Illustration of hands performing a medical procedure with needle insertion (no text or symbols)6 Select stitch 22 23 or .
7 Stitch between the straight stitches.

natural_image
Diagram of a mechanical or fluidic component with dashed lines indicating flow or force, no text or symbols present8 Pull out the threads for the straight stitches.

natural_image
Illustration of hands performing a sewing or sewing process with a blue arrow indicating the motion (no text or symbols present)Shell tuck stitching
The gathers that look like shells are called "shell tucks". They are used to decorate trims, the front of blouses or cuffs made of thin fabrics.
1 Fold the fabric along the bias.

natural_image
Simple diagram showing a blue arrow pointing diagonally across a gray triangular shape (no text or symbols)2 Turn on the machine.
3 Select stitch tension.
- For details, refer to "Selecting a stitch" (page 38).
4 Attach zigzag foot "J".
5 Sew while making sure that the needle drops slightly off the edge of the fabric.
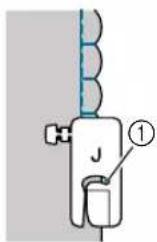
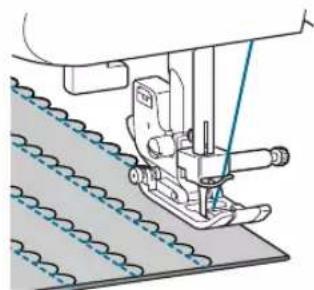
natural_image
Mechanical sewing machine needle stitching a patterned fabric (no text or symbols visible)① Needle drop point
6 Unfold the fabric, and then iron the tucks down to one side.

natural_image
Repeating pattern of interlocking curved lines with dashed outlines, no text or symbols presentJoining
Decorative bridging stitches can be sewn over the seam allowance of joined fabrics. This is used when making a crazy quilt.
1 Turn on the machine.
2 Sew together the right sides of the two pieces of fabric, and then open up the seam allowances.

① Wrong side of fabric
② 6.5 mm (1/4 inch) seam allowance
③ Straight stitch
3 Select stitch or 21
4 Attach zigzag foot "J".
5 Turn the fabric over so that the right side faces up, and then sew over the seam with the center of the presser foot aligned with the seam.
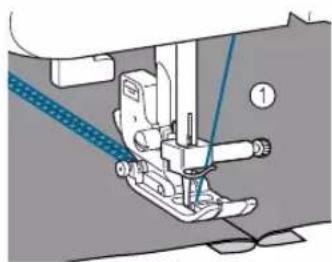
natural_image
Mechanical assembly diagram showing a sewing machine needle inserted into a workpiece, with no visible text or symbols.① Right side of fabric
Heirloom stitching
When sewing with the wing needle, the needle holes are enlarged, creating a lace-like decorative stitch. This is used to decorate hems and tablecloths on thin or medium weight fabrics in addition to plain weave fabrics.
! CAUTION
●The needle threader cannot be used with the wing needle, otherwise the sewing machine may be damaged. Manually pass the thread through the eye of the needle from the front to the back. For details, refer to "Manually threading the needle" (page 22).
1 Insert the wing needle.

- Use a 130/705H 100/16 wing needle.
- For details on inserting a needle, refer to "Replacing the needle" (page 27).
2 Turn on the machine.
3 Select stitch , or
4 Attach monogramming foot "N".
CAUTION
- Select a stitch width of 6.0 mm (15/64 inch) or less, otherwise the needle may bend or break.
●After adjusting the stitch width, slowly turn the handwheel toward you (counterclockwise) and check that the needle does not touch the presser foot. If the needle hits the presser foot, the needle may bend or break.
5 Start sewing.

natural_image
Vertical arrangement of blue asterisk-like shapes on a light gray background (no text or symbols)■Drawnwork (Example 1)
The fabric is turned and sewn twice.

natural_image
Pure vertical line pattern with blue and white segments, no text or symbols present① Pull out several threads from the fabric.
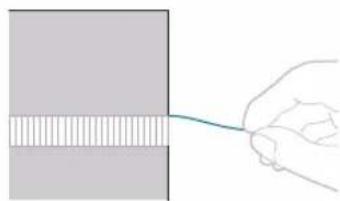
natural_image
Simple line drawing of a hand pulling a thin wire over a rectangular block (no text or symbols)② Attach monogramming foot "N".

- For details, refer to "Replacing the presser foot" (page 29).
③ Select stitch .
- For details, refer to "Selecting a stitch" (page 38).
④ With the right side of the fabric facing up, sew along the right edge of the frayed section.

natural_image
Pure diagram of a vertical line with a labeled component 'N' and horizontal stripes, no text or symbols present.⑤ Turn the fabric around to sew the opposite side.
⑥ Sew along the other edge of the frayed section so that it looks like the previous stitching.

natural_image
Simple line diagram showing a person standing on a path with dashed lines indicating vertical and horizontal distances (no text or symbols)■Drawnwork (Example 2)
① Pull out several threads from two sections of the fabric, separated by an unfrayed section of about 4 mm (3/16 inch).

① 4 mm (3/16 inch)
② Attach monogramming foot "N".
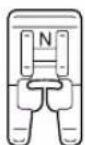
- For details, refer to "Replacing the presser foot" (page 29).

Select stitch

- For details, refer to "Selecting a stitch" (page 38).

Sew along the center of the unfrayed section.
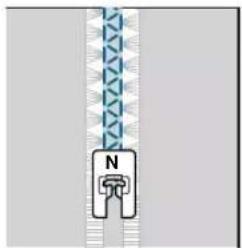
natural_image
Pure diagram of a vertical line with triangular pattern and a labeled connector (no text or symbols)Using the side cutter (optional)
By using the optional side cutter, overcasting stitching can be sewn while the edge of the fabric is cut off.
| Stitch Name | Pattern | Presser Foot | Application | Stitch Width [mm (inch)] | Stitch Length [mm (inch)] | Reverse/ Reinforcement Stitching | ||
| Auto Manual | Auto Manual | |||||||
| Overcasting stitch | 01=0 | S | Basic stitching, sewing gathers or pintucks, etc. | 0.0(0) | 0.0–2.5(0–3/32) | 2.5(3/32) | 0.2–5.0(1/64–3/16) | Reverse |
| 07 | S | Overcasting on thin or medium weight fabrics | 3.5(1/8) | 2.5–5.0(3/32–3/16) | 2.0(1/16) | 1.0–4.0(1/16–3/16) | Reinforcement | |
| 08 | S | Overcasting on thick fabrics | 5.0(3/16) | 2.5–5.0(3/32–3/16) | 2.5(3/32) | 1.0–4.0(1/16–3/16) | Reinforcement | |
| 09 | S | Preventing fraying in thick fabrics and fabrics that fray easily | 5.0(3/16) | 3.5–5.0(1/8–3/16) | 2.5(3/32) | 1.0–4.0(1/16–3/16) | Reinforcement | |
The values below "Auto" are set when the pattern is selected. The setting can be adjusted to any value within the range indicated below "Manual". When using the side cutter, adjust the stitch width setting to a value within the range indicated in the table above.

CAUTION
- Before replacing the presser foot and presser foot holder, be sure to turn off the sewing machine, otherwise injuries may occur if a button is accidentally pressed and the machine starts sewing.
Remove the presser foot.
- For details, refer to "Replacing the presser foot" (page 29).
Thread the upper thread.
- For details, refer to "Threading the upper thread" (page 18).

Note
●The needle threader cannot be used while the side cutter is installed on the sewing machine, otherwise damage to the needle threader may result.
Select a stitch.
- For details, refer to "Selecting a stitch" (page 38).
4 Raise the presser foot lever.
5 Raise the presser foot lever even higher, and then hook the connecting fork of the side cutter onto the needle clamp screw.

① Connecting fork
② Needle clamp screw
6 Position the side cutter so that the side cutter pin is aligned with the notch in the presser foot holder, and then slowly lower the presser foot lever.
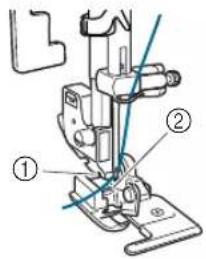
① Notch in presser foot holder
② Pin
The side cutter is attached.
7 Raise the presser foot lever to check that the side cutter is securely attached.
8 Pass the upper thread under the side cutter, and then pull it out toward the rear of the sewing machine.

natural_image
Mechanical sewing machine diagram showing needle insertion and cutting tool (no text or labels)! CAUTION
●After adjusting the stitch width, slowly turn the handwheel toward you and check that the needle does not touch the presser foot. If the needle hits the presser foot, the needle may bend or break.
9 Make a cut of about 2 cm (3/4 inch) long in the fabric at the beginning of the stitching.
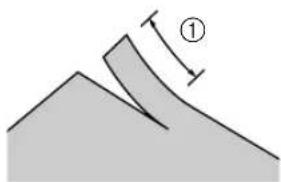
natural_image
Diagram showing a sloped surface with a labeled dimension (①), no text or symbols present.① 2 cm (3/4 inch)
10 Position the fabric.
Position the fabric so that the right side of the cut is on top of the guide plate and the left side of the cut is underneath the presser foot.

natural_image
Line drawing of a sewing machine with needle and base (no text or symbols)
natural_image
Line drawing of a sewing machine needle and foot (no text or symbols)① Guide plate

Note
- If the fabric is not positioned correctly, the fabric will not be cut.
11 Lower the presser foot lever, and then start sewing.
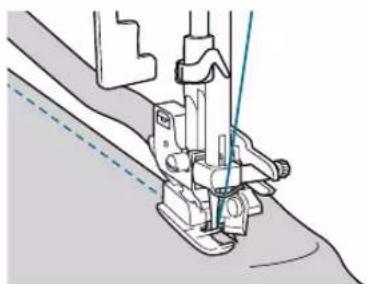
natural_image
Technical line drawing of a sewing machine needle stitching a fabric (no text or symbols)A seam allowance is cut while the stitching is sewn.
If stitch 01 is sewn, the seam allowance will be about 5 mm (3/16 inch).
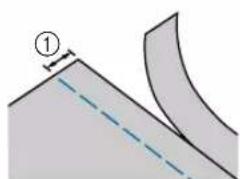
natural_image
Diagram showing a curved surface with a dashed line indicating a slope, no text or symbols present① 5 mm (3/16 inch)

Note
●The side cutter can cut as much as one layer of 13-oz. denim.
●After using the side cutter, clean it by removing any lint or dust.
- If the side cutter can no longer cut fabric, use a rag to apply a small amount of oil to the cutting edge of the cutter.
4APPENDIX
Stitch settings
Applications, stitch lengths and widths and whether the twin needle can be used are listed for utility stitches in the following table.

CAUTION
- When using the twin needle, be sure to attach zigzag foot "J", otherwise the needle may break or the machine may be damaged.
Utility stitches
| Stitch Name | Pattern | Presser Foot | Application | Stitch Width [mm (inch)] | Stitch Length [mm (inch)] | Twin Needle | Walking Foot | Reverse/ Reinforcement Stitching | |||
| Auto Manual | Auto Manual | ||||||||||
| Straight stitch | Left | 01=0- | J | Basic stitching, sewing gathers or pintucks, etc. | 0.0(0) | 0.0–7.0(0–1/4) | 2.5(3/32) | 0.2–5.0(1/64–3/16) | Yes(J) | *1Yes | Reverse |
| Center | 02=0- | J | Attaching zippers, basic stitching, and sewing gathers or pintucks, etc. | 3.5(1/8) | 0.0–7.0(0–1/4) | 2.5(3/32) | 0.2–5.0(1/64–3/16) | Yes(J) | *1Yes | Reverse | |
| Triple stretch stitch | 03=0- | J | Attaching sleeves, sewing inseams, sewing stretch fabrics and decorative stitching | 0.0(0) | 0.0–7.0(0–1/4) | 2.5(3/32) | 1.5–4.0(1/16–3/16) | Yes(J) | No Reinforcement | ||
| Stretch stitch | 04= | J | Sewing stretch fabrics and decorative stitching | 1.0(1/16) | 1.0–3.0(1/16–1/8) | 2.5(3/32) | 1.0–4.0(1/16–3/16) | Yes(J) | No Reinforcement | ||
| Zigzag stitch | 05= | J | Overcasting and attaching appliqués | 3.5(1/8) | 0.0–7.0(0–1/4) | 1.4(1/16) | 0.0–4.0(0–3/16) | Yes(J) | *1Yes | Reverse | |
| 3-point zigzag stitch | 06= | J | Overcasting on medium weight or stretch fabrics, attaching elastic, darning, etc. | 5.0(3/16) | 1.5–7.0(1/16–1/4) | 1.0(1/16) | 0.2–4.0(1/64–3/16) | Yes(J) | No Reinforcement | ||
^*1 Do not use reverse stitching.
| Stitch Name | Pattern | Presser Foot | Application | Stitch Width [mm (inch)] | Stitch Length [mm (inch)] | Twin Needle | Walking Foot | Reverse/ Reinforcement Stitching | ||
| Auto Manual | Auto Manual | |||||||||
| Overcasting stitch | 07 | G | Overcasting on thin or medium weight fabrics | 3.5(1/8) | 2.5–5.0(3/32–3/16) | 2.0(1/16) | 1.0–4.0(1/16–3/16) | No | No Reinforcement | |
| 08 | G | Overcasting on thick fabrics | 5.0(3/16) | 2.5–5.0(3/32–3/16) | 2.5(3/32) | 1.0–4.0(1/16–3/16) | No | No Reinforcement | ||
| 09 | G | Preventing fraying in thick fabrics and fabrics that fray easily | 5.0(3/16) | 3.5–5.0(1/8–3/16) | 2.5(3/32) | 1.0–4.0(1/16–3/16) | No | No Reinforcement | ||
| 10 | J | Overcasting on stretch fabrics | 5.0(3/16) | 0.0–7.0(0–1/4) | 2.5(3/32) | 0.5–4.0(1/32–3/16) | Yes(J) | No Reinforcement | ||
| Blind hem stitch | 11 | R | Blind hem stitching on medium weight fabrics | 0(0) | -3 – 3 | 2.0(1/16) | 1.0–3.5(1/16–1/8) | No | No Reinforcement | |
| 12 | R | Blind hem stitching on stretch fabrics | 0(0) | -3 – 3 | 2.0(1/16) | 1.0–3.5(1/16–1/8) | No | No Reinforcement | ||
| Appliqué stitch | 13 | J | Appliqué stitching | 3.5(1/8) | 2.5–7.0(3/32–1/4) | 2.5(3/32) | 1.6–4.0(1/16–3/16) | Yes(J) | No Reinforcement | |
| Shell tuck stitch | 14 | J | Shell tuck stitching | 4.0(3/16) | 0.0–7.0(0–1/4) | 2.5(3/32) | 0.2–4.0(1/64–3/16) | Yes(J) | No Reinforcement | |
| Piecing straight stitch | 15 | J | Piecing straight stitching (with a seam allowance of 6.5 mm(1/4 inch) from the right edge of the presser foot) | 5.5(7/32) | 0.0–7.0(0–1/4) | 2.0(1/16) | 0.2–5.0(1/64–3/16) | No | No Reinforcement | |
| Hand-look quilt-ing | 16 | J | Straight stitch quilt-ing that looks hand-sewn | 0.0(0) | 0.0–7.0(0–1/4) | 2.5(3/32) | 1.0–4.0(1/16–3/16) | No | No Reinforcement | |
| Quilting stitch (for stippling) | 17 | J | Quilting back-ground stitching (stippling) | 7.0(1/4) | 1.0–7.0(1/16–1/4) | 1.6(1/16) | 1.0–4.0(1/16–3/16) | No | No Reinforcement | |
| Satin scallop stitch | 18 | N | Scallop stitching | 5.0(3/16) | 2.5–7.0(3/32–1/4) | 0.5(1/32) | 0.1–1.0(1/64–1/16) | Yes(J) | No Reinforcement | |
| Joining stitch | 19 | J | Patchwork stitching and decorative stitching | 4.0(3/16) | 0.0–7.0(0–1/4) | 1.2(1/16) | 0.2–4.0(1/64–3/16) | Yes(J) | No | Reinforcement |
| 20 | J | Patchwork stitching, decorative stitching and sewing overcasting on both pieces of fabrics, such as with tricot | 5.0(3/16) | 2.5–7.0(3/32–1/4) | 2.5(3/32) | 1.0–4.0(1/16–3/16) | Yes(J) | No | Reinforcement | |
| 21 | J | Patchwork stitching and decorative stitching | 5.0(3/16) | 0.0–7.0(0–1/4) | 1.2(1/16) | 0.2–4.0(1/64–3/16) | Yes(J) | No | Reinforcement | |
| Fagoting stitch | 22 | J | Fagoting, smocking and decorative stitching | 5.0(3/16) | 0.0–7.0(0–1/4) | 2.5(3/32) | 1.0–4.0(1/16–3/16) | Yes(J) | No | Reinforcement |
| 23 | J | Fagoting, smocking and decorative stitching | 5.0(3/16) | 2.5–7.0(3/32–1/4) | 2.5(3/32) | 1.0–4.0(1/16–3/16) | Yes(J) | No | Reinforcement | |
| Decorative stitch | 24 | J | Decorative stitching | 4.0(3/16) | 0.0–7.0(0–1/4) | 3.0(1/8) | 2.0–4.0(1/16–3/16) | No | No | Reinforcement |
| 25 | J | Decorative stitching | 4.0(3/16) | 0.0–7.0(0–1/4) | 2.5(3/32) | 1.0–4.0(1/16–3/16) | Yes(J) | No | Reinforcement | |
| 26 | N | Decorative stitching and elastic-attaching | 5.0(3/16) | 1.5–7.0(1/64–1/4) | 1.0(1/16) | 0.2–4.0(1/64–3/16) | Yes(J) | No | Reinforcement | |
| 27 | N | Lace sewing, decorative hemming, heirloom stitching, etc. | 3.5(1/8) | 1.5–7.0(1/16–1/4) | 2.5(3/32) | 1.6–4.0(1/16–3/16) | No | No | Reinforcement | |
| 28 | N | Decorative hemming, heirloom stitching, etc. | 6.0(15/64) | 1.5–7.0(1/16–1/4) | 3.0(1/8) | 1.5–4.0(1/16–3/16) | No | No | Reinforcement | |
| 29 | N | Decorative hemming on thin, medium weight and plain weave fabrics, heirloom stitching, etc. | 5.0(3/16) | 1.5–7.0(1/16–1/4) | 4.0(3/16) | 1.5–4.0(1/16–3/16) | No | No | Reinforcement | |
| Stitch Name | Pattern | Presser Foot | Application | Stitch Width [mm (inch)] | Stitch Length [mm (inch)] | Twin Needle | Walk-ing Foot | Reverse/Reinforcement Stitching | ||
| Auto Manual | Auto Manual | |||||||||
| Buttonhole stitch | 30 | A | Horizontal button-holes on thin and medium weight fabrics | 5.0(3/16) | 3.0-5.0(1/8-3/16) | 0.5(1/32) | 0.2-1.0(1/64-1/16) | No | No | Automatic Reinforcement |
| 31 | A | Secured button-holes for fabrics that have backings | 5.0(3/16) | 3.0-5.0(1/8-3/16) | 0.5(1/32) | 0.2-1.0(1/64-1/16) | No | No | Automatic Reinforcement | |
| 32 | A | Buttonholes for stretch or knit fabrics | 6.0(15/64) | 3.0-6.0(1/8-15/64) | 1.0(1/16) | 0.5-2.0(1/32-1/16) | No | No | Automatic Reinforcement | |
| 33 | A | Buttonholes for stretch fabrics | 6.0(15/64) | 3.0-6.0(1/8-15/64) | 1.5(1/16) | 1.0-3.0(1/16-1/8) | No | No | Automatic Reinforcement | |
| 34 | A | Keyhole button-holes for thick or furry fabrics | 7.0(1/4) | 3.0-7.0(1/8-1/4) | 0.5(1/32) | 0.3-1.0(1/64-1/16) | No | No | Automatic Reinforcement | |
| Bar tack stitch | 35 | A | Reinforcing openings and areas where the seam easily comes loose | 2.0(1/16) | 1.0-3.0(1/16-1/8) | 0.4(1/64) | 0.3-1.0(1/64-1/16) | No | No | Automatic Reinforcement |
| Decorative stitch | 36 | N | For decoration, etc. | 7.0(1/4) | 0.0-7.0(0-1/4) | 2.5(3/32) | 0.2-4.0(1/64-3/16) | No | No Reinforcement | |
| Satin stitches | 37 | N | For decoration, etc. | 7.0(1/4) | 2.5-7.0(3/32-1/4) | 0.4(1/64) | 0.1-1.0(1/64-1/16) | Yes(J) | No Reinforcement | |
| 38 | N | For decoration, etc. | 7.0(1/4) | 2.5-7.0(3/32-1/4) | 0.4(1/64) | 0.1-1.0(1/64-1/16) | Yes(J) | No Reinforcement | ||
| 39 | N | For decoration, etc. | 7.0(1/4) | 2.5-7.0(3/32-1/4) | 0.4(1/64) | 0.1-1.0(1/64-1/16) | Yes(J) | No Reinforcement | ||
| Cross-stitches | 40 | N | For decoration, etc. | 6.0(15/64) | 0.0-7.0(0-1/4) | 1.4(1/16) | 0.2-4.0(1/64-3/16) | No | No Reinforcement | |
Maintenance
Simple sewing machine maintenance operations are described below.
Cleaning the machine surface
If the surface of the machine is dirty, lightly soak a cloth in neutral detergent, squeeze it out firmly, and then wipe the surface of the machine. After cleaning it once with a wet cloth, wipe it again with a dry cloth.

CAUTION
● Make sure that the sewing machine has been turned off, and then unplug the power cord before cleaning the machine, otherwise injuries or an electric shock may occur.
- Do not use benzene, thinner or cleansing powder, otherwise the machine may be discolored or deformed.
Cleaning the race
Clean the hook and under the needle plate. Sewing performance will suffer if lint and dust collect in the race; therefore, it should be cleaned periodically.

Turn off the sewing machine, and then unplug the power cord from the electrical outlet.

CAUTION
● Make sure that the sewing machine has been turned off, and then unplug the power cord before cleaning the machine, otherwise injuries or an electric shock may occur.

Raise the needle and presser foot lever.

Pull the flat bed attachment off to the left.

natural_image
Diagram of a car interior showing a blue plastic tray and handle, with no visible text or symbols.
Loosen the presser foot holder screw and remove the presser foot holder, and then loosen the needle clamp screw and remove the needle.
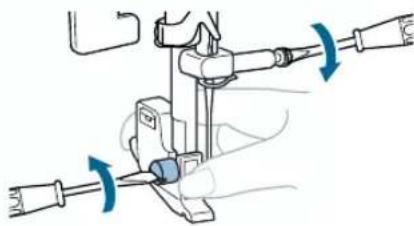
natural_image
Mechanical assembly diagram showing a tool interacting with a component, with blue arrows indicating motion direction (no text or symbols present)
Grasp both sides of the needle plate cover, and then slide it toward you to remove it.

natural_image
Diagram of a sewing machine needle stitching fabric, showing mechanical components and a blue directional arrow (no text or symbols)① Needle plate cover

Remove the bobbin case.
Grasp the front of the bobbin case, and then pull it out.
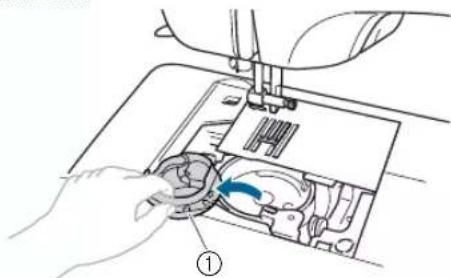
natural_image
Line drawing of a sewing machine needle stitching a component, with no visible text or symbols① Bobbin case

Use the enclosed cleaning brush or a vacuum cleaner to remove any lint and dust from the race and its surrounding area.

① Cleaning brush
② Race
- Do not apply oil to the race or bobbin case.
8 Insert the bobbin case so that the projection on the bobbin case aligns with the spring.
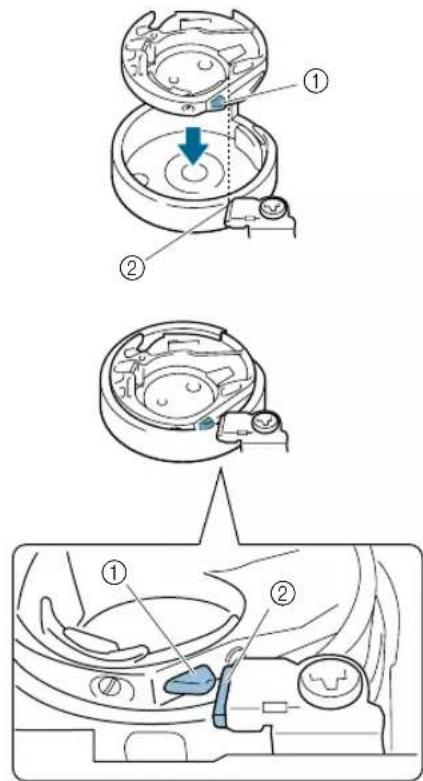
① Projection
② Spring
9 Insert the tabs on the needle plate cover into the needle plate, and then slide the cover back into position.

natural_image
Line drawing of a sewing machine needle stitching fabric (no text or symbols)
CAUTION
●Never use a bobbin case that is scratched, otherwise the upper thread may become tangled, the needle may break, or sewing performance may suffer.
For a new bobbin case, contact your nearest authorized service center.
●Be sure that the bobbin case is correctly installed, otherwise the needle may break.
Removing the needle plate
When the thread is tangled and cannot be removed by cleaning the race, remove the needle plate.
1 Follow steps ① through ⑥ on page 89.
2 Remove the needle plate by removing the screws with the disc-shaped screwdriver.
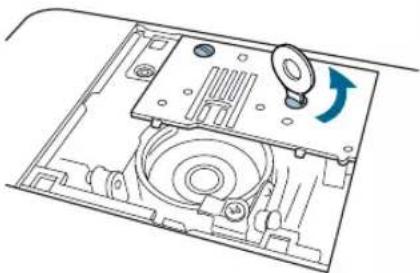
natural_image
Technical line drawing of a mechanical device with a circular housing and a knob, showing no text or symbols.3 Remove the tangled thread from the needle plate.
4 Return the needle plate to its original position, and then tighten the screws with the disc-shaped screwdriver.

natural_image
Technical line drawing of a mechanical device with a knob and rotating arrow (no text or symbols)
Note
●Align the two screw holes on the needle plate with the two holes on the machine.
5 Follow steps 7 through 9 beginning on page 89.
Troubleshooting
If the machine stops operating correctly, check for the following possible causes before requesting service. If the problem persists, contact your retailer or the nearest authorized service center.
| Symptom Probable Cause Remedy Reference | |||
| The sewing machine does not operate. | The plug of the power cord is not inserted into an electrical outlet. | Insert the plug of the power cord into a household electrical outlet. | page 12 |
| The machine is not turned on. Turn on | the machine. page 12 | ||
| The bobbin winder shaft is moved to the right. | Slide the bobbin winder shaft to the left. | page 15 | |
| The presser foot lever is raised. | Lower the presser foot lever. | page 40 | |
| A stitch other than the buttonhole or bar tack stitch was selected and the start/stop button was pressed while the buttonhole lever is lowered. | Raise the buttonhole lever. - | ||
| The buttonhole or bar tack stitch was selected and the start/stop button was pressed while the buttonhole lever is raised. | Pull down the buttonhole lever. page 57 | ||
| The start/stop button was pressed, even though the foot controller is connected. | Do not use the start/stop button when the foot controller is connected. To use the start/stop button, disconnect the foot controller. | page 40 | |
| The needle breaks. | The needle is incorrectly installed. | Correctly install the needle. | page 27 |
| The needle clamp screw is loose. | Use the screwdriver to firmly tighten the screw. | page 28 | |
| The needle is bent or blunt. | Replace the needle with a new one. | page 27 | |
| The combination of fabric, thread and needle is incorrect. | Select a thread and needle that are appropriate for the type of fabric being sewn. | page 26 | |
| The appropriate presser foot for the type of stitch that you wish to sew is not used. | Attach the presser foot that is appropriate for the type of stitch that you wish to sew. | page 85 | |
| The upper thread tension is too tight. | Loosen the upper thread tension. page 45 | ||
| The fabric is pulled too much. | Lightly guide the fabric. | - | |
| The area around the hole in the needle plate is scratched. | Replace the needle plate. Contact your retailer or the nearest authorized service center. | - | |
| The area around the hole in the presser foot is scratched. | Replace the presser foot. Contact your retailer or the nearest authorized service center. | - | |
| The bobbin case is scratched. | Replace the bobbin case. Contact your retailer or the nearest authorized service center. | - | |
| A bobbin designed specifically for this machine is not used. | Bobbins from older models, which have a different thickness, will not work properly. Only use a bobbin designed specifically for this machine. | page 13 | |
| Symptom | Probable Cause | Remedy | Reference |
| The upper thread breaks. | The upper thread was incorrectly threaded (for example, the spool is incorrectly installed or the thread has come out of the needle bar thread guide). | Correct the upper threading. page 18 | |
| There are knots or tangles in the thread. | Remove any knots or tangles. - | ||
| The selected needle is not appropriate for the thread being used. | Select a needle that is appropriate for the type of stitch being used. | page 26 | |
| The upper thread tension is too tight. | Loosen the upper thread tension. page 45 | ||
| The thread is tangled, for example, in the bobbin case. | Remove the tangled thread. If the thread is tangled in the bobbin case, clean the race. | page 89 | |
| The needle is bent or blunt. | Replace the needle with a new one. | page 27 | |
| The needle is incorrectly installed. | Correctly install the needle. | page 27 | |
| The area around the hole in the needle plate is scratched. | Replace the needle plate. Contact your retailer or the nearest authorized service center. | - | |
| The area around the hole in the presser foot is scratched. | Replace the presser foot. Contact your retailer or the nearest authorized service center. | - | |
| The bobbin case is scratched. | Replace the bobbin case. Contact your retailer or the nearest authorized service center. | - | |
| A bobbin designed specifically for this machine is not used. | Bobbins from older models, which have a different thickness, will not work properly. Only use a bobbin designed specifically for this machine. | page 13 | |
| The lower thread is tangled or breaks. | The bobbin thread is incorrectly installed. | Correct the bobbin threading. page 16 | |
| The bobbin thread is incorrectly wound. | Correctly wind the bobbin. page 13 | ||
| There are scratches on the bobbin or it doesn't rotate properly. | Replace the bobbin. - | ||
| The thread is tangled. | Remove the tangled thread and clean the race. | page 89 | |
| A bobbin designed specifically for this machine is not used. | Bobbins from older models, which have a different thickness, will not work properly. Only use a bobbin designed specifically for this machine. | page 13 | |
| The thread tension is incorrect. | The upper thread is incorrectly installed. | Correct the upper threading. page 18 | |
| The bobbin thread is incorrectly installed. | Correct the bobbin threading. page 16 | ||
| The bobbin thread is incorrectly wound. | Correctly wind the bobbin. page 13 | ||
| The combination of fabric, thread and needle is incorrect. | Select a thread and needle that are appropriate for the type of fabric being sewn. | page 26 | |
| The presser foot holder is incorrectly installed. | Correctly install the presser foot holder. | page 31 | |
| The thread tension is incorrectly set. | Adjust the thread tension. page 45 | ||
| A bobbin designed specifically for this machine is not used. | Bobbins from older models, which have a different thickness, will not work properly. Only use a bobbin designed specifically for this machine. | page 13 | |
| The fabric is puckered. | The upper thread or bobbin thread is incorrectly installed. | Correctly thread the upper thread and correctly install the bobbin thread. | page 16, 18 |
| The spool is incorrectly installed. | Correctly install the spool. | page 13 | |
| The combination of fabric, thread and needle is incorrect. | Select a thread and needle that are appropriate for the type of fabric being sewn. | page 26 | |
| The needle is bent or blunt. | Replace the needle with a new one. | page 27 | |
| If thin fabrics are being sewn, the stitch is too long or the fabric is not being fed correctly. | Sew with stabilizer material under the fabric. | page 47 | |
| The thread tension is incorrectly set. | Adjust the thread tension. page 45 | ||
| Stitches are skipped. | The upper thread is incorrectly installed. | Correct the upper threading. page 18 | |
| The combination of fabric, thread and needle is incorrect. | Select a thread and needle that are appropriate for the type of fabric being sewn. | page 26 | |
| The needle is bent or blunt. | Replace the needle with a new one. | page 27 | |
| The needle is incorrectly installed. | Correctly install the needle. | page 27 | |
| Dust has accumulated under the needle plate or in the bobbin case. | Remove the needle plate cover and clean the bobbin case. | page 89 | |
| A high-pitched sound is produced while sewing.A rattling noise is produced. | Dust has accumulated in the feed dogs or in the bobbin case. | Clean the bobbin case. page 89 | |
| The upper thread is incorrectly installed. | Correct the upper threading. page 18 | ||
| The bobbin case is scratched. | Replace the bobbin case.Contact your retailer or the nearest authorized service center. | - | |
| A bobbin designed specifically for this machine is not used. | Bobbins from older models, which have a different thickness, will not work properly. Only use a bobbin designed specifically for this machine. | page 13 | |

| Symptom | Probable Cause | Remedy | Reference |
| The thread does not pass through the eye of the needle. | The needle was not raised. | Press (needle position button) once or twice to raise the needle. | page 19 |
| The needle is incorrectly installed. | Correctly install the needle. | page 27 | |
| The stitch is not sewn correctly. | The appropriate presser foot for the type of stitch that you wish to sew is not used. | Attach the presser foot that is appropriate for the type of stitch that you wish to sew. | page 85 |
| The thread tension is incorrectly set. Adjust the thread tension. page 45 | |||
| The thread is tangled, for example, in the bobbin case. | Remove the tangled thread. If the thread is tangled in the bobbin case, clean the race. | page 89 | |
| The fabric does not feed. | The feed dogs are lowered. | Slide the feed dog position switch to ★★. | page 71 |
| The stitch is too short. Lengthen the stitch length. page 38 | |||
| The combination of fabric, thread and needle is incorrect. | Select a thread and needle that are appropriate for the type of fabric being sewn. | page 26 | |
| The thread is tangled, for example, in the bobbin case. | Remove the tangled thread. If the thread is tangled in the bobbin case, clean the race. | page 89 | |
| The sewing lamp does not come on. | The sewing lamp is damaged. | Contact your retailer or the nearest authorized service center. | - |
Error messages
If the sewing machine is incorrectly operated or if the sewing machine malfunctions, an error message appears in the LCD.
The message can be cleared by pressing any key in the operation panel, turning any dial, or performing the operation correctly.
| Error Message (in LCD) | Probable Cause Remedy | |
| E1 | The start/stop button or the reverse/reinforcement stitch button was pressed (The foot controller was depressed if it is connected.) while the presser foot is raised. | Lower the presser foot before continuing the operation. |
| E2 | A stitch other than the buttonhole or bar tack stitch was selected and the start/stop button was pressed (The foot controller was depressed if it is connected.) while the buttonhole lever is lowered. | Raise the buttonhole lever before continuing the operation. |
| E3 | The buttonhole or bar tack stitch was selected and the start/stop button was pressed (The foot controller was depressed if it is connected.) while the button-hole lever is raised. | Lower the buttonhole lever before continuing the operation. |
| E4 | The reverse/reinforcement stitch button or needle position button was pressed while the bobbin winder shaft is moved to the right. | Move the bobbin winder shaft to the left before continuing the operation. |
| E5 | The start/stop button was pressed, even though the foot controller is connected. | Disconnect the foot controller, and then press the start/stop button. Otherwise, operate the machine by using the foot controller. |
| E6 | The motor locked up because the thread is tangled. | Turn off the machine and remove the tangled thread before continuing the operation. |
| E7 | The needle mode selection key was pressed to select twin needle sewing while a stitch that cannot be used with the twin needle is selected. | Select a stitch that can be used with the twin needle. |
| E8 | The pattern selection dial was turned to select a pattern while the twin needle setting is selected. | Cancel the twin needle setting, and then select a stitch. |

Memo
- If error message "F1" through "F9" appears in the LCD while the sewing machine is being used, the machine may be malfunctioning. Contact your retailer or the nearest authorized service center.
Operation beep
Each time a key is pressed or an incorrect operation is performed, a beep is sounded.
■For a correct operation
One beep is sounded.
■If an incorrect operation is performed
Two or four beeps are sounded.
■ If the machine locks up, for example, because the thread is tangled
The sewing machine continues to beep for three seconds, and then the machine automatically stops. Be sure to check for the cause of the error, and correct it before continuing to sew.
Canceling the operation beep
When the sewing machine is purchased, it is set to beep each time an operation panel key is pressed. This setting can be changed so that the machine does not beep.

Turn off the sewing machine.


While holding the “-” side of (-|+) (stitch width key) pressed, turn on the sewing machine.
When a beep is heard, release the "-" side of the stitch width key.
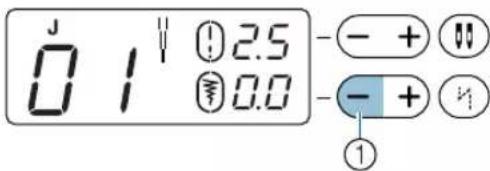

① “-” side of the stitch width key
The machine is now set so that it will not beep.

Memo
● Perform the same operation to set the machine so that the operation beep is sounded.
Index
Numerics
1/4 inch quilting foot....10
1/4 inch quilting foot with guide 10
A
accessory bag....9
adjustable zipper/piping foot 10
appliques 68
attaching elastic tape....65
B
bar tack stitching 73
basic stitching ....50, 61, 62
blind hem stitching....52
blind stitch foot 9
bobbin 9
bobbin cover....16
bobbin thread....13, 16, 48
button fitting foot....9
buttonhole....54
buttonhole foot....9, 56, 73
buttonhole lever 57, 73
buttonhole stitching....54
C
changing sewing direction....46
cleaning 89
cleaning brush....9,89
crazy quilts....68
D
disc-shaped screwdriver 9
E
error messages....95
extension table 10,35
extra spool pin 9,23
eyelet punch 9,57
F
fagoting 76
feed dog position switch....70, 71
feed dogs....71
flat bed attachment....8
foot controller 9
free-motion quilting....70
H
heirloom stitching ....78
|
included accessories 9
J
joining....78
M
main power switch....12
maintenance 89
monogramming foot....9
N
needle 25
needle plate cover....89
needle position....51
needle position button....16
needle set....9
needle stop position ....33
non stick foot 10
0
open toe foot....10
operation beep 96
operation buttons 7
operation manual 9
operation panel 8, 38, 95
optional accessories ....10
overcasting foot....9,50
P
patchwork 68
pattern selection dial ....38
power supply 11
presser foot....29
presser foot holder....30
presser foot lever 18
presser foot mounting pin....47
Q
quick reference guide....9
quilting foot....10, 70
quilting guide 10
R
race....89
replacing the needle....25
S
safety instructions....1
scallop stitching ....76
screwdriver 9
seam ripper 9,57
selecting a stitch....38
sewing curves....46
sewing heavyweight fabric 46
sewing lightweight fabric....47
sewing machine needles 25
sewing speed controller....15
sewing stretch fabrics 47
sewing thick fabrics....46
side cutter 10
smocking....77
spool cap 9
spool net 9
spool pin ....18
stitch guide foot....10
stitch length....38
stitch settings....85
stitch width 38
straight stitch 51
stretch stitching 65
T
thread guide 18
thread tension 45
thread tension dial....45
triple stretch stitching 72
twin needle 9,23
U
upper thread....18
W
walking foot 10, 31, 69
Z
zigzag foot 9,47
zipper foot....9,62
zipper insertion 61


- Grace
- A-LINE SERIES
- Model BL40
- Instruction and Reference Guide
- CONGRATULATIONS ON CHOOSING OUR MACHINE
- PLEASE READ BEFORE USING THIS MACHINE
- For safe operation
- For a longer service life
- For repair or adjustment
- Important Safety Instructions
- DANGER - To reduce the risk of electric shock:
- WARNING - To reduce the risk of burns, fire, electric shock, or injury to persons.
- Always keep your work area clear:
- Special care is required when sewing:
- This machine is not a toy:
- For a longer service life:
- For repair or adjustment:
- Contents
- Useful Sewing Tips 46
- UTILITY STITCHES ....49
- Overcasting 49
- Basic Stitching 51
- Blind Hem Stitching 52
- Buttonhole Stitching 54
- Zipper Insertion 61
- Sewing Stretch Fabrics and Elastic Tape 65
- Appliqué, Patchwork and Quilt Stitching 67
- Reinforcement Stitching 72
- Decorative stitching 75
- APPENDIX ....85
- Stitch settings 85
- Maintenance 89
- Troubleshooting 91
- Error messages 95
- Operation beep 96
- Index 97
- Introduction
- Names of Machine Parts and Their Functions
- Machine
- Needle and presser foot section
- Operation buttons
- Operation panel
- Flat bed attachment
- Note
- Accessories
- Included accessories
- Optional accessories
- 1.2.3.
- 4.5.6.7.
- 8.9.10.11.
- Memo
- 1GETTING READY
- Turning the Machine On/Off
- Power supply precautions
- WARNING
- CAUTION
- Turning on the machine
- Turning off the machine
- Preparing for Upper and Lower Threading
- Winding the bobbin
- Slide the spool cap onto the spool pin.
- Pull some thread off the spool, and then pass the thread under the thread guide.
- Pass the thread under the thread guide cover from the back to the front.
- Pull the thread, pass it under the hook of the bobbin-winding thread guide, and then wind the thread counterclockwise between the discs, pulling it in as far as possible.
- !
- 12
- 13
- 14
- 15
- Installing the bobbin
- Threading the upper thread
- ■Manually threading the needle
- Using the twin needle
- Attach zigzag foot "J".
- Turn on the sewing machine.
- Select a stitch.
- Press Needle mode selection key).
- Start sewing.
- Replacing the Needle
- Needle precautions
- Needle types and their uses
- Checking the needle
- ! CAUTION
- Loosen the needle clamp screw and remove the needle.
- With the flat side of the needle toward the rear of the machine, insert the needle until it touches the needle stopper.
- While holding the needle with your left hand, tighten the needle clamp screw.
- Replacing the Presser Foot
- Presser foot precautions
- Place the presser foot to be installed below the holder so that the presser foot pin is aligned with the notch in the holder.
- Slowly lower the presser foot lever so that the presser foot pin snaps into the notch in the presser foot holder.
- Raise the presser foot lever to check that the presser foot is securely attached.
- Removing the presser foot holder
- Remove the presser foot.
- Loosen the presser foot holder screw, and then remove the presser foot holder.
- ■Attaching the presser foot holder
- Align the presser foot holder with the presser bar.
- Hold up the presser foot holder with your right hand, and tighten the screw.
- Using the optional walking foot
- ■Attaching the walking foot
- Remove the presser foot holder.
- ② Hook the connecting fork of the walking foot onto the needle clamp screw.
- ■Removing the walking foot
- Useful Functions
- Changing the needle stop position
- ■When the needle stops in the lowered position
- Changing the initial needle position
- Sewing Cylindrical or Large Pieces
- Stitching cylindrical pieces
- Pull the flat bed attachment off to the left.
- Slide the part that you wish to sew onto the arm, and then sew from the top.
- When you are finished with free-arm sewing, install the flat bed attachment back in its original position.
- Sewing large pieces of fabric
- Open up the legs at the bottom of the extension table.
- Pull the flat bed attachment off to the left.
- Install the extension table.
- When you are finished using the extension table, remove it.
- SEWING BASICS
- Starting to Sew
- Sewing procedure
- Selecting a stitch
- Adjusting the stitch length and width
- Positioning the fabric
- Place the fabric under the presser foot.
- Important:
- ■Using the operation buttons
- ① Slide the sewing speed controller to the left or right to select the desired sewing speed.
- ■Using the foot controller
- ⑤ Once you are ready to start sewing, slowly press down on the foot controller.
- ⑥ When the end of the stitching is reached, completely release the foot controller.
- ⑦ When you are finished sewing, raise the needle, and then cut the threads.
- Securing the stitching
- Lower the needle into the fabric at the beginning of the stitching, and then lower the presser foot lever.
- Press (start/stop button) or press down on the foot controller.
- After sewing 3 to 5 stitches, press ⏻ (reverse/reinforcement stitch button).
- After sewing back to the beginning of the stitching, release (reverse/reinforcement stitch button).
- Press (start/stop button), or press down on the foot controller.
- When the end of the stitching is reached, press (reverse/reinforcement stitch button).
- After 3 to 5 reverse stitches have been sewn, release ⓘ (reverse/reinforcement stitch button).
- Press (start/stop button), or press down on the foot controller.
- After sewing to the end of the stitching, stop the sewing machine.
- ■Sewing reinforcement stitches
- Cutting the thread
- Automatically sewing reverse/reinforcement stitches
- Adjusting the thread tension
- ■Correct thread tension
- ■Upper thread is too tight
- ■Upper thread is too loose
- Useful Sewing Tips
- Trial sewing
- Changing the sewing direction
- Sewing curves
- Sewing thick fabrics
- ■ If thick seams are being sewn and the fabric does not feed at the beginning of stitching
- Sewing thin fabrics
- Sewing stretch fabrics
- Pulling up the bobbin thread
- UTILITY STITCHES
- Overcasting
- Sewing overcasting stitches using zigzag foot "J"
- Sewing overcasting stitches using overcasting foot "G"
- Basic Stitching
- Blind Hem Stitching
- Remove the basting stitching.
- Buttonhole Stitching
- ■Changing the stitch length
- ■Changing the stitch width
- ■Sewing buttonholes on stretch fabrics
- Button sewing
- Use scissors to cut the upper thread and the bobbin thread at the beginning of the stitching.
- ■Attaching a shank to a button
- Zipper Insertion
- Inserting a centered zipper
- UTILITY STITCHES
- Sewing Stretch Fabrics and Elastic Tape
- Stretch stitching
- Elastic attaching
- Appliqué, Patchwork and Quilt Stitching
- Appliqué stitching
- Patchwork (crazy quilt) stitching
- Piecing
- Quilting
- Free-motion quilting
- Reinforcement Stitching
- Triple stretch stitching
- Bar tack stitching
- Pull down the buttonhole lever as far as possible.
- Gently hold the end of the upper thread in your left hand, and then start sewing.
- Raise the presser foot lever, cut the threads, and then remove the fabric.
- Raise the buttonhole lever to its original position.
- Decorative stitching
- Fagoting
- Scallop stitching
- Smocking
- Shell tuck stitching
- Joining
- Heirloom stitching
- Select stitch
- Using the side cutter (optional)
- Thread the upper thread.
- Raise the presser foot lever.
- 4APPENDIX
- Stitch settings
- Maintenance
- Cleaning the machine surface
- Cleaning the race
- Removing the needle plate
- Troubleshooting
- Error messages
- Operation beep
- ■For a correct operation
- ■If an incorrect operation is performed
- ■ If the machine locks up, for example, because the thread is tangled
- Canceling the operation beep
- Index
- Numerics
- A
- B
- C
- D
- E
- F
- H
- |
- J
- M
- N
- 0
- P
- Q
- R
- S
- T
- U
- W
- Z
Brand : BABY LOCK
Model : Grace BL40A
Category : Sewing machine