
Boost Force N9100 - Mobile Phone ZTE - Free user manual and instructions
Find the device manual for free Boost Force N9100 ZTE in PDF.


| Type of Product | Mobile Phone |
| Brand | ZTE |
| Model | Boost Force N9100 |
| Dimensions (Approximate) | 145 x 72 x 10 mm |
| Weight | 150 g (with battery) |
| Power Source | Rechargeable Li-Ion battery, charger: 5V DC |
| Battery Capacity | 2500 mAh (estimated) |
| Display | Touchscreen, capacitive |
| Network | 4G LTE capable (Boost Mobile) |
| Connectivity | Wi-Fi, Bluetooth, GPS |
| Camera | Rear camera (estimated 5 MP) |
| Operating System | Android (version not specified) |
| Memory | Internal storage (approx 8 GB), microSD slot |
| Main Features | Mobile ID packs, messaging (SMS/MMS), email, contacts, calling |
| Cleaning and Maintenance | Wipe with soft dry cloth; avoid moisture |
| Safety Precautions | Do not disassemble; use only approved charger; avoid extreme temperatures |
| Spare Parts Available | Battery, charger, back cover |
| Repairability | User-replaceable battery; other repairs by qualified service |
| General Information | Supports Boost Mobile network; includes user manual on device |
Frequently Asked Questions - Boost Force N9100 ZTE
User questions about Boost Force N9100 ZTE
0 question about this device. Answer the ones you know or ask your own.
Ask a new question about this device
Download the instructions for your Mobile Phone in PDF format for free! Find your manual Boost Force N9100 - ZTE and take your electronic device back in hand. On this page are published all the documents necessary for the use of your device. Boost Force N9100 by ZTE.
USER MANUAL Boost Force N9100 ZTE
Get Started
All you need to know to get going.
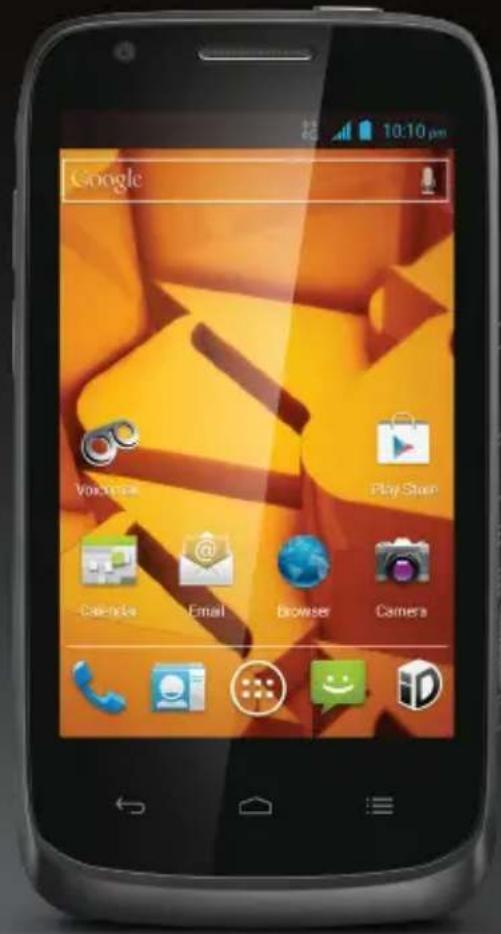
BOOST* FORCE
Your Device Features
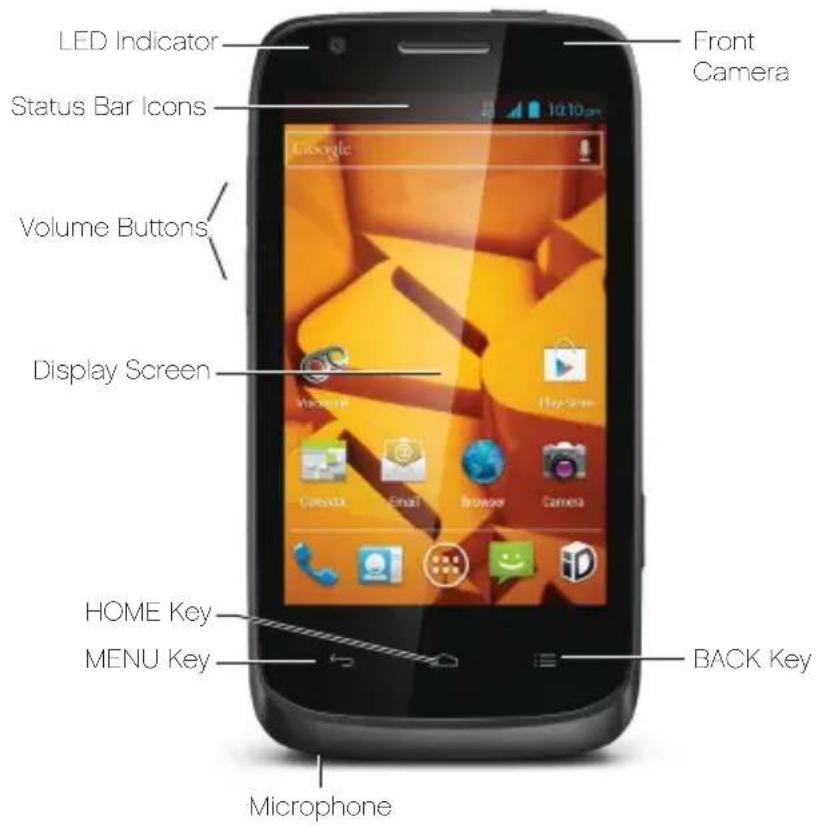
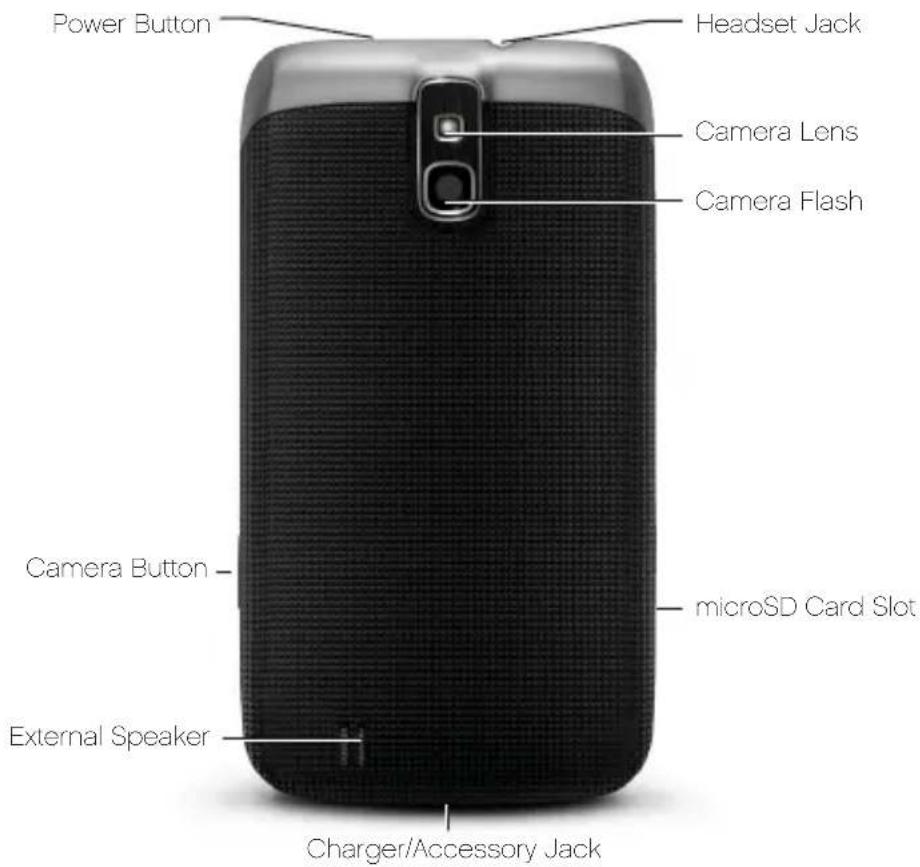
Quick Tip.
For additional device support please visit the Boost Mobile Device Support Webpage at: http://www.boostmobile.com/support/device-support/
Or access the full user guide on your device by going to:


Boost Zone > My Device > User Manual
Get Your Device Ready
Set Up Your Device
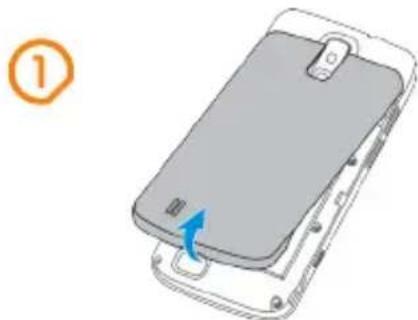
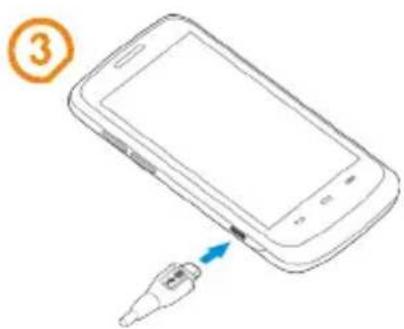
You must first install and charge the battery to begin setting up your device.
- Remove the back cover.
- Insert the battery by aligning the metal contacts on the battery with the metal contacts in the battery compartment. Gently push down on the battery until it clicks into place.
- Press the cover gently back into place until you hear a click.
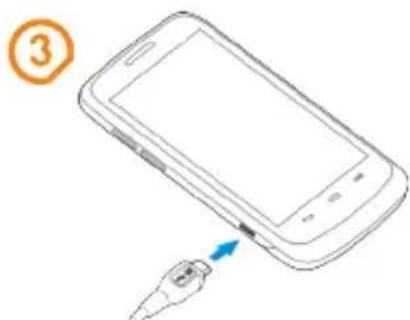
- Connect the adapter to the charger jack. Ensure that the adapter is inserted with the correct orientation. Do not force the connector into the charger jack.
- Connect the charger to a standard AC wall outlet.
- Disconnect the charger when the battery is fully charged.
natural_image
Illustration of a smartphone rear panel with a blue arrow indicating the pad or edge (no text or symbols present)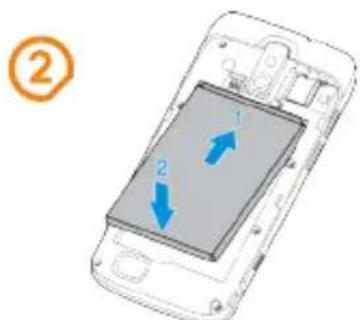
natural_image
Line drawing of a smartphone with a blue arrow pointing to its screen, labeled with number 3 (no text or symbols on the device itself)Powering On/Off
Make sure the battery is charged.
+ Press and hold the Power Key to turn on your phone.
+ To turn it off, press and hold the Power Key to open the options menu. Touch Power off and then touch OK.
Unlocking Your Phone Screen & Keys
-
Press the Power Key to turn the screen on.
-
Touch and hold 📞 at the center of the screen.
Changing the System Language
-
Touch > 📋 > ⚙️ > Settings > Language & input > Language.
-
Select the language you need.
Calling
Place a Call by Dialing
- Touch
- In the dialer tab, enter the phone number with the on-screen keypad. Touch ✉ to delete wrong digits.
- Touch the Phone icon below the keypad to dial.


Call a Contact
- Touch > and then touch the Contact tab .
- Flick the screen up or down to view all your contacts with phone numbers.
- Touch a contact or number to call it.

Contacts
Add a Contact
- Touch > and touch the all contacts tab .
- Touch 📷 to add a new contact.
- Touch the account field on the top of the screen to choose where to save the contact. If a sync account is selected, the contacts will be synced automatically with your account online.
- Enter the contact name, phone numbers, email addresses, and other information.
- Touch DONE to save the contact.

Messaging
Send a Text Message (SMS)
- Touch > > at the bottom.
- Touch the To field, and enter the recipient's number or, if the recipient is stored in People as a contact, the first letters of the recipient's name. As matching contacts appear, you can touch a suggested recipient.
- Touch the Type to compose field, and enter the contents of your text message.
- Touch
Send a Multimedia Message (MMS)
- On the Messaging screen, touch at the bottom.
- Enter the recipient and the text of the message, as you do when sending a text message.
- Touch: > Add subject to add a message subject.
- Touch the paper clip icon beside the message text box to open a menu where you can select the kind of media file to attach to the message.
Pictures: Select a picture to add to your message.
Capture picture: Take a photo and add to your message.
Videos: Select a video clip to attach to your message.
Capture video: Shoot a video clip and add to your message.
Audio: Select an audio file to add to your message.
Record audio: Record an audio file and add to your message.
Slideshow: Edit a slideshow and add to your message.
Files: Select a file to add to your message.
People: Select a contact to add to your message as an attachment.
- Touch ▶ or Send.
Add an Email Account
- Touch >>Email.
- When you open Email for the first time, enter your email address and password and then touch Next.
NOTE: Your phone will connect to the Internet and verify incoming and outgoing server settings before proceeding to the next step. If the email service provider is not a popular one, you need to select the type of your account and edit the settings for incoming and outgoing servers. Please contact your mobile service provider and email service provider for more information.
- Set the email checking frequency, download options, account name and other settings. Touch Next when you finish. Your phone will show the inbox of the email account and start to download email messages.
Compose and Send an Email
- Open your email Inbox.
- Touch to open the compose screen.
- If you have more than one email accounts added on the phone, touch the sender line to select the account you want to use for sending the message.
- Enter a contact name or email address in the To field. Separate each recipient with a comma. You can also touch to select recipients from your contacts.
- Enter the email subject and compose the email text.
- Touch: ≡ > Attach file to add audio files, images, videos and other types of files as attachment.
- Touch▶at the top right of the screen to send the message.
Download Mobile ID
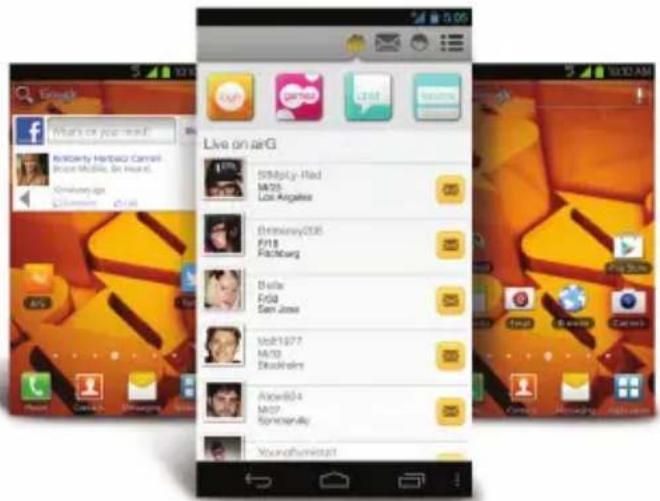
Mobile ID delivers the very best applications for your phone, handpicked by Boost, in one easy-to-use Boost ID pack – Facebook ^® , YouTube ^™ , GPS and more. Mobile ID is free to download and install.
- From the main screen, touch > Get New ID Packs.
- Touch on Boost ID.
- Touch Install and agree to the Terms & Conditions.
- Once your pack has completed downloading, it will automatically install and appear as your current Mobile ID.
- You can switch between Mobile ID packs installed on your phone by clicking on ID at the bottom of the main screen.
Tip: Before you install Mobile ID, make sure your device is activated, your battery is fully charged, and you are in a network coverage area.
Support
For additional device support:
Please visit the Boost Mobile Device Support Webpage at:
http://www.boostmobile.com/support/device-support/
Or access the full user guide on your device by going to:
Boost Zone > My Device > User Manual
http://www.boostmobile.com/support/device-support/
natural_image
Illustration of a smartphone rear panel with a blue arrow indicating the pad or switch (no text or symbols present)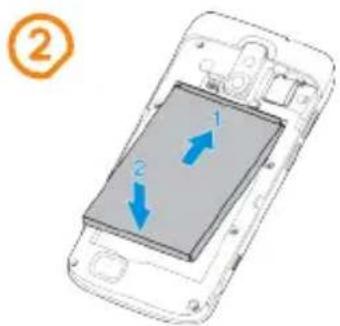
natural_image
Line drawing of a smartphone with a blue arrow pointing to its cable (no text or symbols)Encendido/Apagado
http://www.boostmobile.com/support/device-support/
BOOST® FORCE
081704100108
- Get Started
- Your Device Features
- Quick Tip.
- Get Your Device Ready
- Set Up Your Device
- Powering On/Off
- Unlocking Your Phone Screen & Keys
- Changing the System Language
- Calling
- Place a Call by Dialing
- Call a Contact
- Contacts
- Add a Contact
- Messaging
- Send a Text Message (SMS)
- Send a Multimedia Message (MMS)
- Add an Email Account
- Compose and Send an Email
- Download Mobile ID
- Support
- Encendido/Apagado
Brand : ZTE
Model : Boost Force N9100
Category : Mobile Phone