GoSafe 330 - Dash cam Papago - Free user manual and instructions
Find the device manual for free GoSafe 330 Papago in PDF.


User questions about GoSafe 330 Papago
0 question about this device. Answer the ones you know or ask your own.
Ask a new question about this device
Download the instructions for your Dash cam in PDF format for free! Find your manual GoSafe 330 - Papago and take your electronic device back in hand. On this page are published all the documents necessary for the use of your device. GoSafe 330 by Papago.
USER MANUAL GoSafe 330 Papago
natural_image
Black PAPAGO digital camera with visible lens and control buttons (no text-heavy elements)dashcam
GoSafe330
Disclaimer
Flip:
Set up flip when you install dashcam on the dashboard. This function allows the screen to auto rotate the image to correct position.
- Please follow the set-up and usage instructions in the print material that came with this Dashboard Camera (dashcam) product.
- You should not set/install this dashcam at a place that would obstruct or reduce a driver's view; make sure your usage comply with pertinent vehicle codes of your state, province, territory or country.
- You should post the required notices of recordation to occupants inside the vehicle, if voices or other information/signal pertaining to in-vehicle activities will be recorded.
- You should not change the dashcam's setting or mode of operation or when the vehicle is in motion.
- The optional driving warning signals, including any visual or audible reminding signals, should not replace your decision-making and judgment that are needed for the proper operation of the vehicle.
- You should not leave the dashcam in a visible spot when no one is inside the vehicle, to avoid attracting break-ins to steal the unit, or other property.
- You should avoid extended exposure of the dashcam to direct sunlight or extreme temperatures (either high or low temperature) which tend to degrade or damage the unit and its normal functionality.
- You should examine, check and/or verify the dashcam at least every six (6) months, including the associated memory cards, to ensure the video reception and recording are working properly. For each use, you should verify that the dashcam unit, the visible lights and the audible sounds are working normally. If there are signs of non-operation or mal-function, you should immediately seek to replace the product and check to see if the product is covered under any applicable warranty.
- The dashcam unit may have additional functionality, such as transmission and recordation of audible or GPS signal or other identification information. If you have privacy concerns about these functions, make sure you follow the instruction to disable these functions.
- You should use the dashcam unit in the way it is intended. You should not use the dashcam unit in a way that would be illegal or that tends to physically damage the unit, or tends to cause danger to the safe operation of the vehicle or the occupants.
Attention please
【About Usage】
① To save your power and avoid accidents, if vehicles still provide power after leaving car, please be aware to release the charger.
② The embedded Supercapacitors can help to save your record file even if power off.
③ To avoid breaking down the file recorded, don't plug out the Micro SD Card immediately after powering off.
④ We suggest using adapter provided.
⑤ To enable detecting and monitoring function, the power supplier must be enabled.
① Please use Micro SD card with the size / memory at least 8GB, Class 6 (up to 32GB).
② Be sure to format Micro SD card before usage.
③ The following information is the card capacity and recording time. (reference only)
| Micro SD Card | 1080P 30fps |
| 8GB | 100min |
| 16GB | 200min |
| 32GB | 400min |
* Product feature may change by different area without notice.
1. Product Introduction
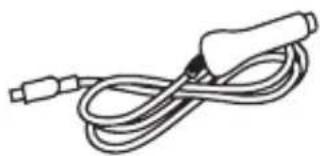
1.1 Package Contents
To check the items in your package with the list below. If any of the below items is damaged or missing, contact your retailer.
① Device
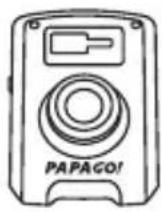
② Cradle

③ Car Charger
natural_image
Line drawing of a medical or laboratory device with coiled tubing and connectors (no text or symbols)④ quick start guide

⑤ warranty card

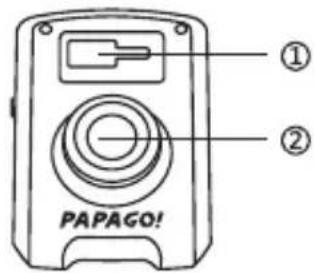
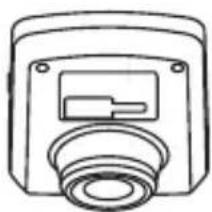
1.2 Driving Recorder Overview
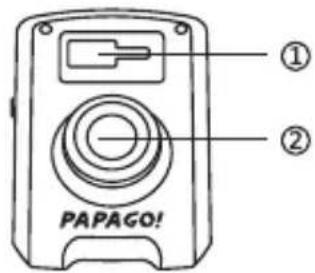
Front view
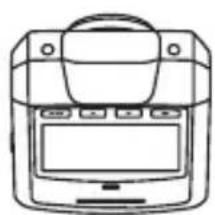
Back view

① Cradle Locker
② Camera
③ LED
④ Speaker
⑤ Microphone
⑥ Display
⑦ Buttons
⑧ Power Switch
⑨ Mini USB
⑩ HDMI
⑪ SD Slot
⑫ AV Out
Left view

Right view

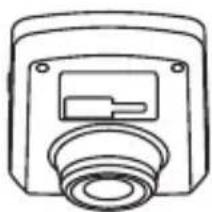
Top view
natural_image
Simple line drawing of a camera or sensor device with no text or symbolsBottom view

natural_image
Line drawing of a vintage electronic device with a front panel and screen (no text or symbols)2. Installation and removal
2.1 Location


DO NOT place products within the working area of safety bag. We are not responsible to any damage cause of safety bag issue or incorrect placement of the device or safety bag.
① To have a better view, try to install in the center of the windshield.
② Make sure the lens is located at the place which wiper can clean.
③ Make sure the device is not installed at the place where it will interfere safety bag.
④ Make sure the device will not be interfered by the sun control film.
⑤ Clean the place before sticking the device, and DO NOT move the device within 24 hours.
2.2 Installation

natural_image
Diagram of a car rearview mirror and vehicle inside a vehicle (no text or symbols)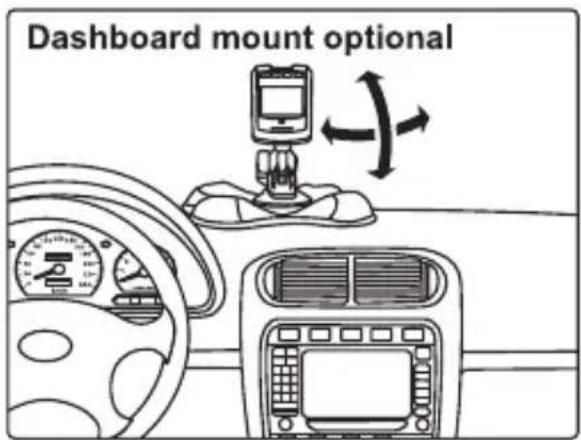
① To hold Recorder and Cardle by your hands, and to slide the head of Cardle into the slot on the Recorder
② Choice place suitable for installation and make sure with the best view.
③ It's best to see the car in the middle of the view and you can adjust it by changing capture angle.
* Product appearance may change by different model without notice.
3. Start and Go
3.1 Power On
Insert car charger cable into car-use cigarette lighter and mini USB port. Plug thr Micro SD Card into Micro SD Card slot. After tuning on, the system will start recording automatically(C), and LED turns red.
3.2 Power Off
Hold down the power button at least 5 seconds to turn off machine as power on.
To avoid breaking down the file recorded, don't plug out sdcard immediately after powering off.
Hold down the power button at least 3 seconds to turn on machine as power off.
3.3 LED
| LED Color | Behavior |
| Green | Power ON, not Recording |
| Red | Power ON, Recording |
| Two Flash Red | Event:1 Auto backup on impact.2 Old record files will be replaced due to the Micro SD Card full. |
| Flashing Red | Can't Record:1 Micro SD Card can't be written.2 Micro SD Card full.3 Micro SD Card format error.4 The other problem, recommend to format the Micro SD Card. |
3.4 Buttons
| Buttons | Behavior |
 | Recording mode : Enter Emergency modePlaylist : Back to previous menuReplay/Setting : Back to camera mode. |
 | Recording mode : Enter playlist.Playlist/Setting : UpwardReplay mode : Delete |
 | Recording mode : One short click can enter setting menu.One long click can snapshot.Playlist/Setting : DownwardReplay mode : Back to previous menu |
 | Recording mode : One short click to turn on/off screen.One long click to turn on/off record volumePlaylist/Setting : ConfirmReplay mode : Pause/Resume |
 | Power button: To turn on/off device |
3.5 Recording

- Record indicator
00:15 Record time

Record resolution

No record sound

Emergency indicator 4/10 Emergency files/reserve files
4. Record/Play/Delete record Snapshot function
4.1 Circulation video recording
① It will start circulation video recording after powering on with the Micro SD Card plugged in.
② Each circulation video recording file is 5 minutes, and the old one will be replaced as Micro SD Card full.
4.2 Emergency recording
① Non-auto backup
Hold down the button ⚠️, to backup without file being rewritten.
② Auto backup
It will auto backup without file being rewritten as Colliding with G-Sensor activating.
③ It provide 10 sets for protected files.


flowchart
graph LR
    A["Emergency Buton"] --> B["Cancel Rewrite File"]
    B --> C["Writing Emergency files"]
    D["ON/OFF"] --> E["3 min"]
    E --> F["4 min"]
    F --> G["5 min"]
    G --> H["6 min"]
    I["0 min"] --> J["1 min"]
    J --> K["2 min"]
    K --> L["3 min"]
    L --> M["4 min"]
    M --> N["5 min"]
    N --> O["6 min"]
    P["CYCLE RECORDING"] --> Q["Time axis 0-3"]
    R["If the power is shut down when backup files, system will cancel the backup and save the file as flag file. The system will continue to backup this flag when the engine starts next times."] --> S
4.3 Snapshot
① Hold down ▼ 3 seconds to snapshot as recording mode.
② The snapshot files are located at the folder in Micro SD card:\REC\100MEDIA, as the video files located.
③ The icon will be shown as succeeding snapshot, and it will not disturb recording mode.
4.4 Cop files by USB connection
① Connect driving recorder and PC by USB cable, it will be recognized as "removable device" in PC.
② There are two folders \REC\100MEDIA ( circulation video recording files ) and \EmgRec ( emergency video recording files ) on the "removable device".
③ Copy what you needed to PC.
4.5 Copy files from Micro SD Card
① Shutting down driving recorder and plug out Micro SD Card.
② Plug Micro SD Card into Micro SD Card reader and the "removable device" will be recognized.
③ Enter the "removable device" and copy what you needed to PC.
4.6 Play/Delete video or photo
① Hold down ▲ to enter playlist mode as recording.
② Choice type : emergency files type, circulation video recording files type (including photo files)
③ Choice file and enter browsing mode.
④ Click ▲ To delete the file.
5. Reference
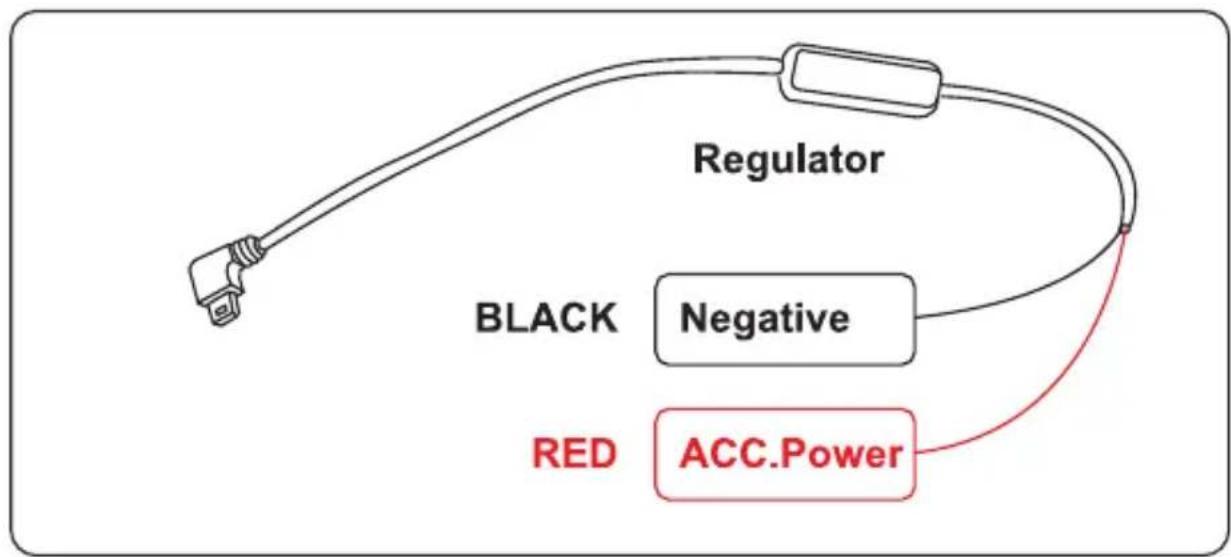
How to connect car charger to vehicle battery.
* Beware: this is NOT in the warranty.
① Cut car charger cable in the front, be sure leave the regulator.
② Connect red line to ACC side, and connect black line to negative of battery.
flowchart
graph TD
    A["Regulator"] --> B["BLACK"]
    A --> C["Negative"]
    A --> D["RED"]
    A --> E["ACC.Power"]
本機使用注意事項
【使用相關】
natural_image
Line drawing of a medical or laboratory device with coiled tubing and connectors (no text or symbols)1.2 主機介面
前視圖
後視圖

頂視圖

natural_image
Simple line drawing of a camera or sensor device with no text or symbols底視圖
natural_image
Line drawing of a vintage electronic device with a front panel and screen (no text or symbols)2. 安装與拆卸
2.1 安装位置

natural_image
Diagram of a car rearview mirror and vehicle inside a vehicle (no text or symbols)
00:15 錄影時間
緊急錄影狀態
FULL HD 影像解析度
4/10 緊急錄影空間
natural_image
Line drawing of a medical or laboratory device with coiled tubing and connectors (no text or symbols)④ Manual de usuario
Vista Arriba

natural_image
Simple line drawing of a mechanical component with no text or symbolsVista Abajo

natural_image
Line drawing of a vintage digital device with a screen and top panel (no text or symbols)natural_image
Diagram of a car interior showing a vehicle mounted on a mirror, with directional arrows indicating motion (no text or symbols)
natural_image
Line drawing of a medical or laboratory device with coiled tubing and connectors (no text or symbols)④ Manual do usuário

Vista Superior

natural_image
Line drawing of a mechanical device with a central button and circular base (no text or symbols)Vista Inferir

natural_image
Line drawing of a vintage digital device with a top panel and front panel (no text or symbols)natural_image
Diagram of a car interior showing a vehicle mounted on a mirror, with directional arrows indicating movement or rotation (no text or symbols present)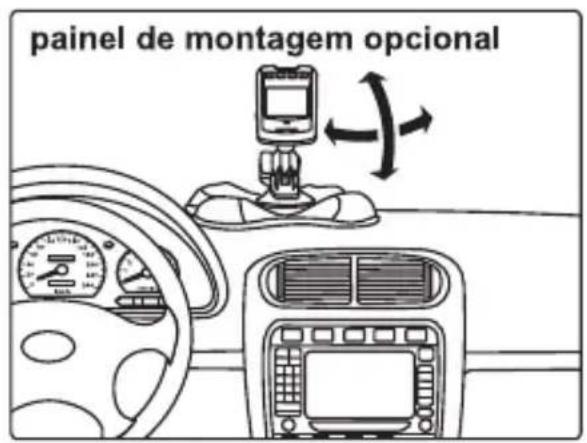
natural_image
Line drawing of a medical or laboratory device with coiled tubing and connectors (no text or symbols)Vue du dessus
natural_image
Simple line drawing of a camera or sensor device with no text or symbolsVue du dessous

natural_image
Line drawing of a vintage electronic device with front panel and screen (no text or symbols)natural_image
Diagram of a car rearview mirror with directional arrows indicating motion (no text or symbols)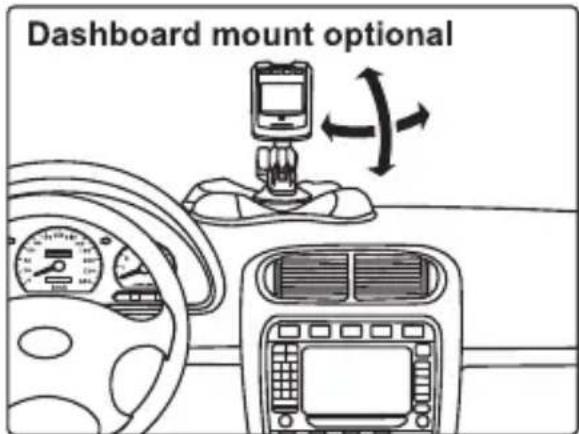


- Disclaimer
- Flip:
- Attention please
- 【About Usage】
- Product Introduction
- Package Contents
- Driving Recorder Overview
- Installation and removal
- Location
- Installation
- Start and Go
- Power On
- Power Off
- LED
- Buttons
- Recording
- Record/Play/Delete record Snapshot function
- Circulation video recording
- Emergency recording
- Snapshot
- Cop files by USB connection
- Copy files from Micro SD Card
- Play/Delete video or photo
- Reference
- 本機使用注意事項
- 【使用相關】
- 主機介面
- 安装與拆卸
- 安装位置
Brand : Papago
Model : GoSafe 330
Category : Dash cam