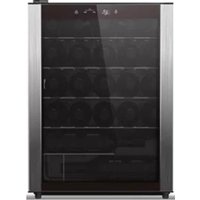
MWR02FLSFSC - Wine cellar GE - Free user manual and instructions
Find the device manual for free MWR02FLSFSC GE in PDF.


| Product Type | Wine Cellar |
| Brand | GE |
| Model | MWR02FLSFSC |
| Capacity | Up to 18 standard bottles |
| Temperature Range | 40°F - 65°F (adjustable) |
| Cooling System | Thermoelectric (vibration-free) |
| Shelves | 4 sliding wooden shelves |
| Interior Light | LED light (soft glow) |
| Door Type | Double-pane glass door with UV protection |
| Door Lock | Yes, with key |
| Dimensions (H x W x D) | 17.5 x 21.5 x 21.5 inches |
| Weight | 45 lbs |
| Power Source | 115V AC, 60Hz |
| Power Consumption | 150W (typical) |
| Noise Level | < 42 dB |
| Installation | Undercounter or freestanding |
| Control Type | Digital touch controls |
| Defrost | Automatic |
| Warranty | 1 year limited |
| Certifications | ETL listed |
Frequently Asked Questions - MWR02FLSFSC GE
User questions about MWR02FLSFSC GE
0 question about this device. Answer the ones you know or ask your own.
Ask a new question about this device
Download the instructions for your Wine cellar in PDF format for free! Find your manual MWR02FLSFSC - GE and take your electronic device back in hand. On this page are published all the documents necessary for the use of your device. MWR02FLSFSC by GE.
USER MANUAL MWR02FLSFSC GE
Safety Instructions....2,3
Installation Instructions.....4
Operating Instructions
Control Settings 5
Care and Cleaning 6
Troubleshooting Tips ..... 8, 9
Consumer Support
Product Registration....11
Warranty 13
Consumer Support 14
Write the model and serial
numbers here:
Model # ____
Serial #
Find these numbers on the Rating Plate located either inside the or outside on the rear wall of the Wine Chiller.
Owner's Manual and Installation
MWR02

natural_image
Line drawing of a simple refrigerator with glass door and handle (no text or symbols)⚠ WARNING!
Use this appliance only for its intended purpose as described in this Owner's Manual.

SAFETY PRECAUTIONS
When using electrical appliances, basic safety precautions should be followed, including the following:
This wine chiller must be properly installed and located in accordance with these instructions before it is used.
Do not allow children to climb, stand or hang on the shelves in the wine chiller. They could damage the wine chiller and seriously injure themselves.
Do not store or use gasoline or other flammable vapors and liquids in the vicinity of this or any other appliance.
- Keep fingers out of the "pinch point" areas; clearances between the doors and between the doors and cabinet are necessarily small. Be careful closing doors when children are in the area.
■ Unplug the wine chiller before cleaning and making repairs.
NOTE: We strongly recommend that any servicing be performed by a qualified individual.
- Do not store or install this appliance outdoors.
▲ DANGER! RISK OF CHILD ENTRAPMENT
PROPER DISPOSAL OF THE WINE CHILLER

Child entrapment and suffocation are not problems of the past. Junked or abandoned refrigeration products are still dangerous... even if they will sit for "just a few days." If you are getting rid of your old appliance, please follow the instructions below to help prevent accidents.
Before You Throw Away Your Old Refrigeration Product:
Take off the doors.
Leave the shelves in place so that children may not easily climb inside.
CFC Disposal
Your old refrigerator has a cooling system that used CFCs (chlorofluorocarbons). CFCs are believed to harm stratospheric ozone.
If you are throwing away your old refrigerator, make sure the CFC refrigerant is removed for proper disposal by a qualified servicer. If you intentionally release this CFC refrigerant, you can be subject to fines and imprisonment under provisions of environmental legislation.

USE OF EXTENSION CORDS
Because of potential safety hazards under certain conditions, we strongly recommend against the use of an extension cord.
However, if you must use an extension cord, it is absolutely necessary that it be CSA certified, 3-wire grounding type appliance extension cord having a grounding type plug and outlet and that the electrical rating of the cord be 15 amperes (minimum) and 120 volts.

HOW TO CONNECT ELECTRICITY
Do not, under any circumstances, cut or remove the third (ground) prong from the power cord. For personal safety, this appliance must be properly grounded.
The power cord of this appliance is equipped with a 3-prong (grounding) plug which mates with a standard 3-prong (grounding) wall outlet to minimize the possibility of electric shock hazard from this appliance.
Have the wall outlet and circuit checked by a qualified electrician to make sure the outlet is properly grounded.
If you have only a standard 2-prong wall outlet, it is your personal responsibility and obligation to have it replaced with a properly grounded 3-prong wall outlet.
The wine chiller should always be plugged into its own individual electrical outlet which has a voltage rating that matches the rating plate.
This provides the best performance and also prevents overloading house wiring circuits which could cause a fire hazard from overheated wires.
Never unplug your wine chiller by pulling on the power cord. Always grip plug firmly and pull straight out from the outlet.
Repair or replace immediately all power cords that have become frayed or otherwise damaged. Do not use a cord that shows cracks or abrasion damage along its length or at either end.
When moving the wine chiller away from the wall, be careful not to roll over or damage the power cord.

USE OF ADAPTER PLUGS
Adapter plugs are not permitted in Canada.

READ AND FOLLOW THIS SAFETY INFORMATION CAREFULLY.
SAVE THESE INSTRUCTIONS
Installing the wine chiller.
Removing the Packaging
Before using the wine chiller, be sure all packing materials and tape have been removed, including any protective film covering the control and any film protecting the cabinet.
If you are discarding an old refrigeration product, remove the doors to reduce the danger of children being trapped inside.
Installation Guidelines
The wine chiller must be freestanding.
- Allow the following clearances for ease of installation, proper air circulation and electrical connections:
Each side 2" (51 mm)
Top 2" (51 mm)
Back 3" (51 mm)
Before connecting the appliance to the power source, let it stand upright for approximately 2 hours. This will reduce the possibility of a malfunction in the cooling system from handling during transportation.
Do not install the wine chiller where the temperature will go below 55irc F ( 13irc C) or above 90irc F ( 32irc C).
- Install it on a level floor.
Do not install the wine chiller where it will be subject to direct sunlight, heat or moisture.
- Do not store or install this appliance outdoors.

natural_image
Pure mechanical diagram showing a lever and curved arrow without any text or symbolsTo raise the wine chiller
Leveling Legs
Adjustable legs at the front corners of the wine chiller should be set so the wine chiller is firmly positioned on the floor, with a 1/8" (3 mm) tilt to the back to help the door closure.
To adjust the leveling legs, turn the legs clockwise to raise the wine chiller, counterclockwise to lower it.
Loading the Wine
As with any refrigeration product, there is a slight temperature variance at different locations within the cabinet. In this wine chiller, the lower shelves provide a slightly cooler temperature than the upper shelves.
When storing both red and white wines, it is best to store the white wine on the lower shelves where the temperature is slightly cooler.

Setting the Temperature Control
Display Panel


You can set the temperature as you desire by pushing the button (Up) or (Down). When you push the two buttons for the first time, the LED readout will show the original temperature set at the factory (the temperature preset at the factory is 50°F/10°C).
Temperature Display Panel (Wine Types)
RED
WHITE
SPARKL

The temperature that you desire to set will increase 1irc F ( 0.5irc C) if you push the once. The temperature will decrease 1irc F ( 0.5irc C) if you push the once.
SPARKL: 41-45°F (5-7°C)
WHITE: 46-54°F (8-12°C)
RED: 55-65°F (13-18°C)
When the Wine Chiller is Plugged In
After plugging in the wine chiller and making your temperature selection, allow the wine chiller to reach the set temperature before loading your wine. This may take up to 12 hours to completely stabilize.
Power Button
The Power button turns the cooling system off.
Lock/Unlock Key Button
Pressing the lock/unlock key, 1 min later the keyboard will be locked not including the key.
After loading the wine, you may notice a rise in the temperature. Allow adequate time for the temperature to return back to the set temperature. This may take up to 12 hours to completely stabilize.
There are 2 short "ding" sounds when locked. Press ⏻ for one second to unlock. There is a one second long "ding" when unlocked.
Interior Light
You can turn the interior light on or off by pushing the button.
Important:
Initially, the temperature defaults to 50irc F ( 10irc C) factory setting. When it restarts (ie. after a power failure), it will default back to factory the factory setting.
In order to extend the compressor life, please restart wine cooler after waiting 3 minutes.
Malfunction indicators:
Sensor problem show E1; Self diagnostic error show E3; Communication problem show E4; Too cold in cabinet show L.
In this condition, a buzzer will hum for one second every 30 seconds.
Call for service if any of the above error messages show.
You should touch the temperature control panel softly as the panel is touch screen control. Please protect the touch control panel carefully to avoid scratching, keep far away from strong magnetic fields and high humidity, or it can cause wine cooler to not work properly.
Care and cleaning.
Cleaning the Outside
IMPORTANT: Unplug the wine chiller before cleaning.
Keep the outside clean. The cabinet can be washed with mild soap and water. Rinse thoroughly with clear water.
Never use abrasive scouring powders.
Use a glass cleaner or mild soap and water and a soft cloth to clean the glass door. Do not use any abrasive powders.
Wipe the control panel with a damp cloth. Dry thoroughly. Do not use cleaning sprays, large amounts of soap and water, abrasives or sharp objects on the panel—they can damage it. Some paper towels can also scratch the control panel.
Do not wipe the wine chiller with a soiled dishcloth or towel. These may leave a residue that can erode the paint. Do not use scouring pads, powdered cleaners, bleach or cleaners containing bleach because these products can scratch and weaken the paint finish.
Stainless steel. Regularly clean and polish the stainless steel areas (on some models) with a commercially available stainless steel cleaner such as Gleem-it ® to preserve and protect the fine finish. Gleem-it ® is available at leading hardware stores. It is also available by calling 1.888.261.3055. Order part number WX10X15.
Do not use appliance wax or polish on the stainless steel.
Protect the paint finish. The finish on the outside of the wine chiller is a high-quality, baked-on paint finish. With proper care, it will stay new-looking and rust-free for years. Apply a coat of kitchen/appliance wax when the wine chiller is new, and then at least twice a year.
Cleaning the Inside
IMPORTANT: Unplug the wine chiller before cleaning.
To clean the inner liner and racks, use a warm water and baking soda solution—about one tablespoon (15 mL) of baking soda to a quart (1 liter) of water. This both cleans and neutralizes odors. Rinse and wipe dry.
The vinyl door gasket may be cleaned with mild soap and water or a baking soda solution. Rinse well.
Do not use detergents, scouring powders, spray cleaners or other harsh chemicals to clean the interior.
Defrosting
Defrost whenever frost on the inside surfaces of the storage area becomes 1/8" (3 mm) thick.
Never use a heater of any kind, scraper or sharp instrument to remove frost as it may damage the wine chiller.
To defrost, unplug the wine chiller. Remove the contents and wipe inside surfaces and
racks with a clean towel. If frost does not come off easily, allow the frost to melt somewhat and wipe off.
After defrosting, make sure inside surfaces are dry; then return the contents to the wine chiller and set the temperature control to the desired setting.
In the Event of a Power Failure
If the power fails, open the door as infrequently as possible to maintain the temperature. A gradual rise in temperature should not have any adverse effect on the wine.
If it is extremely hot, you may want to unload the wine from the wine chiller and move the wine to a cooler location until power is restored.
When power is restored, the controls automatically are set to the Factory Setting 50°F (10°C). If needed, reset the controls to the desired setting.
Care and cleaning.
Vacation Time
■ Short vacations: Leave the Wine/ Beverage Cooler operating during vacations of less than three weeks.
- Long vacations: If the appliance will not be used for several months, remove
all items and unplug the power cord. Clean and dry the interior thoroughly. To prevent odor and mold growth, leave the door open slightly: blocking it open if necessary.
Preparing to Move
Unload the wine, then secure the racks and door by taping them in place to prevent damage.
Turn the adjustable leveling legs up to the base to avoid damage.
Be sure the wine chiller stays in an upright position during the move.
Energy Saving Tips
The Wine/Beverage Cooler should be located in the coolest area of the room, away from heat producing appliances, and out of the direct sunlight.
■ Try not to open the door too often, especially when the weather is wet or hot. Once you open the door, mind to close it as soon as possible.
This appliance is intended to be used exclusively for the storage wine.
■ Every now and then check if the appliance is sufficiently ventilated (adequate air circulation behind the appliance).
For wine storage appliances, please arrange the temperature following the instruction: SPARKLE: 41-45°F (5-7°C), WHITE: 46-54°F (8-12°C), RED: 55-65°F (13-18°C).
LED Refrigerator Lights
An authorized technician will need to replace the LED light
Before you call for service...

Troubleshooting Tips
Save time and money! Review the charts on the following
pages first and you may not need to call for service.
Problem Possible Causes What To Do
| Wine chiller does not operate and the display is blankthe fuse is blown. | Wine chiller is unplugged. | Push the plug completely into the outlet. |
| The circuit breaker is tripped/the fuse is blown. | Replace fuse or reset the breaker. | |
| Vibration or rattling(slight vibration uneven surface.is normal) | Wine chiller is on an surface. | See the Leveling Legs section. |
| The Wine/Beverage The rattling noise may come Cooler seems to make from the flow of the refrigerant,too much noise. | As each cycle ends, you may hear gurgling sounds caused by the flow of refrigerant in your Wine/ Beverage Cooler. | |
| Contraction and expansion of the inside walls may cause popping and crackling noises. | ||
| The Wine/Beverage Cooler is not level. | ||
| Motor operates for long periods or cycles | Normal when wine chiller is first plugged in. | Wait 12 hours for the wine chiller to completely cool down. |
| Often occurs when large amounts of wine are placed in wine chiller. | This is normal. | |
| Door left open. | Door is not self-closing. Always make sure that the door is closed after opening.Check to see if a bottle is holding door open. | |
| Hot weather or frequent door openings. | This is normal. | |
| Temperature control set at the coldest setting. | See About the control and settings. | |
| Wine chiller is too close to the wall. | See the Installation Guidelines section for the correct clearances. | |
| Wine chiller too warm | Normal when wine chiller is first plugged in. | Wait 12 hours for the wine chiller to completely cool down. |
| Often occurs when large amounts of wine are placed in wine chiller. | This is normal. | |
| Temperature control not set cold enough. | See About the control and settings. | |
| Warm weather or frequent door openings. | Set the temperature control one step colder.See About the control and settings. | |
| Wine chiller is too close to the wall. | See the Installation Guidelines section for the correct clearances. |
The Wine/Beverage The rattling noise may come Cooler seems to make from the flow of the refrigerant, too much noise. which is normal.
| As each cycle ends, you may hear gurgling sounds caused by the flow of refrigerant in your Wine/ Beverage Cooler. | ||
| Contraction and expansion of the inside walls may cause popping and crackling noises. | ||
| The Wine/Beverage Cooler is not level. | ||
| Motor operates for long periods or cycles | Normal when wine chiller is first plugged in. | ·Wait 12 hours for the wine chiller to completely cool down. |
| Often occurs when large amounts of wine are placed in wine chiller. | ·This is normal. | |
| Door left open. | ·Door is not self-closing. Always make sure that the door is closed after opening. ·Check to see if a bottle is holding door open. | |
| Hot weather or frequent door openings. | ·This is normal. | |
| Temperature control set at the coldest setting. | ·See About the control and settings. | |
| Wine chiller is too close to the wall. | ·See the Installation Guidelines section for the correct clearances. | |
| Wine chiller too warm | Normal when wine chiller is first plugged in. | ·Wait 12 hours for the wine chiller to completely cool down. |
| Often occurs when large amounts of wine are placed in wine chiller. | ·This is normal. | |
| Temperature control not set cold enough. | ·See About the control and settings. | |
| Warm weather or frequent door openings. | ·Set the temperature control one step colder. See About the control and settings. | |
| Wine chiller is too close to the wall. | ·See the Installation Guidelines section for the correct clearances. | |
Before you call for service...
| Problem Possible Causes What To Do | ||
| Wine chiller too warm door is closed after opening. | Door left open. | • Door is not self-closing. Always make sure that the |
| • Check to see if a bottle is holding door open. | ||
| may have occurred. | If the temperature setting is not showing what you last selected, a power outage | • When the power came back on, the wine chiller returned to the default setting, which is 50ircF (10ircC) . Reset the control to the desired setting. |
| Wine chiller has odor | Interior needs cleaning. | • See Care and cleaning. |
| Moisture forms on outside of wine chiller | Not unusual during periods of high humidity. | • Wipe surface dry. |
| Moisture collects inside (in humid weather, air carries moisture into wine chiller when the back wall, door is opened) | Too frequent or too long door openings. | |
| Wine bottles touching | • Reposition bottles. | |
| Frost forms on interior surfaces of wine chiller | This is normal. | • See the Defrosting section. |
| Door left open. | • Excessive frost may form if the door is left open. | |
| See the Defrosting section. | ||
| • Door is not self-closing. Always make sure that the door is closed after opening. | ||
| • Check to see if a bottle is holding door open. | ||
| Wine chiller too cold is set too cold. | Temperature control | • See About the control and settings. |
| may have occurred. | If the temperature setting is not showing what you last selected, a power outage | • When the power came back on, the wine chiller returned to the default setting, which is 50ircF (10ircC) . Reset the control to the desired setting. |
| The room temperature where the wine chiller is located is too cold. | • For proper operation, the room temperature should be equal to or greater than the set temperature of the wine chiller. | |
| Temperature in the display is not the temperature that was just set. | This is normal. | • After you set the temperature, the display will go back to showing the actual temperature. |
| Condensation on front of door | Wine chiller is located in a high humidity environment. | • Wipe off the condensation with a clean, dry cloth. • Locate the wine chiller in a lower humidity environment. |
| Water on floor behind wine chiller | Door left open. door is closed after opening. • Check to see if a bottle is holding door open. | • Door is not self-closing. Always make sure that the |
| The door will not close properly | The Wine/Beverage Cooler is not level. | |
| The door was reversed and not properly installed. | ||
| The gasket is dirty. | ||
| The shelves are out of position. | ||
Please place in envelope and mail to:
For Canadian Customers

Wine Chiller Warranty.

All warranty service provided by our Factory Service Centers, or an authorized Customer Care® technician. For service call 1-800-561-3344.
Proof of the original purchase date is needed to obtain service under warranty.
| For The Period Of: | Mabe Will Replace: |
| One YearFrom the date of the original purchase | Any part of the wine chiller which fails due to a defect in materials or workmanship. During this limited one-year warranty, Mabe will also provide, free of charge, all labour and service to replace the defective part. |
What Mabe Will Not Cover:
■ Service trips to your home to teach you how to use the product.
■ Improper installation.
- Failure of the product if it is abused, misused, or used for other than the intended purpose or used commercially.
■ Loss of wine due to spoilage.
■ Replacement of house fuses or resetting of circuit breakers
■ Damage to the product caused by accident, fire, floods or acts of God.
In-home warranty service will be provided in areas where it is available and deemed reasonable by Mabe to provide.
■ Incidental or consequential damage to personal property caused by possible defects with this appliance.
Please read your Use & Care Material:
If you then have any questions about operating the product, please contact your dealer or our Consumer Affairs office at the address below, or call toll free: Mabe Canada Inc. 1-800-561-3344 Consumer Information Service
This warranty is extended to the original purchaser and any succeeding owner for products purchased in Canada for home use within Canada. If the product is located in an area where service by a Mabe Authorized Servicer is not available, you may be responsible for a trip charge or you may be required to bring the product to an Authorized Mabe Service location.
Some provinces do not allow the exclusion or limitation of consequential damages, so the above limitation or exclusion may not apply to you. This warranty gives you specific legal rights, and you may also have other rights which vary from province to province. To know what your legal rights are in your province, consult your local or provincial consumer affairs office.
Warrantor Mabe Canada Inc.
If further help is needed concerning this warranty, write;
Consumer Relations Manager - Mabe Canada Inc.
1 Factory Lane, Suite 310, Moncton NB E1C 9M3
Service Telephone Numbers

In-Home Repair Service 1-800-561-3344
Expert Mabe repair service is only a phone call away.

Parts and Accessories 1-800-263-0686
Individuals qualified to service their own appliances can have parts or accessories sent directly to their homes.
Instructions contained in this manual cover procedures to be performed by any user. Other servicing generally should be referred to qualified service personnel. Caution must be exercised, since improper servicing may cause unsafe operation.

Service Satisfaction
If you are not satisfied with the service you receive from Mabe, follow these steps. First, contact the people who serviced your appliance. Next, if you are still not pleased, write all the details—including your phone number-to:
Manager, Consumer Relations,
Mabe Canada Inc., Suite 310, 1 Factory Lane,
Moncton (N.-B.) E1C 9M3
Moffat Appliances Website www.MoffatAppliances.ca
Have a question or need assistance with your appliance? Try the Moffat Appliances Website 24 hours a day, any day of the year! For greater convenience and faster service, you can now download Owner's Manuals, order parts, catalogs.


- Operating Instructions
- Consumer Support
- ⚠ WARNING!
- SAFETY PRECAUTIONS
- ▲ DANGER! RISK OF CHILD ENTRAPMENT
- PROPER DISPOSAL OF THE WINE CHILLER
- Before You Throw Away Your Old Refrigeration Product:
- CFC Disposal
- USE OF EXTENSION CORDS
- HOW TO CONNECT ELECTRICITY
- USE OF ADAPTER PLUGS
- Installing the wine chiller.
- Removing the Packaging
- Installation Guidelines
- Leveling Legs
- Loading the Wine
- Setting the Temperature Control
- Display Panel
- Temperature Display Panel (Wine Types)
- RED
- WHITE
- SPARKL
- When the Wine Chiller is Plugged In
- Power Button
- Lock/Unlock Key Button
- Interior Light
- Important:
- Care and cleaning.
- Cleaning the Outside
- IMPORTANT: Unplug the wine chiller before cleaning.
- Cleaning the Inside
- Defrosting
- In the Event of a Power Failure
- Vacation Time
- Preparing to Move
- Energy Saving Tips
- LED Refrigerator Lights
- Before you call for service...
- Wine Chiller Warranty.
- What Mabe Will Not Cover:
- Please read your Use & Care Material:
- Warrantor Mabe Canada Inc.
- Service Telephone Numbers
Brand : GE
Model : MWR02FLSFSC
Category : Wine cellar