
MX-M450N - Printer SHARP - Free user manual and instructions
Find the device manual for free MX-M450N SHARP in PDF.


| Product Type | Digital Multifunction Copier (Printer, Copier, Scanner, optional Fax) |
| Model | MX-M450N |
| Brand | Sharp |
| Functions | Copy, Print, Scan, Fax (optional), Document Filing |
| Copy Speed | Up to 45 copies per minute |
| Print Speed | Up to 45 pages per minute |
| Duplex Printing | Automatic with optional Duplex Module |
| Paper Capacity (Standard) | 500 sheets in Tray 1 |
| Paper Capacity (Maximum) | Up to 3000 sheets with optional drawers |
| Supported Paper Sizes | 11x17, A3, A4, B5, and more (inch and AB systems) |
| Supported Paper Weight | 16 to 28 lbs (plain), special papers up to 110 lbs cover stock |
| Scan Resolution | 600 x 600 dpi (with optional Network Scanner Kit) |
| Print Resolution | 600 x 600 dpi |
| Connectivity | 10/100 Base-T Ethernet (standard on N models) |
| Network Protocol | TCP/IP, IPP, FTP, SMTP, POP3 |
| Toner Cartridge | Replaceable drum/toner cartridge |
| Maintenance | User replaceable toner, cleaning of document glass and charger |
| Safety | Class 1 Laser Product, FCC Class A, Ozone emission within safe limits |
| Operating Systems Supported | Windows, Mac OS (with optional PostScript kit) |
| Document Filing | Standard on N models (stores documents on internal hard disk) |
| Optional Accessories | Finisher, Saddle Stitch Finisher, Document Feeder, Paper Drawers, Fax Kit, Network Scanner Kit |
Frequently Asked Questions - MX-M450N SHARP
User questions about MX-M450N SHARP
0 question about this device. Answer the ones you know or ask your own.
Ask a new question about this device
Download the instructions for your Printer in PDF format for free! Find your manual MX-M450N - SHARP and take your electronic device back in hand. On this page are published all the documents necessary for the use of your device. MX-M450N by SHARP.
USER MANUAL MX-M450N SHARP
MX-M350U MX-M450U MX-M350N MX-M450N
LASER PRINTER
OPERATION MANUAL
(for general information and copier operation)
Page
PART 1: GENERAL INFORMATION
- BEFORE USING
THE PRODUCT 1-1
• MANAGING THE MACHINE ..... 2-1
• PERIPHERAL DEVICES .... 3-1
Be sure to become thoroughly familiar with this manual to gain the maximum benefit from the product.
Before installing this product, be sure to read the installation requirements and cautions sections.
Be sure to keep all operation manuals handy for reference including this manual, the "Operation manual (for general information and copier operation)" and operation manuals for any optional equipment which has been installed.
Each instruction also covers the optional units used with these products.
The power switch positions are marked "I" to indicate power "ON" and "☐" to indicate stand-by.
Caution:
For complete electrical disconnection, pull out the main plug.
The socket-outlet should be installed near the equipment and should be easily accessible.
To protect against loss or theft, record and retain for reference the machine's serial number located on the back of the unit.
Model Number ____
Serial Number ____
Date of Purchase
Place of Purchase ____
Authorized Sharp Copier
Service Department Number ____
For users in the USA
This device complies with Part 15 of the FCC Rules. Operation is subject to the following two conditions: (1) This device may not cause harmful interference, and (2) this device must accept any interference received, including interference that may cause undesired operation.
WARNING:
FCC Regulations state that any unauthorized changes or modifications to this equipment not expressly approved by the manufacturer could void the user's authority to operate this equipment.
Note:
This equipment has been tested and found to comply with the limits for a Class A digital device, pursuant to Part 15 of the FCC Rules. These limits are designed to provide reasonable protection against harmful interference when the equipment is operated in a commercial environment. This equipment generates, uses, and can radiate radio frequency energy and, if not installed and used in accordance with the instruction manual, may cause harmful interference to radio communications. Operation of this equipment in a residential area is likely to cause harmful interference in which case the user will be required to correct the interference at his own expense.
Shielded interface cables must be used with this equipment to maintain compliance with EMC regulations.
This operation manual is also used for the MX-350 / MX-450 / MX-350 J /
MX-450 J / MX-M350U J / MX-M450U J / MX-M350N J / MX-M450N J.
Trademark acknowledgments
The following trademarks and registered trademarks are used in conjunction with the machine and its peripheral devices and accessories.
- Micro® Windows®, Windows® 98, Windows® Me, Windows NT® 4.0, Windows® 2000, Windows® XP, Windows® Server 2003 and Internet Explorer® are registered trademarks or trademarks of Microsoft Corporation in the U.S.A. and other countries.
- PostScript is a registered trademark of Adobe Systems Incorporated.
• Macintosh, Mac OS, AppleTalk, EtherTalk, LaserWriter, and Safari are registered trademarks or trademarks of Apple Computer, Inc. - Netscape Navigator is a trademark of Netscape Communications Corporation.
- Adobe, the Adobe logo, Acrobat, the Adobe PDF logo, and Reader are registered trademarks or trademarks of Adobe Systems Incorporated in the United States and other countries.
- PCL is a registered trademark of the Hewlett-Packard Company.
- IBM, PC/AT, and PowerPC are trademarks of International Business Machines Corporation.
- Sharpdesk is a trademark of Sharp Corporation.
- All other trademarks and copyrights are the property of their respective owners.
Candid and Taffy are trademarks of Monotype Imaging, Inc. registered in the United States Patent and Trademark Office and may be registered in certain jurisdictions. CG Omega, CG Times, Garamond Antiqua, Garamond Halbfett, Garamond Kursiv, Garamond and Halbfett Kursiv are trademarks of Monotype Imaging, Inc. and may be registered in certain jurisdictions. Albertus, Arial, Coronet, Gill Sans, Joanna and Times New Roman are trademarks of The Monotype Corporation registered in the United States Patent and Trademark Office and may be registered in certain jurisdictions. Avant Garde, ITC Bookman, Lubalin Graph, Mona Lisa, Zapf Chancery and Zapf Dingbats are trademarks of International Typeface Corporation registered in the United States Patent and Trademark Office and may be registered in certain jurisdictions. Clarendon, Eurostile, Helvetica, Optima, Palatino, Stempel Garamond, Times and Univers are trademarks of Heidelberger Druckmaschinen AG, which may be registered in certain jurisdictions, exclusively licensed through Linotype Library GmbH, a wholly owned subsidiary of Heidelberger Druckmaschinen AG. Apple Chancery, Chicago, Geneva, Monaco and New York are trademarks of Apple Computer Inc. and may be registered in certain jurisdictions. HGGothicB, HGMinchoL, HGPGothicB and HGPMinchoL are trademarks of Ricoh Company, Ltd. and may be registered in some jurisdictions. Wingdings is a registered trademark of Microsoft Corporation in the United States and other countries. Marigold and Oxford are trademarks of Arthur Baker and may be registered in some jurisdictions. Antique Olive is a trademark of Marcel Olive and may be registered in certain jurisdictions. Hoefler Text is a trademark of Johnathan Hoefler and may be registered in some jurisdictions. ITC is a trademark of International Typeface Corporation registered in the United States Patent and Trademark Office and may be registered in certain jurisdictions. Agfa is a trademark of the Agfa-Gevaert Group and may be registered in certain jurisdictions. Intellifont, MicroType and UFST are trademarks of Monotype Imaging, Inc. registered in the United States Patent and Trademark Office and may be registered in certain jurisdictions. Macintosh and TrueType are trademarks of Apple Computer Inc. registered in the United States Patent and Trademark Office and other countries. PostScript is a trademark of Adobe Systems Incorporated and may be registered in some jurisdictions. HP, PCL, FontSmart and LaserJet are trademarks of Hewlett-Packard Company and may be registered in some jurisdictions. The Type 1 processor resident in Monotype Imaging's UFST product is under license from Electronics For Imaging, Inc. All other trademarks are the property of their respective owners.
Part 1: General Information
NOTES
- Considerable care has been taken in preparing this manual. If you have any comments or concerns about the manual, please contact your nearest SHARP Service Department.
● This product has undergone strict quality control and inspection procedures. In the unlikely event that a defect or other problem is discovered, please contact your dealer or nearest SHARP Service Department. - Aside from instances provided for by law, SHARP is not responsible for failures occurring during use of the product or its options, or failures due to incorrect operation of the product and its options, or other failures, or for any damage that occurs due to use of the product.
Warranty
While every effort has been made to make this document as accurate and helpful as possible, SHARP Corporation makes no warranty of any kind with regard to its content. All information included herein is subject to change without notice. SHARP is not responsible for any loss or damages, direct or indirect, arising from or related to the use of this operation manual.
© Copyright SHARP Corporation 2007. All rights reserved. Reproduction, adaptation or translation without prior written permission is prohibited, except as allowed under copyright laws.
The display screens, messages, and key names shown in the manual may differ from those on the actual machine due to product improvements and modifications.
PRODUCT CONFIGURATIONS
This product series consists of the models listed below. The product configuration varies by model. The peripheral devices required to use each of the functions are indicated.
| Model Function Required peripheral devices | ||
| MX-M350U/MX-M450U | Copier Standard | |
| Printer Standard | ||
| Network printer Network expansion kit | ||
| Facsimile Facsimile expansion kit | ||
| Network scanner Network expansion kit, network scanner expansion kit | ||
| Internet fax | Network expansion kit (with hard drive), network scanner expansion kit, Internet fax expansion kit | |
| Document filing Network expansion kit (with hard drive) | ||
| Metadata send | Network expansion kit (with hard drive), network scanner expansion kit, application integration module | |
| MX-M350N/MX-M450N | Copier Standard | |
| Printer Standard | ||
| Network printer Standard | ||
| Facsimile Facsimile expansion kit | ||
| Network scanner Network scanner expansion kit | ||
| Internet fax Network scanner expansion kit, Internet fax expansion kit | ||
| Document filing Standard | ||
| Metadata send | Network scanner expansion kit, application integration module | |
OPERATION MANUALS
The following operation manuals are provided for the machine. Please read the appropriate manuals as needed for the features you wish to learn about.
● Operation manual (for general information and copier operation) (this manual):
The first half of this manual provides general information about the machine, including safety information, loading paper, removing misfeeds, and regular maintenance.
The second half of the manual explains how to use the copy and document filing functions.
● Administrator settings guide
The administrator settings are used by the administrator of the machine to configure functions to meet the needs of your workplace.
This guide explains administrator settings for machine management, copying, and document filing. Administrator settings for the fax, printer, network scanner and Internet fax functions are explained in the manuals for those functions.
● Software setup guide
This manual mainly explains how to install and configure the software that allows the machine to be used as a printer.
● Operation manual (for printer)*
This manual explains the procedures for using the machine as a printer.
● Operation manual (for image send)*
This manual explains the procedures for using the image send feature of the machine, including the network scanner and Internet fax functions.
* The Operation manual (for printer) and the Operation manual (for image send) are provided as PDF files in the CD-ROM.
These manuals are not provided as printed manuals.
INSTALLATION REQUIREMENTS
Improper installation may damage this product. Please note the following during initial installation and whenever the machine is moved.
-
The machine should be installed near an accessible power outlet for easy connection.
-
Be sure to connect the power cord only to a power outlet that meets the specified voltage and current requirements. Also make certain the outlet is properly grounded.
●For the power supply requirements, see the name plate on the back of the main unit.
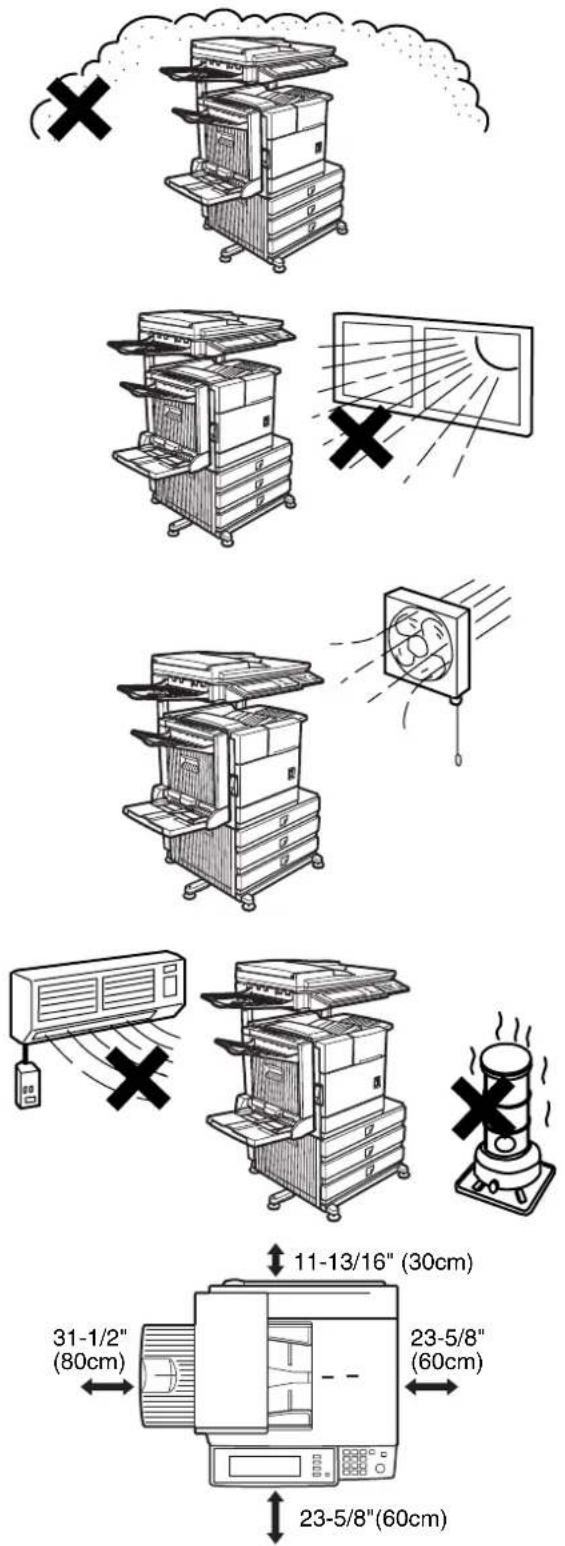
3.Do not install your machine in areas that are:
●damp, humid, or very dusty
●exposed to direct sunlight
●poorly ventilated
●subject to extreme temperature or humidity changes, e.g., near an air conditioner or heater.
- Be sure to allow the required space around the machine for servicing and proper ventilation.
A small amount of ozone is produced within the machine during operation. The emission level is insufficient to cause any health hazard.
NOTE:
The present recommended long term exposure limit for ozone is 0.1 ppm (0.2 mg/m ^3 ) calculated as an 8 hr. time-weighted average concentration.
However, since the small amount that is emitted may have an objectionable odor, it is advisable to place the copier in a ventilated area.
CAUTIONS
- Do not touch the photoconductive drum. Scratches or smudges on the drum will cause dirty prints.
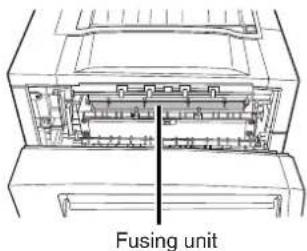
- The fusing unit is extremely hot. Exercise care in this area.
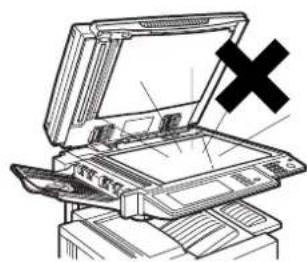
3.Do not look directly at the light source. Doing so may damage your eyes. - Five adjusters are provided on all optional stand/paper drawer units. These adjusters should be lowered until they contact the floor.
When moving the machine with the optional stand/paper drawer, be sure to raise the adjusters. Also, unlock the two casters at the front of the optional stand/paper drawer. After moving the machine, lower the four adjusters until they reach the floor and lock the two casters.
- Do not make any modifications to this machine. Doing so may result in personal injury or damage to the machine.
- Since this machine is heavy, it is recommended that it be moved by more than one person to prevent injury.
- When connecting this machine to a computer, be sure to first turn both the computer and the machine off.
- Do not make copies of anything which is prohibited from copying by law. The following items are normally prohibited from printing by national law. Other items may be prohibited by local law.
● Money ● Stamps ● Bonds ● Stocks
● Bank drafts ● Checks ● Passports ● Driver's licenses
natural_image
Illustration of an open computer with a black X symbol indicating a device (no text or symbols present)
natural_image
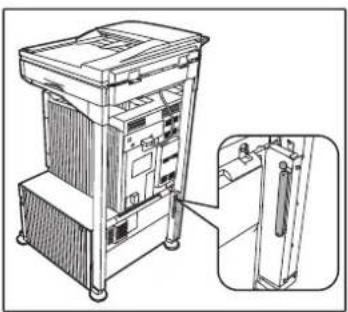
Technical line drawing of a server rack unit with an inset view showing internal components (no text or symbols)The part indicated in the illustration is only to be handled by a service technician. Absolutely do not touch this part.
Some models include the document filing function, which stores document image data on the machine's hard disk. Stored documents can be called up and printed or transmitted as needed. If a hard disk failure occurs, it will no longer be possible to call up the stored document data. To prevent the loss of important documents in the unlikely event of a hard disk failure, keep the originals of important documents or store the original data elsewhere. With the exception of instances provided for by law, Sharp Corporation bears no responsibility for any damages or loss due to the loss of stored document data.
"BATTERY DISPOSAL"
THIS PRODUCT CONTAINS A LITHIUM PRIMARY MEMORY BACK-UP BATTERY THAT MUST BE DISPOSED OF PROPERLY. PLEASE CONTACT YOUR LOCAL SHARP DEALER OR AUTHORIZED SERVICE REPRESENTATIVE FOR ASSISTANCE IN DISPOSING OF THIS BATTERY.
This product utilizes tin-lead solder, and a fluorescent lamp containing a small amount of mercury.
Disposal of these materials may be regulated due to environmental considerations.
For disposal or recycling information, please contact your local authorities or the Electronics Industries Alliance: www.eia.org
Laser Information
| Wave length | 785 nm +10 nm-15 nm |
| Pulse times North America: | 35 cpm model: (4.1 μs ± 4.1 ns)/7 mm45 cpm model: (5.7 μs ± 5.7 ns)/7 mmEurope: 35 cpm model: (3.8 μs ± 3.8 ns)/7 mm45 cpm model: (4.4 μs ± 4.4 ns)/7 mm |
| Output power 0.2 mW - 0.4 | mW |
At the production line, the output power of the scanner unit is adjusted to 0.4 MILLIWATT PLUS 8 % and is maintained constant by the operation of the Automatic Power Control (APC).
Caution
Use of controls or adjustments or performance of procedures other than those specified herein may result in hazardous radiation exposure.
For North America:
SAFETY PRECAUTIONS
This Digital Equipment is rated Class 1 and complies with 21 CFR 1040.10 and 1040.11 of the CDRH standards. This means that the equipment does not produce hazardous laser radiation. For your safety, observe the precautions below.
- Do not remove the cabinet, operation panel or any other covers.
● The equipment's exterior covers contain several safety interlock switches. Do not bypass any safety interlock by inserting wedges or other items into switch slots.
This product utilizes a CR coin Lithium battery which contains a Perchlorate material. Special handling for this material may apply, California residents, See www.dtsc.ca.gov/hazardouswaste/perchlorate/Others, consult local environmental officers.
For Europe:
CLASS 1 LASER PRODUCT
LASER KLASSE 1
LUOKAN 1 LASERLAITE
KLASS 1 LASERAPPARAT
CAUTION
INVISIBLE LASER RADIATION WHEN OPEN INTERLOCKS DEFEATED. AVOID EXPOSURE TO BEAM.
VORSICHT
natural_image
Technical line drawing of a multi-chamber office unit with visible internal components and ventilation grilles (no text or labels)CLASS 1 LASER PRODUCT LASER KLASSE 1
natural_image
Line drawing of a multi-level office workstation with open doors and drawers (no text or symbols)
CAUTION VORSICHT ADVERSEL ADVERSEL WARNING VARO
注意(サービスマン用)
PRODUCT CONFIGURATIONS....0-1
●Laser Information....0-5
CONTENTS....0-6
CHAPTER 1 BEFORE USING THE PRODUCT
INTRODUCTION....1-2
MAIN FEATURES....1-3
PART NAMES AND FUNCTIONS....1-9
●Exterior 1-9
●Interior 1-10
●Part names and functions of peripheral devices...1-11
●Operation panel....1-13
●Touch panel 1-14
LOADING PAPER....2-2
● Loading paper in paper tray 1....2-2
●Changing the paper size in paper tray 1......2-2
●Specifications of paper trays....2-3
●Setting the paper type and paper size....2-5
- Setting the paper size when a special size is loaded....2-6
●Programming and editing paper types....2-7
●Loading paper in the multi purpose drawer .....2-8
●Specifications (multi purpose drawer) ......2-10
●Loading paper in the stand/3 x 500 sheet paper drawer....2-10
●Specifications (stand/3 x 500 sheet paper drawer) ......2-10
●Loading paper in the stand/MPD & 2000 sheet paper drawer....2-11
●Specifications (stand/MPD & 2000 sheet paper drawer) ......2-11
SYSTEM SETTINGS....2-12
● General procedure for system settings....2-12
●About the settings....2-14
REPLACING THE TONER CARTRIDGE ......2-15
STORAGE OF SUPPLIES....2-16
MISFEED REMOVAL 2-17
●Misfeed removal guidance....2-17
●Misfeed in the transport area, fusing area, and exit area....2-18
●Misfeed in the duplex module....2-19
● Misfeed in the paper feed area....2-20
REMOVING AN ORIGINAL MISFEED....2-22
●Removing a misfed original from the automatic document feeder....2-22
TROUBLESHOOTING....2-23
CHAPTER 3 PERIPHERAL DEVICES
DUPLEX MODULE 3-2
●Part names.... 3-2
●Specifications.... 3-2
● Loading paper in the bypass tray 3-3
● Troubleshooting (concerning the duplex module). 3-4
MAIL-BIN STACKER.... 3-5
●Part names.... 3-5
●Specifications.... 3-5
●Misfeed in the mail-bin stacker.... 3-6
FINISHER.... 3-7
●Part names.... 3-7
●Specifications.... 3-7
●Finisher functions.... 3-8
●Using the finisher functions.... 3-9
●Staple cartridge replacement.... 3-10
●Misfeed in the finisher.... 3-12
●Troubleshooting finisher problems 3-13
SADDLE STITCH FINISHER.... 3-14
●Part names.... 3-14
●Specifications.... 3-14
● Saddle stitch finisher functions ..... 3-15
● Using the saddle stitch finisher 3-18
● Staple cartridge replacement and staple jam removal.... 3-19
●Misfeed in the saddle stitch finisher.... 3-22
● Troubleshooting (concerning the saddle stitch finisher) ...3-24
SHARP OSA.... 3-25
APPLICATION COMMUNICATION MODULE (MX-AMX2)3-25
●Standard application setup 3-25
- Selecting a standard application .... 3-25
●Operation in OSA mode 3-26
EXTERNAL ACCOUNT MODULE (MX-AMX3)...... 3-27
●External account application setup 3-27
●Operation in external account mode 3-27
CHAPTER 4 MAKING COPIES
AUTOMATIC DOCUMENT FEEDER 4-2
- Acceptable originals.... 4-2
PLACING ORIGINALS.... 4-3
CHECKING THE SIZE OF A PLACED ORIGINAL..... 4-5
●Manually setting the scanning size 4-5
STORING, DELETING, AND USING ORIGINAL SIZES 4-6
●Storing or deleting an original size.... 4-6
NORMAL COPYING.... 4-7
●Making copies with the automatic document feeder.... 4-7
●Automatic two-sided copying using the automatic document feeder.... 4-10
●Copying from the document glass 4-11
●Automatic two-sided copying from the document glass 4-13
ADJUSTING THE EXPOSURE 4-14
REDUCTION/ENLARGEMENT/ZOOM 4-15
● Automatic selection (auto image)...... 4-15
● Manual selection (preset copy ratios/zoom)...... 4-16
●XY ZOOM 4-18
SPECIAL PAPERS 4-20
CHAPTER 5 CONVENIENT COPY FUNCTIONS
SPECIAL MODES 5-2
● General procedure for using special functions ..... 5-2
● Margin shift....5-3
● Erase....5-4
● Dual page copy 5-5
● Pamphlet copy....5-6
● Job build....5-8
● Tandem copy....5-10
● Covers/inserts 5-12
● Transparency film with insert sheets .....5-23
● Multi shot....5-24
● Book copy....5-26
● Card shot....5-27
● Mirror image 5-29
● B/W reverse....5-29
● Print menu....5-30
STORING, USING AND DELETING JOB
PROGRAMS 5-42
● Storing a job program....5-42
- Calling up a job program ....5-43
● Deleting a stored job program....5-43
INTERRUPTING A COPY RUN 5-44
CHAPTER 6 MACHINE MAINTENANCE (FOR COPYING)
USER MAINTENANCE....6-2
● Cleaning the document glass and the automatic document feeder ....6-2
● Cleaning the main charger of the photoconductive drum....6-2
TROUBLESHOOTING 6-3
CHAPTER 7 DOCUMENT FILING FUNCTION
OVERVIEW 7-2
● Document filing function....7-2
TO USE THE DOCUMENT FILING FUNCTION......7-4
● A look at the operation panel....7-4
● Saving files....7-4
● Main screen of document filing ..... 7-5
● Document filing icons ...... 7-5
SAVING A DOCUMENT IMAGE FILE....7-6
● Quick File 7-6
● Filing....7-7
● Print jobs 7-9
- Scan Save....7-10
CALLING UP AND USING A FILE....7-13
- Searching for and calling up a saved file....7-13
- Calling up and using a saved file....7-15
● File selection screen 7-16
SYSTEM SETTINGS 7-24
- Creating, editing, and deleting user names and folders....7-24
ENTERING CHARACTERS 7-29
TROUBLESHOOTING 7-31
CHAPTER 8 SPECIFICATIONS
SPECIFICATIONS....8-2
LIST OF COMBINATION OF PERIPHERAL DEVICES ..8-4
INDEX......8-5
CHAPTER 1
BEFORE USING THE PRODUCT
This chapter contains basic information that should be read before using the product.
Page
INTRODUCTION....1-2
MAIN FEATURES 1-3
PART NAMES AND FUNCTIONS.... 1-9
- Exterior.... 1-9
- Interior.... 1-10
- Part names and functions of peripheral devices 1-11
• Operation panel.... 1-13 - Touch panel....1-14
TURNING THE POWER ON AND OFF.... 1-17
AUDITING MODE 1-18
- Using the machine when the auditing mode is enabled.... 1-18
INTRODUCTION
Thank you for purchasing a SHARP digital multifunction copier.
Please read this manual before using the machine. In particular, be sure to read "INSTALLATION REQUIREMENTS" before using the machine.
Please keep this manual close at hand for reference whenever necessary.
This manual provides general information on using the machine, such as routine maintenance and how to load paper and remove misfeeds. It also explains how to use the copier and document filing functions.
Separate manuals have been provided for the fax function, printer function, and network scanner function.
■ Original and paper sizes
This machine allows use of standard sizes in both the inch and AB systems.
These are shown in the tables below.
| Sizes in the inch system Sizes in the AB system | |
| 11" x 17" (LEDGER) A3 | |
| 8-1/2" x 14" (LEGAL) B4 | |
| 8-1/2" x 13" (FOOLSCAP) A4 | |
| 8-1/2" x 11" (LETTER) B5 | |
| 7-1/4" x 10-1/2" (EXECUTIVE) A5 | |
| 5-1/2" x 8-1/2" (INVOICE) | |
■ The meaning of "R" in original and paper size indications
Some original and paper sizes can be placed in either the portrait or landscape orientations. To differentiate between landscape and portrait, the landscape orientation size indication will contain an "R". These are indicated as 8-1/2" x 11"R, 5-1/2" x 8-1/2"R, A4R, B5R, etc. Sizes that can be placed only in the landscape orientation (11" x 17", 8-1/2" x 14", 8-1/2" x 13", A3, B4) do not contain the "R" in their size indication.
Size indication with "R"
Landscape orientation
Size indication without "R"

Portrait orientation
MAIN FEATURES
The digital multifunction copier is capable of performing a variety of functions. This page shows features related to the copy function.
- Sort mode -See page 1-3
● Group mode See page 1-3
● 2-sided Copy - See page 1-3
(When the duplex module is installed.)
● Exposure Adjustments - See page 1-3
● Reduction/Enlargement - See page 1-4
● XY Zoom - See page 1-4
● Margin Shift - See page 1-4
● Erase - See page 1-4
● Dual Page Copy - See page 1-4
● Pamphlet Copy - See page 1-4
● Job Build - See page 1-5 - Tandem Copy - See page 1-5 (MX-M350N/MX-M450N, or when the network function has been added.)
● Covers/inserts - See page 1-5
● Transparency Insert - See page 1-5
● Multi Shot See page 1-5
● Book Copy - See page 1-5
● Card Shot - See page 1-6
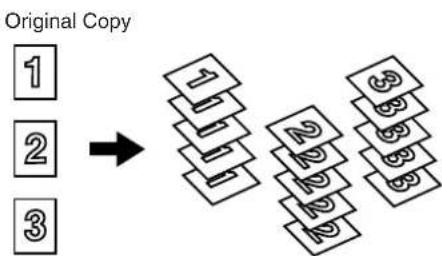
Sort mode See page 4-9 →
Copies can be collated.

Group mode See page 4-9 →
Copies can be grouped by page.
flowchart
graph TD
    A["Original Copy"] --> B["1"]
    A --> C["2"]
    A --> D["3"]
● Job programs - See page 1-6
● Mirror Image - See page 1-6
● B/W Reverse - See page 1-6
● Date - See page 1-6
- Stamp - See page 1-6
● Page numbering - See page 1-7
● Text -See page 1-7
● Interrupting a copy run - See page 1-7
- Offset mode - See page 1-7
(When the Finisher or Saddle stitch finisher is installed.)
● Staple sort mode See page 1-7
(When the Finisher or Saddle stitch finisher is installed.)
- Saddle stitch - See page 1-7
(When the Saddle stitch finisher is installed.)
● Hole punching - See page 1-8
(When the Saddle stitch finisher and Punch Module are installed.)
● Document filing function See page 1-8 (MX-M350N/MX-M450N, or when the document filing function has been added.)
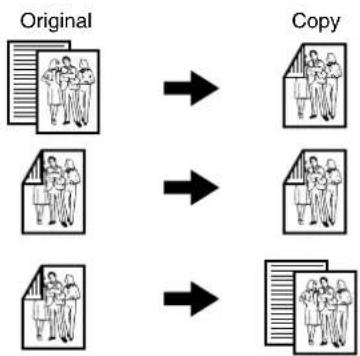
2-sided Copy See pages 4-10, 4-13
Copy onto both sides of the paper using the document glass or the automatic document feeder.
flowchart
graph TD
    A["Original"] --> B["Copy"]
    C["Original"] --> D["Copy"]
    E["Original"] --> F["Copy"]
    G["Original"] --> H["Copy"]
* When the duplex module is installed.
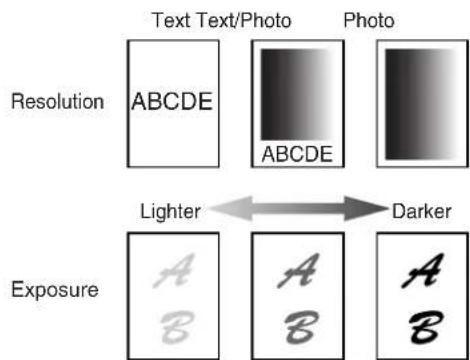
Exposure Adjustments See page 4-14
The desired image type for the original can be selected.
Reduction / Enlargement See page 4-15
Copies can be enlarged or reduced to the desired size.

XY Zoom See page 4-18
Separate ratio settings can be selected for the length and width of a copy.

Margin Shift See page 5-3
Margins can be added to copies.

Erase See page 5-4
Shadows that appear around the edges of copies of books or thick originals can be erased.

flowchart
graph LR
    A["Original"] --> B["Copy"]
    subgraph Original
        A1["A"]
    end
    subgraph Copy
        C1["A"]
    end
    D["Edge erase"] --> E["Copy"]
    F["Center erase"] --> G["Copy"]
    H["Edge+Center erase"] --> I["Copy"]
    J["A B"] --> K["Copy"]
    L["A B"] --> M["Copy"]
Dual Page Copy See page 5-5→
The left and right pages of a book can be successively copied onto separate sheets.

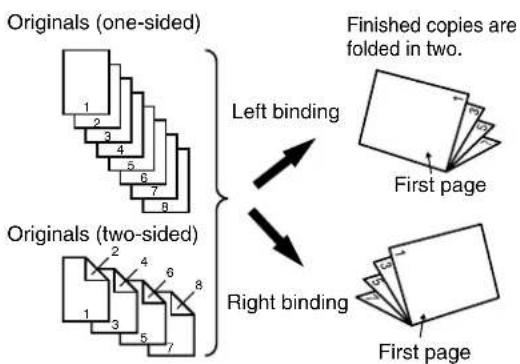
Pamphlet Copy See page 5-6→
One-sided or two-sided pamphlet style copies can be made.
flowchart
graph TD
    A["Originals (one-sided)"] --> B["Left binding"]
    C["Originals (two-sided)"] --> D["Right binding"]
    B --> E["Finished copies are folded in two. First page"]
    D --> F["First page"]
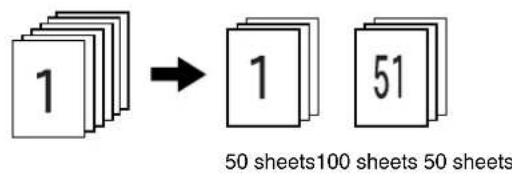
Job Build See page 5-8

When you have a very large number of originals, the pages can be scanned in sets.
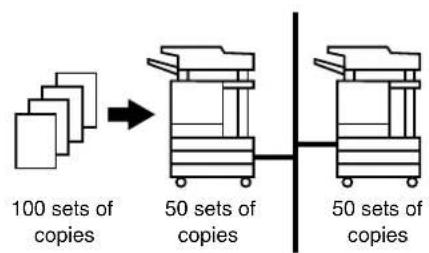
Tandem Copy See page 5-10
Two machines can be used to run a large copy job in parallel.
flowchart
graph LR
    A["100 sets of copies"] --> B["50 sets of copies"]
    B --> C["50 sets of copies"]
* MX-M350N/MX-M450N, or when the network function has been added
Covers/inserts See page 5-12
Front covers, back covers, and inserts can be added. These can also be copied on.
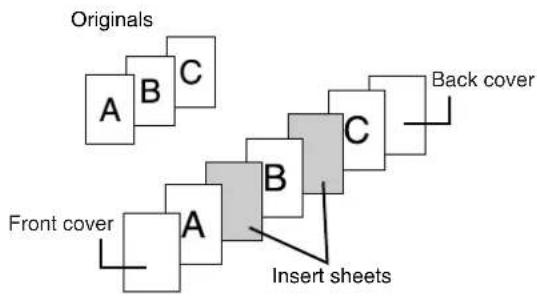
flowchart
graph TD
    A["Originals"] --> B["A"]
    B --> C["B"]
    C --> D["C"]
    D --> E["Back cover"]
    F["Front cover"] --> G["A"]
    G --> H["B"]
    H --> I["C"]
    I --> J["Insert sheets"]
Transparency Insert See page 5-23
Inserts can be automatically inserted between transparencies.
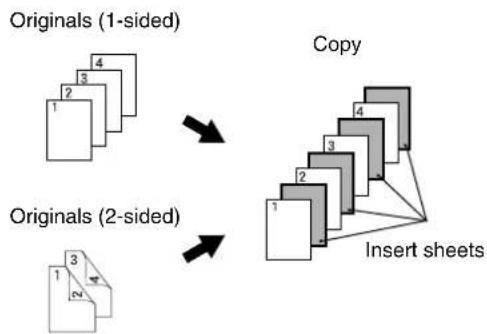
flowchart
graph TD
    A["Originals (1-sided)"] --> B["Copy"]
    C["Originals (2-sided)"] --> D["Copy"]
    E["Insert sheets"] --> F["Copy"]
1
Multi Shot See page 5-24

Multiple original pages can be copied onto a single sheet of paper in a uniform layout.

Book Copy See page 5-26

Books and other bound originals can be copied pamphlet style.
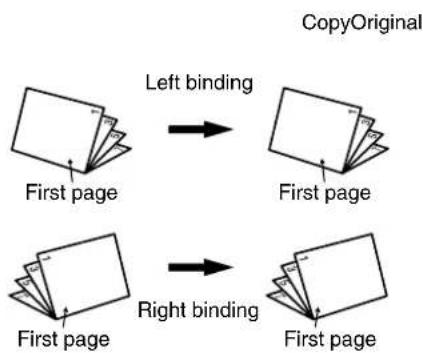
flowchart
graph TD
    A["First page"] -->|Left binding| B["First page"]
    B -->|Right binding| C["First page"]
Card Shot See page 5-27 →
The front and back of a card can be copied onto one sheet of paper.
This function is convenient for making copies for certification purposes and helps save paper.

flowchart
graph LR
    A["Original CARD Front of card Back of card"] --> B["Copy CARD"]
    B --> C["Example: Portrait 8-1/2" x 11" (A4) size"]
    B --> D["Example: Landscape 8-1/2" x 11"(A4) size"]
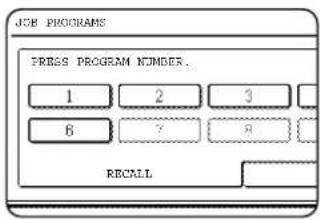
Job programs See page 5-42
Various steps of a copy operation can be stored as a program, and up to 10 programs can be stored. Saving frequently used sets of settings in a program saves you the trouble of selecting those settings each time you wish to use them.
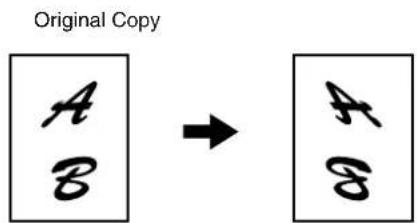
Mirror Image See page 5-29 →
A mirror image copy can be made.
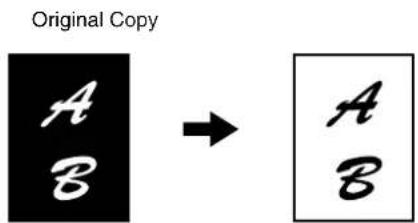
B/W Reverse See page 5-29→
White and black can be inverted on a copy to produce a negative image.
Date See page 5-33 →
The date can be added to copies.
2010/APR/4
Stamp See page 5-34 →
Reverse text can be added to copies ("stamp").
CONFIDENTIAL
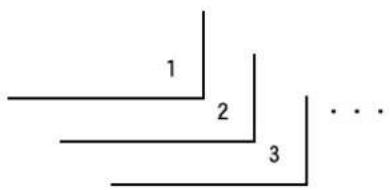
Page numbering See page 5-35
Page numbers can be added to copies.
Text See page 5-39
Entered text can be added to copies.
Meeting
Interrupting a copy run See page 5-44
A copy job in progress can be interrupted for a rush job.

Offset mode See page 3-8 →
Each set of output can be offset slightly from other sets for easy separation.
Offset mode Non-Offset mode

natural_image
Two identical 3D illustrations of stacked rectangular panels, no text or symbols present*When the Finisher or Saddle stitch finisher is installed.
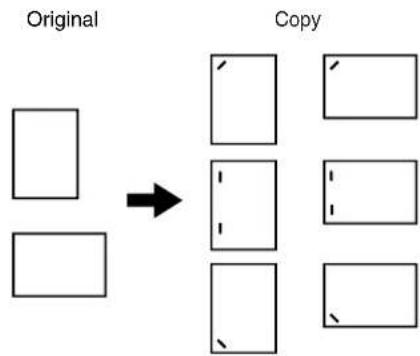
Staple sort mode See page 3-8, 3-16
Sets of copies can be automatically stapled.
flowchart
graph LR
    A["Original"] --> B["Copy"]
    A --> C[" "]
    A --> D[" "]
    A --> E[" "]
    B --> F[" "]
    B --> G[" "]
    B --> H[" "]
    B --> I[" "]
*When the Finisher or Saddle stitch finisher is installed.
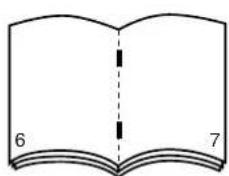
Saddle stitch See page 3-14→
When a saddle stitch finisher is installed, copies can be automatically folded in half and stapled at the fold. (Use with the pamphlet function (see page 5-6) or book copy function (see page 5-26).)
Saddle stitch binding
natural_image
Simple line drawing of an open book with page number 6 and page number 7, no text or symbols on pages*When the Saddle stitch finisher is installed.
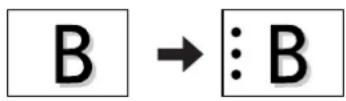
Hole punching See page 3-17
Copies can be punched to add holes.
Original Punch positions

flowchart
graph LR
    A["A"] --> B["...A"]
* When the saddle stitch finisher and punch module are installed.
Document filing function See CHAPTER 7
A document image can be stored on the hard disk. A stored file can easily be called up and printed or transmitted.

flowchart
graph LR
    A["Document Image"] --> B["HDD"]
    B --> C["Printed"]
    B --> D["Transmitted"]
    B -->|Save to machine's hard disk| B
    B -->|Call up a saved file to reuse| B
* MX-M350N/MX-M450N, or when the document filing function has been added

Products that have earned the ENERGY STAR® are designed to protect the environment through superior energy efficiency.
Achieves ENERGY STAR energy savings; product fully qualifies when used with a duplexer.

The Environmental Choice Program guidelines are applied to the products only in Canada. The products that meet the Environmental Choice Program guidelines carry the logo shown to the left. The products without the logo may not meet the Environmental Choice Program guidelines.
Energy saving features
This product has the following two power reducing modes to help conserve natural resources and reduce environmental pollution.
Preheat mode
When the machine remains in the standby state for the amount of time set in the administrator settings, preheat mode automatically reduces the temperature of the fusing unit to save power while the machine is on standby. When a fax or print job is received, or keys are pressed on the operation panel, or an original is placed for a copy, fax, or network scanner job, preheat mode automatically turns off.
Auto power shut-off mode
The auto power shut-off mode is the second level of power reduction. In this mode power is shut off to the fusing unit and the touch panel. In this state more energy is saved than in the preheat mode but the time to recover to the ready condition will be longer. The preset time to enter this mode can be set by a administrator setting.
When this product is used as a printer, and either of the above modes is active, the mode will be deactivated automatically by an incoming job and the machine will automatically warm up and start to print when it has reached the ready temperature.
When this product is configured for multi-function operation, and either of the above modes is active, the mode will be deactivated as above by an incoming print job. Either mode will also be deactivated by operation of DOCUMENT FILING, IMAGE SEND or COPY mode key.
PART NAMES AND FUNCTIONS
Exterior

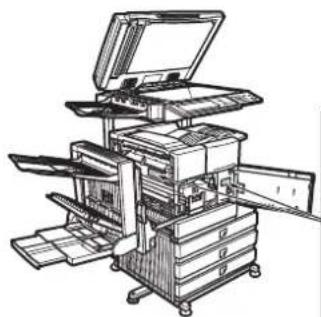
(1) Bypass tray*
(2) Exit tray*
(3) Automatic document feeder (See page 4-2.)
This automatically feeds and scans multiple sheet originals. Both sides of two-sided originals can be scanned at once.
(4) Duplex module*
Module for two-sided printing
(5) Upper paper output area (Center tray)
Finished sheets are deposited here.
(6) Upper exit tray extension*
Provides support for large size paper.
(7) Operation panel
(8) Front cover
Open to add toner.
(9) Power switch
Press to turn power on and off.
(10) Paper tray 1
(11) Stand/3 x 500 sheet paper drawer*
(12) Stand/MPD & 2000 sheet paper drawer* (See page 2-11.)
(13) Multi purpose drawer* (See page 2-8.)
Interior

(14) Duplex module side cover
Open when a misfeed has occurred in the duplex module.
(15) Side cover latch
Push up to open the side cover when a misfeed has occurred in the main unit.
(16) Fusing unit
Lift up to open the side cover when a misfeed has occurred in the main unit.
CAUTION
The fusing unit is hot. Take care in removing misfed paper.
(17) Toner cartridge (drum/toner cartridge)
The toner cartridge must be replaced when indicated on the operation panel. (See page 2-15)
(18) Photoconductive drum
Images are formed on the photoconductive drum.
NOTE
Do not touch or damage the photoconductive drum.
(19) Cartridge lock lever
When replacing the drum, toner or developer cartridge, turn down this lever and pull it out.
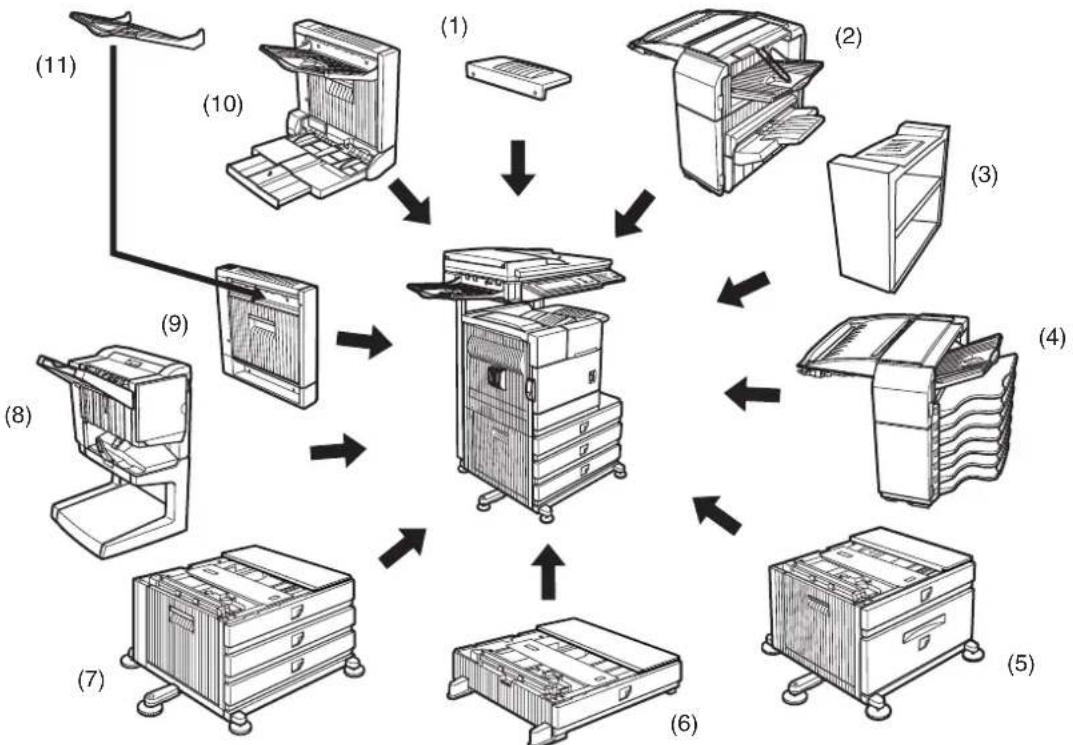
Part names and functions of peripheral devices
flowchart
graph TD
    A["11"] --> B["(1)"]
    B --> C["(2)"]
    C --> D["(3)"]
    D --> E["(4)"]
    E --> F["(5)"]
    F --> G["(6)"]
    G --> H["(7)"]
    H --> I["(8)"]
    I --> J["(9)"]
    J --> K["(10)"]
    K --> L["(11)"]
(1) Upper exit tray extension (AR-TE4)
Mount this unit to the upper paper exit tray. This extension is needed to support large size paper.
(2) Finisher (AR-FN6)
Output sheets can either be sorted in page order or grouped by page. Sorted sets or groups are offset stacked for easy separation when removed. Sorted sets can be delivered either stapled or unstapled.
(3) Right output tray (AR-TE5)
Attaches to the output outlet on the right side of the machine.
(4) Mail-bin stacker (AR-MS1)
This unit is an output sorter that has seven receiving bins.
The bin to receive printed output can be selected in the printer driver. Each bin can be assigned to receive printed output by an individual person or by groups of people so that their prints are separated from other users making them easy to retrieve.
When this unit is installed, any copies or facsimile prints will be sent to the top tray and not into the mail bins.
(5) Stand/MPD & 2000 sheet paper drawer (AR-D28)
This paper feed unit contains an upper multi-purpose drawer (see item (6)) and a lower drawer which can hold a maximum of 2000 sheets of 20 lbs. (80 g/m ^2 ) paper.
(6) Multi purpose drawer (AR-MU2)
Up to 500 sheets of 20 lbs. (80 g/m ^2 ) paper can be loaded. Also special papers such as envelopes (standard sizes only) and postcards can be set.
(7) Stand/3 x 500 sheet paper drawer (AR-D27)
This paper feed unit contains an upper multi-purpose drawer (see item (6)) and two lower drawers each of which can hold a maximum of 500 sheets of 20 lbs. (80 g/m ^2 ) paper.
(8) Saddle stitch finisher (AR-FN7)
The saddle stitch finisher can automatically place two staples for centerline binding of paper and fold them along the centerline.
An optional punch module is available for installation into the finisher.
(9) Duplex module (AR-DU3)
An optional duplex module must be installed for automatic two-sided printing.
(10) Duplex module/bypass tray (AR-DU4)
This module is basically the same as (9) above with the addition of a manual bypass paper feed unit.
(11) Exit tray (AR-TE3)
Mounted to the paper output port of a duplex module.
■ Other optional equipment
●Network expansion kit (MX-NBX2)
This is required to add on the network function. When this expansion kit is installed, the machine can be used as a network printer.
●Network expansion kit (MX-NBX3)
Required to add the network function and a hard drive to the machine. Installing this expansion kit allows the machine to be used as a printer and enables use of the document filing function.
●Barcode font kit (AR-PF1)
This kit adds bar code fonts to the machine.
●Data security kit (MX-FRX6, MX-FRX6U, MX-FRX7, MX-FRX7U)
The MX-FRX6 and MX-FRX6U are for models that have a hard disk drive, and the MX-FRX7 and MX-FRX7U are for models without a hard disk drive. This kit is used to erase electronic data from the hard disk and memory immediately after a document is printed or transmitted.
●PS3 expansion kit (AR-PK6)
This kit provides compatibility of PostScript level 3 to the printer.
●Facsimile expansion kit (AR-FX12)
This kit is required to add fax function.
●Additional fax memory (8MB) (AR-MM9)
●Network scanner expansion kit (MX-NSX1)
This kit is required to add the network scanning feature.
To add the network scanner function to the MX-M350U, or MX-M450U, the network expansion kit is required.
●Internet fax expansion kit (MX-FWX1)
This kit is required to use the Internet fax function. To add on the Internet fax function, the network scanner expansion kit is required. On the MX-M350U/MX-M450U, the network expansion kit (with hard drive) is also required.
●Application integration module (MX-AMX1)
The application integration module can be combined with the network scanner function to append a metadata file to a scanned image file.
● Application communication module (MX-AMX2)
This allows the machine to be linked over a network to an external software application.
● External account module (MX-AMX3)
This is required to use an external account application on the machine.
●Flash ROM kit (AR-PF2)
This kit contains download fonts.
Some peripheral devices cannot be installed together while others may require the installation of one or more others to be functional. See page 8-4, "LIST OF COMBINATION OF PERIPHERAL DEVICES".
Peripheral devices are basically optional, but some are provided as standard equipment for some models.
Operation panel
1
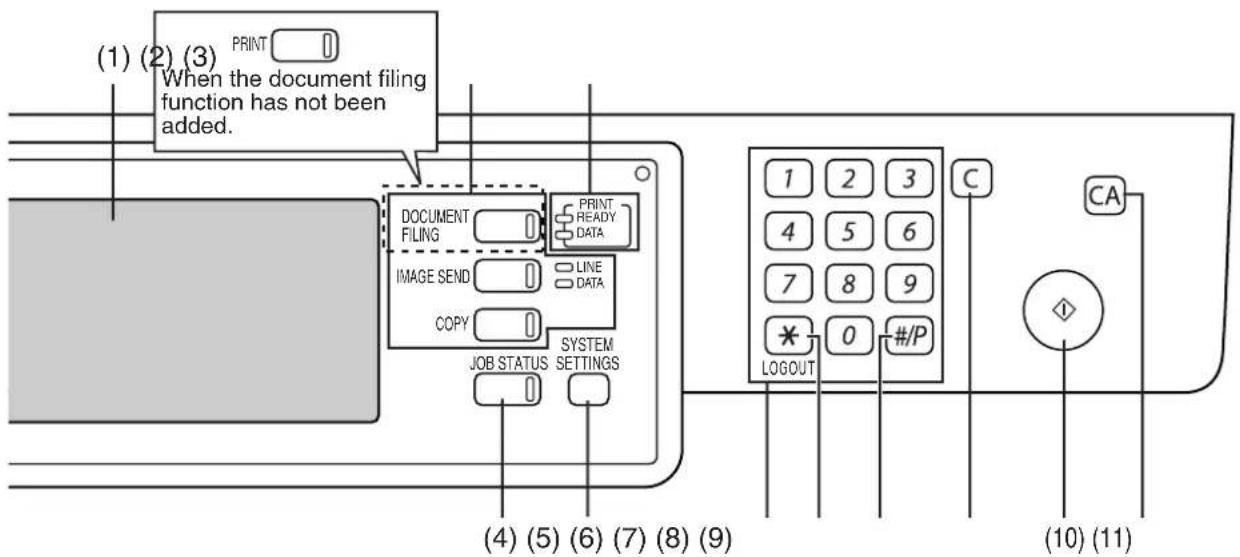
(1) Touch panel
The machine status, messages and touch keys are displayed on the panel. The document filing ^1 , copy, network scanner ^2 , fax ^3 , and Internet fax ^4 functions are used by switching to the screen for the desired function. See the following page.
(2) Mode select keys and indicators
Use to change modes and the corresponding display on the touch panel.
[DOCUMENT FILING] key
Press to select the document filing mode ^*1 . (See page 7-5.)
When the document filing function has not been added, this key is the [PRINT] key. This key is pressed to change to the print mode screen.
[IMAGE SEND] key/LINE indicator/DATA indicator
Press to change the display to network scanner mode ^2 , fax mode ^3 or Internet fax mode ^*4 . (See the "Operation manual (for image send)") and "Operation manual (for facsimile)".
[COPY] key
Press to select the copy mode.
(3) PRINT mode indicators
READY indicator
Print data can be received when this indicator is lit.
DATA indicator
Lights up or blinks when print data is being received. Also lights up or blinks when printing is being performed.
(4) [JOB STATUS] key
Press to display the current job status. (See page 1-15.)
(5) [SYSTEM SETTINGS] key
This is used to store, edit, and delete user names and folder names for the document filing function ^*1 , and to configure the administrator settings and printer configuration settings. (See page 7-24)
(6) Numeric keys
Use to enter numeric values for various settings.
(7) [ ]key ([LOGOUT] key)
This key is used in copy mode, document filing mode ^1 , network scanner mode ^2 , fax mode ^3 , and Internet fax mode ^4 .
(8) [#/P] key
This is used as a program key when using the copy function, and to dial when using the fax function ^*3 .
(9) [C] key (Clear key)
This key is used in copy mode, document filing mode ^1 , network scanner mode ^2 , and fax mode ^*3 .
(10) [START] key
Use this key to start copying in copy mode, scan a document in network scanner mode ^2 , or scan a document for transmission in fax mode ^3 or Internet fax mode ^*4 .
(11) [CA] key (Clear all key)
This key is used in copy mode, document filing mode ^1 , network scanner mode ^2 , fax mode ^3 , and Internet fax mode ^4 . Use the key to cancel settings and perform an operation from the initial machine
*1 MX-M350N/MX-M450N, or when the document filing function has been added.
*2 When the network scanner option is installed.
*3 When the fax option is installed.
*4 When the Internet fax option is installed.
Touch panel
The touch panel screens shown in this manual are printed images, and may appear different from the actual screens.
■ Using the touch panel
[Example 1]

Items on the touch panel are easily selectable by touching the key associated with the item with a finger. Selection of an item will be accompanied with a beep tone* to confirm the item was selected.
Also, the key area for the item will be highlighted for visual confirmation.
* If a grayed out key is touched, double beeps will sound.
[Example 2]
Keys which are grayed out on any screen are not selectable.
The confirmation beeps can be disabled using "Keys touch sound" in the administrator setting. (See page 10 of the administrator settings guide.)
■ Selecting a function
[Example 1]
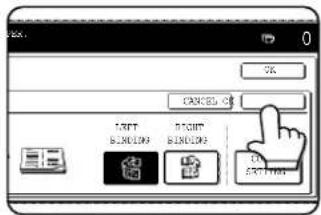
If a key is highlighted in a setting screen at the time the screen appears, the [OK] key can be pressed to store the selection without further operation.
[Example 2]

A function in the special functions screen is selected by touching the key so that it is highlighted. To cancel the selection, touch the highlighted key once again.
| Copier feature |
| ● Dual page copy ● Job build ● Tandem copy ● Mirror image ● B/W Reverse |
[Example 3]

A corresponding icon representing the feature will appear on the touch panel and on the main screen of the mode selected. If this icon is touched, the setting screen of the function (or a menu screen) will
appear, allowing the settings to be checked or adjusted and the function to be canceled easily.
■ Job status screen (common to print, scan, fax and Internet fax)
This screen is displayed when the [JOB STATUS] key on the operation panel is pressed.
This screen can be used to display the "JOB QUEUE" (showing stored jobs and the current job) or the "COMPLETE" job list (showing finished jobs). This screen can be used to check jobs, interrupt a job in progress to perform another job, and cancel a job.

The displayed jobs in the job list are themselves operation keys. To cancel printing or to give a job the highest print priority, touch the relevant job key to select the job and execute the desired operation using the keys described in (8) and (9).
This shows the current job and the jobs waiting to be run. The icons to the left of the jobs in the queue show the job mode. The document filing reprint job icon is highlighted.
Note that the icon does not become highlighted during retransmission of a fax/image transmission job.

Print mode Copy mode
SCAN mode

Scan to e-mail job Scan to FTP job

Scan to Desktop job

Scan to Network folder job
Fax mode

Fax send job Fax reception job

PC-Fax send job
Internet Fax mode

i-Fax send job i-Fax reception job

PC-Internet Fax send job
\*1 "PAPER EMPTY" in the job status display
When a job status display indicates "PAPER EMPTY", the specified paper size for the job is not loaded in any of the trays.
In this case, the job will be suspended until the required paper is loaded. Other stored jobs will be printed (if possible) until the required paper is loaded. (Other jobs will not be printed if the paper runs out during printing.) If you need to change the paper size because the specified paper size is not available, touch the current job key to select it and then touch the [DETAIL] key described in (10).
(2) Mode select key
This switches the job list display between "JOB QUEUE" and "COMPLETE".
"JOB QUEUE": Shows stored jobs and the job in progress.
"COMPLETE": Shows finished jobs.
Files saved using the "FILE"*2 and "QUICK FILE"*2 functions and finished broadcast transmission jobs appear as keys in the finished job screen. The "FILE"*2 or "QUICK FILE"*2 job keys in the finished job screen can be touched, followed by the [CALL] key*, to call up a finished job and print or transmit it. A finished broadcast transmission job key can be touched followed by the [DETAIL] key to check the result of the transmission.
*2 Can only be used on the MX-M350N/MX-M450N or when the document filing function has been added.
(3) [PRINT JOB] key
This displays the print job list of print mode (copying, printing, fax reception, Internet fax reception, and self printing).
(4) [SCAN TO] key
This displays the transmission status and finished jobs of scan mode (Scan to e-mail, Scan to FTP, Scan to Desktop, and Scan to Network Folder) when the network scanner option is installed.
(5) [FAX JOB] key
This displays the transmission/reception status and finished jobs of fax mode (fax and PC-Fax) when the fax option is installed.
(6) Display switching keys
Use to switch the page of the displayed job list.
(7) [INTERNET-FAX] key
This displays the transmission/reception status and finished jobs of Internet fax mode and PC Internet fax mode when the Internet fax option is installed.
(8) [STOP/DELETE] key
Use to cancel or delete the current job or delete the stored job. Note that printing of received faxes and received Internet faxes cannot be canceled or deleted.
(9) [PRIORITY] key
Touch this key after selecting a stored job in this [JOB QUEUE] list to print the job ahead of the other jobs.
Note that a job in progress cannot be interrupted if it is an interrupt copy job or if it is a list print job.
(10) [DETAIL] key
This shows detailed information on the selected job. Files saved using the "FILE"*2 and "QUICK FILE"*2 functions and finished broadcast transmission jobs appear as keys in the finished job screen. A Quick File in the finished job screen or the [Filing] key*2 can be touched, followed by the [CALL] key*2, to call up a finished job and print or transmit it. A finished broadcast transmission job key can be touched followed by the [DETAIL] key to check the result of the transmission.
(11) [CALL] key ^*2
When this key is touched after selecting a job in the COMPLETE job status screen (a job stored using the FILE or QUICK FILE keys of the document filing function), the "JOB SETTINGS" menu screen appears to let you resend or reprint the finished job. (See "Document filing function" on page 7-2.)
Use the power switch on the front of the machine to turn the power on or off.
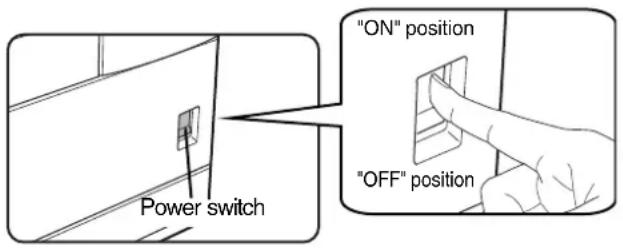
CAUTION
Before turning off the main power switch, make sure that the communication and data indicators are not blinking on the operation panel. Turning off the main power switch or unplugging the power cord while the lights are blinking may damage the hard disk and cause the data being stored or received to be lost.
NOTES
- Turn both switches off and unplug the power cord if you suspect a machine failure, if there is a bad thunderstorm nearby, or when you are moving the machine.
- If the fax function has been added, always keep the fax power switch turned on. Faxes cannot be received if the fax power switch is turned off. (Faxes can be received when the main power switch is turned off.)
AUDITING MODE
Auditing mode can be enabled to keep track of the number of pages printed and transmitted (scanned) by each account (up to 500 accounts can be established). The page counts can be viewed and totaled as needed.
Using the machine when the auditing mode is enabled
The procedure for making copies when auditing mode has been enabled for the copy function is explained below.
NOTES
- When auditing mode is enabled for document filing and fax/image transmission, a message will appear asking you to enter your account number each time you switch to the main screen of one of those functions in the touch panel. Enter your account number in the same way as for copy mode, and then begin the scanning procedure.
- When the account counter is turned on for the printer function, you must enter your account number in the setting screen of the printer driver on your computer in order to print.
When the auditing mode is turned on, the right message appears on the touch panel.

When the above screen appears, enter your 5-digit account number and then begin the copying procedure.
1 Enter your account number (5 digits) with the numeric keys.
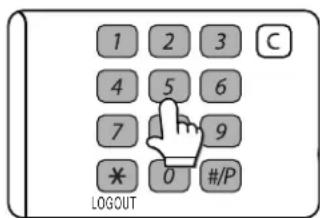
As you enter your account number, the hyphens (-) change to asterisks (*). If you enter an incorrect digit, press the [C] (Clear) key and re-enter the correct
digit.
When a correct account number is entered, the following message will appear.
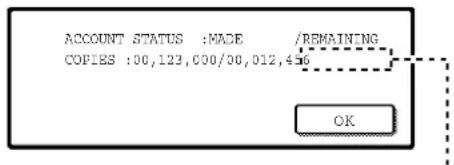
If a limit has been set in the administrator settings for the number of copies that can be made by the account, the remaining number that can be made is displayed.
Check the number in the display and touch the [OK] key.
NOTE
If "ACCOUNT NUMBER SECURITY" is enabled in the administrator settings and an incorrect account number is entered three times in a row, "PLEASE SEE YOUR KEY OPERATOR FOR ASSISTANCE." will appear. (Page 8 of the administrator settings guide.)
Operation is not possible while this message appears (about one minute).
2 Follow the appropriate steps to perform the copy job.
When copying is begun, the following message will appear.
READY TO SCAN FOR COPY.
PRESS [LOGOUT] WHEN FINISHED.
To perform an interrupt copy job (page 5-44), touch the [INTERRUPT] key and then enter your account number as explained in step 1. The following message will appear.
COPY INTERRUPT MODE.
READY TO SCAN FOR COPY.
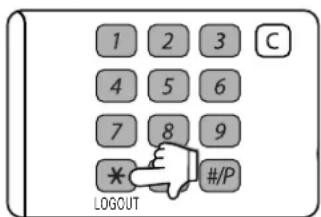
3 When the copy job is finished, press the [✗ key ([LOGOUT] key)
CHAPTER 2
MANAGING THE MACHINE
This chapter explains how to load paper, replace the toner cartridge, and remove paper misfeeds. It also contains information about supplies.
Page
LOADING PAPER 2-2
- Loading paper in paper tray 1 2-2
- Changing the paper size in paper tray 1 .... 2-2
- Specifications of paper trays 2-3
- Setting the paper type and paper size 2-5
- Setting the paper size when a special size is loaded.... 2-6
- Programming and editing paper types 2-7
- Loading paper in the multi purpose drawer.... 2-8
- Specifications (multi purpose drawer).... 2-10
- Loading paper in the stand/3 x 500 sheet paper drawer.... 2-10
- Specifications (stand/3 x 500 sheet paper drawer) ...... 2-10
- Loading paper in the stand/MPD & 2000 sheet paper drawer ...... 2-11
- Specifications (stand/MPD & 2000 sheet paper drawer).... 2-11
SYSTEM SETTINGS 2-12
- General procedure for system settings 2-12
- About the settings 2-14
REPLACING THE TONER CARTRIDGE.... 2-15
STORAGE OF SUPPLIES 2-16
MISFEED REMOVAL.... 2-17
- Misfeed removal guidance 2-17
- Misfeed in the transport area, fusing area, and exit area.... 2-18
- Misfeed in the duplex module.... 2-19
- Misfeed in the paper feed area.... 2-20
REMOVING AN ORIGINAL MISFEED 2-22
- Removing a misfed original from the automatic document feeder .. 2-22
TROUBLESHOOTING 2-23
LOADING PAPER
If the paper runs out during printing, a message will appear in the display.
Follow the procedure below to load paper.
NOTES
●Do not use curled or folded paper. Doing so may cause a misfeed.
●For best results use paper supplied by SHARP. (See page 2-4.)
- When you change the paper type and size in paper tray 1, set the paper type and size referring to "Setting the paper type and paper size" (page 2-5).
●Do not place heavy objects or press hard on any tray which is pulled out.
- Load paper with the print side face up. However, when the paper type is set to "PRE-PRINTED", "PRE-PUNCHED" or "LETTER HEAD", load the paper face down*.
* If the two-sided function is disabled using "DISABLING OF DUPLEX" in the administrator settings (page 11 of the administrator settings guide), load the paper face up.
Loading paper in paper tray 1
1 Pull out paper tray 1.

natural_image
Hand operating a mechanical device with a hand adjusting the component (no visible text or symbols)Gently pull the tray out until it stops.
2 Load paper into the tray.

natural_image
Illustration of a hand inserting a device into a rack with a black arrow indicating direction (no text or symbols present)Do not load paper above the maximum height line (approximately 500 sheets of 20 lbs. (80 g/m ^4 ) paper).
3 Gently push tray 1 into the machine.
Push the tray firmly all the way into the machine.
4 Set the paper type.
If you change the paper type setting if the paper type is changed in either paper tray, refer to "Setting the paper type and paper size" (page 2-5).
5 Loading paper in paper tray 1 is now complete.
Changing the paper size in paper tray 1
For paper tray 1, 8-1/2" x 11", A4 or B5 size paper can be set. Use the following procedure to change the size as needed.
1 Pull out paper tray 1.
If paper remains in the tray, remove it.
2 Adjust the guide plates A and B in the tray to the length and width of the paper.

natural_image
Technical diagram of a mechanical assembly with cross-sectional views and component details (no text or symbols)The guide plates A and B are slidable. Adjust them to the paper size to be loaded while squeezing their lock levers.
4 Gently push tray 1 into the machine.
Push the tray firmly all the way into the machine.
5 Set the paper size.
Be sure to set the paper size and paper type referring to "Setting the paper type and paper size" (page 2-5).
If this is not done, paper misfeeds will occur.
6 Changing paper size in paper tray 1 is now complete.
3 Load paper into the tray.
2-2
Specifications of paper trays
The specifications for types and sizes of paper that can be used in each tray are shown below.
| Tray Tray No. | (tray name) | Applicable paper types Applicable paper sizes Paper | weight | |||
| Paper tray 1 Tray 1 | Plain paper | (Refer to the next page for applicable plain papers.) | ● 8-1/2" x 11", A4, B5 | 16 to 28 lbs. or 60 to 105 g/m2 | ||
| Multi purpose drawer /bypass tray | Tray 2 /bypass tray | Plain paper (Refer to the next page for applicable plain papers.) | ● If "AUTO-INCH" is selected in setting the paper type and paper size (page 2-5), the following paper sizes can be used with the automatic detection function: 11" x 17", 8-1/2" x 14", 8-1/2" x 11", 8-1/2" x 11"R, 7-1/4" x 10-1/2", 5-1/2" x 8-1/2" R●If "AUTO-AB" is selected in setting the paper type and paper size (page 2-5), the following paper sizes can be used with the automatic detection function: A3, B4, A4, A4R, B5, B5R, A5R, 8-1/2 x 13"● Non-standard sizes | 16 to 34 lbs. or 60 to 128 g/m2 | ||
| Special paper (Refer to the next page for applicable special papers.) | ● Thick paper● Labels, transparency film | ● If "AUTO-INCH" is selected in setting the paper type and paper size (page 2-5), the following paper sizes can be used with the automatic detection function: 8-1/2" x 11", 8-1/2" x 11" R● If "AUTO-AB" is selected in setting the paper type and paper size (page 2-5), the following paper sizes can be used with the automatic detection function: A4, A4R, B5, B5R● Non-standard sizes | See the remarks for special paper on the next page. | |||
| Postcard ● | Japanese official postcard | |||||
| Envelopes can only be fed from the multi-purpose drawer. Applicable stock weight for envelopes is 20 to 23 lbs. or 75 to 90 g/m2. | ● Applicable standard size envelopes: COM-10, Monarch, DL, C5, ISO B5 CHOKEI 3● Non-standard size | |||||
| Stand /3 x500 sheet paper drawer | Upper Tray 2 Same as multi purpose drawer | |||||
| Middle Tray 3 Plain paper (Refer to the next page for applicable plain papers.) | ● If "AUTO-INCH" is selected in setting the paper type and paper size (page 2-5), the following paper sizes can be used with the automatic detection function: 11" x 17", 8-1/2" x 14", 8-1/2" x 11", 8-1/2" x 11"R, 7-1/4" x 10-11/2"●If "AUTO-AB" is selected in setting the paper type and paper size (page 2-5), the following paper sizes can be used with the automatic detection function: A3, B4, A4, A4R, B5, B5R, 8-1/2" x 13" | 16 to 28 lbs. or 60 to 105g/m2 | ||||
| Lower Tray 4 | ||||||
| Stand /MPD & 2000 sheet paper drawer | Upper Tray 2 Same as multi purpose drawer | |||||
| Lower Tray 3 Plain paper (Refer to the next page for applicable plain papers.) | ● 8-1/2" x 11", A4 | 16 to 28 lbs. or 60 to 105g/m2 | ||||
■Applicable plain paper
For satisfactory results, plain paper must conform to the following requirements.
| Paper in AB system Paper in inch system | ||
| A5 to A3 5-1/2 | "x8-1/2" to 11"x17" | |
| Plain paper 16 to 28 lbs. or 60 to 105 g/m ^2 | ||
| Recycled, colored, pre-punched, pre-printed and letterhead papers must conform to the same conditions as above. | ||
■Applicable special paper
For satisfactory results, special paper must conform to the following requirements.
| Type Remarks | ||
| Special paper Thick paper ● | For 5-1/2" x 8-1/2" to 8-1/2" x 11" or A5 to A4 sizes, thick paper ranging from 16 to 34 lbs. or 60 to 128 g/m2 can be used.For sizes larger than 8-1/2" x 11" or A4, thick paper ranging from 16 to 28 lbs. or 60 to 105 g/m2 can be used.Other thick papers Index stock (65 lbs. or 176 g/m2) can be used.Cover stock (110 lbs. or 200 to 205 g/m2) can be used but only for 8-1/2 x 11, A4 paper in the portrait orientation.For 5-1/2" x 8-1/2" or A5 paper, the orientation must be landscape. | |
■Paper that can be used for automatic two-sided printing
Paper used for automatic two-sided printing (paper that can be fed through the duplex module) must meet the following conditions:
Paper type :Plain paper as specified above.
Paper size :Must be one of the following standard sizes: 11" x 17", 8-1/2" x 14", 8-1/2" x 13", 8-1/2" x 11", 8-1/2" x 11" R or 5-1/2" x 8-1/2" R (A3, B4, A4, A4R, B5, B5R or A5R)
Paper weight :16 to 28 lbs. (64 to 105 g/m ^2 )
NOTES
● Special papers (explained above) cannot be used for automatic two-sided printing.
● Various types of plain paper and special paper are sold. Some of these cannot be used in the machine. Please consult your retailer or your dealer when buying paper.
● The image quality and toner fusibility of special papers may change due to ambient conditions, operating conditions, and paper characteristics, resulting in image quality inferior to that of SHARP standard paper.
Setting the paper type and paper size
Follow these steps to change the paper type setting if the paper type is changed in either paper tray. For the paper types that can be used in each tray, see page 2-3.
1 Press the [SYSTEM SETTINGS] key.
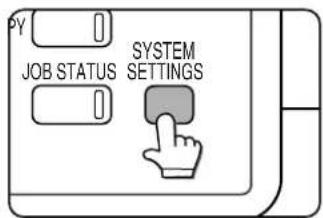
The system setting menu screen will appear.
2 Touch the [PAPER TRAY SETTINGS] key.
![SHARP MX-M450N - Touch the [PAPER TRAY SETTINGS] key. - 1](/content/2026/05/944414/images/bb716abaea8d8872db900e1ba498ab4d188fb1798c2f9408c3423eac08311d40.jpg)
flowchart
graph TD
    A["PRINT"] --> B["PAPER TRAY SETTINGS"]
    C["TATORWARD"] --> D["PRIPER CONDITION"]
The paper tray selection screen will appear.
3 Touch the [TRAY SETTINGS] key.

4 Display the setting screen of the desired paper tray.

Touch the ▲key or key to display the setting screen of the desired paper tray.
NOTE
To automatically switch to a tray with the same size and type of paper (if there is one) in the event that the paper tray runs out of paper, display the last screen with the ↓ key and select [AUTO TRAY SWITCHING].
5 Touch the [TYPE / SIZE] key.

6 Select the type of paper that was loaded in the tray.
Example: The paper type of tray 2 is selected
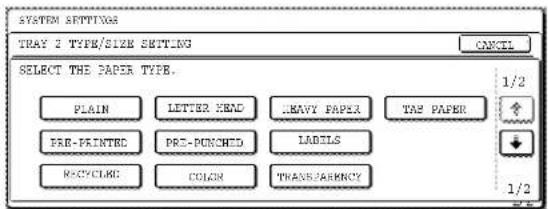
Touch the desired paper type to select it. The paper size setting screen will appear.
NOTE
Heavy paper, label sheets and transparency film cannot be used in trays 1, 3, and 4. Envelopes can only be placed in tray 2.
■User type
Set a user type when a paper type is not available as an option. To select a user type, touch the ↓ key in the screen of step 6 to display the user type selection screen. To store or edit a user type name or set tray attributes, see "Programming and editing paper types" on page 2-7.

7 Select the size of paper that was loaded in the tray.
Touch the appropriate keys (checkboxes).
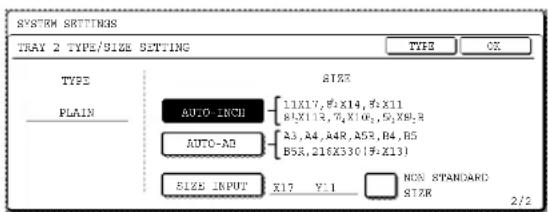
[AUTO-INCH] key : Select when you have loaded an inch-based size of paper.
[AUTO-AB] key : Select when you have loaded an AB size of paper.
[SIZE INPUT] key : Select to directly enter a paper size (see below).
[NON STANDARD: Select when you have SIZE] checkbox loaded a non-standard size of paper (see below).
[POST] key : Select this when you have loaded postcards.
NOTE
Sizes that can be selected vary depending on the selected paper type.
8 Touch the [OK] key in the size setting screen.
You will return to the tray setting screen of step 4.
9 Select output functions that can be used with the selected tray.
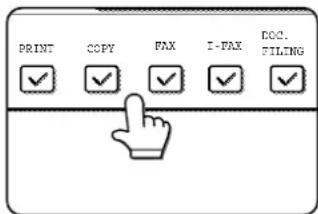
Touch the checkboxes under the desired items to select them.
Checkboxes that can be selected will vary depending on the options that are installed.
10 Configure paper settings for each tray and then touch the [OK] key to exit.
NOTE
The type and size of paper loaded in the bypass tray can also be set from the paper selection screen. Touch the [PAPER SELECT] key at the top of the base screen to display the paper selection screen, touch the [PAPER SELECT] key for the bypass tray, and then go to step 6.
Setting the paper size when a special size is loaded
NOTE
Special sizes of paper cannot be loaded in trays 1, 3 and 4.
Tray 2 and the bypass tray
1 Perform steps 1 through 6 of "Setting the paper type and paper size" (see page 2-5).
2 Touch the [SIZE INPUT] key and then touch the [INCH] tab.
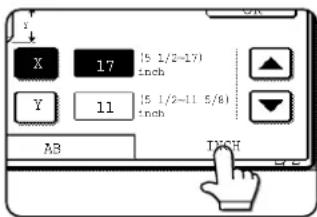
The size entry palette appears.
3 Touch the key or the key to enter the X (width) and Y (length) dimensions of the paper.

Entry of the X dimension (width) is initially selected. Touch the [Y] key and enter the Y dimension (length) in the same way as the X dimension.
4 Touch the [OK] key.
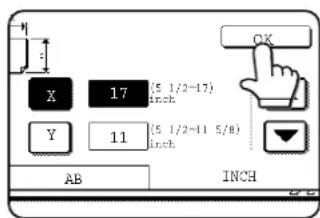
You will return to the size setting screen of step 2.
5 If the paper is a non-standard size, select the [NON STANDARD SIZE] checkbox.
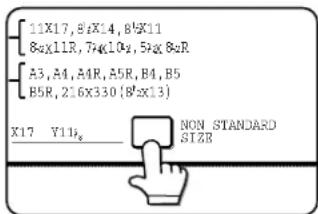
6 Perform steps 8 through 10 of "Setting the paper type and paper size" (See above).
Programming and editing paper types
To program or edit the name of a paper type or set paper attributes, follow the steps below.
1 Follow steps 1 and 2 of "Setting the paper type and paper size" (page 2-5)
2 Touch the [PAPER TYPE REGISTRATION] key.

3 Select the paper type that you wish to program or edit.

4 Touch the [TYPE NAME] key.

A character entry screen appears.
Enter a type name (maximum of 14 characters). (See page 7-29 to enter characters.)
5 Set the attributes of the paper tray.
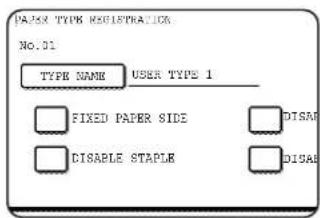
Touch the checkboxes to the left of the items to select them.
"FIXED PAPER SIDE": Select when paper is to be loaded print side down in the tray. Make sure a checkmark does not appear when paper is to be loaded print side up.
- If the two-sided function is prohibited in "DISABLING OF DUPLEX" in the administrator settings (page 11 of the administrator settings guide), do not use this setting.
"DISABLE DUPLEX": Prohibits two-sided printing. Enable when the back side of the paper cannot be printed on.
"DISABLE STAPLE": Prohibits stapling. Enable when using special papers such as transparency film and label sheets.
"DISABLE PUNCH": Prohibits punching. Enable when using special papers such as transparency film and label sheets.
NOTE
"FIXED PAPER SIDE" and "DISABLE DUPLEX" cannot be simultaneously enabled.
6 Touch the [EXIT] key to exit the programming/editing procedure.

Loading paper in the multi purpose drawer
The method of loading paper into the multipurpose drawer is the same as for paper tray 1 described on page 2-2. For specifications of paper, see page 2-3. When loading envelopes, postcards or transparency film, follow the descriptions below.
● Two maximum height lines are indicated: one for plain paper and one for special paper.

■How to change the paper size
To change the paper size or paper type when paper is loaded into the multi purpose drawer, refer to page 2-5 for details.
■Setting envelopes or postcards
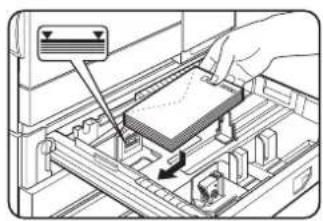
When setting envelopes or postcards in the multi purpose drawer, set them in the orientation shown below.
Loading postcards
Load postcards print side up to the rear left of the tray as shown.

Loading envelopes
Envelopes can only be printed on the address side. Be sure to place envelopes with the address side up and the top of the envelope to the rear.
natural_image
Diagram of a hand operating a device in an open circuit board (no text or symbols visible)Printing onto envelopes or postcards
- Attempting to print onto both sides of envelopes or postcards may result in misfeeds or poor prints.
- Do not use paper that has already been printed on by a thermal transfer or inkjet printer. In particular, paper that has been printed on by a thermal transfer printer (such as a word processor that uses a cassette) may cause missing characters and smudges.
● To avoid wrinkling, misfeeds or poor printing, make sure the postcard or envelopes stock is not curled.
Printing onto envelopes
- Do not use envelopes that have metal clasps, plastic snaps, string closures, windows, linings, self-adhesive patches or synthetic materials. Attempting to print on these may cause misfeeds, inadequate toner adherence or other trouble.
- Creases or smudging may occur. This is especially true of embossed surfaces and other irregular surfaces.
● Under high humidity and temperature conditions the glue flaps on some envelopes may become sticky and be sealed closed when printed. - Use only envelopes which are flat and crisply folded. Curled or poorly formed envelopes may be poorly printed or may cause misfeeds.
Fusing unit pressure adjusting levers
When feeding envelopes from the multi purpose drawer, damage to the envelopes or smudges on prints may occur even if envelopes within specification are used. In this case, the problem may be reduced by shifting the fusing unit pressure adjusting levers from the normal position to the lower pressure position. Follow the procedure below.
2
NOTE
Be sure to return the lever to the normal position when finished feeding envelopes. If not, inadequate toner adherence, paper misfeeds or other trouble may occur.
1 Unlatch the duplex module and slide it to the left.

natural_image
Illustration of a mechanical device with a handle and internal components (no visible text or symbols)Unlatch the module and gently move the module away from the machine. If the machine is not equipped with a duplex module, open the side cover similarly.
3 Gently close the duplex module.

natural_image
Illustration of hands operating a computer tower with an open lid (no text or symbols visible)If the machine is not equipped with a duplex module, close the side cover.
2 Lower the two fusing unit pressure adjusting levers marked A and B in the illustration.


A: Rear side of fusing unit
B: Front side of fusing unit
■Loading transparency film
Be sure to load the transparency film with the white label side up. Make sure no image will be printed on the label. Printing on the label may cause smudges on prints. Transparency film must be set in the portrait orientation.
Specifications (multi purpose drawer)
| Name Multi purpose drawer | |
| Paper size/weight See specifications of paper trays on page 2-3. | |
| Paper capacity | 500 sheets (20 lbs. (80 g/m2)) of paper, 40 envelopes, 40 postcards, 40 sheets of transparency film |
| Dimensions | 25-3/4" (W) x 22-21/64" (D) x 5-43/64" (H)(654 mm (W) x 567 mm (D) x 144 mm (H)) |
| Weight Approximately 24.3 lbs. or 11 kg | |
Specifications are subject to change for improvement without notice.
Loading paper in the stand/3 x 500 sheet paper drawer
Upper paper tray:
The upper tray is the same as the multi-purpose drawer. Use the upper tray according to the instructions for the multi-purpose drawer on page 2-8.
Middle and lower paper trays:
Up to 500 sheets of SHARP recommended plain paper can be loaded in these trays. The method of loading paper is the same as for paper tray 1 in the main unit. See the description (page 2-2).
NOTE
If the paper size or paper type is changed in either paper tray, the tray settings must be changed in system settings. Refer to "Setting the paper type and paper size" on page 2-5.
Specifications (stand/3 x 500 sheet paper drawer)
| Name Stand/3 x 500 sheet paper drawer | |
| Paper size/weight See specifications of paper trays on page 2-3. | |
| Paper capacity(ordinary paper) | 500 sheets (20 lbs. (80 g/m2)) each |
| Dimensions | 23-3/16" (W) x 24-51/64" (D) x 15-29/32" (H)(589 mm (W) x 630 mm (D) x 404 mm (H)) |
| Weight Approximately 70.6 lbs. or 32.9 kg | |
Loading paper in the stand/MPD & 2000 sheet paper drawer
Upper paper tray:
The upper paper tray is equivalent to the multi purpose drawer. The method of loading paper and the paper that can be used are the same as for the multi purpose drawer. Refer to the description of the multi purpose drawer (see page 2-8).
Lower paper tray:
The lower paper tray is a large capacity tray that holds 2,000 sheets of 8-1/2" x 11" or A4 paper (20 lbs. (80 g/m ^2 )). Use the following procedure to load paper in the large capacity tray.
NOTE
If the paper size or paper type is changed in either paper tray, the tray settings must be changed in system settings. Refer to "Setting the paper type and paper size" on page 2-5.
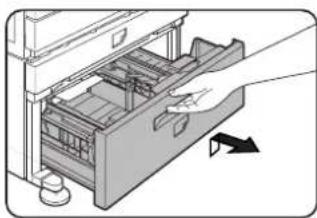
1 Pull out the large capacity tray.
natural_image
Illustration of a hand inserting a device into a drawer with an arrow indicating direction (no text or symbols present)Gently pull the tray out until it stops.
2 Load paper onto the right and left paper feed tables.

natural_image
Illustration of a hand inserting a card into a file drawer (no text or symbols visible)Load paper onto the right paper feed table. The right table holds approximately 1,200 sheets.

natural_image
Illustration of a printer's internal structure with arrows indicating motion (no text or symbols)Raise the paper guide and load paper onto the left paper feed table. The left table holds approximately 800 sheets. After loading paper, be sure to return the paper guide.
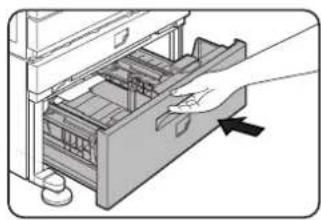
3 Gently push the large capacity paper tray into the machine.
natural_image
Illustration of a hand inserting into a device into a rack (no text or symbols visible)Push the tray firmly all the way into the machine.
4 Set the paper type.
If you have changed the paper size from the AB system to the inch system or vice versa, select the relevant type referring to "Setting the paper type and paper size" on page 2-5.
5 Loading paper in the stand/MPD & 2000 sheet paper drawer is now complete.
Specifications (stand/MPD & 2000 sheet paper drawer)
| Name Stand/MPD & 2000 sheet paper drawer | |
| Paper size/weight See specifications of paper trays on page 2-3. | |
| Paper capacity(ordinary paper) | Upper tray: 500 sheets (20 lbs. (80 g/m2)), Lower tray: 2,000 sheets (20 lbs. (80 g/m2)) |
| Dimensions | 23-3/16" (W) x 24-51/64" (D) x 15-29/32" (H)(589 mm (W) x 630 mm (D) x 404 mm (H)) |
| Weight Approximately 75 lbs. or 34 kg | |
SYSTEM SETTINGS
The system settings can be used as needed to meet the needs of your workplace. The items that can be set with the system settings are shown below.
● Total count .... The number of pages processed by the machine and optional equipment can be displayed. (See page 2-14)
- Default settings ....Used to configure the screen contrast, date and time, and keyboard selection*1 settings. (See page 2-14)
● List print ....Used to print lists of settings and fonts. (See page 2-14)
● Paper tray settings.... The paper type, paper size and automatic tray switching can be set for each tray. Automatic tray switching allows feeding to switch between trays loaded with the same type and size of paper. If one tray runs out of paper during printing, printing will continue from the other tray. (See page 2-14)
For the detailed descriptions and use of the settings listed below, see the fax, image send, and printer manuals.
- Address control ^*1 . . . . . . . . . . . . Used to store information for various functions.
- Sender control ^*2 ....Used to store the sender's information that appears on your Scan to E-mail transmissions at the destination.
- Fax data receive/forward*1 . . . . . . Faxes received to memory and received Internet faxes can be forwarded to another destination.
- Printer condition....Used to configure default settings for the printer function (see the Operation manual (for printer)).
- Document filing control*3 .... Used to configure default settings for the document filing function. (pages 7-24 to 7-28)
- Administrator settings .... These are items that are used by the administrator of the machine to configure machine settings. A key appears for these settings in the system settings menu screen. For information on these settings, see the administrator settings guide.
*1 These settings can be configured in a system where the facsimile, network scanner or Internet fax function is available.
2 These settings can be configured in a system where the network scanner function is available.
3 These settings can be configured in a system where the document filing function is available.
General procedure for system settings
1 Press the [SYSTEM SETTINGS] key.

The system settings menu screen will appear.
2 Touch the key of the desired item to display its setting screen.
The example of selecting the [DEFAULT SETTINGS] key and then the [CLOCK] key is explained below.
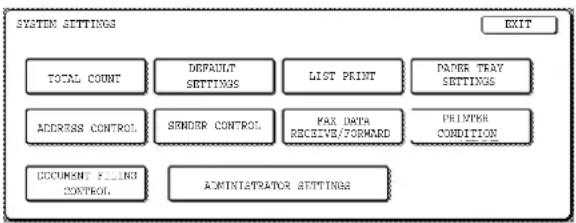
The system settings are described in detail on the following pages.
3 Touch the [CLOCK] key.
Touch the [CLOCK] key and then the following screen appears.
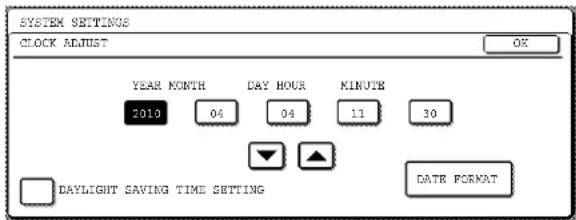
4 Touch the year, month, day, hour or minute key, and then use the or key to adjust the setting.
- If you select a non-existent date (for example, Feb. 30), the [OK] key will gray out to prevent entry of the date.
- Select [DAYLIGHT SAVING TIME SETTING] checkbox to have the time automatically change at the beginning and end of daylight saving time.
5 Touch the [DATE FORMAT] key.
The following screen appears.

6 If you wish to change the format of the date and time, touch the desired format keys.
Touched keys are highlighted.
The selected format is applied to lists printed out in "LIST PRINT".
7 Touch the [OK] key.

You will return to the date and time setting screen.
8 Touch the [OK] key.
9 To exit the settings, touch the [EXIT] key.
![SHARP MX-M450N - To exit the settings, touch the [EXIT] key. - 1](/content/2026/05/944414/images/31837fbdedb9ed9dd5600d90eb5e63228072a35a2f31afbaf7a12ca81521e090.jpg)
flowchart
graph TD
    A["TOTAL COUNT"] --> B["DEFAULT SETTINGS"]
    B --> C["LIST PRINT"]
    C --> D["FAPER TRAN SETTINGS"]
    E["ADDRESS CONTROL"] --> F["GRENDER CONTROL"]
    F --> G["FAX DATA RECEIVE/FORWARD"]
    G --> H["PRINTER CONDITION"]
    I["DOCUMENT PILING CONTROL"] --> J["ADMINISTRATOR SETTINGS"]
    K["EXIT"] --> L
— More information on setting procedures In the following type of screen, a setting is selected by touching the key so that a checkmark ☑ appears. The settings below are configured to allow use of tray 1 in print, copy, and fax modes. To display the next screen, touch the ☑ or keys.
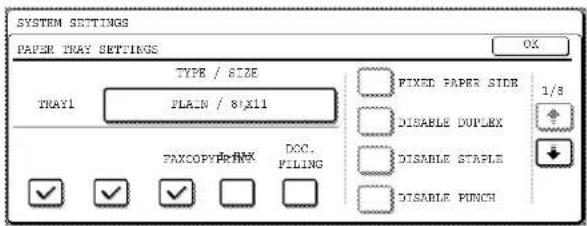
About the settings
■ Total count
This displays the following sheet counts (the counts that can be displayed vary depending on the options installed):
(1) Number of pages output by the machine.
(2) Number of original pages transmitted by the machine.
(3) Number of times the automatic document feeder was used to feed original pages and number of times the stapler was used (if installed).
(4) Number of pages stored by document filing. In the case of (1) only,
●11" x 17" (A3) size paper is counted as two sheets.
●Each sheet of paper used for automatic two-sided copying is counted as two sheets (11" x 17" (A3) paper is counted as four sheets).
●Paper with an entered size of 15-1/8" (384 mm) or larger is counted as two sheets (four sheets during automatic two-sided copying).
■ Default settings
The following settings can be configured:
●Display contrast
Screen contrast adjustment is used to make the LCD touch panel easier to view under various lighting conditions. Touch the [LIGHTER] key to make the screen lighter, or the [DARKER] key to make the screen darker.
●Clock
Use this to set the date and time in the machine's built-in clock. This clock is used by functions that require date and time information.
●Keyboard select
The layout of the keyboard that appears in letter entry screens can be changed.
Select the arrangement of the letter keys that you find easiest to use.
The following three alphabet keyboard configurations are available:
● Keyboard 1 (QWERT... configuration)*
● Keyboard 2 (AZERTY...configuration)
● Keyboard 3 (ABCDEF...configuration)
* The default setting is "Keyboard 1".
(Example: Character entry screen when Keyboard 3 is selected)
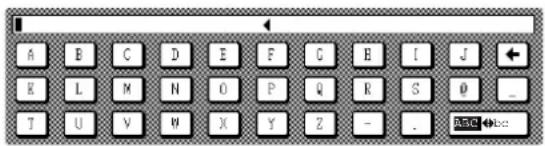
■ List print
This is used to print lists of machine settings and a test page to check resident fonts.
The following lists and pages are available:
●All custom setting list
Shows the hardware status, software status, printer configuration settings, tray settings, and counts.
●Printer test page
Shows the PCL symbol set list, fonts, network interface (NIC interface) settings, and settings used for the NIC card.
- Sending address list
One touch destination list, group list, program list, and memory box list.
●Document filing user / folder list
Shows the user names and folder names for document filing.
●Sender control list
Shows the senders that have been stored.
NOTE
A test page cannot be printed if "PROHIBIT TEST PAGE PRINTING" (See the "Operation manual (for printer)"). has been set to "prohibited" in the administrator settings.
■ Paper tray settings
The paper type, paper size, enabled modes and automatic tray switching can be set for each tray. See page 2-5 to 2-7 for details on setting the paper type and paper size. Automatic switching to another paper tray is used to automatically switch to another tray with the same size and type of paper in the event that the paper runs out during continuous printing. This requires that the trays be loaded with the same size of paper. The paper tray settings can be enabled or disabled for each tray, and for printer mode, copy mode, fax mode, Internet fax mode, and document filing mode. To enable any function, touch the check box key so that a checkmark (☑) appears.
REPLACING THE TONER CARTRIDGE
When toner runs low, a message will appear to inform you that the toner cartridge must be replaced.
NOTE
To view the approximate amount of toner remaining, hold down the [COPY] key during printing or when the machine is on standby. The percentage of toner remaining will appear in the display while you hold down the key. When the percentage falls to "25-0%", obtain a new toner cartridge and keep it ready for replacement.
Follow the steps below to replace the toner cartridge.
1 Open the front cover.
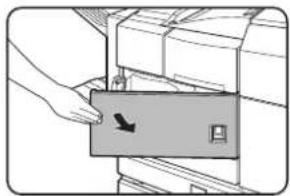
natural_image
Illustration of a hand pressing a button on a machine component (no text or symbols visible)2 Lower the cartridge lock lever.

natural_image
Technical line drawing of a mechanical assembly with a hand operating a component (no text or symbols visible)3 While depressing the lock release button, pull out the toner cartridge and remove it.

natural_image
Illustration of a hand holding a device with arrows indicating movement or force (no text or symbols present)4 Remove a new toner cartridge from the package and shake it horizontally five or six times.

natural_image
Illustration of hands holding a rectangular electronic device with directional arrows indicating movement (no text or symbols)NOTE
Shake the toner cartridge well to ensure that the toner flows well and will not stick to the inside of the cartridge.
5 Insert a new toner cartridge.
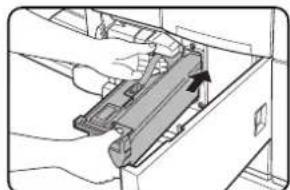
natural_image
Illustration of a hand inserting a device into a folder (no text or symbols visible)Push the cartridge in until it locks securely into place.
6 Gently remove the sealing tape from the cartridge.
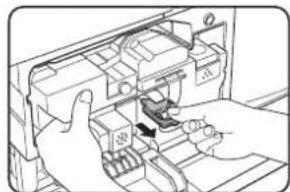
natural_image
Line drawing of a hand inserting a component into an electronic device (no text or symbols visible)Once the seal is pulled out, the toner in the toner cartridge is supplied to the developer cartridge.
7 Return the cartridge lock lever.
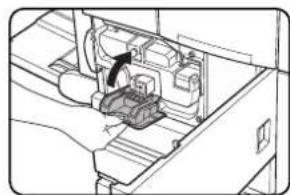
natural_image
Technical line drawing of a mechanical assembly with no visible text or symbols8 Close the front cover.

natural_image
Diagram showing a hand pressing a button on a machine component (no text or symbols visible)CAUTION
● Do not throw the toner cartridge into a fire. Toner may fly and cause burns.
● Store toner cartridges out of the reach of small children.
NOTE
Place the used toner cartridge in the plastic bag and store it. When placing the toner cartridge in the bag, insert it horizontally, not vertically. If the cartridge is stood on end, the collected used toner may spill out and soil the floor or your clothes.
STORAGE OF SUPPLIES
Standard supplies for this product that can replaced by the user include paper, toner cartridges, and staple cartridges for the finisher.
SHARP.

For best copying results, be sure to use only Sharp Genuine Supplies which are designed, engineered, and tested to maximize the life and performance of Sharp products. Look for the Genuine Supplies label on the toner package.
GENUINE SUPPLIES
■ Proper storage
-
Store the supplies in a location that is:
-
clean and dry,
● at a stable temperature,
● not exposed to direct sunlight. -
Store paper in the wrapper and lying flat.
- Paper stored in packages standing up or out of the wrapper may curl or become damp, resulting in paper misfeeds.
- Store a new toner cartridge box horizontally. Do not store it standing on end. If stored standing on end, the toner may not distribute well even after shaking the cartridge vigorously, and will remain inside the cartridge without flowing out.
Supply and Consumables
The supply of spare parts for a repair of the appliance is guaranteed for at least 7 years following the termination of production. Spare parts are those parts of the apparatus which may break down within the scope of the ordinary use of the product - whereas those parts which normally exceed the life of the product are not to be considered as spare parts. Consumables too, are available for 7 years following the termination of production.
MISFEED REMOVAL
When a misfeed has occurred during printing, the message "A MISFEED HAS OCCURRED". will appear in the touch panel display of the operation panel and printing including copying and facsimile output will stop. The approximate misfeed locations are indicated with "▼" shown in the illustration below. The page numbers for detailed information on misfeed removal are also shown.

flowchart
graph TD
    A["Misfeed in the document feeder (page 2-22)"] --> B["Misfeed in the finisher (page 3-12)"]
    B --> C["Misfeed in the mail-bin stacker (page 3-6)"]
    C --> D["Misfeed in the transport area, fusing area, and exit area (page 2-18)"]
    D --> E["Misfeed in the duplex module (page 2-19)"]
    E --> F["Misfeed in the bypass tray (page 2-19)"]
    F --> G["Misfeed in paper tray 1 (page 2-20)"]
    G --> H["Misfeed in the multi purpose drawer (page 2-21)"]
    H --> I["Misfeed in the stand/3 x 500 sheet paper drawer (page 2-21)"]
    I --> J["Misfeed in the multi purpose drawer (page 2-21)"]
    J --> K["Misfeed in the stand/MPD & 2000 sheet paper drawer (page 2-21)"]
    K --> L["Misfeed in the saddle stitch finisher (page 3-22)"]
NOTE
Printing is not possible when a misfeed occurs, and thus any faxes or Internet faxes received at this time will be temporarily held in memory. The faxes will print out automatically as soon as the misfeed is cleared.
NOTES
● Do not damage or touch the photoconductive drum. (See page 2-18.)
● Be careful not to tear the misfed paper during removal.
- If paper is accidentally torn during removal, be sure to remove all pieces.
!CAUTION
The fusing unit is hot. Take care in removing paper.
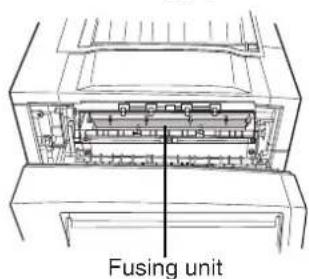
Misfeed removal guidance
Misfeed removal guidance can be displayed by touching the [INFORMATION] key on the touch panel after a misfeed has occurred.

Misfeed in the transport area, fusing area, and exit area
CAUTION
The fusing unit is hot. Take care in removing paper. (Do not touch the metal parts.)
1 Unlatch the duplex module and slide it to the left.
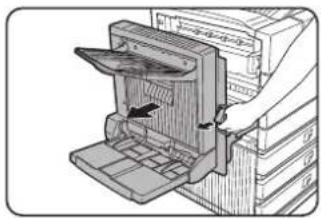
natural_image
Technical illustration of a mechanical device with a handle and internal components (no visible text or symbols)Unlatch the module and gently move the module away from the machine. If the machine is not equipped with a duplex module, open the side cover similarly.
2 Remove the misfed paper as shown in the illustrations below.

If paper is misfed in the transport area, turn roller rotating knob A in the direction of the arrow to remove the misfed paper.
NOTE

Do not touch or damage the transfer roller.
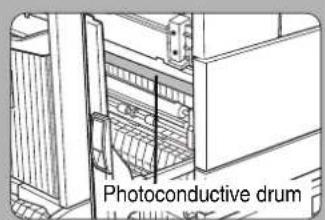
Do not touch or damage the photoconductive drum.

If paper is misfed in the fusing area, turn roller rotating knob B in the direction of the arrow to remove the misfed paper.
CAUTION
The fusing unit is hot. Take care in removing paper. (Do not touch any metal parts.)

If the misfed paper is inside the fusing area, turn down the fusing unit open tab to open the fusing unit and remove the misfed paper.
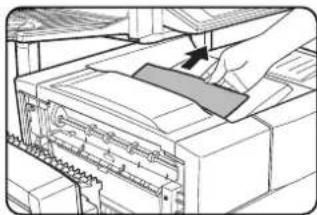
natural_image
Illustration of a hand inserting a card into a server rack (no text or symbols visible)If paper is misfed in the exit area, remove it as shown while taking care not to tear the paper.

natural_image
Illustration of a hand inserting a component into a stack of electronic devices (no text or symbols visible)If the duplex module is equipped with an exit tray and paper is misfed in the exit area, remove the misfed paper as shown in the illustration.
3 Gently close the duplex module.

natural_image
Illustration of a hand inserting a device into a rack, showing internal components and a directional arrow (no text or symbols)If the machine is not equipped with a duplex module, close the side cover.
After closing, confirm that the misfeed message is cleared and the normal display appears.
Misfeed in the duplex module
1 Unlatch the duplex module and slide it to the left.
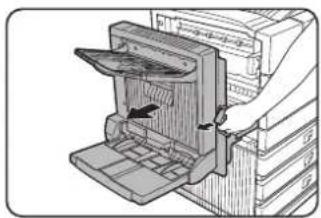
natural_image
Technical illustration of a mechanical device with internal components and a handle (no text or symbols)Unlatch the unit and gently move the module away from the machine.
2 If the duplex module has an exit tray, rotate it up out of the way and open the cover of the duplex module.
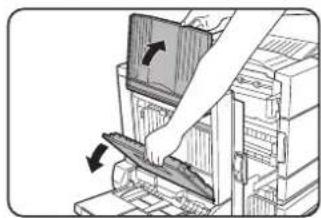
natural_image
Illustration of a hand pressing down on a computer monitor with arrows indicating motion (no text or symbols)If no exit tray is attached, just open the cover of the duplex module and ignore any reference to the tray in the following steps.
3 While holding the exit tray up, remove the misfed paper as shown in the illustrations below.
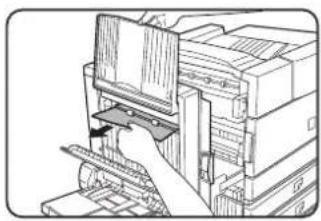
natural_image
Technical line drawing of a mechanical assembly with no visible text or symbolsIf paper is misfed at the upper part of the duplex module, gently remove it while taking care not to tear the paper.

natural_image
Illustration of a hand inserting a device into a computer tower (no text or symbols visible)If paper is misfed at the lower part of the duplex module, gently remove it while taking care not to tear the paper.
4 Close the cover of the duplex module and lower the exit tray.

natural_image
Illustration of a hand inserting a card into a printer (no text or symbols visible)5 Gently close the duplex module.
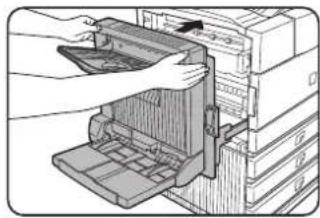
natural_image
Illustration of a hand inserting a device into a rack, showing internal components and a handle (no text or symbols)After closing the duplex module, confirm that the misfeed message is cleared and the normal display appears.
■ Misfeed in the bypass tray
1 Unlatch the duplex module and slide it to the left.

natural_image
Technical illustration of a mechanical device with a paper holder and clamped components (no text or symbols)Unlatch the unit and gently move the module away from the machine.
2 Remove the misfed from the bypass tray.
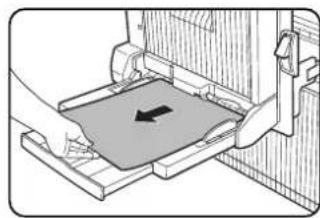
natural_image
Illustration of a hand pressing a component into a machine (no text or symbols visible)Be careful not to tear the misfed paper during removal.
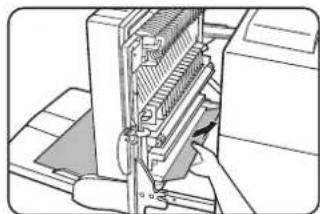
natural_image
Diagram of a mechanical device with internal components and an arrow indicating a specific part (no text or symbols present)Be careful not to tear the misfed paper during removal.
3 Gently close the duplex module.
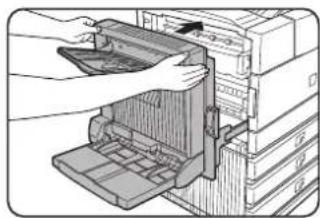
natural_image
Illustration of a hand inserting a device into a rack, showing internal components and a handle (no text or symbols)After closing the duplex module, confirm that the misfeed message is cleared and that the normal display appears.
Misfeed in the paper feed area
NOTE
Be sure to follow the misfeed removal sequence. Do not pull the tray out immediately as the misfeed may have occurred with paper partially fed out of the tray. Open the left cover and see if there is misfed paper first (steps 1 and 2). If you open the tray without checking, the partially fed paper may tear and leave torn pieces in the machine, increasing the difficulty of removal.
■ Misfeed in paper tray 1
1 Unlatch the duplex module and slide it to the left.
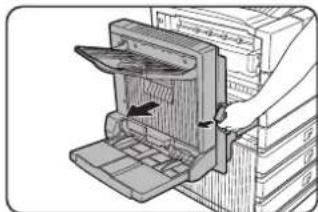
natural_image
Illustration of a printer's internal structure showing paper feeding into a stack (no text or symbols)Unlatch the module and gently move the module away from the machine. If the machine is not equipped with a duplex module, open the side cover similarly.
2 Remove the misfed paper.
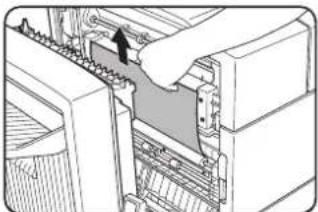
natural_image
Diagram of a computer interface showing a hand inserting a component into a rack (no text or symbols visible)Be careful not to tear the misfed paper during removal.
NOTE
The paper may not be extending out far from inside the machine but must be removed if it is possible to grasp it. If it is not possible to grasp it, go to the next step.
3 If misfed paper is not found in step 2, pull out paper tray 1 and remove the misfed paper.
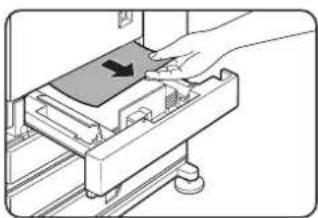
natural_image
Illustration of a hand pressing down on a mechanical component with a black arrow indicating motion (no text or symbols present)Be careful not to tear the misfed paper during removal.
4 Gently close the paper tray.
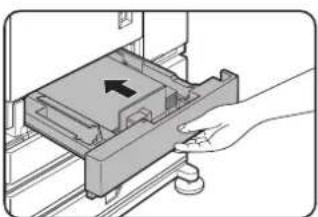
natural_image
Hand operating a mechanical device with a black arrow indicating the component (no text or symbols visible)Push the paper tray back into the machine.
5 Gently close the duplex module.

natural_image
Illustration of a hand inserting a device into a rack, showing internal components and a handle (no text or symbols)If the machine is not equipped with a duplex module, close the side cover.
After closing, confirm that the misfeed message is cleared and the normal display appears.
NOTE
If paper drops beyond the rear side of the paper tray that has been pulled out, remove the paper tray and then remove the paper. (For removal of the paper tray, see the illustration below.)
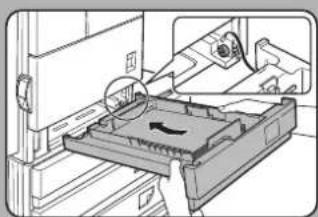
natural_image
Technical line drawing of a mechanical assembly or machine component (no visible text or symbols)After pulling out the paper tray until it stops, gently lift and pull the tray to remove it. To reinstall the paper tray, insert it at an angle and then push it into the machine.
To remove a paper tray from a stand/paper drawer, pull the tray out until it stops then rotate it to the left to disengage it from the stand. When reinstalling it, place the left rear or the drawer into the slot and rotate the drawer to the right and into the stand.
Installation of trays in the stand/3x500 sheet paper drawer
The middle and lower trays cannot be installed in the upper tray position and the upper tray cannot be installed to the middle and lower tray positions. (These cannot be pushed into the machine.)
Take care not to install a tray to an improper position after removing the tray.
■ Misfeed in the multi purpose drawer
1 Unlatch the duplex module and slide it to the left.

natural_image
Technical illustration of a mechanical assembly with no visible text or symbolsUnlatch the module and gently move the module away from the machine. If the machine is not equipped with a duplex module, open the side cover similarly.
2 Open the left cover of the stand/paper drawer.

natural_image
Diagram of a hand using a tool to adjust or install a mechanical component, with no visible text or symbols.Hold the knob and gently open the cover. If the machine is not equipped with a stand/paper drawer, open the left cover of the multi purpose drawer.
3 Remove the misfed paper.

natural_image
Illustration of a hand operating a mechanical device with no visible text or symbolsBe careful not to tear the misfed paper during removal.
NOTE
The paper may not be extending out far from inside the machine but must be removed if it is possible to grasp it. If it is not possible to grasp it, go to the next step.
4 Close the left cover of the stand/paper drawer.
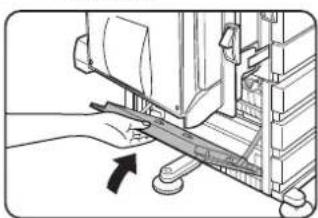
natural_image
Illustration of a hand using a tool to adjust or install a mechanical component (no text or symbols visible)5 Gently close the duplex unit.

natural_image
Illustration of hands operating a desktop computer with an open lid (no text or symbols visible)If the machine is not equipped with a duplex module, close the side cover.
After closing, confirm that the misfeed message has been cleared and the normal display appears.
6 If misfed paper is not found in step 3, refer to "Misfeed in paper tray 1" (steps 1 to 5 on the previous page) to remove the misfed paper.
■ Misfeed in the stand/3 x 500 sheet paper drawer
For misfeed removal in the upper tray, follow the procedure of "Misfeed in the multi purpose drawer" shown to the left to remove the misfed paper.
■ Misfeed in the stand/MPD & 2000 sheet paper drawer
For misfeed removal in the upper tray, follow the procedure of "Misfeed in the multi purpose drawer" shown to the left to remove the misfed paper. For misfeed removal in the lower large capacity tray, follow the procedure below.
1 Follow steps 1 to 4 of "Misfeed in the multi purpose drawer" shown to the left.
2 If misfed paper is not found in step 1, refer to "Misfeed in paper tray 1" on the previous page.
3 If misfed paper is not found in steps 1 and 2, pull out the large capacity tray (lower tray) and remove the misfed paper as shown in the illustrations below.
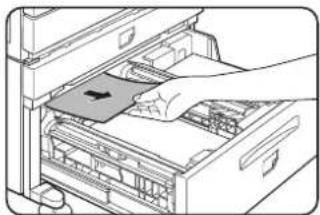
natural_image
Illustration of a hand inserting a card into an open file into a rack (no text or symbols visible)
natural_image
Diagram of a printer's internal structure showing a hand inserting a component into a paper plane (no text or symbols visible)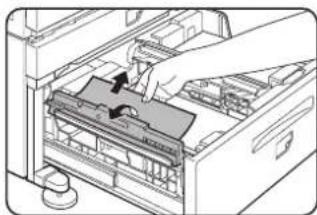
natural_image
Illustration of a hand inserting a device into a file drawer (no text or symbols visible)Raise the paper guide and remove the misfed paper. After removing the misfed paper, be sure to return the paper guide.
4 Gently close the large capacity tray.

natural_image
Illustration of a hand inserting a device into a drawer with an arrow indicating direction (no text or symbols present)Push the paper tray all the way into the machine.
5 Gently close the duplex module.
If the machine is not equipped with a duplex module, close the side cover.
After closing, confirm that the misfeed message has been cleared and the normal display appears.
REMOVING AN ORIGINAL MISFEED
Removing a misfed original from the automatic document feeder
If an original misfeed occurs in the automatic document feeder, follow the steps below to remove the misfed original.
NOTES
● For misfeed removal in the main unit and other peripheral devices, see page 2-17
- When a misfeed occurs, touch the [INFORMATION] key to display detailed information for misfeed removal.

1 Removing misfeeds from each location.
- Check location A
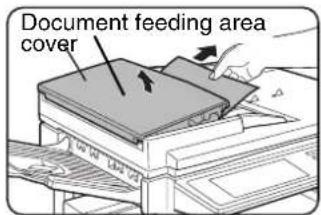
Open the document feeding area cover and gently remove the misfed original without tearing it.

natural_image
Illustration of a hand pressing down on a printer stack with an arrow indicating compression (no text or symbols present)Close the cover securely so that cover clicks into place.
- Check location B
● Misfeed in the transfer unit

natural_image
Illustration of hands installing or adjusting a component on a computer monitor (no text or symbols visible)Open the document feeder and turn the green rotating knob in the direction of the arrow to remove any misfed originals.
Check locations A and B in the diagram at left to remove the original.
2 Open and close the document feeder.

natural_image
Illustration of a hand inserting a device into an open screen (no text or symbols visible)Opening and closing the cover clears the misfeed display. Copying cannot be resumed until this step is performed.
However, this step is not necessary after a
misfeed is removed from location B.
A message may appear indicating the number of originals which must be returned to the document feeder tray. Return the originals to the document feeder tray and press the [START] key.
TROUBLESHOOTING
Check the following troubleshooting list before requesting service as many problems can be fixed by the user. If you are unable to solve the problem by checking the list, turn off the power switch, unplug the power cord.
Problems related to general use of the machine are described below. For problems related to the copy function, see page 6-3. For problems related to document filing, see page 7-31. For fax, printer, and network scanner/Internet fax problems, see the manuals for those functions. For peripheral device problems, see the explanation of the device.
If the message "CALL FOR SERVICE. CODE:**-**"(Note) appears in the touch panel, turn off the power switch, wait about 10 seconds, and then turn the power switch back on. If the message still appears after turning the power switch off and on several times, it is likely that a failure has occurred that requires service. In this event, stop using the machine, unplug the power cord, and contact your Sharp dealer.
Note: Letters and numbers appear in "***-**". When you contact your Sharp dealer, please tell your dealer what letters and numbers appear.
| Problem Check Solution or cause | ||
| The machine does not operate. | Machine plugged in? Plug the machine into a grounded outlet. | |
| The power switch are not turned on? Turn on the power switch. (Page 1-17) | ||
| READY indicator off? | The machine is warming up. (Warm-up time is approximately 80 seconds.) Wait until the READY indicator lights up. | |
| Message indicating need to load paper displayed? | Load paper. (Page 2-2) | |
| Message indicating need to replace the toner cartridge displayed? | Replace the toner cartridge. (Page 2-15) | |
| Message indicating a paper misfeed displayed? | Remove misfed paper. (Page 2-17) | |
| Copying/printing is not possible. | A message appears saying that this type of paper cannot be used for two-sided copying. | Two-sided printing is not possible on special paper. Use paper that can be used for automatic two-sided printing. (Page 2-4) |
| Problem Check | Solution or cause | |
| Printing stops before the job is finished. | If too many pages collect on the output tray, the tray full sensor activates and stops printing. | Remove the paper from the output tray. |
| The paper tray is out of paper. Load paper. (Page 2-2) | ||
| Smudges on printed sheets. | Does a message appear indicating the need for maintenance? | Please contact your dealer as soon as possible. |
| The displayed paper size or paper type does not match the loaded paper size or paper type. | The correct paper size or paper type is not set in the paper tray settings of the system settings. | When loading paper, if you change the paper size from an inch size to an AB size, or from an AB size to an inch size, or change the paper type, be sure to set the new paper type as explained in "Setting the paper type and paper size" (see page 2-5). |
| When printing on a special size of paper, part of the printed image is missing. | The paper size setting is not set correctly in the paper tray settings of the system settings. | When using a special size of paper, set the correct paper size as explained in "Setting the paper type and paper size" on page 2-5. If the paper size setting is not correct, part of the image may be cut off or the image may not be printed. |
| Paper misfeeds frequently. | Is paper other than SHARP-recommended paper being used? | Use SHARP-recommended paper. (Page 2-16) |
| Paper curled or damp? | Do not use curled or crimped paper. If you will not use the paper for a long time, remove the paper from the tray and store it in the wrapper in a cool and dark location so that it will not absorb moisture. | |
| Is the paper curled and does it frequently misfeed in the finisher or saddle stitch finisher? | Paper may be curled when output depending on the paper type and quality.In some cases turning the paper over in the tray will reduce misfeeding due to curling. | |
| Multiple sheets of paper fed simultaneously? | 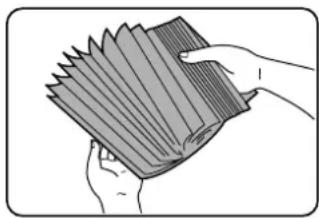 Remove the paper from the paper tray or the bypass tray, fan the paper as shown in the illustration, and then load it again. Remove the paper from the paper tray or the bypass tray, fan the paper as shown in the illustration, and then load it again. | |
| The paper in the tray is not stacked evenly. | Make sure that the paper in the paper tray is stacked evenly. If the stack is not even, paper misfeeds will occur. | |
| Problem Check Solution or cause | ||
| Printed paper is wrinkled or the image rubs off easily. | Is paper other than SHARP-recommended paper being used? | Use SHARP-recommended paper. (Page 2-16) |
| Is the paper size or weight outside the specifications? | Use paper within the specifications. | |
| Paper damp? | Be sure to store paper in the wrapper in a dry location and do not store paper in a location that is●humid●at a high temperature or an extremely low temperature●exposed to direct sunlight●dusty. | |
| The contrast on the touch panel is too high or too low. | Is LCD contrast properly adjusted? | Adjust the screen contrast using "DISPLAY CONTRAST" in "Default settings" of the system settings. (Page 2-14) |
| Printing takes place on the wrong side of the paper. | The paper is loaded in the tray with the print side face down*.* Face up if the paper type is "PRE-PRINTED", "PRE-PUNCHED" or "LETTER HEAD". | Load paper in the tray with the print side face up. However, if the paper type is "PRE-PRINTED", "PRE-PUNCHED" or "LETTER HEAD", load the paper with the print side face down*.* If the two-sided function has been prohibited using "DISABLING OF DUPLEX" in the administrator settings (page 11 of the administrator settings guide), load the paper face up. |
| Marks appear at regular intervals on printed pages. | Paper with punch holes is being used. | If the original image overlaps the punch holes, marks will appear at the position of the holes on the back of the paper after one-sided printing, or on the front and back of the paper after two-sided printing. Make sure that the original image does not overlap the punch holes. |
CHAPTER 3
PERIPHERAL DEVICES
This chapter describes operating instructions for the Mail-Bin Stacker, the Finisher, the Saddle Stitch Finisher, and the Duplex Module, as well as Sharp OSA (application communication module and external account module).
Page
DUPLEX MODULE 3-2
- Part names.... 3-2
- Specifications.... 3-2
- Loading paper in the bypass tray 3-3
- Troubleshooting (concerning the duplex module) 3-4
MAIL-BIN STACKER 3-5
- Part names.... 3-5
- Specifications.... 3-5
- Misfeed in the mail-bin stacker.... 3-6
FINISHER 3-7
- Part names.... 3-7
- Specifications.... 3-7
- Finisher functions.... 3-8
- Using the finisher functions.... 3-9
- Staple cartridge replacement.... 3-10
- Misfeed in the finisher 3-12
- Troubleshooting finisher problems.... 3-13
SADDLE STITCH FINISHER.... 3-14
- Part names.... 3-14
- Specifications.... 3-14
- Saddle stitch finisher functions.... 3-15
- Using the saddle stitch finisher .... 3-18
- Staple cartridge replacement and staple jam removal.... 3-19
- Misfeed in the saddle stitch finisher 3-22
- Troubleshooting (concerning the saddle stitch finisher) 3-24
SHARP OSA 3-25
APPLICATION COMMUNICATION MODULE (MX-AMX2).... 3-25
- Standard application setup.... 3-25
- Selecting a standard application 3-25
• Operation in OSA mode.... 3-26
EXTERNAL ACCOUNT MODULE (MX-AMX3) 3-27
- External account application setup 3-27
• Operation in external account mode 3-27
DUPLEX MODULE
If a duplex module is installed, printing onto both sides of paper can be performed.
Two types of duplex modules are available: duplex module/bypass tray and duplex module. The descriptions in this manual are for the duplex module/bypass tray. For information on misfeed removal for these modules, see page 2-19.
Part names
Exit tray
The tray is extendable to support large size paper. Extend the tray when 11" x 17", 8-1/2" x 14", 8-1/2" x 13", A3 or B4 paper is being used. For a duplex module (not duplex module/bypass tray), the exit tray is optional.
Bypass tray
This tray can also be used for special papers including transparency film. (See next page and page 2-3.)

natural_image
Technical line drawing of a mechanical device with open lid and internal compartments (no text or symbols)Duplex module
Automatic copying on both sides of the paper is possible.
NOTE
Automatic two-sided printing can be done only onto plain paper. Special papers cannot be used for two-sided printing. (See page 2-4 for explanation on special paper.)
NOTES
● Do not press down on the bypass tray or the exit tray.
● The duplex module requires the installation of other peripheral devices in order to be functional and cannot be installed together with some other devices. The table on page 8-4 shows the configurations which are compatible.
Specifications
| Name Duplex module (AR-DU3) or Duplex module/bypass tray (AR-DU4) | |
| Paper size (for duplex copy)*1 | 11" x 17", 8-1/2" x 14", 8-1/2" x 13", 8-1/2" x 11", 8-1/2" x 11"R, 5-1/2" x 8-1/2" R, A3, B4, A4, A4R, B5, B5R, A5R |
| Paper weight (for duplex copy)*1 | 16 to 28 lbs. or 60 to 105 g/m2 |
| Reference paper position Center | |
| Bypass tray paper capacity*2 | 100 sheets (8-1/2" x 11" or A4 size, 20 lbs. or 80 g/m2) |
| Dimensions | Duplex module: 4-17/32" (W) x 16-15/64" (D) x 16-25/64" (H) (115 mm (W) x 412 mm (D) x 416 mm (H))Duplex module/bypass tray*3: 17-23/64" (W) x 17-11/64" (D) x 16-25/64" (H) (441 mm (W) x 436 mm (D) x 416 mm (H)) |
| Weight | Duplex module: Approx. 11.1 lbs. (5 kg)Duplex module/bypass tray: Approx. 16.6 lbs. (7.5 kg) |
*1 For paper size and paper weight for the bypass tray, see "Specifications of paper trays (types and sizes of applicable papers for trays)" on page 2-3.
^*2 Duplex module/bypass tray only.
*3 When the bypass tray extension is extended.
| Name Exit tray (AR-TE3) | |
| Paper output Print face down | |
| Paper capacity | 100 sheets (8-1/2" x 11" or A4 size, 20 lbs. or 80 g/m2) |
| Paper size Max. 11" x 17" or A3, Min. | 5-1/2" x 8-1/2"R or A5R |
| Paper type and weight to be output | Plain paper, 16 to 28 lbs. or 60 to 105 g/m2Heavy paper, 29 to 110 lbs. or 106 to 205 g/m2 |
Specifications are subject to change for improvement without notice.
Loading paper in the bypass tray
The bypass tray can be used for plain paper and special paper including labels. Up to 100 sheets of standard paper can be set. For paper types that can be used in the bypass tray, refer to page 2-3.
NOTE
If the paper type or size is changed, be sure to enter the paper type and size as in step 4.
1 Open the bypass tray.

natural_image
Illustration of a hand inserting a device into a rack, showing internal components and a directional arrow (no text or symbols)
When setting 11"x 17", 8-1/2" x 14", 8-1/2" x 13, A3 or B4 paper, be sure to extend the bypass tray extension.
If the bypass tray extension is not pulled all the way out the size of the loaded paper will not be correctly displayed.
2 Set the bypass tray paper guides to the width of the paper to be used.
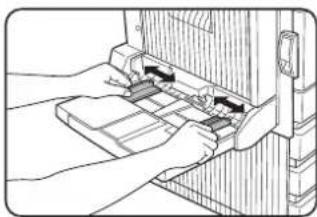
natural_image
Illustration of hands operating a mechanical device with no visible text or symbols3 Insert the paper all the way into the bypass tray.
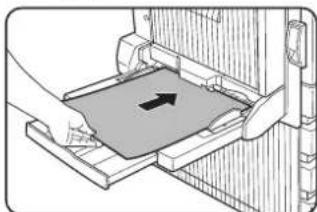
natural_image
Diagram of a hand pressing a component into a device, showing a black arrow indicating direction (no text or symbols present)Set the paper face down. If there is a clearance between the paper and the paper guides, the paper may not be fed correctly. Adjust the guides so that they contact the edges of the paper.
NOTES
- When using 5-1/2" x 8-1/2" paper, A5 paper or postcards, be sure to load them with their shorter edge into the feed slot as shown in the illustration.
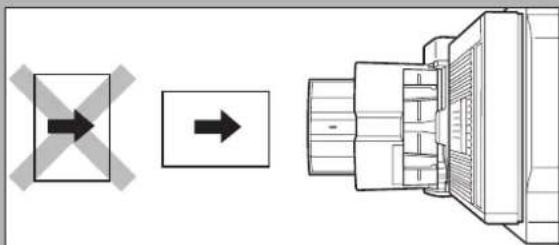
flowchart
graph LR
    A["→"] --> B["→"]
    style A fill:#f9f,stroke:#333
    style B fill:#bbf,stroke:#333
- When loading plain paper other than SHARP standard paper, special media other than postcards, SHARP-recommended transparency film, or paper to be printed on the back, the paper must be loaded one sheet at a time. Loading more than one sheet at a time will cause misfeeds.
- When adding paper, remove any paper remaining in the tray, combine it with the paper to be added, and reload as a single stack.
- Do not use paper that has already been printed on by a plain paper fax machine or a laser printer. This may cause printed images to become dirty.
- Do not use paper that has already been printed on by a thermal transfer or inkjet printer. In particular, paper that has been printed on by a thermal transfer printer (such as a word processor that uses a cassette) may cause missing characters and smudges.
- When printing on transparency film, be sure to remove each sheet as it exits the machine. Allowing sheets to stack in the output tray may cause curling.
- Please use SHARP-recommended transparency film. Place the film in the bypass tray so that it is oriented vertically with the label side face up. If the label side is placed face down, smudging may result.
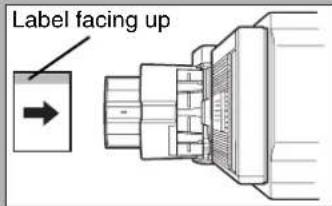
- When loading multiple sheets of transparency film in the bypass tray, be sure to fan the sheets several times before loading.
4 Set the type and size of the loaded paper.
When the paper system is changed from the inch system to the AB system or vise versa or when the paper type is changed, the paper type must be designated. For setting the paper type and paper size, see page 2-5.
5 Loading paper in the bypass tray is now complete.
Troubleshooting (concerning the duplex module)
Check the list below before calling for service.
| Problem Check Solution or cause | ||
| The machine will not print duplex prints. | Message indicating the paper type cannot be used for two-sided printing displayed? | Special paper cannot be used for two-sided printing. Use a paper type adequate for two-sided printing. (See pages 2-4 and 3-2.) |
| Message indicating the paper size cannot be used for two-sided printing displayed? | Use a paper size adequate for two-sided printing. (See pages 2-4 and 3-2.) | |
| Bypass tray extension not extended? | When using 11" x 17", 8-1/2" x 14", 8-1/2 "x 13", A3 or B4 paper, the bypass tray extension must be extended. | |
| Printed images onto paper from the bypass tray are skewed. | Does the number of sheets exceed the limit? | Set paper within the allowable range. |
| Paper guides properly set? Set the paper guides properly to the paper size. | ||
| A paper misfeed occurs in the bypass tray. | Paper size and type set properly? | When using non-standard size paper or special paper, be sure to set the paper size and type. (See pages 2-3 to 2-5.) |
| Does the number of sheets exceed the limit? | Set paper within the allowable range. | |
| Paper guides properly set? Set the paper guides properly to the paper size. | ||
| When printing on a special size of paper, part of the printed image is missing. | The paper size setting is not set correctly in the paper tray settings of the system settings. | When using a special size of paper, set the correct paper size as explained in "Setting the paper type and paper size" on page 2-5. If the paper size setting is not correct, part of the image may be cut off or the image may not print. |
MAIL-BIN STACKER
The mail-bin stacker has 7 mail bins which can each be designated to receive printed output from a user or a group of users.
Output paper in the copy mode and the fax mode will be delivered to the top tray of the stacker separated from printed output. (Printed output can also be delivered to the top tray.)
Part names
Top cover
Open for misfeed removal.
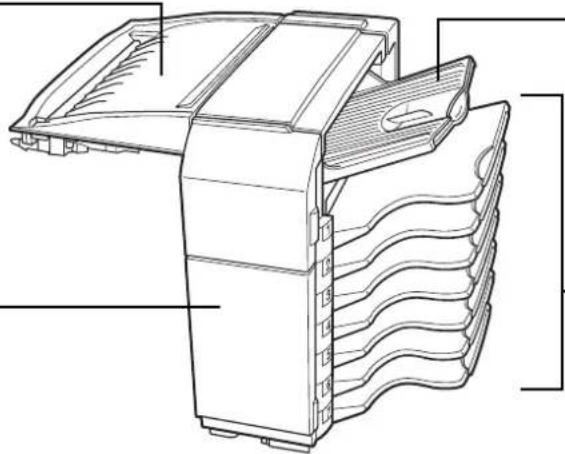
natural_image
Technical line drawing of a multi-tiered rack-mounted device with no visible text or symbolsTop tray
Output paper from the printer, copier, and facsimile features can be delivered here.
Front cover
Open for misfeed removal.
Mail bins
Each bin can be designated to receive printed output for assigned users. These bins cannot be used for copier or facsimile output.
NOTES
- Do not put pressure on the mail-bin stacker, particularly on the top tray and mail bins.
- Do not place anything on the top cover. Doing so will interfere with the machine's paper handling during duplex printing.
- The top tray and each mail bin are extendable. To print onto large paper (11" x 17", 8-1/2" x 14", 8-1/2" x 13", A3 or B4), extend the tray.
● The mail-bin stacker requires the installation of other peripheral devices in order to be functional and cannot be installed together with some other devices. The table on page 8-4 shows the configurations which are compatible.
Specifications
| Name Mail-bin stacker (AR-MS1) | |
| Number of trays 8 (Top tray and seven mail bins) | |
| Paper output Print face down | |
| Tray type Top tray: normal tray, Mail bins: mail bin tray | |
| Tray capacity | Top tray: 250 sheets (8-1/2" x 11" or A4 size, 20 lbs. or 80 g/m2)Mail bins: 100 sheets each (8-1/2" x 11" or A4 size, 20 lbs. or 80 g/m2) |
| Paper sizes | Top tray: same as the specifications of paper for feeding in the main unitMail bins: 11" x 17", 8-1/2" x 14", 8-1/2" x 13", 8-1/2" x 11", 8-1/2" x 11"R, 7-1/4" x 10-1/2", A3, B4, A4, A4R, B5, B5R |
| Paper weight | Top tray: same as the specifications of paper for feeding in the main unitMail bins: 15 to 34 lbs. or 60 to 105 g/m2 |
| Paper types | Top tray: same as the specifications of paper for feeding in the main unitMail bins: plain paper only |
| Tray full detection Provided in both the top tray and the mail bins | |
| Power supply Supplied from machine | |
| Dimensions | 19-51/64"* (W) x 20-7/8" (D) x 20" (H) (503 mm* (W) x 530 mm (D) x 508 mm (H))* When the top tray is extended. |
| Weight Approx. 41.9 lbs. (19 kg) | |
Specifications are subject to change for improvement without notice.
Misfeed in the mail-bin stacker
If a misfeed has occurred in the mail-bin stacker during printing, remove the misfed paper following the procedure below.
1 Open the top cover.
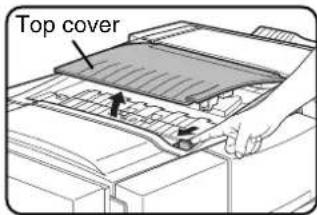
Move the tab in the direction of the arrow as shown in the illustration to open the top cover.
6 Remove the misfed paper.

natural_image
Hand inserting a card into a device (no text or symbols visible)Be careful not to tear the misfed paper during removal.
2 Remove the misfed paper.

natural_image
Illustration of a hand holding a card over a printer (no text or symbols visible)Be careful not to tear the misfed paper during removal.
After removing the paper, press down on the top cover to close it.
7 Close the paper guide.

natural_image
Line drawing of a hand inserting a component into a door (no text or symbols)Close the paper guide securely.
3 If the misfed paper is not found in step 2, open the front cover.

natural_image
Diagram of a hand inserting a spring into a wall-mounted device (no text or symbols visible)8 Close the front cover.
4 Turn the roller rotating knob in the direction of the arrow to remove the misfed paper.

natural_image
Line drawing of a hand inserting a small component into a device (no text or symbols)5 Open the paper guide.
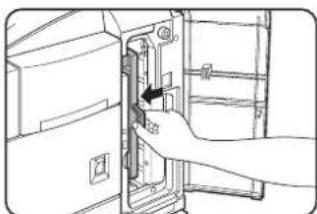
natural_image
Hand inserting a component into a door panel (no text or symbols visible)Unlatch the paper guide and open it in the direction of the arrow.
FINISHER
The finisher can deliver collated sets either stapled or unstapled. Unstapled sets can be offset stacked from the previous set for easy separation of the sets.
Part names
Latch
Release the latch to open the finisher for misfeed removal.
Top cover
Open for misfeed removal.
Staple box-
Pull the box out to replace the staple cartridge or to remove jammed staples.
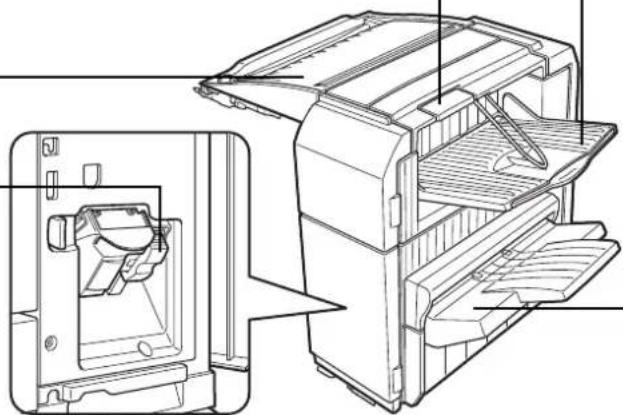
natural_image
Technical line drawing of a mechanical device showing internal components and assembly (no text or symbols)Top tray
Printer, copier and fax output can be delivered here.
To print onto large paper (11" x 17", 8-1/2" x 14", 8-1/2" x 13", A3 or B4), extend the tray.
Offset tray
Stapled sets or sets to be offset will be delivered here.
NOTES
● Do not put pressure on the finisher (particularly each tray).
- Do not place anything on the top cover. Doing so will interfere with the machine's paper handling during duplex printing.
● The tray moves up and down during operation. Be careful not to impede its movement.
● The finisher requires the installation of other peripheral devices in order to be functional and cannot be installed together with some other devices. The table on page 8-4 shows the configurations which are compatible.
Specifications
| Name Finisher (AR-FN6) | |
| Number of trays 2 | |
| Paper output Print face down | |
| Tray type Top tray: normal tray, Lower tray: offset tray | |
| Tray capacity | Top tray: 500 sheets (8-1/2" x 11" or A4 size, 20 lbs. or 80 g/m2)Lower tray: 750 sheets (8-1/2" x 11" or A4 size, 20 lbs. or 80 g/m2) |
| Paper sizes | Top tray: same as the specifications of paper for feeding in the main unitLower tray: Max. 8-1/2" x 11" or A4, Min. B5 |
| Paper weight | Top tray: same as the specifications of paper for feeding in the main unitLower tray: 16 to 34 lbs. or 60 to 128 g/m2 |
| Paper types | Top tray: same as the specifications of paper for feeding in the main unit Lower tray: plain paper only |
| Tray full detection Provided in both the top tray and the lower tray | |
| Offset function Provided for the lower tray only. The offset amount is approx. 1 inch (25 mm) | |
| Paper sizes for stapling 8-1/2" x 11", A4, and B5 | |
| Stapling capacity | 30 sheets* (8-1/2" x 11" or A4 or smaller 20 lbs. or 80 g/m2)*Up two sheets of cover stock (34 lbs. or 128 g/m2) can be included. |
| Staples | Single staple can be placed in the top left or lower left corners or two staples can be centered on the left side |
| Power supply Supplied from machine | |
| Dimensions | 18-5/8"* (W) x 20-7/8" (D) x 20" (H) (473 mm* (W) x 530 mm (D) x 508 mm (H))* When the top tray is extended. |
| Weight | Approx. 46.3 lbs. (21 kg) |
Specifications are subject to change for improvement without notice.
Supplies
AR-SC1 staple cartridges must be used for this finisher. The cartridge package contains three cartridges approx. 3000 staples each.

natural_image
Isometric illustration of a mechanical component with a left-pointing arrow (no text or symbols)Finisher functions
■ Sort mode
Sorted sets will be delivered.

flowchart
graph LR
    A["1 2 3"] --> B["1 2 3 1 2 3 1 2 3"]
    style A fill:#fff,stroke:#000
    style B fill:#fff,stroke:#000
    style_C["Original"] --> D["Printouts"]
■ Offset mode
Offset mode Non-offset mode

natural_image
Stack of three rectangular panels or sheets, no text or symbols visible
■ Group mode
Groups of prints or copies of the same page will be delivered.

Sets will move from side to side so that each set or group will be offset from the previous set or group for easy separation. The offset function can only be used in the offset tray.
Stapled sets will not be offset.
■ Staple sort mode
Collated sets will be stapled and delivered to the offset tray. The stapling positions, orientation, paper size for stapling, and stapling capacity are shown below.
| Stapling positions | Portrait orientation | Landscape orientation | ||
| Top left corner of printouts |  | Available paper sizes: 8-1/2" x 11", A4 and B5Stapling capacity: Up to 30 sheets for any available sizes | Stapling cannot be made. | |
| Center left two positions of printouts |  | Same as above | ||
| Lower left corner of printouts |  | Same as above | ||
NOTES
● Stapling can only be done when the offset tray has been selected.
- If mixed paper sizes are selected for stapling jobs, stapling will be automatically canceled.
NOTE
Transparency film heavy paper, punched paper, labels, envelopes and postcards cannot be stapled.
Using the finisher functions
When the [OUTPUT] key on the main screen of copy mode is touched, a screen for selecting the sort/group/staple sort functions and selecting an exit tray will appear. As a selection is made, the touch key for the selection will be highlighted.

flowchart
graph TD
    A["OUTPUT"] --> B["SORT"]
    A --> C["STAPLE SORT"]
    A --> D["GROUP"]
    B --> E["123"]
    C --> F["124"]
    D --> G["125"]
    E --> H["1"]
    F --> I["1"]
    G --> J["1"]
    H --> K["OFFSET TRAY"]
    I --> L["OFFSET TRAY"]
    J --> M["OK"]
    K --> N["OFFSET"]
    L --> O["OFFSET"]
    style A fill:#f9f,stroke:#333
    style B fill:#ccf,stroke:#333
    style C fill:#ccf,stroke:#333
    style D fill:#ccf,stroke:#333
    style E fill:#cfc,stroke:#333
    style F fill:#cfc,stroke:#333
    style G fill:#cfc,stroke:#333
    style H fill:#fcc,stroke:#333
    style I fill:#fcc,stroke:#333
    style J fill:#fcc,stroke:#333
    style K fill:#fcc,stroke:#333
    style L fill:#fcc,stroke:#333
    style M fill:#fcc,stroke:#333
    style N fill:#fcc,stroke:#333
    style O fill:#fcc,stroke:#333
(1) (2) (3) (4) (5)
When Group is selected, all copies of the same original will be grouped.
(2) [STAPLE SORT] key (See page 3-8.)
When Staple Sort is selected, sorted sets will be stapled and delivered to the offset tray. (They will not be offset stacked.)
(3) [SORT] key (See page 3-8.)
When Sort is selected, sets of copies will be sequentially delivered.
(4) Icon display
An icon representing a selected function (sort, staple sort or group) is displayed.
(5) [OFFSET] key (See page 3-8.)
If Offset is checked, offset is enabled. If not checked, offset will not function. If staple sort is selected, the check mark of offset will be automatically canceled. If the staple sort function is selected, the checkmark in the offset checkbox is automatically removed.
(6) [OFFSET TRAY] key (See page 3-8.)
When the offset tray is selected, copies will be delivered to the offset tray. When staple sort is selected, the offset tray will be automatically selected.
(7) [TOP TRAY] key
When top tray is selected, copies will be delivered to the top tray.
(8) [OK] key
Press to close the output screen and to return to the main screen.
Staple cartridge replacement
When the staple cartridge becomes empty, the message "Add staples." will appear in the message display of the operation panel.
Follow the procedure below to replace the staple cartridge.
1 Open the front cover.
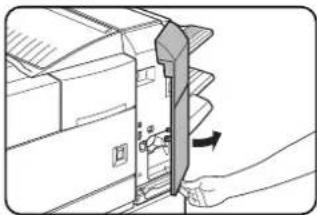
natural_image
Illustration of a hand inserting a device into a computer case (no text or symbols visible)2 Turn the staple unit to face up.
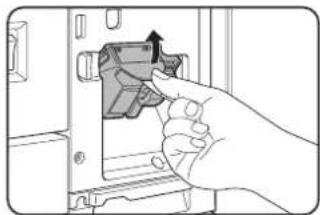
natural_image
Hand inserting a device into a door panel (no text or symbols visible)3 Pull the release lever for the staple box and remove the box.

natural_image
Line drawing of a hand inserting a device into a machine (no text or symbols)4 Remove the empty staple cartridge from the staple box.

natural_image
Hand holding a mechanical component with an arrow indicating direction (no text or symbols)5 Insert a new staple cartridge into the staple box aligning the arrow of the staple cartridge with that of the staple box.
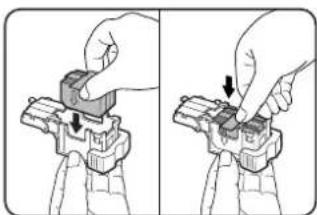
natural_image
Two-step illustration showing hands installing or adjusting a mechanical component (no text or symbols present)When reinstalling the staple box, push it in until it clicks into place.
NOTES
- Do not remove the tape from the cartridge before inserting the staple cartridge into the box.
- When reinstalling the staple box, push it in until it clicks into place.
6 Remove the tape from the staple cartridge by pulling it straight.
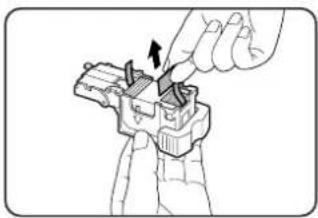
natural_image
Illustration of a hand using a tool to adjust or install a mechanical component (no text or symbols visible)7 Reinstall the staple box.

natural_image
Illustration of a hand using a tool to remove or remove a device (no text or symbols visible)Push the staple box in until it clicks into place.
8 While pushing the staple unit release lever to the left, rotate the staple unit to face down.

natural_image
Hand inserting a USB into a device panel (no text or symbols visible)9 Close the front cover.
NOTE
Make a test print or copy in the staple sort mode to ensure that stapling is performed properly.
■ Checking the staple unit
If the message "CHECK THE STAPLER UNIT" or "CHECK STAPLER POSITION OR STAPLER JAM" appears, follow the procedure below.
1 Open the finisher compiler.

natural_image
Illustration of a hand inserting a device into a printer (no text or symbols visible)Release the latch to open the finisher compiler.
2 Remove the misfed paper from the stapler compiler.

natural_image
Diagram of a printer or printer with a hand inserting a component into the cover (no text or symbols visible)Be careful not to tear the misfed paper during removal.
3 Close the finisher compiler.

natural_image
Illustration of a printer's internal structure with a hand operating it (no text or symbols visible)4 Open the finisher front cover.

natural_image
Illustration of a hand inserting a device into a folder (no text or symbols visible)5 Turn the staple unit to face up.

natural_image
Hand inserting a device into a door panel (no text or symbols visible)6 Pull the release lever for the staple box and remove the box.
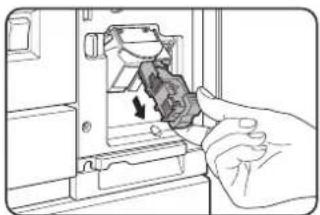
natural_image
Illustration of a hand inserting a device into a device (no text or symbols visible)7 Raise the lever at the end of the staple box.

natural_image
Illustration of hands assembling a mechanical component with arrows indicating motion (no text or symbols)Remove the top staple if it is bent. If bent staples remain, a staple jam will occur again.
8 Return the lever to its original position.

natural_image
Illustration of hands holding a small object with an arrow indicating rotation (no text or symbols)3
9 Reinstall the staple box.
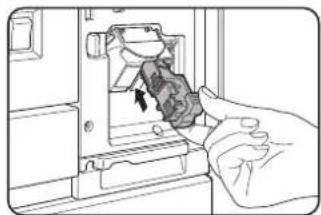
natural_image
Illustration of a hand inserting a device into a device (no text or symbols visible)Push the staple box in until it clicks into place.
10 While pushing the staple unit release lever to the left, rotate the staple unit to face down.
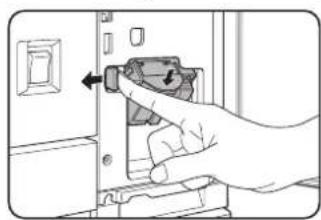
natural_image
Hand inserting a component into a door panel (no text or symbols visible)When reinstalling the staple box, push it in until it clicks into place.
11 Close the front cover.
NOTE
Make a test print or copy in the staple sort mode to ensure that stapling is performed properly.
Misfeed in the finisher
When a misfeed occurs in the finisher, remove the misfed paper following the procedure below.
1 Remove the misfed paper from the output area.
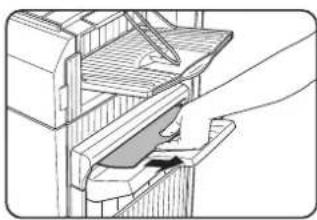
natural_image
Illustration of a hand using a tool to interact with a mechanical device (no text or symbols visible)Be careful not to tear the misfed paper during removal.
5 Raise the paper guide and remove the misfed paper.
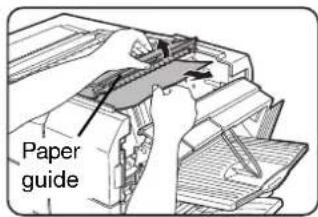
Be careful not to tear the misfed paper during removal.
2 Open the finisher top cover.

Move the tab in the direction of the arrow as shown in the illustration to open the top cover.
6 Close the finisher compiler.

natural_image
Illustration of a printer's internal structure with a hand operating it (no text or symbols visible)3 Remove the misfed paper.

natural_image
Illustration of a hand holding a folded paper or sheet with an arrow indicating direction (no text or symbols present)Be careful not to tear the misfed paper during removal.
After removing the paper, press down on the top cover to close it.
4 Open the finisher compiler.

natural_image
Illustration of a hand inserting a device into a printer (no text or symbols visible)Release the latch to open the finisher compiler.
Troubleshooting finisher problems
Check the list below before calling for service.
| Problem Check Solution or cause | ||
| The finisher does not operate. | Are any finisher covers open? Close all covers. | |
| Message indicating need to remove paper from the stapler compiler displayed? | Open the finisher as described in step 4 on page 3-12 and remove all paper from the stapler compiler.  | |
| Stapling cannot be performed. | Is a "CHECK THE STAPLER UNIT" or "CHECK STAPLER POSITION OR STAPLER JAM" message displayed? | Check the staple unit. (See page 3-11.) |
| Is a message "ADD STAPLES" displayed? | Replace the staple cartridge. (See page 3-10.) | |
| Different size paper included? | Stapling cannot be performed onto different size paper. | |
| Stapled sets are not stacked correctly or some sheets in a set are not stapled. | Paper heavily curled? | Paper may be curled heavily depending on the paper type and quality. Remove paper from the paper tray or the bypass tray, turn it upside down, and load it again. |
SADDLE STITCH FINISHER
The saddle stitch finisher can automatically place two staples for centerline binding of prints or copies and fold them along the centerline.
An optional hole punching unit is available for installation into the finisher.
Part names
Stapler compiler
Paper to be stapled is stacked temporarily.
Offset tray
Output which is stapled or offset will be delivered to this tray.
Saddle stitch tray
Saddle stitched output is delivered here.

Top cover
Open for misfeed removal.
Stapler section
Open the front cover and pull out this section to replace the staple cartridge or to remove jammed staples.
Front cover
Open the front cover and pull out this section for staple cartridge replacement or to remove jammed
NOTES
- Do not press on the saddle stitch finisher (particularly the offset tray).
● Be careful about the offset tray during printing because the tray moves up and down. - The saddle stitch finisher requires the installation of other peripheral devices in order to be functional and cannot be installed together with some other devices. The table on page 8-4 shows the configurations which are compatible.
Specifications
| Name Saddle stitch finisher | (AR-FN7) |
| Number of trays 2 | |
| Paper output Print face down | |
| Tray system Upper tray: offset tray, Lower tray: saddle stitch tray | |
| Tray capacity | Upper tray:Non-stapling: Max. 1,000 sheets for 8-1/2" x 11" or A4 or smaller sizes (20 lbs. or 80 g/m2), max. 500 sheets for 8-1/2" x 13" or B4 or larger sizes (20 lbs. or 80 g/m2)Stapling: Max. 50 stapled sets and max. 1,000 sheets for 8-1/2" x 11" or A4 or smaller sizes (20 lbs. or 80 g/m2), max. 30 stapled sets and max. 500 sheets for 8-1/2" x 13" or B4 or larger sizes (20 lbs. or 80 g/m2)Lower tray: Stapled print capacity is (6 - 10) sheets x 10 sets or (1 - 5) sheets x 20 sets. |
| Paper size | Upper tray: 11" x 17", 8-1/2" x 14", 8-1/2" x 13", 8-1/2" x 11", 8-1/2" x 11"R, 7-1/4" x 10-1/2", 5-1/2" x 8-1/2"R, A3, B4, A4, A4R, B5, B5R, A5RLower tray: max. 11" x 17", 8-1/2" x 11"R, A3, B4, A4R |
| Paper weight | Upper tray: 16 to 54 lbs. or 60 to 205 g/m2Lower tray: 17 to 34 lbs. or 64 to 80 g/m2 |
| Paper types | Upper tray: plain paper, thick paper, transparency filmLower tray: plain paper only |
| Tray full detection Provided in both trays | |
| Offset function Upper tray only | |
| Paper sizes for stapling | Upper tray: 11" x 17", 8-1/2" x 14", 8-1/2" x 13", 8-1/2" x 11", 8-1/2" x 11"R, A3, B4, A4, A4R, and B5Lower tray: 11" x 17", 8-1/2" x 11"R, A3, B4, and A4R |
(Continued on next page)
| Stapling capacity | 8-1/2" x 11" or A4 or smaller size: 50 sheets*(20 lbs. or 80 g/m2)8-1/2" x 14" or B4 or larger size: 25 sheets*(20 lbs. or 80 g/m2)*Up to two sheets of 34 lbs. or 128 g/m2 paper can be included as covers. |
| Staples | Upper tray: Single staple can be placed in the top left or lower left corners or two staples can be centered on the left side.Lower tray: 4-47/64" (120 mm) pitch from the center of paper |
| Power supply Supplied from machine | |
| Dimensions | 29-41/64"* (W) x 23-3/4" (D) x 37-33/64" (H) (753 mm* (W) x 603 mm (D) x 953 mm (H))*When the top tray is extended. |
| Weight Approx. 86 lbs. (39 kg) | |
| Name Punch module | |
| Paper sizes for hole punching | 3 holes: 11" x 17", 8-1/2" x 11", A3, A42 holes: 8-1/2" x 14", 8-1/2" x 11"R |
Specifications are subject to change for improvement without notice.

Supplies
AR-SC2 staple cartridges must be used for this finisher. The cartridge package contains three cartridges approx. 5000 staples each.

natural_image
Isometric illustration of a mechanical component with no visible text or symbolsSaddle stitch finisher functions
■ Sort mode
Sorted sets will be delivered.
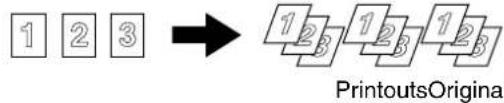
■ Group mode
Groups of copies of the same page will be delivered.
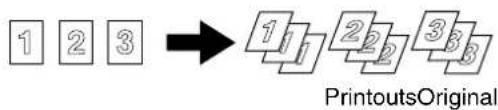
flowchart
graph LR
    A["1 2 3"] --> B["1/1 2/2 3/3"]
    B --> C["PrintoutsOriginal"]
■ Offset mode
Offset mode Non-offset mode

natural_image
Two 3D illustration of stacked rectangular panels, no text or symbols presentSets will move from side to side so that each set or group will be offset from the previous set or group for easy separation. The offset function can only be used in the offset tray.
Stapled sets will not be offset.
■Staple sort mode
Collated sets of prints or copies will be stapled and delivered to the offset tray. When saddle stitching is selected, the prints or copies will be stapled at the center and delivered to the saddle stitch tray. The stapling positions, orientation, paper size for stapling, and stapling capacity are shown below.
| Stapling positions | Portrait orientation | Landscape orientation | ||
| Top left corner of printouts |  | Available paper sizes: 8-1/2" x 11", A4 and B5Stapling capacity: Up to 50 sheets for any sizes | 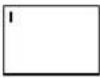 | Available paper sizes: 11" x 17", 8-1/2" x 14", 8-1/2" x 13", 8-1/2" x 11" R, A3, B4, and A4RStapling capacity: Up to 50 sheets for 8-1/2" x 11" R, A4R and B5R, and up to 25 sheets for other sizes |
| Center left two positions of printouts | 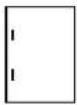 | Same as above |  | Available paper sizes: 11" x 17", 8-1/2" x 14", 8-1/2" x 13", 8-1/2" x 11" R, A3, B4, and A4RStapling capacity: Up to 50 sheets for 8-1/2" x 11" R, A4R and B5R, and up 25 sheets for other sizes |
| Lower left corner of printouts |  | Same as above |  | Available paper sizes: 11" x 17", 8-1/2" x 14", 8-1/2" x 13", 8-1/2" x 11" R, A3, B4, and A4RStapling capacity: Up to 50 sheets for 8-1/2" x 11" R, A4R and B5R, and 10 sheets for other sizes |
| Saddle stitch on centerfold line. |  | Paper in the portrait direction cannot be saddle stitched. |  | Available paper sizes: 11" x 17", 8-1/2" x 11" R, A3, B4, and A4RStapling capacity: Up to 10 sheets for any sizes |
■ Original orientation when using the staple sort or punch function
When using the staple sort or punch function, the original must be placed in the following orientations to enable stapling or punching in the desired position on the paper.
| Staple sort | Punch | ||
| Document feeder Document glass | Document feeder Document glass | ||
 |  | ||
 |  | 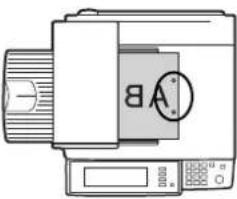 | 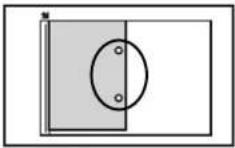 |
 | 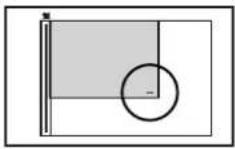 | 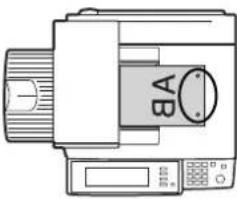 |  |
■ Saddle stitch function
The saddle stitch finisher can automatically place two staples for centerline binding of prints or copies and fold them along the centerline.
■ Hole punching (only if a punch module is installed)
If the saddle stitch finisher is equipped with a hole punch module, printed paper can be hole punched and delivered to the offset tray. Saddle stitching and hole punching cannot be selected at the same time. The automatic image rotation will not function when the hole punching function is used.
Two or three holes can be punched depending on the paper size. (See paper sizes for hole punching on page 4-4.)
If the punching function is enabled for a paper size that cannot be punched, the paper will be output without being punched. (For paper sizes that can be punched, see the specifications on page 3-15.) When using the punching function in copy mode, place the original with the top edge toward the back of the machine. If the original is not placed in this orientation, punching will not take place at the correct positions.
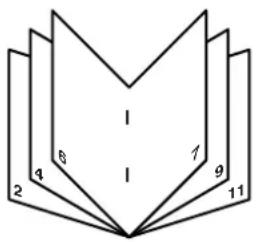
{Original 1}
{Punch positions}


{Original 2}
{Punch positions}



3
Using the saddle stitch finisher
When [OUTPUT] is selected on the main screen of copy mode, a screen for making selections for sort, group, staple sort, saddle stitch, punch and exit tray will appear.

(1) [GROUP] key (See page 3-15.)
When Group is selected, all copies of the same original will be grouped.
(2) [STAPLE SORT] key (See page 3-16.)
When Staple Sort is selected, sorted sets will be stapled and delivered to the offset tray. (They will not be offset stacked.)
(3) [SORT] key (See page 3-15.)
When Sort is selected, sets of copies will be sequentially delivered.
(4) Icon display
An icon representing a selected function (sort, staple sort or group saddle stitch) is displayed.
(5) [OFFSET TRAY] key
If Offset is checked, the offset will be enabled. If not checked, the offset will not function. If the staple sort is selected, the check mark of offset will be automatically selected.
(6) [CENTER TRAY] key
If the center tray is selected, output paper will be delivered to the exit tray.
(7) [OK] key
Press to close the [OUTPUT] screen and to return to the main screen.
(8) [OFFSET] key (See page 3-15.)
When the offset tray is selected, copies will be delivered to the offset tray. When staple sort is selected, the offset tray will be automatically canceled.
(9) [SADDLE STITCH] key (See page 3-17.)
When saddle stitching is selected, the copies will be stapled at the center and delivered to the saddle stitch tray.
(10) [PUNCH] key (See page 3-17.)
If the saddle stitch finisher is equipped with a punch module, printed paper can be hole punched and delivered to the offset tray.
* As a selection is made, the touch key for the selection will be highlighted.
Staple cartridge replacement and staple jam removal
When the staple cartridge becomes empty or staples become jammed, a message will appear in the message display of the operation panel.
Follow the procedure below to replace the staple cartridge or remove jammed staples.
■ Staple cartridge replacement
1 Open the front cover.
6 Insert a new staple cartridge into the staple box.
After inserting the staple cartridge, press down on the staple box cover to lock the cartridge in place.
2 Pull out the stapler section.
3 Turn roller rotating knob A in the direction of the arrow to move the staple unit to the front.
Turn the roller rotating knob until the triangle mark is aligned with the index.
Roller rotating knob A
Staple unit
4 Remove the empty staple box.
NOTES
- Do not remove the tape from the cartridge before inserting the staple cartridge into the box.
- Make sure that the staple cartridge is secured firmly.
- When reinstalling the staple box, push it in until it clicks into place.
7 Remove the tape from the staple cartridge by pulling it straight.
8 Insert the staple box.
Push the staple box in until it clicks into place.
5 Remove the empty staple cartridge.
Press the lock button to unlock the staple box cover and remove the staple cartridge.
9 Push the stapler section back into the finisher.
10 Close the front cover.
NOTE
If staples remain, the staple cartridge cannot be removed.
NOTE
Make a test print or copy in the staple sort mode to ensure that stapling is performed properly.
■ Staple jam removal
1 Unlatch the saddle stitch finisher and slide it away from the machine.
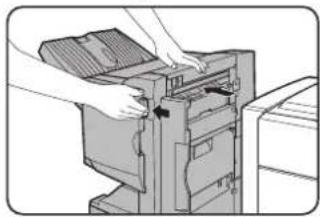
natural_image
Illustration of hands operating a computer tower with a scroll wheel (no text or symbols visible)2 Open the front cover.
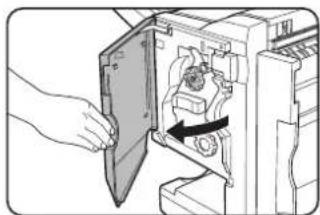
natural_image
Illustration of a hand opening a mechanical device into a machine (no text or symbols visible)3 Turn roller rotating knob C as shown in the illustration until the blue indication is seen.
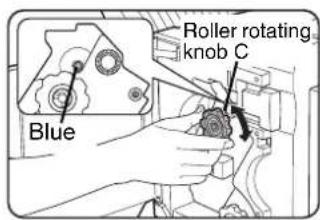
4 Remove the paper from the stapler compiler.

natural_image
Illustration of a hand inserting a device into a printer (no text or symbols visible)5 If saddle stitch was selected, open the saddle stitch section cover.
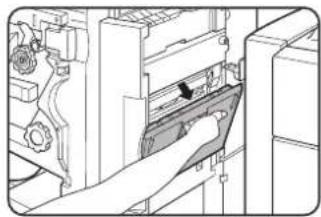
natural_image
Illustration of a hand inserting a component into a machine (no text or symbols visible)6 Remove the misfed paper.
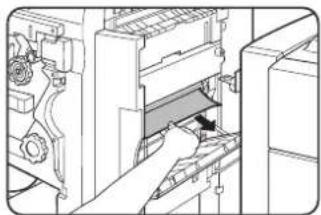
natural_image
Technical line drawing of a mechanical assembly with a hand inserting a component (no text or symbols visible)Be careful not to tear the misfed paper during removal.
7 Close the saddle stitch section cover.

natural_image
Hand inserting a component into a machine (no text or symbols visible)8 Open the front cover and pull out the stapler unit.

natural_image
Mechanical assembly diagram showing a hand operating a component with an arrow indicating direction (no text or symbols present)9 Turn roller rotating knob A in the direction of the arrow to move the staple unit to the front.

Turn the roller rotating knob until the triangle mark is aligned with the index.
10 Remove the staple box.
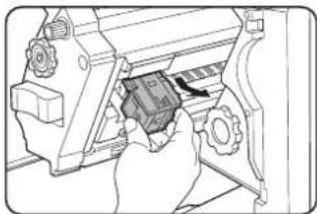
natural_image
Illustration of a hand operating a mechanical device with gears and a handle (no text or symbols visible)11 Raise the lever at the end of the staple box.

natural_image
Illustration of hands assembling a mechanical component with an arrow indicating rotation (no text or symbols present)Remove the top staple if it is bent. If bent staples remain, a staple jam will occur again.
■ Disposal of hole punch scrap
1 Unlatch the saddle stitch finisher and slide it away from the machine.

natural_image
Illustration of hands operating a desktop computer tower (no text or symbols visible)2 Pull out the punch scrap collecting container and empty it.
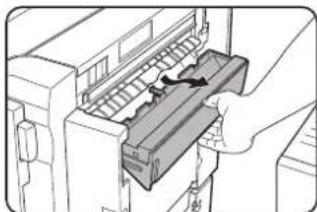
natural_image
Illustration of a hand inserting a device into a printer (no text or symbols visible)Empty the punch debris into a plastic bag or other container for disposal, taking care not to spill any of the punch debris.
12 Return the lever to its original position.

natural_image
Illustration of hands holding a small electronic device with a scroll wheel (no text or symbols visible)13Reinstall the staple box.

natural_image
Two-panel illustration showing hands installing or adjusting a small component on a mechanical device (no text or symbols visible)Push the staple box in until it clicks into place.
14 Push the stapler section back into the finisher.
15 Close the front cover.
16 Push the saddle stitch finisher back against the machine.
NOTE
Make a test print or copy in the staple sort mode to ensure that stapling is performed properly.
3 Return the punch scrap collecting container to its original position.

natural_image
Diagram of a printer's internal structure showing paper feeding into a slot (no text or symbols visible)4 Push the saddle stitch finisher back against the machine.

natural_image
Illustration of hands operating a computer tower with a monitor (no text or symbols visible)Misfeed in the saddle stitch finisher
When a misfeed occurs in the saddle stitch finisher, remove the misfed paper following the procedure below.
1 Press the detach button and separate the saddle stitch finisher from the machine.
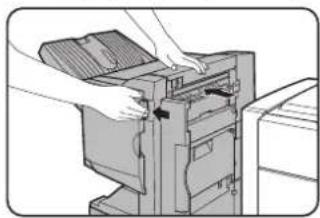
natural_image
Illustration of hands operating a computer tower with a paper stack (no text or symbols visible)CAUTION
The saddle stitch finisher and the machine are connected at the rear. Exercise caution when pulling them apart.
2 Remove any misfed paper from the machine.
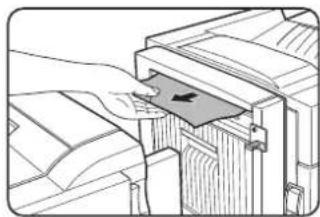
natural_image
Diagram of a printer's internal structure showing paper feeding into a printer (no text or symbols present)3 If there was no misfed paper in step 2, pull roller rotating knob B on the punch unit toward you and rotate it. (Only when an optional punch unit is installed.)
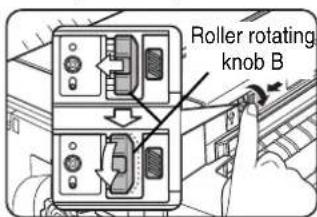
Rotating roller rotating knob B releases the caught paper.
4 Open the top cover.
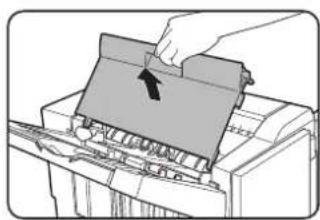
natural_image
Illustration of a hand pressing down on a printer cover with an arrow indicating the paper's front cover (no text or symbols present)5 Remove the misfed paper.

natural_image
Illustration of a hand inserting a card into a printer (no text or symbols visible)Remove the paper gently, taking care not to tear it.
6 Close the top cover.

natural_image
Illustration of a hand pressing down a printer cover with a downward arrow (no text or symbols)7 Remove any misfed paper from the stapler compiler.

natural_image
Illustration of a printer being inserted into a slot, showing the blade and handle (no text or symbols present)Remove the paper gently, taking care not to tear it.
8 Open the cover of the saddle stitch section.

natural_image
Illustration of a hand inserting a component into a machine (no text or symbols visible)9 Remove the misfed paper.

natural_image
Line drawing of a hand inserting a component into a machine (no text or symbols visible)Remove the paper gently, taking care not to tear it.
10 Open the front cover.

natural_image
Illustration of a computer tower with a hand inserting a device into the case (no text or symbols visible)11 Rotate roller rotating knob D in the direction of the arrow.
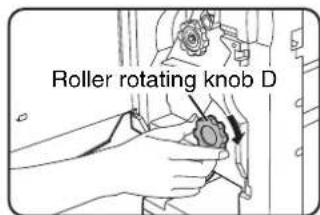
12 Remove any misfed paper from the saddle stitch tray.

natural_image
Diagram of a mechanical assembly with a lever and component, no visible text or symbolsRemove the paper gently, taking care not to tear it.
13 Close the cover of the saddle stitch section.

natural_image
Illustration of a hand inserting a device into a computer interface (no text or symbols visible)14 Close the front cover.

natural_image
Illustration of a hand inserting a device into a computer tower (no text or symbols visible)15 Push the saddle stitch finisher back onto the machine.

natural_image
Illustration of hands operating a computer tower with a printer (no text or symbols visible)Troubleshooting (concerning the saddle stitch finisher)
Check the list below before calling for service.
| Problem Check | Solution or cause | |
| The saddle stitch finisher does not operate. | Are any saddle stitch finisher covers open? | Close all covers. (See page 3-14.) |
| Message indicating need to remove paper from the stapler compiler displayed? | Remove all remaining paper from the stapler compiler referring to step 4 on page 3-20. | |
| Stapling cannot be performed (including saddle stitch). | Message requesting check for the staple unit displayed? | Remove jammed staples. (See page 3-20.) |
| Message requesting adding staples displayed? | Replace the staple cartridge. (See page 3-19.) Check that a staple cartridge has been installed. (See page 3-20.) | |
| Different size paper included? | Stapling cannot be performed onto different size paper. | |
| Stapled sets are not stacked correctly or some sheets in a set are not stapled. | Paper heavily curled? | Paper may be curled heavily depending on the paper type and quality. Remove paper from the paper tray or the bypass tray, turn it upside down, and load it again. |
| Punching does not take place in the correct positions.* | The punching function is not set for the correct positions. | Check the positions where punching is possible. |
| Cannot be punched.* | Message requesting check for punch module displayed? | Dispose of punch scraps. (See page 3-21.) |
| Different size paper included? | Stapling cannot be performed onto different size paper. | |
| The paper is badly curled and is not punched. | Some types and qualities of paper may curl badly when printed on. Remove the paper from the tray or bypass tray, turn it around to reverse the top and bottom, and then place it back in the tray. |
* When a punch module is installed
SHARP OSA
Sharp OSA (Open Systems Architecture) is an architecture that enables external applications to be directly connected to a digital multifunction machine over a network.
When a digital multifunction machine that supports Sharp OSA is used, the operation panel controls and functions of the machine such as scan send can be linked to an external application.
There are two types of external applications: "standard application" and "external account application". An "external account application" is used for centralized account management of a multifunction machine on a network. A "standard application" refers to all other applications.
APPLICATION COMMUNICATION MODULE (MX-AMX2)
The application communication module is required to use a "standard application" on the machine.
When a previously registered standard application is selected in the Web pages of the machine, the machine retrieves the operation screen from the registered URL. Control of the operation screen is performed by the standard application, and Scan to FTP can be executed.
3
Standard application setup
To register a standard application in the machine's Web pages, click [External Applications] in the administrator menu frame and then click [Standard Applications]. Configure settings for the standard application in the screen that appears.
Selecting a standard application
There are two methods for selecting a standard application that has been registered in the machine's Web pages.
■ Selecting a standard application from the job status screen
The Sharp OSA icon will appear in the lower left-hand corner of the job status screen. Follow the steps below to select a standard application.
1 Touch the Sharp OSA icon.
natural_image
Simple icon of a document with arrows indicating rotation, no text or symbols presentIf no standard applications have been stored in the Web pages, the key cannot be touched.
2 Select the standard application.
If two or more standard applications have been stored in the Web pages, the screen to select the standard application will appear. Touch the standard application that you wish to use.
If only one standard application has been stored in the Web pages, connection to the standard application will begin.
3 The machine connects to the standard application.
The message "Connecting to the external application." appears while the machine communicates with the standard application.
■ Selecting the standard application from document filing mode
The [Sharp OSA] key appears in the upper right-hand corner of the document filing screen. Follow the steps below to select a standard application.
1 Touch the [Sharp OSA] key.
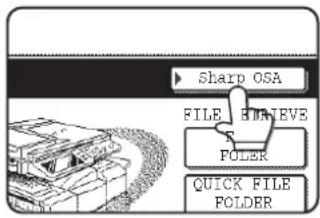
If no standard applications have been stored in the Web pages, the key cannot be touched.
2 Select the standard application.

If one or more standard applications have been stored in the Web pages, the screen to select the standard application will appear. Touch the standard application that you wish to use.
If only one standard application has been stored in the Web pages, connection to the standard application will begin.
3 The machine connects to the standard application.
The message "Connecting to the external application." appears while the machine communicates with the standard application.
Operation in OSA mode
When the application communication module is installed, it is possible to check the job log of OSA scan mode in the job status screen. The procedure for displaying the job log is the same as for regular Scan to FTP.
To display the job log of OSA scan mode, touch the [SCAN] key once again while the job log of scan mode appears in the job status screen. (When this is done, the name of the key will change to [OSA SCAN].) To return to the scan screen from the OSA scan screen, touch the [OSA SCAN] key.
EXTERNAL ACCOUNT MODULE (MX-AMX3)
The external account module is required to use a "external account application" on the machine.
An external account application can be used in "external authentication mode" or "external count mode". When external authentication mode is used, the login screen is retrieved from the application when the machine is started.
When a job ends, a job notification screen is sent to the application to enable counts to be kept for each authenticated user.
When "external count mode" is used, the login screen is not displayed when the machine is started. Only a job result notification is sent to the application. User authentication by the external account application cannot be used, however, the external account application can be used in combination with the internal account function.
External account application setup
To register an external account application in the machine's Web pages, click [External Applications] in the administrator menu frame and then click [External Accounting]. Configure settings for the external account application in the screen that appears. To make the settings in the Web page take effect, restart the machine.
Operation in external account mode
The two modes for using an external account application operate as explained below.
■ External authentication mode
When the [ENABLE AUTHENTICATION BY EXTERNAL SERVER] checkbox is selected in "External account setting" of "Sharp OSA settings" in the administrator settings, the machine enters external authentication mode. When the machine is powered on in external authentication mode, the machine accesses the external account application and displays the login screen. The login screen also appears when the [CALL] key is touched to run a job in the job status complete screen. (The login screen does not appear if the user has already logged in by the normal method.)
The [JOB STATUS] key can be pressed while the login screen appears to show the job status screen. To return to the previous state, press the mode select key.
NOTES
● The user control function of the machine cannot be used in external authentication mode.
● The [SYSTEM SETTINGS] key can be pressed while the login screen appears to show the system settings screen. To return to the initial state, touch the [EXIT] key.
If login fails
If the login screen fails to appear or the application does not operate correctly, the machine may also stop operating correctly. In this event, it is recommended that you quit external account mode from the Web pages of the machine. For more information, see [Help] in the Web pages.
If it is necessary to forcibly terminate external account mode using the operation panel of the machine, follow the steps below.
Press the [SYSTEM SETTINGS] key and change "External account setting" in the administrator settings (see page 14 of the administrator settings guide). After changing the setting, restart the machine.
■ External count mode
When only the [ENABLE EXTERNAL ACCOUNT CONTROL] setting is enabled in "External account setting" of "Sharp OSA settings" in the administrator settings, the machine enters external count mode.
Unlike external authentication mode, when the machine is started in "external count mode", the login screen of the external account application is not displayed. Only the job result is sent to the external account application.
External count mode can be used together with the user control function of the machine. (External count mode can also be used when the user control function is disabled.)
Part 2: Copier Operation
CHAPTER 4
MAKING COPIES
This chapter explains the basic procedures for making copies, including selection of the copy ratio and other copy settings.
Page
AUTOMATIC DOCUMENT FEEDER 4-2
- Acceptable originals.... 4-2
PLACING ORIGINALS.... 4-3
CHECKING THE SIZE OF A PLACED ORIGINAL.... 4-5
- Manually setting the scanning size 4-5
STORING, DELETING, AND USING ORIGINAL SIZES 4-6
- Storing or deleting an original size.... 4-6
NORMAL COPYING 4-7
- Making copies with the automatic document feeder 4-7
• Automatic two-sided copying using the automatic document feeder.... 4-10
- Copying from the document glass.... 4-11
- Automatic two-sided copying from the document glass 4-13
ADJUSTING THE EXPOSURE 4-14
REDUCTION/ENLARGEMENT/ZOOM.... 4-15
- Automatic selection (auto image)...... 4-15
- Manual selection (preset copy ratios/zoom).... 4-16
- XY ZOOM.... 4-18
SPECIAL PAPERS.... 4-20
AUTOMATIC DOCUMENT FEEDER
The automatic document feeder automatically feeds originals into the machine, making continuous copying possible. In addition, both sides of two-sided sheet originals can be simultaneously scanned. This function is convenient when you have a large number of original pages to scan.
Acceptable originals
A stack of up to 50 original sheets (30 original sheets*1 for 8-1/2" x 14" (B4) or larger) of the same size paper can be set in the document feeder tray provided the stack height is within the limit shown below.
A stack of up to 30 mixed size originals can be set if the width of the originals is the same and the stack height is within the limit shown below. In this case, however, stapling and duplex will not function and some special functions may not give the expected result.
*1 For paper heavier than 28 lbs. (105 g/m ^2 ), only a stack of up to 15 sheets can be set. Setting 16 or more sheets may cause incorrect scanning of original and scanned image may become expanded compared with original itself.
■ Size and weight of acceptable originals
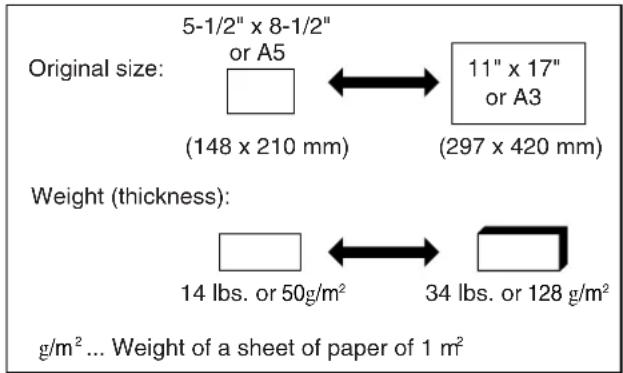
■ Total number of originals that can be set in the document feeder tray
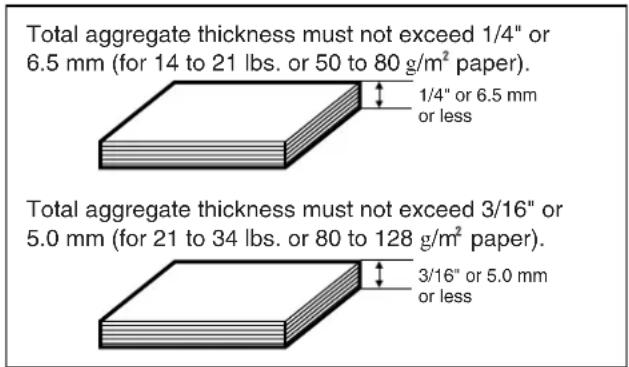
■ Notes on use of the automatic document feeder
- Use originals within the specified size and weight ranges. Use of originals out of the specified range may cause an original misfeed.
●Before loading originals into the document feeder tray, be sure to remove any staples or paper clips. - If originals have damp spots from correction fluid, ink or glue from pasteups, be sure they are dried before they are fed. If not, the interior of the document feeder or the document glass may be soiled.
- Do not use the following originals. These originals may cause incorrect original size detection, original misfeeds, and smudges on copies.
- Transparency film, tracing paper, carbon paper, thermal paper or originals printed with thermal transfer ink ribbon should not be fed through the document feeder. Originals to be fed through the feeder should not be damaged, crumpled or folded or have loosely pasted paper on them or cutouts in them. Originals with multiple punched holes other than two-hole or three-hole punched paper may not feed correctly.
- When using originals with two or three holes, place them so that the punched edge is at a position other than the feed slot.
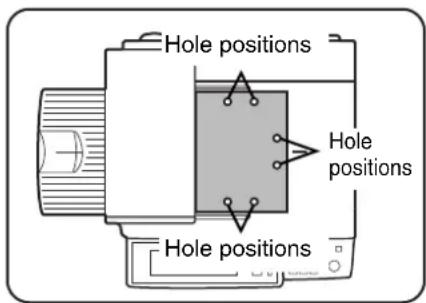
PLACING ORIGINALS
■Using the automatic document feeder
1 Open the document cover, make sure that an original has not been left on the document glass, and then gently close the document cover.

natural_image
Illustration of a hand inserting a device into an open screen, showing a left-side rotation arrow (no text or symbols)2 Adjust the original guides to the size of the originals.
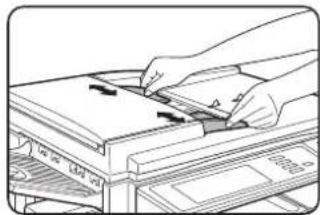
natural_image
Illustration of hands inserting or removing a document into a file (no text or symbols visible)3 Place the originals face down in the document feeder tray.
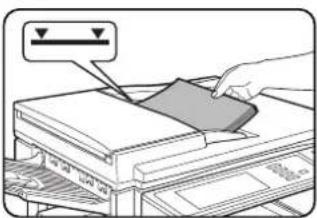
natural_image
Illustration of a hand inserting a card into a printer (no text or symbols visible)Place the originals face down.
Insert the originals all the way into the document feeder. The stack height must not be higher than the indicator
line (maximum of 50 pages).
■Using the document glass
Open the document cover, place the original face down on the document glass, and then gently close the document cover.

To make a copy of a small original such as a postcard, use the [PAPER SELECT] key to select the desired paper size.
NOTES
●After placing the original, be sure to close the document cover. If left open, parts outside of the original will be copied black, causing excessive use of toner.
●Do not place any objects under the original size detector, because they may damage it or the original size may not be detected properly.

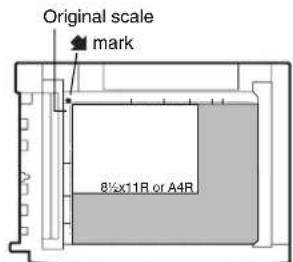
●Align the corner of the original with the tip of the arrow mark ▲ on the document glass scale.
●Place the original in the appropriate position for its size as shown above.
NOTE
Original size detection function
One of the four groups of standard original sizes shown below can be selected for detection by the original size detection function. The factory default setting is "INCH-1". The setting can be changed using "ORIGINAL SIZE DETECTOR SETTING" in the administrator settings.
| Group | Detectable original sizes | ||
| Document feeder tray (for automatic document feeder) Document glass | |||
| 1 | INCH-1 | 11" x 17", 8-1/2" x 14", 8-1/2" x 11", 8-1/2" x 11"R, 5-1/2" x 8-1/2" | Document glass + A3, A4 |
| 2 | INCH-2 | 11" x 17", 8-1/2" x 13", 8-1/2" x 11", 8-1/2" x 11"R, 5-1/2" x 8-1/2" | Document glass + A3, A4 |
| 3 AB-1 | A3, A4, A4 | 4R, A5,B4, B5, B5R | Document glass + 11" x 17", 8-1/2" x 11", 216x330 |
| 4 AB-2 | A3, A4, A4 | 4R, A5,B5, B5R, 216x330 | Document glass + 11" x 17", 8-1/2" x 11", B4 |
■ Standard original placement orientations
[Example 1]
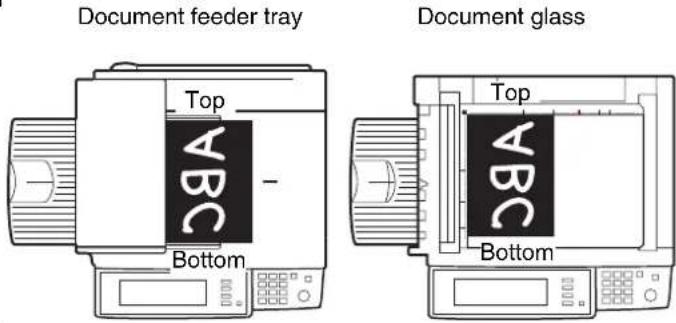
[Example 2]
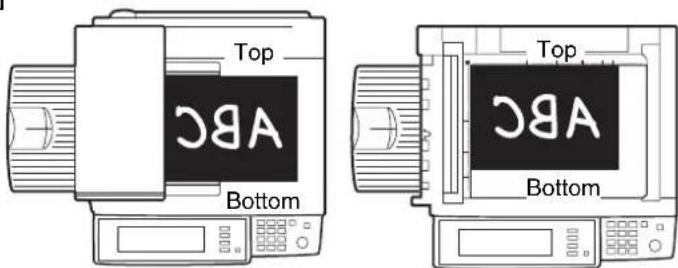
Place originals in the document feeder tray or on the document glass so that the top and bottom of the original is positioned as shown in the illustration. If not, staples will be incorrectly positioned and some special features may not give the expected result.
■ Automatic copy image rotation - rotation copying
If the orientation of the originals and copy paper are different, the original image will be automatically rotated 90^ and copied. (When an image is rotated, a message will be displayed.) If a function is selected that is not suitable for rotation, such as enlarging the copy to greater than 8-1/2" × 11" (A4) size or staple sorting with the saddle stitch finisher, rotation will not be possible.
[Example]
Orientation of original Orientation of paper Copy after rotation

●This function operates in both the auto paper select or auto image mode. ("Rotation copy setting" can be disabled with a administrator setting. See page 16 of the administrator settings guide.)
CHECKING THE SIZE OF A PLACED ORIGINAL
If the placed original is a standard size, the size will be automatically detected (automatic original detection function) and displayed in the touch panel. Make sure that the correct size has been detected.
(A) : The original size is displayed.
(B) :[AUTO] appears when the automatic original detection function is operating.
If you have loaded a non-standard size original or wish to change the scanning size, you can follow the steps below to manually set the original scanning size. (For the standard sizes, see "Original size detection function" on page 4-3.)
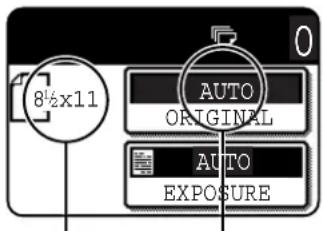
(B)(A)
NOTE
If a non-standard size original is loaded (including special sizes), the closest standard size may be displayed, or the original size may not appear at all.
If "CANCEL DETECTION AT DOCUMENT GLASS" is enabled in the administrator settings (see page 11 of the administrator settings guide), automatic original detection at the document glass will not operate. In this case, follow the steps below to manually set the original scanning size.
Manually setting the scanning size
If you load an original that is not a standard size (such as an AB size), or if the size is not detected correctly, you must touch the [ORIGINAL] key and set the original size manually. Perform the following steps after placing the document in the automatic document feeder or on the document glass.
1 Touch the [ORIGINAL] key.
![SHARP MX-M450N - Touch the [ORIGINAL] key. - 1](/content/2026/05/944414/images/578de0234b8e0ae60d6486765bd7c3b252260b0e78fecb8942746dd79dc0759e.jpg)
flowchart
graph TD
    A["AUTO ORIGINAL"] --> B["AUTO EXPOSURE"]
    B --> C["User icon pointing to 'AUTO' arrow"]
2 Touch the desired original size key.
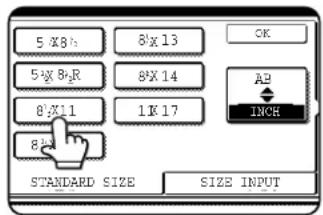
[AUTO] is no longer highlighted. [MANUAL] and the original size key you touched are highlighted.
If you wish to select an AB size, touch the [AB/INCH] key and then touch the desired original size key.

[AB] is highlighted and AB size keys are displayed. To return to the inch palette, touch the [AB/INCH] key once again.
If a non-standard size original is placed in the document feeder or on the document glass, touch the [SIZE INPUT] tab and then enter the X (width) and Y (length) dimensions of the original.
![A X 17 [2.1/2=17] Y 11 5/8 [2.1/2=11 5/6] STANDARD SIZE SIZE INPUT OK](/content/2026/05/944414/images/043e520a5988e6dbfd0ab016cd85e7945f125bb352ee9e91a388ef013bfe7321.jpg)
X is initially selected. Enter the X dimension (width) and then touch the Y(y key and enter the Y dimension (length). X can be from 2-1/2 to 17 inch, and Y can be from 2-1/2 to 11-5/8 inch.
If you frequently use originals that are the same non-standard size, you can store the size as explained in "STORING, DELETING, AND USING ORIGINAL SIZES" on the following page. This will save you the trouble of manually entering the size each time you use that original size.
3 Touch the [OK] key.
You will return to the initial screen.
4 The selected original size appears in the top half of the [ORIGINAL] key.

STORING, DELETING, AND USING ORIGINAL SIZES
Up to 9 special original sizes can be stored. Stored sizes can be easily called up and are not erased if the power is turned off. Storing a frequently used original size saves you the trouble of manually setting the size each time you copy that size of document.
● To cancel an original size storing, using, or deleting operation, touch the [ORIGINAL] key on the screen.
Storing or deleting an original size
1 Touch the [ORIGINAL] key.

2 Touch the [CUSTOM SIZE] key.
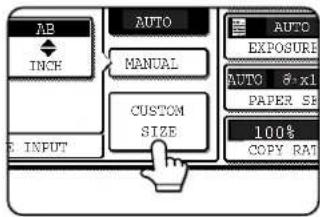
3 Touch the [STORE/DELETE] key.

4 Touch the original size key ( ) that you wish to store or delete.
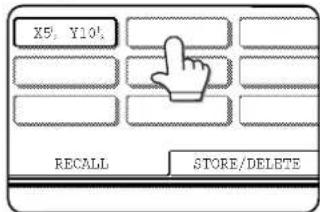
To store an original size, touch a key that does not show a size (☐).
Keys that already have an original size stored will show the stored size ( X_0^2 , Y_10^2 ).
To delete or change a stored size, touch the key that shows the size that you wish to delete or change.
●If you are storing an original size, go to step 5.
●To delete or change an original size, go to step 7.
5 Enter the X (width) and Y (length) dimensions of the original with the ▲▼ keys.

X (width) is initially selected.
Enter X and then touch the ( ) key to enter Y. A width of 2-1/2 to 17 inches can be entered in X, and a length of 2-1/2
to 11-5/8 inches can be entered in Y.
6 Touch the [OK] key.
The original size entered in step 5 is stored in the key selected in step 4.
To exit, touch the [ORIGINAL] key.
7 When you touch a key that shows an original size in step 4, a message screen appears that contains the keys [CANCEL], [DELETE], and [AMEND].
●To cancel the procedure, touch the [CANCEL] key.
●To delete the selected original size, touch the [DELETE] key.
●To change the original size stored in the key, touch the [AMEND] key. The screen of step 5 will appear to let you change the size.
8 To exit, touch the [ORIGINAL] key.
■ USING A STORED ORIGINAL SIZE
1 Follow steps 1 to 2 of "STORING OR DELETING AN ORIGINAL SIZE".
2 Touch the original size key that you wish to use.
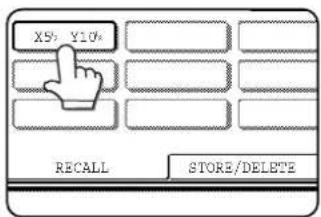
3 Touch the [OK] key.
The stored original size is called up.
NORMAL COPYING
This section describes the normal copying procedure.
Making copies with the automatic document feeder
■ 1-sided copies of 1-sided originals
Original Copy
natural_image
Illustration of two groups of people interacting, one moving right and the other standing (no text or symbols)1 Place the originals in the document feeder tray. (pages 4-3 to 4-6)

natural_image
Illustration of a hand inserting a card into a printer (no text or symbols visible)2 Make sure that the 1-sided to 1-sided copy mode is selected.

The one-sided to one-sided mode is selected when no icon for a two-sided mode appears in the dashed area on the display. If the 1-sided to 1-sided copy mode is
already selected, steps 3 to 5 are not needed.
3 Touch the [2-SIDED COPY] key.
4 Touch the [1-sided to 1-sided copy] key.
Touch the [1-sided to 1-sided copy] key.
5 Touch the [OK] key.
6 Make sure that paper of the same size as the originals is automatically selected*.
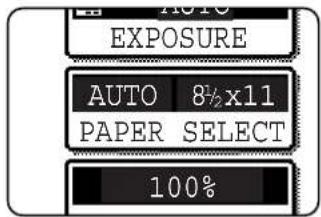
The selected tray will be highlighted or the message "LOAD xxxxxx PAPER." will appear. If the message appears, load paper in a paper tray with paper of the required size.
Even if the message above appears, copying can be performed onto the currently selected paper.
*The following requirements must be satisfied.
Originals of a standard size (11" x 17", 8-1/2" x 14", 8-1/2" x 11", 8-1/2" x 11" R or 5-1/2" x 8-1/2R" (A3, B4, A4, A4R, B5, B5R or A5)) are set and the auto paper select function is enabled.

If originals of a size other than the sizes above are to be copied, manually select the desired paper size by touching the [PAPER SELECT] key and then touching the
desired paper size selection key.
The selected key will be highlighted and the paper selection screen will close. To close the paper selection screen without making a selection, touch the [PAPER SELECT] key.
7 Select the desired output mode (page 4-9).

flowchart
graph TD
    A["2-SIDED COPY"] --> B["OUTPUT"]
    B --> C["FILE"]
The sort mode is the default mode.
To select the group mode, touch the [OUTPUT] key, then touch the [GROUP] key on the output setting
screen, and then touch the [OK] key on the setting screen.
8 Use the numeric keys to set the desired number of copies.

Up to 999 can be set.
If you are only making a single copy, the copy can be made with the copy number display showing "0". Use the [C] (clear) key to cancel an entry if
a mistake has been made.
9 Press the [START] key.
![SHARP MX-M450N - Press the [START] key. - 1](/content/2026/05/944414/images/ec7b25e294a2b768a7a08c0fae793648fbe34acffdbdd40b2dff28baf572bd14.jpg)
natural_image
Simple line drawing of a hand pressing a button with a circular icon (no text or symbols)If the [C] key is pressed while originals are being scanned, scanning will stop. If copying had already started, copying and scanning will stop after the original in
progress is output to the original exit area. In these cases the copy quantity will be reset to "0".
NOTES
● The 1-sided to 1-sided copying mode is set as the default in the initial settings. If the default setting has not been changed using the "Initial status settings" (administrator settings), steps 3 to 5 on page 4-7 can be omitted.
To cancel copying...
To cancel a copy job in progress, press the [CA] key. A confirmation message will appear. Touch the [YES] key to cancel copying.
■ Copy output (sort and group)
Example: Making five sets or five copies each of three originals
- Sorting copies into sets
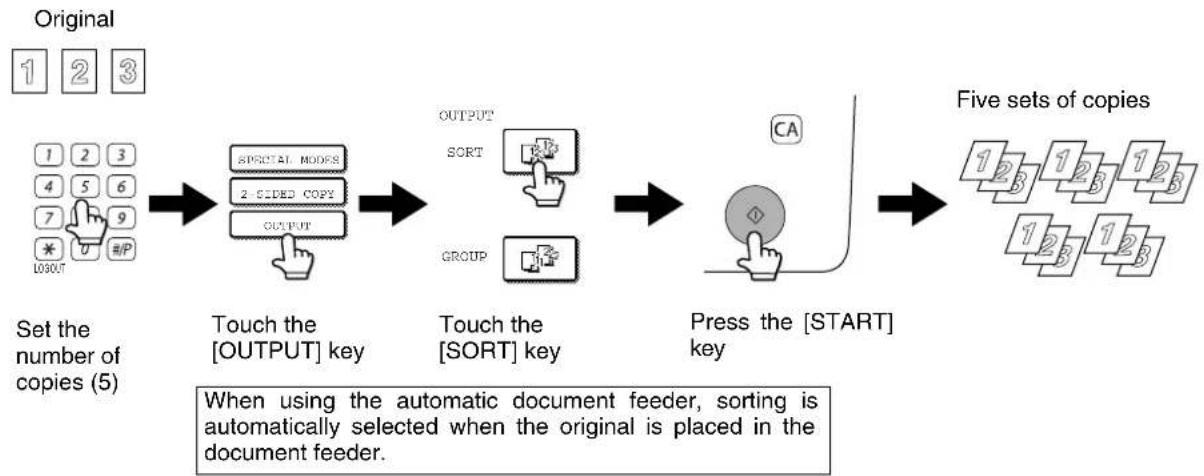
flowchart
graph LR
    A["Original"] --> B["Set the number of copies (5)"]
    B --> C["Touch the [OUTPUT"] key]
    C --> D["Touch the [SORT"] key]
    D --> E["Press the [START"] key]
    E --> F["Five sets of copies"]

    subgraph Original
        G["1 2 3"]
        H["1 2 3"]
        I["4 5 6"]
        J["7 9"]
        K["* #P"]
        L["LOGOUT"]
    end

    subgraph Five Sets of Copies
        M["1 2 3 1 2 3 1 2 3"]
        N["1 2 3 1 2 3"]
        O["1 2 3 1 2 3"]
    end
● Grouping copies by page

flowchart
graph LR
    A["Original"] --> B["Set the number of copies (5)"]
    B --> C["Touch the [OUTPUT"] key]
    C --> D["2-SIDED COPY OUTPUT"]
    D --> E["OUTPUT"]
    E --> F["SORT"]
    F --> G["GROUP"]
    G --> H["Touch the [GROUP"] key]
    H --> I["Press the [START"] key]
    I --> J["CA"]
    J --> K["5 copies per page"]
■ Selecting the output tray (when an optional finisher or saddle stitch finisher is installed)
When the [OFFSET TRAY] key is highlighted, output pages are delivered to the offset tray of the finisher or saddle stitch finisher. When the "CENTER TRAY" key is highlighted, output pages are delivered to the center tray. Touch the appropriate key to select the desired output tray.

This screen appears when a saddle stitch finisher is installed.
The screen that appears when a finisher is installed is slightly different.
Automatic two-sided copying using the automatic document feeder
When the optional duplex module is installed, the following automatic two-sided copying can be performed. The paper is automatically turned over during copying, allowing two-sided copies to be made with ease.

flowchart
graph LR
    A["Original"] --> B["Copy"]
    B --> C["Group Image 1"]
    B --> D["Group Image 2"]
    B --> E["Group Image 3"]
    C --> F["Text Output"]
    D --> G["Text Output"]
    E --> H["Text Output"]
1 Place the originals in the document feeder tray. (pages 4-3 to 4-6)

natural_image
Illustration of a hand pressing down on a printer with a paper clip (no text or symbols visible)2 Touch the [2-SIDED COPY] key.

- Automatic two-sided copying from one-sided originals
- Automatic two-sided copying from two-sided originals
- Automatic one-sided copying from two-sided originals
3 Select the desired copy mode.
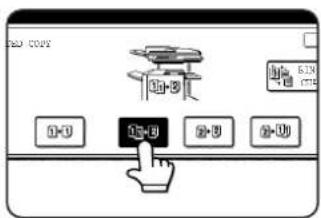
The display will vary depending on the equipment installed.
If a copy key is touched for a mode that cannot be selected, a double beep will sound.
Example of a portrait-oriented original
Example of a landscape-oriented original


When making automatic two-sided copies of a one-sided 11" x 17" (A3) or 8-1/2" x 14" (B4) size portrait original, or when you wish to invert the top and bottom of the back side of a two-sided original, touch the [BINDING CHANGE] key.
4 Touch the [OK] key.

Perform steps 6 through 9 on pages 4-7 and 4-8.
Copying from the document glass
When copying originals which cannot be fed from the automatic document feeder such as thick originals, open the document cover and copy the originals from the document glass.
■1-sided copies of 1-sided originals
Original Copy

1 Place the original on the document glass. (pages 4-3 to 4-6)

natural_image
Illustration of a printer's front panel with an arrow pointing to the cover (no text or symbols present)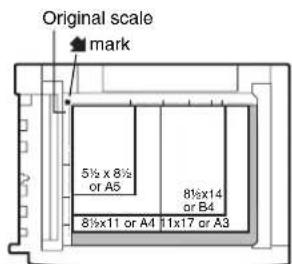
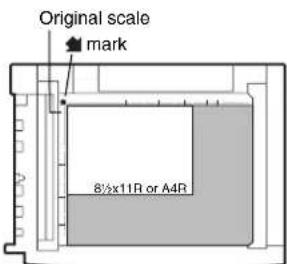
●Align the corner of the original with the tip of the arrow mark ◆ on the document glass scale.
●Place the original in the appropriate position for its size as shown above.
2 Ensure that the 1-sided to 1-sided copy mode is selected.

The one-sided to one-sided mode is selected when no icon for a two-sided mode appears in the dashed area on the display. If an icon appears, perform steps
3 to 5 on page 4-7 and then go to step 3.
3 Ensure that paper of the same size as the original is automatically selected\*.

The selected tray will be highlighted or the message "LOAD xxxxxx PAPER." will appear. If the message appears, load paper in a paper tray with paper of the
required size.
Even if the message above is displayed, copying can be performed onto the currently selected paper.
* The following requirements must be satisfied. Originals of a standard size (11" x 17", 8-1/2" x 14", 8-1/2" x 11", 8-1/2" x 11"R or 5-1/2" x 8-1/2"R (A3, B4, A4, A4R, B5, B5R or A5)) are set and the auto paper select function is enabled.

If originals of a size other than the sizes above are to be copied, manually select the desired paper size by touching the [PAPER SELECT] key and then touching the
desired paper size selection key.
The selected key will be highlighted and the paper selection screen will close. To close the paper selection screen without making a selection, touch the [PAPER SELECT] key.
4 Select the desired output mode. (page 4-9.)

flowchart
graph TD
    A["2-SIDED COPY"] --> B["OUTPUT"]
    B --> C["FILE"]
Group mode is the default mode.
To select sort mode, touch the [OUTPUT] key, touch the [SORT] key in the screen that appears, and then touch the [OK] key.
5 Use the numeric keys to set the desired number of copies.

Up to 999 can be set. If you are only making a single copy, the copy can be made with the copy number display showing "0".
Use the [C] (clear) key to
cancel an entry if a mistake has been made.
6 Press the [START] key.
![SHARP MX-M450N - Press the [START] key. - 1](/content/2026/05/944414/images/1271127826017b5051bc30b78da79adf8ea74117a374b0de17b7bdb95a29513e.jpg)
natural_image
Simple line drawing of a hand pressing a button with a circular icon (no text or symbols)Replace the original with the next original and press the [START] key. Repeat this operation until all originals have been scanned.
If you selected "Sort" for
the output mode in step 4 and pressed the [START] key, it is necessary to touch the [READ-END] key.
7 Touch the [READ-END] key.
![PLACE TEXT ORIGINAL, PRESS [START], EXEM PIXLASHED, PRESS [READ-END]. READ-END](/content/2026/05/944414/images/f2120f089c2cf690945d2c728d591f8bcedd8df73147cdbe6189033aa9597a88.jpg)
To cancel copying...
To cancel a copy job in progress, press the [CA] key. A confirmation message will appear. Touch the [YES] key to cancel copying.
Automatic two-sided copying from the document glass
When the optional duplex module is installed, the following automatic two-sided copying can be performed. The paper is automatically turned over during copying, allowing two-sided copies to be made with ease.
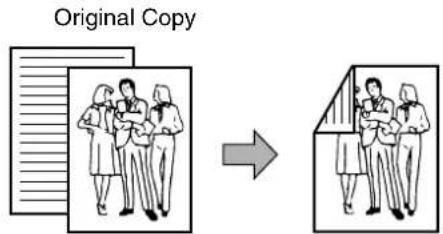
1 Place the original on the document glass. (pages 4-3 to 4-6)
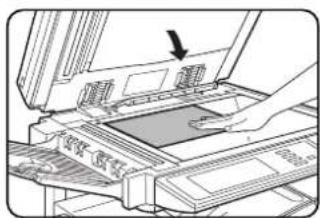
natural_image
Illustration of a printer's front panel with an arrow pointing to the cover (no text or symbols visible)

●Align the corner of the original with the tip of the arrow mark on the document glass scale.
●Place the original in the appropriate position for its size as shown above.
2 Touch the [2-SIDED COPY] key.

3 Touch the [1-sided to 2-sided copy] key.
Example of a landscape-oriented original
Example of a portrait-oriented original
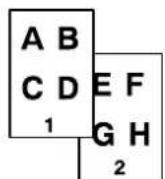

When making automatic two-sided copies of a one-sided 11" x 17" (A3) or 8-1/2" x 14" (B4) size portrait original, or when you wish to invert the top and bottom of the back side of a two-sided original, touch the [BINDING CHANGE] key.
4 Touch the [OK] key.
Perform steps 3 to 7 on pages 4-11 and 4-12.
ADJUSTING THE EXPOSURE
Select an appropriate exposure mode for the original to be copied. The selections are AUTO, TEXT, TEXT/PHOTO and PHOTO.
■ Automatic exposure adjustment

The default exposure setting is "AUTO", which automatically adjusts the exposure for the original. To select the exposure mode, or to manually adjust the
exposure level, follow the steps below.
■ Selecting the exposure mode and manually adjusting the exposure level
1 Touch the [EXPOSURE] key.
2 Select [TEXT], [TEXT/PHOTO] or [PHOTO] as appropriate for the original to be copied.

To select [TEXT], touch the [AUTO MANUAL] key so that [MANUAL] is selected.
Exposure modes selection
TEXT: This mode is useful for producing dark text copies with minimum background.
TEXT/PHOTO: This provides the best balance for copying an original which contains both text and photos. This mode is also useful for copying printed photographs.
PHOTO: This mode provides the best copies of photographs with fine details.
3 Adjust the exposure level.
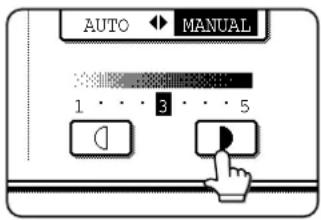
Touch the ▶key to make darker copies. Touch the ▶key to make lighter copies.
NOTE
Exposure levels in TEXT mode
1 to 2: Dark originals such as newspaper
3: Normal density originals
4 to 5: Originals written with pencils or light color characters
About the steps that follow
If an automatic document feeder is being used, see pages 4-7 through 4-10. If the document glass is being used, see pages 4-11 through 4-13.
NOTES
● To return to the automatic exposure mode, touch the [AUTO / MANUAL] key to highlight [AUTO], and then touch the [OK] key.
● The exposure level used in automatic exposure mode can be adjusted in the administrator settings. See "Exposure adjustment" on page 16 of the administrator settings guide)
REDUCTION/ENLARGEMENT/ZOOM
Reduction and enlargement ratios can be selected automatically or manually.
● Automatic selection: Auto image (see below)
● Manual selection: Preset copy ratios/zoom (see page 4-16)
Automatic selection (auto image)
The reduction or enlargement ratio will be selected automatically based on the original size and the selected paper size.
1 Place the original in the document feeder tray or on the document glass. (pages 4-3 to 4-6)
The detected original size will be displayed.
NOTE
Automatic ratio adjustment can only be used for the following original and paper sizes. It cannot be used for other sizes. However, in the case of non-standard original and paper sizes, the sizes can be entered to make automatic ratio adjustment possible for those sizes.
Original sizes: Standard sizes (see "Original size detection function" on page 4-3.)
Paper size: 11" x 17", 8-1/2" x 14", 8-1/2" x 11", 8-1/2" x 11"R, or 5-1/2" x 8-1/2"R (A3, B4, A4, A4R, B5, B5R, or A5R)
2 Touch the [PAPER SELECT] key and then select the desired paper size.
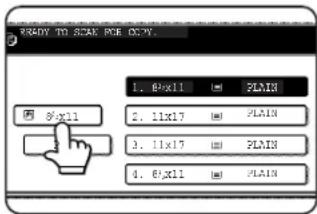
The selected paper size key is highlighted and the paper selection screen closes.
NOTE
If paper of the desired size is not loaded in any tray, load paper of the required size in a paper tray. (See "Setting the paper type and paper size" on page 2-5.)
3 Touch the [AUTO IMAGE] key.

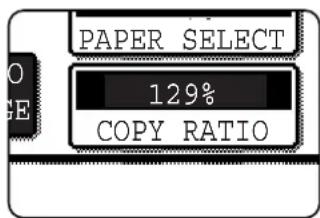
The [AUTO IMAGE] key will be highlighted and the best reduction or enlargement ratio for the original size and the selected paper size will be selected and
displayed in the copy ratio display.
NOTE
If the message "ROTATE ORIGINAL FROM ☐TO ☐" is displayed, change the orientation of the original as indicated in the message. When the message above is displayed, copying can be done without changing the orientation, but the image will not fit the paper correctly.
4 Use the numeric keys to set the desired number of copies.
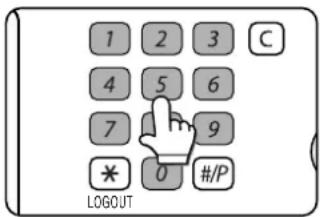
Up to 999 can be set. If you are only making a single copy, the copy can be made with the copy number display showing "0".
Use the [C] (clear) key to cancel an entry if a mistake has been made.
5 Press the [START] key.
![SHARP MX-M450N - Press the [START] key. - 1](/content/2026/05/944414/images/1bfc4505c8aecd5b591a73f88c325a93f768e25ba50f2961511019c90dd84087.jpg)
natural_image
Simple line drawing of a hand cursor clicking a circular button with an eye symbol (no text or labels)If you placed the original on the document glass, set the output mode to "Sort", and pressed the [START] key, you must touch the [READ-END] key after all pages of the original have been scanned. (Step 7 on page 4-12)
To cancel the auto image mode, touch the [CA] key.
Manual selection (preset copy ratios/zoom)
Preset ratios (maximum 400%, minimum 25%) can be selected with the enlargement and reduction keys. In addition, the zoom keys can be used to select any ratio from 25% to 400% in increments of 1%.
(The administrator setting on page 16 of the administrator settings guide can be used to set two additional enlargement ratios and two additional reduction ratios.)
1 Place the original in the document feeder tray or on the document glass. (pages 4-3 to 4-6)
NOTE
When the original is placed in the document feeder, the ratio can be set from 25% to 200%.
2 Touch the [COPY RATIO] key.

3 Use the [MENU] key to select menu "1 for menu" 2 for copy ratio selection.
Menu 1

●A.Preset reduction copy ratios are: 77% and 64% (for the inch system). 70%, 81% and 86% (for the AB system).
● B.Preset enlargement copy ratios are: 121% and 129% (for the inch system). 115%, 122% and 141% (for the AB system).
Menu 2

●A.Preset reduction copy ratios are: 50% and 25%.
●B.Preset enlargement copy ratios are: 200% and 400%.
(The custom ratios set by the administrator appear in ratio menu 2.)
4 Use the reduction, enlargement, and [ZOOM] keys on the touch panel to set the desired copy ratio.

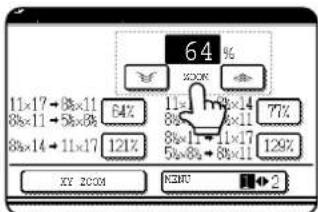
Zoom ratios: Any ratio from 25% to 400% can be set in 1% increments. Touch the [▶key to increase the ratio, or the [▶key to decrease the ratio. (If you continue
to touch the [ ] key, the ratio will change automatically. After 3 seconds, the ratio will change rapidly.)
NOTES
- Touch a reduction or enlargement key to set the approximate ratio, then touch the [ ] key to increase the ratio or the [ ] key to decrease the ratio.
● Automatic changing of the ratio when a zoom key is continuously touched can be disabled in the administrator settings (see "Key operation setting (prohibit key repeat)" on page 10 of the administrator settings guide). - If the message "IMAGE IS LARGER THAN COPY PAPER." appears when a ratio is selected, the image may not fit on the copy paper.
● To set the horizontal and vertical copy ratios separately, use the XY ZOOM feature. See page 4-18.
5 Touch the [OK] key.
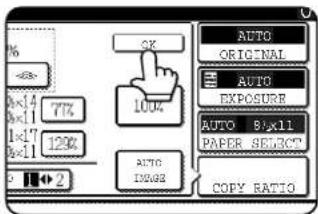
6 Make sure that an appropriate paper size has been selected based on the selected ratio.

NOTE
If the auto paper select display does not appear, a tray with the correct size of paper for the selected ratio will not be automatically selected.
7 Use the numeric keys to set the desired number of copies.

Up to 999 can be set.
If you are only making a single copy, the copy can be made with the copy number display showing "0".
Use the [C] (clear) key to
cancel an entry if a mistake has been made.
8 Press the [START] key.
![SHARP MX-M450N - Press the [START] key. - 1](/content/2026/05/944414/images/6aac5663fb0b176f0caa7c95c613f9d659015978d8173d0380780f31ceeb9c98.jpg)
natural_image
Simple line drawing of a hand pressing a button with an icon (no text or symbols)If you placed the original on the document glass, set the output to "Sort", and pressed the [START] key, you must touch the [READ-END] key after all pages of the
original have been scanned. (Step 7 on page 4-12)
To return the ratio to 100%
To return the ratio setting to 100%, touch the [COPY RATIO] key to display the ratio menu and then touch the [100%] key. (Steps 2 and 3 on page 4-16.)
XY ZOOM
The XY ZOOM feature allows the horizontal and vertical copy ratios to be changed separately. The ratios can be set from 25% to 400% in increments of 1%.
Example: Selecting 100% for the length and 50% for the width

1 Place the original in the document feeder tray or on the document glass. (pages 4-3 to 4-6)
NOTE
When the original is placed in the document feeder, the ratio can be set from 25% to 200%.
2 Touch the [COPY RATIO] key.

3 Touch the [XY ZOOM] key.
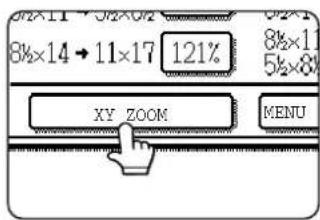
4 Touch the [X] key.

The initial state of the [X] key is selected (highlighted), so this step normally is not necessary. Touch the [X] key only if it is not highlighted yet.
5 Use the reduction, enlargement, and ZOOM ([ ], [ ]) keys to change the copy ratio in the horizontal (X) direction.
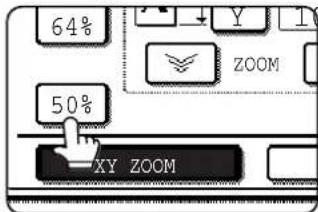
A fixed ratio key will not become highlighted when touched.
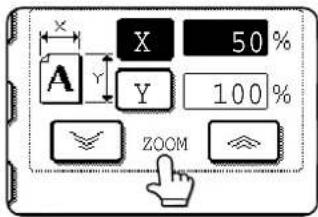
Zoom ratios: Any ratio from 25% to 400% can be set in 1% increments.
Touch the [ ] key to increase the ratio, or the [ ] key to decrease the ratio. (If you continue
to touch the [ ] key, the ratio will change automatically. After 3 seconds, the ratio will change rapidly.)
NOTES
- Touch a reduction or enlargement key to set the approximate ratio, then touch the [ ] key to increase the ratio or the [ ] key to decrease the ratio.
● Automatic changing of the ratio when a zoom key is continuously touched can be disabled in the administrator settings (see "Key operation setting (prohibit key repeat)" on page 10 of the administrator settings guide).
6 Touch the [Y] key.
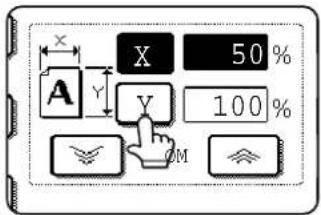
7 Use the reduction, enlargement, and ZOOM ([ ], [ ]) keys to change the copy ratio in the vertical (Y) direction.
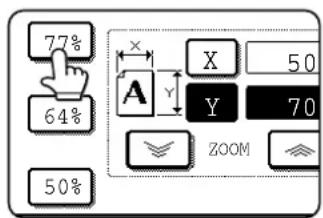
A fixed ratio key will not become highlighted when touched.
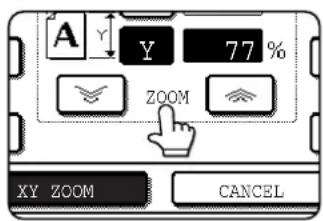
The zoom keys can be used to change the ratio from 25% to 400% in increments of 1%.
If needed, you can touch the [X] key once again to readjust the X zoom.
8 Touch the [OK] key.

9 If needed, touch the [PAPER SELECT] key and select the paper size.
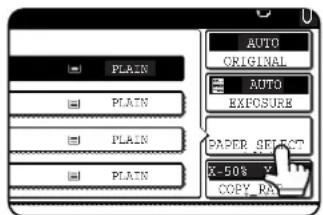
If the AUTO PAPER SELECT mode is on, the appropriate copy paper size will have been automatically selected based on the original size and selected copy ratios.
10 Select any desired copy settings such as the exposure or number of copies, and then press the [START] key.

natural_image
Simple line drawing of a hand pressing a button with an icon (no text or symbols)To cancel an X or Y zoom setting...
Touch the [XY ZOOM] key or the [CANCEL] key in the ratio selection screen (step 3 on page 4-18 or step 7).
SPECIAL PAPERS
The tray 2 and the bypass tray on the optional duplex module with bypass tray can be used to make copies on transparencies, postcards, label sheets, envelopes ^*1 , and plain paper.
*1 Envelopes can be placed in the tray 2.
1 Place the original in the document feeder tray or on the document glass. (pages 4-3 to 4-6)
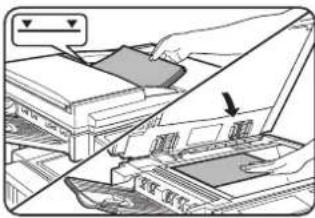
natural_image
Illustration of a hand inserting a card into a printer (no text or symbols visible)2 Load the special paper in the bypass tray.
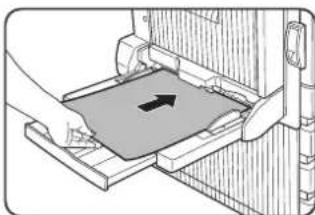
natural_image
Illustration of a hand pressing a component into a machine (no text or symbols visible)Place the paper with the printed side face down. See page 2-3 for the specifications of paper that can be used in the bypass tray.
For the paper loading instructions, see "Loading paper in the bypass tray" (page 3-3).
5 Select the bypass tray.

6 Select any desired copy settings such as the exposure or number of copies, and then press the [START] key.

natural_image
Simple line drawing of a hand pressing a button with a circular icon (no text or symbols)When copying from the document glass in the sort mode using the [START] key, touch the [READ-END] key after all originals have been scanned (step 7 on page 4-12).
3 Touch the [PAPER SELECT] key.
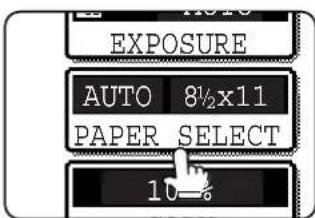
4 Set the type and size of paper loaded in the bypass tray.
(X) (Y)
(1)The (X) key shows the currently selected paper type.
(2)The (Y) key shows the size of paper loaded in the bypass tray.
(3) To change the displayed paper type, touch the (X) key before touching the (Y) key. When loading paper, if you changed the paper size from an inch size to an AB size (or from an AB size to an inch size), or if you changed the paper type, be sure to change the paper type and size settings as explained in steps 5 to 6 on page 2-5, and steps 7 to 10 on page 2-6.
CHAPTER 5
CONVENIENT COPY FUNCTIONS
This chapter explains special-purpose functions, storing of copy settings, and other convenient functions. Please select and read sections of this chapter as needed.
Page
SPECIAL MODES.... 5-2
- General procedure for using special functions.... 5-2
- Margin shift.... 5-3
- Erase.... 5-4
- Dual page copy 5-5
- Pamphlet copy.... 5-6
- Job build.... 5-8
- Tandem copy.... 5-10
- Covers/inserts 5-12
- Transparency film with insert sheets 5-23
- Multi shot.... 5-24
• Book copy 5-26 - Card shot.... 5-27
- Mirror image.... 5-29
- B/W reverse.... 5-29
- Print menu.... 5-30
STORING, USING AND DELETING JOB PROGRAMS.... 5-42
- Storing a job program.... 5-42
- Calling up a job program 5-43
- Deleting a stored job program.... 5-43
INTERRUPTING A COPY RUN 5-44
SPECIAL MODES
Touch the [SPECIAL MODES] key in the main screen of copy mode to open the special modes screen. The following functions can be selected in the special modes screen.
![Touch the [SPECIAL MODES] key in the main screen. READ TO SCAN FOR COPY. 0 SPECIAL MODES 2-SIDED COPY OUTPUT FILE QUICK FILE ORIGINAL AUTO ORIGINAL AUTO EXPOSURE AUTO 8 x11 PAPER 100$ COPY_RATIO SPECIAL MODES MARGIN SHIFT ERASE DUAL PAGE COPY PAMELET COPY JOB BUILD TANDEM COPY (1) (2) (3) OK 1/3 (4) (5) (6) (7) (8)](/content/2026/05/944414/images/eb8334deb82a43f7cd1b0f5a1034d3d134c4905dd886263904912d3cc96d6be1.jpg)
(1) Margin shift (page 5-3)
(2) Erase (page 5-4)
(3) Dual page copy (page 5-5)
(4) Pamphlet copy (page 5-6)
(5) Job build (page 5-8)
(6) Tandem copy (page 5-10)
(7) [OK] key on the special modes screen
Touch the [OK] key to return to the main screen of copy mode.
(8) / key
Touch these keys to change the special modes screen.
There are three special modes screens.
Touch the key to change to the other two screens.
●The following special functions can be selected in the 2nd screen (2/3).
Covers/inserts (page 5-12)
Transparency inserts (page 5-23)
Multi shot (page 5-24)
Book copy (page 5-26)
Card shot (page 5-27)
Mirror image (page 5-29)
●The following special functions can be selected in the 3rd screen (3/3).
B/W reverse (page 5-29) Print menu (page 5-30)
General procedure for using special functions
1 Touch the [SPECIAL MODES] key.
![SHARP MX-M450N - Touch the [SPECIAL MODES] key. - 1](/content/2026/05/944414/images/b5315752fc701d63425371b5dc7a95b9a1cf75516e31816a2838d66469be8aa5.jpg)
flowchart
graph TD
    A["SPECIAL MODES"] --> B["2-SIDED COPY"]
    B --> C["OUTPUT"]
2 Touch the key for the desired special mode.
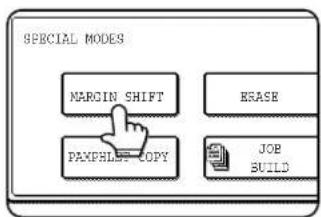
To select a special function in one of the other two screens, use the 🔊 keys to change the screen.
Setting procedures for modes requiring setting screens start on the next page.
The dual page copy, job build, tandem copy, mirror image and B/W reverse functions do not require setting screens.
Margin shift
The margin shift function will automatically shift the text or image on the copy paper approximately 1/2" (10 mm) in its initial setting.
This function is convenient when stapling or binding copies with a string.
NOTES
● The initial setting for the margin width can be changed in the administrator settings to any value from 0 to 1" (0 to 20 mm). (Page 17 of the administrator settings guide)
- When margin shift is selected, rotating copying will not operate even if the condition for rotate copying is met.
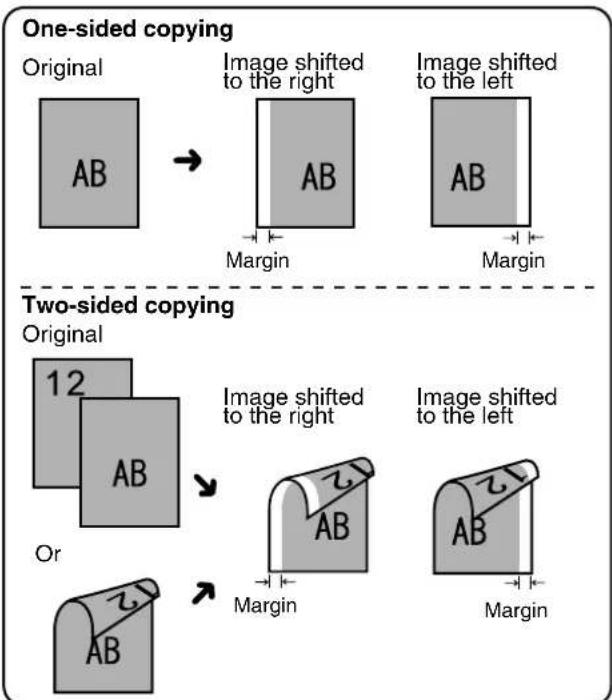
To display the special modes screen...
See "General procedure for using special functions" on page 5-2.
1 Touch the [MARGIN SHIFT] key on the special modes screen.
The margin shift setting screen will appear. The margin shift icon ( ± ) will also appear in the upper left of the screen to indicate that the function is turned on.
2 Select the shift direction.

Touch a shift direction key to select right or left. The selected key will be highlighted.
●The shift direction can be selected from right or left shift as shown in the illustration.
3 Set the shift amount as needed and touch the [OK] key.

Use the ▼ and the ▲ keys to set the shift amount. The shift amount can be set from 0" to 1" in 1/8" (0 to 20 mm in 1 mm) increments.
4 Touch the [OK] key on the special modes screen.
You will return to the main screen of copy mode.
About the steps that follow
If an automatic document feeder is being used, see pages 4-7 through 4-10. If the document glass is being used, see pages 4-11 through 4-13.
To cancel the margin shift function, touch the [CANCEL] key on the margin shift setting screen (step 3).
Erase
The erase function is used to erase the shadow lines on copies produced when copying thick originals or books. The erase modes that can be selected are shown below. The erase width is approximately 1/2" (10 mm) in it's initial setting.
NOTE
The initial setting for the erasure width can be changed in the administrator settings to any value from 0 to 1" (0 to 20 mm). (Page 17 of the administrator settings guide)
Original Copy


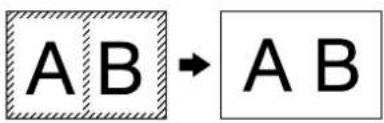
EDGE ERASE
Eliminates shadow lines around the edges of copies caused when heavy paper or a book is used as an original.
CENTER ERASE
Eliminates shadow lines produced by the bindings of bound documents.
EDGE + CENTER ERASE
Eliminates shadow lines around the edges of copies and eliminates the shadow at the center of copies.
To display the special modes screen...
See "General procedure for using special functions" on page 5-2.
1 Touch the [ERASE] key on the special modes screen.
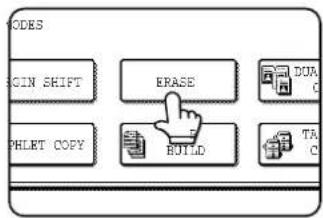
The erase setting screen will appear.
The erase icon (Dwill also appear in the upper left of the screen to indicate that the function is turned on.
2 Select the desired erase mode.
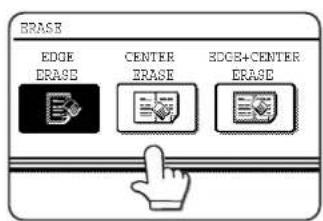
Select one of the three erase modes. The selected key will be highlighted.
3 Adjust the amount of erase and touch the [OK] key.

Use the ▼ and keys to set the erase width to any value from 0" to 1" in increments of 1/8" (0 to 10 mm in 1 mm).
4 Touch the [OK] key on the special modes screen.
You will return to the main screen of copy mode.
About the steps that follow
If an automatic document feeder is being used, see pages 4-7 through 4-10. If the document glass is being used, see pages 4-11 through 4-13.
NOTE
When erase is used, edge erase takes place at the edges of the original image. If you also use a ratio setting, the edge erase width will change according to the set ratio.
To cancel the erase function, touch the [CANCEL] key on the erase setting screen (step 3).
Dual page copy
The dual page copy function produces separate copies of two documents placed side by side on the document glass. This function is especially useful when copying books and other bound documents.
[Example] Copying right and left pages of a book
Book original Dual page copy

To display the special modes screen...
See "General procedure for using special functions" on page 5-2.
1 Touch the [DUAL PAGE COPY] key on the special modes screen.

The [DUAL PAGE COPY] key will be highlighted to indicate that the function is turned on, and the dual page copy icon (☐) will appear in the upper left of the screen.
2 Touch the [OK] key on the special modes screen.
You will return to the main screen of copy mode.
3 Place the originals on the document glass.
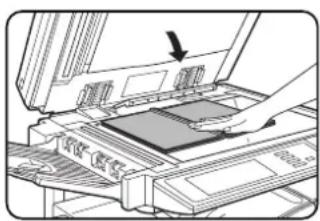
natural_image
Diagram of a printer's internal structure showing a printer's lid and base panel, with an arrow indicating the component (no text or symbols present)When copying a thick book, press down lightly on the book to flatten it against the document glass.
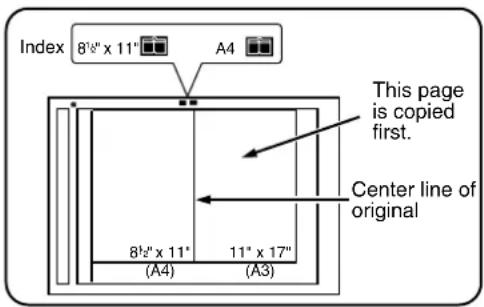
Place the opened original on the document glass so that the first page you wish to copy is on the right and the center of the original is aligned with the size mark.
●The dual page copy function can be used only when copying from the document glass. The automatic document feeder cannot be used with this function.
●Only 8-1/2" x 11" (A4) paper can be used.
4 Ensure that 8-1/2" x 11" (A4) size paper is selected.

If 8-1/2" x 11" (A4) size paper is not selected, touch the [PAPER SELECT] key to select 8-1/2" x 11" (A4) size paper.
About the steps that follow
For two-sided copying, follow steps 2 through 4 on page 4-13 and then follow steps 4 through 6 on page 4-12.
For one-sided copying, follow steps 4 through 6 on page 4-12.
NOTE
To erase shadows caused by document binding, use the edge erase function (page 5-4). (Center Erase and Edge + Center Erase cannot be used in combination.)
To cancel the dual page copy function, touch the [DUAL PAGE COPY] key on the special modes screen (screen of step 1).
Pamphlet copy
The pamphlet copy function is used to arrange copies in proper order for eventual center-stapling and folding into a booklet. Two original pages are copied onto each side of copy paper. Four pages are, therefore, copied onto one sheet. This function is convenient for arranging copies into an attractive booklet or pamphlet.
NOTE
To make pamphlet copies of a book or other bound original, use the book copy function (page 5-26). The book copy function scans the opened original in two-page units. (Two pages are scanned at each scan, reducing the number of repetitions of the scanning operation by a half.)
[Example] Copying eight originals in the pamphlet copy mode

flowchart
graph TD
    A["Originals (one-sided)"] -->|Left binding| B["Finished copies are folded in two."]
    C["Originals (two-sided)"] -->|Right binding| D["Finished copies are folded in two."]
To display the special modes screen...
See "General procedure for using special functions" on page 5-2.
1 Touch the [PAMPHLET COPY] key on the special modes screen.

The PAMPHLET COPY setting screen will appear. The pamphlet copy icon (etc.) will also appear in the upper left corner of the screen to indicate that the function is turned on.
2 Designate the type of originals to be copied: 1-sided or 2-sided.
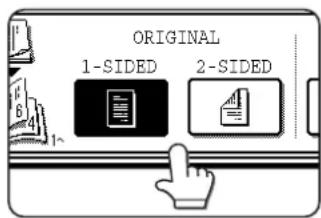
Select the [2-SIDED] key if you wish to scan a two-sided original using the automatic document feeder.
- When using this function, a duplex module must be installed.
- Scan the originals from the first page to the last page. The order of copying will be automatically adjusted by the machine.
● Either left binding (right to left turning) or right binding (left to right turning) can be selected.
● Four originals will be copied onto one sheet. Blank pages may be automatically produced at the end depending on the number of the originals. - If a saddle stitch finisher is installed, copies can be stapled in two positions along the center of copies and folded at the center.
3 Select the binding position (left binding or right binding).

If you wish to insert a different type of paper for use as a cover, follow steps 4 through 12 below.
If you do not wish to insert paper for a cover, continue from step 8 on the next page.
4 Touch the [COVER SETTING] key.

5 Select whether or not you wish to copy on the cover ("YES" or "NO").

6 Select the paper tray for the cover.

(1)The currently selected paper tray for the cover is displayed.
(2)The size and type of paper in the currently selected tray is displayed.
In the example screen above, 8-1/2" x 11" (A4) size plain paper is loaded.
To change the paper tray for the cover, touch the tray selection key. (In the screen example, the "TRAY2" display is the tray selection key.)
The tray selection screen appears when the tray selection key is touched. Select the desired tray in this screen.
NOTES
- Two-sided copying is not possible on label sheets, and transparency film. When copying on a cover, do not select a tray that has one of these types of paper.
- Select the same size of paper for the covers as for the copies.
7 Touch the [OK] key.

8 Touch the [OK] key.

Return to the main screen of copy mode.
9 Place the original in the document feeder or on the document glass. (page 4-3)
10 Ensure that the desired paper size has been automatically selected based on the original size.

To select another size paper, select the desired size and touch the [AUTO IMAGE] key. The appropriate copy ratio will be selected automatically based on
the original size and the paper size. (See steps 2 and 3 on page 4-15.)
11 Select any desired copy settings such as the exposure or number of copies, and then press the [START] key.
12[When using the automatic document feeder:]
Copying will start after all originals have been scanned. (The next step is not needed.)
[When using the document glass:]
Replace the original with the next original and press the [START] key. Repeat this operation until all originals have been scanned and then touch the [READ-END] key.
NOTES
- When the pamphlet copy function is set, the two-sided copying mode will be automatically selected.
- If this function is used in combination with the pamphlet copy function (pamphlet stapling) and the number of original pages exceeds the number of pages that can be stapled, a message asking you to select "CANCEL", "CONTINUE", or "DIVIDE" will appear.
To cancel the job, select "CANCEL". To make pamphlet copies without stapling, select "CONTINUE". To divide the pages into sets that can be stapled, select "DIVIDE".
If you performed steps 4 to 6 to insert cover paper, divided stapling is not possible. You can either continue pamphlet copying without stapling, or cancel the job.
To cancel the pamphlet copy function, touch the [CANCEL] key on the pamphlet copy setting screen (step 7).
Job build
Use job build mode when you need to copy more originals than can be placed in the document feeder at once. The maximum number of originals that can be placed in the document feeder at once is 50 sheets (30 sheets when the size is B4 or larger; for more information see "Acceptable originals" on page 4-2). This function lets you divide and scan the originals in sets. This function allows the original pages to be scanned in sets.
[Example] Copying 100 pages of 8-1/2" x 11" originals

*Divide the originals into sets of 50 pages each. Scan the originals starting from the first page of set A. Scan set B next, taking care to keep the correct page order.
To display the special modes screen...
See "General procedure for using special functions" on page 5-2.
1 Touch the [JOB BUILD] key on the special modes screen.
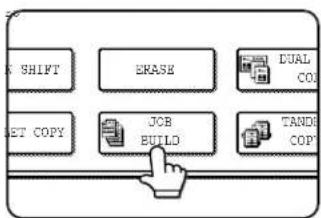
flowchart
graph TD
    A["SHIFT"] --> B["JOB BUILD"]
    C["ERASE"] --> B
    D["DUAL COI"] --> B
    E["SET COPY"] --> B
    F["TAND COPY"] --> B
The [JOB BUILD] key will be highlighted to indicate that the function is turned on, and the job build icon (☐) will appear in the upper left of the screen.
2 Touch the [OK] key on the special modes screen.
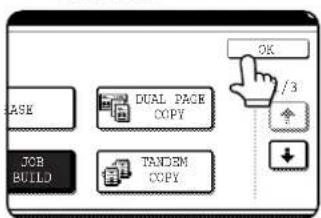
Return to the main screen of copy mode.
3 Place the first set of originals in the document feeder tray. (page 4-3)
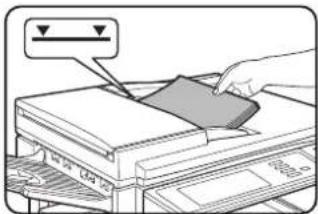
natural_image
Illustration of a hand inserting a card into a printer (no text or symbols visible)4 Make sure that the desired paper size is selected, select the number of copies or other copy settings, and press the [START] key.

natural_image
Simple line drawing of a hand pressing a circular button with a diamond symbol (no text or labels)Scanning of originals will start. After scanning of the first set of originals (A in the example above) is completed, remove the scanned originals, place the next set of originals
(set B in the example) and press the [START] key. Repeat this operation until all sets of originals have been scanned.
If you wish to adjust the copy settings each time you place a set of originals, see "Changing the copy settings for each set of originals" on the next page.
5 Touch the [READ-END] key.
![PLACE NEXT ORIGINAL. PRESS [START]. TO CHANGE COPY SETTINGS. PRESS [CHANGE]. ORANGE READ-END](/content/2026/05/944414/images/6fecdc0cfbb354b24eec2486ae5e708e20d11ceb7ebf721aed791ebd3d44c200.jpg)
To cancel the job build function, touch the [JOB BUILD] key on the special modes screen (step 1). The highlighted display will be canceled.
■ Changing the copy settings for each set of originals
When using job build mode, you can change the copy settings each time you place a set of originals. After performing step 4 on page 5-8, follow the steps below.
5 Touch the [CHANGE] key.
![PLACE NEXT ORIGINAL. PRESS [START]. TO CHANGE COPY SETTINGS, PRESS [CHANGE]. CHANGE READ-END](/content/2026/05/944414/images/90d7a82fabfb52cc861370a9386409e67d3e703781da28b85f6dcde515411860.jpg)
7 Touch the [READ-END] key.
![PLACE NEXT ORIGINAL. PRESS [START]. TO CHANGE COPY SETTINGS, PRESS [CHANGE]. CHANGE READ-IND](/content/2026/05/944414/images/8ec09b9a9343afc05898e1767a73aeba7ed9df86ed9260335a78bf5017635ded.jpg)
6 Select the desired copy settings in the screen that appears and press the [START] key.

The copy settings that can be selected are "EXPOSURE", "PAPER SELECT", and "COPY RATIO".
If you touch the [READ-END] key now, copying will begin without scanning the new set of originals.
NOTES
- If the original size was set manually at the beginning of the job build procedure, it will not be possible to change the original size setting. If the automatic original detection function is operating, the original size will be detected for each set of originals placed.
- When the bypass tray is selected, it is not possible to change the paper type.
- If "XY ZOOM" was initially set for the ratio, it will not be possible to change the ratio setting.
- When job build mode is used in combination with any of the following functions, the [CHANGE] key will not appear in the screen of step 5.
Pamphlet copy, tandem copy, covers/inserts, transparency inserts, multi-shot, book copy, staple sort, saddle stitch
Tandem copy
This function can only be used on the MX-M350N/MX-M450N, or when the network function has been added.
Two machines connected to the same network can be used to run a large copy job in parallel.
By dividing the job in half, approximately half the time is required to complete the job.
To use this function, two machines must be connected to your network as network printers. Even if more machines are connected to the network, this function can only be used to have one other machine share a job.

flowchart
graph LR
    A["100 sets of copies"] --> B["50 sets of copies"]
    B --> C["50 sets of copies"]
To display the special modes screen...
See "General procedure for using special functions" on page 5-2.
1 Touch the [TANDEM COPY] key on the special modes screen.
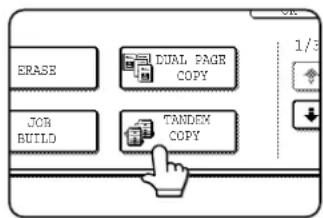
The [TANDEM COPY] key will be highlighted to indicate that the function is turned on, and the tandem copy icon (💡) will appear in the upper left of the screen.
2 Touch the [OK] key on the special modes screen.

You will return to the main screen of copy mode.
Server machine and client machine
●In the following explanations, the machine on which the copy job is initially set up and tandem copy selected is called the server machine. The other machine that is asked to share the job is called the client machine.
●To use the tandem copy function, the tandem settings must be configured in the administrator settings. (See page 13 of the administrator settings giude)
- When configuring the tandem settings in the server machine, the IP address of the client machine must be entered. For the port number, it is best to use the initial setting (50001). Unless you experience difficulty with this setting, do not change it. The tandem settings should be configured by your network administrator. If the server and client machines will alternate server and client roles, the IP address of the server machine must also be entered in the client machine. The same port number can be set in both machines.
3 Set the number of copies with the numeric keys.

Up to 999 copies can be set. When the [START] key is pressed, the copies will automatically be divided between the server and client machines. If an odd
number of copies is set, the server machine will make the extra set.
If an incorrect number of copies is set...
Press the clear key and set the correct number of copies.
4 Place the original in the document feeder or on the document glass. (page 4-3)
5 Press the [START] key.
![SHARP MX-M450N - Press the [START] key. - 1](/content/2026/05/944414/images/07102464c504b4bbf0310d771d22a8a4d36cceb3b98fd07ed14825e08af1a434.jpg)
natural_image
Simple line drawing of a hand pressing a circular button with an icon (no text or symbols)NOTES
● To perform tandem copying, the server machine and client machine must meet certain conditions.
After the [START] key is pressed on the server machine, the server machine verifies that the conditions have been met. If the conditions have not been met, tandem copying does not begin and "TANDEM OUTPUT IS NOT ALLOWED. OUTPUT ALL SETS USING MASTER MACHINE?" appears in the display. To have the server machine make all the copies, touch the [OK] key. To cancel the job, touch the [CANCEL] key.
- As an example, the following conditions must be met when a staple finisher is installed on the server machine and not on the client machine:
(1) If tandem copying is executed for a two-sided copy job with the number of copies set to 999 and "Non-staple" is selected, tandem copying will take place.
(2) If tandem copying is executed for a two-sided copy job with the number of copies set to 999 and "Staple" is selected, tandem copying will not take place because the client machine does not have a finisher.
● After the [START] key is pressed, if the client machine cannot print because it is out of paper or other reason, the server machine will print its half of the job. The other half of the job will be stored in the client machine and the job will be printed when the client machine is able to print.
- If auditing mode is enabled on both the server and client machines, the same account number must be entered on both machines.
- If auditing mode is enabled on the client machine but not on the server machine, tandem copying cannot be performed.
To cancel the tandem copy function, touch the [TANDEM COPY] key on the special modes screen (step 1). The highlighted display will be canceled.
Covers/inserts
A different type of paper can be inserted in positions corresponding to front and back covers of a copy job when the automatic document feeder is used. A different type of paper can also be automatically added as an insert at specified pages.
- Covers/inserts can be disabled in the administrator settings (page 11 of the administrator settings guide).
Example of adding covers
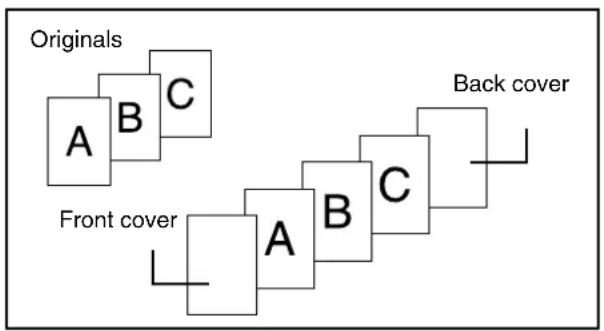
flowchart
graph TD
    A["Originals"] --> B["A"]
    B --> C["B"]
    C --> D["C"]
    D --> E["Back cover"]
    F["Front cover"] --> G["A"]
    G --> H["B"]
    H --> I["C"]
    I --> J["Back cover"]
Example of adding covers and inserts

flowchart
graph TD
    A["Originals"] --> B["A"]
    B --> C["B"]
    C --> D["C"]
    D --> E["Back cover"]
    F["Front cover"] --> G["A"]
    G --> H["B"]
    H --> I["Inserts"]
    I --> J["..."]
Example of adding inserts
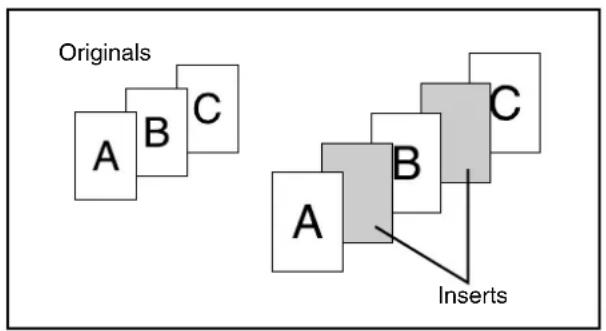
flowchart
graph TD
    A["Originals"] --> B["A"]
    B --> C["B"]
    C --> D["C"]
    D --> E["Inserts"]
    style A fill:#f9f,stroke:#333
    style B fill:#ccf,stroke:#333
    style C fill:#cfc,stroke:#333
    style D fill:#fcc,stroke:#333
    style E fill:#ffc,stroke:#333
About the explanations of covers and inserts
There are various ways of using covers and inserts. To keep the explanations simple, covers and inserts are explained separately. The procedure for inserting covers is explained on page 5-13. The procedure for adding inserts is explained on page 5-14. After reading these explanations, see the examples of using covers and inserts on pages 5-17 to 5-22.
■ Preparations for using covers and inserts
- Load the cover/insert paper in the tray before using the cover/insert function.
- Use the same size of paper for the covers/inserts as for the copies. (For the procedures for loading paper, see pages 2-2 to 2-7.)
- Before selecting the cover/insert function, place the originals in the document feeder, select one-sided or two-sided copying, and select the number of copies and any other desired copy settings as explained on pages 4-7 to 4-10. When these settings have been completed, perform the procedure to select covers/inserts on the following page.
● The original must be scanned from the document feeder. The document glass cannot be used.
● Up to 100 covers/inserts can be inserted. Two covers/inserts cannot be inserted between the same pages. - Pamphlet copying cannot be used in combination with covers/inserts.
- When performing two-sided copying of two-sided originals, an insert cannot be added between the front and back sides of an original page.
■ Procedure for inserting front and back cover paper
The paper for the front cover is called the front cover paper ("FRONT COVER" in the touch panel). The paper for the back cover is called the back cover paper ("BACK COVER" in the touch panel).
●Examples of insertion methods for the front and back cover paper are given on pages 5-18 to 5-21.
To display the special modes screen...
See "General procedure for using special functions" on page 5-2.
1 Touch the [COVERS/INSERTS] key in the special modes screen (2nd screen).

2 Touch the [PAPER TRAY SETTINGS] key.
![SHARP MX-M450N - Touch the [PAPER TRAY SETTINGS] key. - 1](/content/2026/05/944414/images/e0216137b6fcf3b9241423c30a28c51077fb7c85ca10bc94703ab07b0aeb0f41.jpg)
flowchart
graph LR
    A["FRONT COVER"] --> B["INSERTION TYPE A SETTING"]
    C["BACK COVER"] --> D["INSERTION TYPE B SETTING"]
    B --> E["INSERTION SETTINGS"]
    D --> E
    E --> F["PAPER TRAY SETTINGS"]
    E --> G["PAGE LAYOUT"]
3 Select the tray used for the front cover paper.
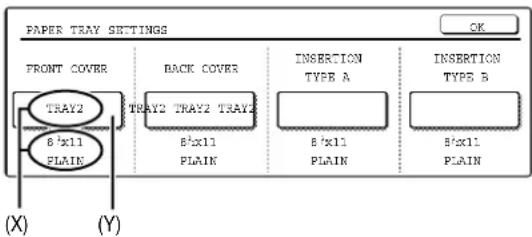
(1)The tray name (tray position) selected for the front cover paper and the paper size and type are shown in (X). If the tray in which you loaded paper for the front cover is shown, touch the [OK] key. You will return to the screen of step 2.
(2) If the correct tray for the cover sheet paper does not appear in (X), touch the (Y) key. The tray selection screen will appear. Select the tray in which you loaded paper for the front cover. You will return to the screen of above.
4 Touch the [FRONT COVER] key in the screen of step 2.
5 Set the insertion conditions for the front cover paper.
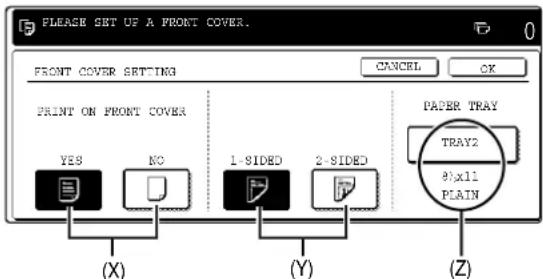
(1) Select whether or not the front cover paper is to be copied on with the (X) keys ([YES] or [NO]).
(2)Select whether one-sided copying or two-sided copying is to be performed on the front cover paper with the (Y) keys. This selection is only possible when the [YES] key of (X) has been selected. (The one-sided/two-sided selection made here only applies to the front cover paper. When the back cover paper is selected, the selection only applies to the back cover paper.)
(3)The (Z) key shows the tray selected for the front cover paper in step 3 and the paper size and type.
6 Touch the [OK] key in the screen of step 5. You will return to the screen of step 2.
When you return to the screen of step 2, the [FRONT COVER] key will be highlighted.
7 To insert back cover paper, repeat steps 2 through 6, using the [BACK COVER] key instead of the [FRONT COVER] key.

8 Touch the [PAGE LAYOUT] key in the screen of step 7 to display a list of the selected settings (page 5-16).
To exit the cover/insert settings, touch the upper [OK] key in the screen of step 7.
9 Press the [START] key.
To cancel covers/inserts settings...
Touch the [CANCEL] key in the screen of step 2.
■ Procedure for adding inserts
You can have different paper automatically inserted as an insert at a specified pages. Two types of insert paper can be used. These are specified with the [INSERTION TYPE A SETTING] key and [INSERTION TYPE B SETTING] in the touch panel.
●Examples of insertion methods for insert paper are given on page 5-22.
To display the special modes screen...
See "General procedure for using special functions" on page 5-2.
1 Touch the [COVERS/INSERTS] key in the special modes screen (2nd screen).
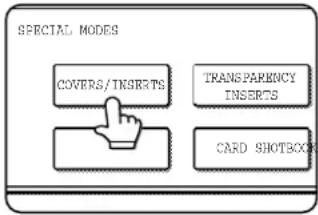
2 Touch the [PAPER TRAY SETTINGS] key.

3 Select the tray used for insertion type A.
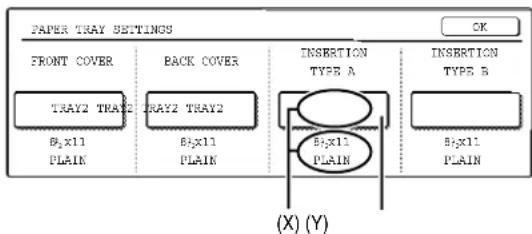
(1)The tray name (tray position) selected for insertion type A and the paper size and type are shown in (X). If the tray in which you loaded paper for insertion type A is shown, touch the [OK] key. You will return to the screen of step 2.
(2) If the correct tray for insertion type A does not appear in (X), touch the (Y) key. The tray selection screen will appear. Select the tray in which you loaded paper for insertion type A. You will return to the screen of step 2.
4 Touch the [INSERTION TYPE A SETTING] key in the screen of step 2
5 Set the insertion conditions for insertion type A.

(1)Select whether or not insertion type A paper is to be copied on with the (X) keys ([YES] or [NO]).
(2)Select whether one-sided copying or two-sided copying is to be performed on insertion type A with the (Y) keys. This selection is only possible when the [YES] key of (X) has been selected. (The one-sided/two-sided selection made here only applies to insertion type A paper. When insertion type B is selected, the selection only applies to insertion type B paper.) The [2-SIDED] key appears when the duplex module is installed.
(3)The (Z) key shows the tray selected for insertion type A in step 3 and the paper size and type.
6 Touch the [OK] key in the screen of step 5. You will return to the screen of step 2.
When you return to the screen of step 2, the [INSERTION TYPE A SETTING] key will be highlighted.
7 If you wish to insert a different paper with the [INSERTION TYPE B SETTING] key, repeat steps 2 through 6. Use the [INSERTION TYPE B SETTING] key instead of the [INSERTION TYPE A SETTING] key, and the [INSERTION TYPE B] key instead of the [INSERTION TYPE A] key.
![SHARP MX-M450N - If you wish to insert a different paper with the [INSERTION TYPE B SETTING] key, repeat steps 2 through 6. Use the [INSERTION TYPE B SETTING] key instead of the [INSERTION TYPE A SETTING] key, and the [INSERTION TYPE B] key instead of the [INSERTION TYPE A] key. - 1](/content/2026/05/944414/images/641a8891dc3f09c60365b285a1a0ae77eb481cb44a5fb2796ae19fa88c8e4967.jpg)
flowchart
graph TD
    A["INSERTION TYPE A SETTING"] --> B["INSERTION TYPE B SETTING"]
    B --> C["INSERTION SETTINGS"]
    C --> D["PAPER TRAY SETTINGS"]
    C --> E["PAGE LAYOUT"]
8 Touch the [INSERTION SETTINGS] key to specify the pages where you wish to insert the insert papers of [INSERTION TYPE A SETTING] and [INSERTION TYPE B SETTING].
![SHARP MX-M450N - If you wish to insert a different paper with the [INSERTION TYPE B SETTING] key, repeat steps 2 through 6. Use the [INSERTION TYPE B SETTING] key instead of the [INSERTION TYPE A SETTING] key, and the [INSERTION TYPE B] key instead of the [INSERTION TYPE A] key. - 2](/content/2026/05/944414/images/aa87a8d6075b51d486f1c2f25811b96d6392ceea073e6d1d7d49f57b4a5544bd.jpg)
flowchart
graph TD
    A["INSERTION SETTINGS"] --> B["INSERTION SETTINGS"]
    style A fill:#f9f,stroke:#333
    style B fill:#ccf,stroke:#333
9 Touch the [INSERTION TYPE A] key or the [INSERTION TYPE B] key, enter the page number where you wish to insert the insert paper with the numeric keys, and then touch the [ENTER] key.
![INPUT THE PAGE NUMBER AND PRESS [ENTER]. USE [C] KEY TO AMEND. INSERTION SETTINGS OK INSERTION TOTAL:0 INSERTION PAGE 3 ENTER INSERTION TYPE A TRAY2 TRAY2 8"x11 PLAIN INSERTION TYPE B 8"x11 PLAIN (X) (Y) (Z)](/content/2026/05/944414/images/f169443cf243cbf438d11c1b9a810b40d0ceed0559a2da6065cb0ce672055726.jpg)
(1)(X) shows the total number of inserts. Up to 100 inserts can be added. When inserting multiple inserts, touch the [ENTER] key after each entry of an insertion page number (insertion position) with the numeric keys.
(2)(Y) shows the tray selected in step 3 for [INSERTION TYPE A SETTING] and the paper size and type.
(3)(Z) shows the tray selected in step 3 for [INSERTION TYPE B SETTING] and the paper size and type.
(4) When the [INSERTION TYPE A] key is highlighted, the insert settings apply to [INSERTION TYPE A SETTING]. When the [INSERTION TYPE B] key is highlighted, the insert settings apply to [INSERTION TYPE B SETTING].
10 Touch the [OK] key in the screen of step 9. You will return to the screen of step 2.
11 If you wish to insert a different paper with the [INSERTION TYPE B SETTING] key, repeat steps 2 through 6. Use the [INSERTION TYPE B SETTING] key instead of the [INSERTION TYPE A SETTING] key, and the [INSERTION TYPE B] key instead of the [INSERTION TYPE A] key.
![SHARP MX-M450N - If you wish to insert a different paper with the [INSERTION TYPE B SETTING] key, repeat steps 2 through 6. Use the [INSERTION TYPE B SETTING] key instead of the [INSERTION TYPE A SETTING] key, and the [INSERTION TYPE B] key instead of the [INSERTION TYPE A] key. - 4](/content/2026/05/944414/images/16b7128280cc784bdb8d17508b0c029b49de0e7d640680c564063a2645ea935d.jpg)
flowchart
graph TD
    A["INSERTION TYPE A SETTING"] --> B["INSERTION TYPE B SETTING"]
    B --> C["INSERTION SETTINGS"]
    C --> D["PAPER TRAY SETTINGS"]
    C --> E["PAGE LAYOUT"]
    F["OK"] --> G["CANCEL"]
    G --> H["OK"]
12 Touch the [PAGE LAYOUT] key in the screen of step 11 to display a list of the selected settings (page 5-16). To exit the cover/insert settings, touch the upper [OK] key in the screen of step 11.
13 Press the [START] key.
To cancel covers/inserts settings... Touch the [CANCEL] key in the screen of step 2.
- Checking, editing, and deleting cover/insert pages
The [PAGE LAYOUT] key appears after covers/inserts settings are configured (the settings of step 1 through step 7 on pages 5-13 and 5-14).
The [PAGE LAYOUT] key is used for the following:
● To display the status of covers/inserts pages
● To edit, delete, or add inserted pages
To display the [PAGE LAYOUT] key...
Configure the settings in step 1 through step 7 on pages 5-13 and 5-14.
1 Touch the [PAGE LAYOUT] key.
![SHARP MX-M450N - Touch the [PAGE LAYOUT] key. - 1](/content/2026/05/944414/images/ec06e4a05e15a93bde69f3e495ccccc6e62a28980b6937642afa402646c65a9a.jpg)
flowchart
graph TD
    A["INSERTION TYPE A SETTING"] --> C["INSERTION SETTINGS"]
    B["INSERTION TYPE B SETTING"] --> C
    D["PAPER TRAY SETTINGS"] --> C
    E["PAGE LAYOUT"] --> C
2 The set covers/inserts pages are shown.

(1) If there are multiple screens, touch the ☐ or ☐ key to change screens.
(2) Displayed icons:
: Front side copy only
: Back side copy only
: Two-sided copy
: No copying
For inserts, the insertion page also appears.
" *represents a page number.
*/- : Front side copy only at page *
*/* Two-sided copy at page /* *
<* Insert non-copied insert at page *
(3) To edit or delete the insertion page of an insert, touch the key of the insert that you wish to edit or delete in the page layout screen. When the key is touched, the [CANCEL], [DELETE], or [AMEND] keys appear.

●To cancel, touch the [CANCEL] key.
●To delete an inserted page, touch the [DELETE] key.
●To edit an inserted page, touch the [AMEND] key. The screen of step 9 on page 5-15 appears. Edit the insertion page in the screen that appears.
(4) To edit or delete a cover page, touch the [BACK COVER] key in the page layout screen. The screen of step 5 on page 5-13 will appear. Edit or delete the cover page in this screen.
3 When you have finished checking the pages, touch the [OK] key.

■ Examples of covers and inserts
The relations between the originals and finished copies when covers or inserts are inserted are shown on the following pages.
Covers
●One-sided copying of one-sided originals (page 5-18)
●One-sided copying of two-sided originals (page 5-20)
Inserts
●One-sided copying of one-sided originals (page 5-22)
●One-sided copying of two-sided originals (page 5-22)
●Two-sided copying of one-sided originals (page 5-19)
●Two-sided copying of two-sided originals (page 5-21)
●Two-sided copying of one-sided originals (page 5-22)
●Two-sided copying of two-sided originals (page 5-22)
■ Symbols used for covers and inserts
The following symbols are used to make the explanations easier to understand.
The numbers that appear indicate relations between the originals and copies, and will vary depending on the settings.
| Type | Symbol | Meaning | Iconappearingin display | Type | Symbol Meaning | Iconappearingin display | |
| Front cover |  | Front cover when not copied on. |  | Inserts |  | Insert when not copied on. | [ACAD] |
 | Front cover after one-sided copying. |  |  | Insert after one-sided copying. | [027D] | ||
 | Front cover after one-sided copying of a two-sided original. (One page is not copied on.) |  |  | Insert after one-sided copying of a two-sided original. (One page is not copied on.) | |||
 | Front cover after two-sided copying. |  |  | Insert after two-sided copying. | [K46E] | ||
| Back cover |  | Back cover when not copied on. | [SCY0] | Other |  | One-sided original or output page of regular one-sided copying | |
 | Back cover after one-sided copying of one-sided original. | [DOCA] |  | Two-sided original or output page of regular two-sided copying. | |||
 | Back cover after one-sided copying of a two-sided original. (One page is not copied on.) |  | One-sided original or output page of regular one-sided copying. | ||||
 | Back cover after two-sided copying. | [TZSW] |  | Two-sided copy when only one side is copied on due to insufficient originals. | |||
■ Covers (One-sided copying of one-sided originals)
One-sided copies are made of the following one-sided originals.
| 1st page 2nd page 3rd page | 4th page 5th page 6th page | ||||
 |  |  |  |  |  |
| Copying on cover | Resulting copies | ||||||||
| Front cover Back cover | |||||||||
| No copying No copying |  |  |  |  |  |  |  |  | |
| One-sided copying | No copying | YG32 | 6 |  |  |  |  |  | |
| Two-sided copying | No copying |  |  |  |  |  |  |  | |
| No copying | One-sided copying |  |  |  |  |  |  |  | |
| No copying | Two-sided copying |  |  |  |  |  |  | ||
| One-sided copying | One-sided copying |  |  |  |  |  |  | ||
| One-sided copying | Two-sided copying |  |  |  |  |  | |||
| Two-sided copying | One-sided copying |  |  |  |  |  | |||
| Two-sided copying | Two-sided copying |  |  |  |  | ||||
■ Covers (Two-sided copying of one-sided originals)
Two-sided copies are made of the following one-sided originals.
| 1st page 2nd page 3rd page | 4th page 5th page 6th page | |||
 |  |  |  |  |
| Copying on cover | Resulting copies | |||||
| Front cover Back cover | ||||||
| No copying No | copying |  |  |  |  |  |
| One-sided copying | No copying |  |  |  |  |  |
| Two-sided copying | No copying |  |  |  |  | |
| No copying | One-sided copying |  |  |  |  | |
| No copying | Two-sided copying |  |  |  |  | |
| One-sided copying | One-sided copying |  |  |  |  | |
| One-sided copying | Two-sided copying |  |  |  |  | |
| Two-sided copying | One-sided copying |  |  |  |  | |
| Two-sided copying | Two-sided copying |  |  |  | ||
■ Covers (One-sided copying of Two-sided originals)
One-sided copies are made of the following two-sided originals.
| 1st page 2nd page 3rd page | ||
 |  |  |
| Copying on cover | Resulting copies | ||||||||
| Front cover Back cover | |||||||||
| No copying No | copying |  | [H65S] |  |  |  |  |  |  |
| One-sided copying | No copying |  | 6 |  |  |  |  |  | |
| Two-sided copying | No copying |  |  |  |  |  |  |  | |
| No copying | One-sided copying |  |  |  |  |  |  |  | |
| No copying | Two-sided copying |  |  |  |  |  |  | ||
| One-sided copying | One-sided copying |  |  |  |  |  |  | ||
| One-sided copying | Two-sided copying |  |  |  |  |  | |||
| Two-sided copying | One-sided copying |  |  |  |  |  | |||
| Two-sided copying | Two-sided copying |  |  |  |  | ||||
■ Covers (Two-sided copying of two-sided originals)
Two-sided copies are made of the following two-sided originals.
| 1st page 2nd page 3rd page | ||
| | |
| Copying on cover | Resulting copies | |||||
| Front cover Back cover | ||||||
| No copying No | copying |  |  |  |  |  |
| One-sided copying | No copying |  | [DST7] |  |  | |
| Two-sided copying | No copying |  |  |  |  | |
| No copying | One-sided copying |  |  |  |  | |
| No copying | Two-sided copying |  |  |  |  | |
| One-sided copying | One-sided copying |  |  |  | ||
| One-sided copying | Two-sided copying |  |  |  | ||
| Two-sided copying | One-sided copying |  |  |  | ||
| Two-sided copying | Two-sided copying |  |  |  | ||
■ Inserts (One-sided copying of one-sided originals)
One-sided and two-sided copying is performed using the following one-sided originals. The insertion page of the insert is set to page 3.
| 1st page 2nd page 3rd page | 4th page 5th page 6th page | |||
 |  |  |  |  |
| Copying on insert | Resulting copies (one-sided copying) | Resulting copies(two-sided copying) | |||||||||
| No copying |  |  |  |  |  |  |  |  |  |  |  |
| One-sided copying |  |  |  |  |  |  |  |  |  |  | |
| Two-sided copying |  |  |  |  |  |  |  |  | |||
■ Inserts (One-sided copying of two-sided originals)
One-sided and two-sided copying is performed using the following two-sided originals. The insertion page of the insert is set to page 3
| 1st page 2nd page 3rd page | ||
 |  |  |
| Copying on insert | Resulting copies (one-sided copying) | Resulting copies(two-sided copying) | |||||||||
| No copying |  |  |  |  |  |  |  |  |  |  |  |
| One-sided copying |  |  |  |  |  |  |  |  | (ZHCT) | ||
| Two-sided copying |  |  |  |  |  |  |  |  | |||
Transparency film with insert sheets
When copying onto transparency film, blank insert sheets can be placed between transparent sheets.
Example: Inserting insert sheets between transparencies
Originals (1-sided)
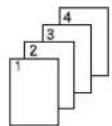
Originals (2-sided)

Two-sided originals are only supported when automatic document feeder is used.


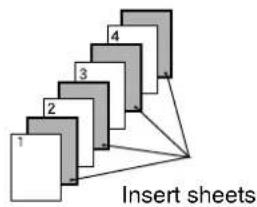
Inserts can also be copied on.
1 Load transparency film into the tray 2.
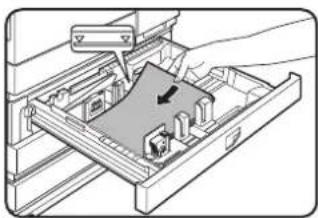
natural_image
Diagram of a mechanical assembly with a component inserted into a tray, showing no text or symbols.Remove any paper already in the tray 2 before loading the transparency film. (To load paper in the tray 2, see pages 2-6 and 2-7.)
2 Press the [SYSTEM SETTINGS] key.

The system settings menu screen will appear.
3 Touch the [PAPER TRAY SETTINGS] key.
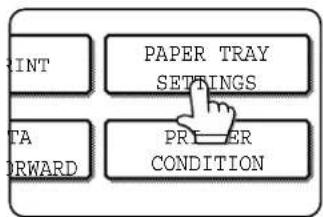
The paper tray selection screen will appear.
4 Touch the [TRAY SETTINGS] key.
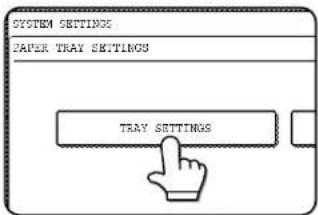
● This function only operates in "one-sided to one-sided" and "two-sided to one-sided" modes.
● Multiple copies cannot be selected in this mode.
● The inserts are inserted under each transparency as shown at left.
- Select insert paper that is the same size as the transparencies.
● Transparencies can be fed from the tray 2 or bypass tray.
- If the transparencies are loaded in tray 2, be sure to set the paper size and paper type as explained on pages 2-5 and 2-6.
5 Touch the +key to display the tray settings screen of tray 2.
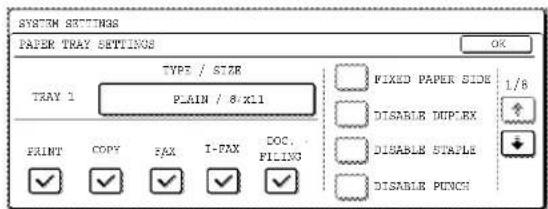
6 Touch the [TYPE/SIZE] key.
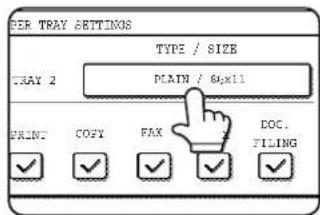
7 Touch the [TRANSPARENCY] key.

8 Touch the [OK] key.

If the paper size was changed from an inch size to an AB size, or from an AB size to an inch size, be sure to set the paper type and size as explained on steps 5 to 6 on page 2-5 and steps 7 to 10 on page 2-6.
9 Select the tray 2.
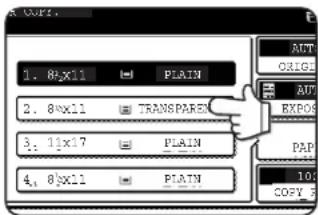
To display the special modes screen...
See "General procedure for using special functions" on page 5-2.
10 Touch the [TRANSPARENCY INSERTS] key in the special modes screen (2nd screen).
![SHARP MX-M450N - Touch the [TRANSPARENCY INSERTS] key in the special modes screen (2nd screen). - 1](/content/2026/05/944414/images/41ed86f307e7c9e8a48d309dcdfbe406118f744d2a5da20ec02ddca0b76e8102.jpg)
flowchart
graph TD
    A["SPECIAL MODES"] --> B["COVERS/INSERTS"]
    A --> C["TRANSPARENCY INSERTS"]
    A --> D["CARD-SHOTBOX"]
The Transparency inserts setting screen will appear. The transparency inserts icon (etc.) will also appear in the upper left corner of the screen to indicate that the function is turned on.
11 Set the insertion conditions for the insert paper.

(1) Select whether or not the insert paper will be copied on with the (X) keys ([YES] or [NO]).
(2) The (Y) key shows the tray selected for the insert paper and the paper size and type. To select a different tray, touch this key to display the tray selection screen and select the tray that has the insert paper.
12 Touch the outer [OK] key in the screen of step 7.
You will return to the main screen of copy mode.
About the steps that follow
If an automatic document feeder is being used, see pages 4-7 through 4-10. If the document glass is being used, see pages 4-11 through 4-13.
To cancel the Transparency film with insert sheets function, touch the [CANCEL] key on the Transparency film with insert sheets setting screen.
Multi shot
Multiple original pages can be copied onto one sheet of copy paper in a uniform layout. Select 2in1 to copy two original pages onto one sheet, or 4in1 to copy four original pages onto one sheet. This function is convenient when you wish to present multiple pages in a compact format, or show a view of all pages in a document.
[Example] Copying 4 original pages onto one sheet of paper
(Page number : 4in1, layout : left top : right top (see the next page))

flowchart
graph TD
    A["One-sided copies from one-sided originals"] --> B["Copies"]
    C["One-sided copies from two-sided originals"] --> D["Copies"]
    B --> E["3D Grid with Grids 1-7"]
    D --> F["3D Grid with Grids 5-7"]
- When using the multi shot function, place the originals, select the desired paper size, and select the copying mode before selecting the multi shot function on the special modes screen.
- When using the multi shot function, the appropriate copy ratio will be automatically set based on the original size, paper size, and the number of originals to be copied onto one sheet. The minimum reduction ratio is 25% . The original size, copy paper size, and selected number of original pages may require that the ratio be less than 25% . As copying will take place at 25% in this case, part of the original images may be cut off.
To display the special modes screen...
See "General procedure for using special functions" on page 5-2.
1 Touch the [MULTI SHOT] key in the special modes screen (2nd screen).

The MULTI SHOT setting screen will appear.
A multi shot icon (12/54) etc.) will also appear in the upper left of the screen to indicate that the function is turned on.
2 Select the number of images to be copied onto one sheet of copy paper.

If needed, the orientation of the copy paper and the orientation of the images will be rotated.
3 Select the layout.
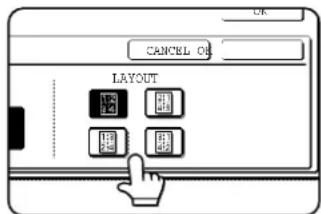
Select the order in which the originals will be arranged on the copy.
| Shot number | Layout |
| 2in1 | |
| 4in1 |
The arrows in the above diagram indicate the directions in which the images are arranged.
4 Touch the [OK] key (inside [OK] key) on the multi shot setting screen.
You will return to the special modes screen.
5 Touch the [OK] key in the special modes screen.
You will return to the main screen of copy mode.
About the steps that follow
If an automatic document feeder is being used, see pages 4-7 through 4-10. If the document glass is being used, see pages 4-11 through 4-13.
To cancel the multi shot function, touch the [CANCEL] key in the multi shot setting screen (the screen of step 2).
Book copy
This function is convenient when you wish to compile copies of books or other bound originals into an attractive pamphlet format. The two pages of the open book are scanned as a set, and two pages each are copied onto the front and back sides of the copy paper (four pages are copied onto one sheet of copy paper). This allows the copies to be folded down the center and made into a pamphlet.
[Example] Book copying an 8-page pamphlet
Originals
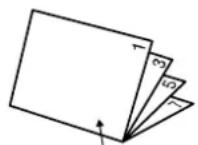
First page
Left binding

Finished copies are folded in two.

First page

First page

Right binding
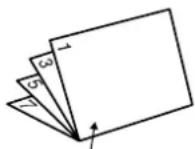
First page
To display the special modes screen...
See "General procedure for using special functions" on page 5-2.
1 Touch the [BOOK COPY] key in the special modes screen (2nd screen).
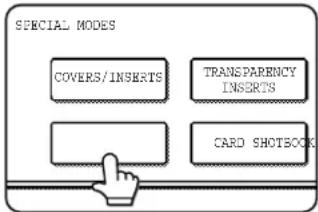
The BOOK COPY setting screen will appear. The book copy icon (etc.) will also appear in the upper left corner of the screen to indicate that the function is turned on.
2 Select whether the book opens to the left or to the right, and touch the [OK] key in the book copy setting screen.

You will return to the special modes screen.
3 Select any desired cover settings.

If you wish to use a different type of paper for the cover, perform steps 4 to 12 on pages 5-6 to 5-7.
If you do not wish to use a different type of paper, continue from step 4.
- When using this function, a duplex module must be installed.
- Scan the originals from the first page to the last page. The order of copying will be automatically adjusted by the machine.
● Either left binding (right to left turning) or right binding (left to right turning) can be selected.
● Four originals will be copied onto one sheet. Blank pages may be automatically produced at the end depending on the number of the originals. - If a saddle stitch finisher is installed, book copy can be used in combination with the pamphlet function to staple and fold the copies at the centerline.
4 Touch the [OK] key in the special modes screen.
You will return to the main screen of copy mode.
5 Place the originals on the document glass. (page 4-3)
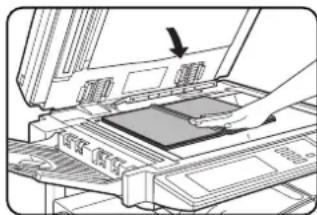
natural_image
Diagram of a printer's internal structure showing paper feeding into a tray with an arrow indicating the page (no text or symbols present)Scan the original pages in the following order:
Opened front and back cover
Opened inside of front cover and 1st page
Opened 2nd and 3rd page :
Opened last page and inside of back cover
6 Make sure that the desired paper size has been selected.
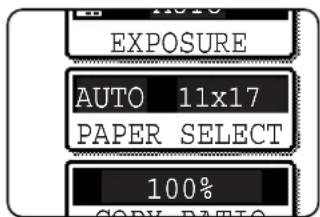
If the desired paper size is not selected, select the desired size.
7 Select the number of copies and any other desired copy settings, and then press the [START] key.
8 Place the next two pages and press the [START] key. Repeat until all pages have been scanned, and then touch the [READ-END] key.
When book copy is selected, two-sided copying is automatically selected.
To cancel the book copy function, touch the [CANCEL] key in the book copy setting screen (the screen of step 2).
Card shot
When copying a card, this function allows you to combine the front and back sides on a single sheet of paper. This function is convenient for making copies for certification purposes and helps save paper.

flowchart
graph LR
    A["Original CARD Front of card Back of card"] --> B["Copy CARD"]
    B --> C["Example: Portrait 8-1/2" x 11" (A4) size"]
    B --> D["Example: Landscape 8-1/2" x 11" (A4) size"]
● Copying is only possible on standard size paper.
● A copy ratio cannot be selected when using this function.
● The image cannot be rotated when using this function.
1 Touch the [PAPER SELECT] key and then select the desired paper size.

The selected paper size key is highlighted and the paper selection screen closes.
NOTE
If paper of the desired size is not loaded in any tray, load paper of the required size in a paper tray or the bypass tray. (See "Setting the paper type and paper size" on page 2-5.)
To display the special modes screen...
See "General procedure for using special functions" on page 5-2.
2 Touch the [CARD SHOT] key in the special modes screen (2nd screen).
![SHARP MX-M450N - Touch the [CARD SHOT] key in the special modes screen (2nd screen). - 1](/content/2026/05/944414/images/3bb152db8506fec1893a860dced89749c0ae725ffcbafed68706d75e9b42bbc1.jpg)
flowchart
graph TD
    A["TRANSPARENCY INSERTS"] --> B["CARD SHOT"]
    C["MULTI SHOT"] --> D["MIRROR IMAGE"]
The CARD SHOT setting screen will appear. A card shot icon (C etc.) will also appear in the upper left corner of the screen to indicate that the function is turned on.
3 Enter the X dimension (width) and Y dimension (length) of the original with the ▼▲ keys.

●X (width) is initially selected. Enter X and then touch the Y (☐key to enter Y.
●To return the X and Y values to the initial settings configured in the administrator settings, touch the [SIZE RESET] key. (See "CARD SHOT SETTINGS" on page 17 of the administrator settings guide).
●To have the images enlarged or reduced by a suitable ratio based on the entered original size so that the front and back sides fit into the selected paper size, touch the [FIT TO PAGE] key.
4 Touch the outer [OK] key.
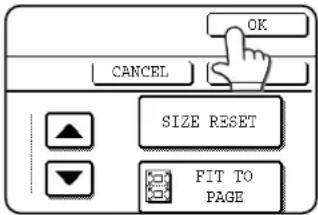
You will return to the main screen of copy mode.
5 Place the original on the document glass.

Place the front side of the original face down and close the document cover.
6 Follow steps 4 through 6 of "Copying from the document glass" (page 4-12).
7 Press the [START] key.
![SHARP MX-M450N - Press the [START] key. - 1](/content/2026/05/944414/images/62b43d0a68a4429d21ea9c5d4b54dca4766c58d751e02c74153293ba6fa9bd67.jpg)
natural_image
Simple line drawing of a hand pressing a circular button with an exclamation mark (no text or symbols)The front side of the card is scanned.
8 Place the back side of the original face down on the document glass (see step 5).
9 Press the [START] key.
![SHARP MX-M450N - Press the [START] key. - 1](/content/2026/05/944414/images/7442255ae226e5421d9721d8e1c1e4eddcac5babc8a5f5aa8af0d84d1cff2738.jpg)
natural_image
Simple line drawing of a hand pressing a button with a circular icon containing an eye symbol (no text or labels)The back side of the card is scanned.
10 Touch the [READ-END] key.
NOTE
The original must be placed on the document glass. The document feeder (automatic document feeder) cannot be used.
To cancel the card shot function, touch the [CANCEL] key in the card shot setting screen (the screen of step 4).
Mirror image
This function is used to print a mirror image of the original. The images will be inverted in the right to left direction on the copies.
Original Copy

To display the special modes screen...
See "General procedure for using special functions" on page 5-2.
1 Touch the [MIRROR IMAGE] key in the special modes screen (2nd screen).

The [MIRROR IMAGE] key will be highlighted to indicate that the function is turned on, and the mirror image icon (☐) will appear in the upper left of the screen.
2 Touch the [OK] key on the special modes screen.
You will return to the main screen of copy mode.
About the steps that follow
If an automatic document feeder is being used, see pages 4-7 through 4-10. If the document glass is being used, see pages 4-11 through 4-13.
To cancel the mirror image function, touch the [MIRROR IMAGE] key in the special modes screen (the screen of step 1).
B/W reverse
Black and white are reversed in the copy to create a negative image.
NOTES
- When this function is selected, the exposure mode setting (page 4-14) automatically changes to "Text".
● Originals with large black areas (which use a large amount of toner) can be printed with black/white reverse to reduce toner consumption.
Original B/W reverse copy
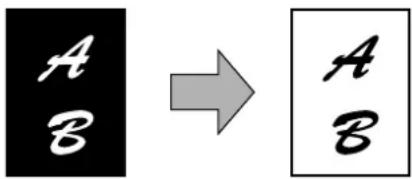
To display the special modes screen...
See "General procedure for using special functions" on page 5-2.
1 Touch the [B/W REVERSE] key in the special modes screen (3rd screen).

The [B/W REVERSE] key will be highlighted to indicate that the function is turned on, and the mirror image icon (A) will appear in the upper left of the screen.
2 Touch the [OK] key in the special modes screen.
You will return to the main screen of copy mode.
About the steps that follow
If an automatic document feeder is being used, see pages 4-7 through 4-10. If the document glass is being used, see pages 4-11 through 4-13.
To cancel the B/W reverse function, touch the [B/W REVERSE] key in the special modes screen (the screen of step 1).
Print menu
The date, a stamp, page numbers, and entered text can be printed on copies. Four selections are available for the PRINT MENU:
• Date print (page 5-33)
This prints the date on the paper.
[Example] Printing 2010/APR/4 in the upper right-hand corner of the paper
2010/APR/4
The format of the date and the character that separates the year, month, and day can be changed.
• Page numbering (page 5-35)
Page numbers can be printed on copies.
[Example] Printing page numbers in the bottom right-hand corner of the paper
The format of the page number can be changed.
- Stamp (page 5-34)
Print a message such as "CONFIDENTIAL" in reverse text on the paper.
[Example] Printing "CONFIDENTIAL" in the upper right-hand corner of the paper
CONFIDENTIAL
One of 12 stamps can be selected.
- Text (page 5-39)
Entered text can be printed.
[Example] Printing "Meeting" in the upper left-hand corner of the paper
Meeting
Up to 50 characters can be printed. You can store up to 30 sequences of frequently used text.
Six printing positions are available: left, center, or right of the top or bottom of the page.
Each printing position is divided into an area for the date, page number, and text (A below), and an area for the stamp (B below).

| Print menu | Printing area | Maximum number of settings |
| DATE A One position only | ||
| STAMP B 6 positions | ||
| PAGE NUMBERING | A One position only | |
| TEXT A 6 positions | ||
NOTES
● A part that overlaps the printed text will not be copied.
- If the set text content overlaps the print content of another position, the central print content will be moved to the bottom, the content on the left will be next, and the content on the right will be placed on top in that order such that only the content visible at the top is printed. Content that is hidden due to overlapping will not be printed.
● The printed text will be printed at the set size regardless of the copy ratio or paper size.
● The printed text will also be printed at the set density regardless of the copy exposure.
● Some copy paper sizes may cause the printed contents to be cut off or the print position to shift.
- If a copy job with a print menu setting is saved using the document filing function, the print menu setting will not be saved. If you wish to print a file saved in copy mode and use a print menu setting, use the special modes in the Job settings / print screen (or the document filing print screen in the Web page if the machine is connected to a network) to select the print menu setting. (A print menu setting cannot be selected when printing a file saved in a mode other than copy mode.)
■ Common operation procedure for using the print menu
To display the special modes screen...
See "General procedure for using special functions" on page 5-2.
1 Touch the [PRINT MENU] key in the special modes screen (3rd screen).
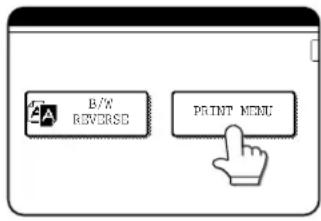
The print menu setting screen will appear. The print menu icon (¥) will also appear in the upper left corner of the screen to indicate that the function is turned on.
2 Select the print position.
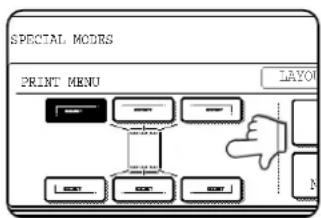
Six positions are available: left, center, or right of the top or bottom of the page. The touched key is highlighted.
The keys indicating the print position appear as follows depending on the state of the setting:
 | Not selected, print menu setting has not been selected. |
 | Selected during selection of the print menu setting. |
 | Not selected, print menu setting has already been selected. |
The image displayed within each key varies depending on the key position.
3 Select the print menu.

The settings screen of the print menu appears.
For information on each of the print menus, see the settings of each.
● DATE (page 5-33) ● STAMP (page 5-34)
● PAGE NUMBERING (page 5-35)
- TEXT (page 5-39)
4 To select print menu settings at another print position, repeat steps 2 and 3.
NOTES
- If the [DATE], [PAGE NUMBERING], or [TEXT] key is touched when other than a "STAMP" print menu setting has been selected for the print position selected in step 2, a message will appear. To overwrite the previously set print content of the print menu that you touched, touch the [YES] key. To keep the previous settings, touch the [NO] key.
● The "DATE" and "PAGE NUMBERING" cannot be set in multiple positions. If either of these keys is touched when a date or page numbering setting has already been configured, a message will appear asking you if you wish to move the print settings to the position that you selected in step 2. To move the print settings, touch the [YES] key. Otherwise touch the [NO] key.
5 Touch the ▼key.
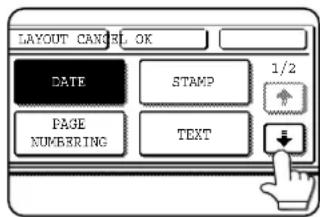
6 To specify the orientation of the original, touch the [ORIGINAL ORIENTATION] key.

If you placed a two-sided original, touch the [ ] key to specify the binding style (book or tablet). The icon of the selected binding style is highlighted.
7 If you are adding covers or inserts, select whether or not you wish to print on the covers or inserts.
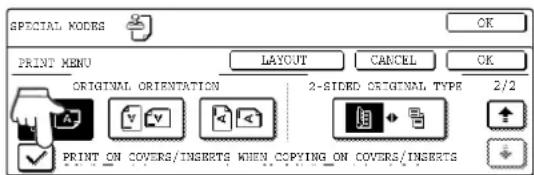
If you do not wish to print on covers or inserts, touch the checkbox to remove the checkmark.
NOTES
- If you are not copying on covers or inserts, printing will not take place on these even if a checkmark appears.
● A page number is never printed on covers or inserts, regardless of the above setting. - If covers/inserts have been disabled in the administrator settings, the checkbox will be grayed out to prevent selection.
8 Check the print layout if needed (page 5-41).

To display the layout and print content of the configured print menu, touch the [LAYOUT] key. The position can be changed and settings canceled if needed.
9 Touch the [OK] key on the print menu setting screen.
10 Touch the [OK] key on the special modes screen.
About the steps that follow
If an automatic document feeder is being used, see pages 4-7 through 4-10.
If the document glass is being used, see pages 4-11 through 4-13.
NOTE
To cancel print menu...
Touch the [CANCEL] key in the screen of step 3.
Printing in combination with other special functions
When a print menu is combined with one of the following special modes, printing will reflect the selected special mode.
| Special modes Printing operation | |
| Margin shift | Like the copy image, the printed contents are shifted in accordance with the set margin. |
| Dual page copy The print content is printed on each copy sheet. | |
| Pamphlet copy Book copy | The print content is printed on each page of the "book". |
| Multi shot Card shot | The print content is printed on each copy sheet. |
| Covers/inserts | In the print menu settings, specify whether or not the print content is printed on covers and inserts. |
NOTE
When combined with "Erase", "Job build", "Mirror image" or "B/W reverse", printing takes place normally at the set position on the paper.
■Printing the date on copies
The date can be printed on copies. Four selections each are available for the date format and the character that separates the year, month, and day.
NOTE
The date must be previously set in the system settings. (See page 2-14.)
1 Follow steps 1 and 2 of "Common operation procedure for using the print menu" (page 5-31).
2 Touch the [DATE] key.

3 Select the date format.

The selected date format is highlighted.
If you selected [YYYY/MM/DD], [MM/DD/YYYY], or [DD/MM/YYYY], you can select the character that separates the year,
month, and date. Select [/] (slash), [.] (period), [-] (hyphen), or [ ] (space).
4 Check the date and format.

The date to be printed is displayed in "CURRENT SETTING" in the selected format. The date that appears is the date set in the machine. If you need to
change the date, touch the [DATE CHANGE] key. The following screen appears.
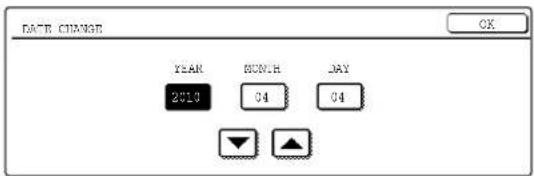
Touch the key of the number (year, month, or day) that needs to be changed, and then adjust the number with the ▼ key ▲ When finished, touch the [OK] key.
NOTE
If you select a non-existent date (for example, Feb. 30), the [OK] key will gray out to prevent entry of the date.
5 Select the pages to be printed on.

Select whether to print on only the first page, or all pages. The touched key is highlighted.
6 Touch the [OK] key.
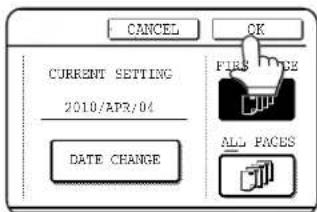
7 Continue from step 4 of "Common operation procedure for using the print menu" (page 5-31).
NOTE
To cancel a date print setting...
Touch the [CANCEL] key in the date selection screen. (The screen of step 6.)
■ Printing a stamp (reverse text) on copies
A message such as "CONFIDENTIAL" can be printed in reverse text on copies.
The following 12 messages are available.
| CONFIDENTIAL PRIORITY PRELIMINARY FINAL | |||
| FOR YOUR INFO. DO NOT COPY IMPORTANT COPY | |||
| URGENT DRAFT | TOP SECRET | PLEASE REPLY | |
You can select from three density levels for the background of the stamp.
Two selections are available for the size of the stamp.
NOTE
The text of the stamp cannot be edited.
1 Follow steps 1 and 2 of "Common operation procedure for using the print menu" (page 5-31).
2 Touch the [STAMP] key.
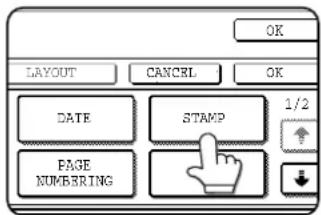
3 Select the stamp that you wish to print.
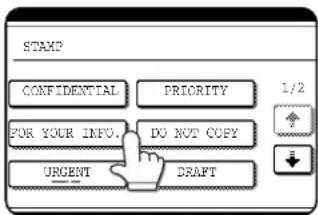
The selected stamp is highlighted. If the desired stamp does not appear, change screens with the ↑ or ↓ key.
4 Adjust the exposure as needed.
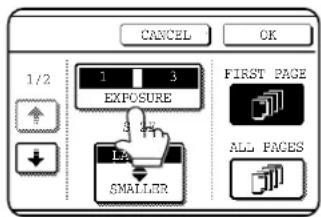
The density of the background of the stamp can be adjusted. Touch the [EXPOSURE] key to display the following screen.

Touch the key for a darker background. Touch the key for a lighter background (3 levels). When finished, touch the [OK] key.
5 Select the desired stamp size.
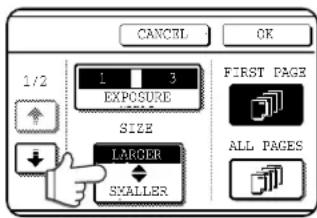
"LARGER" is initially selected. To make the stamp smaller, touch the [LARGER/SMALLER] key. "Smaller" is selected when [SMALLER] is highlighted.
6 Select the pages to be printed on.

Select whether to print on only the first page, or all pages. The touched key is highlighted.
7 Touch the [OK] key.
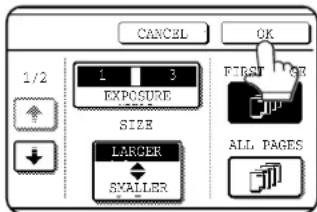
8 Continue from step 4 of "Common operation procedure for using the print menu" (page 5-31).
NOTE
To cancel a stamp setting...
Touch the [CANCEL] key in the stamp selection screen. (The screen of step 7.)
■ Printing the page number on copies
The page number can be printed on copies. One of 6 formats can be selected for the page number.
1 Follow steps 1 and 2 of "Common operation procedure for using the print menu" (page 5-31).
2 Touch the [PAGE NUMBERING] key.
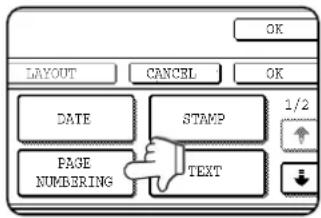
3 Select the page number format.

The selected format is highlighted.
If you selected "1/5, 2/5, 3/5",
"PAGE NUMBER/TOTAL PAGES" will be printed. "AUTO" is initially selected for "TOTAL PAGE", which means that the number of scanned original pages is automatically used. If you need to enter the total pages manually (for example, when a large number of originals are scanned in batches), touch the [MANUAL] key to display the total page entry screen.

Enter the total pages (1 to 999) with the numeric keys and touch the [OK] key.
NOTES
- When two-sided copying is performed, each side of the paper is counted as a page. If the last page is blank, it will not be included in the total pages. However, if [COUNT BACK COVER] is selected, the last page will be counted. (See step 7.)
- When used in combination with "Dual page copy", "Multi shot", or "Card shot", the number of copied images is the total pages.
- When used in combination with "Pamphlet copy" or "Book copy", the number of pages in the "book" is the total pages.
4 If you need to change the starting or ending number of page numbering, the first page printed on, or the print settings for covers/inserts, touch the [PAGE NUMBER] key.
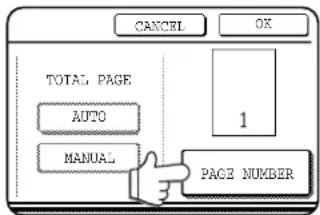
5 Touch the [MANUAL] key.
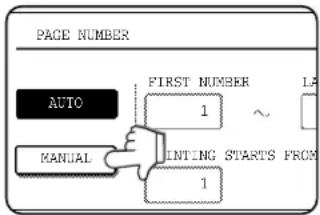
flowchart
graph TD
    A["MANUAL"] --> B["INTING STARTS FROM 1"]
    C["AUTO"] --> D["FIRST NUMBER 1"]
    style A fill:#000,stroke:#000,color:#fff
    style B fill:#fff,stroke:#000
    style C fill:#000,stroke:#000,color:#fff
    style D fill:#fff,stroke:#000
6 Enter settings for "FIRST NUMBER", "LAST NUMBER", and "PRINTING STARTS FROM SHEET".

Touch each key so that it is highlighted, and then enter the number with the numeric keys (1 to 999). To return a number to its initial value (FIRST
NUMBER: 1, LAST NUMBER: AUTO, PRINTING STARTS FROM SHEET: 1), press the [C] (clear) key while the key of the number is highlighted. If you enter the wrong number, press the [C] (clear) key and enter the correct number.
NOTES
● A last number smaller than the "FIRST NUMBER" number cannot be set.
- "LAST NUMBER" is initially set to "AUTO", which means that the page number is printed on each page through the final page in accordance with the "FIRST NUMBER" and "PRINTING STARTS FROM SHEET" settings.
● A number less than the total page number is set as the last number, the page number will not be printed on the pages that follow the set number.
● Unlike the first and last page numbers, "PRINTING STARTS FROM SHEET" specifies the sheet of paper (not the page number) from which printing of the page number begins.
For example, when "3" is selected for one-sided copying, printing of the page number will start from the 3rd sheet of copy paper (the copy of the 3rd original page). When "3" is selected for two-sided copying, printing of the page number will start from the 3rd sheet of copy paper, which is the copy of the 5th original page.
7 When covers/inserts are added and you wish to include the covers/inserts in the page number count, touch the [COVERS/ INSERTS COUNTING] key.
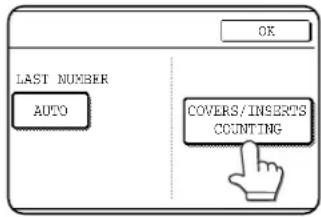
9 Touch the [OK] key.

10 Touch the [OK] key.
8 Select the checkboxes of the items that you wish to include in the page count and then touch the [OK] key.

Items that are selected are reflected in the print image on the right side of the screen.
number
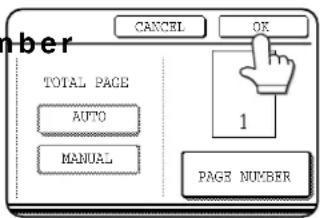
11 Continue from step 4 of "Common operation procedure for using the print menu" (page 5-31).
NOTES
- When an item is selected, one inserted sheet (front cover, insert, or back cover) is counted as one page during one-sided copying, and two pages during two-sided copying. However, if one-sided copying is used for the body pages and two-sided copying is used for the inserted sheets, each body page will be counted as one page and each inserted sheet will be counted as two pages.
● Printing never takes place on the front cover and back cover, regardless of whether or not these are counted.
● To print on an insert, the insert must be counted and it must be copied on.
NOTE
To cancel a page number setting...
Touch the [CANCEL] key in the page number selection screen. (The screen of step 10.)
NOTES
● Copying in group mode is not possible when page number printing is selected. The mode will automatically switch to sort mode.
- When the page number print position is set to the left or right side and "Pamphlet copy" or "Book copy" is selected, the position of the page numbers will alternate so that they are always on the outside when the pamphlet/book is opened. If a stamp is set in an area with a page numbering setting, the position of the stamp will alternate in the same way.
If another item is set in a position that changes, that item will appear in the position that alternates with the page number position.
Print menus not related to the alternating print positions will appear in their set positions.
[Example] When the page number format "1, 2, 3.." is selected when performing pamphlet copying of 4 pages, the copies will appear as shown below.
In this example, the page number is at the bottom of the page and the date is at the top, so the position of the date does not change.
Print settings Front


Back
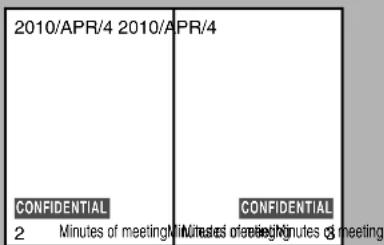
Examples of page number printing
Page number printing during one-sided copying (5 originals)
| Setting | Value | 1st page | 2nd page | 3rd page | 4th page | 5th page |
| TOTAL PAGE AUTO |  |  |  |  |  | |
| FIRST NUMBER 1 | ||||||
| LAST NUMBER AUTO | ||||||
| PRINTING STARTS FROM SHEET | 1 | |||||
| Printed contents when settings are changed as follows | FIRST NUMBER: 11 11/15 12/15 13/15 14/15 15/15 | |||||
| FIRST NUMBER: 11 LAST NUMBER: 13 | 11/13 12/13 13/13 | Not printed | Not printed | |||
| TOTAL PAGE: 2 1/2 2/2 | Not printed | Not printed | Not printed | |||
| TOTAL PAGE: 15 FIRST NUMBER: 11 LAST NUMBER: 13 | 11/15 12/15 13/15 | Not printed | Not printed | |||
| PRINTING STARTS FROM SHEET: 3 | Not printed | Not printed | 1/3 | 2/3 | 3/3 | |
Page number printing during two-sided copying (9 originals)
| Setting | Value | 1st page | 2nd page | 3rd page | 4th page | 5th page | |||||
| Front | Back | Front | Back | Front | Back | Front | Back | Front | Back | ||
| TOTAL PAGE | AUTO |  |  |  |  |  |  |  |  |  | |
| FIRST NUMBER | 1 | ||||||||||
| LAST NUMBER | AUTO | ||||||||||
| PRINTING STARTS FROM SHEET | 1 | ||||||||||
| Printed contents when settings are changed as follows | PRINTING STARTS FROM SHEET: 3 | Not printed | Not printed | Not printed | Not printed | 1/5 | 2/5 | 3/5 | 4/5 | 5/5 | Not printed |
Page number printing during one-sided copying of body pages with covers inserted (4 originals)
| Setting | Value | 1st page (Front cover) | 2nd page | 3rd page | 4th page | 5th page |
| TOTAL PAGE | AUTO |  |  |  |  |  |
| FIRST NUMBER | 1 | |||||
| LAST NUMBER | AUTO | |||||
| PRINTING STARTS FROM SHEET | 1 | |||||
| COUNT FRONT COVER | Not selected | |||||
| Printed contents when settings are changed as follows | PRINTING STARTS FROM SHEET: 2 | Not printed | Not printed | 1/3 | 2/3 | 3/3 |
| COUNT FRONT COVER: Selected | Not printed (count) | 2/5 | 3/5 | 4/5 | 5/5 | |
| COUNT FRONT COVER: Selected PRINTING STARTS FROM SHEET: 2 | Not printed (count) | 1/4 | 2/4 | 3/4 | 4/4 |
When a back cover is inserted, page numbers are counted and printed in the same way. Note that page numbers are never printed on front and back covers.
Page number printing during two-sided copying of body pages with covers (one-side copying) inserted (9 originals)
| Setting Value | 1st page(front cover) | 2nd page | 3rd page | 4th page | 5th page | ||||||
| Front | Back | Front | Back | Front | Back | Front | Back | Front | Back | ||
| TOTAL PAGE | AUTO |  |  | C2/8 |  | E4/  F5/8 F5/8 |  | I7,  I8/8 I8/8 | |||
| FIRST NUMBER | 1 | ||||||||||
| LAST NUMBER | AUTO | ||||||||||
| PRINTING STARTS FROM SHEET | 1 | ||||||||||
| COUNTFRONT COVER | Not selected | ||||||||||
| Printed contents when settings are changed as follows | PRINTING STARTS FROM SHEET: 3 | Not printed | Not printed | Not printed | Not printed | Not printed | Not printed | 1/4 2/4 | 3/4 4/4 | ||
| COUNT FRONT COVER: Selected | Not printed (count) | Not printed (count) | 3/10 4/ | 10 5/10 6/ | 10 7/10 | 8/10 9/10 | 10/10 | ||||
| COUNT FRONT COVER: Selected PRINTING STARTS FROM SHEET: 3 | Not printed (count) | Not printed (count) | Not printed | Not printed | 1 | / 6 | 2 | / | 6 | 3 / | |
When a back cover is inserted, page numbers are counted and printed in the same way.
Note that page numbers are never printed on front and back covers.
Page number printing during one-sided copying with inserts (4 originals; 5 originals when copying on inserts)
| Setting | Value | 1st page | 2nd page | 3rd page (insert) | 4th page | 5th page |
| TOTAL PAGE | AUTO |  |  |  |  |  |
| FIRST NUMBER | 1 | |||||
| LAST NUMBER | AUTO | |||||
| PRINTING STARTS FROM SHEET | 1 | |||||
| COUNT INSERTS | Not selected | |||||
| Printed contents when copying on inserts and settings are changed as follows | PRINTING STARTS FROM SHEET: 3 | Not printed | Not printed | Not printed | 1/2 | 2/2 |
| COUNT INSERTS: Selected | 1/5 | 2/5 | 3/5 (count) | 4/5 | 5/5 | |
| COUNT INSERTS: Selected PRINTING STARTS FROM SHEET: 3 | Not printed | Not printed | 1/3 (count) | 2/3 | 3/3 | |
| Printed contents when not copying on inserts and settings are changed as follows | COUNT INSERTS: Selected | 1/5 | 2/5 | Not printed (count) | 4/5 | 5/5 |
| COUNT INSERTS: Selected PRINTING STARTS FROM SHEET: 3 | Not printed | Not printed | Not printed (count) | 2/3 | 3/3 |
When inserts are not copied on, the page number is not printed.
Page number printing during two-sided copying of body pages with inserts (one-side copying) (9 originals)
| Setting Value | 1st page | 2nd page | 3rd page(insert) | 4th page 5th | page | ||||||
| Front | Back | Front | Back | Front | Back | Front | Back | Front | Back | ||
| TOTAL PAGE | AUTO |  | B2/8 |  | D4/8 |  |  | F5/8 |  | I7 |  8/8 8/8 |
| FIRST NUMBER | 1 | ||||||||||
| LAST NUMBER | AUTO | ||||||||||
| PRINTING STARTS FROM SHEET | 1 | ||||||||||
| COUNT INSERTS | Not selected | ||||||||||
| Printed contents when settings are changed as follows | COUNT INSERTS: Selected | 1/10 2/ | 10 3/10 4/ | 10 5/10 | Not printed(count) | 7/10 8/ | 10 9/10 10/10 | ||||
■Printing entered text on copies
Entered text can be printed on copies. Up to 50 characters can be printed.
Up to 30 sequences of frequently used text can be stored. See "Storing text sequences" (page 5-40).
NOTE
When the machine is connected to a network, the printed text sequences can be stored and deleted in the Web page. For details, see Help in the Web page.
1 Follow steps 1 and 2 of "Common operation procedure for using the print menu" (page 5-31).
2 Touch the [TEXT] key.
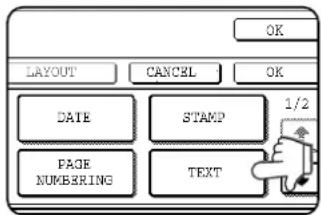
3 If you wish to use one of the preset text sequences, touch the [RECALL] key. To directly enter the text, touch the [DIRECT ENTRY] key.

If you touch the [DIRECT ENTRY] key, a character entry screen will appear. For information on entering characters, see page 7-29. When finished, click the [OK] key to close the character entry screen. (Go to step 6.)
4 The stored text sequences will appear as keys. Touch the key of the desired text sequence.
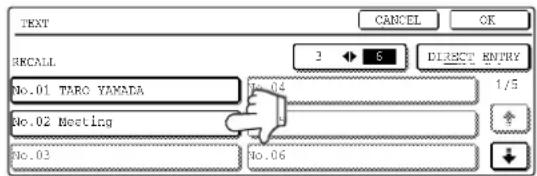
The selected text sequence key is highlighted. If the desired text sequence key does not appear, change screens with the or key
The display is initially set to show 6 keys per screen. This can be changed to 3 keys per screen by touching the [3 ◆] key. When 3 keys are displayed, the entire text sequence will appear in each key. (When 6 keys are displayed, up to 22 characters appear in each key.)
5 Touch the [OK] key.

To edit the selected text sequence, touch the [DIRECT ENTRY] key to display the character entry screen. The selected text sequence is entered. For
information on entering characters, see page 7-29. When finished, touch the [OK] key to close the character entry screen.
6 Select the pages to be printed on.

Select whether to print on only the first page, or all pages. The touched key is highlighted.
7 Touch the [OK] key.

8 Continue from step 4 of "Common operation procedure for using the print menu" (page 5-31).
NOTE
To cancel a text setting...
Touch the [CANCEL] key in the text print screen. (The screen of step 7.)
Storing text sequences
1 Follow steps 1 and 2 of "Common operation procedure for using the print menu" (page 5-31).
2 Touch the [TEXT] key.

3 Touch the [STORE/DELETE] key.

4 Touch a key that has not been programmed (a key in which No. xx appears).

When touched, the character entry screen appears. Enter the text (max. 50 characters). For information on entering characters, see page 7-29. When finished, touch the [OK] key to close the character entry screen.
If no free keys appear, change screens with the ↑ or ↓ key.
5 Touch the [BACK] key.
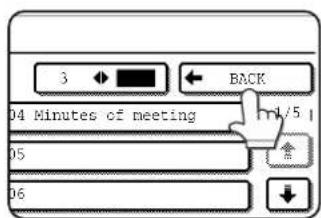
The entered text is stored.
Editing and deleting stored text
1 Follow steps 1 and 2 of "Common operation procedure for using the print menu" (page 5-31).
2 Touch the [TEXT] key.

3 Touch the [STORE/DELETE] key.

4 Touch the text key that you wish to edit or delete.
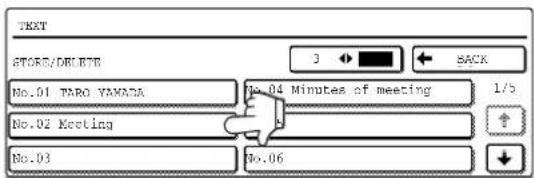
5 To edit the text, touch the [AMEND] key. To delete the text, touch the [DELETE] key.
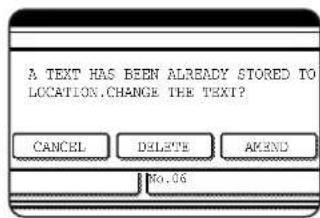
When the [AMEND] key is touched, the character entry screen appears. The selected text sequence is entered. For information on entering characters, see page 7-
- When finished, touch the [OK] key to close the character entry screen. If you touch the [DELETE] key, the text will be deleted and you will return to the screen of step 4. To cancel editing or deletion, touch the [CANCEL] key.
6 Touch the [BACK] key.
■ Checking and changing the print layout
You can check the print layout after the print items have been selected. If needed you can change the print position or delete print content.
1 Touch the [LAYOUT] key on the print menu screen.

2 Touch the key in which you wish to change the print position or delete print content.

NOTE
Up to 14 characters of the print text appears in the key.
3 To change the print position, touch the [MOVE] key. To delete print content, touch the [DELETE] key.
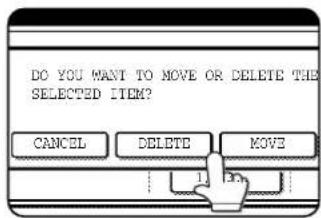
If you touched the [MOVE] key, the new position selection screen appears.
If you touched the [DELETE] key, the print content is deleted. (Go to step 6.)
4 Touch the key of the new position.

The selected key is highlighted and the print position changes to the new position.
The keys indicating the print position appear as follows depending on the state of the setting:
 | Print position without any set print menus. |
 | Currently set print position. |
 | Print position with another competing print menu set.(When moving a stamp, this indicates that another stamp has been set. When moving a print menu other than a stamp, this indicates that the date, page number, or text has been set.) |
NOTE
If you wish to swap the contents of two positions, temporarily move the content of one position to an unused position and then complete the swap.
5 Touch the [OK] key.

If you attempt to move print content to a position that already has print content set, a message will appear asking you if you wish to overwrite the previously set content.
To overwrite the content, touch the [YES] key. To cancel the move and return to the condition before the [OK] key was touched, touch the [NO] key.
6 Touch the [OK] key.
![SHARP MX-M450N - Touch the [OK] key. - 1](/content/2026/05/944414/images/184b3c418fd743ae0cea8bfe6c269c08310f66332b6bc661f48055bc137fcb6d.jpg)
flowchart
graph TD
    A["OK"] --> B["DO NOT COPY"]
    C["CONFIDENTIAL"] --> B
    D["1,2,3.."] --> B
STORING, USING AND DELETING JOB PROGRAMS
The steps of up to 10 copy jobs can be stored as job programs. Job programs can be called up with ease, and are retained even when the power is turned off. By storing frequently used copy settings in a job program, you can eliminate the bother of selecting the settings each time you use them for a copy job.
- If any settings related to the steps of a job program are changed in the administrator settings after the job program is stored, the steps related to the changed settings will not be included when the job program is called up.
● To exit the job programs mode, press the [CA] (clear all) key on the operation panel or touch the [EXIT] key on the touch panel.
Storing a job program
1 Press the [#/P] key.
2 Touch the [STORE/DELETE] key.

3 Touch the number key ([1] to [10]) in which you wish to store the job program.
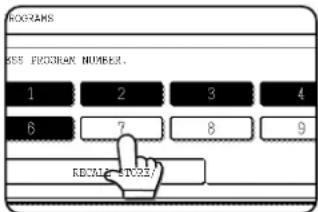
Number keys in which job programs are already stored are highlighted.
4 Select the copy settings that you wish to store in the job program.
![TO STORE, MAKE SELECTIONS AND PRESS [OK], TO DELETE, PRESS [CANCEL]. SPECIAL MODES 2-SIDED COPY OUTPUT](/content/2026/05/944414/images/400ac2ee25af8a77152c8dc013eb65e73f5f13a9e8fe627585e3a03d3b6fc7ed.jpg)
The number of copies cannot be stored.
5 Touch the [OK] key.
![SHARP MX-M450N - Touch the [OK] key. - 1](/content/2026/05/944414/images/2b0df735579700fdfa1cf3a25cb6c17005bf6bf64012ef501fe219e170e7d9ab.jpg)
flowchart
graph TD
    A["NCEL"] --> B["OK"]
    B --> C["AUTO ORIGINAL"]
    C --> D["AUTO"]
The selected settings will be stored in the number key selected in step 3.
■ If a number key is selected in step 3 that has already been programmed.
A setting confirmation screen will appear. To replace the existing program with the new program, touch the [STORE] key and continue from step 4. If you do not wish to replace the existing program, touch the [CANCEL] key to return to the screen of step 3 and select a different number key.
NOTE
If overwriting of programmed copy settings has been prohibited in the administrator settings, it will not be possible to store or delete a job program. (See page 17 of the administrator settings guide.)
Calling up a job program
1 Press the [#/P] key.
2 Touch the number key of the desired job program.

The screen automatically closes and the job program is called up. A number key that does not have a job program cannot be selected.
3 Set the number of copies if needed and then press the [START] key.
![SHARP MX-M450N - Set the number of copies if needed and then press the [START] key. - 1](/content/2026/05/944414/images/03ec58d11a0cce88e8b1a49c577641d63f9d0905defbc531247b139499a8de8d.jpg)
natural_image
Simple line drawing of a hand pressing a button with a circular icon containing an eye symbol (no text or labels)Copying will begin using the settings of the job program.
Deleting a stored job program
1 Press the [#/P] key.
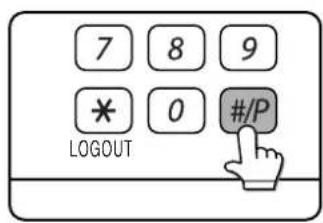
2 Touch the [STORE/DELETE] key.

3 Select a storage register number of the program to be deleted.
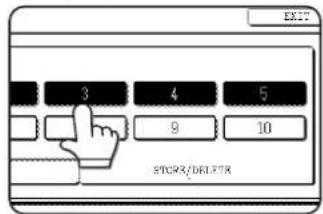
If a number key for which no job program has been stored is selected, the screen will change to the screen of step 4 on the previous page for storing a job program.
4 Touch the [DELETE] key.

The selected program is deleted and you return to the screen of step 3. To return to the screen of step 3 without deleting the job program, touch the [CANCEL] key. In both cases, touch the
[EXIT] key displayed in the screen of step 3 to exit the job program mode.
NOTE
If overwriting of programmed copy settings has been prohibited in the administrator settings, it will not be possible to store or delete a job program. (See page 17 of the administrator settings guide.)
INTERRUPTING A COPY RUN
The copy of the original scanned in interrupt mode is output before the remainder of the interrupted copy job.
1 Touch the [INTERRUPT] key.
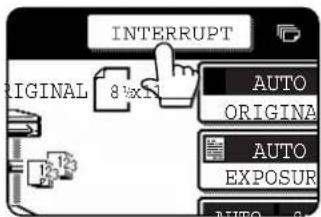
If interrupt copying is possible during a copy run, the [INTERRUPT] key will appear. (If the key does not appear, interrupt copying is not possible.)
![CANCEL ORIGINAL [8x1] AUTO EXPOSURE UTO 9:11 EXPOSURE UTO 8:11 PER SELECT 100%](/content/2026/05/944414/images/9c245126bca1c071174ff159b8959b2890d8ab42e2892080297a497f8f7a7bef.jpg)
When the [INTERRUPT] key is touched in step 1, the [INTERRUPT] key will be replaced by the [CANCEL] key as shown in the illustration.
100\$ To cancel an interrupt
copy job while the interrupt original is being scanned or while you are selecting copy settings, touch the [CANCEL] key.
NOTES
- If you touch the [INTERRUPT] key when auditing mode is enabled, the display will prompt you to enter your account number. Enter your account number with the numeric keys. The copies you make will be added to the count of the entered account number.
- If a copy is being printed when the [INTERRUPT] key is pressed, interrupt mode will begin after the copy is finished.
- If the document glass is used for an interrupt copy job, two-sided copying, sort copying, and staple sort copying cannot be selected. If any of these functions are necessary, use the document feeder.
2 Place the original for the interrupt copy job in the document feeder or on the document glass (page 4-3).

natural_image
Illustration of a printer or printer being inserted into a stack of sheets, with no visible text or symbols.3 Select the exposure mode, paper size, number of copies, and any other copy settings as needed, and then press the [START] key.
natural_image
Simple line drawing of a hand pressing a button with a circular icon (no text or symbols)4 The previous copy job automatically resumes after the interrupt job finishes.
CHAPTER 6
MACHINE MAINTENANCE (FOR COPYING)
This chapter explains procedures for cleaning the machine, and troubleshooting.
Page
USER MAINTENANCE....6-2
- Cleaning the document glass and the automatic document feeder .....6-2
- Cleaning the main charger of the photoconductive drum....6-2
TROUBLESHOOTING 6-3
USER MAINTENANCE
Cleaning the document glass and the automatic document feeder
If the document glass, document cover or automatic document scanning unit have dirty spots, these spots will form lines in scanned images. These will show up as defects when the images are printed. Always keep these parts clean.
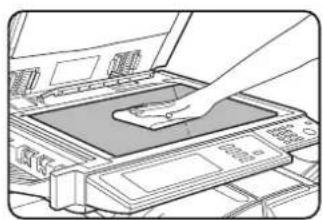
natural_image
Illustration of a hand inserting a component into a device (no text or symbols visible)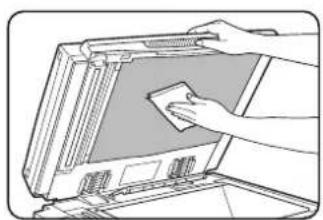
natural_image
Illustration of a hand cleaning a computer monitor with a cloth (no text or symbols visible)Wipe with a clean, soft cloth. If necessary, moisten the cloth with water or a small amount of neutral detergent. When finished, wipe dry with a clean cloth. When cleaning, do not use thinner, benzene, or similar volatile cleaning agents.

If black or white stripes appear on printed images of originals that were fed through the automatic document feeder, wipe the long narrow glasses in the scanning unit ((A) and (B) in the illustration).
Example of dirty print image

Black stripes

White stripes
CAUTION
Do not use flammable spray to clean the machine. If gas from the spray comes in contact with hot electrical components or the fusing unit inside the machine, fire or electrical shock may result.
Cleaning the main charger of the photoconductive drum
If black (or white) lines appear even after you have cleaned the document glass and document feeder, use the charger cleaner to clean the main charger that charges the drum.
1 Switch off the power switch (see page 1-17).
2 Open the front cover.
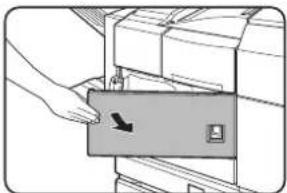
natural_image
Illustration of a hand inserting a card into a machine (no text or symbols visible)3 Slowly pull out the green knob (charger cleaner).

4 Once the knob is pulled out, slowly push it back in.

natural_image
Illustration of a hand inserting a cable into a device panel (no text or symbols visible)5 Close the front cover and switch on the power switch.
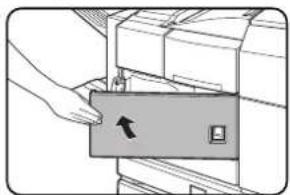
natural_image
Illustration of a hand pressing a button on a machine component (no text or symbols visible)NOTES
- If this does not solve the problem, pull the knob out and push it back in 2 more times.
- When pulling and pushing the knob to clean the charger, pull and push the knob slowly from one end to the other.
TROUBLESHOOTING
Check the following troubleshooting list before requesting service as many problems can be fixed by the user. If you are unable to solve the problem by checking the list, turn off the power switch, and unplug the power cord.
Problems related to the copy function are described below. For problems related to general use of the machine, see page 2-23.
| Problem Check | Solution | |
| Machine does not operate. | Is the [START] key indicator off? This indicates that the machine is warming up (warming up lasts no more than 80 seconds after the power switch is turned on). Copying is not possible during this time. Wait until the [START] key light illuminates. | |
| Copies are too dark or too light. | Is the original image too dark or too light? Select an appropriate exposure mode for the original being copied and adjust the copy exposure. (See page 4-14.) | |
| Is the exposure mode set to "AUTO"? | The exposure level for "AUTO" can be adjusted using the "Exposure adjustment" in the administrator settings. Contact your administrator. (See page 16 of the administrator settings guide.) | |
| An appropriate exposure mode for the original has not been selected. | Change the exposure mode to "AUTO" or manually select an appropriate resolution setting. (See page 4-14.) | |
| Text is not clear on a copy. | An appropriate exposure mode for the original has not been selected. | Change the exposure mode to "TEXT". (See page 4-14.) |
| Smudges appear on copies. | Document glass or document cover dirty? Clean regularly. (See page 6-2.) | |
| Black lines appear on copies when the automatic document feeder is used. | Clean the original scanning area. (See page 6-2.) | |
| Original smudged or blotchy? Use a clean original. | ||
| Image cannot be rotated. | Is the auto paper select or auto image function selected? | Rotation copy functions only if the machine is either in the auto paper select mode or in the auto image mode. (See page 4-15.) |
| Part of original image is not copied. | Is the original positioned correctly? Set the original properly. (See page 4-3.) | |
| Is the copy ratio proper for the original and paper sizes? | Use the auto image function to select the appropriate copy ratio based on the original and copy sizes. (See page 4-15.) | |
| Blank copies | Is the original placed correctly? | When using the document glass, place the original face down.When using the automatic document feeder, place original face down. (See page 4-3.) |
| Order of copies incorrect | Is the order of originals correct? | When using the document glass, place the originals from the first page one sheet at a time.When using the automatic document feeder, place the originals with the first page down. |
| Job cancellation needed | Is a message requesting cancellation of job displayed? | Press the [CA] key to cancel the current job. |
CHAPTER 7
DOCUMENT FILING FUNCTION
Page
OVERVIEW....7-2
- Document filing function.... 7-2
TO USE THE DOCUMENT FILING FUNCTION.... 7-4
- A look at the operation panel 7-4
- Saving files.... 7-4
- Main screen of document filing 7-5
- Document filing icons.... 7-5
SAVING A DOCUMENT IMAGE FILE 7-6
- Quick File 7-6
- Filing....7-7
- Print jobs 7-9
- Scan Save....7-10
CALLING UP AND USING A FILE.... 7-13
- Searching for and calling up a saved file.... 7-13
- Calling up and using a saved file.... 7-15
- File selection screen 7-16
SYSTEM SETTINGS 7-24
- Creating, editing, and deleting user names and folders...... 7-24
ENTERING CHARACTERS....7-29
TROUBLESHOOTING 7-31
OVERVIEW
Document filing function
This function can only be used on the MX-M350N/MX-M450N, or when the document filing function has been added. The document filing function allows you to save a document image in the machine's hard disk as a data file. The image can be called up and printed or transmitted as needed.
The scanned document image is saved when printing or transmitting a document in copy mode, printer mode, or image send mode ("QUICK FILE" or "FILE"). A document can also be scanned and saved without being printed, copied, or transmitted ("scan save").
To allow you to search for the file and call it up, names (user name, file name, etc.) can be assigned to the file (except when using Quick File in copy mode or fax/image send mode).
■ Data flow

flowchart
graph TD
    A["Printing in copy mode (Quick File saving, page 7-6)"] --> B["Save to machine's hard disk"]
    C["Printing from a computer (printer data, page 7-9)"] --> B
    D["Transmission in fax/image send mode (filing, page 7-7)"] --> B
    E["Scanning a document only (scan save, page 7-10)"] --> B
    B --> F["Machine hard disk"]
    F --> G["Call up a saved file to reuse it."]
    G --> H["Print"]
    G --> I["Send (facsimile or image send function must be required)"]
Machine hard disk
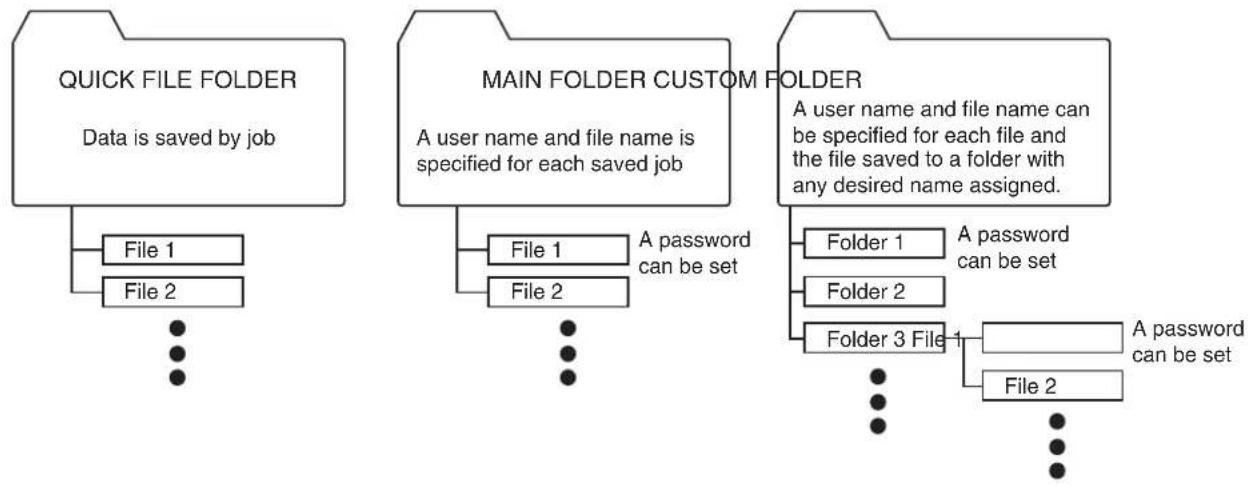
flowchart
graph TD
    A["QUICK FILE FOLDER\nData is saved by job"] --> B["File 1"]
    A --> C["File 2"]
    D["MAIN FOLDER CUSTOM FOLDER\nA user name and file name is specified for each saved job"] --> E["File 1"]
    D --> F["File 2"]
    D --> G["A password can be set"]
    H["Folder 1"] --> I["A password can be set"]
    J["Folder 2"] --> K["A password can be set"]
    L["Folder 3 File 1"] --> M["A password can be set"]
    N["File 2"] --> O["A password can be set"]
●A stored file can be moved to a different folder under certain conditions (page 7-22).
■ Quick File folder
When [QUICK FILE FOLDER] is selected in the main screen of any of the modes, the file is saved in this folder.
Up to 1000 files can be saved in the Quick File folder. All files in the Quick File Folder can be deleted using the administrator settings. If you have a file that you do not want deleted, set the file attribute to [PROTECT] (up to 500 files can be protected). (See [Property change] on page 7-21)
The following user and file names are automatically assigned:
User name : User unknown
File name (example) : COPY_04042010_113050AM (job mode and month, day, year, hour, minute, second, AM/PM of save). (In the example, the file was saved on 4/4/2010 at 11:30 and 50 sec in copy mode.)
When saved, jobs are classified by mode. A saved job can be called up from the COMPLETE job status screen.
■ Main folder
When saving a file, a previously stored user name (see [SYSTEM SETTINGS] on page 7-24) can be specified and any file name can be assigned.
A password can also be set for a saved file ([CONFIDENTIAL] save). (See [Property change] on page 7-21.)
If a user name and file name are not selected, a name in the same format as Quick File is automatically assigned.
■ Custom folder
Up to 500 folders (named as desired) can be created in this folder. When saving a file in one of these folders, a previously stored user name (see [SYSTEM SETTINGS] on page 7-24) can be specified and any file name can be assigned.
A password can be set for a file saved in one of these folders.
■ Attributes of saved files
The protect setting can be selected for files saved with the document filing function. This prevents a file from being moved or automatically or manually deleted.
Three attributes are available for saved files: [SHARING], [PROTECT], and [CONFIDENTIAL]. When saved with the [SHARING] attribute, a file is not protected. When saved with the [PROTECT] or [CONFIDENTIAL] attribute, a file is protected.
Files saved to the Quick File folder are all [SHARING]. When saving a file to the main folder or a custom folder, [SHARING] or [CONFIDENTIAL] can be selected.
● A [SHARING] file can be changed to a [PROTECT] or [CONFIDENTIAL] file using [Property change] (page 7-21).
● A password is set for a [CONFIDENTIAL] file to protect it. (The password must be entered to call up the file.)
- A password cannot be set for a [PROTECT] file, however, as long as the file is not changed to [SHARING] with [PROPERTY CHANGE], the file will be protected.
CAUTION
- Documents saved with [QUICK FILE] are shared files that can be called up by anyone and printed or transmitted. For this reason, do not use Quick File for sensitive documents or documents that you do not want to be reused by others.
- When saving a document with [FILE], set the attribute to [CONFIDENTIAL] and set a password to prevent others from reusing the document.
● Even when a file is saved with the [CONFIDENTIAL] attribute, the attribute can be changed afterward to [SHARING] using [Property change] (page 7-21). For this reason, do not save sensitive documents or documents that you do not want to be reused by others. - Except in cases provided for by law, SHARP Corporation bears no responsibility for any damages that result from the leaking of sensitive information due to 1) manipulation by a third party of any data saved using the Quick File function or filing function, or 2) incorrect operation of the Quick File function or filing function by the operator that saves the data.
TO USE THE DOCUMENT FILING FUNCTION
A look at the operation panel
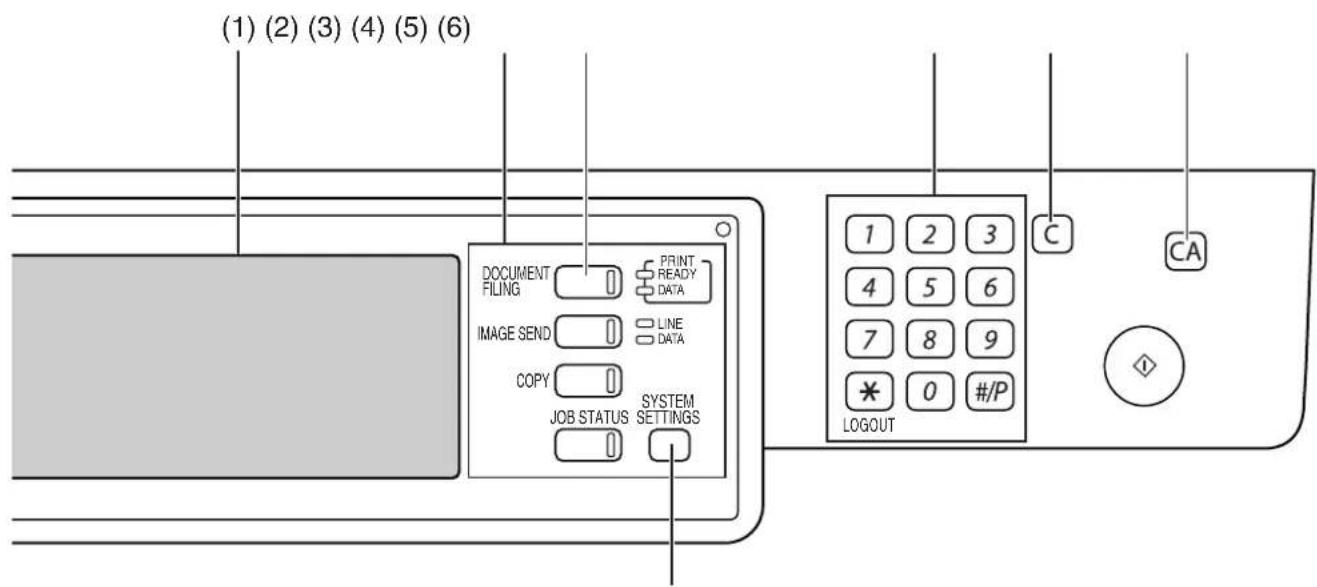
(7)
(1) Touch panel (see the next page)
This displays messages and keys. Keys can be touched to select and enter settings.
When a key is touched, a beep will sound and the key will be highlighted to indicate that it is selected.
When a key cannot be selected in a screen, it will be grayed out. If touched, a warning beep will sound to alert you that it cannot be selected.
(2) Mode select keys
Use this key to select the mode.
(3) [DOCUMENT FILING] key
Touch this key to display the main screen of document filing mode.
(4) Numeric keys
Use these keys to enter a password or a numeric value for a setting.
(5) [C] key (Clear key)
Use this key if you make a mistake when entering a password or numeric setting.
This key is also used to cancel scanning of a document.
(6) [CA] key (Clear all key)
Use this key to cancel a setting procedure and return to the main screen. The key is also used to cancel a special function.
(7) [SYSTEM SETTINGS] key
Use this key to store, edit or delete a user name or custom folder.
Saving files
To save files to the main folder or custom folders, a user name must be previously stored. To create a folder in the custom folder, the folder name must be stored. These settings are configured in the system settings.
Follow the procedures explained in "Programming a user name", "Editing and deleting a user name", "Creating a custom folder", and "Editing/deleting a custom folder" on pages 7-25 to 7-28.
Main screen of document filing
To display the main screen of document filing, press the [DOCUMENT FILING] key when the touch panel shows the copy mode screen, image send mode, or the job status screen.
The main screen shows messages, keys, and items that can be selected for document filing.

(2) (4)(3) (5) (6)
(1) Message display
Displays messages.
(2) [SCAN TO HDD] key
Touch to select scan save. Scan save is used to save the image file of a scanned document in the main folder or a custom folder without printing or transmitting the document.
(3) [FILE FOLDER] key
Touch to call up a file from the main folder or the custom folder. When the key is touched, the files in the main folder or the folders in the custom folder appear.
(4) [QUICK FILE FOLDER] key
Touch to call up a file from the Quick File folder. When the key is touched, the files in the Quick File folder appear.
(5) [SEARCH] key
Touch to search for a file by user name, file name, or folder name.
(6) [HDD STATUS] key
Touch to check the use of the machine's hard disk.
Document filing icons
| Main icon | Icon of confidential file or folder | Icon of protected file | Meaning |
![SHARP MX-M450N - [HDD STATUS] key - 1](/content/2026/05/944414/images/c77ae58bc2bd63e4d012fc7ec044d74d0da2137927275c0fe760dd2b5185a3e6.jpg) | ![SHARP MX-M450N - [HDD STATUS] key - 2](/content/2026/05/944414/images/f5e7dd2bbb3abc3a46cda5a51968b2d769906229e7facc1a6b77916f3ddd5230.jpg) | Folder | |
![SHARP MX-M450N - [HDD STATUS] key - 3](/content/2026/05/944414/images/b514441daddbe5b85a0f083ec82b502244ff73c44e73013cc8e9989628f17e66.jpg) | ![SHARP MX-M450N - [HDD STATUS] key - 4](/content/2026/05/944414/images/24dcd8e8c03654dcbb2f1bb92425a8bbd84c4bbbbe43f146d25cc7100bd0a9fb.jpg) — — | ![SHARP MX-M450N - [HDD STATUS] key - 5](/content/2026/05/944414/images/f50b325ab10153817cc3b495119d9e0c84b18378a251f188d295f33de046f4ff.jpg) — — | Copy job file |
![SHARP MX-M450N - [HDD STATUS] key - 6](/content/2026/05/944414/images/cfb6b4a1d3bba788d9b4c5e697809c07e61865b3a510c9e0b73a0907f651a1ca.jpg) — — | ![SHARP MX-M450N - [HDD STATUS] key - 7](/content/2026/05/944414/images/32a219ab4ae34a47a786984509eb2932a33097fb46ed9c907f1958322ca145eb.jpg) — — | [6TKT]— | Print job file (including direct print jobs) |
![SHARP MX-M450N - [HDD STATUS] key - 8](/content/2026/05/944414/images/987e53496086a7be5d4387e8b6cbc9b4ec666f9146d66d1c8116083c708ef7f1.jpg) | [08T6]— | ![SHARP MX-M450N - [HDD STATUS] key - 9](/content/2026/05/944414/images/c774780cebe480fa5a53aac958a55cc5cc49af88d3951132cf105cf7a6e8f5b5.jpg) — — | Fax transmission job file |
| [2S0DZ]— | ![SHARP MX-M450N - [HDD STATUS] key - 10](/content/2026/05/944414/images/abee3bdb2a63de87f26162604c24a0c605b7fb895985697d38e1af6ead476b7b.jpg) — — | [27K2]— | PC-FAX transmission job file |
| [Y70G]— | [CYTW]— | ![SHARP MX-M450N - [HDD STATUS] key - 11](/content/2026/05/944414/images/039bd4d83ee37aa10c9c0a4ac5880cf2c4c205457772cc4d1abaae6f0092339d.jpg) — — | Internet fax transmission job file |
| [04ZD]— | [0TAZ]— | [ZBW7]— | PC-Internet fax transmission job file |
![SHARP MX-M450N - [HDD STATUS] key - 12](/content/2026/05/944414/images/d5cd47860945bd9fc362049597c040f64b6045e289ee1c91c490d59f48a64d0d.jpg) | ![SHARP MX-M450N - [HDD STATUS] key - 13](/content/2026/05/944414/images/3e81a7da4cf6671a55a3040712422544310800ce4d0fcb4e5098005051224441.jpg) — — | ![SHARP MX-M450N - [HDD STATUS] key - 14](/content/2026/05/944414/images/f9d097628f9962e41ca9db96b83fe564addc535da3aee0974c19a3d8f868fe9d.jpg) — — | Scan save file |
![SHARP MX-M450N - [HDD STATUS] key - 15](/content/2026/05/944414/images/b0f443a1c518b5e919572e3fe6b9b773a431dd0980707091622371d82571a8b0.jpg) | ![SHARP MX-M450N - [HDD STATUS] key - 16](/content/2026/05/944414/images/848960c8894a6829a0834dccd2aa1285ed8185ca0f59af5dce8be39a3946d2f7.jpg) — — | [0TT4]— | E-mail transmission job file |
![SHARP MX-M450N - [HDD STATUS] key - 17](/content/2026/05/944414/images/35fa04f318788d2888c79f62f99802621c01797def1b353bf92b15eb2970c2f4.jpg) — — | [7HDO]— | ![SHARP MX-M450N - [HDD STATUS] key - 18](/content/2026/05/944414/images/d3fef21684462a6f726dc93ef5e048b306a06e767305c8a3b8308bd1530b626a.jpg) — — | FTP transmission job file |
![SHARP MX-M450N - [HDD STATUS] key - 19](/content/2026/05/944414/images/c89d9d9cbacf5c57ca644a4c90eaa4e32f2597742edb20af8da4b4d37259d5e7.jpg) — — | [W8ZD]— | ![SHARP MX-M450N - [HDD STATUS] key - 20](/content/2026/05/944414/images/eadbb83074bd6939d87d10f8456361095788fa9a8af4da4ff5f3f55dd988e02d.jpg) — — | Desktop transmission job file |
| [XTDS]— | ![SHARP MX-M450N - [HDD STATUS] key - 21](/content/2026/05/944414/images/9c79f324d3cfcf81424428d4d59e58c3ab7d798e431c229e892adb35ed284abf.jpg) — — | ![SHARP MX-M450N - [HDD STATUS] key - 22](/content/2026/05/944414/images/70d6ee1c4c10d8119cba041cce044f16d6b61e7a08301886399be861732ade62.jpg) — — | Network Folder transmission job file |
The following icons may appear added to a main icon or alone.
| Icon | Meaning |
| Confidential file or folder | |
| Protected file |
NOTE
When the file of a job that was saved using scan save is printed in job settings, the icon of the job is highlighted.
SAVING A DOCUMENT IMAGE FILE
Quick File
When printing or transmitting a document in copy mode, printer mode, or fax/image transmission mode, "QUICK FILE" can be selected to save an image of the document to the Quick File folder.
The image can be called up at a later time, allowing you to print or transmit the document without having to locate the original.
NOTE
As an example, the procedure for saving a document to the Quick File folder while copying using the automatic document feeder is explained below.
1 Place the originals in the document feeder tray and select resolution and exposure settings.
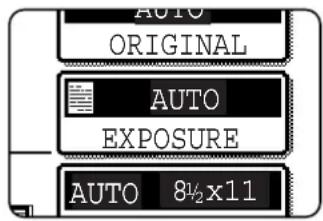
See steps 1 to 8 of "Making copies with the automatic document feeder" on pages 4-7 to 4-8 and "ADJUSTING THE EXPOSURE" on page 4-14.
2 Touch the [QUICK FILE] key in the main screen.
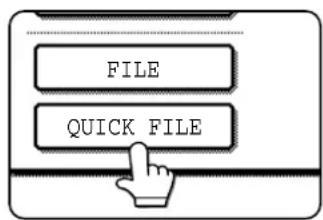
The [QUICK FILE] key will be highlighted to indicate that the function is selected.
If the [FILE] key is grayed out, only the [QUICK FILE] key can be selected.
When you touch the [QUICK FILE] key, a message asking you to confirm the save will appear. Touch the [OK] key in the message screen and go to the next step.
If you wish to cancel the save, touch the [QUICK FILE] key after touching the [OK] key so that the [QUICK FILE] key is no longer highlighted.
3 Press the [START] key on the operation panel.
![SHARP MX-M450N - Press the [START] key on the operation panel. - 1](/content/2026/05/944414/images/1ed8cc79657a5f15d26d85d25278da372e8147836eaab97affe6264acbaaacf2.jpg)
natural_image
Simple line drawing of a hand pressing a circular button with an eye symbol (no text or labels)To prevent accidental saving of the document, the warning "THE SCANNED DATA IS STORED IN THE QUICK FILE FOLDER." appears for 6 seconds
after the [START] key is pressed.
When copying begins, the image is saved.
4 The saved image can be called up from the Quick File folder or the job status screen.
●To call the image up from the Quick File folder, see "Calling up and using a saved file" on page 7-15.
●To call the job up from the finished job status screen, see "Calling up and manipulating a file from the job status screen" on page 7-23.
5 The following operations can be performed on the image that was called up in step 4.
●Print the image (page 7-17)
●Transmit the image (page 7-20)
●Change the attribute (page 7-21)
●Move the image (page 7-22)
- Delete the image (page 7-22)
●Check details on the image (page 7-22)
Filing
When printing or transmitting a document in copy mode, printer mode, or image send mode, "FILE" can be selected to save an image of the document to the main folder or a previously created custom folder. The image can be called up at a later time, allowing you to print or transmit the document without having to locate the original.
NOTE
As an example, the procedure for using the filing function while copying using the automatic document feeder is explained below.
1 Place the originals in the document feeder tray and select resolution and exposure settings.
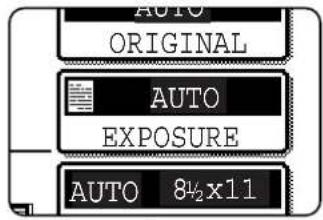
See steps 1 to 8 of "Making copies with the automatic document feeder" on pages 4-7 to 4-8 and "ADJUSTING THE EXPOSURE" on page 4-14.
2 Touch the [FILE] key in the main screen.
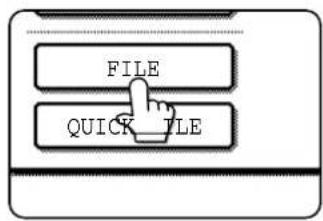
An information entry screen appears.
3 Touch the [USER NAME] key.

4 Touch the desired user name in the list of user names that appears.

User names must be previously stored ("Programming a user name" on page 7-25).
5 Touch the [OK] key.
The touched user name is selected and you return to the screen of step 3. The selected user name appears.
NOTE
If you do not select a user name, the following name is automatically selected: Example : User unknown
6 Touch the [FILE NAME] key.

A character entry screen appears. Enter a file name (maximum of 30 characters). (See page 7-29 to enter characters.)
NOTE
If you do not enter a file name, a file name in the following format is automatically assigned: Auto generated file name : Month, day, year, hour minute, second, AM/PM (Example : COPY_04042010_113050AM)
7 Touch the [STORED TO:] key.
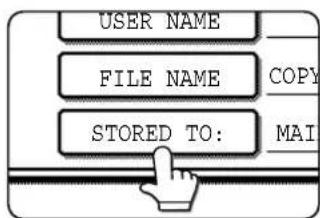
8 Touch the desired folder name in the list of folder names that appears

Folder names must be previously stored. ("Creating a custom folder" on page 7-27). If a password has been set for the folder, a password entry screen will appear. Enter the 5-digit password for the folder.
9 Touch the [OK] key.

The touched folder is selected and you return to the screen of step 7. The selected folder name is displayed.
10 If needed, select the [CONFIDENTIAL] checkbox (only in copy mode).
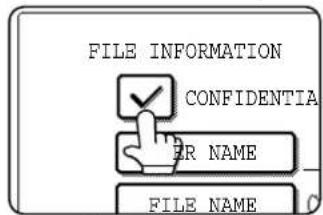
When this is selected, the file is stored with the attribute [CONFIDENTIAL]. To call up the file, the password that will be set in the following steps must be entered.
- If you selected the [CONFIDENTIAL] checkbox, touch the [PASSWORD] key and enter a password.
- If you did not select the [CONFIDENTIAL] checkbox, go to step 16. The file will be saved as a [SHARING] file.
11 Touch the [PASSWORD] key.

The password entry screen appears.
12 Enter a 5-digit password with the numeric keys.
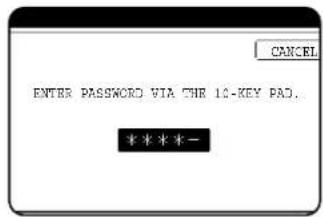
As each digit is entered, "-" changes to "*
13 Touch the [OK] key.

14 You will return to the screen of step 10. The set password is displayed with "\*".

15 Touch the [OK] key.
You will return to the main screen.
16 Press the [START] key on the operation panel.
![SHARP MX-M450N - Press the [START] key on the operation panel. - 1](/content/2026/05/944414/images/25002d0abfacfb7621851025b06725c63cad0e08cd7392b46f7213c8f48270f4.jpg)
natural_image
Simple line drawing of a hand pressing a circular button with an eye symbol (no text or labels)When copying begins, the image is saved.
17 The saved image can be called up using the file name, folder name, or user name, or from the filing folder.
●To call up the image by entering the file name, folder name, or user name, see "Searching for and calling up a saved file" on page 7-13.
●To call up the image from the filing folder, see "Calling up and using a saved file" on page 7-15.
18 The following operations can be performed on the image that was called up:
●Print the image (page 7-17)
●Transmit the image (page 7-20)
●Change the attribute (page 7-21)
●Move the image (page 7-22)
- Delete the image (page 7-22)
●Check details on the image (page 7-22)
Print jobs
Print jobs sent to the machine using the machine's printer driver can be saved in the main folder or a previously created custom folder when printed. The saved print data can be called up and printed or transmitted without having to open the original file on your computer.
This section gives an overview of this function and explains the procedure for printing from the operation panel of the machine.
For the procedures that are performed at your computer when initiating printing such as selecting the save location and file attribute, see the printer driver Help file.
■ Using a print job file (printing, deleting, transmitting, etc.)
1 Press the [DOCUMENT FILING] key on the operation panel.

2 Touch the [FILE FOLDER] key or the [QUICK FILE FOLDER] key depending on where the file is saved.

●Touch the [FILE FOLDER] key if the file is saved in the main folder or the custom folder. Touch the [QUICK FILE FOLDER] key if the file is saved in the Quick File folder. If you touched the [FILE FOLDER] key, the files in the main folder or the folders in the custom folder appear. If you open the wrong folder, touch the [MAIN FOLDER] key or the [CUSTOM FOLDER] key and open the correct folder.
- If the desired file is saved in the main folder, go to step 4. If the desired file is saved in a custom folder, go to step 3.
- If you touched the [QUICK FILE FOLDER] key, the files in the Quick File folder appear. Go to step 4.
3 Touch the key of the folder that contains the desired file.
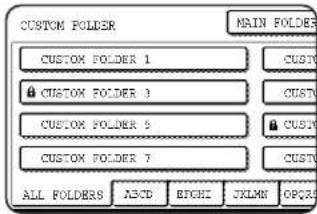
If a password is set for the selected folder, a password entry screen will appear. Enter the 5-digit password with the numeric keys.
4 Touch the printer icon (tab and then touch the key of the desired file.
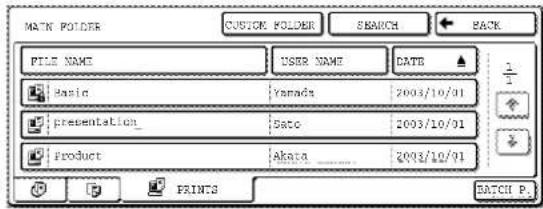
The following screen appears if the [QUICK FILE FOLDER] key is touched in step 2.
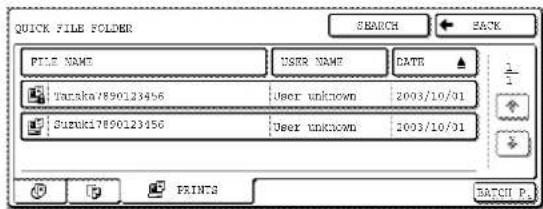
Touch the key of the file that you wish to call up. A menu screen will appear.
If a password is set for the file, a password entry screen will appear. Enter the 5-digit password with the numeric keys.
5 Touch the key of the operation that you wish to perform.
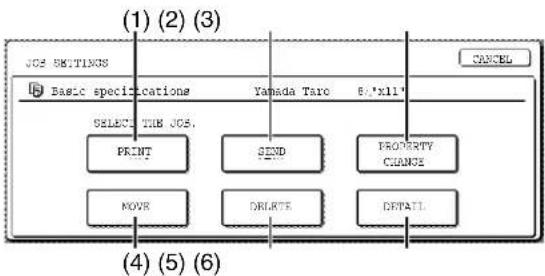
(1) [PRINT] key (see page 7-17)
(2) [SEND] key (see page 7-20)
(3) [PROPERTY CHANGE] key (see page 7-21)
(4) [MOVE] key (see page 7-22)
(5) [DELETE] key (see page 7-22)
(6) [DETAIL] key (see page 7-22)
The setting screen of the selected operation appears. See the indicated page.
Scan Save
Scan save is used to save a scanned document image in the main folder or the custom folder without copying or transmitting it.
1 Press the [DOCUMENT FILING] key on the operation panel.
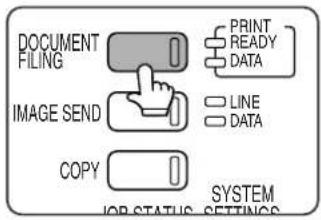
2 Touch the [SCAN TO HDD] key.

3 Touch the [SPECIAL MODES] key.
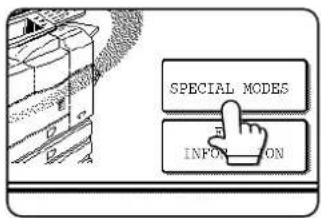
Select any special functions that you wish to use (otherwise skip this step).
When the [SPECIAL MODES] key is touched, the special modes
selection screen appears. (See "Using special functions for scan save" on page 7-12.)
NOTE
For explanations of the special functions, see page 7-12 and chapter 5.
4 Touch the [FILE INFORMATION] key.
![SHARP MX-M450N - Touch the [FILE INFORMATION] key. - 1](/content/2026/05/944414/images/f824323c98cdbf6149ee7453bea4aee0f811ef4bd6998cb7af76f56ecc3efa7f.jpg)
flowchart
graph TD
    A["SPECIAL MODES"] --> B["FILE INFORMATION"]
    B --> C["Hand Icon"]
5 The screens for selecting the user name, file name, folder, and attribute appear. Configure the settings as explained in step 3 to step 15 on pages 7-7 to 7-8. When step 15 is completed, you will return to the main screen of document filing.
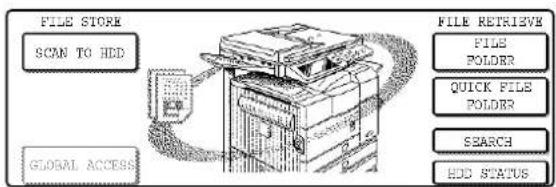
6 Perform any of the following steps 7 to 16 as needed. When finished, go to step 17 on page 7-11.
●To set the original size, perform steps 7 to 10.
●To set the resolution, perform steps 11 to 13 on page 7-11.
●To select the exposure, perform steps 14 to 16 on page 7-11.
- If you no not wish to select any of the above settings, go to step 17 on page 7-11.
7 Touch the [ORIGINAL] key.

8 To set the original size, see "Manually setting the scanning size" on page 4-5.
9 If the original is two-sided, touch the [2-SIDED BOOKLET] key or the [2-SIDED TABLET] key depending on where the pages are bound.
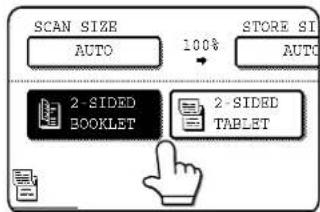
10 Touch the [OK] key.
You will return to the screen of step 7.
NOTE
If the original pages are bound at the side, the document is a "booklet". If the original pages are bound at the top, the document is a "tablet".
11 Touch the [RESOLUTION] key.

12 Touch the key of the desired resolution.
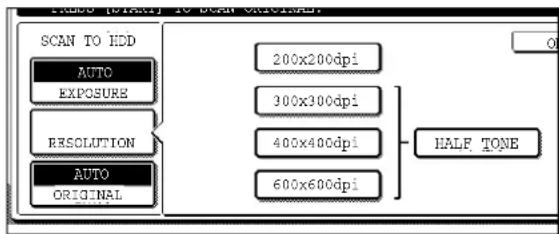
Select one of four resolution levels as appropriate for the original.
The selected resolution key is highlighted.
13 Touch the [OK] key.

You will return to the screen of step 11.
14 Touch the [EXPOSURE] key.

15 Select [AUTO] or [MANUAL].
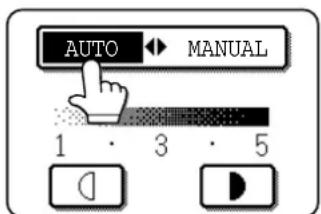
To have the exposure adjusted automatically, select [AUTO].

If you selected [MANUAL], touch the ☐ or □ to adjust the exposure.
(For a darker image, touch the key. For a lighter image, touch the key.)
16 Touch the [OK] key.
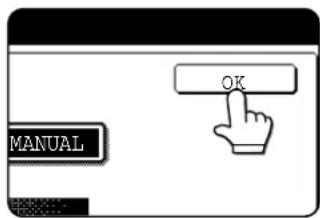
You will return to the screen of step 14.
17 Place the original and touch the [START] key.
[Placing the original]
●For information on placing the original, see "NORMAL COPYING" in chapter 4.
- If you selected the "Card Shot" special function, the document glass must be used.
- If you selected job build mode, the automatic document feeder must be used.
![SHARP MX-M450N - [Placing the original] - 1](/content/2026/05/944414/images/74bccc27cca8c085417d41aa2c64598d1be467e3757f3ac57a30c86c58acab17.jpg)
natural_image
Simple line drawing of a hand pressing a button with an icon (no text or symbols)Scanning begins. If you are using the document glass, touch the [READ-END] key after all pages have been scanned.
NOTE
This completes the scan save procedure. Follow the steps below when you wish to call up the image and print or transmit it.
18 The saved image can be called up using the file name, folder name, or user name, or from the filing folder.
●To call up the image by entering the file name, folder name, or user name, see "Searching for and calling up a saved file" on page 7-13.
●To call up the image from the filing folder, see "Calling up and using a saved file" on page 7-15.
19 The following operations can be performed on the image that was called up in step 18:
●Print the image (page 7-17)
●Transmit the image (page 7-20)
●Change the attribute ((page 7-21)
●Move the image (page 7-22)
- Delete the image (page 7-22)
●Check details on the image (page 7-22)
■ Using special functions for scan save
Touch the [SPECIAL MODES] key in the main scan save screen to display the special modes screen. The functions below can be selected in this screen.
![Touch the [SPECIAL MODES] key in the main screen. READY TO SCAN TO HDD. PRESS [START] TO SCAN ORIGINAL. SCAN TO HDD AUTO EXPOSURE 300x300dpi RESOLUTION AUTO ORIGINAL BACK SPECIAL MODES FILE INFORMATION (1) (2) (3) [READY TO SCAN TO HDD. PRESS [START] TO SCAN ORIGINAL. SPECIAL MODES ERASE DUAL PAGE SCAN 1: 2in1 JOB BUILD CARD SHOT (4) (5)](/content/2026/05/944414/images/a8e63681fe05f34d825a708e4cae4b366ae57752095a882b10d95097c7da89f9.jpg)
(1) [ERASE] key (see page 5-4)
Use this function to erase shadows that can appear around the edges of the image when books and other thick originals are scanned.
(2) [DUAL PAGE SCAN] key (see page 5-5)
(Equivalent to Dual page copy in copy mode)
This function is used to save the opened pages of a book in order one page at a time (left page then right page).
(3) [2in1] key (see page 5-24)
(When the fax or image send function is installed, this corresponds to the 2in1 function explained in the fax and network scanner manuals. This also corresponds to the "Multi shot" function in copy mode; however, only 2in1 is possible for scan save.)
This function reduces two original pages and arranges the images on a single page in a uniform layout.
(4) [JOB BUILD] key (see page 5-8)
When you have more pages than can be placed in the document feeder at once, this function allows you to scan the pages in sets.
(5) [CARD SHOT] key (see page 5-27)
This function allows you to save the front and back side of a card on a single page (instead of saving each side as a separate file).
CALLING UP AND USING A FILE
Searching for and calling up a saved file
When calling up a file, you can enter the file name, folder name, or user name to quickly search for the file.
To search for a file, touch the [SEARCH] key in the main screen of document filing mode or in a screen that shows folders or files in a folder. A data search screen will appear.
■Procedure for searching for a file
1 Touch the [SEARCH] key in the main screen of document filing mode or in a screen that shows folders or files in a folder.
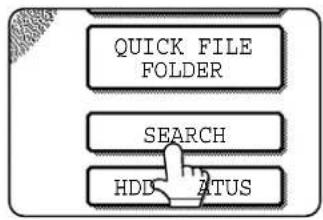
flowchart
graph TD
    A["QUICK FILE FOLDER"] --> B["SEARCH"]
    B --> C["HDD STATUS"]
If you touch the [SEARCH] key in the screen that shows the folders in the custom folder or a screen that shows the files in a folder, the [SEARCH
WITHIN CURRENT FOLDER] checkbox will appear. Select this checkbox to search for a file only in the selected folder.
2 In the data search screen, select whether you will search by [USER NAME] or [FILE OR FOLDER NAME].

●To search by user name, follow steps 3 to 6.
●To search by file name or folder name, perform step 8.
●To stop searching, touch the [CANCEL]key.
[Searching by user name]
3 Touch the [USER NAME] key.
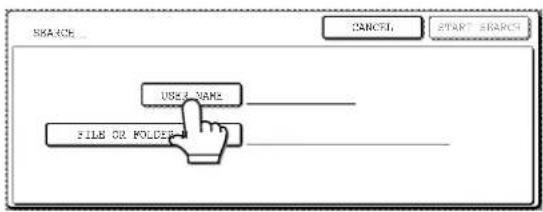
4 Touch the one-touch key of the user name that you wish to use to search for the file. If you wish to directly enter the user name, touch the [DIRECT ENTRY] key.

●The selected user name is highlighted.
- If you select the wrong user name, touch the key of the correct name.
- If you touch the [DIRECT ENTRY] key, a character entry screen will appear. Enter the user name.
See page 7-29 for the procedure for entering characters.
5 Touch the [OK] key.

You will return to the screen of step 2 and the selected user name will appear.
6 Touch the [START SEARCH] key.

7 The results of the user name search appear. Touch the desired file name or folder name.

●See page 7-5 for a list of the document filing icons.
- When a file name is touched, the operation selection screen appears. (To perform an operation using the file, go to step 5 on page 7-16.)
- When a folder name is touched, all files in the folder are displayed. Touch the desired file. (To perform an operation using the file, go to step 5 on page 7-16.)
●To change the order of file display, touch the [FILE OR FOLDER NAME] key, [USER NAME] key, or [DATE] key.
If you touch a file name or folder name that has a password, a password entry screen will appear. Enter the 5-digit password with the numeric keys.
10 The results of the file or folder name search appear. Touch the desired file name or folder name.
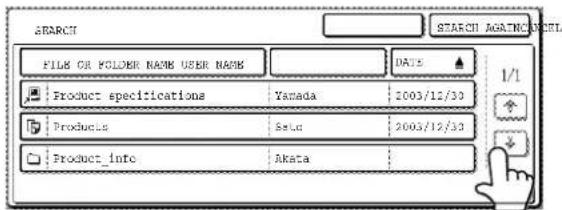
●See page 7-5 for a list of the document filing icons.
- When a file name is touched, the operation selection screen appears. (To perform an operation using the file, go to step 5 on page 7-16.)
- When a folder name is touched, all files in the folder are displayed. Touch the desired file. (To perform an operation using the file, go to step 5 on page 7-16.)
●To change the order of file display, touch the [FILE OR FOLDER NAME] key, [USER NAME] key, or [DATE] key.
If you touch a file name or folder name that has a password, a password entry screen will appear. Enter the 5-digit password with the numeric keys.
[Searching by file or folder name]
8 Touch the [FILE OR FOLDER NAME] key.

A character entry screen appears. Enter the file name or folder name to be used for the search. See page 7-29 to enter characters.
9 Touch the [START SEARCH] key.
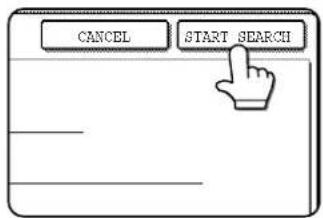
Calling up and using a saved file
A file saved with the document filing function can be called up and printed or manipulated as needed.
The following operations can be performed:
● [Print] : Print the file (page 7-17).
● [Send] : Transmit the saved file (page 7-20). The file can be transmitted by Scan to E-mail, Scan to FTP, Scan to Network Folder, fax, or Internet fax. (All of these methods require installation of the appropriate options.) (Page 1-11)
● [Property change] : Change the attribute of the saved file (page 7-21).
● [Move] : Move the file (page 7-22).
● [Delete] : Delete the file (page 7-22).
● [Detail] : Show details on the saved file (page 7-22).
■ General procedure for using a saved file
1 Press the [DOCUMENT FILING] key on the operation panel.

2 Touch the [FILE FOLDER] key or the [QUICK FILE FOLDER] key depending on where the file is saved.

●Touch the [FILE FOLDER] key if the file is saved in the main folder or the custom folder. Touch the [QUICK FILE FOLDER] key if the file is saved in the Quick File folder. If you touched the [FILE FOLDER] key, the files in the main folder or the folders in the custom folder appear. If you open the wrong folder, touch the [MAIN FOLDER] key or the [CUSTOM FOLDER] key and open the correct folder.
- If the desired file is saved in the main folder, go to step 4. If the desired file is saved in a custom folder, go to step 3.
- If you touched the [QUICK FILE FOLDER] key, the files in the Quick File folder appear. Go to step 4.
3 Touch the key of the folder that contains the desired file.

If there are more custom folder keys than can appear in one screen, touch the or keys to change screens.
If a password is set for the selected folder, a password entry screen will appear. Enter the 5-digit password with the numeric keys.
4 Touch the desired file key.
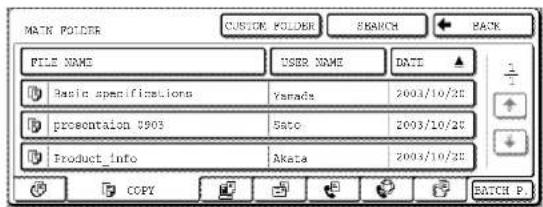
Touch the key of the file that you wish to use. (Parts of the screen that are framed in black are keys that can be touched.)
A menu screen will appear. If a password is set for the file, a password entry screen will appear. Enter the 5-digit password with the numeric keys.
5 Touch the key of the operation that you wish to perform.
(1) (2) (3)

(4) (5) (6)
(1) [PRINT] key (see below)
(2) [SEND] key (see page 7-20)
(3) [PROPERTY CHANGE] key (see page 7-21)
(4) [MOVE] key (see page 7-22)
(5) [DELETE] key (see page 7-22)
(6) [DETAIL] key (see page 7-22)
The setting screen of the selected operation appears. See the indicated page.
File selection screen
The file selection screen of the Quick File folder, Main folder, and custom folders is explained below.

(1) File keys
The stored files are displayed. An icon showing which mode the file was stored from, the file name, the user name, and the date the file was stored appear in each file key.
When a file is touched, the job setting screen appears.
(2) [File Name] key, [User Name] key, [Date] key
Use these keys to change the order of display of the file keys. When one of the keys is touched, ▲ or ▼ appears in the key.
- When ▲appears in the [File Name] key or [User Name] key, the files appear by file name or user name in ascending order.
When ▲appears in the [Date] key, the files appear in order from the oldest date.
- When appears in the [File Name] key or [User Name] key, the files appear by file name or user name in descending order.
When appears in the [Date] key, the files appear in order from the most recent date.
(3) [Back] key
Touch this key to return to the screen one level up.
(4) Select displayed files by job type.
You can select the file keys that are displayed by job type.
[ALL FILES] is initially selected.
Touch a tab to show a list of the files that were stored from that mode.
(5) [Batch Print] key
Touch this key to print all files in a folder.
For detailed information on batch printing, see 7-18.
[Print]
A saved file can be printed.
The screen below appears when the [PRINT] key is selected in the operation selection screen. To begin printing, touch the [PRINT] (7) key. Printing settings can be selected in this screen before printing. The settings that were in effect when the file was saved appear initially. The settings can be changed as needed.
NOTES
- When print settings are changed with this procedure, only the value for the number of copies is overwritten.
● The printing speed will be slower for image files saved using certain resolution settings. (See page 7-31.)
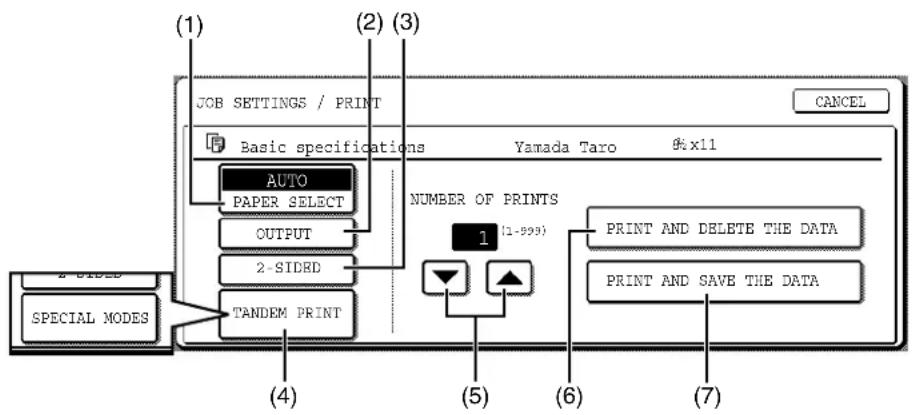
flowchart
graph TD
    A["JOB SETTINGS / PRINT"] --> B["Basic specifications"]
    B --> C["OUTPUT"]
    C --> D["2-SIDRD"]
    D --> E["TANDEM PRINT"]
    E --> F["NUMBER OF PRINTS"]
    F --> G["PRINT AND DELETE THE DATA"]
    F --> H["PRINT AND SAVE THE DATA"]
    I["SPECIAL MODES"] --> J["2-SIDRD"]
    J --> K["OUTPUT"]
    K --> L["2-SIDRD"]
    L --> M["TANDEM PRINT"]
    M --> N["1 (1-999)"]
    N --> O["PRINT AND DELETE THE DATA"]
    N --> P["PRINT AND SAVE THE DATA"]
(1) [PAPER SELECT] key
Use this key to set the paper size.
(2) [OUTPUT] key
Use this key to select sort, group or staple sort functions, and to select the output tray.
(3) [2-SIDED] key
When performing two-sided printing, use this key to select the orientation of the image on the back side of the paper. To have the front and back images oriented in the same direction, touch the [2-SIDED BOOKLET] key. To have the front and back images oriented opposite to each other, touch the [2-SIDED TABLET] key. Note that the size and orientation of the saved image may cause these keys to have the opposite effect. If neither key is selected, one-sided printing will take place.
To perform two-sided printing, the optional duplex module is necessary.
(4) [TANDEM PRINT] key
If the conditions for tandem printing are met (page 5-10), touch this key to enable tandem printing. See page 5-10 for more information.
When printing a file that was saved in copy mode, this key changes to the [SPECIAL MODES] key. The [SPECIAL MODES] include [PRINT MENU] and [TANDEM PRINT]. For information on the print menu, see page 5-30.
(5) [NUMBER OF PRINTS] setting key
Use this key to set the number of copies.
(6) [PRINT AND DELETE THE DATA] key
Touch this key to print a file and then have it automatically deleted.
(7) [PRINT AND SAVE THE DATA] key
Touch this key to print a file. The file will not be automatically deleted after printing.
■ Batch printing
All files in a folder that have the same user name and password can be printed at once.
1 Touch the [BATCH P.] key in the file list screen of document filing mode.
To print all files of a specific type of job, touch the desired job tab. The files shown on that tab can be printed as a batch.
2 Touch the [USER NAME] key.
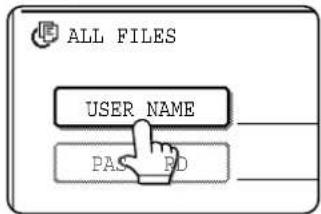
3 Touch the user name of the files that you wish to print by batch printing.

NOTE
When [SELECTION OF [ALL USERS] IS NOT ALLOWED.] checkbox and [SELECTION OF [USER UNKNOWN] IS NOT ALLOWED.] checkbox are disabled in the administrator settings, the [ALL USERS] key and [USER UNKNOWN] key can be selected.
The [ALL USERS] key can be touched to select all files in the folder (the files of all users).
The [USER UNKNOWN] key can be touched to select all files in the folder that do not have a user name.
4 If a password has been established, touch the [PASSWORD] key.
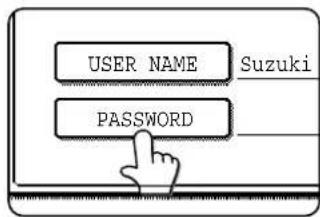
Enter the password with the numeric keys (5 to 8 digits) and touch the [OK] key. Only files that have the same password will be selected.
If you do not wish to enter a password, go to the next step.
5 To set the number of copies, touch the [CHANGE PRT.NO.] key.

If you wish to use the number of copies stored with each file, go to step 9.
6 Touch the [APPLY THE NUMBER FROM STORED SETTING OF EACH JOB] checkbox to remove the checkmark.

7 Set the number of copies with the keys.
The number of copies can be also set with the numeric keys.
8 Touch the [OK] key.

9 Touch the [PRINT AND DELETE THE DATA] key or the [PRINT AND SAVE THE DATA] key.
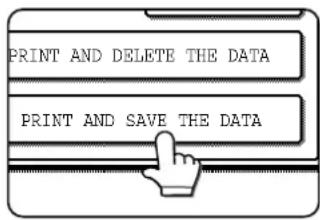
If the [PRINT AND DELETE THE DATA] key is touched, the files will be automatically deleted after printing.
If the [PRINT AND SAVE THE DATA] key is
touched, the files will be saved after printing.
If there are no files that match the search conditions, you will return to the file list screen.
NOTES
- If "Auditing mode" is enabled in the administrator settings for copy mode, print mode, or document filing mode, it will not be possible to perform batch printing of [ALL FILES].
- To display the job tab of a mode for which "Auditing mode" is enabled in the administrator settings, the account number must be entered.
■ [Send]
A saved file can be transmitted by Scan to E-mail, Scan to FTP, Scan to Network Folder, fax, or Internet fax. These transmission methods require installation of the appropriate options.
The following screen appears when the [SEND] key is touched. Select the destination and other settings required for transmission and then touch the [SEND] (10) key to transmit the file. Transmission settings include the resolution and transmission functions such as a timer setting. Change or select these settings as needed.
NOTE
Jobs that use the following special functions cannot be transmitted when called up. (The [SEND] key is grayed out in the operation selection screen.)
Pamphlet copying, covers/insert, card shot, Multi shot.
Jobs that use the following functions can be transmitted with certain restrictions when called up:
Card shot: Can be transmitted if saved by scan save or image send.
Multi shot (2in1): Can be transmitted if saved as 2in1 using a portrait original.
[Example of E-MAIL/FTP mode]
![MAIL/FTP mode] READY TO SEND CANCEL 200x200dpi RESOLUTION PDP NONE FILE FORMAT E-MAIL/FTP MODE SWITCH ADDRESS BOOK ADDRESS ENTRY ADDRESS REVIEW SEND SETTINGS SPECIAL MODES SEND (1) (2) (3) (4) (5) (6) (7) (8) (9) (10) (11)(12)](/content/2026/05/944414/images/6bec38507427227dcbcb3107c49cee8d651d53bab5d42e863c2994bd2d938131.jpg)
(1) [RESOLUTION] key
Use this key to set the resolution.
(2) [FILE FORMAT] key
The [FILE FORMAT] key appears in scan mode (Scan to E-mail, Scan to FTP, or Scan to Network Folder). Touch this key to set the file format of scan images that you transmit.
(3) [FILE NAME/USER NAME] display
This shows the file name and user name of the file to be transmitted.
(4) [ ] key (Speed dial key)
Use this key to specify a destination by entering the 3-digit number that is assigned to an e-mail address or fax number when it is stored in a one-touch key or group key.
(5) [MODE SWITCH] key
Use this key to select the transmission mode (Scan to E-mail, Scan to FTP, Scan to Network Folder, fax, or Internet fax).
(6) [CANCEL] key
Touch this key to return to the operation selection screen.
(7) [ADDRESS BOOK] key
Touch this key to display the destinations stored in the directory.
(8) [ADDRESS REVIEW] key
Touch this key to display the destinations.
(9) [SPECIAL MODES] key
Touch this key to display the special function menu. The functions that can be selected vary depending on the transmission mode:
● Scan to E-mail/FTP/Network Folder
TIMER : The transmission time can be specified.
● FAX
TIMER : The transmission time can be specified. FAX OWN ADDRESS SENDING: Your sender's information can be included on the fax pages printed out by the receiving machine.
TRANSACTION REPORT: A transaction report can be printed based on the specified conditions after a transaction ends.
- Internet FAX
TIMER : The transmission time can be specified. I-FAX OWN ADDRESS SEND: Your sender's information can be included on the Internet fax pages printed out by the receiving machine.
TRANSACTION REPORT: A transaction report can be printed based on the specified conditions after a transaction ends.
(10) [SEND] key
Touch this key after selecting transmission settings to begin transmission. (The [START] key can also be pressed to begin transmission.)
(11) [SEND SETTINGS] key
[SEND SETTINGS] key is displayed in scanner mode and Internet FAX mode.
Touch this key to set the subject and file name. In scanner mode, the sender name can also be set.
(12) [SUB ADDRESS] key or [ADDRESS ENTRY] key
● Touch this key to directly enter the destination for a Scan to E-mail, Scan to FTP, Scan to Network Folder or Internet fax transmission.
- Touch this key to enter the sub-address and passcode for an F-code fax transmission.
NOTE
See the "Operation manual (for facsimile)" and "Operation manual (for image send)" for detailed explanations of (1), (2), (3), (4), (5), (6), (7), (8), (9), (11), and (12).
■ [Property change]
Select this operation to change the attribute of a saved file. Three attributes are available: [SHARING], [PROTECT], and [CONFIDENTIAL].
The following screen appears when the [PROPERTY CHANGE] key is selected in the operation selection screen. Note the restrictions below on changing the attribute.

[Restrictions on changing the attribute]
●A file that is set to [SHARING] can be changed to [PROTECT] or [CONFIDENTIAL]. However, a [SHARING] file that is saved in the Quick File folder can only be changed to [PROTECT].
●A file that is set to [PROTECT] can be changed to [SHARING] or [CONFIDENTIAL]. However, a [PROTECT] file that is saved in the Quick File folder can only be changed to [SHARING].
●A file that is saved in the Quick File folder cannot be changed to [CONFIDENTIAL].
1 Touch the [PROPERTY CHANGE] key in the operation selection screen.
![SHARP MX-M450N - Touch the [PROPERTY CHANGE] key in the operation selection screen. - 1](/content/2026/05/944414/images/36e993f935c0e5841ccc97c7673cffbedfd802bc7c8abeb3b2fb779c6ac5ed73.jpg)
flowchart
graph TD
    A["PROPERTY CHANGE"] --> B["DETAIL"]
3 Touch the [OK] key.

2 Touch the key of the desired attribute.
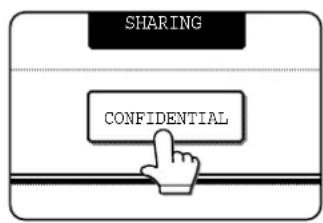
If you are changing a [SHARING] or [PROTECT] file to [CONFIDENTIAL], touch the [PASSWORD] key and enter the password.

flowchart
graph TD
    A["PROTECT"] --> B["PASSWORD"]
■ [Move]
This operation is used to move a file to a different folder.
The following screen appears when the [MOVE] key is selected.
Only [SHARING] and [CONFIDENTIAL] files can be moved. A [PROTECT] file can be moved by first using [PROPERTY CHANGE] to change the attribute to [SHARING] or [CONFIDENTIAL].
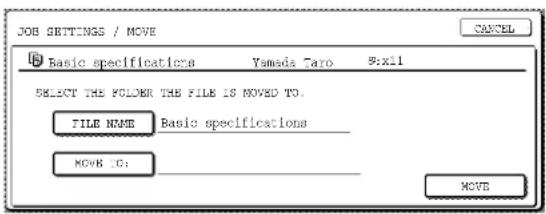
1 Touch the [MOVE TO:] key and select the folder to which you wish to move the file.
- Select the main folder or a folder in the custom folder. A file cannot be moved to the Quick File folder.
●The file name can be changed when moving a file. To change the name, touch the [FILENAME] key and enter the desired file name. See page 7-29 for the procedure for entering characters.
2 Touch the [OK] key.
3 Touch the [MOVE] key.

4 Touch the [CANCEL] key.
You will return to the operation selection screen.
■ [Delete]
This operation is used to delete the selected file. Touch the [DELETE] key in the operation select screen. A message asking you to confirm the deletion will appear. Touch the [YES] key to delete the file.
Only [SHARING] or [CONFIDENTIAL] files can be deleted. (A [PROTECT] file can be deleted by first using [PROPERTY CHANGE] to change the attribute to [SHARING].)
[Detail]
This operation is used to show detailed information on the selected file.
Touch the [DETAIL] key to display the information. The information appears on two screens. Touch the ↓ key or ↑ key to move between the two screens.
The file name can be changed in the information screen. To change the name, touch the [FILE NAME] key and enter the desired file name in the character entry screen that appears. See page 7-29 for the procedure for entering characters.
■ Calling up and manipulating a file from the job status screen
Files saved using the "FILE" and "QUICK FILE" functions appear as keys in the finished job status screen. You can view information on a file that appears in this screen and manipulate the file.
1 Press the [JOB STATUS] key.

The job status screen appears.
2 Touch the [COMPLETE] key.

The finished job screen appears.
3 Touch the key of the desired file.
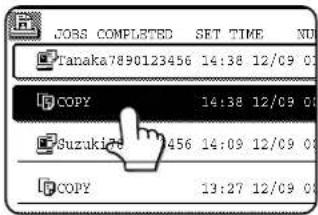
If there are more keys than can appear in one screen and the desired file does not appear, touch the ▲key or ▼key to change screens.
The touched key is highlighted.
4 To view information on the file, touch the [DETAIL] key.
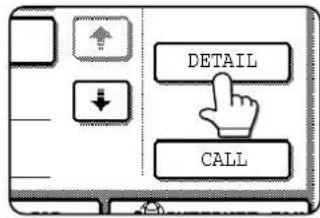
Use the keys to change screens. When you are finished, touch the [OK] key to return to the screen of step 3.

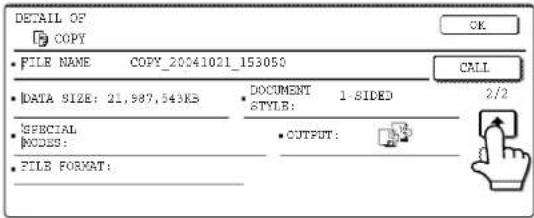
5 Touch the [CALL] key.

The operation selection screen appears.
Select and perform the desired operation as explained in "Calling up and using a saved file" (page 7-15).
keys
SYSTEM SETTINGS
Creating, editing, and deleting user names and folders
This section explains how to create, edit, and delete user names and custom folders for saving files with the document filing function. User names and custom folders are created and edited at the operation panel of the machine or in the Web page.
NOTES
● A previously stored name cannot be used when creating a new user name or custom folder. However, the same password can be used more than once.
● A password cannot be omitted when creating a user name.
■ General procedure for creating, editing, and deleting user names and folders
Follow steps 1 to 3 below to create, edit, or delete a user name or custom folder. In step 3, select the key for the specific operation that you wish to perform.
1 Press the [SYSTEM SETTINGS] key.

2 Touch the [DOCUMENT FILING CONTROL] key.

3 Touch the key of the operation that you wish to perform.
Go to the page indicated below for the selected operation.
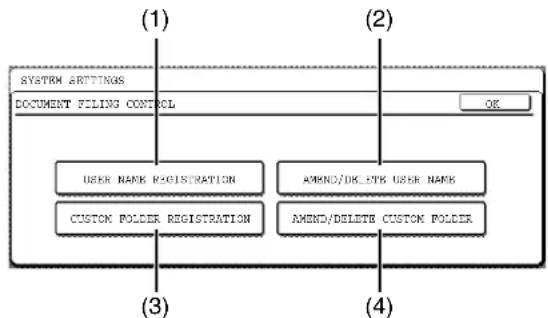
flowchart
graph TD
    A["SYSTEM SETTINGS"] --> B["DOCUMENT FILING CONTROL"]
    B --> C["USER NAME REGISTRATION"]
    B --> D["CUSTOM POLDER REGISTRATION"]
    B --> E["AMEND/DELETE USER NAME"]
    B --> F["AMEND/DELETE CUSTOM POLDER"]
    C --> G["(1)"]
    D --> H["(2)"]
    F --> I["(3)"]
    G --> J["(4)"]
(1) [USER NAME REGISTRATION] key
Program a user name. (See the next page)
(2) [AMEND/DELETE USER NAME] key
Edit or delete a user name. (See page 7-26)
(3) [CUSTOM FOLDER REGISTRATION] key
Create a custom folder. (See page 7-27)
(4) [AMEND/DELETE CUSTOM FOLDER] key
Edit or delete a custom folder. (See page 7-28)
■ Programming a user name
To program a user name, follow steps 1 and 2 on page 7-24, touch the [USER NAME REGISTRATION] key in step 3, and then follow these steps:
1 Touch the [USER NAME] key.

The lowest number that has not yet been programmed appears automatically in "No.". Touch the number to display a character entry screen and enter a user
name (maximum of 16 characters). See page 7-29 for the procedure for entering characters.
2 Touch the [INITIAL] key.
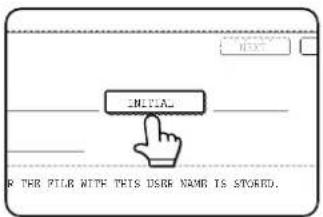
A character entry screen appears. Enter up to 10 search characters. See page 7-29 for the procedure for entering characters.
3 Touch the [PASSWORD] key.

A password cannot be omitted.
4 Set a password for the user name (enter a 5-digit password with the numeric keys).
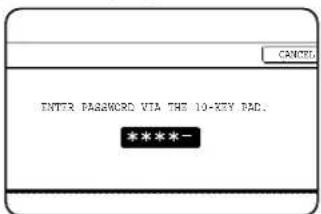
This will be the password for the user name entered in step 1. As each digit is entered, "-" changes to "*\$. If you make a mistake, press the [C] key and
then enter the correct number.
5 Touch the [OK] key.

6 If you wish to specify a folder for the user name, touch the [STORED TO:] key. If you wish to use the main folder, go to step 8.

7 The folders that have been created appear. Touch the desired folder. If you wish to create a new folder, or if no folders have been created, touch the [ADD NEW] key.
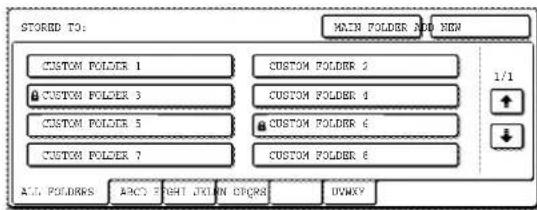
If you touched the [ADD NEW] key, program a name for the folder as explained on page 7-27. The user name programmed in step 1 is selected as the user name of the folder.
8 Touch the [EXIT] key.

You will return to the "USER NAME REGISTRATION" screen.
"REGISTRATION IS COMPLETED." will appear highlighted next to "No.".
9 To exit, touch the [EXIT] key. To program another user name, touch the [NEXT] key.
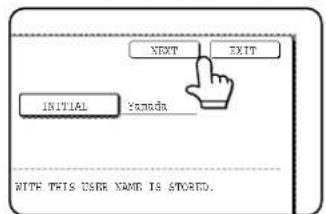
If you touched the [EXIT] key, you will return to the screen of step 3 on page 7-24. If you touched the [NEXT] key, a new user entry screen will appear. Repeat steps 1 to 9 to program a new user.
■ Editing and deleting a user name
To edit or delete a user name, follow steps 1 and 2 on page 7-24 and then follow these steps:
1 Touch the [AMEND/DELETE USER NAME] key.

2 Touch the [USER NAME] key that you wish to edit or delete.
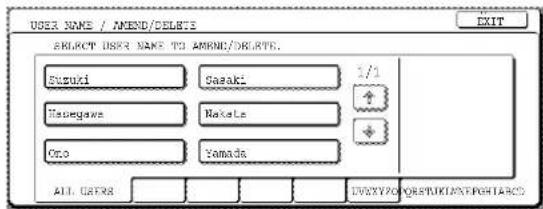
A password entry screen will appear.
3 Enter the 5-digit password with the numeric keys.
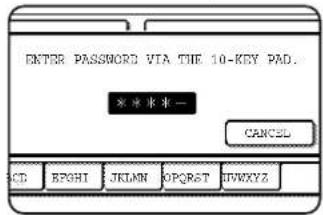
After entering the password, the following screen will appear.
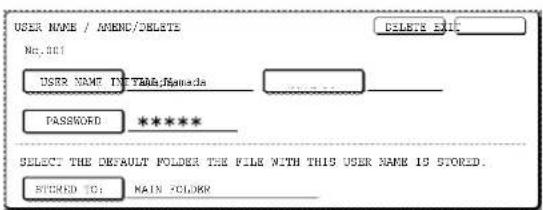
● To edit a user name, perform steps 4 and 5.
● To delete a user name, perform steps 6 and 7.
[Editing]
4 Touch the key of each item that you wish to edit (edit as explained in steps 1 to 9 in "Programming a user name" on page 7-25).

When you have finished editing the items, "REGISTRATION IS COMPLETED." will appear highlighted next to "NO.".
5 When you have finished editing the desired items, touch the [EXIT] key.
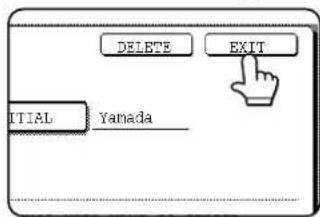
To edit another user name, repeat steps 2 to 4.
To exit, touch the [EXIT] key in the screen of step 2.
NOTE
When a user name is changed, the change is not updated to any previously saved data (files or folders).
[Deleting]
6 Touch the [DELETE] key.
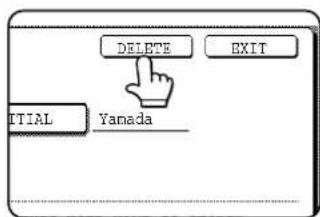
7 Touch the [YES] key.

You will return to the screen of step 2. To delete another user name, repeat steps 2, 3 and 6. To exit, touch the [EXIT] key in the screen of step 2.
■ Creating a custom folder
Up to 500 custom folders can be created. When no further folders can be created, delete unneeded folders (page 7-28) and then create a new folder. A password can be omitted when creating a folder. To create a custom folder, follow steps 1 and 2 on page 7-24, touch the [CUSTOM FOLDER REGISTRATION] key in step 3, and then follow the steps below.
1 Touch the [FOLDER NAME] key.
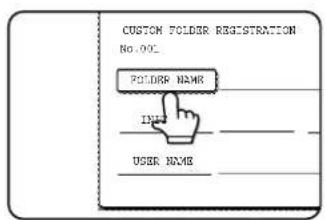
The lowest number that has not yet been programmed appears automatically in "No.". Touch the number to display a character entry screen and enter a folder
name (maximum of 28 characters). See page 7-29 for the procedure for entering characters.
2 Touch the [INITIAL] key.

A character entry screen appears. Enter up to 10 search characters. See page 7-29 for the procedure for entering characters.
3 If you wish to set a password for the new folder, touch the [PASSWORD] key.

A password can be omitted.
If you are omitting a password, go to step 6.
4 Set a password for the folder (enter a 5-digit password with the numeric keys).

This will be the password for the folder name entered in step 1.
5 Touch the [OK] key.
6 Touch the [USER NAME] key.

You will select a user name that will be associated with the folder name you are programming.
Selection of a user name cannot be omitted.
7 The programmed user names appear. Touch the desired user name. If you do not wish to use any of the user names that appear, touch the [ADD NEW] key to program a new user name.

When you touch a user name, a password entry screen appears.
If you touched the [ADD NEW] key, program a user name as explained on page 7-25. The folder name programmed in step 1 will be selected as the folder for the user.
8 Enter the 5-digit password of the selected user name with the numeric keys.
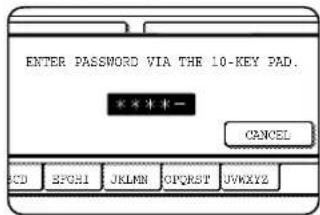
9 Touch the [OK] key.

10 To exit, touch the [EXIT] key. To create another folder, touch the [NEXT] key.

create a new folder.
If you touched the [EXIT] key, you will return to the screen of step 3 on page 7-24. If you touched the [NEXT] key, a new folder screen will appear. Repeat steps 1 to 10 to
■ Editing/deleting a custom folder
To edit a previously created folder (change the folder name, initial, password, or user name), or to delete a folder, follow steps 1 and 2 on page 7-24 and then follow the steps below.
When deleting a folder...
A folder that contains files cannot be deleted. Either move the files to a different folder or delete them before deleting the folder.
: [MOVE] (see page 7-22): [DELETE] (see page 7-22)
1 Touch the [AMEND/DELETE CUSTOM FOLDER] key.

2 Touch the [FOLDER NAME] key that you wish to edit or delete.

If a password has been set for the folder, a password entry screen will appear. Enter the correct 5-digit password with the numeric keys.
3 Edit or delete the folder.

●To edit the folder, perform steps 4 and 5.
●To delete the folder, perform steps 6 and 7.
●To exit, touch the [EXIT] key.
[Editing]
4 Touch the key of each item that you wish to edit (edit as explained in steps 1 to 10 of "Creating a custom folder" on page 7-27).

After editing the items and returning to the screen of step 3, "REGISTRATION IS COMPLETED." will be highlighted to the right of "No.".
To stop using a password, touch the [PASSWORD] key and then touch the [OK] key without entering anything for the password. [-] will appear and the password will be canceled.
5 When you have finished editing the items, touch the [EXIT] key.
To edit another folder, repeat steps 2 to 5.
[Deleting]
6 Touch the [DELETE] key.

7 Touch the [YES] key.

You will return to the screen of step 2.
To delete another folder, repeat steps 2, 6, and 7. To exit, touch the [EXIT] key in the screen of step 2.
ENTERING CHARACTERS
To enter or edit characters in setting screens such as auto dial key programming screens, follow the steps below. Characters that can be entered are alphabetical characters, special characters, numbers, and symbols.
■ Entering alphabetical characters
(Example: Sharp äÄ)
1 Touch the [S] key.
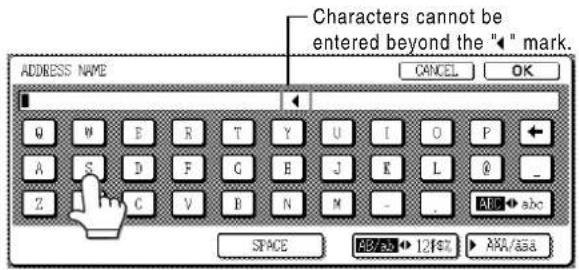
To switch between upper case and lower case, touch the [ABC ◆ abc] key. When ABC is highlighted, upper case letters are entered.
2 Touch the [ABC ◀abc] key.

3 Touch the [h] key, [a] key, [r] key, and [p] key.
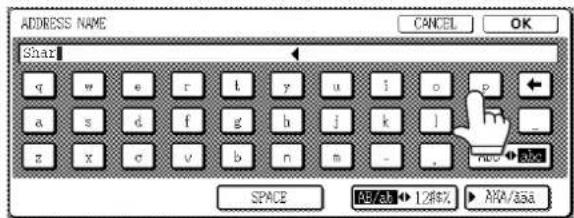
If you make a mistake, touch the ⚠key to move the cursor (■ back one space and then enter the correct character. You can also press the [AB/ab ◆ 12#\$%] key during entry to enter a number or symbol.
4 Touch the [SPACE] key.
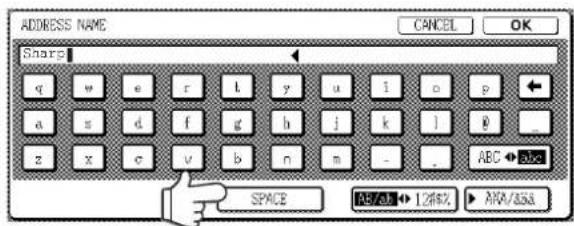
The cursor (■) moves forward and a space is entered.
5 Touch the [▶ÄÄÄ/äää] key.
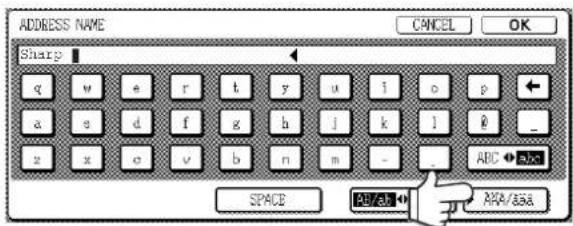
6 Touch the [ä] key.
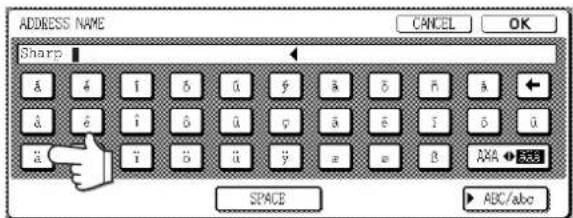
To switch between upper case and lower case, touch the [ÄÄÄ ◆ ääå] key. When ääå is highlighted, lower case letters are entered.
7 Touch the [ÄÄÄ◄ãäå] key.

8 Touch the [Ä] key.

You can press the [ABC/abc] key during entry to return to alphabetical character entry. You can also enter numbers and symbols.
9 When finished, touch the [OK] key.

You will exit the character entry screen and return to the programming screen. If you touch the [CANCEL] key, you will return to the programming screen without storing the entered characters.
■Entering numbers and symbols
1 Touch the [AB/ab ◀12#\$%] key.

When the characters "12#\$%" are highlighted, number/symbol entry mode is selected.
2 Enter the desired number or symbol.
Numbers and symbols that can be entered are as follows:
Screen 1/2
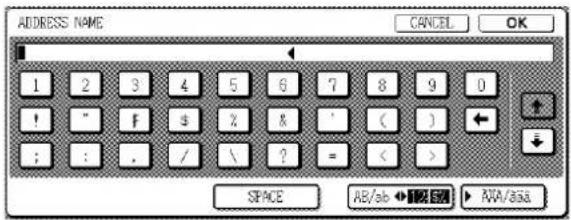
Screen 2/2
![ADDRESS NAME CANCEL OK SPACE AB/ab ← [ ] ( ) ARA/ASA](/content/2026/05/944414/images/b9a6a5a3af0feac0f9193422e1f93be852f5481deb019686f9b47742b3f4fe93.jpg)
Change screens by touching the key or key displayed in the screen. If you make a mistake, touch the key to move the cursor () back one space and then enter the correct character.
You can continue touching keys to enter characters. You can also touch another character type selection key ([▶ÄÄÄ/ääå] key or [AB/ab ◀ 12#\$%] key) to enter characters other than numbers and symbols.
3 When you have finished entering characters, touch the [OK] key.
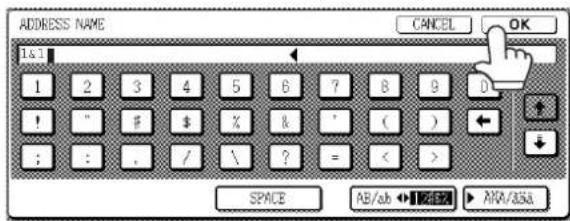
You will exit the character entry screen and return to the programming screen. If you touch the [CANCEL] key, you will return to the programming screen without storing the entered characters.
NOTE
The following symbols cannot be used when entering a file name or folder name.
| \ | ? | / | " | ; | : | |
| < | > | ! | * |
Depending on the environment of use of the OS, it may not be possible to use spaces and the symbols indicated below.
For example, hyperlinks will not operate correctly or nonsense characters may appear.
$$ \% ^ {\prime} () + -. = @ [ ] ^ {\prime} {} $$
TROUBLESHOOTING
This section explains problems frequently encountered when using the document filing function. If you experience any difficulty, refer to the following table. For information on general machine problems, printer problems, fax problems, and network scanner problems, please see the troubleshooting sections of the appropriate manuals.
| Problem Check | Cause and solution | |
| A saved file has disappeared. | Was the file called up and then printed by touching the [PRINT AND DELETE THE DATA] key? | A file that is printed using the [PRINT AND DELETE THE DATA] key is automatically deleted after being printed. To print a file without deleting it, use the [PRINT AND SAVE THE DATA] key. |
| A file cannot be deleted. | Is the file's attribute set to [PROTECT]? A file | cannot be deleted when its attribute is set to [PROTECT]. Change the attribute to [SHARING] and then delete the file. |
| A file's attribute cannot be set to [CONFIDENTIAL]. | Is the file in the main or custom folder? A file | in the Quick File folder cannot be set to [CONFIDENTIAL]. Move the file to a different folder or set it to [PROTECT]. |
| A file's attribute cannot be changed to [PROTECT]. | Is the file set to [CONFIDENTIAL]? A | file cannot be simultaneously set to [CONFIDENTIAL] and [PROTECT]. If set to [CONFIDENTIAL], use [PROPERTY CHANGE] (page 7-21) to change the attribute to [PROTECT]. |
| A name in the Quick File folder is cut off. | Was the name programmed in the advanced transmission settings? | If the name was programmed in the advanced transmission settings before the file was saved in the Quick File folder, that name will be used. However, if the name is longer than the maximum name length of the Quick File folder (30 characters), the excess characters will be discarded. |
| Resolution settings are not possible. | Was the file saved at low resolution? A saved | file cannot be transmitted at a resolution higher than the resolution at which it was saved. |
| A file name cannot be stored or changed. | Have you entered prohibited characters in the file name? | Certain characters (symbols) cannot be used in file names. See "ENTERING CHARACTERS" (entering numbers and symbols) on page 7-29. |
| A custom folder name cannot be stored or changed. | Have you entered prohibited characters in the folder name? | Certain characters (symbols) cannot be used in folder names. See "ENTERING CHARACTERS" (entering numbers and symbols) on page 7-29. |
| The printing speed of a saved file is slow. | The file was saved using one of the following resolution settings:• 200 x 200 dpi resolution.• STANDARD (200 x 100 dpi) or FINE (200 x 200 dpi) | When a file is saved using one of the resolutions setting at left, the printing speed will be slower than when other resolution settings are used. |
| Black dots appear when a file that was saved with the document filing function is printed. | Was the file saved at other than the following resolutions?• 600 x 600 dpi• 600 x 600 dpi and HALF TONETo check the resolution of the saved file, touch the [DETAIL] key in step 5 on page 7-16. | This problem can be alleviated by setting the resolution to 600x600dpi when saving a file with scan save.The problem can be further alleviated by selecting HALF TONE after setting the resolution to 600x600dpi, as light images will be printed lightly. |
CHAPTER 8
SPECIFICATIONS
This chapter contains useful information about the machine.
Page
SPECIFICATIONS....8-2
LIST OF COMBINATION OF PERIPHERAL DEVICES.... 8-4
INDEX 8-5
SPECIFICATIONS
| Type Console | |
| Print system Electrophotographic system | |
| Photoconductive type OPC drum | |
| Developer system Dry-type two-component magnetic brush development | |
| Fusing system Heater roller | |
| Resolution Scan: 600 x 600 dpi, output: 600 x 600 dpi | |
| Gradation 256 levels | |
| Originals Sheets, bound documentsMaximum size: 11" x 17" or A3 | |
| Copy paper Plain paper and special papers | |
| Copy sizes Max. 11" x 17" or A3, min. 5-1/2" x 8-1/2"R or A5R, PostcardImage loss: Max 21/64" or 8 mm (leading edge and trailing edge in total), max. 21/64" or 8 mm (along all other edges in total) | |
| Warm-up time | 80 seconds or less |
| First-copy time | MX-M350N/MX-M350U : 4.9 seconds or less*MX-M450N/MX-M450U : 4.4 seconds or less** Conditions: The document glass is used and A4 size paper is fed horizontally from the machine tray (tray 1). |
| Copy ratio | Variable: 25 to 400% in 1% increments, total 376 stepsFixed presets: 25%, 50%, 64%, 77%, 100%, 121%, 129%, 200% and 400% for inch system, 25%, 50%, 70%, 81%, 86%, 100%, 115%, 122%, 141%, 200% and 400% for AB system. |
| Continuous copy | 999 copies |
| Dimensions | 33-1/16" (W) x 26-11/64" (D) x 44-23/64" (H)(840 mm (W) x 665 mm (D) x 1127 mm (H))(including automatic document feeder) |
| Weight | Approx. 241.0 lbs. (Approx. 109.3 kg)(when the duplex module/bypass tray is installed) |
| Overall dimensions | 40-37/64" (W) x 26-11/64"(D) (1031 mm (W) x 665 mm (D))(when the duplex module/bypass tray is installed) |
| Required power supply | AC120V±10%, 60Hz |
| Power consumption | 1.44 kW |
| Operating conditions | Temperature: 50°F to 86°F (10°C to 30°C)Humidity: 20% to 85% |
Automatic document feeder
| Name | B/W scanner module/DSPF |
| Original size 11" x 17" to 5-1/2" x 8-1/2" (A3 to A5) | |
| Weight of originals | 14 to 34 lbs. (50 to 128 g/m2) |
| Number of originals | Maximum 50 sheets (maximum 30 11" x 17" or 8-1/2" x 14" (A3 or B4) size sheets*), stack height must not exceed the heights indicated below.14 to 21 lbs. (50 to 80 g/m2): 17/64" (6.5 mm) or less21 to 34 lbs. (80 to 128 g/m2): 13/64" (5 mm) or less |
| Power supply | Supplied from machine |
| Dimensions | 32-7/16" (W) x 25-33/64" (D) x 7-31/64" (H) (824 mm (W) x 648 mm (D) x 190 mm (H)) |
| Weight | Approx. 46.8 lbs. (21.2 kg) |
* Maximum of 15 sheets when originals are heavier than 28 lbs. (105 g/m^2) . If the number of placed sheets exceeds this, scanning of the originals will not take place correctly and an extended image may result.
Some discrepancies may exist in the illustrations and content due to improvements to the machine.
Continuous copying speed (when the offset function is not used)
| MX-M350N/MX-M350U MX-M450N/MX-M450U | ||
| Copy paper size 100% / Reduced / Enlarged | ||
| 11" x 17" (A3) 17 copies/min. | 20 copies/min. | |
| 8-1/2" x 14" (B4) 20 copies/min. | 22 copies/min. | |
| 8-1/2" x 11" (A4) 35 copies/min. | 45 copies/min. | |
| 8-1/2" x 11"R (A4R) 25 copies/min. | 30 copies/min. | |
| 7-1/4" x 10-1/2" (B5) 35 copies/min. | 45 copies/min. | |
| 7-1/4" x 10-1/2"R (B5R) 25 copies/min. | 30 copies/min. | |
| 8-1/2" x 5-1/2"R (A5R) 35 copies/min. | 45 copies/min. | |
Center tray specifications
| Output method Face-down output | |
| Maximum number of sheets(20lbs. (80g/m2)/recommended paper) | 400 sheets* |
| Paper type Plain paper and special paper | |
* The maximum number of pages that can be held varies depending on ambient conditions in the installation location, the type of paper, and the storage conditions of the paper.
Acoustic Noise Emission (measurement according to ISO7779)
| Printing mode Standby mode | ||
| Sound power level LwA 6.8B or less | 5.0B or less | |
Emission Concentration (measurement according to RAL-UZ85: Edition Mar. 2002)
| Ozone | 0.02 mg/m3 or less |
| Dust | 0.075 mg/m3 or less |
| Styrene | 0.07 mg/m3 or less |
LIST OF COMBINATION OF PERIPHERAL DEVICES
The table below shows the possible system configurations. Some devices require the installation of others (B) to be functional and some cannot be installed together (A).
| Related to paper feed unit | Multi purpose drawer | Stand/3 x 500 sheet paper drawer | Stand/MPD & 2000 sheet | Duplex module/bypass tray | Duplex module | Saddle stitch finisher | Finisher | Mail-bin stacker | Exit tray | Upper exit tray extension | Punch unit |
| Multi purpose drawer | - | × | × | × | × | ||||||
| Stand/3 x 500 sheet paper drawer | × | - | × | ||||||||
| Stand/MPD & 2000 sheet paper drawer | × | × | - | ||||||||
| Duplex module/bypass tray | O*1 | - | × | × | |||||||
| Duplex module | O*1 | - | |||||||||
| Output units | |||||||||||
| Saddle stitch finisher | × | O*1 | × | ○ | - | × | × | ||||
| Finisher | O*1 | × | - | × | × | ||||||
| Mail-bin stacker | O*1 | × | - | ||||||||
| Exit tray | O*1 | × | - | × | |||||||
| Upper exit tray extension | × | × | - | ||||||||
| Punch unit | × | O*1 | × | ○ | ○ | × | × | - | |||
O = (A) and (B) must be installed together.
O^*1 = (A) requires installation of one of the (B) units.
X = Cannot be installed together.
INDEX
[★key.... 1-13
[#/P] key 1-13
■ Numerics
1-sided copy
-Automatic document feeder 4-7
-Document glass 4-11
2in1 5-24,7-12
2-sided copy....1-3, 4-10, 4-13
A
LOGOUT 1-13
[LOGOUT] key.... 1-13, 1-18
Acceptable originals 4-2
Account number 1-18
Additional fax memory.... 1-12
Address control 2-12
Adjusting the exposure.... 1-3, 4-14
Administrator settings.... 2-12
All custom setting list.... 2-14
Applicable plain paper.... 2-4
Applicable special media.... 2-4
Application communication module.... 1-12, 3-25
Application integration module 1-12
Applicable special media.... 2-4
Attributes 7-3
Auditing mode 1-18
Auto image 4-15
Auto power shut-off mode 1-8
Automatic copy image rotation 4-4
Automatic document feeder 1-9, 2-22, 4-2
-1-sided copies.... 4-7
-Acceptable originals.... 4-2
-Automatic two-sided copying 4-10
-Misfeed original.... 2-22
-Setting originals 4-3
-User maintenance.... 6-2
Automatic exposure adjustment.... 4-14
Automatic selection 4-15
Automatic two-sided copying
-Automatic document feeder 4-10
-Document glass 4-13
Automatic two-sided printing 2-4
B
B/W reverse....1-6, 5-2, 5-29
Barcode font kit 1-12
Binding change 4-10, 4-13
Book copy 1-5, 5-2, 5-26
Book original 5-5
Bypass tray....1-9, 2-19, 3-2, 4-20
Bypass tray extension 3-3
■ C
[C] key 1-13, 7-4
[CA] key.... 1-13, 7-4
Call for service 2-23
[CALL] key.... 1-16
Calling up and using a file 7-13
Calling up and using a saved file.... 7-15
-Delete....7-22
-Detail....7-22
-Move 7-22
-Print....7-17
-Property change 7-21
-Send....7-20
Card shot....1-6, 5-2, 5-27, 7-12
Cartridge lock lever 1-10
Center erase.... 5-4
Center tray.... 1-9, 4-9
[CENTER TRAY] key.... 3-18
Changing the paper size in paper tray 2-2
Charger cleaner 6-2
Clear all key.... 1-13, 7-4
Clear key 1-13, 7-4
Clock 2-12
Confidential 7-3
Contents....0-6 to 0-7
Continuous copying speed 8-3
[COPY] key.... 1-13
Covers/inserts 1-5, 5-2, 5-12
Creating a custom folder 7-27
Custom folder....7-3, 7-24, 7-27 to 7-28
D
Data security kit.... 1-12
Date print....1-6, 5-30, 5-33
Default settings.... 2-14
[DETAIL] key.... 1-16
Display contrast.... 2-14
Display switching keys.... 1-16
Disposal of hole punch scrap 3-21
Document feeder tray.... 4-2, 4-3
Document filing control.... 2-12
Document filing function....1-8, 7-1
Document filing user / folder list 2-14
[DOCUMENT FILING] key 1-13, 7-4
Document glass
-1-sided copies.... 4-11
-Automatic two-sided copying 4-13
-Placing originals.... 4-3
-User maintenance.... 6-2
Dual page copy 1-4, 5-2, 5-5
DUAL PAGE SCAN 7-12
Duplex module .....1-9, 1-11, 2-19, 3-2
Duplex module/bypass tray 1-11, 3-2
Duplex module side cover 1-10
E
Editing and deleting
-Custom folder.... 7-28
-User names....7-26
Energy saving features.... 1-8
Energy Star guidelines 1-8
Enlargement.... 4-15
Entering characters ......7-29 to 7-30
Erase....1-4, 5-2, 5-4, 7-12
Examples of covers and inserts .... 5-17 to 5-22
-Covers.... 5-18 to 5-21
-Inserts 5-22
External account module.... 1-12, 3-27
Exit tray 1-9, 1-11, 3-2
■ F
Facsimile expansion kit 1-12
Fax data receive/forward.... 2-12
[FAX JOB] key.... 1-16
Features 1-3
[FILE FOLDER] key.... 7-5
Finisher 1-11, 3-7
Finisher compiler.... 3-11
Flash ROM kit 1-12
Front cover 1-9, 3-5, 3-14
Fusing unit....1-10, 2-17, 2-18
Fusing unit pressure adjusting levers.... 2-9
G
General procedure for using special functions..... 5-2
Grayed out.... 1-14
Group 1-3, 3-8, 3-18, 4-9
[GROUP] key.... 3-9, 3-18
■ H
[HDD STATUS] key....7-5
Heavy paper.... 2-3, 2-4
Highlighted 1-14
Hole punching 1-8, 3-17
■
Icon 1-14, 5-17, 7-5
[IMAGE SEND] key 1-13
Information 2-17
Installation requirements 0-3
Interior.... 1-10
Internet fax expansion kit 1-12
[INTERNET-FAX] key 1-16
Interrupting a copy run 1-7, 5-44
■ J
Job build....1-5, 5-2, 5-8, 7-12
Job programs ....1-6, 5-42 to 5-43
-Calling up.... 5-43
-Deleting.... 5-43
-Storing 5-42
Job status screen.... 1-15
[JOB STATUS] key 1-13
■K
Keyboard select.... 2-14
■ L
Labels.... 2-3
Landscape.... 1-2
Latch 3-7
List print.... 2-14
Loading paper 2-2
-Bypass tray 3-3
-Multi purpose drawer 2-8
-Stand/3 x 500 sheet paper drawer.... 2-10
-Stand/MPD & 2000 sheet paper drawer ...... 2-11
-Tray 1 2-2
■M
Mail bins 3-5
Mail-bin stacker 1-11, 3-5
Main charger 6-2
Main features....1-3 to 1-8
Main folder.... 7-3
Main screen.... 5-2
Manual exposure adjustment 4-14
Manual selection 4-16
Margin shift....1-4, 5-2, 5-3
Meaning of "R" 1-2
Mirror image 1-6, 5-2, 5-28
Misfeed.... 2-17 to 2-22, 3-6, 3-12, 3-22 to 3-23
Misfeed in the paper feed area.... 2-20 to 2-21
Misfeed original 2-22
Misfeed removal 2-17
-Automatic document feeder 2-22
-Bypass tray 2-19
-Duplex module 2-19
-Finisher 3-12
-Saddle stitch finisher.... 3-22
-Stand/3 x 500 sheet paper drawer.... 2-21
-Transport area, fusing area, and exit area ..... 2-18
-Tray 1 2-20
Mode select key 1-15
Mode select keys....1-13, 7-4
Multi purpose drawer....1-9, 1-11, 2-3, 2-8
Multi shot....1-5, 5-2, 5-24
■ N
Network expansion kit 1-12
Network scanner expansion kit 1-12
Non-standard sizes 2-3, 2-5, 2-6, 4-5
Number of pages printed.... 1-18
number of pages transmitted (scanned)...... 1-18
Numeric keys....1-13, 7-4
10
Offset....1-7, 3-8, 3-15
[OFFSET] key.... 3-9, 3-18
Offset tray.... 3-7, 3-14
Operation panel.... 1-9, 1-13
-Document filing function.... 7-4
Original guides 4-3
Original orientation.... 3-16, 4-4
Original size 4-2, 4-5, 4-6
Output 3-9, 3-18, 4-9, 4-12
Output tray.... 4-9
P
Page numbering....1-7, 5-30, 5-35 to 5-38
Pamphlet copy....1-4, 5-2, 5-6
Paper curled.... 2-24
Paper tray.... 1-9, 2-20
Paper tray settings 2-5, 2-14
Part names
-Duplex module.... 3-2
-Exterior 1-9
-Finisher 3-7
-Interior.... 1-10
-Mail-bin stacker.... 3-5
-Operation panel 1-13, 7-4
-Peripheral devices.... 1-11
-Saddle stitch finisher.... 3-14
Password.... 7-8
Peripheral devices.... 1-11, 1-12
Photo.... 4-14
Photoconductive drum 1-10, 6-2
Placing originals.... 4-3
Plain paper 2-3 to 2-4
Portrait.... 1-2
Postcards 2-8
Power 1-17,2-23
Power switch 1-9, 1-17
Preheat mode.... 1-8
Preset copy ratios.... 4-16
[PRINT JOB] key.... 1-16
Print menu.... 5-30 to 5-41
-Date 5-33
-Stamp 5-34
-Page numbering.... 5-35
-Text 5-39
PRINT mode indicators.... 1-13
Printer condition 2-12
Printer test page.... 2-14
PS3 expansion kit 1-12
Punch module 3-15
[PUNCH] key.... 3-18
■Q
Quick File folder 7-3
[QUICK FILE FOLDER] key 7-5
[READ-END] key.... 4-12
■ R
Reduction 4-15
Reduction/Enlargement.... 1-4, 4-15
Replacing the toner cartridges 2-15
Right output tray.... 1-11
Rotation copying 4-4
■s
Saddle stitch....1-7, 3-14, 3-17
Saddle stitch finisher.... 1-11, 3-14
Saddle stitch tray.... 3-14
[SADDLE STITCH] key 3-18
Saving a document image file 7-6 to 7-12
-Filing 7-7 to 7-8
-Print jobs.... 7-9
-Quick file 7-6
-Scan save 7-10 to 7-11
[SCAN TO] key.... 1-16
[SCAN TO HDD] key 7-5
[SEARCH] key 7-5
Searching for a file 7-13 to 7-14
Selecting a function.... 1-14
Selecting the exposure level.... 4-14
Selecting the exposure mode.... 4-14
Selecting the output tray.... 4-9
Sender control.... 2-12
Sender control list 2-14
Sending address list.... 2-14
Setting the paper size.... 2-5 to 2-6
Setting the paper type 2-5 to 2-7
Sharing.... 7-3
Sharp OSA 3-25
Side cover latch.... 1-10
Sort....1-3, 3-8, 3-15, 4-9
[SORT] key.... 3-9, 3-18
Special modes (Copier operation).... 5-2
Special modes (Document filing function)...... 7-12
Special paper 2-3 to 2-4
Special papers 4-20
Specifications 8-2 to 8-3
-Duplex module 3-2
-Finisher 3-7
-Mail-bin stacker.... 3-5
-Punch module 3-15
-Saddle stitch finisher.... 3-14
-Stand/3 x 500 sheet paper drawer.... 2-10
-Stand/MPD x 2000 sheet paper drawer ...... 2-11
Specifications of paper trays 2-3
Stamp....1-6, 5-30, 5-34
Stand/3 x 500 sheet paper drawer 1-9, 1-11, 2-3, 2-10
Stand/MPD & 2000 sheet paper drawer .1-9, 1-11, 2-3, 2-11
Standard sizes.... 1-2, 2-4
Standard sizes in both the inch and AB systems ... 1-2
Staple box 3-7
Staple cartridge.... 3-10, 3-14
Staple cartridge replacement 3-10, 3-19
Staple jam removal....3-11, 3-20 to 3-21
Staple sort 1-7, 3-8, 3-16
[STAPLE SORT] key.... 3-9, 3-18
Stapler compiler 3-14
Stapler section 3-14
Stapling positions 3-8, 3-16
[START] key.... 1-13
[STOP/DELETE] key 1-16
Storage of supplies.... 2-16
System settings....2-12, 7-24
[SYSTEM SETTINGS] key 1-13, 7-4
■T
Tandem copy....1-5, 5-2, 5-9
Text....1-7, 4-14, 5-30, 5-39
Text/photo.... 4-14
The machine does not operate 2-23, 6-3
Toner cartridge 1-10, 2-15
Top cover....3-5, 3-7, 3-14
Top tray.... 3-5, 3-7
Total count.... 2-14
Total number of originals 4-2
Touch panel....1-13, 1-14, 7-4, 7-5
Transparency film ......2-3, 2-4, 2-10, 4-20, 5-23
Transparency inserts....1-5, 5-2, 5-23
Tray.... 1-9
Troubleshooting
-Copier operation 6-3
-Document filing function.... 7-31
-Duplex module.... 3-4
-Finisher 3-13
-General information 2-23 to 2-25
-Saddle stitch finisher.... 3-24
Types and sizes of paper 2-3 to 2-4
Types and sizes of paper that can be used.... 2-3
■ U
Upper exit tray extension.... 1-9, 1-11
Upper paper output area.... 1-9
User maintenance.... 6-2
User name.... 7-24 to 7-26
■ w
Warming up.... 2-23
■ X
XY Zoom 1-4, 4-18
■Z
Zoom 4-16
NOTICE
BE SURE TO ASK YOUR AUTHORIZED SHARP DEALER ABOUT THE WARRANTY THAT YOUR SELLING DEALER EXTENDS TO YOU. In order to assure you, the end-user, of warranty protection, Sharp extends a limited warranty to each of its authorized dealers and, in turn, requires each of its authorized dealers to extend its own warranty to you on terms that are no less favorable than those given to the dealer by Sharp. You should be aware, however, that Sharp does not itself extend any warranties, either express or implied, directly to you, the end-user and no one is authorized to make any representations or warranties on behalf of Sharp. Specifically, SHARP DOES NOT EXTEND TO YOU, THE END-USER, ANY EXPRESS WARRANTY OR ANY IMPLIED WARRANTY OF MERCHANTABILITY, FITNESS FOR USE OR FITNESS FOR ANY PARTICULAR PURPOSE IN CONNECTION WITH THE HARDWARE, SOFTWARE OR FIRMWARE EMBODIED IN, OR USED IN CONJUNCTION WITH THIS PRODUCT. Sharp is not responsible for any damages or loss, either direct, incidental or consequential, which you, the end-user, may experience as a result of your purchase or use of the hardware, software or firmware embodied in or used in conjunction with this Product. Your sole remedy, in the event that you encounter any difficulties with this Product, is against the authorized dealer from which you purchased the Product. In the event that this authorized dealer does not honor its warranty commitments, please contact the General Manager, Business Products Group, Sharp Electronics Corporation, Sharp Plaza, Mahwah, NJ 07430-1163, so that Sharp can try to help assure complete satisfaction of all the warranty rights to which you are entitled from the authorized dealer.
In the event that this authorized dealer does not honor its warranty commitments, please contact the General Manager, Business Products Group, Sharp Electronics Corporation, Sharp Plaza, Mahwah, NJ 07430-1163, so that Sharp can try to help assure complete satisfaction of all the warranty rights to which you are entitled from the authorized dealer.
SHARP®
SHARP ELECTRONICS CORPORATION
Sharp Plaza, Mahwah, New Jersey 07430-1163.
www.sharpusa.com
SHARP ELECTRONICS OF CANADA LTD.
335 Britannia Road East, Mississauga, Ontario, L4Z 1W9
SHARP CORPORATION
This manual has been printed using a vegetable-based soy oil ink to help protect the environment.
Printed on 100% post-consumer recycled paper

PRINTED IN CHINA
2007C KS1
TINSE3659FCZ1
ADMINISTRATOR SETTINGS GUIDE
LASER PRINTER
This manual explains settings for use by the administrator of the machine.
Page
• PURPOSE OF THE ADMINISTRATOR SETTINGS 1
• ADMINISTRATOR SETTINGS LIST 3
• USING THE ADMINISTRATOR SETTINGS 4
- GENERAL SETTINGS 7
• COPY SETTINGS 16
• DOCUMENT FILING
SETTINGS 18
• TO THE ADMINISTRATOR OF THE MACHINE 22
Be sure to become thoroughly familiar with this manual to gain the maximum benefit from the product.
Before installing this product, be sure to read the installation requirements and cautions sections of the "Operation manual (for general information and copier operation)".
Be sure to keep all operation manuals handy for reference including this manual, the "Operation manual (for general information and copier operation)" and operation manuals for any optional equipment which has been installed.
Contents page
●PURPOSE OF THE ADMINISTRATOR SETTINGS ....1
●ADMINISTRATOR SETTINGS LIST ....3
●USING THE ADMINISTRATOR SETTINGS....4
●GENERAL SETTINGS ....7
●COPY SETTINGS....16
●DOCUMENT FILING SETTINGS....18
●TO THE ADMINISTRATOR OF THE MACHINE ....22
The display screens, messages, and key names shown in the manual may differ from those on the actual machine due to product improvements and modifications.
PURPOSE OF THE ADMINISTRATOR SETTINGS
The administrator settings are configured by the administrator of the machine. These settings are used to enable or disable functions to suit the needs of your workplace.
This manual explains settings related to general use of the machine, settings for the copy function, and settings for the document filing function*. For administrator settings related to the printer function, fax function, network scanner function, and Internet fax function, see the following manuals:
●Printer ..... Operation manual (for printer), chapter 6
●Fax.... Operation manual (for facsimile), chapter 8
●Network scanner / Internet fax.... Operation manual (for image send), chapter 8
To access the administrator settings, the administrator password must be entered.
* Can only be used on the MX-M350N/MX-M450N, or when the document filing function has been added.
General settings
These settings are used to enable number-based auditing mode, adjust power consumption, manage the machine and peripheral devices, specify the network connection method, and configure security parameters.
Auditing mode can be enabled separately for the copy, printer, fax/Internet fax/network scanner, and document filing* functions. When auditing mode is enabled for a function, a valid account number must be entered in order to use the function.
* Can only be used on the MX-M350N/MX-M450N, or when the document filing function has been added.
When auditing mode is enabled for the printer function, an account number is entered at the user's computer when the print command is selected. (Depending on the setting of "Cancel jobs of invalid accounts" (page 8), a job may be printed even if an incorrect account number is entered.)
* The account number is a 5-digit number, and up to 500 accounts can be created.
Copy settings
These settings can be are used to change the factory default copy settings as needed to suit the needs of your workplace.
When auditing mode is enabled for the copy function,
●A valid account number must be entered to make a copy.
(Copying is not possible unless a valid account number is entered.)
- A count is kept of the number of copies made by each account. This allows you to monitor copier usage by each account. (The counts can be totaled.)
●A limit can be set for the number of copies that can be made by each account.
NOTE
An account number must also be entered to print a document that was saved during copying using the document filing function. (Printing is not possible unless an account number is entered.) The number of pages printed is added to the copy count.
Document filing settings
These settings can be used to change the factory default settings for the document filing function as needed to suit the needs of your workplace.
This function can only be used on the MX-M350N/MX-M450N, or when the document filing function has been added.
When auditing mode is enabled for the document filing function,
●An account number must be entered to print an image that was scan-saved.
(Printing is not possible unless an account number is entered.)
- A count is kept of the number of pages printed by each account, making it possible to monitor each account's usage of the document filing function (a document filing count is kept).
● A limit can be set for the number of scan-saved image file pages that can be printed.
Setting an administrator password
The administrator password is a 5-digit number that must be entered in order to access the key operator programs. The administrator of the machine should change the factory default administrator password that was set at the factory to a new 5-digit number. Be sure to remember the new administrator password, as it must be entered each time the administrator settings are subsequently used. (Only one administrator password can be set.)
The administrator password is initially set to "00000" at the factory.
To change the administrator password, see "USING THE ADMINISTRATOR SETTINGS" on page 4.
ADMINISTRATOR SETTINGS LIST
Settings for general use of the machine, the copy function, and the document filing function are shown in the following list. The administrator password must be entered in order to use these programs.
NOTE
The administrator settings that can be accessed depend on the optional equipment that is installed.
●General settings
| Setting name Page | |
| Account control | |
| Auditing mode 7 | |
| Total pages per account 7 | |
| Resetting account 8 | |
| Account limit setting 8 | |
| Account number control 8 | |
| Account number security 8 | |
| Cancel jobs of invalid accounts 8 | |
| Enter account number in Sharp OSA mode | 8 |
| Job log control | |
| Clear all job log data 9 | |
| Energy save | |
| Toner save in printer mode 9 | |
| Toner save in copy mode 9 | |
| Auto power shut-off | 9 |
| Auto power shut-off timer | 9 |
| Preheat mode setting | 9 |
| Operation settings | |
| Keys touch sound | 10 |
| Auto clear setting | 10 |
| Disabling of job priority operation | 10 |
| Message time setting | 10 |
| Disabling of bypass printing | 10 |
| Display language setting | 10 |
| Key operation setting | 10 |
| Disabling switching of display order | 11 |
| Disabling of clock adjustment | 11 |
| Device control | |
| Original size detector setting | 11 |
| Disabling of document feeder | 11 |
| Disabling of duplex | 11 |
| Disabling of stapler | 11 |
| Disabling of punch | 11 |
| Disabling of optional paper drawer | 11 |
| Disabling of finisher | 11 |
| Disabling of mail-bin stacker | 11 |
| Disabling of covers/inserts mode | 11 |
| Saddle stitch position adjust | 12 |
| High speed stacking | 12 |
| Auto paper selection setting | 12 |
| Optimization of a hard disk | 12 |
| Network settings | |
| IPv4 setting | 13 |
| IPv6 setting | 13 |
| Enable TCP/IP | 13 |
| Enable NetWare | 13 |
| Enable EtherTalk | 13 |
| Enable NetBEUI | 13 |
| Reset the NIC | 13 |
| Tandem setting | 13 |
| PING command | 14 |
| Security settings | |
| SSL setting | 14 |
| Enable IPsec | 14 |
| List print | 14 |
| Sharp OSA settings | |
| Default display setting | 14 |
| External account setting | 14 |
| Change admin password | 14 |
| Product key | |
| PS3 expansion kit | 15 |
| Network scanner expansion kit | 15 |
| Internet fax expansion kit | 15 |
| E-mail alert and status 15 | |
| Network expansion kit | 15 |
| Data security kit | 15 |
| Application integration module | 15 |
| Application communication module | 15 |
| External account module | 15 |
| Serial number | 15 |
| Initialize and/or store settings | |
| Restore factory defaults | 15 |
| Store current configuration | 15 |
| Restore configuration | 15 |
●Copy settings
| Setting name Page | |
| Copy settings | |
| Initial status settings | 16 |
| Exposure adjustment | 16 |
| Rotation copy setting | 16 |
| Add or change extra preset ratios | 16 |
| 600dpi x 600dpi scanning mode for document feeder | 16 |
| Quick scan from document glass | 16 |
| Initial margin shift setting | 17 |
| Erase width adjustment | 17 |
| Card shot settings | 17 |
| Setting a maximum number of copies | 17 |
| Disabling deletion of job programs | 17 |
| Disabling of bypass-tray in duplex copy | 17 |
| Disabling of auto paper selection | 17 |
●Document filing settings
| Setting name Page | |
| Document filing settings | |
| Default mode settings | 18 |
| The number of user name displayed setting | 18 |
| Sort method setting | 18 |
| Document output options | 18 |
| Administrator authority setting | 18 |
| Default output tray | 18 |
| Delete all quick files | 18 |
| Scan complete sound setting | 19 |
| Initial resolution setting | 19 |
| Default exposure settings 19 | |
| Batch print settings | 19 |
| Default display setting | 19 |
USING THE ADMINISTRATOR SETTINGS
The procedure for configuring the administrator password is explained below using the "Change admin password" as an example. Follow the same steps to configure the settings that are described beginning on page 7.
1 Press the [SYSTEM SETTINGS] key.
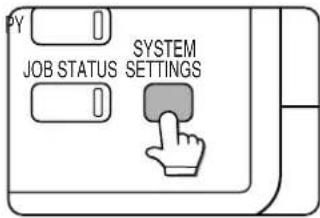
2 Touch the [ADMINISTRATOR SETTINGS] key.
![SHARP MX-M450N - Touch the [ADMINISTRATOR SETTINGS] key. - 1](/content/2026/05/944414/images/d9978344a1d40527e6321bacc9803550d296060b83f5ad933f17e4b3d94ff15f.jpg)
flowchart
graph TD
    A["SENDER CONTROL"] --> B["FAX DATA RECEI/S/FORWARD"]
    B --> C["ADMINISTRATOR SETTINGS"]
3 Use the numeric keys to enter the 5-digit administrator password.
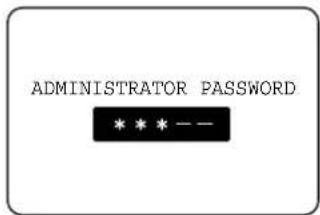
Each time a number is entered, the dashes (-) in the display will change to asterisks (*). The factory default setting for the key operator code number is 00000.
4 Touch the [CHANGE ADMIN PASSWORD] key.
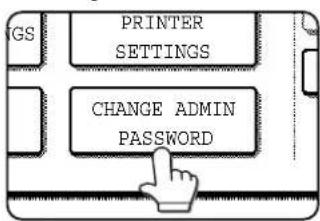
If you wish to configure a different administrator setting, select the desired setting in this step.
A screen for the selected setting will appear.
Configure the setting as explained on pages 7 and following of this manual.
5 Use the numeric keys to enter the new 5-digit administrator password.
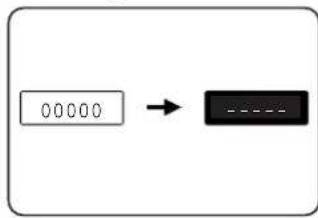
flowchart
graph LR
    A["00000"] --> B["---"]
Use a number for the administrator password that has not been set as an account number for auditing mode (a number that has been set as an account
number cannot be used). The entered number will be the new administrator password. Be sure to remember this number.
6 Touch the [OK] key. You will return to the screen of step 4.
This completes the procedure for changing the administrator password. If you wish to configure another setting, touch the key of the desired setting in the screen of step 4.
7 Touch the [EXIT] key.
![SHARP MX-M450N - Touch the [EXIT] key. - 1](/content/2026/05/944414/images/0d853afd9ed287ffd9cfe11ae990492d11d6f8cedcbfb2546fafaa195fe2373d.jpg)
flowchart
graph TD
    A["EXIT"] --> B["OPERATION SETTINGS"]
    B --> C["PRINTER"]
    C --> D["1/2"]
You will exit the administrator settings.
Additional information on using the keys to configure administrator settings
These keys and indicator are available on setting screens that require the entry of numerical values.
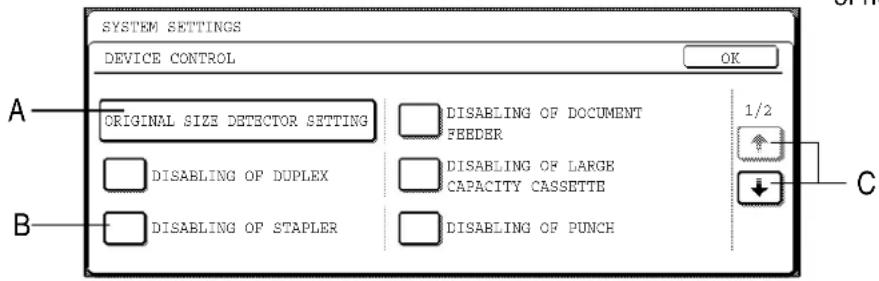

flowchart
graph TD
    A["20 (1~999)"] --> B["Downward Arrow"]
    A --> C["Upward Arrow"]
    B --> D["D"]
    C --> E["E"]
A When a key that appears in the form XXX is touched, the setting screen of that key will appear.
B When a checkbox (☐) appears in front of a setting, a checkmark (☑) will appear when the checkbox is touched. This indicates that the setting is enabled. If a checkbox with a checkmark (☑) is touched, the checkmark is cleared (☐) and the setting is disabled.
C If the settings continue on the following screen(s), touch the and keys to move back and forth through the screens. To return to the category selection screen, touch the [OK] key.
D The currently set numerical value is displayed.
E Numerical values can be set by touching the and keys
Administrator settings menu
The administrator settings are arranged in the following menu.
Refer to this menu when enabling or disabling the settings that are explained beginning on the following page.
* Some items contain an additional level of settings.
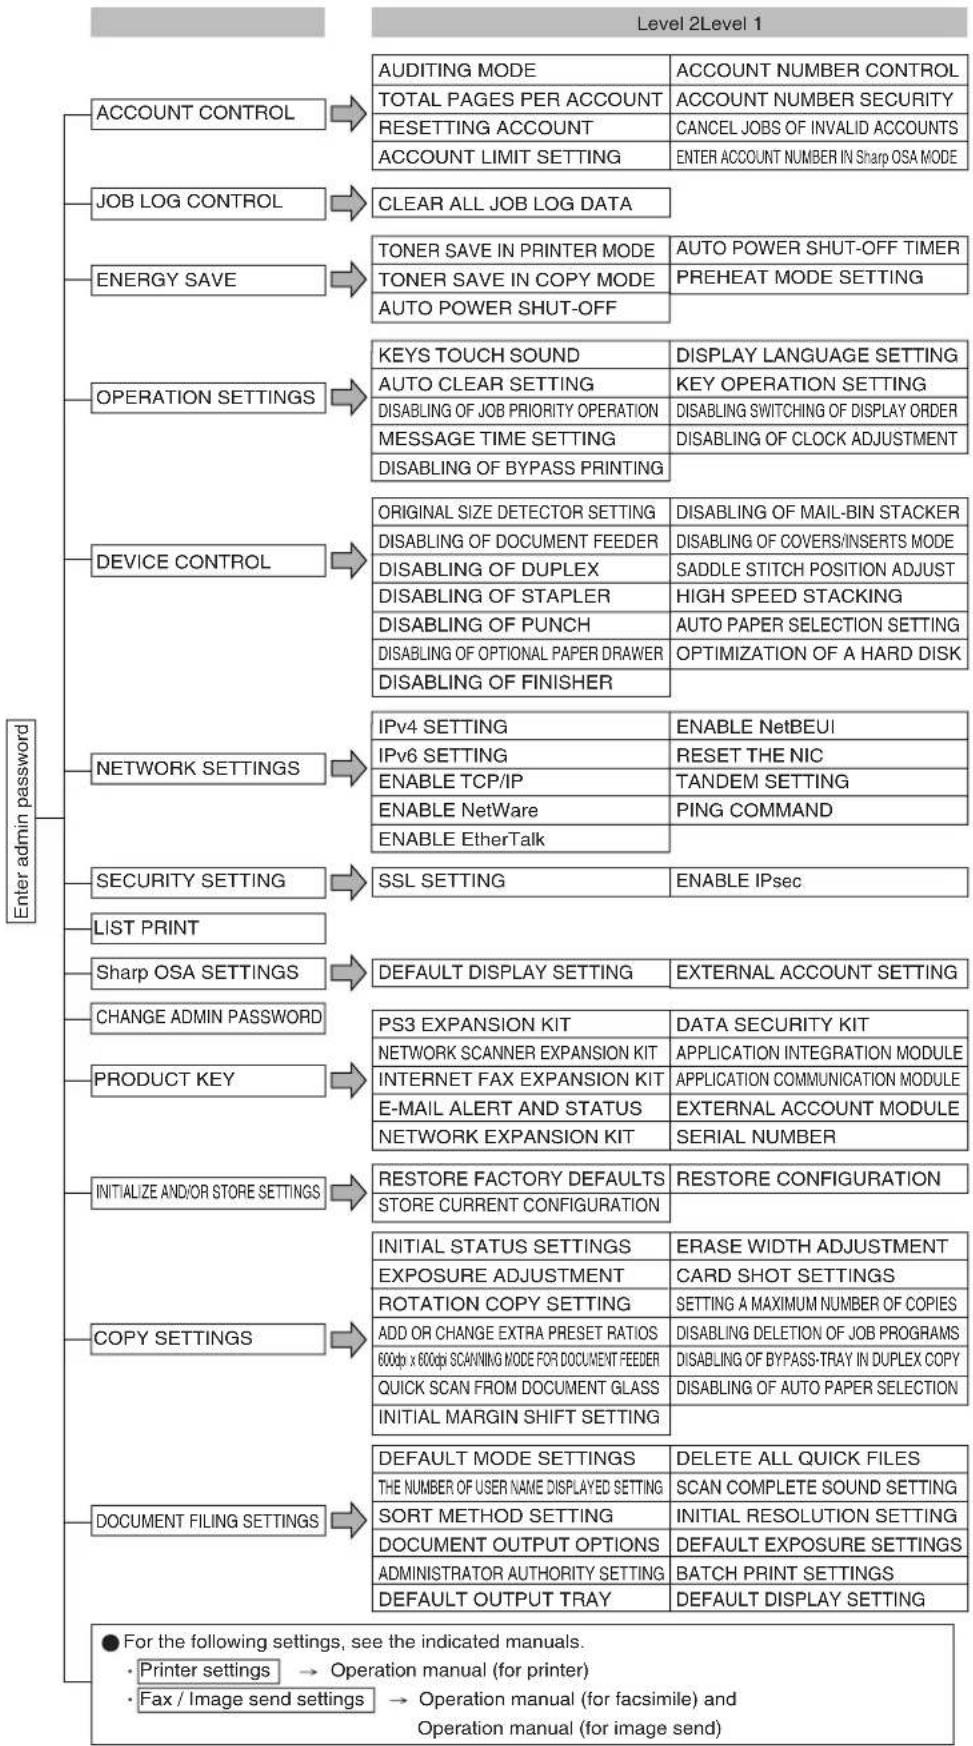
flowchart
graph TD
    A["Enter admin password"] --> B["ACCOUNT CONTROL"]
    A --> C["JOB LOG CONTROL"]
    A --> D["ENERGY SAVE"]
    A --> E["OPERATION SETTINGS"]
    A --> F["DEVICE CONTROL"]
    A --> G["NETWORK SETTINGS"]
    A --> H["SECURITY SETTING"]
    A --> I["LIST PRINT"]
    A --> J["Sharp OSA SETTINGS"]
    A --> K["CHANGE ADMIN PASSWORD"]
    A --> L["PRODUCT KEY"]
    A --> M["INITIALIZE AND/OR STORE SETTINGS"]
    A --> N["COPY SETTINGS"]
    A --> O["DOCUMENT FILING SETTINGS"]

    B --> P["AUDITING MODE"]
    B --> Q["TOTAL PAGES PER ACCOUNT"]
    B --> R["RESETTING ACCOUNT"]
    B --> S["ACCOUNT LIMIT SETTING"]

    C --> T["CLEAR ALL JOB LOG DATA"]

    D --> U["TONER SAVE IN PRINTER MODE"]
    D --> V["TONER SAVE IN COPY MODE"]
    D --> W["AUTO POWER SHUT-OFF"]

    E --> X["KEYS TOUCH SOUND"]
    E --> Y["AUTO CLEAR SETTING"]
    E --> Z["DISABLING OF JOB PRIORITY OPERATION"]
    E --> AA["MESSAGE TIME SETTING"]
    E --> AB["DISABLING OF BYPASS PRINTING"]

    F --> AC["ORIGINAL SIZE DETECTOR SETTING"]
    F --> AD["DISABLING OF DOCUMENT FEEDER"]
    F --> AE["DISABLING OF DUPLEX"]
    F --> AF["DISABLING OF STAPLER"]
    F --> AG["DISABLING OF PUNCH"]
    F --> AH["DISABLING OF OPTIONAL PAPER DRAWER"]
    F --> AI["DISABLING OF FINISHER"]

    G --> AJ["IPv4 SETTING"]
    G --> AK["IPv6 SETTING"]
    G --> AL["ENABLE TCP/IP"]
    G --> AM["ENABLE NetWare"]
    G --> AN["ENABLE EtherTalk"]

    H --> AO["SSL SETTING"]

    I --> AP["DEFAULT DISPLAY SETTING"]

    J --> AQ["INITIAL STATUS SETTINGS"]
    J --> AR["EXPOSURE ADJUSTMENT"]
    J --> AS["ROTATION COPY SETTING"]

    K --> AT["ADD OR CHANGE EXTRA PRESET RATIOS"]
    K --> AU["600dpi x 800dpi SCANNING MODE FOR DOCUMENT FEEDER"]

    L --> AV["DEFAULT MODE SETTINGS"]
    L --> AW["THE NUMBER OF USER NAME DISPLAYED SETTING"]

    M --> AX["SORT METHOD SETTING"]
    M --> AY["DOCUMENT OUTPUT OPTIONS"]

    N --> AZ["ADMINISTRATOR AUTHORITY SETTING"]
    N --> BA["DEFAULT OUTPUT TRAY"]

    P --> BB["ACCOUNT NUMBER CONTROL"]
    P --> BC["ACCOUNT NUMBER SECURITY"]
    P --> BD["CANCEL JOBS OF INVALID ACCOUNTS"]
    P --> BE["ENTER ACCOUNT NUMBER IN Sharp OSA MODE"]

    Q --> BF["AUTO POWER SHUT-OFF TIMER"]
    Q --> BG["PREHEAT MODE SETTING"]

    R --> BH["DISPLAY LANGUAGE SETTING"]
    R --> BI["KEY OPERATION SETTING"]
    R --> BJ["DISABLING SWITCHING OF DISPLAY ORDER"]
    R --> BK["DISABLING OF CLOCK ADJUSTMENT"]

    S --> BL["DISABLING OF MAIL-BIN STACKER"]
    S --> BM["DISABLING OF COVERS/INSERTS MODE"]
    S --> BN["SADDLE STITCH POSITION ADJUST"]
    S --> BO["HIGH SPEED STACKING"]
    S --> BP["AUTO PAPER SELECTION SETTING"]
    S --> BQ["OPTIMIZATION OF A HARD DISK"]

    AT --> BR["DATA SECURITY KIT"]
    AT --> BS["APPLICATION INTEGRATION MODULE"]
    AT --> BT["APPLICATION COMMUNICATION MODULE"]
    AT --> BU["EXTERNAL ACCOUNT MODULE"]
    AT --> BV["SERIAL NUMBER"]

    AU --> BW["ERASE WIDTH ADJUSTMENT"]
    AU --> BX["CARD SHOT SETTINGS"]

    AV --> BY["DISABLED DELETION OF JOB PROGRAMS"]
    AV --> BZ["DISABLED OF BYPASS-TRAY IN DUPLEX COPY"]

    AW --> CA["DELETE ALL QUICK FILES"]
    AW --> CB["SCAN COMPLETE SOUND SETTING"]

    AX --> CC["INITIAL RESOLUTION SETTING"]
    AX --> DD["DEFAULT EXPOSURE SETTINGS"]

    AZ --> DE["BATCH PRINT SETTINGS"]

    BA --> DF["DEFAULT DISPLAY SETTING"]
GENERAL SETTINGS
Administrator settings for general use of the machine are explained in this section.
Account control
"Account control" consists of the following settings.
●Auditing mode
●Total pages per account
- Resetting account
●Account limit setting
●Account number control
●Account number security
- Cancel jobs of invalid accounts
●Enter account number in Sharp OSA mode
NOTE
Some items in the programs may not be available depending on your machine and what options are installed.
Auditing mode
When AUDITING MODE is enabled, a count is kept of the pages printed by each account (up to 500 accounts can be established). The page counts can be viewed in the display. To use the machine, a valid 5-digit account number must be entered.
This function is initially disabled.
Touch the [AUDITING MODE] key to display the following screen.
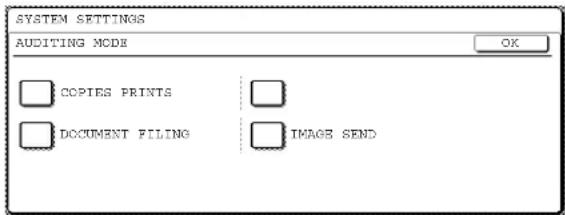
●Auditing mode is enabled for functions that have checkmarks in the checkboxes. If you need to disable auditing mode for a function, touch its checkbox to remove the checkmark.
NOTE
To enable Auditing mode, program an account number as explained in "Account number control" on page 8.
Total pages per account
This setting is used to display or print the total number of pages printed by each account. Misfed paper is not counted.
When using the network scanner feature and fax feature, the number of transmitted pages can also be displayed or printed. (Touch the [IMAGE SEND] key to change screens.)
Touch the [TOTAL PAGES PER ACCOUNT] key to display the following screen.
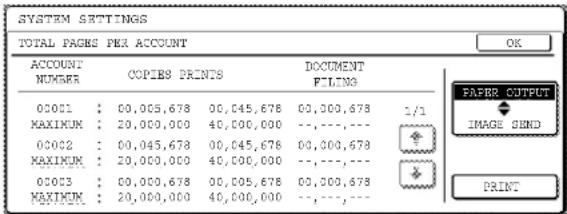
●Printing out all accounts
Touch the [PRINT] key to print out the total pages of all accounts. If the [CANCEL] key appears, this key can be touched to cancel printing.
●Displaying only selected accounts
If the account that you wish to view does not appear in the screen, touch the +key or key until it appears.
Resetting account
This setting is used to reset the printed page count and transmitted page count of an account to "0".
Touch the [RESETTING ACCOUNT] key to display the following screen.
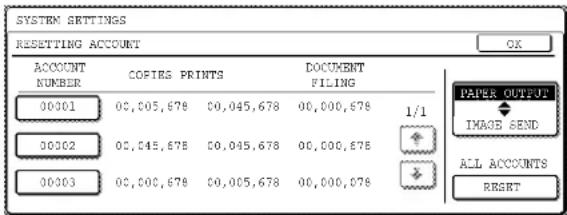
●Resetting one account at a time
Touch the key of the account that you wish to reset, and then select [YES] in the confirmation screen that appears. If the account that you want to reset is not displayed, touch the ☐ or key to scroll through the screens until the desired account appears. When finished, touch the [OK] key.
- Resetting all accounts
Touch the [RESET] key and then select [YES] in the confirmation screen that appears.
When finished, touch the [OK] key.
Account limit setting
A limit for the number of copies that can be made can be set for a single account or for all accounts at once. The maximum limit that can be entered is 99,999,999. Touch the [ACCOUNT LIMIT SETTING] key to display the following setting screen.
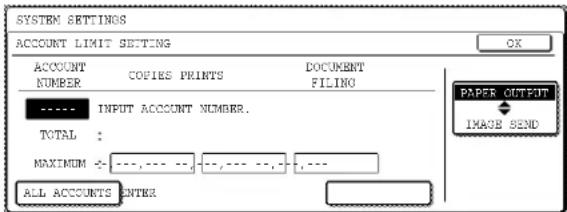
●Limiting the number of copies per account
Enter the number of the desired account with the numeric keys, and then enter limits for the copy, printer, and document filing functions. After entering each limit, touch the [ENTER] key. When finished, touch the [IMAGE SEND] key and then enter limits for fax send, scanner and Internet fax send. If you enter the number of an account that already has a limit set, the limit will appear in the limit display. Press the [C] key to change the limit to a hyphen (-), and then enter a new limit.
When finished, touch the [OK] key to exit.
●Limiting the number of copies of all accounts
Touch the [ALL ACCOUNTS] key. [ALL] appears in the account number entry screen.
The limits for all accounts are entered in the same way as the limits for the individual accounts. When finished, touch the [OK] key to exit.
Account number control
This setting is used to set, delete, and change account numbers used for copy and other modes, as well as print a list of the account numbers that have been set. Up to 500 account numbers can be set.
●Each account number has 5-digit. When you have finished setting one account number, you can continue setting other account numbers.
● Two methods are available for deleting account numbers: deleting an individual account number, and deleting all account numbers at once.
●To change an account number, enter the account number to be changed and then enter a new account number. After an account number is changed, another account number can be selected to be changed. Changes for unregistered account numbers will not be registered.
Account number security
This setting is used to prevent attempts to guess an account number. When enabled, a warning message will appear and account number entry will be prohibited for one minute if an incorrect account number is entered three times in a row.
Cancel jobs of invalid accounts
When this setting is enabled and auditing mode is enabled for the printer function, a print job will not be printed if an incorrect account number is entered or if an account number is not entered. If this setting is disabled, printing will take place and the number of pages printed will be included in the "OTHERS" count.
Enter account number in Sharp OSA mode
When this checkbox is selected, the account number entry screen will appear to allow account number entry each time a user switches to Sharp OSA mode.
To use auditing mode, enable it.
Job log control
Clear all job log data
The machine keeps a log of the jobs it has run. The job log can be used to check general use of the machine. The job log can be written to your computer in CSV format using a Web browser. This setting is used to clear the job log. There is normally no need to use the program.
Energy save
"Energy save" provides the following settings to reduce your power costs. From an environmental perspective, this also helps conserve natural resources and reduce pollution.
●Toner save in printer mode
●Toner save in copy mode
●Auto power shut-off
●Auto power shut-off timer
●Preheat mode setting
Toner save in printer mode
Printing in the toner save mode will reduce toner consumption. If toner save is set, black solid areas will be printed as halftone. (This setting is effective only for printing without use of the dedicated printer driver. If the printer driver is used, the printer driver setting will override this setting.)

flowchart
graph LR
    A["Print data Example of A"] --> B["print in the toner save mode"]
    B --> C["A"]
Toner save in copy mode
This setting is used to save toner in copy mode. This setting functions the same way as toner save in printer mode.
Auto power shut-off
If the machine is not used for a set duration of time, auto power shut-off activates to enable maximum conservation of energy.
This function allows you to reduce power costs, and at the same time helps conserve natural resources and reduce pollution.
This setting is used to enable or disable auto power shut-off. To disable the function, remove the checkmark from the checkbox. Use this setting if you prefer that auto power shut-off does not operate.
NOTE
If you prefer that auto power shut-off activates as little as possible, it is recommended that you try lengthening the time setting after which activation takes place rather than disabling the function altogether. (The time setting is changed using the following "AUTO POWER SHUT-OFF TIMER" setting.)
Auto power shut-off timer
This setting is used to configure the time after which auto power shut-off activates.
The time can be set to as long as 240 minutes in increments of one minute.
NOTE
●We suggest you set the most appropriate time according to your usage pattern.
●This time setting is not effective when auto power shut-off mode is disabled using the "Auto power shut-off" setting.
Preheat mode setting
If the printer is not used for the duration of time configured in this setting after printing is finished, it will enter preheat mode. This function reduces your power costs, and at the same time helps conserve natural resources and reduce pollution.
Select the most suitable setting to match your pattern of use of the printer.
The time can be set to as long as 240 minutes in increments of one minute. (Preheat mode cannot be disabled.)
Operation settings
The "Operation settings" are related to basic operation of the machine and consist of the following settings:
●Keys touch sound
●Auto clear setting
●Disabling of job priority operation
●Message time setting
●Disabling of bypass printing
●Display language setting
●Key operation setting
●Disabling switching of display order
●Disabling of clock adjustment
Keys touch sound
This setting is used to adjust (or turn off) the volume of the beep that sounds when you touch a key. You can also have three beeps sound at base values when setting the ratio in copy mode or adjusting the exposure in any mode.
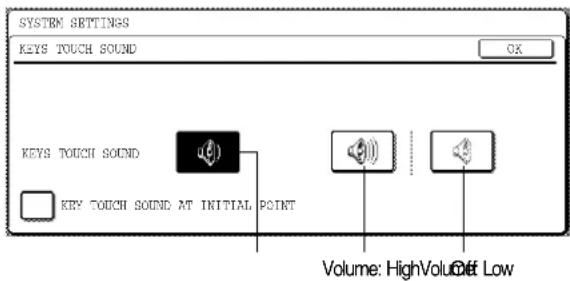
To change the volume, touch the desired volume key.
When "KEY TOUCH SOUND AT INITIAL POINT" is selected, three beeps will sound at the base setting values indicated below.
| Screen in which setting is effective | Base value |
| Ratio setting screen in main screen of copy mode | Ratio = 100% |
| Exposure adjustment screen in main screen of copy mode | Exposure level3 (middle level) |
| Exposure adjustment screen in main screen of fax, Internet fax, and network scanner modes | |
| Exposure adjustment screen in [SCAN TO HDD] in main screen of document filing mode |
Auto clear setting
If the machine is not used for a certain duration of time, the auto clear function will clear any settings that have been selected and return the screen to the main screen of copy mode or the job status screen. This setting is used to set the duration of time after which auto clear operates. The time can be set from 10 seconds to 240 seconds in increments of 10 seconds, or the auto clear function can be disabled. (Note that auto clear can only be disabled for copy mode.)
Disabling of job priority operation
This setting is used to prohibit use of the [PRIORITY] key in the job status screen.
Message time setting
This setting is used to set the length of time that messages appear in the display. (This applies to messages that appear for a certain length of time and then automatically disappear.)
The time can be set to as long as 12 seconds in increments of one second.
Disabling of bypass printing
When a job cannot be printed because there is no suitable paper and there is a subsequent job that can be printed, the subsequent job will be printed ahead of the job that cannot be printed ^1 (page 1-15 of the "Operation manual (general information and copier operation)"). This setting can be used to disable printing of subsequent jobs in this situation.
*1 Except when paper runs out in the middle of a job
Display language setting
This setting is used to select the display language.
Key operation setting
These settings are used to set the length of time a key in the touch panel must be touched before the key input is registered, and to prevent repeated key input when a key is touched continuously.
• Time until key input is registered
The time can be set from 0 seconds to 2 seconds in increments of 0.5 seconds. Normally the time is set to 0 seconds so that key input is immediately registered when a key is touched. By lengthening the time setting, key input can be prevented when a key is touched accidentally. Keep in mind, however, that when a longer setting is selected more care is required when touching keys to ensure that key input is registered.
- Prohibit key repeat
The touch panel contains keys such as the zoom keys (for setting the ratio) that can be touched continuously to make a value change until it reaches a desired value.
This feature whereby a value changes continuously while a key is touched is called key repeat.
Key repeat is normally enabled. If you wish to prohibit key repeat, select the [DISABLE AUTO KEY REPEAT] checkbox.
Disabling switching of display order
This setting is used to disable the function that changes the key display order each time a selected tab is touched on a screen that is divided into tabs, including the screens for selecting the user name and folder for the "SCAN TO HDD" and "FILE" functions, and the address book screen of image send mode.
This does not affect the function that changes the order of display of files in document filing folders.
Disabling of clock adjustment
This setting is used to prohibit changes to the clock adjust setting. When this setting is enabled, "Clock" in the system settings cannot be used. To adjust the date and time, this setting must first be disabled (remove the checkmark).
Device control
Use these settings when a peripheral device on the machine has failed or when you wish to temporarily disable a device. These settings can also be used to change certain device function settings as needed to suit the needs of your workplace.
"Device control" consists of the following settings:
●Original size detector setting
●Disabling of document feeder
●Disabling of duplex
●Disabling of stapler
●Disabling of punch
●Disabling of optional paper drawer
●Disabling of finisher
●Disabling of mail-bin stacker
●Disabling of covers/inserts mode
●Saddle stitch position adjust
●High speed stacking
●Auto paper selection setting
●Optimization of a hard disk
Original size detector setting
This setting is used to select the standard original sizes that are detected by the original size detection function. Select one of the four groups indicated below. The factory default setting is "INCH-1 (AB-1)". Original size detection by the document glass can also be disabled.
| Group | Detectable original sizes | ||
| Document feeder tray (for automatic document feeder) | |||
| Document glass | |||
| 1 | INCH-1 | 11" x 17", 8-1/2" x 14",8-1/2" x 11",8-1/2" x 11"R,5-1/2" x 8-1/2" | A3, A4 |
| 2 | INCH-2 | 11" x 17", 8-1/2" x 13",8-1/2" x 11",8-1/2" x 11"R,5-1/2" x 8-1/2" | A3, A4 |
| 3 | AB-1 | A3, A4, A4R, A5,B4, B5, B5R | 11" x 17", 8-1/2"x 11",216x330 |
| 4 | AB-2 | A3, A4, A4R, A5,B5, B5R, 216x330 | 11" x 17", 8-1/2"x 11", B4 |
If "CANCEL DETECTION AT DOCUMENT GLASS" is set, originals will be regarded as EXTRA for all copier functions and no original size will be displayed.
Disabling of document feeder
This setting is used to prevent use of the automatic document feeder when it malfunctions. In this case, scanning can still be performed using the document glass.
Disabling of duplex
This setting is used to disable duplex printing when the duplex module malfunctions. When this settings is enabled, only one-sided printing can be performed.
Disabling of stapler
This setting is used to disable stapling when the stapler unit of the finisher or the saddle stitch finisher malfunctions.
Disabling of punch
Use this setting when you wish to prohibit punching or when the punch unit of the finisher or saddle stitch finisher has failed.
Disabling of optional paper drawer
This setting is used to disable use of the stand/3 x 500 sheet paper drawer or stand/MPD & 2000 sheet paper drawer when it malfunctions.
Disabling of finisher
Use this setting when you wish to prohibit use of the finisher or saddle stitch finisher, or when either has failed.
Disabling of mail-bin stacker
This setting is used to disable use of the mail-bin stacker when it malfunctions.
Disabling of covers/inserts mode
Use this setting to prohibit the use of covers/inserts mode.
Saddle stitch position adjust
This setting is used to adjust the stapling position (folding position) when using the saddle stitch function of the optional saddle stitch finisher.
The value can be adjusted in 0.1 mm increments within ±3.0 mm from the reference position for each paper size.

[AUTOMATIC SADDLE STITCH] checkmark
The saddle stitch print function can normally be divided into the following three general steps.
- The pages of the original are automatically reordered to allow saddle stitch binding (saddle stitch function).
- The pages are folded at the center.
- The paper is stapled at the center in two places (saddle stitch stapling).
The [AUTOMATIC SADDLE STITCH] checkbox is selected by default.
Selection of the checkbox assumes the use of the above saddle stitch printing function (three steps).
Saddle stitch stapling exceptions
Depending on the purpose of saddle stitch stapling, it may be necessary to perform saddle stitch stapling on printed matter that has already been bound by saddle stitching. In this case, it is necessary to disable step 1 above. If you frequently perform this type of exceptional saddle stitch stapling that requires disabling step 1, remove the checkmark from the [AUTOMATIC SADDLE STITCH] checkbox.
High speed stacking
This setting is used to give priority to print speed when printing in offset mode with the saddle stitch finisher installed.
When priority is given to print speed, a slight decrease in stacking performance may occur. This setting is enabled by factory default.
Auto paper selection setting
Use this setting to select the paper type* for which the automatic paper selection function operates. Selections are "PLAIN PAPER", "PLAIN AND RECYCLE PAPER", and "RECYCLE PAPER".
* The paper type set for each paper tray in the paper tray settings of the system settings (page 2-5 of the "Operation manual (for general information and copier operation)").
Optimization of a hard disk
This is used to optimize the "Main folder" and "Custom folder" that are used for the document filing function. When this setting is executed, a message will appear asking if it is okay to stop the job in progress. Touch the [YES] key to stop the job and begin optimization. When optimization ends, the machine will restart if the power switch is switched on, or turn off if the power switch is switched off.
CAUTION
If the power switch is switched off or the power plug is unplugged while optimization is in progress, the hard drive may be damaged and stored data or received data may be lost.
NOTES
●About stopped jobs
Printing of received faxes and Internet-Faxes and transmission of stored fax jobs will automatically resume after the machine restarts.
For jobs other than the above (copy jobs, print jobs, document filing print jobs, etc.), the job information is not retained and thus the stopped job must be executed again manually (for example, the original for a copy job must be placed again and the copy operation repeated).
●Operation after optimization starts
Until optimization finishes (or the [CANCEL] key is touched to cancel optimization),
- The operation panel cannot be used, with the exception of the [CANCEL] key.
- Operation from the Web page is not possible.
- Faxes and Internet-Faxes cannot be received.
- Print jobs will not be accepted.
- The power will not turn off even if the power switch is switched off.
- Auto power shut-off mode will not activate even if the set time elapses. (Preheat mode will activate.)
Network settings
These settings are set when this product is used as a network printer.
After you complete the setting for one setting, you must exit the administrator settings, turn off the main switch, wait briefly, and then turn on the main switch again before any other settings can be set. The setting that was set will be effective after the power is turned on.
The following items can be configured in the "Network settings".
●IPv4 setting
●IPv6 setting
●Enable TCP/IP
●Enable NetWare
●Enable EtherTalk
●Enable NetBEUI
- Reset the NIC
●Tandem setting
●PING command
NOTE
For setting and modification of "Network settings", be sure to consult with the network administrator.
IPv4 setting
When using this product in a network that uses the TCP/IP protocol (IPv4), use this setting to set the IP address (IP address, IP subnet mask, and IP gateway) of this product. The setting is set to ENABLE DHCP by factory default setting, which obtains the IP address setting automatically. When using this product on a TCP/IP network, be sure to turn on the "Enable TCP/IP" setting below.
If DHCP is used, the IP address assigned to the machine may be changed automatically on occasion. If this happens, printing will not be possible.
IPv6 setting
When using this product in a network that uses the TCP/IP protocol (IPv6), use this setting to set the IP address (enable IPv6, DHCPv6, IP address, prefix length, and default gateway) of this product. By factory default, the IPv6 setting is disabled. When using this product on a TCP/IP network, be sure to turn on the "Enable TCP/IP" setting below.
In an IPv6 environment, the machine can use LPD or IPP protocol.
If DHCP is used, the IP address assigned to the machine may be changed automatically on occasion. If this happens, printing will not be possible.
Enable TCP/IP
When using this product in a network that uses the TCP/IP protocol, set this setting. Also set the IP address using the setting "IP address setting" above. Default setting: Enable
Enable NetWare
When using this product in a network that uses the NetWare protocol, set this setting.
Default setting: Enable
Enable EtherTalk
When using this product in a network that uses the EtherTalk protocol, set this setting.
Default setting: Enable
Enable NetBEUI
When using this product in a network that uses the EtherTalk protocol, set this setting.
Default setting: Enable
Reset the NIC
This setting is used to reset all setting items of NIC (Network Interface Card) of this product to the factory default settings.
NOTE
If any of the [NETWORK SETTINGS] were changed prior to execution of this setting, you must turn off the power switch after exiting the administrator setting, wait briefly, and then turn on the power switch to make the factory default settings take effect.
Tandem setting
This setting is used to configure the IP address and port number of the client printer when you wish to have two machines (which are used as TCP/IP network printers) print in tandem.
The factory default setting for the port number is [50001]. Unless you experience difficulty with this setting, it does not need to be changed.
The tandem function can also be prohibited, or the reception of tandem data from the other machine can be prohibited. (Normally this is not necessary.)
To prohibit the tandem function, select "DISABLING OF MASTER MACHINE MODE".
To prohibit reception of tandem data from the other machine, select "DISABLING OF SLAVE MACHINE MODE".
NOTE
To use the tandem function when auditing mode is enabled, the same account number must be entered on both machines. If the same account number is not entered, only the server machine may print or the printed pages may not be added to the correct account.
PING command
This setting is used to check if the machine and a computer connected to the network can communicate. Enter the IP address of the computer that you wish to check and touch the [START] key. A message will appear indicating whether or not there was a response from the computer.
Security settings
The following settings are related to security. Touch the [SECURITY SETTINGS] key to configure the settings. When any of these settings are changed, you must exit the administrator settings, turn off the main switch, wait a brief interval, and then turn the main switch back on to make the new settings take effect.
SSL setting
SSL can be used for data transmission over a network. SSL is a protocol that enables the encryption of information communicated over a network. Encrypting data makes it possible to transmit and receive sensitive information safely.
Server port
●HTTPS: Apply SSL encryption to HTTP communication.
●IPP-SSL: Apply SSL encryption to IPP communication.
Client port
●FTPS: Apply SSL encryption to FTP communication.
●SMTP-SSL: Apply SSL encryption to SMTP communication.
●POP3-SSL: Apply SSL encryption to POP3 communication.
Level of encryption
The encryption strength can be set to one of 3 levels.
Enable IPsec
IPsec can be used for data transmission/reception on a network. When IPsec is used, data can be sent and received safely without the need to configure settings for IP packet encryption in a Web browser or other higher-level application.
This setting is only used to enable or disable IPsec; detailed IPsec settings are configured in the Web pages. Some Web page settings may not allow connection to the machine, or the settings may not allow printing, scanning, or Web page display. In this case, deselect [ENABLE IPsec] in this screen and change the Web page settings.

List print
This setting is used to print lists and reports that can only be printed from the administrator settings.
- Touch the [ADMINISTRATOR SETTINGS LIST] key to print one of the following groups:
Copy, printer, fax/image send, document filing, general, security, all administrator settings lists - Touch a key other than the [ADMINISTRATOR SETTINGS LIST] key to begin printing a list or report.
Sharp OSA settings
The following settings are related to Sharp OSA. Touch the [Sharp OSA SETTINGS] key to configure the settings.
●Default display setting
●External account setting
Default display setting
The default screen that appears when the [DOCUMENT FILING] key is pressed can be specified. Select either the base screen of document filing mode or the external application selection screen. This setting can only be configured when the application communication module is installed. The setting also appears in the document filing settings.
When the [CA] key ([Clear all] key) is pressed in document filing mode or Sharp OSA mode, the initial screen of the mode appears, regardless of the default display setting.
External account setting
When [ENABLE EXTERNAL ACCOUNT CONTROL] is enabled, the machine enters external count mode. When both [ENABLE EXTERNAL ACCOUNT CONTROL] and [ENABLE AUTHENTICATION BY EXTERNAL SERVER] are enabled, the machine enters external authentication mode. This item can only be selected when the external account module is installed.
Change admin password
This setting is used to change the administrator password that must be entered to configure the administrator settings. When the machine is first used, the administrator should change the administrator password that was set at the factory to the desired 5-digit code. Only one administrator password can be set.
The factory default setting for the administrator password is 00000.
Product key
Use these settings to enter the product keys for the following options.
PS3 expansion kit
This setting is used to enter the product key for the PS3 expansion kit (this allows the machine to be used as a PostScript compatible printer).
Ask your dealer for the product key.
Network scanner expansion kit
This setting is used to enter the product key for the network scanner expansion kit.
Ask your dealer for the product key.
Internet fax expansion kit
This setting is used to enter the product key for the Internet fax expansion kit.
Ask your dealer for the product key.
E-mail alert and status
This setting is used to enter the product key for E-MAIL ALERT AND STATUS, which enables customer product support via a network system.
Ask your dealer for the product key.
Network expansion kit
This setting is used to enter the product key that allows the machine to be used on a network.
Ask your dealer for the product key.
Data security kit
This setting is used to enter the product key for the data security kit.
Ask your dealer for the product key.
Application integration module
This setting is used to enter the product key that allows use of the metadata send function.
Ask your dealer for the product key.
Application communication module
This setting is used to enter the product key that allows the machine to be linked to a "standard application".
Ask your dealer for the product key.
External account module
This setting is used to enter the product key that allows the machine to be linked to an "external account application".
Ask your dealer for the product key.
Serial number
This setting is used to check the serial number of the machine.
Initialize and/or store settings
These settings are used to return the administrator settings to the factory default settings, to store the current settings, and to restore stored administrator settings. (Note that this also includes printer configuration settings.)
The following settings are available:
- Restore factory defaults
●Store current configuration
-Restore configuration
Restore factory defaults ^4
This setting is used to return the administrator settings (including the printer configuration settings) to the factory default settings. If you need a record of the settings prior to restoration of the default settings, use "List print" (page 14) to print a list of the settings.
NOTE
To make the default settings take effect after executing this setting, exit the administrator settings, turn off the power switch, wait at least 3 seconds, and then turn on the power switch again.
Store current configuration ^4
This setting is used to store the current administrator settings in memory. The stored settings will remain in memory even if the power switch is turned off. To retrieve
the stored settings, use the following "Restore configuration" setting.
Restore configuration ^4
This setting is used to retrieve the configuration that was stored using the "Store current configuration" setting and restore it as the current configuration.
The currently set configuration will change to the configuration read from memory.
NOTE
A confirmation message will appear at the end of the procedure executing settings marked by *1. If you need to cancel execution of the setting, touch the [NO] key.
COPY SETTINGS
This section explains the administrator settings that are used for copy mode.
Copy settings
"Copy settings" consists of the following settings:
●Initial status settings
●Exposure adjustment
●Rotation copy setting
●Add or change extra preset ratios
- 600dpi x 600dpi scanning mode for document feeder
●Quick scan from document glass
●Initial margin shift setting
●Erase width adjustment ^1
●Card shot settings *1
●Setting a maximum number of copies
●Disabling deletion of job programs
● Disabling of bypass-tray in duplex copy
●Disabling of auto paper selection
*1 Default settings selected with these settings apply to all functions of the machine (not just the copy function).
Initial status settings
The copy settings revert to the default settings when the power switch is turned on, when the [CA] key is pressed, or when the auto clear time elapses. This setting is used to change the default settings, or return changed default settings to the initial factory default settings.
Defaults for the following copy settings can be changed:
Paper tray/Exposure tray/Copy ratio/2-sided copy/Output (auto, sort, staple sort, group, output tray)
NOTE
If this setting is used to change the default setting for the duplex function to other than "one-sided" →
"one-sided" and the automatic document feeder fails or is disabled*, the setting will revert to "one-sided" → "one-sided".
* DISABLING OF DOCUMENT FEEDER (page 11) DISABLING OF DUPLEX (page 11)
Exposure adjustment
This setting is used to adjust the exposure level when "Auto" is used for the copy exposure.
The factory setting is "5". "1" indicates lighter density and "9" indicates darker density on the touch panel.
Rotation copy setting
This setting is used to have the image of an original automatically rotated when the orientation of the original does not match the orientation of the copy paper.
(Rotation copy will function only if the auto paper select or auto image mode has been selected.)
NOTE
To copy an 5-1/2" x 8-1/2" or A5 size original onto 5-1/2" x 8-1/2" R or A5R paper, this setting must be enabled.
Add or change extra preset ratios
When using inch sizes, there are normally four preset enlargement ratios and four preset reduction ratios. When using AB sizes, there are normally five preset enlargement ratios and five preset reduction ratios.
This setting allows you to add two more preset enlargement ratios and two more preset reduction ratios. This setting also allows you to change a preset ratio.
NOTE
Only an added preset ratio can be changed.
600dpi x 600dpi scanning mode for document feeder
Use this setting to change the original scanning resolution of the automatic document feeder from 600 x 300 dpi to 600 x 600 dpi.
If this mode is set, the copy quality for fine characters and fine lines will be improved but the original scanning speed will be slower.
NOTE
If you prefer a quicker scanning speed over higher resolution, do not enable this setting.
Quick scan from document glass
Use this setting to change the original scanning resolution on the document glass from 600 x 600dpi to 600 x 300 dpi.
When this setting is enabled, the first copy time will be shorter, however, copy images will be slightly coarser.
NOTE
If you prefer a higher quality copy image over a shorter first copy time, do not enable this setting.
Initial margin shift setting
This setting is used to set the initial margin shift amount.
The initial margin shift amount can be set from 0" to 1" (0 mm to 20 mm) in increments of 1/8" (1 mm).
Normally the margin shift is set to 1/2" (10 mm) for both the front and back of the paper.
Erase width adjustment
This setting is used to set the initial width of edge erase copying.
The edge erase width can be set from 0" to 1" (0 mm to 20 mm) in increments of 1/8" (1 mm).
The edge erase and center erase widths are normally set to 1/2" (10 mm).
Card shot settings
This setting is used to set the initial original size for the card shot function.
Enter the X dimension (width) first and then the Y dimension (length).
Both the X and Y dimensions can be set from 1" to 8-1/2" (25 mm to 210 mm) in increments of 1/8" (1 mm).
Setting a maximum number of copies
This setting is used to set the maximum number of copies that are allowed per original.
Any number from 1 to 999 can be set for the maximum.
The maximum number of copies is initially set to 999.
Disabling deletion of job programs
This setting is used to prohibit the deletion and changing of copy settings stored in job programs.
Disabling of bypass-tray in duplex copy
This setting is used to disable the use of the bypass tray when making duplex copies.
The bypass tray is often used to feed label sheets, transparency film, and other special papers for which two-sided copying is prohibited. If one of these special papers enters the reversing unit, a misfeed or damage to the unit may result. If special media for which two-sided copying is prohibited is often used, it is recommended that you enable this setting.
Disabling of auto paper selection
This setting is used to disable the auto paper selection function.
When this setting is enabled, paper that is the same size as the original placed on the document glass or in the automatic document feeder is not automatically selected.
DOCUMENT FILING SETTINGS
This section explains administrator settings for the document filing function.
This function can only be used on the MX-M350N/MX-M450N, or when the document filing function has been added.
Document filing settings
"Document filing settings" consists of the following settings:
●Default mode settings
- Sort method setting
●Document output options
●Administrator authority setting
●Default output tray
- Delete all quick files
●Scan complete sound setting
●Initial resolution setting
●Default exposure settings
●Batch print settings
●Default display setting
●The number of user name displayed setting
Default mode settings
This setting is used to select the initial state of the confidential checkbox (selected or not selected) in the detailed settings screen of the document filing function. Touch the [CONFIDENTIAL MODE] in this setting if you want the confidential checkbox to be initially selected. Touch the [SHARING MODE] key if you do not want the confidential checkbox to not be initially selected. Normally the check box is not initially selected.
The number of user name displayed setting
The number of user names displayed in one screen of the user name list can be changed from 8 (this is the normal setting) to 6 or 12.
Touch [6], [8], or [12] to select the number.
NOTE
When 6 or 8 names per screen is selected, each displayed key name can be up to 18 characters long. When 12 names per screen is selected, each key name can only be up to 10 characters long.
Sort method setting
This setting is used to select how lists of files stored in the "MAIN FOLDER", "CUSTOM FOLDER", and "QUICK FILE FOLDER" are ordered. Select ordering by [FILE NAME], [USER NAME], or [DATE].
Document output options
This setting is used to select the operations (print and send) that are allowed for stored files.
- The [PRINT] key in the [DOCUMENT OUTPUT SETTINGS] screen controls printing from the [JOB SETTINGS] screen.
For example, if the [PRINT] key in this setting is touched and only the [COPY] and [FAX SEND (INCL.PC-FAX)] checkboxes are selected in the screen that subsequently appears, it will only be possible to print stored files of copy jobs and fax jobs from the [JOB SETTINGS] screen of document filing. Files saved in modes that are not selected cannot be printed from the [JOB SETTINGS] screen.
- Similarly, the [SCAN SEND], [FAX SEND], and [I-FAX SEND] keys control the corresponding transmission operations in the [JOB SETTINGS] transmission screen.
Administrator authority setting
When a password has been established for a file, user name or folder, this setting is used to allow the administrator password to be entered instead of the password in order to delete the item. This is only for deletion; editing is not possible.
Default output tray
This setting is used when a finisher is installed to select the output tray for printing of stored files.
Delete all quick files
This setting is used to delete all files except protected files from the Quick File Folder.
File deletion begins when you touch the [DELETE] key and then touch the [YES] key in the message that appears.
To have all files (except protected files) automatically deleted from the Quick File Folder each time the power is turned on, select the [DELETE QUICK FILES AT POWER UP. (PROTECTED FILES EXCLUDED)] checkbox.
Scan complete sound setting
The volume of the beep that alerts you when scanning of an original has finished can be adjusted to two levels.
The beep can also be turned off.
Initial resolution setting
This is used to change the default resolution setting for "SCAN TO HDD" of the document filing function. The default resolution is initially set to "600x600dpi". To change the default resolution, touch the key of the desired resolution.
Default exposure settings
This is used to change the default exposure level for "SCAN TO HDD" of the document filing function. The default exposure is initially set to "AUTO". If changed to "MANUAL", the exposure level can be adjusted to five levels. Level 1 is the lightest level and level 5 is the darkest level.
Batch print settings
When printing files by batch printing, this setting is used to prohibit the selection of the [ALL USERS] key and the [USER UNKNOWN] key in the user selection screen.
Default display setting
The default screen that appears when the [DOCUMENT FILING] key is pressed can be specified. Select either the base screen of document filing mode or the external application selection screen. This setting can only be configured when the application communication module is installed.
When the [CA] key ([Clear all] key) is pressed in document filing mode or Sharp OSA mode, the initial screen of the mode appears, regardless of the default display setting.
Information that the administrator of the machine requires is printed on the back of this page.
(Separate this page from the manual and keep it in a safe place. In addition, fill in the name of the administrator and the administrator's contact information in the left hand margin.)
TO THE ADMINISTRATOR OF THE MACHINE
(Separate this page from the manual and keep it in a safe place.)
Factory default passwords (Web pages)
There are two factory default accounts: "Administrator" and "User". A person who logs in as an "Administrator" can configure all settings in the Web pages. A person who logs in as a "User" can only configure certain settings.
The factory default passwords are shown below.
| Factory default account Factory default password | ||
| User user Sharp | ||
| Administrator admin Sharp | ||
Forwarding all transmitted and received data to the administrator (document administration function)
This function is used to forward all data transmitted and received by the machine to a specified destination (Scan to E-mail address, Scan to FTP destination, Scan to Network Folder destination, or Scan to Desktop destination).
This function can be used by the administrator of the machine to archive all transmitted and received data. To configure the document administration settings, click [Image Send Management] and then [Document Administration Function] in the Web page menu. (Administrator rights are required.)
NOTE
● The format, exposure, and resolution settings of transmitted and received data remain in effect when the data is forwarded.
●The functions below cannot be used when transmitted faxes are forwarded.
Quick Online transmission, dialing using the speaker
● To use the document administration function, the network scanner expansion kit is required.
SHARP®
SHARP ELECTRONICS CORPORATION
1 Sharp Plaza, Mahwah, New Jersey 07430-1164.
www.sharpusa.com
SHARP ELECTRONICS OF CANADA LTD.
335 Britannia Road East, Mississauga, Ontario, L4Z 1W9
SHARP CORPORATION
This manual has been printed using a vegetable-based soy oil ink to help protect the environment.
Printed on 100% post-consumer recycled paper

PRINTED IN CHINA
2007D KS1
TINSE3680FCZ1
- MX-M350U MX-M450U MX-M350N MX-M450N
- LASER PRINTER
- OPERATION MANUAL
- PART 1: GENERAL INFORMATION
- Caution:
- For users in the USA
- WARNING:
- Note:
- Trademark acknowledgments
- NOTES
- Warranty
- PRODUCT CONFIGURATIONS
- OPERATION MANUALS
- INSTALLATION REQUIREMENTS
- CAUTIONS
- "BATTERY DISPOSAL"
- Laser Information
- Caution
- For North America:
- SAFETY PRECAUTIONS
- For Europe:
- VORSICHT
- CHAPTER 1 BEFORE USING THE PRODUCT
- CHAPTER 3 PERIPHERAL DEVICES
- CHAPTER 4 MAKING COPIES
- CHAPTER 5 CONVENIENT COPY FUNCTIONS
- CHAPTER 6 MACHINE MAINTENANCE (FOR COPYING)
- CHAPTER 7 DOCUMENT FILING FUNCTION
- CHAPTER 8 SPECIFICATIONS
- CHAPTER 1
- BEFORE USING THE PRODUCT
- INTRODUCTION
- ■ Original and paper sizes
- ■ The meaning of "R" in original and paper size indications
- MAIN FEATURES
- 2-sided Copy See pages 4-10, 4-13
- Exposure Adjustments See page 4-14
- Reduction / Enlargement See page 4-15
- XY Zoom See page 4-18
- Margin Shift See page 5-3
- Erase See page 5-4
- Dual Page Copy See page 5-5→
- Pamphlet Copy See page 5-6→
- Job Build See page 5-8
- Tandem Copy See page 5-10
- Covers/inserts See page 5-12
- Transparency Insert See page 5-23
- Multi Shot See page 5-24
- Book Copy See page 5-26
- Card Shot See page 5-27 →
- Job programs See page 5-42
- Mirror Image See page 5-29 →
- B/W Reverse See page 5-29→
- Date See page 5-33 →
- Stamp See page 5-34 →
- Page numbering See page 5-35
- Text See page 5-39
- Meeting
- Interrupting a copy run See page 5-44
- Offset mode See page 3-8 →
- Staple sort mode See page 3-8, 3-16
- Saddle stitch See page 3-14→
- Hole punching See page 3-17
- Document filing function See CHAPTER 7
- Energy saving features
- Preheat mode
- Auto power shut-off mode
- PART NAMES AND FUNCTIONS
- Exterior
- Interior
- Duplex module side cover
- Side cover latch
- Fusing unit
- Toner cartridge (drum/toner cartridge)
- Photoconductive drum
- NOTE
- Cartridge lock lever
- Part names and functions of peripheral devices
- Upper exit tray extension (AR-TE4)
- Finisher (AR-FN6)
- Right output tray (AR-TE5)
- Mail-bin stacker (AR-MS1)
- Stand/MPD & 2000 sheet paper drawer (AR-D28)
- Multi purpose drawer (AR-MU2)
- Stand/3 x 500 sheet paper drawer (AR-D27)
- Saddle stitch finisher (AR-FN7)
- Duplex module (AR-DU3)
- Duplex module/bypass tray (AR-DU4)
- Exit tray (AR-TE3)
- ■ Other optional equipment
- ●Network expansion kit (MX-NBX2)
- ●Network expansion kit (MX-NBX3)
- ●Barcode font kit (AR-PF1)
- ●Data security kit (MX-FRX6, MX-FRX6U, MX-FRX7, MX-FRX7U)
- ●PS3 expansion kit (AR-PK6)
- ●Facsimile expansion kit (AR-FX12)
- ●Additional fax memory (8MB) (AR-MM9)
- ●Network scanner expansion kit (MX-NSX1)
- ●Internet fax expansion kit (MX-FWX1)
- ●Application integration module (MX-AMX1)
- ● Application communication module (MX-AMX2)
- ● External account module (MX-AMX3)
- ●Flash ROM kit (AR-PF2)
- Operation panel
- Touch panel
- Mode select keys and indicators
- [DOCUMENT FILING] key
- [IMAGE SEND] key/LINE indicator/DATA indicator
- [COPY] key
- PRINT mode indicators
- READY indicator
- DATA indicator
- [JOB STATUS] key
- [SYSTEM SETTINGS] key
- Numeric keys
- [ ]key ([LOGOUT] key)
- [#/P] key
- [C] key (Clear key)
- [START] key
- [CA] key (Clear all key)
- Touch panel
- ■ Using the touch panel
- ■ Selecting a function
- ■ Job status screen (common to print, scan, fax and Internet fax)
- SCAN mode
- Fax mode
- Internet Fax mode
- \*1 "PAPER EMPTY" in the job status display
- Mode select key
- [PRINT JOB] key
- [SCAN TO] key
- [FAX JOB] key
- Display switching keys
- [INTERNET-FAX] key
- [STOP/DELETE] key
- [PRIORITY] key
- [DETAIL] key
- [CALL] key *2
- AUDITING MODE
- Using the machine when the auditing mode is enabled
- Enter your account number (5 digits) with the numeric keys.
- Follow the appropriate steps to perform the copy job.
- When the copy job is finished, press the [✗ key ([LOGOUT] key)
- CHAPTER 2
- MANAGING THE MACHINE
- Page
- LOADING PAPER 2-2
- SYSTEM SETTINGS 2-12
- REPLACING THE TONER CARTRIDGE.... 2-15
- STORAGE OF SUPPLIES 2-16
- MISFEED REMOVAL.... 2-17
- REMOVING AN ORIGINAL MISFEED 2-22
- TROUBLESHOOTING 2-23
- LOADING PAPER
- Loading paper in paper tray 1
- Pull out paper tray 1.
- Load paper into the tray.
- Gently push tray 1 into the machine.
- Set the paper type.
- Loading paper in paper tray 1 is now complete.
- Changing the paper size in paper tray 1
- Adjust the guide plates A and B in the tray to the length and width of the paper.
- Gently push tray 1 into the machine.
- Set the paper size.
- Changing paper size in paper tray 1 is now complete.
- Load paper into the tray.
- 2-2
- Specifications of paper trays
- ■Applicable plain paper
- ■Applicable special paper
- ■Paper that can be used for automatic two-sided printing
- Setting the paper type and paper size
- Press the [SYSTEM SETTINGS] key.
- Touch the [PAPER TRAY SETTINGS] key.
- Touch the [TRAY SETTINGS] key.
- Display the setting screen of the desired paper tray.
- Touch the [TYPE / SIZE] key.
- Select the type of paper that was loaded in the tray.
- ■User type
- Select the size of paper that was loaded in the tray.
- Touch the [OK] key in the size setting screen.
- Select output functions that can be used with the selected tray.
- Configure paper settings for each tray and then touch the [OK] key to exit.
- Setting the paper size when a special size is loaded
- Tray 2 and the bypass tray
- Touch the [OK] key.
- Programming and editing paper types
- Loading paper in the multi purpose drawer
- ■How to change the paper size
- ■Setting envelopes or postcards
- Loading postcards
- Loading envelopes
- Printing onto envelopes or postcards
- Printing onto envelopes
- Fusing unit pressure adjusting levers
- Unlatch the duplex module and slide it to the left.
- Gently close the duplex module.
- Lower the two fusing unit pressure adjusting levers marked A and B in the illustration.
- ■Loading transparency film
- Loading paper in the stand/3 x 500 sheet paper drawer
- Upper paper tray:
- Middle and lower paper trays:
- Loading paper in the stand/MPD & 2000 sheet paper drawer
- Lower paper tray:
- Pull out the large capacity tray.
- Load paper onto the right and left paper feed tables.
- Gently push the large capacity paper tray into the machine.
- Loading paper in the stand/MPD & 2000 sheet paper drawer is now complete.
- Specifications (stand/MPD & 2000 sheet paper drawer)
- SYSTEM SETTINGS
- For the detailed descriptions and use of the settings listed below, see the fax, image send, and printer manuals.
- General procedure for system settings
- Touch the key of the desired item to display its setting screen.
- Touch the [CLOCK] key.
- Touch the year, month, day, hour or minute key, and then use the or key to adjust the setting.
- Touch the [DATE FORMAT] key.
- If you wish to change the format of the date and time, touch the desired format keys.
- Touch the [OK] key.
- Touch the [OK] key.
- To exit the settings, touch the [EXIT] key.
- About the settings
- ■ Total count
- ■ Default settings
- ■ List print
- ■ Paper tray settings
- REPLACING THE TONER CARTRIDGE
- Open the front cover.
- Lower the cartridge lock lever.
- While depressing the lock release button, pull out the toner cartridge and remove it.
- Remove a new toner cartridge from the package and shake it horizontally five or six times.
- Insert a new toner cartridge.
- Gently remove the sealing tape from the cartridge.
- Return the cartridge lock lever.
- Close the front cover.
- STORAGE OF SUPPLIES
- ■ Proper storage
- Supply and Consumables
- MISFEED REMOVAL
- !CAUTION
- Misfeed removal guidance
- Misfeed in the transport area, fusing area, and exit area
- Misfeed in the duplex module
- ■ Misfeed in the bypass tray
- Misfeed in the paper feed area
- ■ Misfeed in paper tray 1
- Remove the misfed paper.
- If misfed paper is not found in step 2, pull out paper tray 1 and remove the misfed paper.
- Gently close the paper tray.
- Gently close the duplex module.
- Installation of trays in the stand/3x500 sheet paper drawer
- ■ Misfeed in the multi purpose drawer
- Open the left cover of the stand/paper drawer.
- Remove the misfed paper.
- Close the left cover of the stand/paper drawer.
- Gently close the duplex unit.
- If misfed paper is not found in step 3, refer to "Misfeed in paper tray 1" (steps 1 to 5 on the previous page) to remove the misfed paper.
- ■ Misfeed in the stand/3 x 500 sheet paper drawer
- ■ Misfeed in the stand/MPD & 2000 sheet paper drawer
- Gently close the large capacity tray.
- REMOVING AN ORIGINAL MISFEED
- Removing a misfed original from the automatic document feeder
- Removing misfeeds from each location.
- - Check location A
- - Check location B
- ● Misfeed in the transfer unit
- Open and close the document feeder.
- TROUBLESHOOTING
- CHAPTER 3
- PERIPHERAL DEVICES
- DUPLEX MODULE
- Part names
- Exit tray
- Bypass tray
- Loading paper in the bypass tray
- Open the bypass tray.
- Set the bypass tray paper guides to the width of the paper to be used.
- Insert the paper all the way into the bypass tray.
- Set the type and size of the loaded paper.
- Loading paper in the bypass tray is now complete.
- Troubleshooting (concerning the duplex module)
- MAIL-BIN STACKER
- Top cover
- Top tray
- Front cover
- Mail bins
- Specifications
- Misfeed in the mail-bin stacker
- Open the top cover.
- Remove the misfed paper.
- Close the paper guide.
- If the misfed paper is not found in step 2, open the front cover.
- Turn the roller rotating knob in the direction of the arrow to remove the misfed paper.
- Open the paper guide.
- FINISHER
- Latch
- Staple box-
- Offset tray
- Supplies
- Finisher functions
- ■ Sort mode
- ■ Offset mode
- ■ Group mode
- ■ Staple sort mode
- Using the finisher functions
- [STAPLE SORT] key (See page 3-8.)
- [SORT] key (See page 3-8.)
- Icon display
- [OFFSET] key (See page 3-8.)
- [OFFSET TRAY] key (See page 3-8.)
- [TOP TRAY] key
- [OK] key
- Staple cartridge replacement
- Turn the staple unit to face up.
- Pull the release lever for the staple box and remove the box.
- Remove the empty staple cartridge from the staple box.
- Insert a new staple cartridge into the staple box aligning the arrow of the staple cartridge with that of the staple box.
- Remove the tape from the staple cartridge by pulling it straight.
- Reinstall the staple box.
- While pushing the staple unit release lever to the left, rotate the staple unit to face down.
- Close the front cover.
- ■ Checking the staple unit
- Open the finisher compiler.
- Remove the misfed paper from the stapler compiler.
- Close the finisher compiler.
- Open the finisher front cover.
- Turn the staple unit to face up.
- Pull the release lever for the staple box and remove the box.
- Raise the lever at the end of the staple box.
- Return the lever to its original position.
- Reinstall the staple box.
- While pushing the staple unit release lever to the left, rotate the staple unit to face down.
- Close the front cover.
- Misfeed in the finisher
- Remove the misfed paper from the output area.
- Raise the paper guide and remove the misfed paper.
- Open the finisher top cover.
- Close the finisher compiler.
- Open the finisher compiler.
- Troubleshooting finisher problems
- SADDLE STITCH FINISHER
- Stapler compiler
- Saddle stitch tray
- Stapler section
- Saddle stitch finisher functions
- ■Staple sort mode
- ■ Original orientation when using the staple sort or punch function
- ■ Saddle stitch function
- ■ Hole punching (only if a punch module is installed)
- Using the saddle stitch finisher
- [GROUP] key (See page 3-15.)
- [STAPLE SORT] key (See page 3-16.)
- [SORT] key (See page 3-15.)
- [OFFSET TRAY] key
- [CENTER TRAY] key
- [OK] key
- [OFFSET] key (See page 3-15.)
- [SADDLE STITCH] key (See page 3-17.)
- [PUNCH] key (See page 3-17.)
- Staple cartridge replacement and staple jam removal
- ■ Staple cartridge replacement
- ■ Staple jam removal
- Misfeed in the saddle stitch finisher
- Troubleshooting (concerning the saddle stitch finisher)
- SHARP OSA
- APPLICATION COMMUNICATION MODULE (MX-AMX2)
- Standard application setup
- Selecting a standard application
- ■ Selecting a standard application from the job status screen
- Touch the Sharp OSA icon.
- Select the standard application.
- The machine connects to the standard application.
- ■ Selecting the standard application from document filing mode
- Touch the [Sharp OSA] key.
- Operation in OSA mode
- EXTERNAL ACCOUNT MODULE (MX-AMX3)
- External account application setup
- Operation in external account mode
- ■ External authentication mode
- If login fails
- ■ External count mode
- Part 2: Copier Operation
- CHAPTER 4
- MAKING COPIES
- AUTOMATIC DOCUMENT FEEDER
- Acceptable originals
- ■ Size and weight of acceptable originals
- ■ Total number of originals that can be set in the document feeder tray
- ■ Notes on use of the automatic document feeder
- PLACING ORIGINALS
- ■Using the automatic document feeder
- ■Using the document glass
- Original size detection function
- ■ Standard original placement orientations
- ■ Automatic copy image rotation - rotation copying
- CHECKING THE SIZE OF A PLACED ORIGINAL
- Manually setting the scanning size
- Touch the [ORIGINAL] key.
- Touch the desired original size key.
- Touch the [OK] key.
- The selected original size appears in the top half of the [ORIGINAL] key.
- STORING, DELETING, AND USING ORIGINAL SIZES
- Storing or deleting an original size
- Touch the [CUSTOM SIZE] key.
- Touch the [STORE/DELETE] key.
- Touch the original size key ( ) that you wish to store or delete.
- Enter the X (width) and Y (length) dimensions of the original with the ▲▼ keys.
- Touch the [OK] key.
- When you touch a key that shows an original size in step 4, a message screen appears that contains the keys [CANCEL], [DELETE], and [AMEND].
- To exit, touch the [ORIGINAL] key.
- ■ USING A STORED ORIGINAL SIZE
- Follow steps 1 to 2 of "STORING OR DELETING AN ORIGINAL SIZE".
- Touch the original size key that you wish to use.
- NORMAL COPYING
- Making copies with the automatic document feeder
- ■ 1-sided copies of 1-sided originals
- Select the desired output mode (page 4-9).
- Use the numeric keys to set the desired number of copies.
- Press the [START] key.
- To cancel copying...
- ■ Copy output (sort and group)
- ■ Selecting the output tray (when an optional finisher or saddle stitch finisher is installed)
- Automatic two-sided copying using the automatic document feeder
- Copying from the document glass
- ■1-sided copies of 1-sided originals
- Place the original on the document glass. (pages 4-3 to 4-6)
- Ensure that the 1-sided to 1-sided copy mode is selected.
- Ensure that paper of the same size as the original is automatically selected\*.
- Select the desired output mode. (page 4-9.)
- Use the numeric keys to set the desired number of copies.
- Press the [START] key.
- Touch the [READ-END] key.
- Automatic two-sided copying from the document glass
- ADJUSTING THE EXPOSURE
- ■ Automatic exposure adjustment
- ■ Selecting the exposure mode and manually adjusting the exposure level
- Touch the [EXPOSURE] key.
- Select [TEXT], [TEXT/PHOTO] or [PHOTO] as appropriate for the original to be copied.
- Exposure modes selection
- Adjust the exposure level.
- Exposure levels in TEXT mode
- About the steps that follow
- REDUCTION/ENLARGEMENT/ZOOM
- Automatic selection (auto image)
- Place the original in the document feeder tray or on the document glass. (pages 4-3 to 4-6)
- Touch the [PAPER SELECT] key and then select the desired paper size.
- Touch the [AUTO IMAGE] key.
- Use the numeric keys to set the desired number of copies.
- Press the [START] key.
- Manual selection (preset copy ratios/zoom)
- Make sure that an appropriate paper size has been selected based on the selected ratio.
- Use the numeric keys to set the desired number of copies.
- Press the [START] key.
- To return the ratio to 100%
- XY ZOOM
- SPECIAL PAPERS
- CHAPTER 5
- CONVENIENT COPY FUNCTIONS
- SPECIAL MODES
- General procedure for using special functions
- Touch the [SPECIAL MODES] key.
- Touch the key for the desired special mode.
- Margin shift
- Touch the [MARGIN SHIFT] key on the special modes screen.
- Select the shift direction.
- Set the shift amount as needed and touch the [OK] key.
- Touch the [OK] key on the special modes screen.
- Erase
- EDGE ERASE
- CENTER ERASE
- EDGE + CENTER ERASE
- Touch the [ERASE] key on the special modes screen.
- Select the desired erase mode.
- Adjust the amount of erase and touch the [OK] key.
- Dual page copy
- Touch the [DUAL PAGE COPY] key on the special modes screen.
- Touch the [OK] key on the special modes screen.
- Place the originals on the document glass.
- Ensure that 8-1/2" x 11" (A4) size paper is selected.
- Pamphlet copy
- Touch the [PAMPHLET COPY] key on the special modes screen.
- Designate the type of originals to be copied: 1-sided or 2-sided.
- Select the binding position (left binding or right binding).
- Touch the [COVER SETTING] key.
- [When using the document glass:]
- Job build
- ■ Changing the copy settings for each set of originals
- Select the desired copy settings in the screen that appears and press the [START] key.
- Tandem copy
- Touch the [TANDEM COPY] key on the special modes screen.
- Server machine and client machine
- Set the number of copies with the numeric keys.
- Place the original in the document feeder or on the document glass. (page 4-3)
- Covers/inserts
- About the explanations of covers and inserts
- ■ Preparations for using covers and inserts
- ■ Procedure for inserting front and back cover paper
- Touch the [COVERS/INSERTS] key in the special modes screen (2nd screen).
- Select the tray used for the front cover paper.
- Touch the [FRONT COVER] key in the screen of step 2.
- Set the insertion conditions for the front cover paper.
- Touch the [OK] key in the screen of step 5. You will return to the screen of step 2.
- To insert back cover paper, repeat steps 2 through 6, using the [BACK COVER] key instead of the [FRONT COVER] key.
- Touch the [PAGE LAYOUT] key in the screen of step 7 to display a list of the selected settings (page 5-16).
- ■ Procedure for adding inserts
- Select the tray used for insertion type A.
- Touch the [INSERTION TYPE A SETTING] key in the screen of step 2
- Set the insertion conditions for insertion type A.
- If you wish to insert a different paper with the [INSERTION TYPE B SETTING] key, repeat steps 2 through 6. Use the [INSERTION TYPE B SETTING] key instead of the [INSERTION TYPE A SETTING] key, and the [INSERTION TYPE B] key instead of the [INSERTION TYPE A] key.
- - Checking, editing, and deleting cover/insert pages
- To display the [PAGE LAYOUT] key...
- Touch the [PAGE LAYOUT] key.
- The set covers/inserts pages are shown.
- When you have finished checking the pages, touch the [OK] key.
- ■ Examples of covers and inserts
- ■ Symbols used for covers and inserts
- ■ Covers (One-sided copying of one-sided originals)
- ■ Covers (Two-sided copying of one-sided originals)
- ■ Covers (One-sided copying of Two-sided originals)
- ■ Covers (Two-sided copying of two-sided originals)
- ■ Inserts (One-sided copying of one-sided originals)
- ■ Inserts (One-sided copying of two-sided originals)
- Transparency film with insert sheets
- Load transparency film into the tray 2.
- Press the [SYSTEM SETTINGS] key.
- Touch the [PAPER TRAY SETTINGS] key.
- Touch the [TRAY SETTINGS] key.
- Touch the +key to display the tray settings screen of tray 2.
- Touch the [TYPE/SIZE] key.
- Touch the [TRANSPARENCY] key.
- Touch the [TRANSPARENCY INSERTS] key in the special modes screen (2nd screen).
- Set the insertion conditions for the insert paper.
- Touch the outer [OK] key in the screen of step 7.
- Multi shot
- Touch the [MULTI SHOT] key in the special modes screen (2nd screen).
- Select the number of images to be copied onto one sheet of copy paper.
- Select the layout.
- Touch the [OK] key (inside [OK] key) on the multi shot setting screen.
- Touch the [OK] key in the special modes screen.
- Book copy
- Touch the [BOOK COPY] key in the special modes screen (2nd screen).
- Select whether the book opens to the left or to the right, and touch the [OK] key in the book copy setting screen.
- Select any desired cover settings.
- Touch the [OK] key in the special modes screen.
- Place the originals on the document glass. (page 4-3)
- Make sure that the desired paper size has been selected.
- Select the number of copies and any other desired copy settings, and then press the [START] key.
- Place the next two pages and press the [START] key. Repeat until all pages have been scanned, and then touch the [READ-END] key.
- Card shot
- Touch the [PAPER SELECT] key and then select the desired paper size.
- Touch the [CARD SHOT] key in the special modes screen (2nd screen).
- Enter the X dimension (width) and Y dimension (length) of the original with the ▼▲ keys.
- Touch the outer [OK] key.
- Place the original on the document glass.
- Follow steps 4 through 6 of "Copying from the document glass" (page 4-12).
- Press the [START] key.
- Place the back side of the original face down on the document glass (see step 5).
- Touch the [READ-END] key.
- Mirror image
- Touch the [MIRROR IMAGE] key in the special modes screen (2nd screen).
- B/W reverse
- Touch the [B/W REVERSE] key in the special modes screen (3rd screen).
- Touch the [OK] key in the special modes screen.
- Print menu
- • Date print (page 5-33)
- • Page numbering (page 5-35)
- - Stamp (page 5-34)
- CONFIDENTIAL
- - Text (page 5-39)
- ■ Common operation procedure for using the print menu
- To display the special modes screen...
- Touch the [PRINT MENU] key in the special modes screen (3rd screen).
- Select the print position.
- Select the print menu.
- To select print menu settings at another print position, repeat steps 2 and 3.
- Touch the ▼key.
- To specify the orientation of the original, touch the [ORIGINAL ORIENTATION] key.
- If you are adding covers or inserts, select whether or not you wish to print on the covers or inserts.
- Printing in combination with other special functions
- ■Printing the date on copies
- ■ Printing a stamp (reverse text) on copies
- ■ Printing the page number on copies
- Examples of page number printing
- ■Printing entered text on copies
- Storing text sequences
- Editing and deleting stored text
- ■ Checking and changing the print layout
- Touch the [LAYOUT] key on the print menu screen.
- Touch the key in which you wish to change the print position or delete print content.
- To change the print position, touch the [MOVE] key. To delete print content, touch the [DELETE] key.
- Touch the key of the new position.
- Touch the [OK] key.
- STORING, USING AND DELETING JOB PROGRAMS
- Storing a job program
- Press the [#/P] key.
- Touch the [STORE/DELETE] key.
- Touch the number key ([1] to [10]) in which you wish to store the job program.
- Select the copy settings that you wish to store in the job program.
- ■ If a number key is selected in step 3 that has already been programmed.
- Calling up a job program
- Touch the number key of the desired job program.
- Set the number of copies if needed and then press the [START] key.
- Deleting a stored job program
- Select a storage register number of the program to be deleted.
- Touch the [DELETE] key.
- INTERRUPTING A COPY RUN
- Touch the [INTERRUPT] key.
- CHAPTER 6
- MACHINE MAINTENANCE (FOR COPYING)
- USER MAINTENANCE
- Cleaning the document glass and the automatic document feeder
- Cleaning the main charger of the photoconductive drum
- CHAPTER 7
- DOCUMENT FILING FUNCTION
- OVERVIEW
- ■ Quick File folder
- ■ Main folder
- ■ Custom folder
- ■ Attributes of saved files
- TO USE THE DOCUMENT FILING FUNCTION
- A look at the operation panel
- Touch panel (see the next page)
- Mode select keys
- [DOCUMENT FILING] key
- Numeric keys
- [C] key (Clear key)
- [CA] key (Clear all key)
- [SYSTEM SETTINGS] key
- Saving files
- Main screen of document filing
- Message display
- [SCAN TO HDD] key
- [FILE FOLDER] key
- [QUICK FILE FOLDER] key
- [SEARCH] key
- [HDD STATUS] key
- SAVING A DOCUMENT IMAGE FILE
- Quick File
- Place the originals in the document feeder tray and select resolution and exposure settings.
- Touch the [QUICK FILE] key in the main screen.
- Press the [START] key on the operation panel.
- The saved image can be called up from the Quick File folder or the job status screen.
- The following operations can be performed on the image that was called up in step 4.
- Filing
- Touch the [FILE] key in the main screen.
- Touch the [USER NAME] key.
- Touch the desired user name in the list of user names that appears.
- Touch the [FILE NAME] key.
- Touch the [STORED TO:] key.
- Touch the desired folder name in the list of folder names that appears
- Touch the [OK] key.
- If needed, select the [CONFIDENTIAL] checkbox (only in copy mode).
- Touch the [PASSWORD] key.
- Enter a 5-digit password with the numeric keys.
- Touch the [OK] key.
- You will return to the screen of step 10. The set password is displayed with "\*".
- Touch the [OK] key.
- Press the [START] key on the operation panel.
- The saved image can be called up using the file name, folder name, or user name, or from the filing folder.
- The following operations can be performed on the image that was called up:
- Print jobs
- ■ Using a print job file (printing, deleting, transmitting, etc.)
- Press the [DOCUMENT FILING] key on the operation panel.
- Touch the [FILE FOLDER] key or the [QUICK FILE FOLDER] key depending on where the file is saved.
- Touch the key of the folder that contains the desired file.
- Touch the printer icon (tab and then touch the key of the desired file.
- Touch the key of the operation that you wish to perform.
- Scan Save
- Touch the [SCAN TO HDD] key.
- Touch the [SPECIAL MODES] key.
- Touch the [FILE INFORMATION] key.
- The screens for selecting the user name, file name, folder, and attribute appear. Configure the settings as explained in step 3 to step 15 on pages 7-7 to 7-8. When step 15 is completed, you will return to the main screen of document filing.
- Perform any of the following steps 7 to 16 as needed. When finished, go to step 17 on page 7-11.
- Touch the [ORIGINAL] key.
- To set the original size, see "Manually setting the scanning size" on page 4-5.
- If the original is two-sided, touch the [2-SIDED BOOKLET] key or the [2-SIDED TABLET] key depending on where the pages are bound.
- Touch the [OK] key.
- [Placing the original]
- ■ Using special functions for scan save
- [ERASE] key (see page 5-4)
- [DUAL PAGE SCAN] key (see page 5-5)
- [2in1] key (see page 5-24)
- [JOB BUILD] key (see page 5-8)
- [CARD SHOT] key (see page 5-27)
- CALLING UP AND USING A FILE
- Searching for and calling up a saved file
- ■Procedure for searching for a file
- [Searching by user name]
- [Searching by file or folder name]
- Touch the [FILE OR FOLDER NAME] key.
- Touch the [START SEARCH] key.
- Calling up and using a saved file
- ■ General procedure for using a saved file
- Touch the desired file key.
- File selection screen
- File keys
- [File Name] key, [User Name] key, [Date] key
- [Back] key
- Select displayed files by job type.
- [Batch Print] key
- [Print]
- [PAPER SELECT] key
- [OUTPUT] key
- [2-SIDED] key
- [TANDEM PRINT] key
- [NUMBER OF PRINTS] setting key
- [PRINT AND DELETE THE DATA] key
- [PRINT AND SAVE THE DATA] key
- ■ Batch printing
- Touch the [BATCH P.] key in the file list screen of document filing mode.
- Touch the [USER NAME] key.
- Touch the user name of the files that you wish to print by batch printing.
- If a password has been established, touch the [PASSWORD] key.
- To set the number of copies, touch the [CHANGE PRT.NO.] key.
- Touch the [APPLY THE NUMBER FROM STORED SETTING OF EACH JOB] checkbox to remove the checkmark.
- Set the number of copies with the keys.
- ■ [Send]
- [SEND SETTINGS] key
- [SUB ADDRESS] key or [ADDRESS ENTRY] key
- ■ [Property change]
- [Restrictions on changing the attribute]
- Touch the [PROPERTY CHANGE] key in the operation selection screen.
- Touch the key of the desired attribute.
- ■ [Move]
- Touch the [MOVE TO:] key and select the folder to which you wish to move the file.
- Touch the [OK] key.
- Touch the [MOVE] key.
- Touch the [CANCEL] key.
- ■ [Delete]
- [Detail]
- ■ Calling up and manipulating a file from the job status screen
- Press the [JOB STATUS] key.
- Touch the [COMPLETE] key.
- Touch the key of the desired file.
- To view information on the file, touch the [DETAIL] key.
- Touch the [CALL] key.
- Creating, editing, and deleting user names and folders
- ■ General procedure for creating, editing, and deleting user names and folders
- Touch the [DOCUMENT FILING CONTROL] key.
- Touch the key of the operation that you wish to perform.
- ■ Programming a user name
- Touch the [USER NAME] key.
- Touch the [INITIAL] key.
- Touch the [PASSWORD] key.
- Set a password for the user name (enter a 5-digit password with the numeric keys).
- If you wish to specify a folder for the user name, touch the [STORED TO:] key. If you wish to use the main folder, go to step 8.
- The folders that have been created appear. Touch the desired folder. If you wish to create a new folder, or if no folders have been created, touch the [ADD NEW] key.
- Touch the [EXIT] key.
- To exit, touch the [EXIT] key. To program another user name, touch the [NEXT] key.
- ■ Editing and deleting a user name
- Touch the [AMEND/DELETE USER NAME] key.
- Touch the [USER NAME] key that you wish to edit or delete.
- Enter the 5-digit password with the numeric keys.
- [Editing]
- Touch the key of each item that you wish to edit (edit as explained in steps 1 to 9 in "Programming a user name" on page 7-25).
- When you have finished editing the desired items, touch the [EXIT] key.
- [Deleting]
- Touch the [DELETE] key.
- Touch the [YES] key.
- ■ Creating a custom folder
- Touch the [FOLDER NAME] key.
- If you wish to set a password for the new folder, touch the [PASSWORD] key.
- Set a password for the folder (enter a 5-digit password with the numeric keys).
- Touch the [USER NAME] key.
- The programmed user names appear. Touch the desired user name. If you do not wish to use any of the user names that appear, touch the [ADD NEW] key to program a new user name.
- Enter the 5-digit password of the selected user name with the numeric keys.
- ■ Editing/deleting a custom folder
- Touch the [AMEND/DELETE CUSTOM FOLDER] key.
- Touch the [FOLDER NAME] key that you wish to edit or delete.
- Edit or delete the folder.
- Touch the key of each item that you wish to edit (edit as explained in steps 1 to 10 of "Creating a custom folder" on page 7-27).
- When you have finished editing the items, touch the [EXIT] key.
- ENTERING CHARACTERS
- ■ Entering alphabetical characters
- ■Entering numbers and symbols
- Touch the [AB/ab ◀12#\$%] key.
- Enter the desired number or symbol.
- When you have finished entering characters, touch the [OK] key.
- CHAPTER 8
- LIST OF COMBINATION OF PERIPHERAL DEVICES
- INDEX
- ■ Numerics
- A
- B
- ■ C
- D
- E
- ■ F
- G
- ■ H
- ■
- ■ J
- ■K
- ■ L
- ■M
- ■ N
- 10
- P
- ■Q
- ■ R
- ■s
- ■T
- ■ U
- ■ w
- ■ X
- ■Z
- NOTICE
- SHARP®
- SHARP ELECTRONICS CORPORATION
- SHARP ELECTRONICS OF CANADA LTD.
- SHARP CORPORATION
- ADMINISTRATOR SETTINGS GUIDE
- Contents page
- PURPOSE OF THE ADMINISTRATOR SETTINGS
- General settings
- Copy settings
- Document filing settings
- Setting an administrator password
- ADMINISTRATOR SETTINGS LIST
- USING THE ADMINISTRATOR SETTINGS
- Touch the [ADMINISTRATOR SETTINGS] key.
- Use the numeric keys to enter the 5-digit administrator password.
- Touch the [CHANGE ADMIN PASSWORD] key.
- Use the numeric keys to enter the new 5-digit administrator password.
- Touch the [OK] key. You will return to the screen of step 4.
- Touch the [EXIT] key.
- Additional information on using the keys to configure administrator settings
- Administrator settings menu
- Account control
- Total pages per account
- ●Printing out all accounts
- ●Displaying only selected accounts
- Resetting account
- ●Resetting one account at a time
- - Resetting all accounts
- Account limit setting
- ●Limiting the number of copies per account
- ●Limiting the number of copies of all accounts
- Account number control
- Account number security
- Cancel jobs of invalid accounts
- Enter account number in Sharp OSA mode
- Job log control
- Clear all job log data
- Energy save
- Toner save in printer mode
- Toner save in copy mode
- Auto power shut-off
- Auto power shut-off timer
- Preheat mode setting
- Operation settings
- Keys touch sound
- Auto clear setting
- Disabling of job priority operation
- Message time setting
- Disabling of bypass printing
- Display language setting
- Key operation setting
- Disabling switching of display order
- Disabling of clock adjustment
- Device control
- Original size detector setting
- Disabling of document feeder
- Disabling of duplex
- Disabling of stapler
- Disabling of punch
- Disabling of optional paper drawer
- Disabling of finisher
- Disabling of mail-bin stacker
- Disabling of covers/inserts mode
- Saddle stitch position adjust
- [AUTOMATIC SADDLE STITCH] checkmark
- Saddle stitch stapling exceptions
- High speed stacking
- Auto paper selection setting
- Optimization of a hard disk
- ●About stopped jobs
- ●Operation after optimization starts
- Network settings
- IPv4 setting
- IPv6 setting
- Enable TCP/IP
- Enable NetWare
- Enable EtherTalk
- Enable NetBEUI
- Reset the NIC
- Tandem setting
- PING command
- Security settings
- SSL setting
- Server port
- Client port
- Level of encryption
- Enable IPsec
- List print
- Sharp OSA settings
- Default display setting
- External account setting
- Change admin password
- Product key
- PS3 expansion kit
- Network scanner expansion kit
- Internet fax expansion kit
- E-mail alert and status
- Network expansion kit
- Data security kit
- Application integration module
- Application communication module
- External account module
- Serial number
- Initialize and/or store settings
- Restore factory defaults 4
- Store current configuration 4
- Restore configuration 4
- Initial status settings
- Exposure adjustment
- Rotation copy setting
- Add or change extra preset ratios
- 600dpi x 600dpi scanning mode for document feeder
- Quick scan from document glass
- Initial margin shift setting
- Erase width adjustment
- Card shot settings
- Setting a maximum number of copies
- Disabling deletion of job programs
- Disabling of bypass-tray in duplex copy
- Disabling of auto paper selection
- Default mode settings
- The number of user name displayed setting
- Sort method setting
- Document output options
- Administrator authority setting
- Default output tray
- Delete all quick files
- Scan complete sound setting
- Initial resolution setting
- Default exposure settings
- Batch print settings
- TO THE ADMINISTRATOR OF THE MACHINE
- Factory default passwords (Web pages)
- Forwarding all transmitted and received data to the administrator (document administration function)
Brand : SHARP
Model : MX-M450N
Category : Printer