PA340 - Air conditioner Carson - Free user manual and instructions
Find the device manual for free PA340 Carson in PDF.


| Product Type | Portable Air Conditioner |
| Brand | Carson |
| Model | PA340 |
| Cooling Capacity | 4.7 kW (16000 BTU/h) |
| Heating Capacity | 3.3 kW (11200 BTU/h) |
| Noise Level | 65 dB |
| Refrigerant | R-290 (Propane) |
| Airflow Volume | 450 m³/h |
| Recommended Room Size | 28-35 m² |
| Input Voltage | 240 V / 50 Hz |
| Power Plug | Australian Standard (10 A) |
| Dimensions (Approx.) | 45 cm (W) x 75 cm (H) x 40 cm (D) |
| Weight (Approx.) | 30 kg |
| Operation Modes | Cooling, Heating, Fan, Dry, Sleep |
| Timer | 1-24 hours (auto on/off) |
| Remote Control | Yes, with LCD display |
| Air Filter | Washable, clean every 2 weeks |
| Drainage | Manual or continuous (gravity) |
| Minimum Room Area | 13 m² (for installation) |
| Safety Features | Overload protection, auto defrost, R290 leak detection |
| Included Accessories | Exhaust hose, window kit, remote control |
Frequently Asked Questions - PA340 Carson
User questions about PA340 Carson
0 question about this device. Answer the ones you know or ask your own.
Ask a new question about this device
Download the instructions for your Air conditioner in PDF format for free! Find your manual PA340 - Carson and take your electronic device back in hand. On this page are published all the documents necessary for the use of your device. PA340 by Carson.
USER MANUAL PA340 Carson
natural_image
White carson air conditioner unit with control panel and digital display (no visible text or symbols on device body)User Manual
[Revision 3.0]
Safety
Safety messages are designed to alert you to possible dangers or hazards that could cause death, injury or equipment or property damage if not understood or followed. Safety messages have the following symbols:

You WILL be KILLED or SERIOUSLY INJURED if you do not follow instructions.
It is vital that you read and understand this user manual before using the product, including safety warnings, and any assembly and operating instructions. Keep the manual for future reference.
Safety precautions and recommendations detailed here must be fully understood and followed to reduce the risk of injury, fire, explosion, electrical hazard, and/or property damage.
Safety information presented here is generic in nature – some advice may not be applicable to every product. The term "equipment" refers to the product, be it electrical mains powered, battery powered or combustion engine powered.
- Before Use - If you are not familiar with the safe operation/handling of the equipment or are in any way unsure of any aspect of suitability or correct use for your application, you should complete training conducted by a person or organization qualified in safe use and operation of this equipment, including fuel/electrical handling and safety.
- Do NOT operate the equipment in flammable or explosive environments, such as in the presence of flammable liquids, gases, or dust. The equipment may create sparks or heat that may ignite flammable substances.
- Keep clear of moving parts.
• Equipment may be a potential source of electric shock or injury if misused. - Do NOT operate the equipment if it is damaged, malfunctioning or is in an excessively worn state.
- Do NOT allow others to use the equipment unless they have read this manual and are adequately trained.
- Keep packaging away from children - risk of suffocation! Operators must use the equipment correctly. When using the equipment, consider conditions and pay due care to persons and property.
General Work Area Safety
• Work areas should be clean and well it.
- Do not operate the equipment if bystanders, animals etc are within operating range of the equipment or the general work area.
- If devices are provided for connecting dust extraction / collection facilities, ensure these are connected and used properly. Dust collection can reduce dust-related hazards.

You CAN be KILLED or SERIOUSLY INJURED if you do not follow instructions.
General Personal Safety
- Wear appropriate protective equipment when operating, servicing, or when in the operating area of the equipment to help protect from eye and ear injury, poisoning, burns, cutting and crush injuries. Protective equipment such as safety goggles, respirators, non-slip safety footwear, hard hat, hearing protection etc should be used for appropriate equipment / conditions. Other people nearby should also wear appropriate personal protective equipment. Do not wear loose clothing or jewellery, which can be caught in moving parts. Keep hair and clothing away from the equipment.
- Stay alert and use common sense when operating the equipment. Do not overreach. Always maintain secure footing and balance.
- Do not use the equipment if tired or under the influence of drugs, alcohol, or medication.
- This equipment is not intended for use by persons with reduced physical, sensory, or mental capabilities.
General Fuel Safety
- Petrol/fuel/gasoline is extremely flammable – keep clear of naked flames or other ignition sources.
- Do not spill fuel. If you spill fuel, wipe it off the equipment immediately – if fuel gets on your clothing, change clothing.
- Do NOT smoke near fuel or when refuelling.
• Always shut off the engine before refuelling. - Do NOT refuel a hot engine.
- Open the fuel cap carefully to allow any pressure build-up in the tank to release slowly.
• Always refuel in well-ventilated areas. - Always check for fuel leakage. If fuel leakage is found, do not start, or run the engine until all leaks are fixed.
General Carbon-Monoxide Safety
- Using a combustion engine indoors CAN KILL IN MINUTES. Engine exhaust contains carbon-monoxide – a poison you cannot smell or see.
- Use combustion engines OUTSIDE only, and far away from windows, doors, and vents.

You CAN be INJURED if you do not follow instructions or equipment damage may occur.
General Equipment Use and Care
- Keep packaging away from children and pets, potential risk of suffocation or choking.
- The equipment is designed for domestic use only.
- Handle the equipment safely and carefully.
- Before use, inspect the equipment for misalignment or binding of moving parts, loose components, damage, or any other condition that may affect its operation. If damaged, have the equipment repaired by an authorised service centre or technician before use.
- Prevent unintentional starting of the equipment - ensure equipment and power switches are in the OFF position before connecting or moving equipment. Do not carry equipment with hands or fingers touching any controls. Remove any tools or other items that are not a part of the equipment from it before starting or switching on.
- Do not force the equipment. Use the correct equipment for your application. Equipment will perform better and be safer when used within its design and usage parameters.
- Use the equipment and accessories etc. in accordance with these instructions, considering working conditions and the work to be performed. Using the equipment for operations different from those intended could result in hazardous situations.
- Always keep equipment components (engines, hoses, handles, controls, frames, housings, guards etc) and accessories (cutting tools, nozzles, bits etc) properly maintained. Keep the equipment clean and, where applicable, properly lubricated.
- Store the equipment out of reach of children or untrained persons. To avoid burns or fire hazards, let the equipment cool completely before transporting or storing. Never place or store the equipment near flammable materials, combustible gases, or liquids etc.
- The equipment is not weather-proof, and should not be stored in direct sunlight, at high ambient temperatures or locations that are damp or humid.
- Do not clean equipment with solvents, flammable liquids, or harsh abrasives.
- For specific equipment safety use and care, see Equipment Safety.
General Electrical Safety
- Inspect electrical equipment, extension cords, power bars, and electrical fittings for damage or wear before each use. Repair or replace damaged equipment immediately.
- Ensure all power sources conform to equipment voltage requirements and are disconnected before connecting or disconnecting equipment.
- When wiring electrically powered equipment, follow all electrical and safety codes.
- Always use a Residual Current Device (RCD) (GFCI) / Earth Leakage Circuit Breaker / Safety Switch when operating this item (electrical items only).
- High voltage / high current power lines may be present. Use extreme caution to avoid contact or interference with power lines. Electrical shock can be fatal.
General Electrical Safety
- Electrically grounded equipment must have an approved cord and plug and be connected to a grounded electrical outlet.
- Do NOT bypass the ON/OFF switch and operate equipment by connecting and disconnecting the electrical cord.
- Do NOT use equipment that has exposed wiring, damaged switches, covers or guards.
- Do NOT use electrical equipment in wet conditions or in damp locations.
- Do NOT use electrical cords to lift, move or carry equipment.
- Do NOT coil or knot electrical cords, and ensure electrical cords are not trip hazards.
General Service Information
- The equipment must be serviced or repaired at authorised service centres by qualified personnel only.
- Replacement parts must be original equipment manufacturer (OEM) to ensure equipment safety is maintained.
- Do NOT attempt any maintenance or repair work not described in this manual.
- After use, the equipment and components may still be hot – allow the equipment to cool and disconnect spark plugs and/or electrical power sources and/or batteries from it before adjusting, changing accessories, or performing repair or maintenance.
- Do NOT adjust while the equipment is running.
- Perform service-related activities in suitable conditions, such as a workshop.
- Replace worn, damaged or missing warning/safety labels immediately.
Child Choking Hazard!
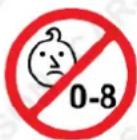
- WARNING: CHOKING HAZARD - CHILDREN UNDER 8 YRS. CAN CHOKE OR SUFFOCATE ON SMALL PARTS. ADULT SUPERVISION REQUIRED.
- Carefully inspect anything a baby or child could gain access to, including this product & packaging.
- Dangers include anything of a size that could become stuck or lodged in a baby or child's airway.
• Dangers include things like raw, hard fruit and vegetable pieces, large pieces of meat, bones or sausage skins, popcorn, nuts,
hard lollies and corn chips, small magnets and batteries, coins, beads, marbles and small uninflated balloons, broken toys and smaller toys, buttons, keys, and coins. But there are also many more.
- Pay particular attention to accessories, nuts, bolts, screws, washers, caps, covers, loose parts, parts that could be removed or break off, pieces of packaging, staples, tape etc.
- In the case of any doubt, secure the item of concern in an appropriate manner, or completely remove the possibility of access by a baby or child.
Intended Use
- This appliance is intended for use by expert or trained users in shops, light industry, farms, or for commercial use by laypersons.
- This appliance can be used by children aged 8 years and above and by persons with reduced physical, sensory, or mental capabilities or lack of experience and knowledge if they have been given supervision or instruction concerning the safe use of the appliance and understand the hazards involved. Children shall not play with the appliance. Cleaning and user maintenance shall not be performed by children without supervision.
Designated Refrigerant
- The unit is designed only for use with R-290 (propane) gas as the designated refrigerant.
- The refrigerant loop is sealed and should only be serviced by a qualified technician.
- Do not discharge the refrigerant into the atmosphere.
Propane Gas Safety
- R-290 (propane) is flammable and heavier than air. It collects first in low areas but can be circulated by the fans.
- If propane gas is present or even suspected, do not allow untrained personnel to attempt to find the cause.
- The propane gas used in the unit has no odour. The lack of smell does not indicate a lack of escaped gas.
- If a leak is detected, immediately evacuate all persons from the area, ventilate the room, and contact the local fire department to advise them of a propane leak.
- Do not allow anyone back into the room until a qualified service technician has arrived and confirmed it is safe to return.
- No open flames, cigarettes, or other possible sources of ignition should be used inside or near the units.
- Component parts are designed for propane and are non-incendiary and non-sparking. Only identical replacement parts should be used for repairs.
- FAILURE TO ABIDE BY THIS WARNING COULD RESULT IN AN EXPLOSION, DEATH, INJURY, AND PROPERTY DAMAGE.
Power Supply and Cord Safety
- If the supply cord is damaged, it must be replaced by the manufacturer, its service agent, or similarly qualified persons to avoid a hazard.
- The appliance must be disconnected from its power source during service.
• Always operate the unit from a power source of equal voltage, frequency, and rating as indicated on the product identification plate.
• Always use a grounded power outlet. - Unplug the power cord when cleaning or when not in use.
- Do not unplug by pulling on the power cord.
Handling and Operation
- Do not operate with wet hands and prevent water from spilling onto the unit.
- Do not immerse or expose the unit to rain, moisture, or any other liquid.
- Do not leave the unit running unattended. Do not tilt or turn over the unit.
- Do not unplug the unit while it is operating.
- Do not use an extension cord or an adapter plug.
- Do not place objects on the unit.
- Do not climb or sit on the unit.
- Do not insert fingers or other objects into the air outlet.
- Do not touch the air inlet or the aluminium fins of the unit.
- Do not operate the unit if it is dropped, damaged, or showing signs of product malfunction.
- Do not clean the appliance with any chemicals.
- Ensure the unit is far away from fire, flammable, or explosive objects.
Installation and Storage
- The unit shall be installed in accordance with national wiring regulations.
- Do not use means to accelerate the defrosting process or to clean other than those recommended by the manufacturer.
- The appliance shall be stored in a room without continuously operating sources (e.g., open flames, an operating gas appliance, or an operating electric heater).
- The appliance shall be stored to prevent mechanical damage from occurring.
- Do not pierce or burn the unit, even after use.
- Be aware that refrigerants may not contain an odour.
- Pipework shall be protected from physical damage and shall not be installed in an unventilated space if that space is smaller than 13m^2 .
- Compliance with national gas regulations shall be observed.
- Keep any required ventilation openings clear of obstruction.
- The appliance shall be stored in a well-ventilated area where the room size corresponds to the room area specified for operation.
- WARNING! PLEASE READ THIS MANUAL CAREFULLY AND FULLY UNDERSTAND IT BEFORE OPERATING YOUR APPLIANCE.
Additional Safety Instructions for Refrigerant Handling
- Any person involved in working on or breaking into a refrigerant circuit must hold a current valid certificate from an industry-accredited assessment authority. This certificate authorises their competence to handle refrigerants safely in accordance with an industry-recognised assessment specification.
Servicing and Maintenance
- Servicing shall only be performed as recommended by the equipment manufacturer.
- Maintenance and repair requiring the assistance of other skilled personnel shall be carried out under the supervision of a person competent in the use of flammable refrigerants.
Seeking Assistance
- If you do not understand something or need help, please contact dealer services.
Safety Precautions on Servicing
- Please follow these warnings when servicing an appliance with R290.
- CHECKS TO THE AREA: Prior to beginning work on systems containing flammable refrigerants, safety checks are necessary to ensure that the risk of ignition is minimized. For repairs to the refrigerating system, the following precautions shall be complied with before conducting work on the system.
- WORK PROCEDURE: Work shall be undertaken under a controlled procedure to minimize the risk of a flammable gas or vapour being present while the work is being performed.
- GENERAL WORK AREA: All maintenance staff and others working in the local area shall be instructed on the nature of the work being carried out. Work in confined spaces shall be avoided. The area around the workspace shall be sectioned off. Ensure that the conditions within the area have been made safe by controlling flammable materials.
- CHECKING FOR PRESENCE OF REFRIGERANT: The area shall be checked with an appropriate refrigerant detector prior to and during work to ensure the technician is aware of potentially flammable atmospheres. Ensure that the leak detection equipment being used is suitable for use with flammable refrigerants, i.e. non-sparking, adequately sealed, or intrinsically safe.
- PRESENCE OF FIRE EXTINGUISHER: If any hot work is to be conducted on the refrigeration equipment or any associated parts, appropriate fire extinguishing equipment shall be available. Have a dry powder or CO2 fire extinguisher adjacent to the charging area.
-
NO IGNITION SOURCES: No person carrying out work on a refrigeration system that involves exposing any pipework containing or that has contained flammable refrigerant shall use any ignition sources that may lead to the risk of fire or explosion. All possible ignition sources, including cigarette smoking, should be kept sufficiently far away from the site of installation, repair, removal, and disposal, during which flammable refrigerant may be released into the surrounding space. Before work begins, the area around the equipment must be surveyed to ensure there are no flammable hazards or ignition risks. "No Smoking" signs shall be displayed.
-
VENTILATED AREA: Ensure the area is open or adequately ventilated before breaking into the system or conducting any hot work. Ventilation should continue during the period that the work is carried out to safely disperse any released refrigerant and preferably expel it externally into the atmosphere.
- CHECKS TO THE REFRIGERATION EQUIPMENT: When changing electrical components, they must be fit for purpose and to the correct specification. At all times, the manufacturer's maintenance and service guidelines shall be followed. If in doubt, consult the manufacturer's technical department for assistance.
-
The following checks shall be applied to installations using flammable refrigerants:
-
The charge size is in accordance with the room size within which the refrigerant-containing parts are installed.
- The ventilation machinery and outlets are operating adequately and are not obstructed.
- If an indirect refrigerating circuit is being used, the secondary circuit shall be checked for the presence of refrigerant.
- Marking on the equipment continues to be visible and legible. Illegible markings and signs shall be corrected.
-
Refrigeration pipes or components are installed in positions where they are unlikely to be exposed to any substances that may corrode refrigerant-containing components, unless the components are constructed of materials inherently resistant to corrosion or are suitably protected against corrosion.
-
CHECKS TO ELECTRICAL DEVICES: Repair and maintenance of electrical components shall include initial safety checks and component inspection procedures. If a fault exists that could compromise safety, no electrical supply shall be connected to the circuit until it is satisfactorily dealt with. If the fault cannot be corrected immediately but it is necessary to continue operation, an adequate temporary solution shall be used. This shall be reported to the owner of the equipment, so all parties are advised.
-
Initial safety checks shall include:
-
Ensuring capacitors are discharged safely to avoid the possibility of sparking.
- Ensuring no live electrical components and wiring are exposed while charging, recovering, or purging the system.
-
Ensuring continuity of earth bonding.
-
WARNING! INSTALL THE UNIT IN ROOMS WITH A MINIMUM AREA OF 13M². DO NOT INSTALL THE UNIT IN PLACES WHERE INFLAMMABLE GAS MAY LEAK.
- Note! The manufacturer may provide other suitable examples or additional information about the refrigerant odour.
Safety Symbols
The product may have safety warning labels attached to it, explained below. Understand the symbols on your product and their meanings. If any stickers become unreadable, unattached etc., replace them.
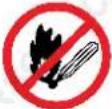 Flammable Material HazardFlammable liquids, gases, or substances etc may present.Avoid ignition sources and open flames. Danger of fire. Flammable Material HazardFlammable liquids, gases, or substances etc may present.Avoid ignition sources and open flames. Danger of fire. |  Read User ManualRead and fully understand product safety warnings, operation, procedures etc before using the product. Read User ManualRead and fully understand product safety warnings, operation, procedures etc before using the product. |  Use Hand ProtectionWear appropriate hand protection and take due care as the product or use of the product may present hand hazards. Use Hand ProtectionWear appropriate hand protection and take due care as the product or use of the product may present hand hazards. |  Exhaust TumesCarbon-Monoxide HazardDo not use the product in confined areas or without adequate ventilation. Carbon-monoxide poisoning can be fatal. Exhaust TumesCarbon-Monoxide HazardDo not use the product in confined areas or without adequate ventilation. Carbon-monoxide poisoning can be fatal. |
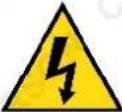 Electrocution / Electrical Shock HazardHigh voltage or high current electricity may be present or required by the product. Take due care when handling electrical products, cables, plugs and leads. Electrical shock can be fatal. Electrocution / Electrical Shock HazardHigh voltage or high current electricity may be present or required by the product. Take due care when handling electrical products, cables, plugs and leads. Electrical shock can be fatal. | 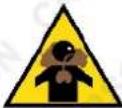 Toxic Fumes / Dust HazardUsing the product or by-products from use may produce fumes, smoke or particles that could be harmful if inhaled. Wear appropriate breathing protection and have adequate ventilation. Toxic Fumes / Dust HazardUsing the product or by-products from use may produce fumes, smoke or particles that could be harmful if inhaled. Wear appropriate breathing protection and have adequate ventilation. | 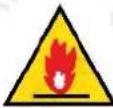 Explosive Material HazardCombustible liquids, gases, or substances etc may be present.Avoid ignition sources and open flames. Danger of explosion. Explosive Material HazardCombustible liquids, gases, or substances etc may be present.Avoid ignition sources and open flames. Danger of explosion. | 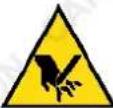 Cutting / Amputation HazardThe product may have blades, edges or mechanical devices that can cause severe cut injury to fingers, limbs etc. Take due care when handling and using the product. Cutting / Amputation HazardThe product may have blades, edges or mechanical devices that can cause severe cut injury to fingers, limbs etc. Take due care when handling and using the product. |
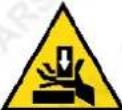 Crush HazardThe product may have blades, edges or mechanical devices that can cause severe crush injury to fingers, limbs etc. Take due care when handling and using the product. Crush HazardThe product may have blades, edges or mechanical devices that can cause severe crush injury to fingers, limbs etc. Take due care when handling and using the product. |  Single Operator OnlyThe product must be operated by a single person only. More than one person operating the product may introduce additional hazards. Single Operator OnlyThe product must be operated by a single person only. More than one person operating the product may introduce additional hazards. |  Use Face ProtectionWear appropriate full-face protection and take due care as the product or use of the product may present face and eye hazards. Use Face ProtectionWear appropriate full-face protection and take due care as the product or use of the product may present face and eye hazards. |  Use Foot ProtectionWear appropriate foot protection and take due care as the product or use of the product may present foot hazards. Use Foot ProtectionWear appropriate foot protection and take due care as the product or use of the product may present foot hazards. |
 Use Eye / Ear / Head ProtectionWear appropriate eye and / or ear and / or head protection and take due care as the product or use of the product may present eye, hearing, and head hazards. Use Eye / Ear / Head ProtectionWear appropriate eye and / or ear and / or head protection and take due care as the product or use of the product may present eye, hearing, and head hazards. | 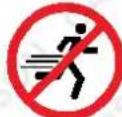 Running HazardDo not run on or near the product as doing so may present a fall hazard. Running HazardDo not run on or near the product as doing so may present a fall hazard. |  Diving HazardDo not dive into the product as doing so may present a neck / head injury hazard. Diving HazardDo not dive into the product as doing so may present a neck / head injury hazard. |  Adult Supervision RequiredAlways supervise children and other users of a product to prevent drowning or injury. Adult Supervision RequiredAlways supervise children and other users of a product to prevent drowning or injury. |
 Skin Penetration / Puncture HazardThe product may produce pressure, emit liquids or objects that can cause severe injury to fingers, limbs, blood etc. Take due care when handling and using the product. Skin Penetration / Puncture HazardThe product may produce pressure, emit liquids or objects that can cause severe injury to fingers, limbs, blood etc. Take due care when handling and using the product. | 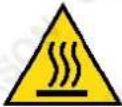 Hot Surface HazardBe aware that the product may produce high temperatures and hot surfaces that can cause burn injuries. Hot Surface HazardBe aware that the product may produce high temperatures and hot surfaces that can cause burn injuries. | 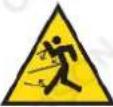 Flying Debris HazardBe aware that the product or use of the product may present hazards produced by flying debris. Wear appropriate clothing and protective devices. Flying Debris HazardBe aware that the product or use of the product may present hazards produced by flying debris. Wear appropriate clothing and protective devices. | 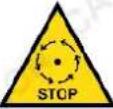 Moving Parts HazardBe aware that the product contains or uses mechanical devices that move or rotate. Always wait for moving parts to stop fully before handling the product, adjusting, maintenance etc. Moving Parts HazardBe aware that the product contains or uses mechanical devices that move or rotate. Always wait for moving parts to stop fully before handling the product, adjusting, maintenance etc. |
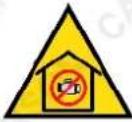 Carbon-Monoxide HazardDo not use the product in confined areas or without adequate ventilation. Carbon-monoxide poisoning can be fatal. Carbon-Monoxide HazardDo not use the product in confined areas or without adequate ventilation. Carbon-monoxide poisoning can be fatal. | 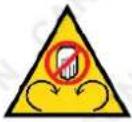 Pull HazardBe aware that the product contains or uses mechanical devices that can pull in objects and can cause severe injury to fingers, limbs etc. Take due care when handling and using the product. Pull HazardBe aware that the product contains or uses mechanical devices that can pull in objects and can cause severe injury to fingers, limbs etc. Take due care when handling and using the product. | 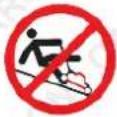 Slope / Fall Injury HazardBe aware that using the product on sloping surfaces or in slippery conditions may present additional dangers from falls and contact with blades, moving parts, hot surfaces etc. Slope / Fall Injury HazardBe aware that using the product on sloping surfaces or in slippery conditions may present additional dangers from falls and contact with blades, moving parts, hot surfaces etc. | 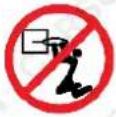 "Slam Dunk" WarningDo NOT attempt "slam dunk" manoeuvres as this may result in severe injury due to falling, product breakage or collapse etc. "Slam Dunk" WarningDo NOT attempt "slam dunk" manoeuvres as this may result in severe injury due to falling, product breakage or collapse etc. |
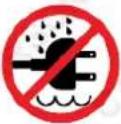 Electrocution / Electrical Shock Hazard - OutdoorHigh voltage or high current electricity may be present or required by the product. Do NOT use in rain, damp, or wet conditions. Electrical shock can be fatal. Electrocution / Electrical Shock Hazard - OutdoorHigh voltage or high current electricity may be present or required by the product. Do NOT use in rain, damp, or wet conditions. Electrical shock can be fatal. | 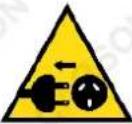 Electrocution / Electrical Shock Hazard - DisconnectHigh voltage or high current electricity may be present or required by the product. Always disconnect the product from the electrical supply before handling the product, adjusting, maintenance etc. Electrocution / Electrical Shock Hazard - DisconnectHigh voltage or high current electricity may be present or required by the product. Always disconnect the product from the electrical supply before handling the product, adjusting, maintenance etc. | 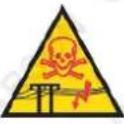 Power Line Electrocution HazardHigh voltage / high current power lines may be present. Use extreme caution to avoid contact or interference with power lines.Electrical shock can be fatal. Power Line Electrocution HazardHigh voltage / high current power lines may be present. Use extreme caution to avoid contact or interference with power lines.Electrical shock can be fatal. | 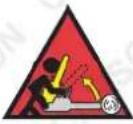 "Kick-Back" HazardHigh level of "kick-back" hazard that can cause the machine to suddenly rotate towards operator.Kick-back injury can be fatal. "Kick-Back" HazardHigh level of "kick-back" hazard that can cause the machine to suddenly rotate towards operator.Kick-back injury can be fatal. |
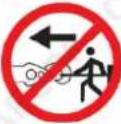 Winch Operator Position HazardDo NOT stand between winch and load. Do NOT use winch to move people. Winch Operator Position HazardDo NOT stand between winch and load. Do NOT use winch to move people. | 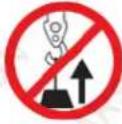 Winch Lift HazardDo NOT LIFT load vertically. Use machine to PULL only. Winch Lift HazardDo NOT LIFT load vertically. Use machine to PULL only. | 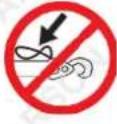 Cable HazardEnsure that load bearing cable is not kinked or knotted. Cable HazardEnsure that load bearing cable is not kinked or knotted. | 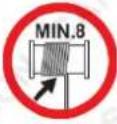 Winch Cable HazardEnsure that there is a minimum number of cable coils on winching mechanism. Winch Cable HazardEnsure that there is a minimum number of cable coils on winching mechanism. |
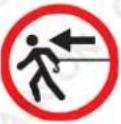 Winch Hook HazardCarry hook to load – do NOT throw or run. Winch Hook HazardCarry hook to load – do NOT throw or run. | 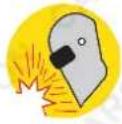 Flash / Blinding HazardWear appropriate eye protection for welding. Direct exposure to weld arcs may cause permanent eye injury. Flash / Blinding HazardWear appropriate eye protection for welding. Direct exposure to weld arcs may cause permanent eye injury. | 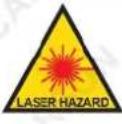 Laser HazardLaser may be in use – do NOT look directly at laser or allow others to. Laser HazardLaser may be in use – do NOT look directly at laser or allow others to. | 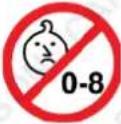 Choking HazardChildren under 8 yrs. Can choke or suffocate on small parts. Adult supervision required. Choking HazardChildren under 8 yrs. Can choke or suffocate on small parts. Adult supervision required. |
Table of Contents
Safety 2
Safety Symbols....6
Parts Identification 9
Assembly 10
Unpacking....10
Choosing Your Location ....10
Attaching the Exhaust Hose 11
Operation 14
Remote Control Features 14
Control Panel and Display 15
Settings....15
Start-up and Shutdown 15
Operation Mode 15
Timer Setting (1 hour - 24 hours)....17
Automatic Defrost....17
Overload Protection 17
Drainage 18
Manual Drainage....18
Continuous Drainage 18
Maintenance....19
Cleaning the Air Filter (Every Two Weeks) 19
Cleaning Up of Refrigerant....19
Troubleshooting 20
Storage 21
Disposal 21
Specifications 22
Parts Identification
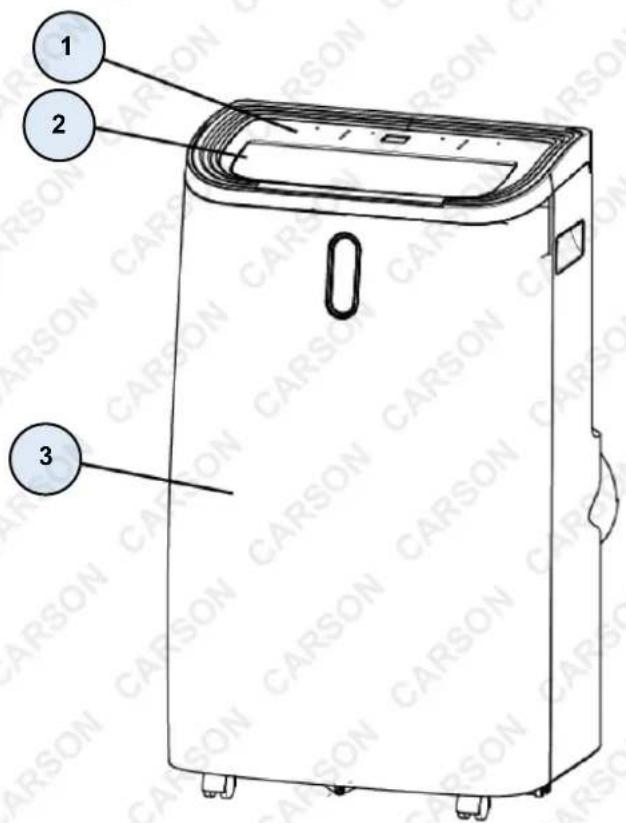
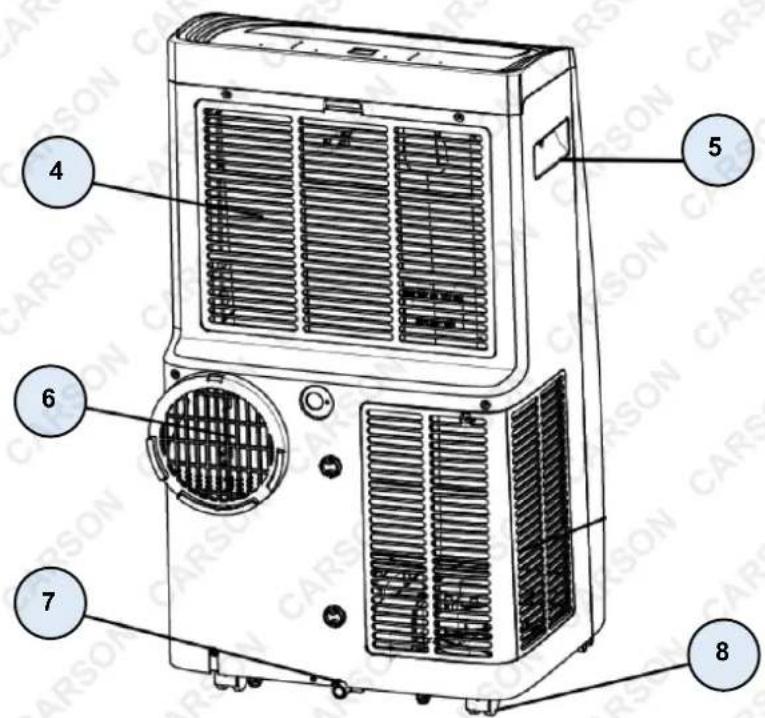
| No. | Name |
| 1 | Control panel |
| 2 | Air outlet with adjustable louver |
| 3 | Front Panel |
| 4 | Air inlet with air filter |
| 5 | Recessed handle |
| 6 | Air Exhaust |
| 7 | Drain opening with sealing plug |
| 8 | Castor |
Assembly
Unpacking
- Unpack the carton and take the appliance and accessories out.
- Check the device after unpacking for any damage or scratches on it.
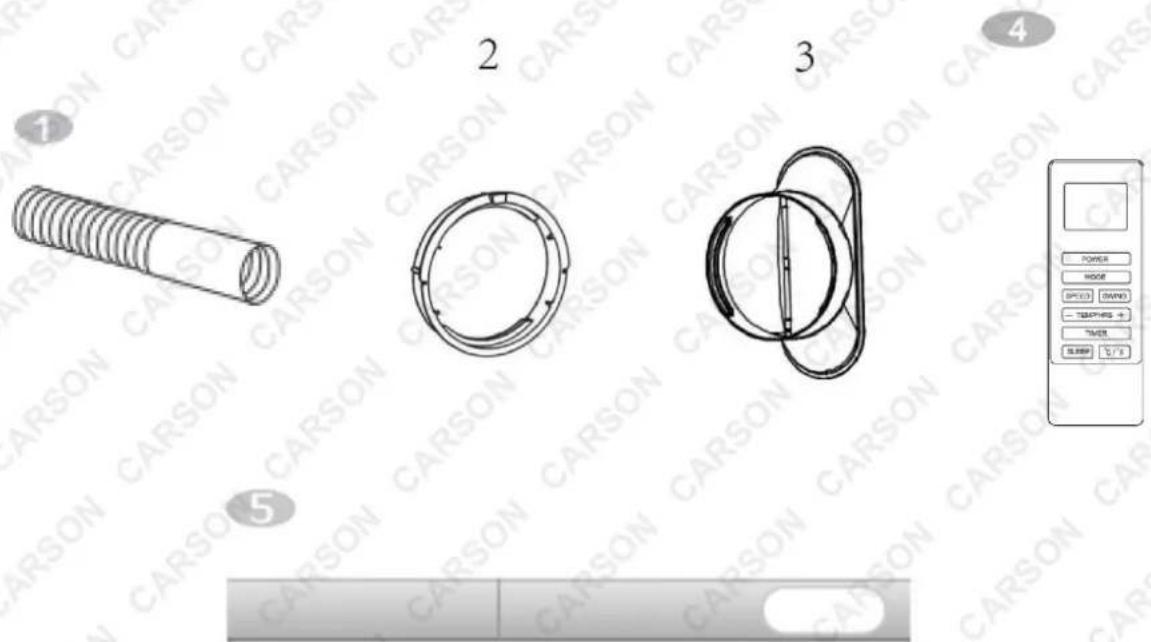
Accessories:
- Exhaust hose
- Hose connector
- Window kit adapter
- Remote control
Choosing Your Location
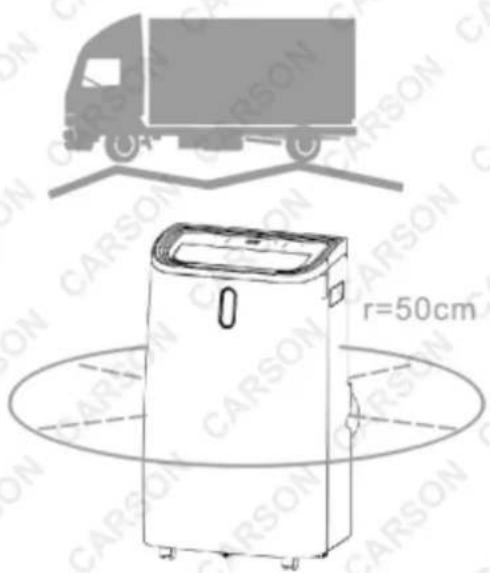
- Initial Setup: If the unit has been tipped more than 45^ , allow it to sit upright for at least 24 hours before starting it up.
- Placement: Place the unit on a firm, level surface in an area with at least 50 cm of free space around it to allow for proper air circulation.
Do not operate the unit near walls, curtains, or other objects that may block the air inlet and outlet. Keep the air inlet and outlet free of obstacles.
- Avoid These Locations: Never install the unit where it could be subject to:
- Heat sources such as radiators, heat registers, stoves, or other products that produce heat.
- Direct sunlight.
- Mechanical vibration or shock.
- Excessive dust.
– Lack of ventilation, such as in a cabinet or bookcase. - Uneven surfaces.
WARNING! Install the unit in rooms with a minimum area of 13m^2 . Do not install the unit in places where inflammable gas may leak.
NOTE: The manufacturer may provide other suitable examples or additional information about the refrigerant odour.
Attaching the Exhaust Hose
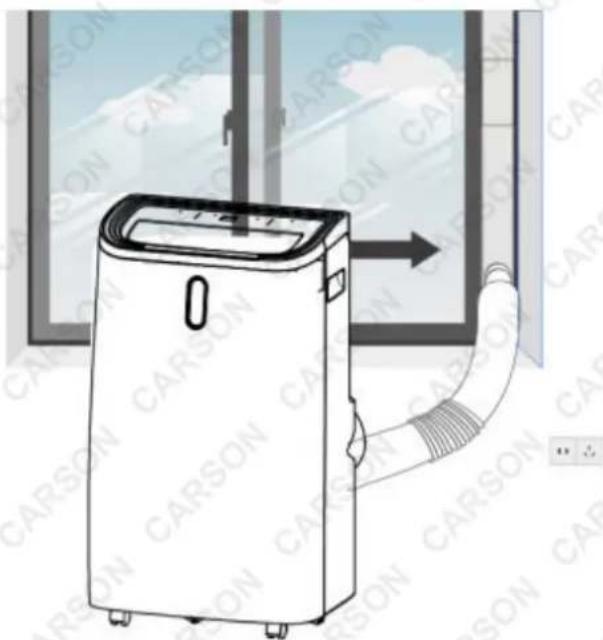
The air conditioner requires venting outside so that the exhaust air, which contains waste heat and moisture, can escape the room.
Do not replace or extend the exhaust hose, as this will result in decreased efficiency and may even cause the unit to shut down due to low backpressure.
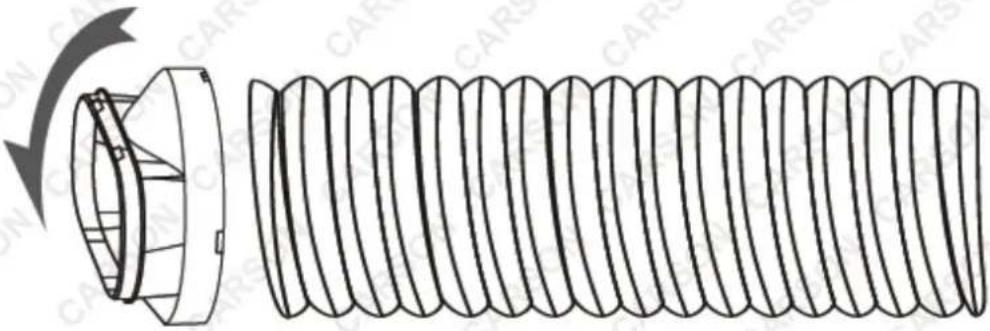
- Connect the hose connector to one end of the exhaust hose.
natural_image
Technical line drawing of a mechanical component with curved grooves and mounting bracket (no text or symbols)- Connect the window kit adapter to the other end of the exhaust hose.
natural_image
Diagram of a mechanical spring assembly with a rotating component (no text or symbols)NOTE: Extending the length of the included exhaust hose may result in reduced cooling performance. We do not recommend adding extra lengths of exhaust hose.
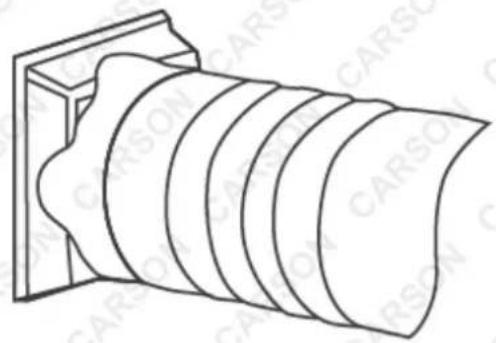
- Extend the adjustable window kit to the length of your window. Connect the exhaust hose to the window kit.
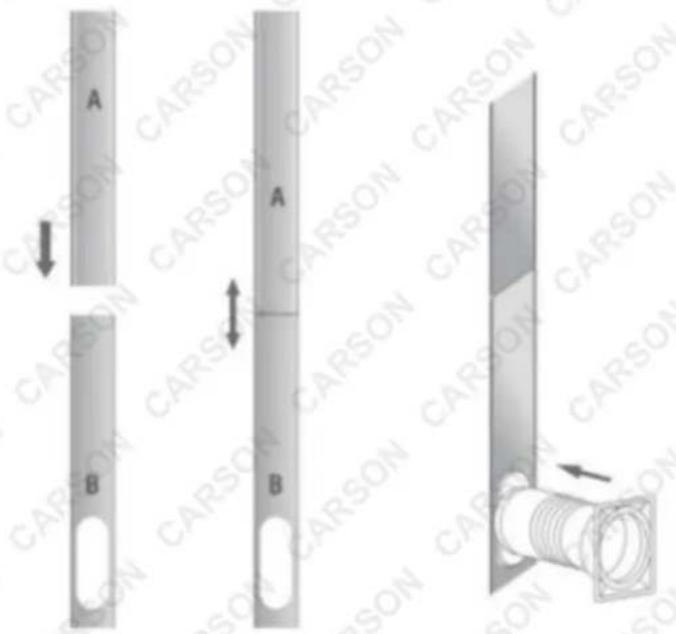
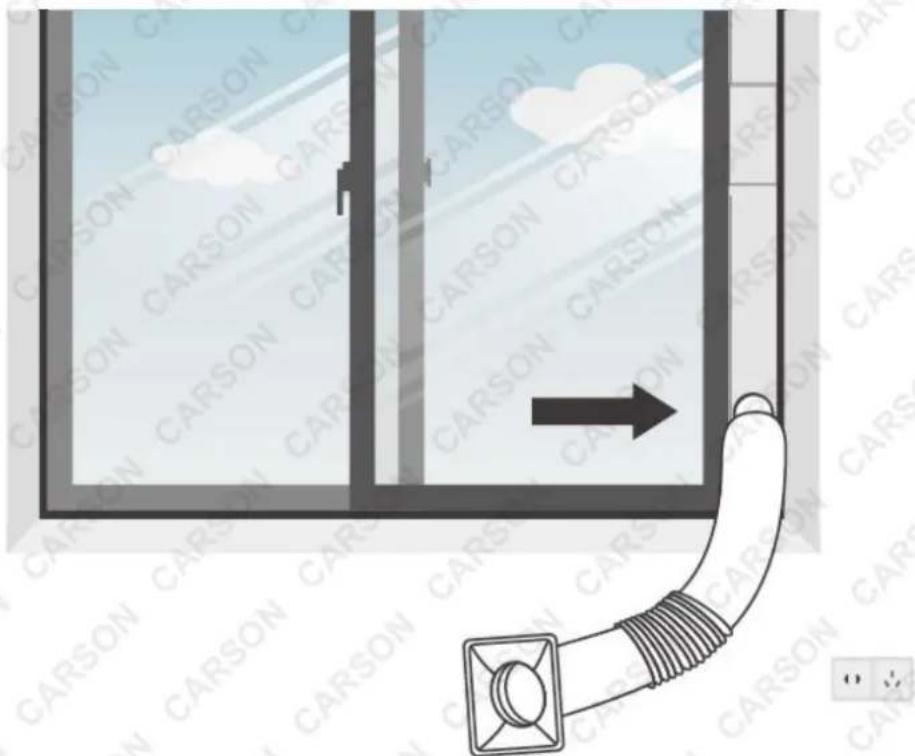
- Close your window to secure the kit in place. It needs to hold the window kit firmly in place. Secure the window kit with duct tape if required. It is recommended that the gap between the adapter and the sides of the window be sealed off for maximum efficiency.
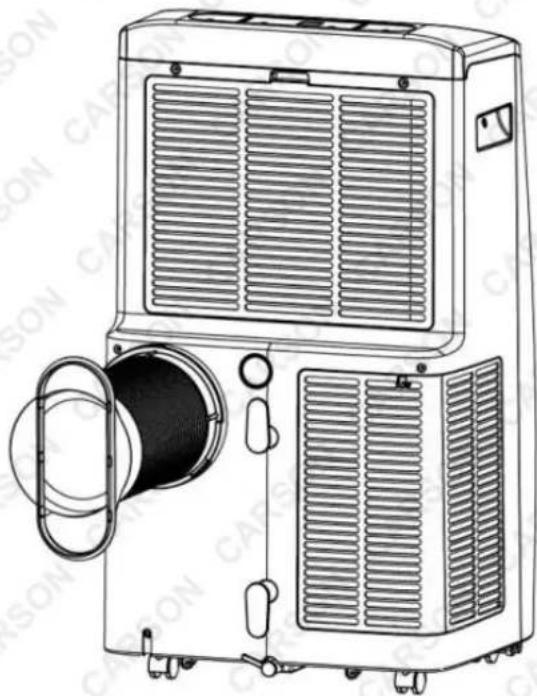
- Attach the hose connector to the exhaust air outlet of the unit.
natural_image
Line drawing of a portable air conditioner unit with ventilation grilles and control panel (no text or symbols)- Adjust the length of the flexible exhaust hose and avoid bends in the hose. Then place the air conditioner near an electrical outlet.
natural_image
Illustration of a car air conditioner unit with attached cable, shown without any text or symbols.- Adjust the louvre at the air outlet, and then switch on the unit.
Operation
IMPORTANT! Please open the front louver before turning ON the unit.
Remote Control Features
flowchart
graph TD
    1["POWER"] --> 2["MODE"]
    3["SPEED"] --> 4["SWING"]
    5["-TEMP/HRS +"] --> 6["TIMER"]
    7["SLEEP"] --> 8["°C / °F"]
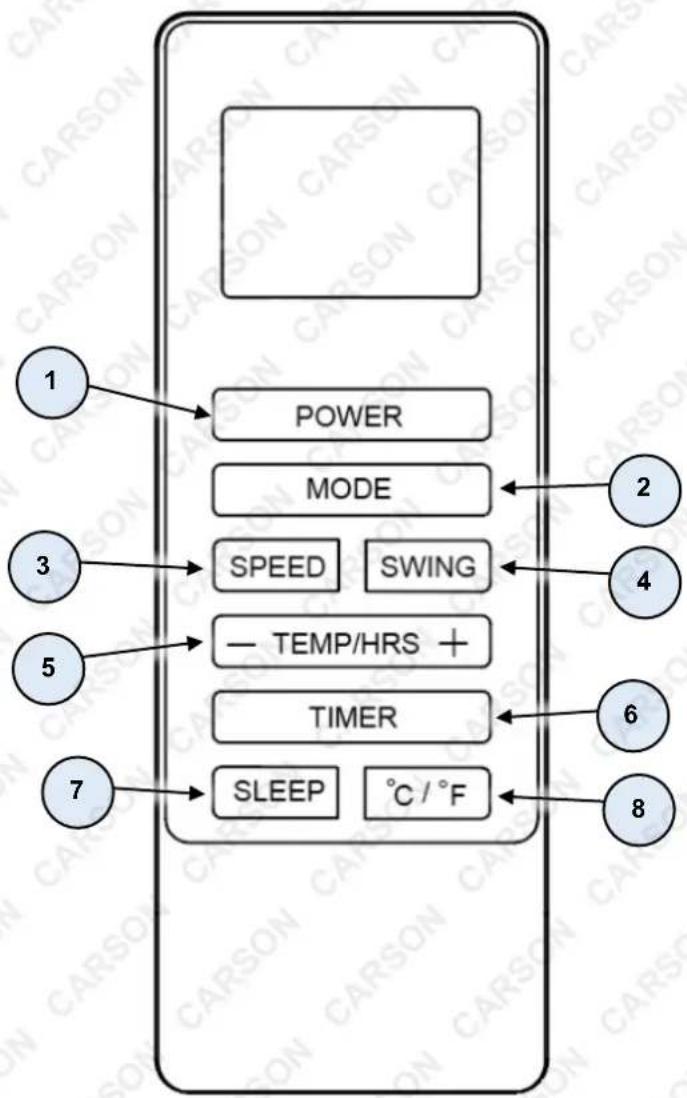
| 1 | POWER | Press to switch the machine on or off. |
| 2 | MODE | Mode button. Press to switch the operation mode between cooling, heating, fan, and dry. |
| 3 | SPEED | Press to switch the fan speed to High/Medium/Low. |
| 4 | SWING | Louver adjustment |
| 5 | TEMP / HRS | Press to increase/decrease the temperature or timer settings to the desired value. |
| 6 | TIMER | Sets a time for the unit to automatically start or stop. |
| 7 | SLEEP | Press to turn sleep mode on or off. |
| 8 | °C / °F | Switch between Celsius and Fahrenheit temperature settings. |
Control Panel and Display
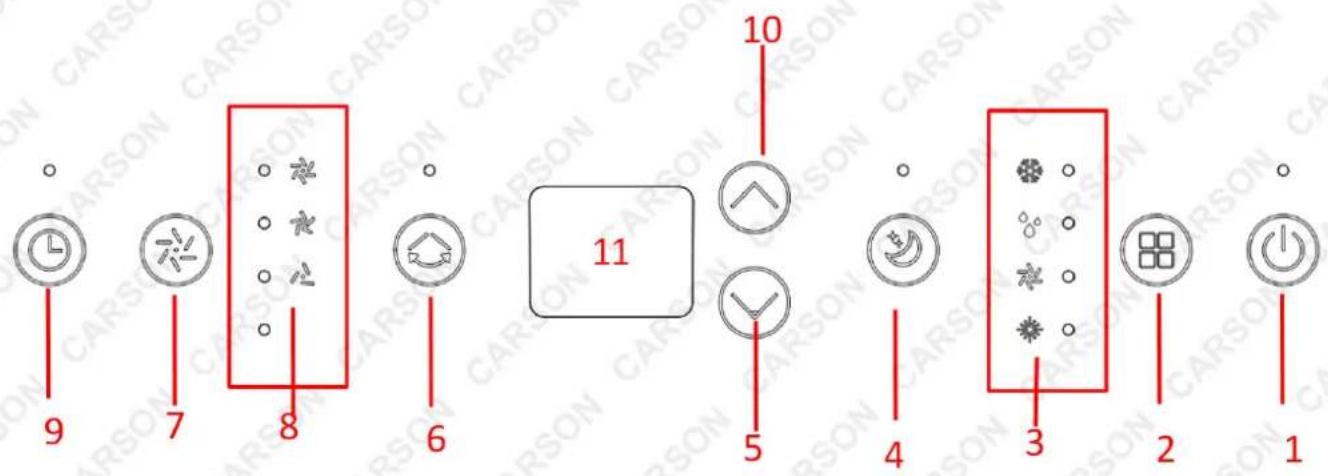
| 1 | POWER | Press to switch the machine on or off. |
| 2 | MODE | Mode button. Press to switch the operation mode between cooling, heating, fan, and dry. |
| 3 | MODE Indicator | Displays the mode setting between cooling, heating, fan, and dry. |
| 4 | SLEEP | Press to turn sleep mode on or off. |
| 5 | MINUS | Press this button to decrease the temperature or timer settings to the desired value. |
| 6 | SWING | Adjust the air flow direction vertically. |
| 7 | FAN SPEED | Press to switch the fan speed to High/Medium/Low. |
| 8 | FAN SPEED INDICATOR | LED for fan speed (High/Medium/Low). |
| 9 | TIMER | Sets a time for the unit to automatically start or stop. |
| 10 | ADD | Press this button to increase the temperature or timer settings to the desired value. |
| 11 | Digital Display | Displays timer setting and temperature. |
Settings
Start-up and Shutdown
- Press POWER to turn the unit on. The unit runs in FAN mode by default.
- Press the MODE button to select the desired operation mode.
- Press POWER again to turn off the unit.
Operation Mode
The unit has five operation modes: Cooling, Heating, Dry, Fan, Sleep
Cooling Your Room:
- Select the cooling mode to lower the temperature in your room.
- Press the MODE button repeatedly until the LED of COOL operation lights up.
- Press the ADD/MINUS button to adjust the temperature displayed on the screen. The temperature can be set between 16°C and 32°C.
- Press the SPEED button repeatedly until the desired fan speed indicator lights up.
- To control the direction of the airflow, press the SWING button.
NOTE: The air conditioner stops if the room temperature is lower than the selected temperature.
Heating Your Room (Optional for Heating Function Unit Only):
- Press the MODE button repeatedly until the LED of Heating operation lights up.
- Press the ADD/MINUS button to set the temperature higher than the room temperature. The fan speed can also be set.
NOTE: The drainage hose should be attached to the unit for continuous operation.
Ventilating Your Room:
- Press the MODE button repeatedly until the LED of FAN operation lights up. In fan mode, the room air is circulated but not cooled.
- Press the SPEED button repeatedly to select the fan speed as desired.
Drying Your Room:
- Press the MODE button on the control panel or remote control until the LED of DRY operation lights up. The fan speed cannot be selected.
- Connect the hose to the drain outlet at the bottom of the unit.
NOTE: In this mode, the fan speed switches to low speed and the temperature cannot be selected.
Sleep Mode:
The sleep mode can be activated when in cooling mode and heating mode.
• In cooling mode:
- After 1 hour, the preset temperature is increased by 1^ . After another hour, the preset temperature is increased by another 1^ .
– In heating mode (Optional for Heating Function Unit Only): - After 1 hour, the preset temperature is decreased by 1^ . After another hour, the preset temperature is decreased by another 1^ .
The temperature is then kept constant for 10 hours. All the indicators dim to dark. The fan speed may switch to low speed for silent operation and cannot be selected.
Timer Setting (1 hour - 24 hours)
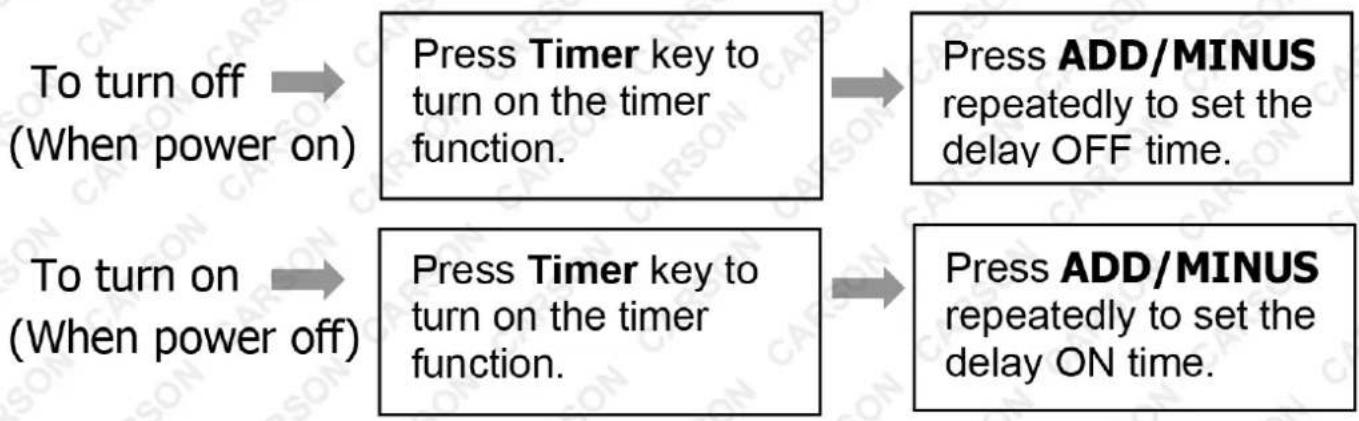
The timer has two ways of operation:
flowchart
graph LR
    A["To turn off (When power on)"] --> B["Press Timer key to turn on the timer function."]
    B --> C["Press ADD/MINUS repeatedly to set the delay OFF time."]
    D["To turn on (When power off)"] --> E["Press Timer key to turn on the timer function."]
    E --> F["Press ADD/MINUS repeatedly to set the delay ON time."]
Press ADD/MINUS repeatedly until the LED shows '00'. Note: when press POWER will also exit the timer setting.
Automatic Defrost
At low room temperatures, frost may build up at the evaporator during operation. The unit will automatically start defrosting, indicated by the POWER LED blinking. The defrost control sequence is as follows:
- When the unit operates in cooling or drying operation, the ambient temperature sensor senses if the evaporator coil temperature is below -1°C. The compressor will stop operating for 10 minutes or until the coil temperature rises to 7°C, at which point the unit will restart in cooling mode.
- When the unit operates in heating or drying operation, if the coil temperature sensor senses the temperature of the evaporator is below 40^ C and the differential temperature between coil temperature and room temperature is below 19^ C after the compressor operates for 20 minutes, the unit will start defrosting for 5 minutes, indicated by the power indicator blinking.
Overload Protection
In the event of a power loss, to protect the compressor, there is a 3-minute delay before the compressor restarts.
Drainage
Manual Drainage
- When the machine stops after the water tank is full, unplug the power plug.
NOTE: Move the machine carefully to avoid spilling the water in the water pan at the bottom of the unit.
-
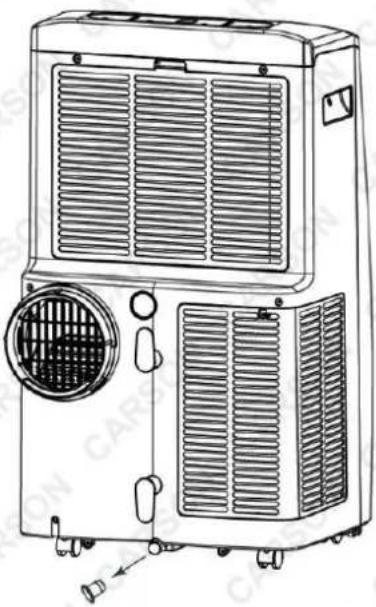
Place a water container below the side water outlet behind the unit.
-
Unplug the water plug; the water will automatically flow into the water container.
NOTE: Keep the water plug properly. During drainage, the unit can be tilted slightly backwards. If the water container cannot hold all the water, plug the water outlet with the water plug before the container is full to prevent water from spilling onto the floor or carpet.
- Once the water is discharged, plug the water outlet.
natural_image
Line drawing of a large industrial air conditioner unit with cooling fans and ventilation slots (no text or symbols)NOTE: Restart the machine only after the water plug and drainage cover are installed. Failure to do so may cause condensate water to flow onto the floor or carpet.
Continuous Drainage
The self-evaporating system uses the collected water to cool the condenser coils for better performance. It is not necessary to empty the drainage tank during cooling operation except in drying and heating operations and high humidity conditions. The condensate water evaporates at the condenser and is evacuated through the exhaust hose.
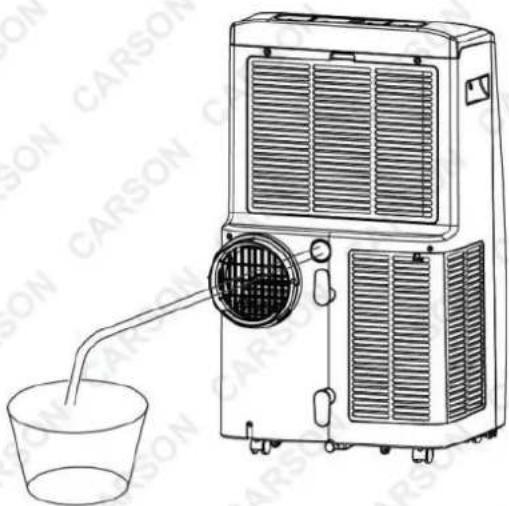
For continuous operation or unattended operation in drying and heating modes, please connect the attached drain hose to the unit. Condensate water can automatically flow into a bucket or drain by gravity.
Steps for Continuous Drainage:
- Switch off the unit before operating.
- Remove the plug from the water outlet opening and keep it in a safe area.
- Securely and properly connect the drain hose, ensuring it is not kinked and is clear of obstructions.
- Place the outlet of the hose over a drain or bucket and ensure that water can freely flow out of the unit.
- Do not submerge the end of the hose into water, as this can cause an "air lock" in the hose.
To Avoid Water Spillage:
- Due to the large negative pressure of the condensate drain pan, tilt the drain hose downward towards the floor. The degree of inclination should exceed 20 degrees.
- Straighten the hose to avoid any traps that could restrict water flow.
natural_image
Line drawing of an air conditioner unit with a cup and cooling fan, no text or symbols presentMaintenance
Cleaning the Air Filter (Every Two Weeks)
Dust collects on the filter and restricts the airflow. The restricted airflow reduces the efficiency of the system, and if it becomes blocked, it can cause damage to the unit. The air filter requires regular cleaning and is removable for easy maintenance. Do not operate the unit without an air filter, as the evaporator may become contaminated.
Steps for Cleaning the Air Filter:
- Press the Power button to switch off the unit and unplug the power cord.
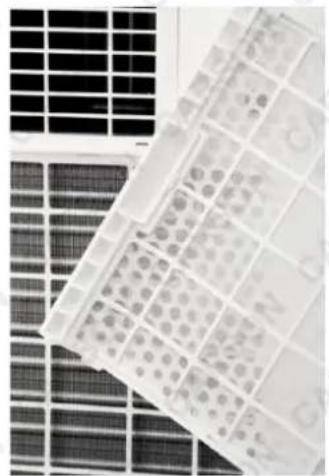
- Remove the filter mesh from the unit.
- Use a vacuum cleaner to suck dust from the filter.
- Turn the filter over and rinse it under running water. Let the water run through the filter in the opposite direction of airflow. Set aside and allow the filter to air dry completely before reinstalling it.
natural_image
Close-up of a grid-patterned plastic tray with circular indentations, placed on a solar panel (no text or symbols visible)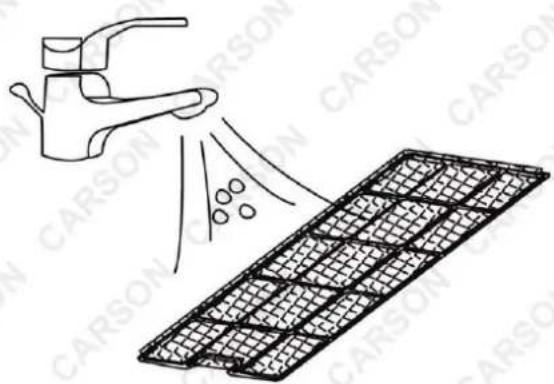
natural_image
Diagram showing a faucet spraying water onto a grid-patterned surface (no text or symbols)Switch off the unit and remove the air filters. Rinse the air filter under running water.
WARNING! Do not touch the evaporator surface with bare hands, as it could cause injury to your fingers.
Cleaning Up of Refrigerant
General Measures:
• Gas/vapour is heavier than air and may accumulate in confined spaces, particularly at or below ground level.
- Eliminate every possible source of ignition.
• Use appropriate personal protective equipment (PPE).
• Evacuate unnecessary personnel, isolate, and ventilate the area.
- Do not get it in eyes, on skin, or on clothing. Do not breathe vapours or gas.
• Prevent entry into sewers and public waters.
- Stop the source of the release if it is safe to do so. Consider using water spray to disperse vapours.
- Isolate the area until the gas has dispersed. Ventilate and test the gas levels before entering. Contact competent authorities after a spill.
Troubleshooting
| Symptom | Inspection | Solution | |
| The unit is not operating. | Check the power connection is secure. | Insert the power cord securely into the wall outlet. | |
| Check if the water level indicator lights up. | Empty the drain pan by removing the rubber plug. | ||
| Check the room temperature. | The range of operating temperature is 5-35°C. | ||
| The unit works with reduced capacity | Check the air filter for dirt. Clean the air filter as | necessary. | |
| Check if the air duct is blocked. | Clear the obstacle. | ||
| Check if the room door or window is open. | Keep the door and windows closed. | ||
| Check if the desired operating mode is selected and the temperature is properly set. | Set the mode and temperature at the proper set point according to the manual. | ||
| The exhaust hose is detached. | Make sure the exhaust hose is securely attached. | ||
| Water Leakage | Overflow while moving the unit. | Empty the water tank before transport. | |
| Check if the drain hose is kinked or bends. | Straighten the hose to avoid a trap existing. | ||
| Excessive Noise | Check if the unit is securely positioned. | Place the unit on horizontal and firm ground. | |
| Check if there are any loose, vibrating parts. | Secure and tight the parts. | ||
| Noise sounds like water flowing. | Noise comes from flowing refrigerant. This is normal. | ||
| Error Codes | E0 | Communication faults between main PCB and display PCB. | Check the wire harness of the display PCB for damage. |
| E1 | Ambient temperature sensor failure | Check connection or replace it. To clean or replace the temperature sensor. | |
| E2 | Coil temperature sensor failures. | Check connection or replace it. To clean or replace the temperature sensor. | |
| Ft | Condensate water high level alarm. | Empty the drain pan by removing the rubber plug. | |
Storage
Long-Term Storage:
If you will not be using the unit for an extended period (more than a few weeks), it is best to clean the unit and dry it out completely. Please store the unit per the following steps:
- Unplug the unit and remove the exhaust hose and window kit. Store them with the unit.
- Drain the remaining water from the unit.
- Clean the filter and let it dry completely in a shaded area.
- Collect the power cord at the water tank.
- Reinstall the filter in its position.
- The unit must be kept in an upright position when in storage.
- Store the machine in a ventilated, dry, non-corrosive, and safe indoor place.
ATTENTION: The evaporator inside the machine must be dried out before the unit is packed to avoid component damage and mould. Unplug the unit and place it in a dry, open area for several days to dry it out.
Disposal
WARNING! Releasing refrigerant into the atmosphere is strictly forbidden!
- Do not dispose of electrical appliances as unsorted municipal waste. Use separate collection facilities.
- Contact your local government for information regarding the collection systems available.
- If electrical appliances are disposed of in landfills or dumps, hazardous substances can leak into the groundwater and get into the food chain, damaging your health and well-being.
Specifications
| Cooling Capacity | 4.7kW (16000BTU) |
| Heating Capacity | 3.3kW (11200BTU) |
| Noise level 65dB | |
| Refrigerant R290 | |
| Airflow Volume 450m3/h | |
| Recommended Room Size | 28-35m2 |
| Input voltage 240V / 50Hz | |
| Power Plug | Australian Standard (10A) |
Note: The frequency of emptying water is dependent on the level of humidity in the air and also the mode the unit is operating in e.g. the dehumidify function will require more frequent emptying.
Note: Minimal assembly required
Some experts believe that the incorrect or prolonged use of almost any product may cause serious injury or death. To help reduce your risk of serious injury or death, refer to the information below. For more information, see www.datastreamserver.com/safety
- Consult all documentation, packaging, and product labelling before use. Note that some products feature documentation available online. It is recommended to print and retain the documentation.
■ Before each use, check the product for loose/broken/damaged/missing parts, wear, or leaks (if applicable). Never use a product with loose/broken/damaged/missing parts, wear, or leaks.
■ Products must be inspected and serviced (if applicable) by a qualified technician every 6 months. This is based on average residential use by persons of average size and strength, and on a property of average metropolitan size. Use beyond these recommendations may require more frequent inspections/servicing.
■ Ensure that all users of the product have completed a suitable industry recognised training course before being allowed access to the product.
The product has been supplied by a general merchandise retailer that may not be familiar with your specific application or description of application. Be sure to attain third-party approval from a qualified specialist for your application before use, regardless of any assurances from the retailer or its representatives.
This product is not intended for use where fail-safe operation is required. As with any product (for example, automobile, computer, toaster), there is the possibility of technical issues that may require the repair or replacement of parts, or the product itself. If the possibility of such failure and the associated time it may take to rectify could in any way inconvenience the user, business, or employee, or financially affect the user, business, or employee, then the product is not suitable for your requirements. This product is not intended for use where incorrect operation or a failure of any kind, including but not limited to, a condition requiring product return, replacement, parts replacement, or service by a technician may cause financial loss, loss of employee time or an inconvenience requiring compensation.
If this product has been purchased in error when considering the information presented here, contact the retailer directly for details of their returns policy, if required.

© Carson. All rights reserved. No part of this document, including descriptive content, concepts, ideas, diagrams, or images may be reproduced or transmitted in any form or by any means, electronic or mechanical, including photocopying, scanning, or recording, or any information storage and retrieval system, without express permission or consent from the publisher.

- User Manual
- Safety
- General Work Area Safety
- General Personal Safety
- General Fuel Safety
- General Carbon-Monoxide Safety
- General Equipment Use and Care
- General Electrical Safety
- General Service Information
- Child Choking Hazard!
- Intended Use
- Designated Refrigerant
- Propane Gas Safety
- Power Supply and Cord Safety
- Handling and Operation
- Installation and Storage
- Additional Safety Instructions for Refrigerant Handling
- Servicing and Maintenance
- Seeking Assistance
- Safety Precautions on Servicing
- Safety Symbols
- Table of Contents
- Safety 2
- Parts Identification 9
- Assembly 10
- Operation 14
- Maintenance....19
- Troubleshooting 20
- Storage 21
- Disposal 21
- Specifications 22
- Parts Identification
- Assembly
- Unpacking
- Accessories:
- Choosing Your Location
- Attaching the Exhaust Hose
- Operation
- Control Panel and Display
- Settings
- Start-up and Shutdown
- Operation Mode
- Cooling Your Room:
- Heating Your Room (Optional for Heating Function Unit Only):
- Ventilating Your Room:
- Drying Your Room:
- Sleep Mode:
- • In cooling mode:
- Timer Setting (1 hour - 24 hours)
- Automatic Defrost
- Overload Protection
- Drainage
- Manual Drainage
- Continuous Drainage
- Steps for Continuous Drainage:
- To Avoid Water Spillage:
- Maintenance
- Cleaning the Air Filter (Every Two Weeks)
- Steps for Cleaning the Air Filter:
- Cleaning Up of Refrigerant
- General Measures:
- Storage
- Long-Term Storage:
- Disposal
- WARNING! Releasing refrigerant into the atmosphere is strictly forbidden!
- Some experts believe that the incorrect or prolonged use of almost any product may cause serious injury or death. To help reduce your risk of serious injury or death, refer to the information below. For more information, see www.datastreamserver.com/safety
Brand : Carson
Model : PA340
Category : Air conditioner