
SWI-X - Air Conditioning PAC - Free user manual and instructions
Find the device manual for free SWI-X PAC in PDF.


| Product Type | Portable Air Conditioner |
| Brand | PAC |
| Model | SWI-X |
| Cooling Capacity | 12,000 BTU (approx.) |
| Energy Efficiency Ratio (EER) | 11.0 (approx.) |
| Power Supply | 115V / 60Hz |
| Power Consumption (Cooling) | 1,300 W (approx.) |
| Refrigerant Type | R-410A |
| Dimensions (W x D x H) | 18.5 x 17.3 x 30.1 inches |
| Weight | 75 lbs (approx.) |
| Noise Level (Low/High) | 50 / 55 dB |
| Functions | Cool, Fan, Dehumidify, Auto Mode |
| Remote Control | Yes, included |
| Timer | 24-hour programmable timer |
| Airflow | 4-speed fan |
| Filter Type | Washable mesh filter |
| Installation Kit | Window kit included (up to 48 inches) |
| Maintenance | Clean filter every 2 weeks; drain condensate manually |
| Safety Features | Overheat protection, auto shut-off |
| Spare Parts Availability | Filters, remote, drain hose available online |
| Warranty | 1 year limited warranty |
Frequently Asked Questions - SWI-X PAC
User questions about SWI-X PAC
0 question about this device. Answer the ones you know or ask your own.
Ask a new question about this device
Download the instructions for your Air Conditioning in PDF format for free! Find your manual SWI-X - PAC and take your electronic device back in hand. On this page are published all the documents necessary for the use of your device. SWI-X by PAC.
USER MANUAL SWI-X PAC
A. Is this product compatible with the vehicle?
- See application guide (seperate sheet) for listing of vehicles and connection information. If not, check www.pacaudio.com for an updated list of compatible vehicles.

B. Is this product compatible with the head unit?
- Ensure that the new head unit is capable of being operated with a remote control, and that it responds to the remote control provided with it.
- The head unit must accept a remote control with the common carrier frequency range of 38 – 40Khz in order to work with the SWI-X.
Note: Certain head units will not work with the SWI-X. See Appendix B - Known Incompatible Aftermarket Head Units (page 7).

C. Prepare for the installation.
- If possible, install the SWI-X while you are installing the new head unit. Keep in mind you may need to plug in the factory stereo to locate certain wires; therefore do not complete the head unit installation until the SWI-X is working properly.
- Plan a general installation location for both the SWI-X LED and the control body. Keep in mind that the supplied wire harness is two feet long, and the IR harness is four feet long.
- Use a multimeter or approved measuring device for checking vehicle circuits.
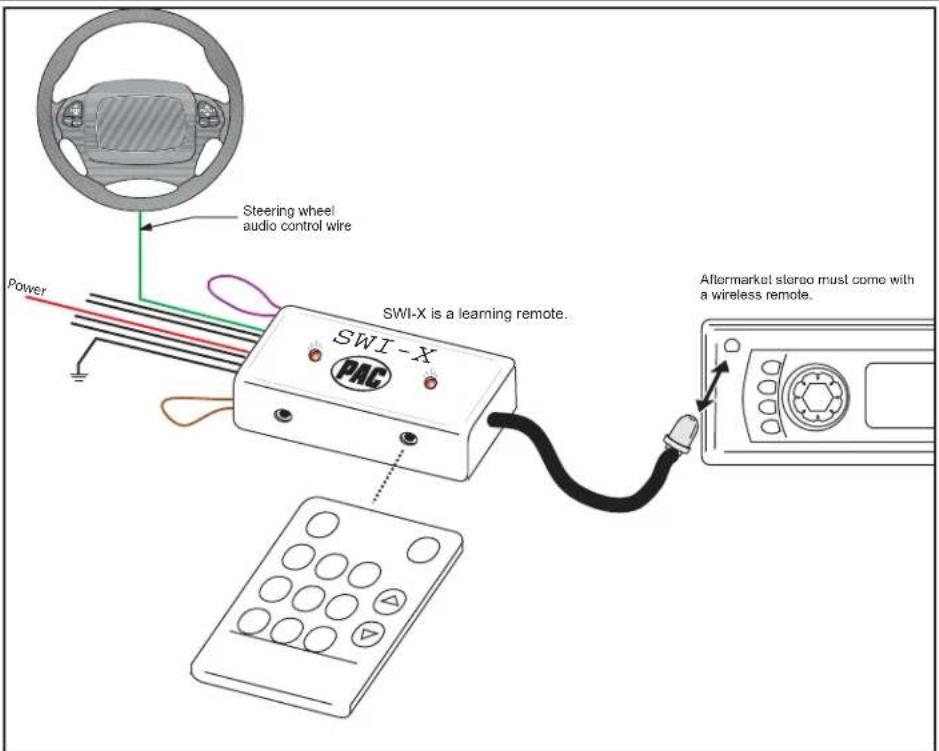
Wiring Connections
Note: Only 3 wires will be used during installation. Only GM vehicles programmed for version #4, will use 4 wires.

Step 1.
Connect the BLACK wire to ground (-).
Verification: Wire or location registers a constant (-) when probed.

Step 2.
Connect the RED wire to switched +12V.
Verification: Wire registers +12V when the ignition key is turned to the ACC or ON positions.
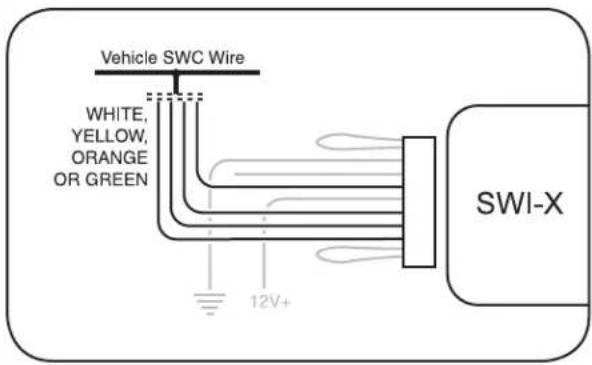
Step 3.
Connect the appropriate interface wire (WHITE, YELLOW, ORANGE or GREEN).
- Refer to the Identification and Connection Chart. Locate the vehicle and note the SWC wire color in the "Interface Wire Color" column.
- Note the vehicle wire color and location information in the "Identification" column.
Note: You will only connect ONE of these wires. The other 3 wires will not be used. Cut and insulate the unused wires.
- Connect the wire as indicated in the chart.
Step 4
If necessary, perform the following operations as indicated by the notes in Identification and Connection Chart.

Step 4a.
Connect the BLUE serial data wire. Connect this wire ONLY on GM passenger vehicles (no trucks or SUVs) with airbags AND steering wheel heater controls. For all other vehicles, cut and insulate the BLUE wire.

Step 4b.
If instructed by the Vehicle Application Guide, cut the BROWN wire loop and insulate both halves.

Step 4c.
If instructed by the Vehicle Application Guide, cut the VIOLET wire loop and insulate both halves, or place a resistor in-line of wires.
Note: Step 4a is for vehicles made by General Motors that are programmed for version #4 only. If no connections is necessary, proceed to Step 4b.
Programming the SWI-X to Work With the Vehicle
IMPORTANT! Some steps of the programming instructions must be completed within a certain number of seconds following the previous step. Review the complete instruction before beginning the programming sequence.
Step 5.
Refer to Appendix C - Head Units That Require IR Extended Mode On and the Vehicle Application Guide. Note the IR Extended Mode Setting and INTERFACE Version Number next to the selected vehicle. Fill in the information below for quick reference.
IR Extended Mode Setting: YES / NO
(Circle one)
Version Number:
(Write Vesion Number here)
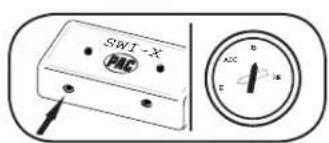
Step 6.
Press and hold programming/ mode button on SWI-X. Turn the vehicle ignition to the ON position.


Both LEDs on SWI-X will light.
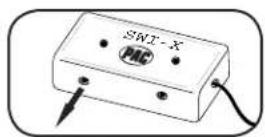
Step 7.
Release the programming/ mode button.


Both LEDs will turn off, indicating memory is cleared, then turn on again for only 3 seconds.
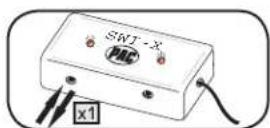
Step 8.
To turn IR Extended Mode ON: Press and release the programming button within 3 seconds. To leave IR Extended Mode OFF:


Both LEDs will turn off.
Do nothing for 3 seconds.
Note: To change IR Extended Mode later, restart procedure at Step 6. Steps 11-24 (learning radio commands) must also be repeated.

Step 9.
Press and release the programming/mode button the same number of times as the desired version number.

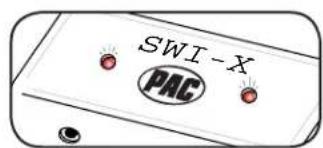
LEDs will flash each time the button is pressed.

After 3 seconds, LEDs will flash to indicate set version number. Left LED: 10's place Right LED: 1's place


Step 10.
Turn vehicle ignition to OFF position. Programming sequence is complete.
Programming the SWI-X to Control the Head Unit
IMPORTANT! Some steps of the programming instructions must be completed within a certain number of seconds following the previous step. Review the complete instruction before beginning the programming sequence.

Step 11.
Turn the vehicle ignition to the ON position.

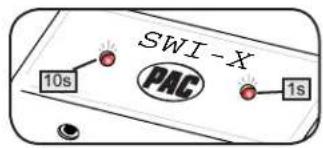
LEDs will flash to indicate set version number. Left LED: 10's place Right LED: 1's place
If you programmed the interface for version #4, proceed with the following steps. If you did not program the interface for version #4, skip to Step 18.

Step 12.
Press and hold programming/ mode button on SWI-X.


Left LED will light.


Step 13.
Release programming/ mode button.
flowchart
graph TD
    A["Process Block 1"] --> B["Process Block 2"]
    B --> C["Arrow pointing to the second block"]
Step 14.
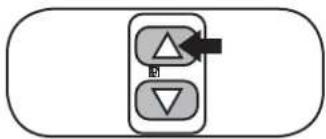
Press and hold the TEMP UP button on the steering wheel control.

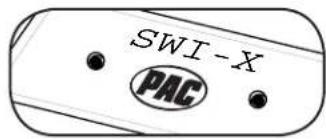
Left LED will turn off.

flowchart
graph TD
    A["Top Step"] --> B["Arrow to Top Step"]
    C["Bottom Step"] --> D["Arrow to Bottom Step"]
Step 15.
Release the TEMP UP button.


Left LED will turn on. The function is programmed.
Step 16.
Repeat Steps 14 and 15, using the TEMP DOWN Button.
Step 17a.
If the vehicle is equipped with FAN UP and FAN DOWN buttons:
Repeat Steps 14 and 15 for these buttons as well.
Step 17b.
If the vehicle is NOT equipped with FAN UP and FAN DOWN buttons:

Press and release the programming/ mode button on the SWI-X.


In either case, left LED will flash once and stay on. Skip to Step 20. You have 7 seconds to perform the next step.

Step 18.
Press and hold programming/mode button on SWI-X.


Left LED will light.


Step 19.
Release programming/ mode button.
You only need to press the programming/mode button once to program all the buttons. If you press this button again after the interface is programmed, it will erase all previous learned buttons.
Programming the SWI-X to Control the Head Unit (cont.)

Step 20.
Within 7 seconds, press and hold the button that is to be learned on the steering wheel.


The left LED will turn off when the button has been learned.

Step 21.
Release the button.

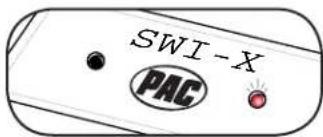
The right LED will turn on.

natural_image
Diagram showing a device with a button and a grid of circular elements, no text or symbols present.Step 22.
Hold the IR emitter on the head unit's remote control within 3 to 4 inches of the IR Input on the SWI-X. Press and hold the button to be learned on the remote control.

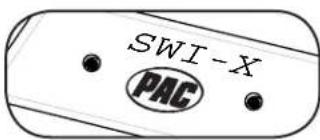
The right LED will turn off when the remote button has been learned.

natural_image
Diagram showing a device with a box and a tray with circular elements, no text or symbols present.Step 23.
Release the button on the remote control.


The left LED will turn on.
Step 24.
If you need to program more buttons, repeat steps 20 - 23 for each additional audio function on the steering wheel.
Program remaining buttons

After all buttons are programmed


Once programming is completed, wait 7 seconds. Both LEDs will flash three times indicating end of programming. The Interface will then flash the version number it was programmed for.
Note: If the steering wheel control has a function that the head unit remote control does not have, you can program the steering wheel function to operate any other command on the head unit remote control.
Testing the SWI-X
Hold the SWI-X infrared emitter (clear blue light at the end of the four-foot wire) close to the head unit and test each function of the steering wheel controls. The right LED on the SWI-X will flash indicating it is sending an IR command when each button on the steering wheel is pressed. If any function does not work, repeat the programming instructions (starting from Step 11) or refer to Troubleshooting Guide.


flowchart
graph TD
    A["Device Input"] --> B{Insertion}
    B --> C["D1 Button"]
    B --> D["D2 Button"]
Final Installation
Mount the SWI-X infrared emitter within line of sight of the head unit, testing continuously to ensure that it will operate from the chosen position. The LED can be installed in the center console or overhead console. Install the LED using the supplied black mounting bezel attached to the LED. Drill a hole just big enough for the bezel to snap into place, but not too big for it to fall through. Once the hole is drilled, insert the LED from behind through the hole and snap bezel onto the LED. Snap bezel with LED into hole.Complete the head unit and SWI-X module installation.
Appendix A: Known Incompatible Vehicles
| VehicleMake(s) Year(s) Model(s) | ||
| BMW All All with factory-activated | cellular phones | All with 5-volt SWC data wire at the steering column |
| 2002-20055-Series w/navigation | ||
| Mercedes-Benz All All vehicles | ||
| Toyota All-2003 Sienna | ||
| Volkswagen 2002-up All vehicles | ||
Appendix B: Known Incompatible Aftermarket Head Units
| Head UnitMake(s) | Model(s) |
| Sony(or any Sony with HiR remotes:ex. RM-X110, 112, 131 145Aand 143A | XAV-7W, CDX-MP80, CDX-MP70, CDX-M850MP, CDX-M3DI, CDX-M800, CDX-CA900X, MEX-5D1, MEX-1HD,CDX-M730, CDX-M770, CDX-M7815X, CDX-M620, CDX-M670, CDX-CA850X, CDX-M9905X and CDX-CA860X |
| Denon | Unknown |
| Delphi | XM SKYFI |
| Terk | XM Commander |
| JVC | stereos that use the RM-RK230 remote |
Appendix C: Head Units That Require IR Extended Mode On
| Head UnitMake(s) Model(s) | |
| Pioneer AVX-P7300DVD / AVXP7000CD / AVXP7000 / AVMP700RAVMP800R / AVMP900R / GEXP7000TV | |
| Rockford Fosgate All Head Units | |
Appendix D: Resistor Kit
Some vehicles have a separate wire for each of the steering wheel buttons. Use this resistor kit for the steering wheel push buttons that do not already have a resistor network connected to them. Examples are Nissan and Harley Davidson motorcycles.
Connect a resistor to each side of a push button and connect the other ends of the resistor all together. Connect the SWI-X to these resistors. On the Harley Davidson, one button can be connected directly to the SWI-X.
47 = yel, vio, blk
100 = brn, blk, brn
150 = brn, grn, brn
560 = grn, blu, brn
1000 = brn, blk, red
1500 = brn, grn, red
3900 = org, wht, red
5100 = grn, brn, red
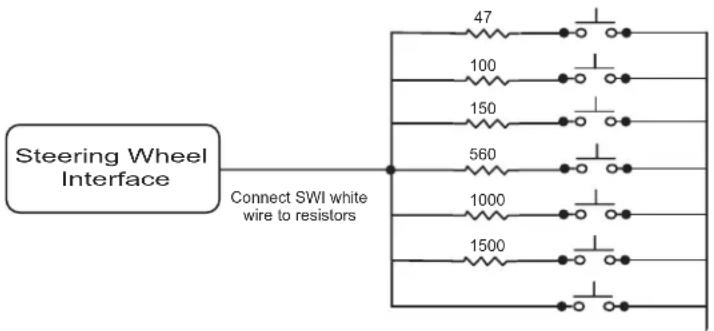
By putting two or more resistor in series, you can come up with additional values. Ex. 150 + 1000 + 1500 = 2650 ohms.
Troubleshooting Guide
No power / won't go into programming mode:
- Check Red wire connection and fuse. Make sure INTERFACE is connected to switched 12V+.
- Make sure vehicle ignition is on.
Won't program radio commands:
- Make sure version number and IR Extended mode setting are programmed before attempting to program radio commands. The right LED of the INTERFACE will flash the programmed version number when power is applied.
Steering wheel controls won't operate new head unit
- Make sure you have programmed the correct version number and IR Extended mode setting.
- Make sure you've followed the programming instructions precisely, noting each exception and time sequence. Repeat if necessary.
- Place the INTERFACE emitter within range of the new head unit.
To replace a broken IR emitter:
- Replace with standard IR emitter (i.e. Radio Shack part number 276-143). Long lead of IR emitter goes to INTERFACE's emitter Red wire and short lead goes to INTERFACE's black wire)
The INTERFACE controls the stereo immediately without pressing any buttons on the steering wheel:
- During programming, press the buttons on the steering wheel firmly until the left LED turns off. Releasing the button too early will cause the INTERFACE to send out a signal even when no buttons are pressed.
During programming, the right LED turns off and goes to the left LED without pressing a button on the wireless remote:
- Turn off fluorescent droplights or shop lights during programming.
- Make sure the INTERFACE's IR Receiver is not in direct sunlight.
The INTERFACE controls the radio whenever the steering wheel is turned (mostly late 80's early 90's Honda/Acura).
- Program the INTERFACE for version #11.
When pressing and holding down the volume button on the steering wheel, the volume or track on the radio only goes up or down by one or is very slow. May also relate to other functions.
- Depending on some vehicles, some stereos may not respond very well. Try programming the interface for 'Extended IR Mode'. This may or may not help in response from the stereo.
For mostly GM vehicles, when going into radio programming the left LED turns off and goes to the right LED without pressing the steering wheel buttons.
- If the SWC wire in the vehicle's steering wheel column is cut in half, do not cut the brown loop wire on the interface.
When ever I program a new button the previous button does not work.
- You must program all buttons during programming. If you try to program another button, all previous button will be erased. You will have to relearn all previous buttons again.
Working on a new or unlisted vehicle?
We are always looking for new vehicle information. If you've successfully completed the installation on a vehicle with steering wheel controls, and the vehicle is not listed in these instructions or on our Website, contact us at techsupport@pac-audio.com so that we may add the information to the instructions.
Pacific Accessory Corporation
1502 S. Santa Fe St. • Santa Ana, CA 92705
techsupport@pac-audio.com • www.pac-audio.com
Copyright 2004 Pacific Accessory Corporation. Content subject to change without notice.
- Is this product compatible with the vehicle?
- Is this product compatible with the head unit?
- Prepare for the installation.
- Wiring Connections
- Step 4
- Programming the SWI-X to Work With the Vehicle
- Step 5.
- IR Extended Mode Setting: YES / NO
- Version Number:
- Step 6.
- Step 7.
- Step 8.
- Step 9.
- Step 10.
- Programming the SWI-X to Control the Head Unit
- Step 16.
- Step 17a.
- Step 17b.
- Programming the SWI-X to Control the Head Unit (cont.)
- Step 20.
- Step 21.
- Step 22.
- Step 23.
- Step 24.
- Testing the SWI-X
- Final Installation
- Appendix A: Known Incompatible Vehicles
- Appendix B: Known Incompatible Aftermarket Head Units
- Appendix C: Head Units That Require IR Extended Mode On
- Appendix D: Resistor Kit
- Troubleshooting Guide
- No power / won't go into programming mode:
- Won't program radio commands:
- Steering wheel controls won't operate new head unit
- To replace a broken IR emitter:
- The INTERFACE controls the stereo immediately without pressing any buttons on the steering wheel:
- During programming, the right LED turns off and goes to the left LED without pressing a button on the wireless remote:
- The INTERFACE controls the radio whenever the steering wheel is turned (mostly late 80's early 90's Honda/Acura).
- When pressing and holding down the volume button on the steering wheel, the volume or track on the radio only goes up or down by one or is very slow. May also relate to other functions.
- For mostly GM vehicles, when going into radio programming the left LED turns off and goes to the right LED without pressing the steering wheel buttons.
- When ever I program a new button the previous button does not work.
- Working on a new or unlisted vehicle?
- Pacific Accessory Corporation
Brand : PAC
Model : SWI-X
Category : Air Conditioning