KAVACRBL20U - Robot vacuum Kogan - Free user manual and instructions
Find the device manual for free KAVACRBL20U Kogan in PDF.


| Product Type | Robot Vacuum and Mop with Self-Cleaning Station |
| Brand | Kogan |
| Model | KAVACRBL20U (LX20 Pro Ultra) |
| Robot Dimensions | 350 x 350 x 102 mm |
| Charging Dock Dimensions | 450 x 400 x 410 mm |
| Robot Weight | Approx. 3.5 kg (estimate based on size) |
| Battery | 5200 mAh Lithium-Ion |
| Suction Power | 25000 Pa |
| Dust Box Capacity (Robot) | 360 ml |
| Dust Bag Capacity (Dock) | 2.5 L |
| Clean Water Tank Capacity | 3.3 L |
| Sewage Tank Capacity | 3 L |
| Charging Time | < 300 minutes |
| Rated Power (Robot) | 55 W |
| Rated Power (Dock) | 1100 W |
| Wi-Fi Connectivity | 2.4 GHz only |
| Smart Home Compatibility | Kogan SmarterHome™ app, Google Home, Amazon Alexa |
| Cleaning Modes | Intelligent (auto), Targeted, Area, Defined Area, Schedule |
| Mapping & Navigation | Laser-based with automatic mapping and room division |
| Self-Cleaning Function | Automatic dust emptying and mop cleaning/drying in dock |
| Safety Features | Drop detection, obstacle avoidance, anti-tangle, automatic return to dock |
| Included Accessories | Charging dock, ramp, dust box, mop cloth, side brush, cleaning brush, HEPA filter, dust bag |
| Maintenance Intervals | Roller brush, side brush, mop cloth: weekly; dust box, sensors, dock: quarterly; battery: charge every 3 months if not in use |
Frequently Asked Questions - KAVACRBL20U Kogan
User questions about KAVACRBL20U Kogan
0 question about this device. Answer the ones you know or ask your own.
Ask a new question about this device
Download the instructions for your Robot vacuum in PDF format for free! Find your manual KAVACRBL20U - Kogan and take your electronic device back in hand. On this page are published all the documents necessary for the use of your device. KAVACRBL20U by Kogan.
USER MANUAL KAVACRBL20U Kogan
natural_image
Line drawing of a robotic vacuum cleaner with control panel and mounting base (no text or symbols)Kogan SmarterHome™ LX20 Pro Ultra Robot Vacuum and Mop
with Self-Cleaning and Drying
KAVACRBL20U
Safety & Warnings 3
Components 6
Overview 7
Operation 10
Connect to the SmarterHome™ App 17
Google Home Control 20
Amazon Alexa Control 23
Cleaning & Care 26
Specifications 31
Troubleshooting 32
Notes 33
Safety & Warnings
Read these instructions carefully before using the product and keep them for future reference.
- Address any issues with the product promptly. Clear any small objects, power cords, and obstacles on the floor before use. Fold the edges of carpets and ensure curtains or tablecloths do not touch the floor.
- If there are any drop-offs (e.g., stairs), test the robot first to ensure it can detect edges and avoid falls. Install protective barriers at the edges to prevent accidents and ensure the barriers do not pose a tripping hazard.
- Use the product as directed and only with accessories recommended by Kogan.com.
- Ensure the voltage of the power supply matches the specifications on the charging dock.
- Ensure the dust box and filter are properly installed before using the robot.
- If the power cord is damaged, cease use immediately and contact help.Kogan.com for support.
- Turn off the robot before performing cleaning or maintenance.
- Unplug the power cord from the outlet before cleaning or servicing the robot.
- Remove the battery and turn off the power before disposing of the robot.
- If the robot will not be used for an extended period, disconnect it from the power supply.
- Follow local regulations for disposing of old batteries.
- The robot is not intended for use by children under 8 years old or individuals with reduced physical, sensory, or mental capabilities, or those lacking experience and knowledge unless supervised by a guardian.
- Do not allow children to ride or play with the robot.
- Use the robot indoors only. Do not use it outdoors or in commercial or industrial settings.
- Do not operate the robot in a room where infants are sleeping.
- Avoid using the robot if it has been dropped, damaged, used outdoors, or exposed to water. If the robot is damaged, cease use immediately and contact help.Kogan.com for support.
Warnings
- Use only the original charging dock provided by Kogan.com. Do not replace the battery yourself. If the battery is damaged, cease use immediately and contact help.Kogan.com for support.
- Do not use the robot in areas with open flames or fragile items.
- Avoid operating the robot in environments with extreme temperatures (above 40^ C or below 0^ C).
- Keep hair, clothing, fingers, and other body parts away from the robot's openings and moving parts.
- Do not use the robot on wet or waterlogged surfaces.
- Prevent the robot from sucking up objects like stones or paper that could obstruct it.
- Do not attempt to vacuum flammable materials, such as gasoline or toner from printers.
- Avoid using the robot in areas containing flammable substances.
- Prevent the robot from picking up burning objects such as cigarettes, matches, or hot ashes.
- Do not block the suction port or use the robot if the suction port is obstructed. Clear dust, lint, and hair from the suction area to maintain proper airflow.
- Handle the power cord with care to avoid damage. Do not pull or drag the charging dock or robot by the cord, use the cord as a handle, or close doors on the cord. Keep the power cord away from sharp edges and heat sources.
- Do not use a damaged charging dock. If the charging dock is damaged, cease use immediately and contact help.Kogan.com for support.
Cleaning Solution Guidelines
- Keep the cleaning solution away from heat sources. Store it in a cool, dry place between 0^ C and 30^ C, out of reach of children and pets.
- Avoid contact with eyes and skin. If contact occurs, rinse with plenty of water for at least 15 minutes. If wearing contact lenses, remove them and continue rinsing. Seek medical attention if irritation persists.
- Do not inhale or ingest the cleaning solution. If inhaled, move to fresh air. If ingested, rinse your mouth with water and seek medical attention if symptoms persist.
- Do not add other liquids to the cleaning solution to avoid damaging the robot.
- A small amount of sediment in the cleaning solution is normal and does not affect its performance.
Battery Removal Instructions
Note:
The following instructions apply only when discarding the robot. They are not for regular maintenance.
- Remove the battery only when it is completely depleted. Avoid contact with metal objects during removal.
• To remove the battery:
a. Run the robot until it has no power.
b. Turn off the power switch.
c. Remove the screws on the battery cover.
d. Lift off the battery cover.
e. Disconnect the battery connector and remove the battery.
Battery Disposal
- Do not dispose of the battery with household waste. Take it to a battery recycling centre or contact a service centre for proper disposal.
- The chemicals in the battery can harm the environment. Ensure the battery is removed from the robot and disposed of at a professional recycling facility.
- Caution Regarding Battery Leaks
- Battery leakage can cause injury. If contact occurs, wash the affected area with water immediately. Seek medical attention if symptoms persist.
Water Tank Connection
• Maximum inlet water pressure: 0.3 MPa, minimum inlet water pressure: 0.1 MPa.
- Warning: This appliance is not intended for use with potable water supplies.
- Do not reuse hoses that have been previously replaced.
- The water inlet of this appliance must not be connected to water from any other water heating system.
- Warning: Do not attempt to recharge non-rechargeable batteries.
Components
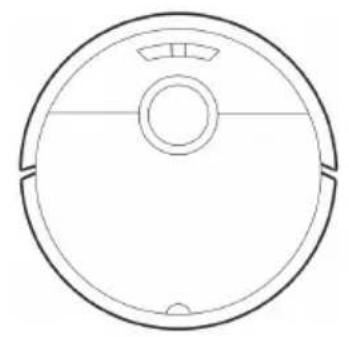
natural_image
Simple line drawing of a circular robotic vacuum cleaner (no text or symbols)Robot
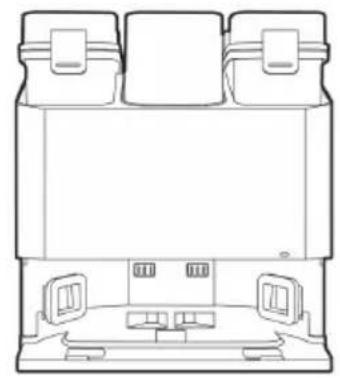
natural_image
Line drawing of a vehicle rear view showing front, side, and top views (no text or symbols)Charging Dock
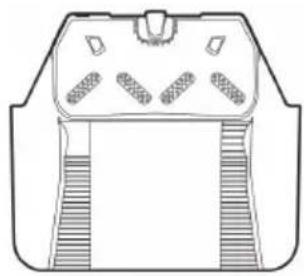
natural_image
Technical line drawing of a mechanical component with no visible text or symbolsRamp
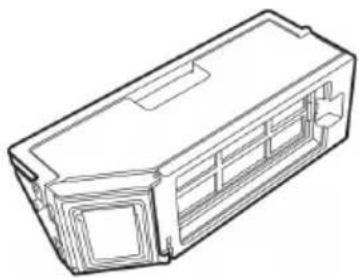
natural_image
Line drawing of a rectangular electronic component with internal slots and mounting holes (no text or symbols)Dust Box
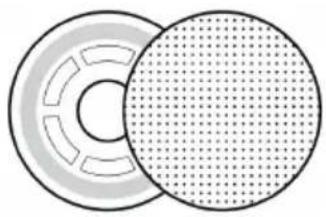
natural_image
Cross-sectional diagram of a mechanical component with internal gear-like structure (no text or symbols)Mop Cloth
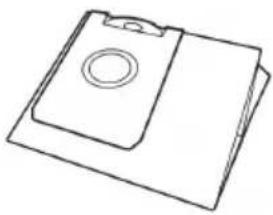
natural_image
Line drawing of a clipboard with a circular hole and a rectangular base (no text or symbols)Dust Bag
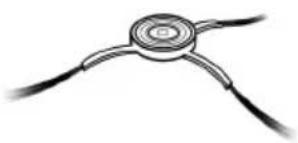
natural_image
Simple line drawing of a three-pronged cable or connector with no text or symbolsSide Brush Cleaning Brush
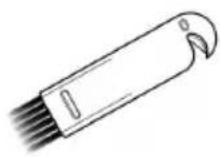
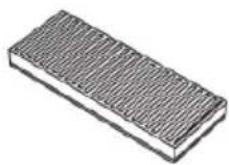
HEPA Filter
Overview
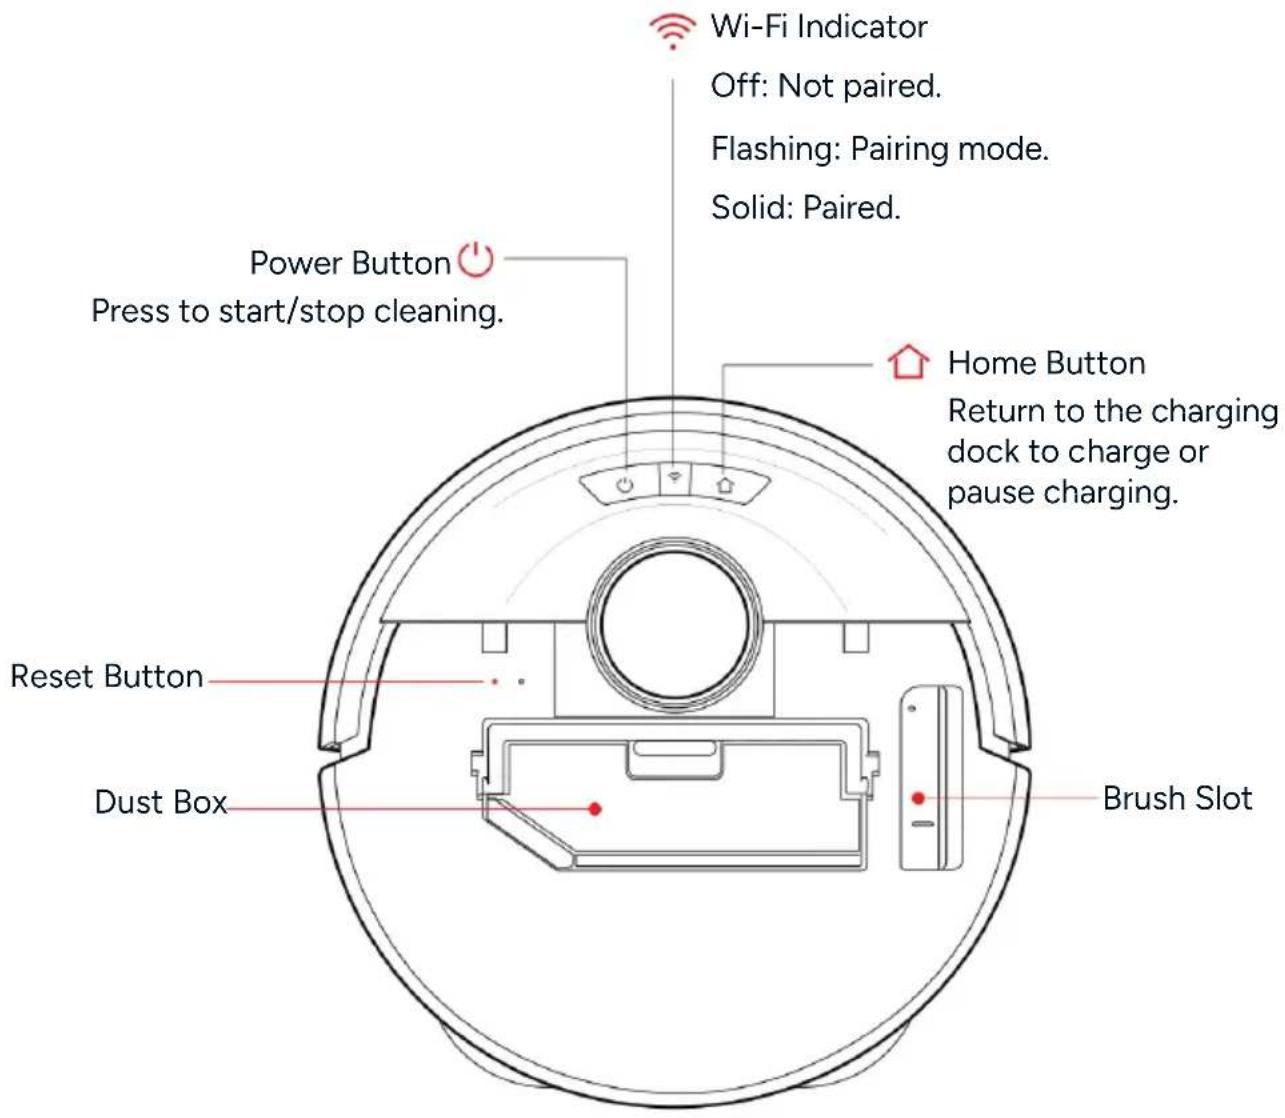
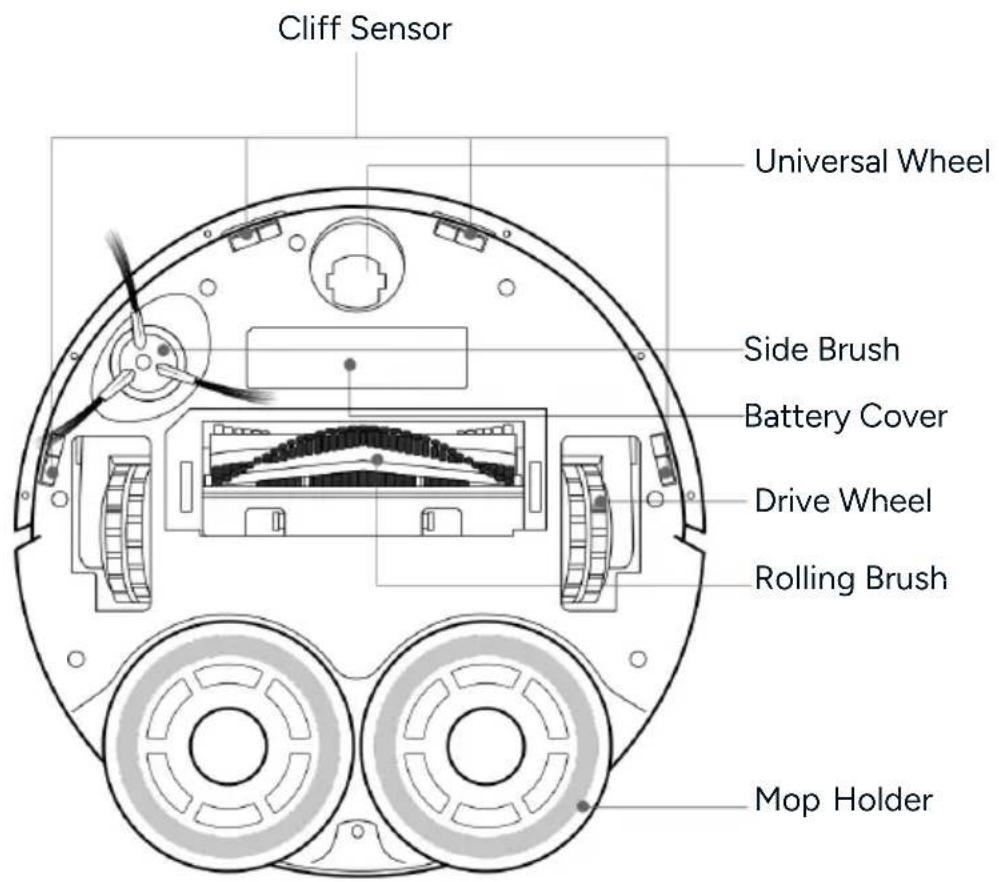
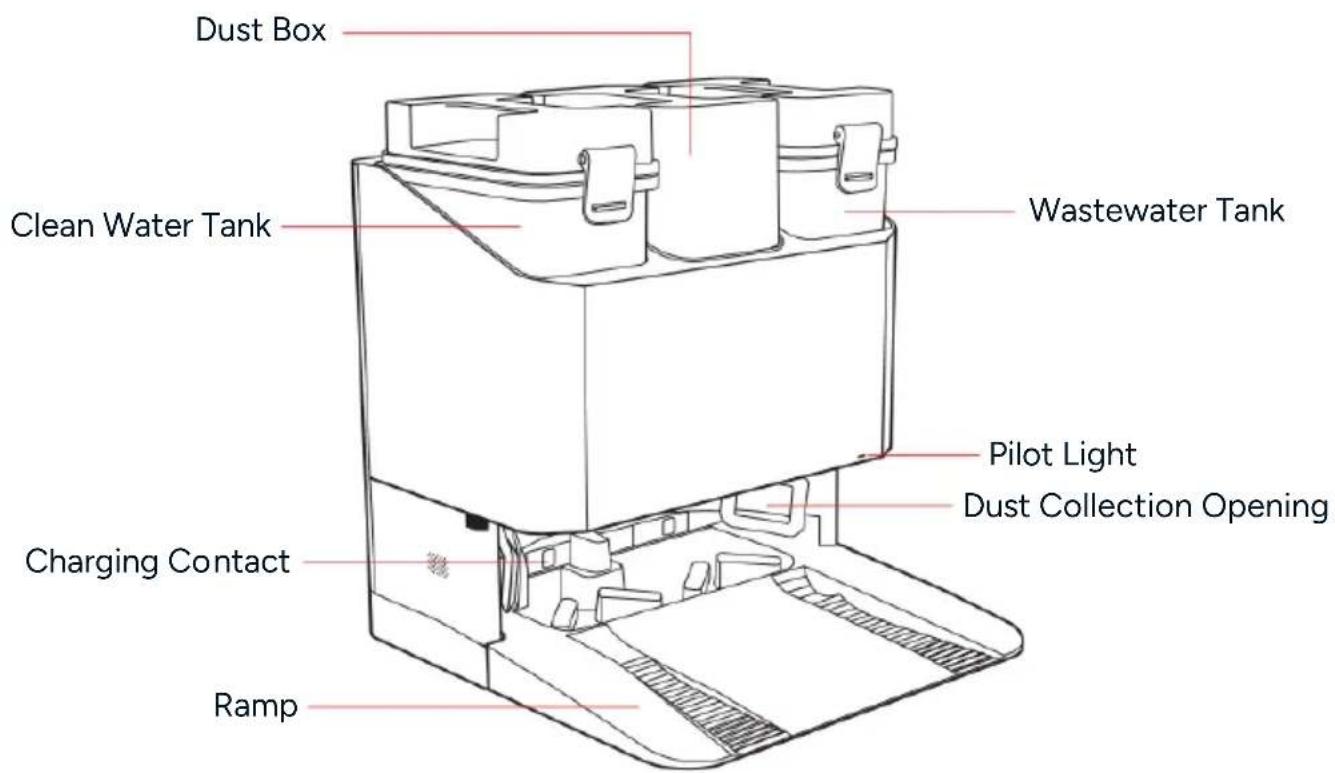
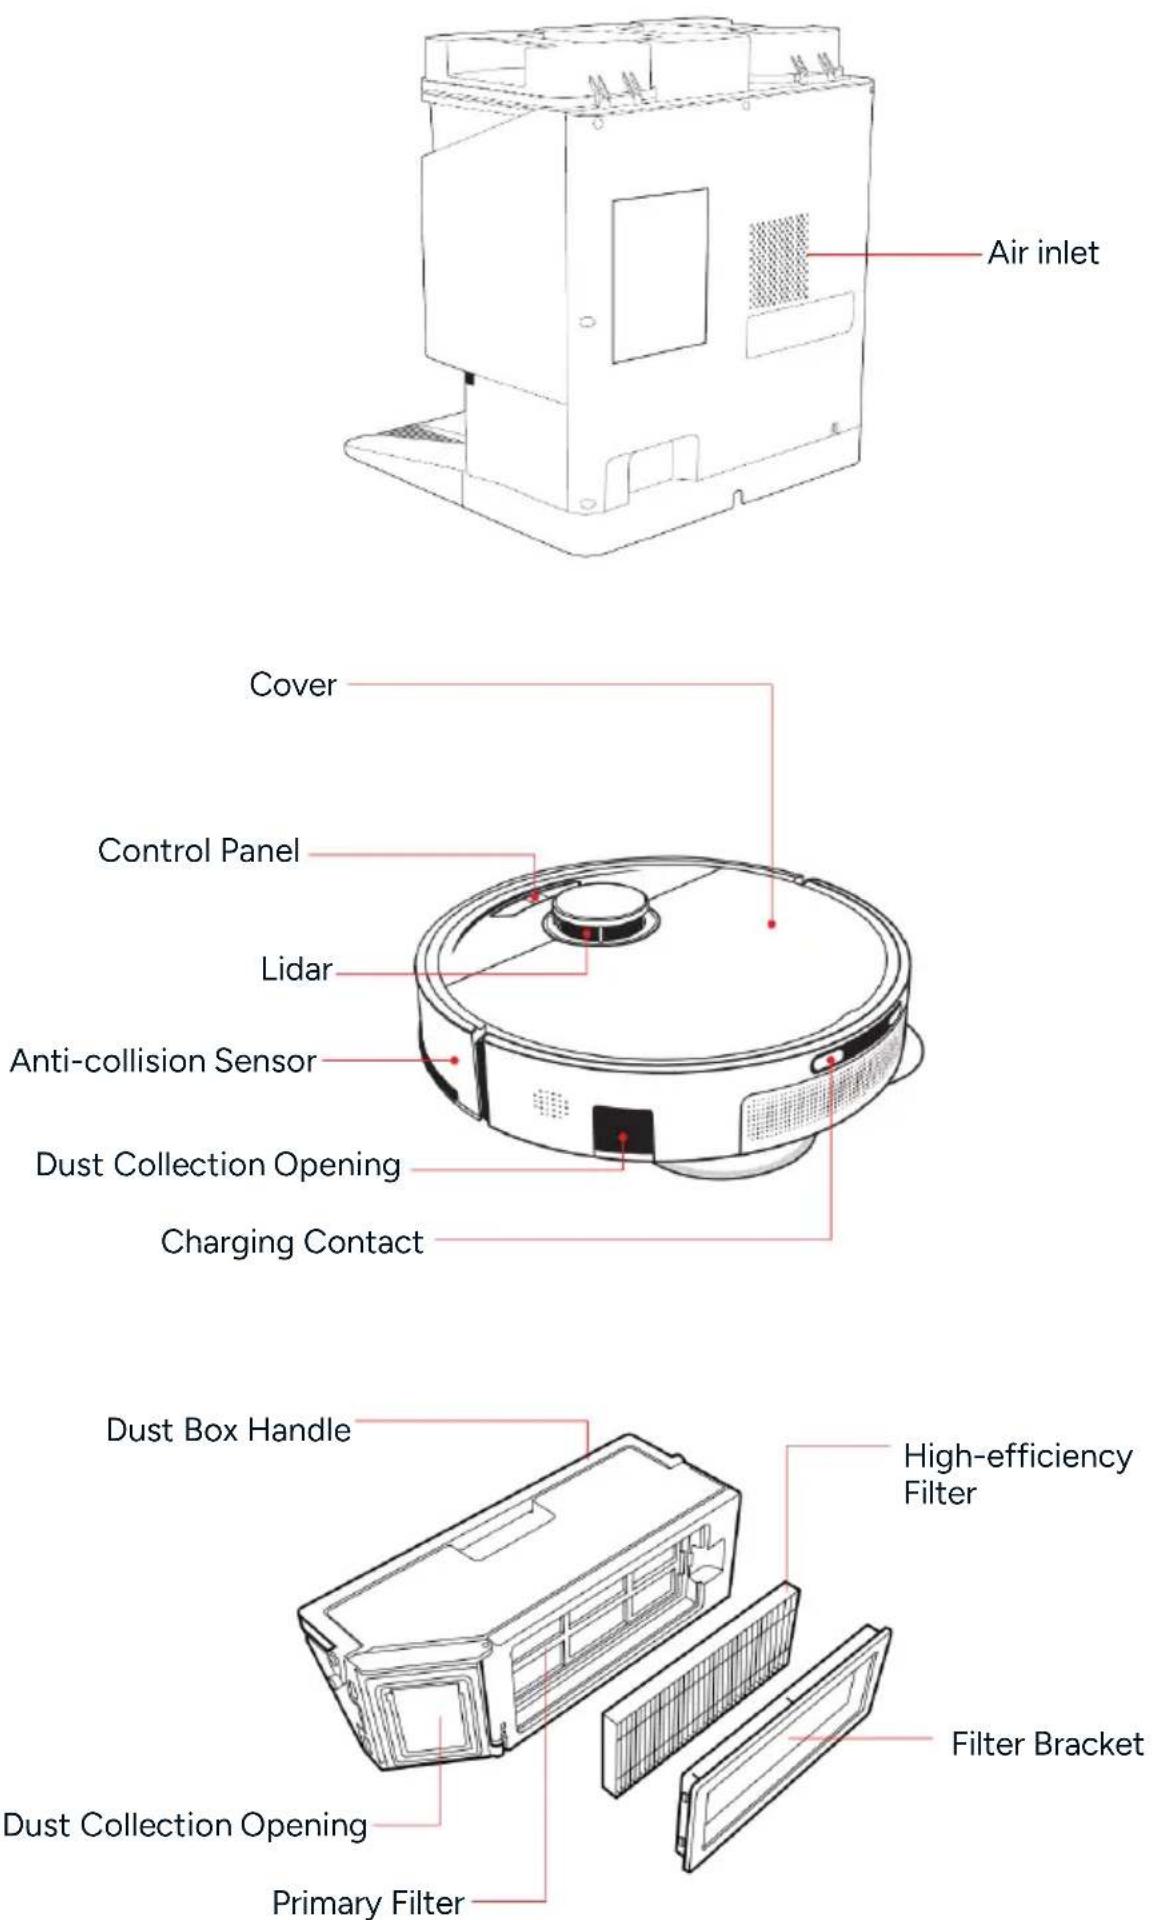
Operation
Precautions
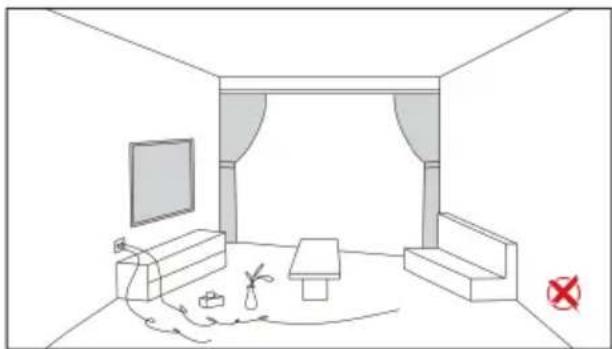
- Before using the vacuum cleaner, clear any wires, debris, and potentially hazardous items from the floor. Remove fragile, valuable, and easily knocked-over objects to prevent accidents.
- Avoid situations where the robot could become stuck, entangled, dragged, or tip over, as this may cause personal injury or property damage.
natural_image
Line drawing of a living room interior with TV, sofa, coffee table, and wall curtains (no text or symbols)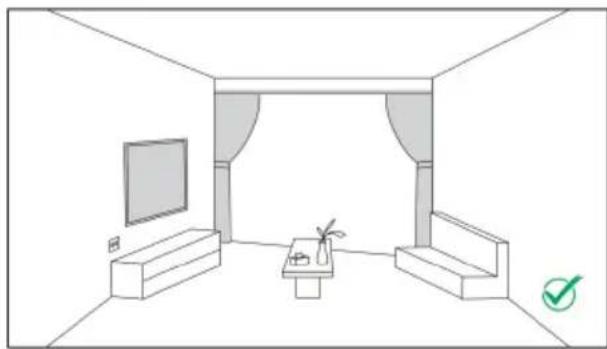
natural_image
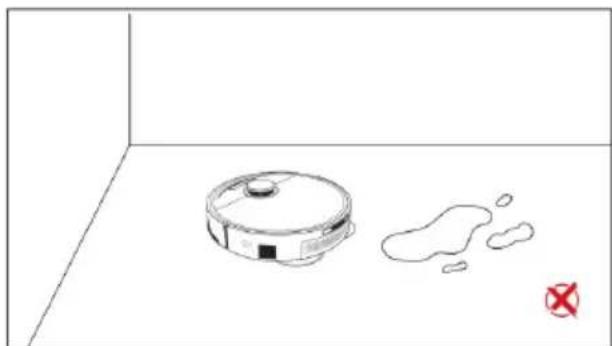
Line drawing of a modern living room interior with TV, curtains, and a coffee table (no text or symbols)• Do not use the robot to clean up liquids.
- When operating in areas with drop-offs, use protective barriers to prevent the robot from falling or pushing other objects off edges, which could lead to injury or damage.
natural_image
Simple line drawing of a vacuum cleaner inside a room with a red cross symbol (no text or labels)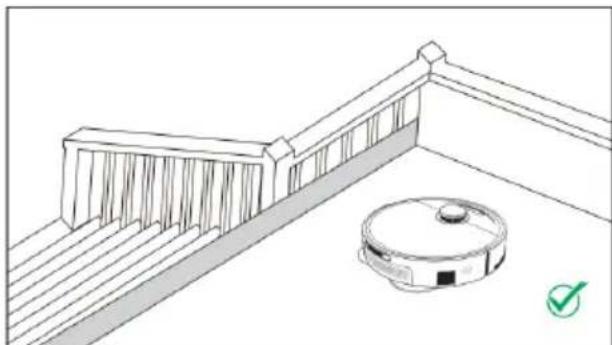
natural_image
Line drawing of a robotic vacuum cleaner placed on a balcony with railings (no text or symbols)Preparations
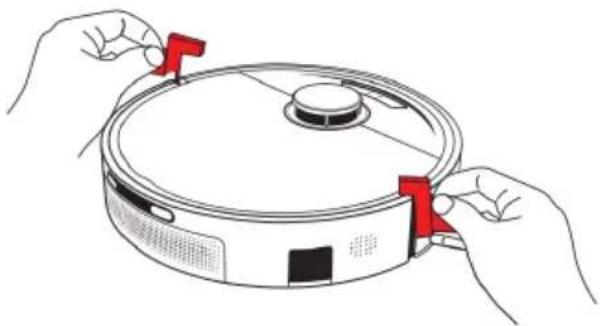
- Remove the protection materials from both sides of the robot.
natural_image
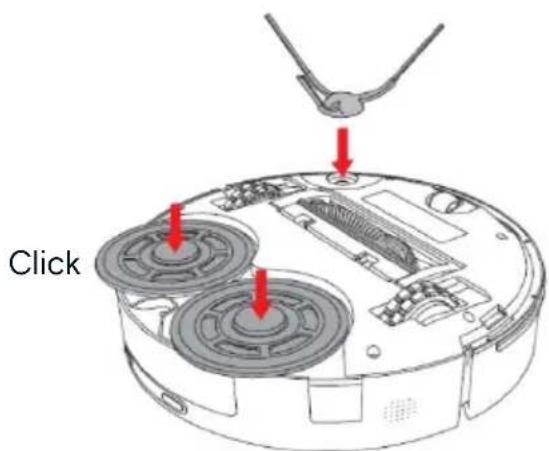
Line drawing of hands installing a circular component with red adjustment knobs (no text or symbols)- Install the side brush and mop bracket. Ensure you hear a 'click' sound to confirm proper installation.
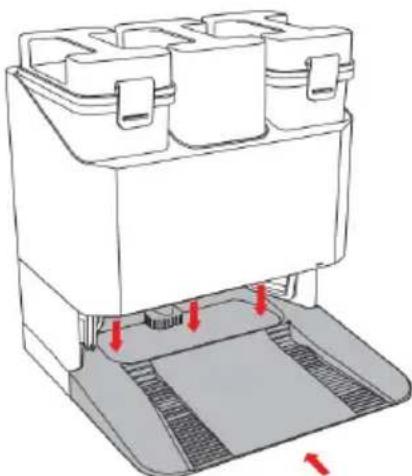
- Install the ramp.
natural_image
Technical line drawing of a mechanical device with red arrows indicating ports or features (no text or symbols present)Water Tank
- Open the tank cover and add water.
- Insert both the clean water tank and the wastewater tank into the base station.
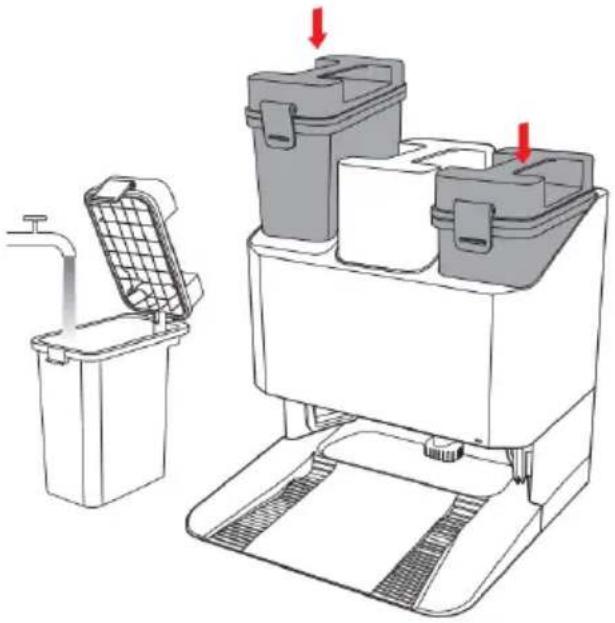
natural_image
Line drawing of a cleaning machine with open lid and water dispenser, showing internal compartments and handle (no text or symbols)Positioning the Charging Dock
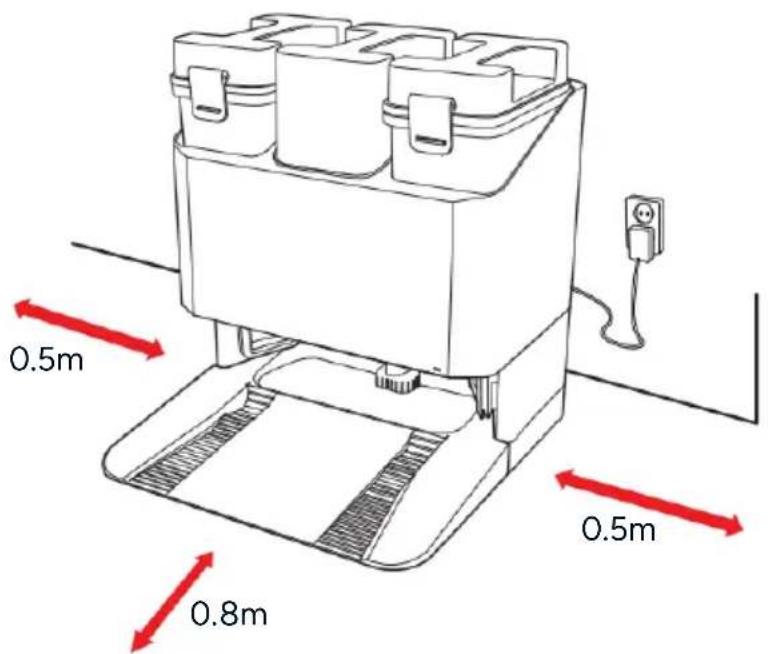
- Place the charging dock against a wall on a flat, hard surface. Ensure there are no objects within 0.5m on either side and 0.8m in front of the base station.
- If there are mirrors, reflective surfaces, or skirting near the base station, cover the bottom 14cm to prevent interference.
- Avoid placing the charging dock in direct sunlight.
- Position the charging dock in an area with a strong Wi-Fi signal for optimal performance.
Charging the Robot
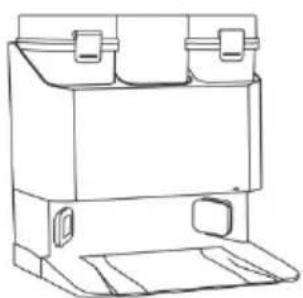
- To charge, briefly press the 'Home' button, and the robot will automatically return to the charging dock to begin charging. Once docked, it will take about 5 seconds to hear the 'Start recharge' voice prompt.
- When the base station is connected to a power source, the robot will automatically return to charge and empty the dust box when needed. It is recommended to start the robot from the charging dock and avoid moving it during cleaning.
natural_image
Line drawing of a mechanical device with two top tabs and a base platform (no text or symbols)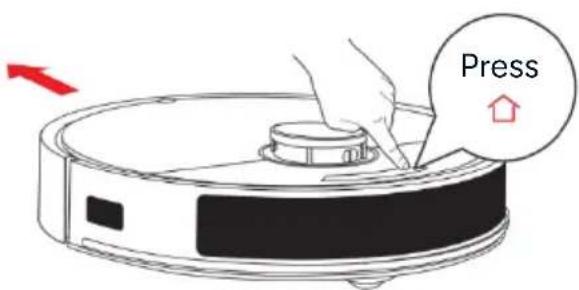
Powering the Robot On/Off
- Press and hold the 'Power' button for 3 seconds to turn the robot on. The indicator will illuminate to confirm startup.
- To turn off the robot, press and hold the 'Power' button again for 3 seconds until the indicator turns off.
• The robot cannot be powered off while it is charging.
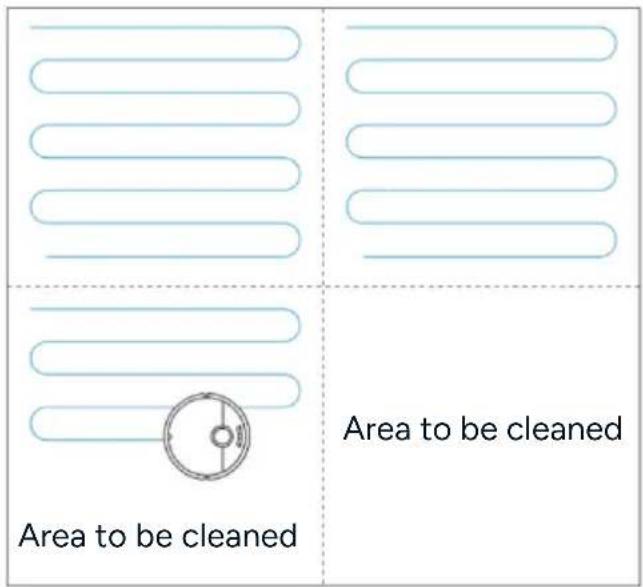
Intelligent Cleaning (Default Mode)
- The robot will scan its environment, create a map, and intelligently divide the areas to be cleaned. It will clean each area in sequence, following a Z-shaped pattern along walls.
- After cleaning is complete, the robot will return to the charging base.
- For optimal mapping, begin the first cleaning cycle from the charging base.
- Avoid frequently relocating the robot during operation. If it is moved, place it back near its original location.
- The robot will attempt to reposition itself; if successful, it will continue cleaning as planned. If repositioning fails, it will abandon the current task and generate a new cleaning map, which may affect its ability to recharge.
Cleaned area
Cleaned area
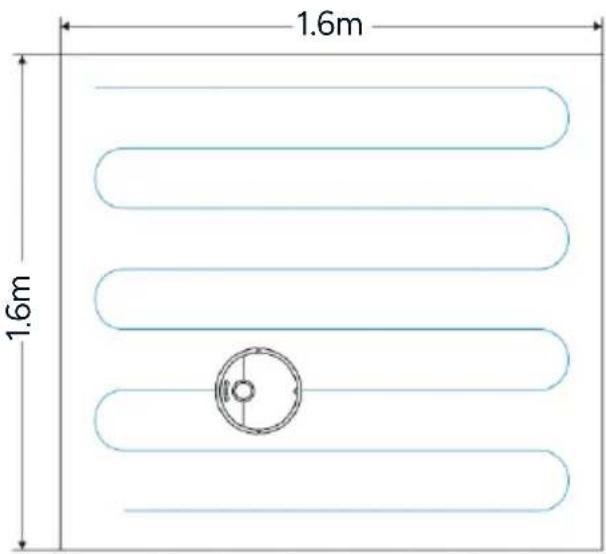
Targeted Cleaning
- Use the app to select the Targeted Cleaning function. Choose a point on the map, and the robot will move to the designated spot and clean a 1.6m x 1.6m area centred on that point.
- Before using this function, ensure the initial map has been completed in the app.
Cleaning a Selected Area
- Use the app to select the Area Cleaning function. Choose a specific area on the map, and the robot will clean only that selected area.
• Before using this function, ensure the initial map has been created in the app. - The robot may enter unplanned areas during cleaning, so clear any obstacles around the designated area. Do not rely on natural barriers for containment.
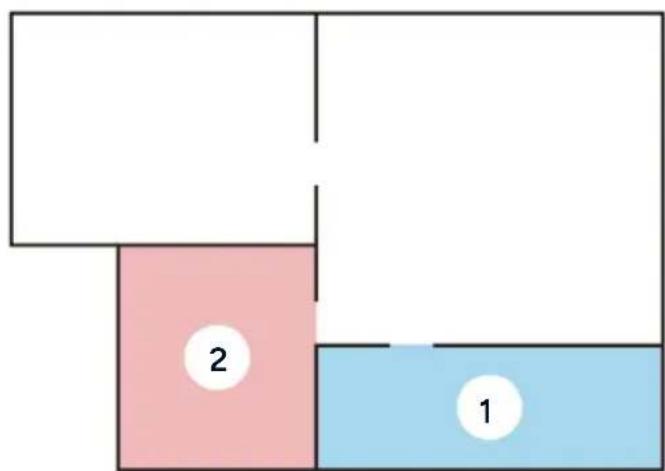
Defined Area Cleaning
- Use the app to select the Defined Area cleaning function. Choose the area to be cleaned on the map, and the robot will focus on that defined space.
• Before using this function, ensure the initial map has been created in the app. - The robot may enter unplanned areas during cleaning, so clear any obstacles around the designated area. Do not rely on natural barriers for containment.
natural_image
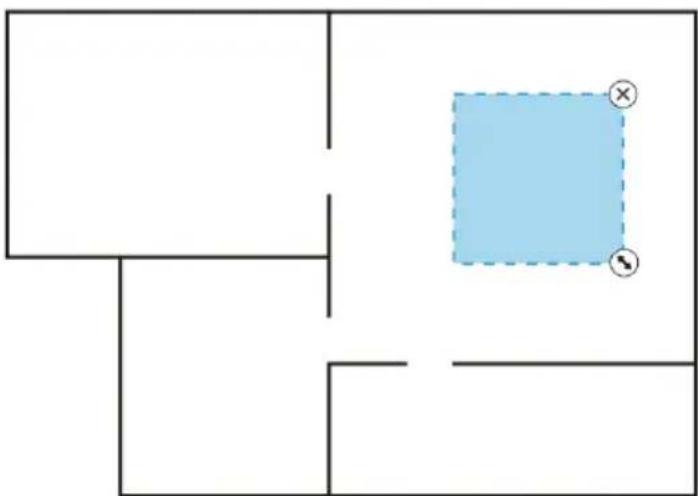
Pure geometric diagram with a light blue square and a circled symbol, no text or labels presentRestricted Area Setting
Use the app to set up restricted areas. Once an area is marked as restricted on the map, the robot will avoid entering it during cleaning.
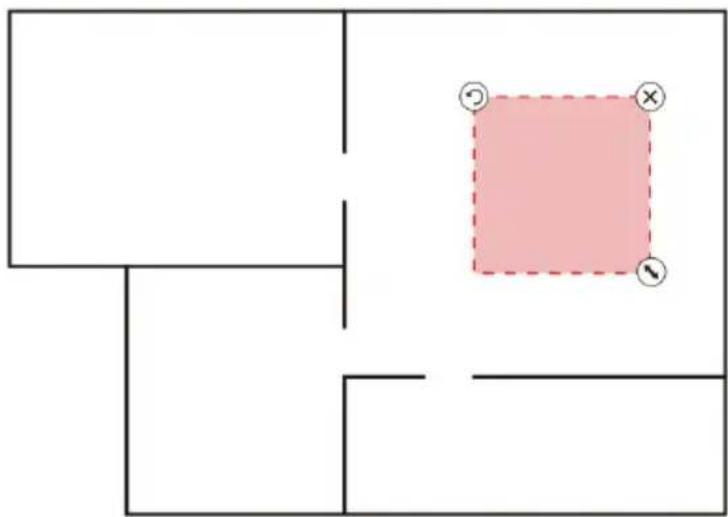
natural_image
Pure geometric diagram with lines and a pink square, no text or symbols presentScheduled Cleaning
Once scheduled cleaning is set, the robot will automatically begin cleaning at the designated time and return to the charging base when finished.
Forced Shutdown
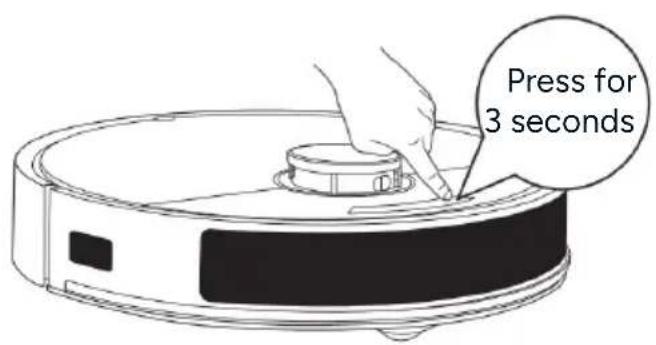
Use a pin to press and hold the 'Reset' button for 3 seconds to enter forced shutdown.
Connect to the SmarterHome™ App
Install App
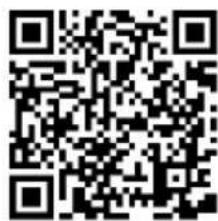
Download the 'Kogan SmarterHome' app from the Play Store (Android) or App Store (iOS).
Play Store (Android)
App Store (iOS)
Register
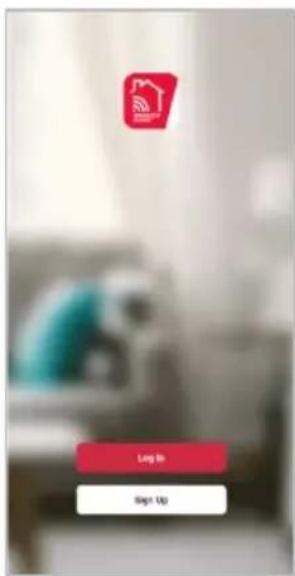
- If you already have a SmarterHome account, select 'Log In'. To register a new account, select 'Sign Up'.
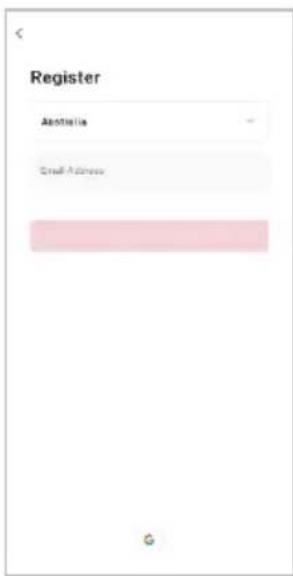
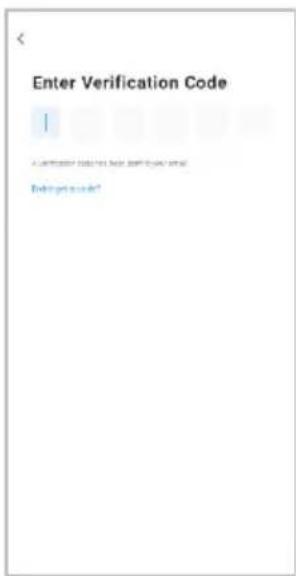
- The system will automatically recognise your country. If needed, you can manually select your country from the drop-down box. Enter your email address and tap 'Get Verification Code' to continue.
- A 6-digit code will be sent to the submitted email address. Enter this code before the one-minute timer expires.
- Continue to the next page and complete your SmarterHome profile.
Set Device in Pairing Mode
When the device is first turned on, it may automatically enter pairing mode (the Wi-Fi indicator will be flashing slowly).
If not automatically in pairing mode when powered on, you can manually set the device in pairing mode by pressing and holding the 'Power' and 'Home' buttons simultaneously for 3 seconds until you hear an 'AP Mode' audio tone and the Wi-Fi indicator flashes.
Add Device Through Network
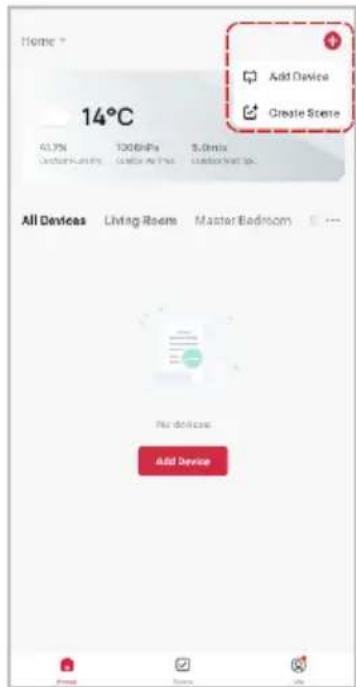
- Once registered, tap 'Add Device' on the app's home page, or the '+' in the upper right corner, to add a new device through the network.
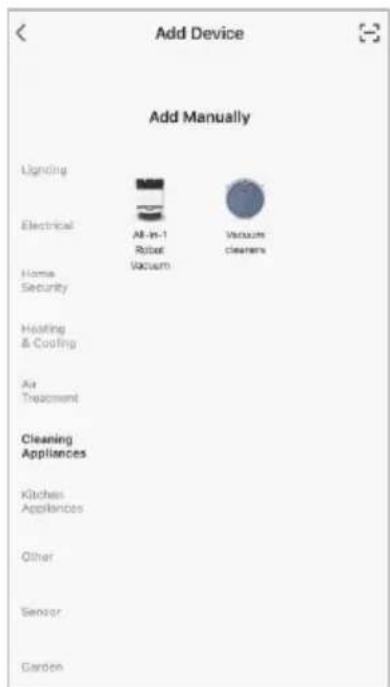
- Select the product type from the list of options in the app (Cleaning Appliances > All-in-1 Robot Vacuum).
- Ensure that the device is in pairing mode, with the Wi-Fi indicator flashing slowly, and tap 'Confirm light is slowly flashing'.
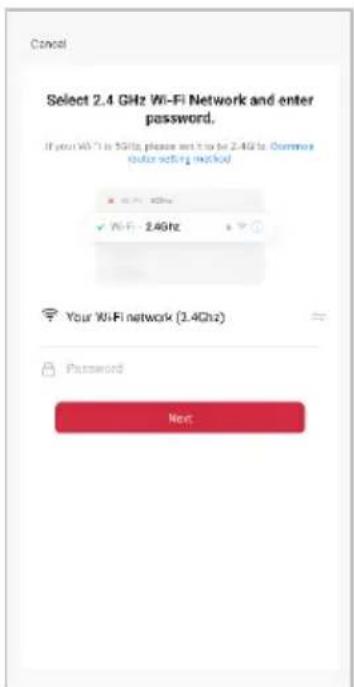
- Enter your Wi-Fi details. It is important that your SmarterHome™ device and the app are connected to the same Wi-Fi network during setup.
Notes:
-
The device and the app have to use the same Wi-Fi network.
• The device is only compatible with 2.4Ghz networks.
• Depending on the product, Steps 3 and 4 may be in opposite order. -
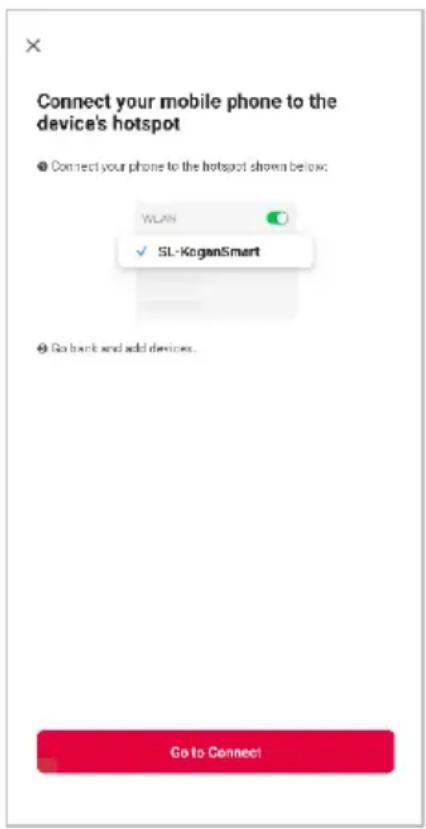
Follow the in-app prompts to continue AP Mode connection, which will pair your mobile phone to the device's Wi-Fi hotspot to ensure a connection. This may be named 'SL-KoganSmart', 'SmartLife-XXXX', or another similar name.
Note:
If the Wi-Fi hotspot does not appear on your phone in the list of available networks, your device may not be set in AP Pairing Mode correctly. Try repeating the steps outlined above to ensure your device is ready for connection.
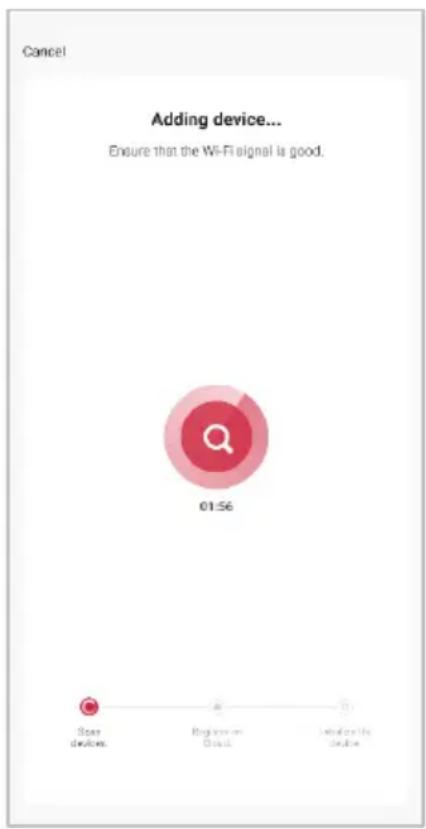
- The device will commence the pairing process and connect to the app. Ensure your Wi-Fi router, mobile phone, and the SmarterHome™ device are kept close until connection is complete.
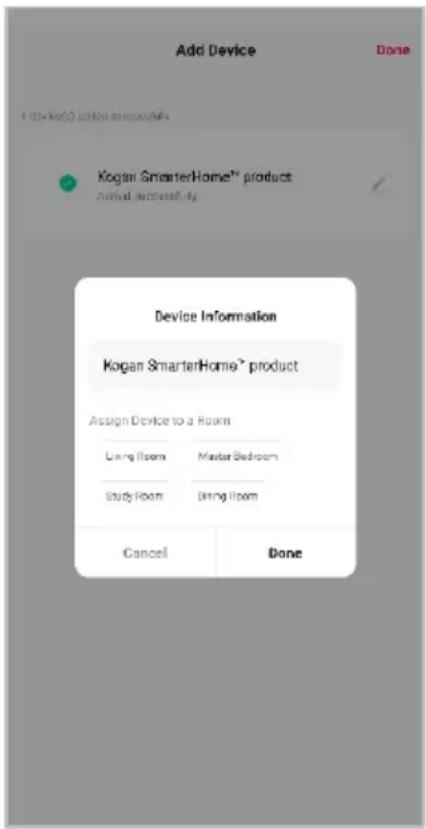
- After successfully being added, you will have the option to rename the device and assign it to a location. It will now be listed on the app's home page. Tap the device listing to enter its control page.
Note:
Once connected, you can select Create Scene from the '+' in the upper right corner (or from the Scene tab) to group connected SmarterHome™ products and automate their functions.
Google Home Control
Note:
You will need to have set up a Google Home account prior to linking your Kogan SmarterHome™ device.
Adding 'SmarterHome' to the Google Home App
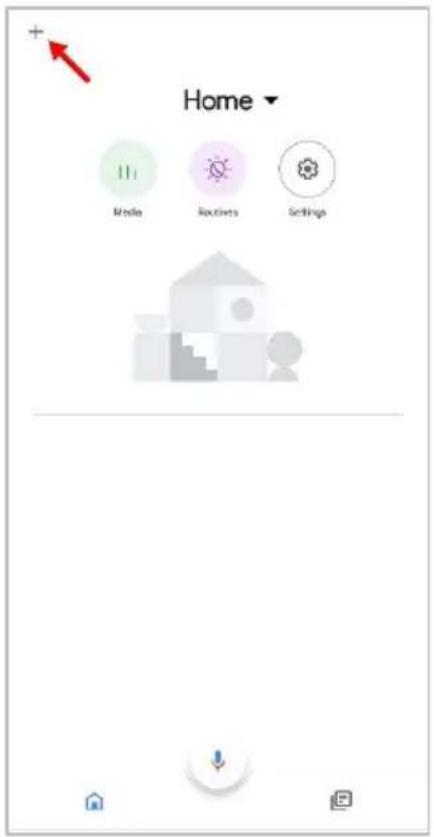
- From the home page of the Google Home app, select the '+' icon (top left corner, see arrow in the below screenshot) to access the 'Add and manage' page.
- Select 'Set up device', then select the 'Works with Google' option.
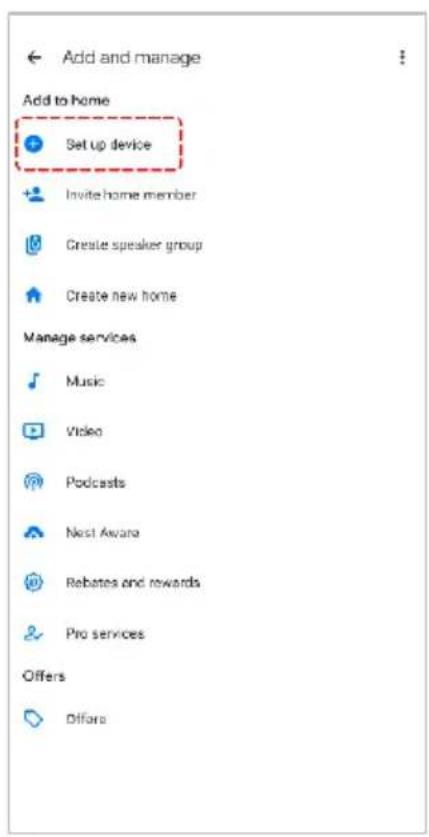
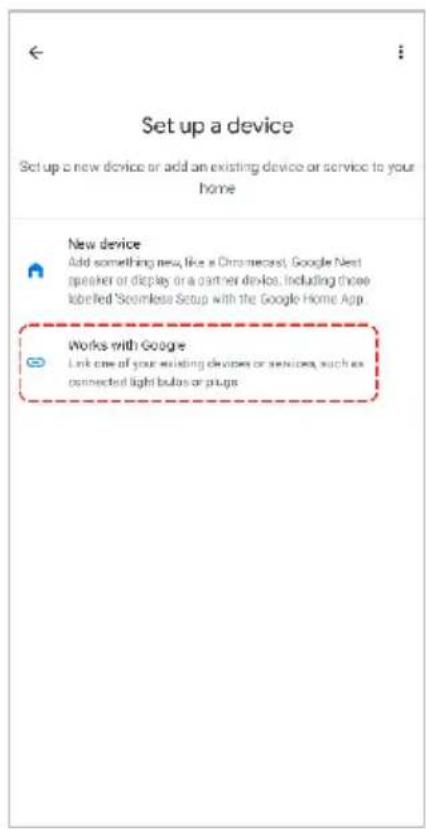
- Select the search bar and type 'Smarter Home' to locate the Kogan SmarterHome™ service.
- From here, you will be prompted to sign into your SmarterHome™ account using either your email or mobile phone number, depending on which method you used to register your account.
- Select "Kogan SmarterHome™" from the app options.
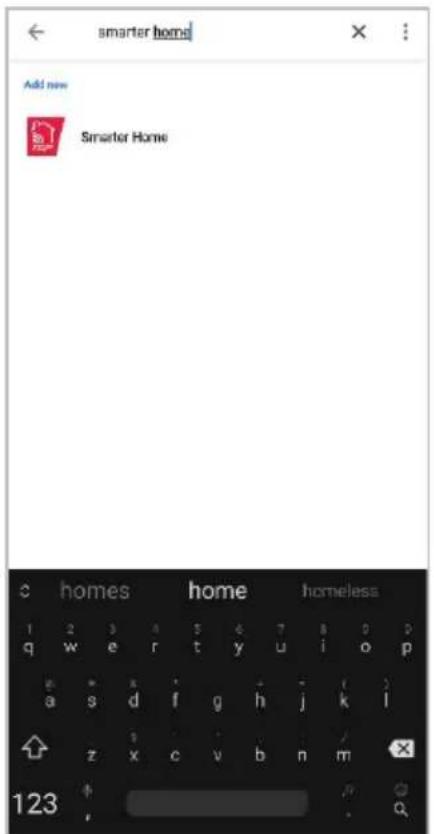
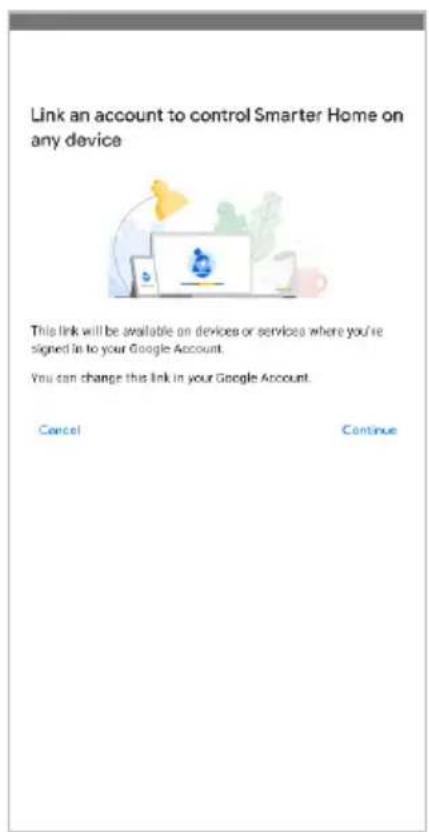
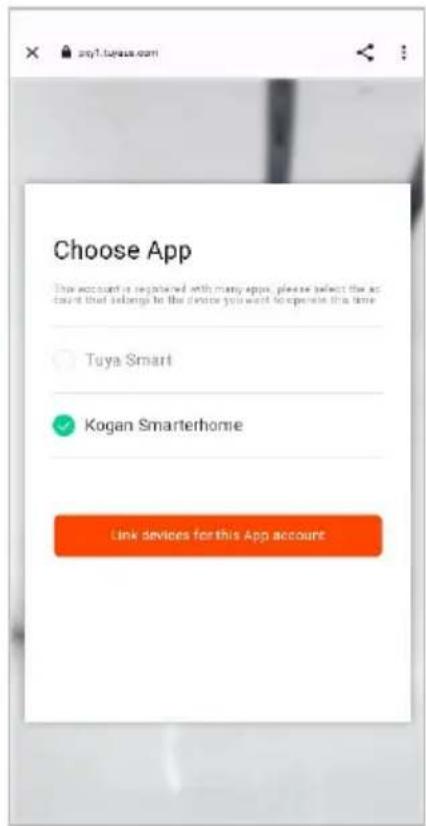
-
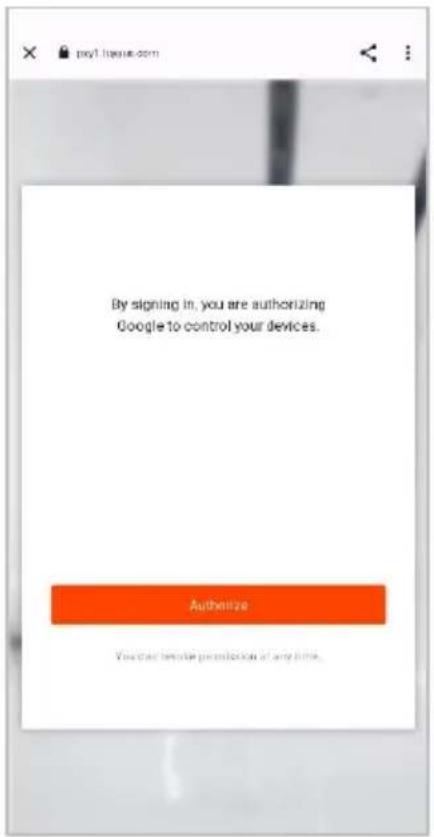
Tap 'Authorise' to grant Google permission to access the SmarterHome™ app and your devices.
-
Once connected, the app will display any compatible devices linked to your SmarterHome™ account. From here you can assign them to rooms and set up any routines. Tap on any of the devices to view a list of available commands.
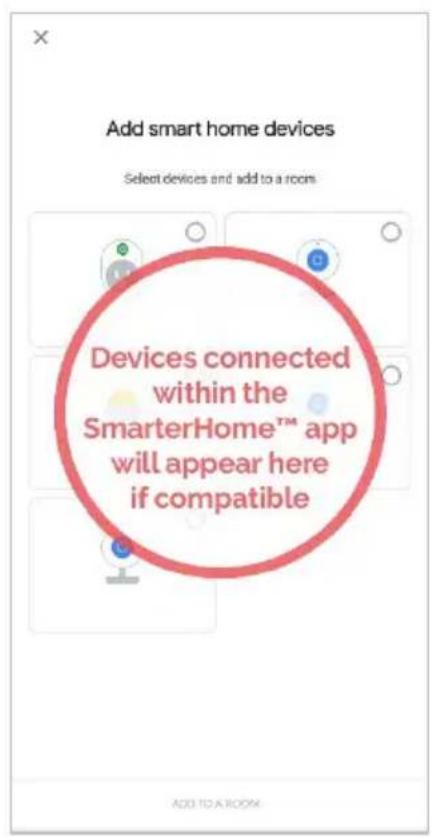
Note:
Please note that Google Home can only control the base/core functions of any compatible SmarterHome™ devices. To make full use of this product's smart functionality, please use the Kogan SmarterHome™ app.
Amazon Alexa Control
Note:
Please note that Google Home can only control the base/core functions of any compatible SmarterHome™ devices. To make full use of this product's smart functionality, please use the Kogan SmarterHome™ app.
Adding 'SmarterHome' to the Alexa App
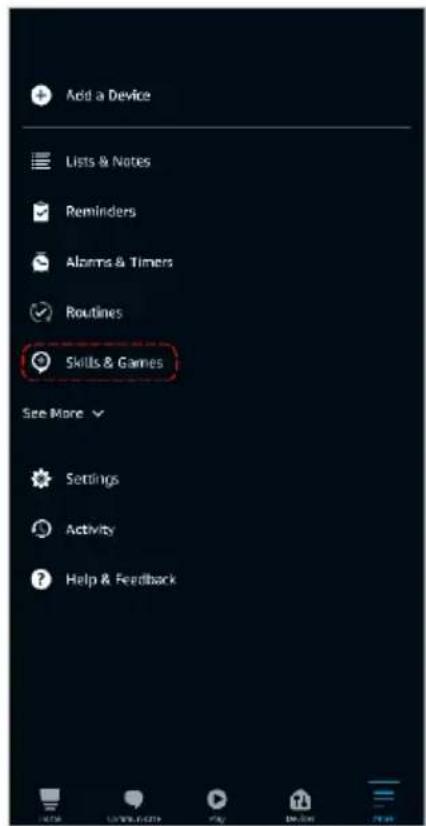
- From the home page of the Alexa app, select the icon in the bottom-right and select 'Skills & Games' from the sidebar.
- Select the search bar and type 'Smarter Home' to locate the Kogan SmarterHome™ skill.
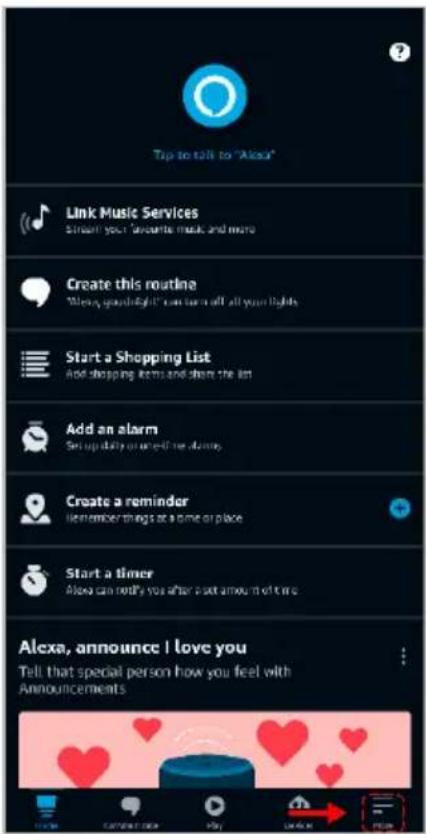
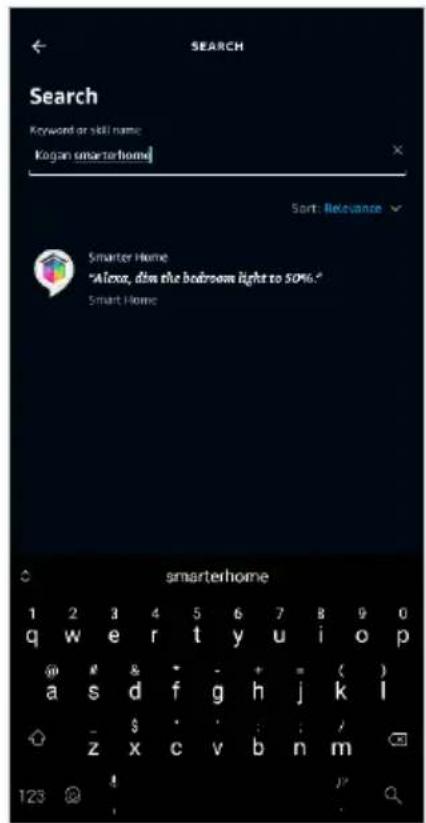
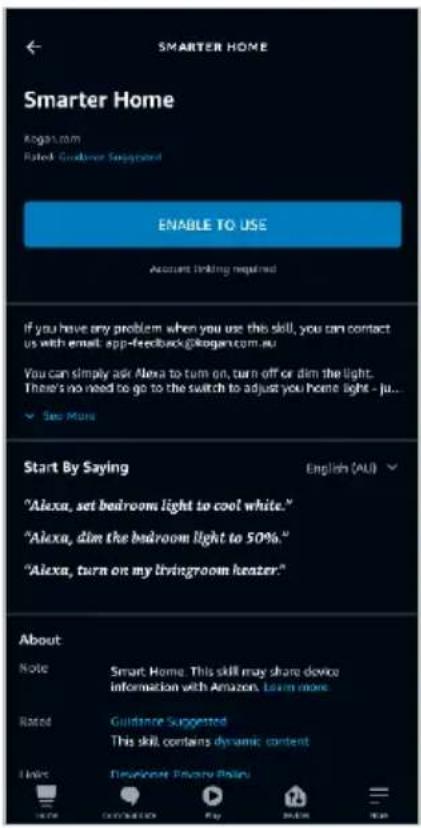
- Tap 'Enable to Use' to add the Kogan SmarterHome™ skill to Alexa.
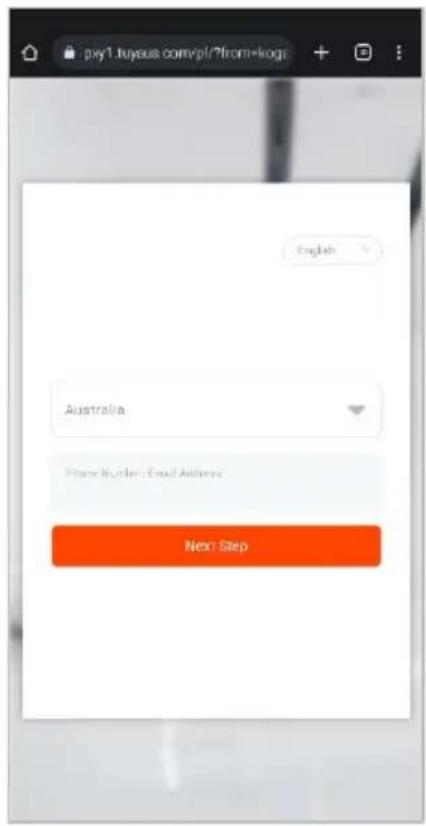
- From here, you will be prompted to sign into your SmarterHome™ account using either your email or mobile phone number, depending on which method you used to register your account.
- Select "Kogan SmarterHome™" from the app options.
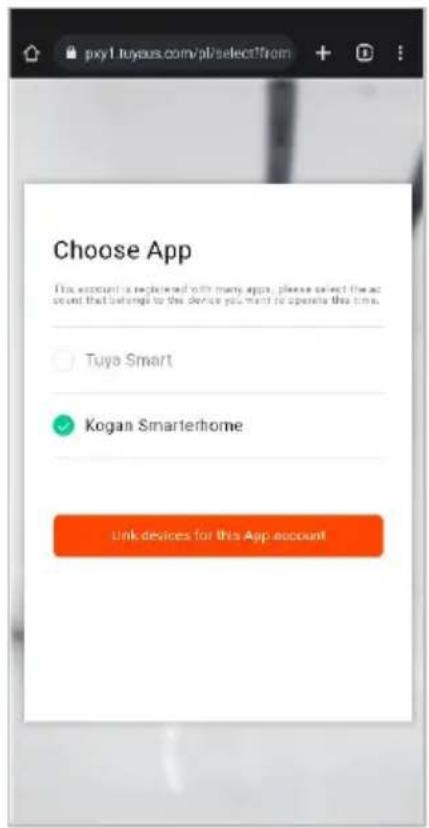
-
Tap 'Authorise' to grant Alexa permission to access the SmarterHome™ app and your devices.
-
Once connected, the app will perform a search and display the devices linked to your SmarterHome™ account. When your devices have successfully connected to the Alexa app, you will be able to control your Kogan SmarterHome™ devices via Alexa's voice commands.
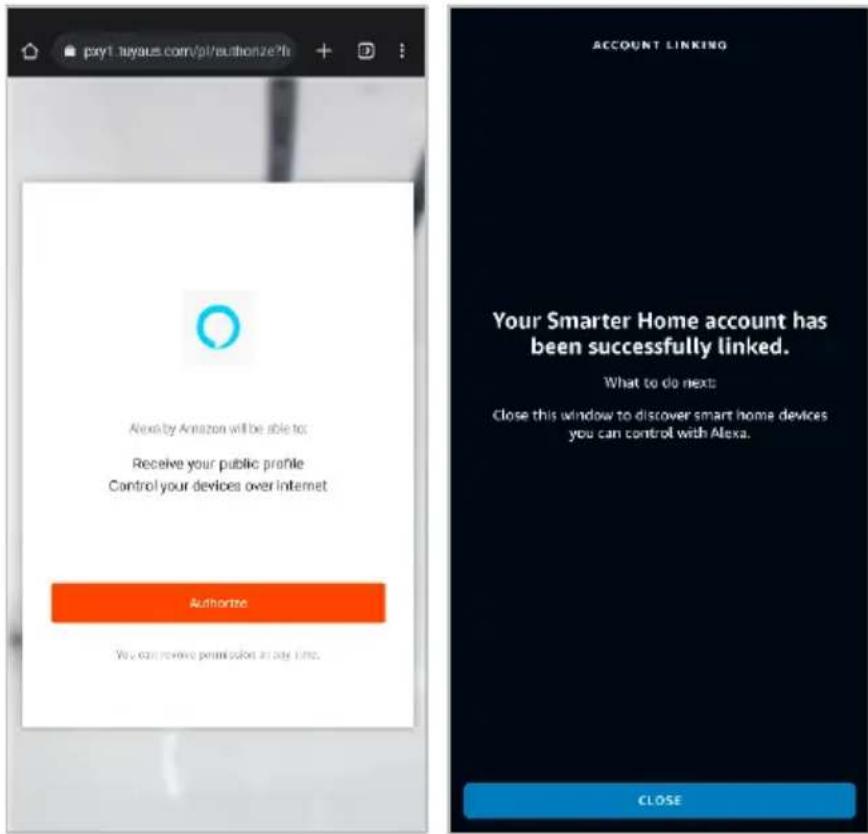
Note:
Please note that Alexa can only control the base/core functions of any compatible SmarterHome™ devices. To make full use of this product's smart functionality, please use the Kogan SmarterHome™ app.
Cleaning & Care
Rolling Brush
Recommended cleaning frequency: Once a week.
- Turn the robot over and press and hold the buckle to release the roller brush cover.
- Remove the roller brush.
- Use a cleaning tool or knife to remove debris from the cavity, main brush, and roller, including any tangled hair or dirt.
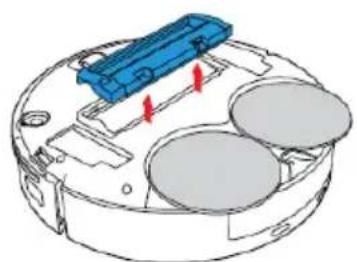
natural_image
3D diagram of a device casing with blue components and red directional arrows indicating movement or force (no text or symbols)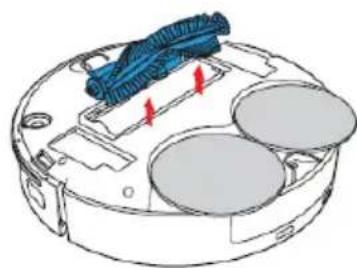
natural_image
Diagram of a device casing with blue components and red arrows indicating flow or movement (no text or symbols)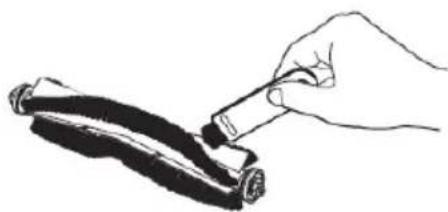
natural_image
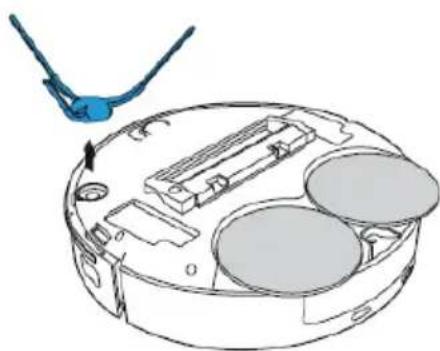
Hand holding a pen applying material to a rolled-up black object (no text or symbols visible)Side Brush and Mop Cloth
Recommended cleaning frequency: Once a week.
- Turn the robot over and pull the side brush straight vertically.
- Remove any tangled hair using the cleaning brush and reinstall the side brush securely.
natural_image
Diagram of a device casing with internal components and a blue arrow indicating motion (no text or symbols)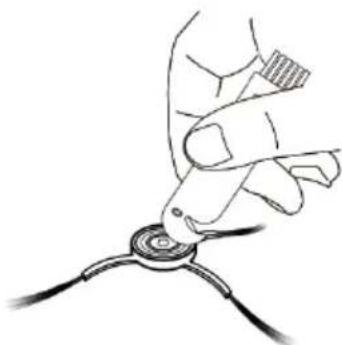
natural_image
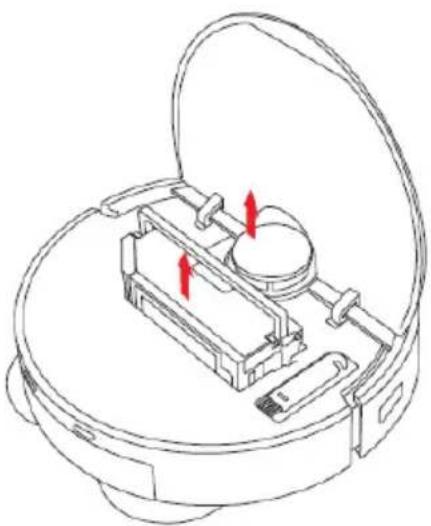
Illustration of a hand holding a small circular object connected to a thin wire (no text or symbols)Dust Box
Recommended cleaning frequency: Once a week.
- Press the release button and remove the dust box.
natural_image
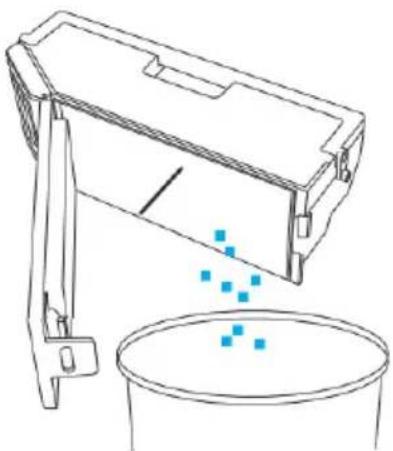
Technical line drawing of a mechanical device inside a circular housing, showing internal components and red directional arrows (no text or symbols)- Lift the dust box, open the primary filter, and empty the debris. This should be done once every 3 months.
natural_image
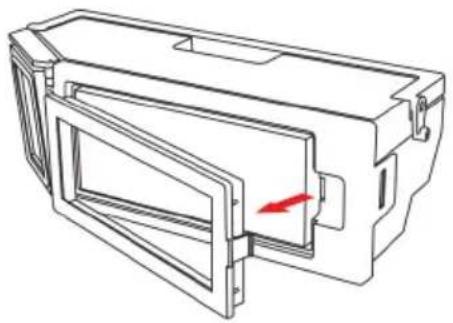
Line drawing of a mechanical device with blue dots falling into a container (no text or symbols)- Open the primary filter and remove the high-efficiency filter.
natural_image
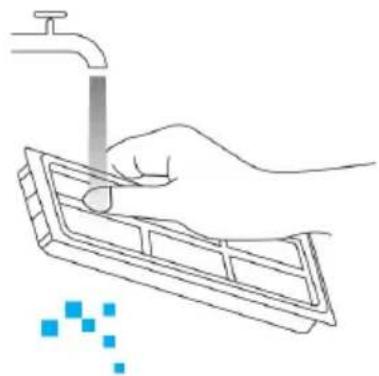
Technical line drawing of a mechanical housing component with a red arrow indicating a specific part (no text or symbols present)- Wash the high-efficiency filter with clean water (do not use detergent). Avoid using brushes on the filter; gently clean it with your fingers.
natural_image
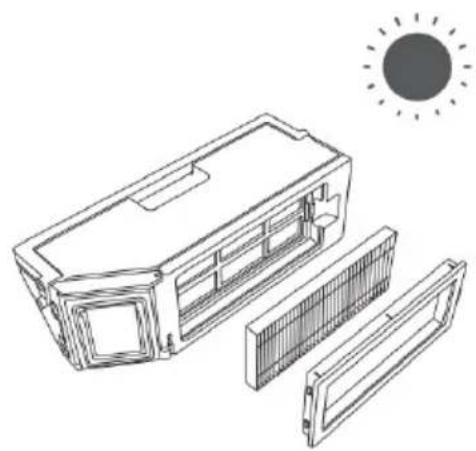
Line drawing of a hand using a pipette to clean a small container (no text or symbols)- Allow the dust box and filters to air dry completely before reinstalling. Avoid direct sunlight exposure.
natural_image
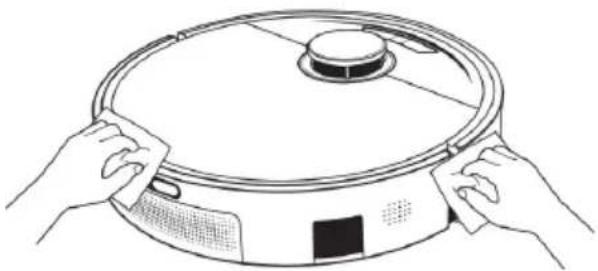
Line drawing of a solar panel installation with sun symbol (no text or labels)Infrared Sensor
Clean the infrared sensor once every 3 months to ensure proper functionality.
natural_image
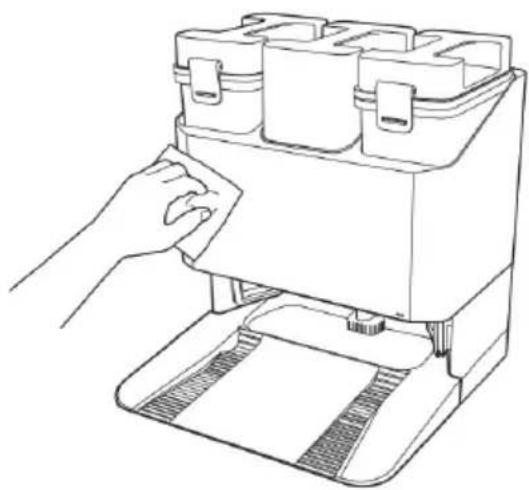
Line drawing of hands holding a circular vacuum cleaner with lid and control panel (no text or symbols)Charging Dock
Clean the charging dock once every 3 months to ensure smooth operation.
natural_image
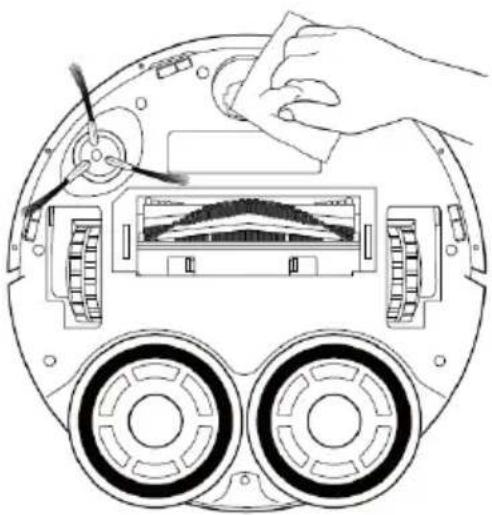
Line drawing of a hand using a portable device to press or install a tray (no text or symbols visible)Clean Universal wheel
Clean the universal wheel once every 3 months to avoid obstruction during movement.
natural_image
Diagram of a hand using a tool to adjust or install a device into a circular housing with two circular wheels (no text or symbols visible)Battery Maintenance
- The robot is equipped with a built-in rechargeable lithium-ion battery. To maintain battery performance, keep the robot charging when not in use.
- If the robot will not be used for an extended period, turn it off and charge it every 3 months to prevent battery damage from over-discharge.
Firmware Upgrade
- Use the app to access the firmware upgrade function. When a new firmware version is available, follow the prompts to upgrade.
- Ensure the battery is at least 50% charged during the upgrade process. It is recommended to keep the robot on the charging base during the upgrade.
Specifications
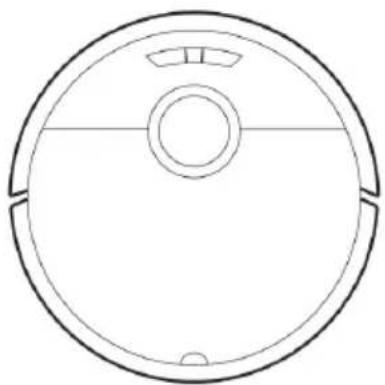
Robot
Size
350 × 350 × 102mm
Battery 5200mAh Li-Battery
Voltage 14.4V
...
Power rating 55W
Charging time <300min
Dust box capacity
360ml
Charging dock
Size 450 x 400 x 410mm
Voltage 19V
-
Power rating 1100W
Suction 25000pa
Clean water box capacity 3.3L
Sewage tank capacity 3L
Dust box capacity
2.5L
natural_image
Simple line drawing of a circular robotic vacuum cleaner (no text or symbols)Robot
natural_image
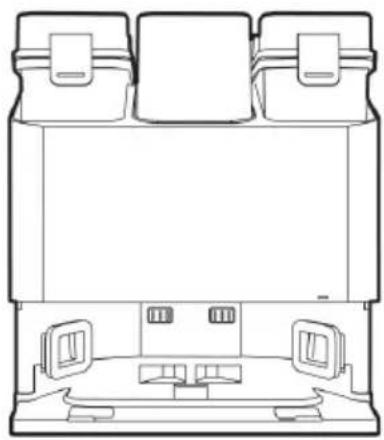
Top-down line drawing of a vehicle cabin layout with three seats and two doors (no text or symbols)Charging Dock
Troubleshooting
| Problem Solution | |
| Can't power on. | Battery is low. Place the machine back on the charging dock and ensure it's aligned with the charging electrodes. The machine will automatically power on.Ensure the machine is used in an ambient temperature between 0°C and 40°C. |
| Unable to charge. | Move the robot away from the charging dock and check if the charging indicator is on. Ensure the power adapter is connected properly.Clean the charging contacts on both the charging dock and robot if they are not making proper contact. |
| Robot cannot return to the charging dock. | The robot may be too far from the charging dock. Try placing the robot closer to the charging dock. |
| Abnormal behaviour. | Turn off the robot and then turn it back on. |
| Unusual noise during cleaning. | The roller brush, side brush, or wheels may be entangled with foreign objects. Clean them after the machine has stopped. |
| Lower cleaning performance or dust leakage. | Replace the cleaning brush or high-efficiency filter.Clean the dust box.Remove any foreign matter from the roller brush and side brush. |
| Unable to connect to the Wi-Fi. | Ensure the robot is within range of a strong Wi-Fi signal.Reset the Wi-Fi settings, download the latest version of the app, and reconnect to the network.The robot supports only 2.4 GHz networks. |
| Unable to perform the scheduled sweep. | The scheduled cleaning will only begin if the remaining battery power is 15% or more. |
| The robot always stays at the charging dock. | When the robot remains at the charging dock, power consumption is extremely low. This helps to preserve battery life. |
| Is it necessary to charge for 16 hours the first time? | Lithium-ion batteries do not have a memory effect. The robot can be used immediately after a full charge, without needing to wait for 16 hours. |
Notes
Need more information?
We hope that this user guide has given you the assistance needed for a simple set-up.
For the most up-to-date guide for your product, as well as any additional assistance you may require, head online to help.Kogan.com.
kogan.com
- Kogan SmarterHome™ LX20 Pro Ultra Robot Vacuum and Mop
- Safety & Warnings
- Warnings
- Cleaning Solution Guidelines
- Battery Removal Instructions
- Note:
- Battery Disposal
- Water Tank Connection
- Components
- Overview
- Operation
- Precautions
- Preparations
- Water Tank
- Positioning the Charging Dock
- Charging the Robot
- Powering the Robot On/Off
- Intelligent Cleaning (Default Mode)
- Targeted Cleaning
- Cleaning a Selected Area
- Defined Area Cleaning
- Restricted Area Setting
- Scheduled Cleaning
- Forced Shutdown
- Connect to the SmarterHome™ App
- Install App
- Register
- Set Device in Pairing Mode
- Add Device Through Network
- Notes:
- Google Home Control
- Adding 'SmarterHome' to the Google Home App
- Amazon Alexa Control
- Adding 'SmarterHome' to the Alexa App
- Cleaning & Care
- Rolling Brush
- Side Brush and Mop Cloth
- Dust Box
- Infrared Sensor
- Charging Dock
- Clean Universal wheel
- Battery Maintenance
- Firmware Upgrade
- Specifications
- Robot
- Troubleshooting
- Notes
- Need more information?
Brand : Kogan
Model : KAVACRBL20U
Category : Robot vacuum