
FPC-85 - Flat Screen Mount Gabor - Free user manual and instructions
Find the device manual for free FPC-85 Gabor in PDF.


| Product Type | Mobile Flat-Panel TV Cart |
| Brand | Gabor |
| Model | FPC-85 |
| Compatible Display Size | 55 to 85 inches (139.7 to 215.9 cm) |
| Maximum Height | 66 inches (167.6 cm) |
| Minimum Height | 48 inches (122 cm) |
| Maximum Weight Capacity | 200 lb (90.7 kg) |
| Product Weight | 64.6 lb (29.3 kg) |
| VESA Mounting Pattern | 200×200 to 800×500 mm |
| Material | Steel |
| A/V Shelf Size | 17.7 × 13 inches (44.9 × 33 cm) |
| Maximum A/V Shelf Load | 25 lb (11.3 kg) |
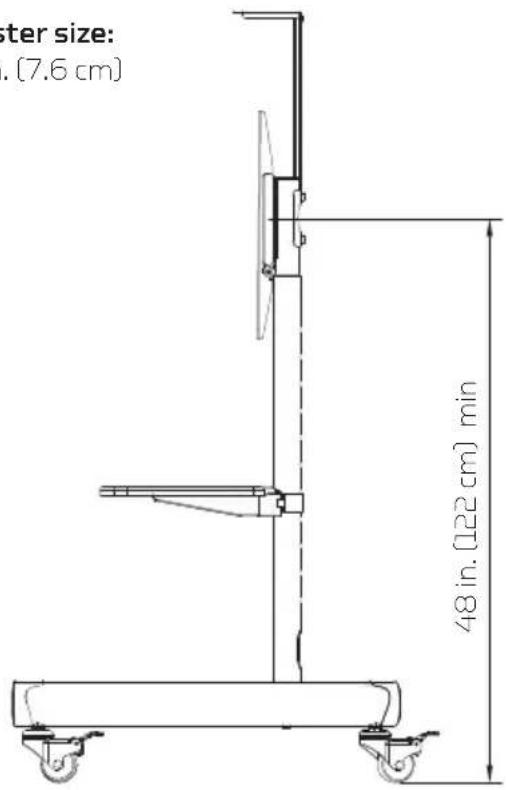
| Caster Size | 3 inches (7.6 cm) |
| Adjustable Height | Yes, via spring pins and locking screws |
| Mobility | 4 swivel casters with locks |
| Included Accessories | Mounting hardware, VESA screws (M5, M6, M8), washers, spacers, tools |
| Warranty | 5-year limited warranty |
| Cleaning Instructions | Use mild detergent solution and dry with soft cloth |
| Safety Features | Locking casters, security screws, spring pins, multi-person assembly recommended |
Frequently Asked Questions - FPC-85 Gabor
User questions about FPC-85 Gabor
0 question about this device. Answer the ones you know or ask your own.
Ask a new question about this device
Download the instructions for your Flat Screen Mount in PDF format for free! Find your manual FPC-85 - Gabor and take your electronic device back in hand. On this page are published all the documents necessary for the use of your device. FPC-85 by Gabor.
USER MANUAL FPC-85 Gabor
for 55 - 85 in. Flat-Panel Screens

natural_image
Technical line drawing of a multi-tiered mechanical device with vertical supports and a central base (no text or symbols)User Manual
Thank you for choosing Gabor.
The Gabor FPC-85 Flat-Panel TV Cart is the modern heavy duty rolling A/V cart. Wheel your 85-inch monitor, laptop, and webcam from room to room, whether it's at the office, on the sales floor, or in school.
If you have safety concerns about installing this product, contact a qualified professional or installation contractor.
If this product is missing hardware or there are defective parts, visit www.madebygabor.com or call Customer Service at 212-594-2353.
Safety Warnings
- When installing this product, be sure to refer to the mounting instructions detailed in this manual; failure to follow the mounting instructions may void the product warranty.
- It is strongly recommended that this product be installed by a qualified professional or installation contractor; Gabor takes no responsibility for any product damage or personal injury resulting from mishandling, incorrect mounting, faulty assembly, or improper use of this product.
- Do not use this product for any flat-panel screen device other than what it is intended for; the exact specifications, size parameters, and weight limits are found both on the product box and in the instruction manual.
- It is recommended that at least two people perform the installation process to prevent injury from mishandling or dropping the product or flatscreen device; proper safety gear and tools must be used at all times when installing this product.
- Do not assemble or use the cart on structures that may be affected by vibrations or noticeable impacts; do not assemble or use near a heater, fireplace, or any other source of direct heat energy.
- This product may contain small parts which can possibly pose a choking hazard; keep out of reach of children and pets.
- Excessive exposure to liquids may damage the finish of this product; when cleaning this product, use only a mild detergent solution and quickly wipe dry with a soft cloth.
- All images are for illustrative purposes only.
Product Specifications
Compatible flat-panel display size:
55 to 85 in. (139.7 to 215.9 cm)
Max height:
66 in. (167.6 cm)
Min height:
48 in. (122 cm)
Max weight capacity:
200 lb. (90.7 kg)
Weight:
64.6 lb. (29.3 kg)
VESA mounting pattern:
200×200 to 800×500 mm
Material:
Steel
A/V shelf size:
17.7×13 in. (44.9×33 cm)
Max A/V shelf load:
25 lb. (11.3 kg)
Caster size:
3 in. (7.6 cm)


1X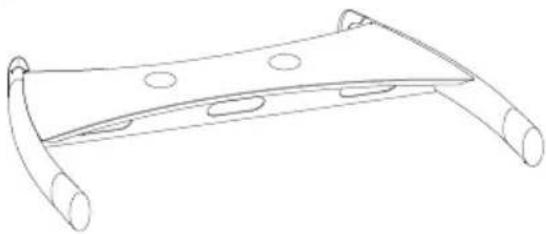 | 1X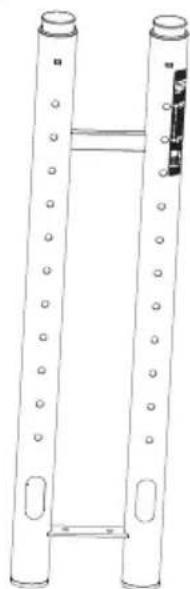 | 1X | ||
1X | ||||
| 1X | 4X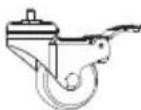 | |||
4X | ||||
1X | 1X | 1X | 1X | 2X |
4X | ||||
A4X M5×25mm M5×25mm | B4X M6×25mm M6×25mm | C4X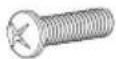 M8×25mm M8×25mm | D4X Φ16×Φ6.2×1.5mm Φ16×Φ6.2×1.5mm | E8X[56HY]Φ19×8.5×H13mm |
F2X M8×20mm M8×20mm | G2X M8×20mm and washer M8×20mm and washer | H4X M8×60mm M8×60mm | I1X M5 M5 | J1Y M6 M6 |
Φ 19×8.5×H13mm
Installing the Base Caps

natural_image
Simple line drawing of a curved mechanical component with a circular base and arrow indicator (no text or symbols)
natural_image
Technical line drawing of a mechanical component with two views: one showing a curved bracket and circular features, the other a separate 4X view (no text or symbols on the diagram itself)Installing the Casters

natural_image
Technical line drawing of a curved mechanical component with a 4X scale indicator (no text or symbols on the diagram itself)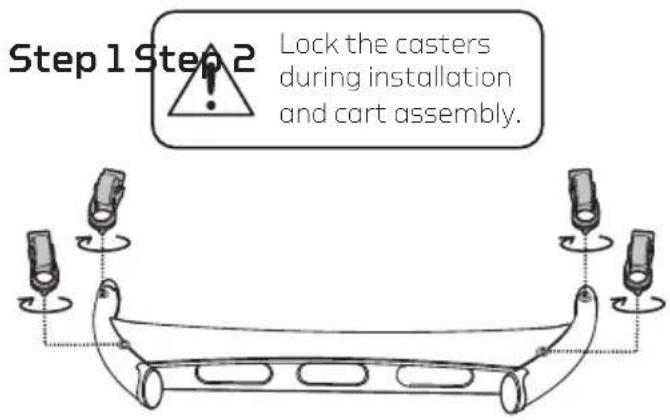

Setting Up the Risers

natural_image
Simple line drawing of a bent tool or bracket with label 'J' (no other text or symbols)- Lay the riser assembly on a flat surface.
- Remove the locking screws.
- Pull the riser out approximately 2 inches, until the spring pin securely pops into the open hole.
- Repeat these steps for the second riser.

Attaching the Riser Post

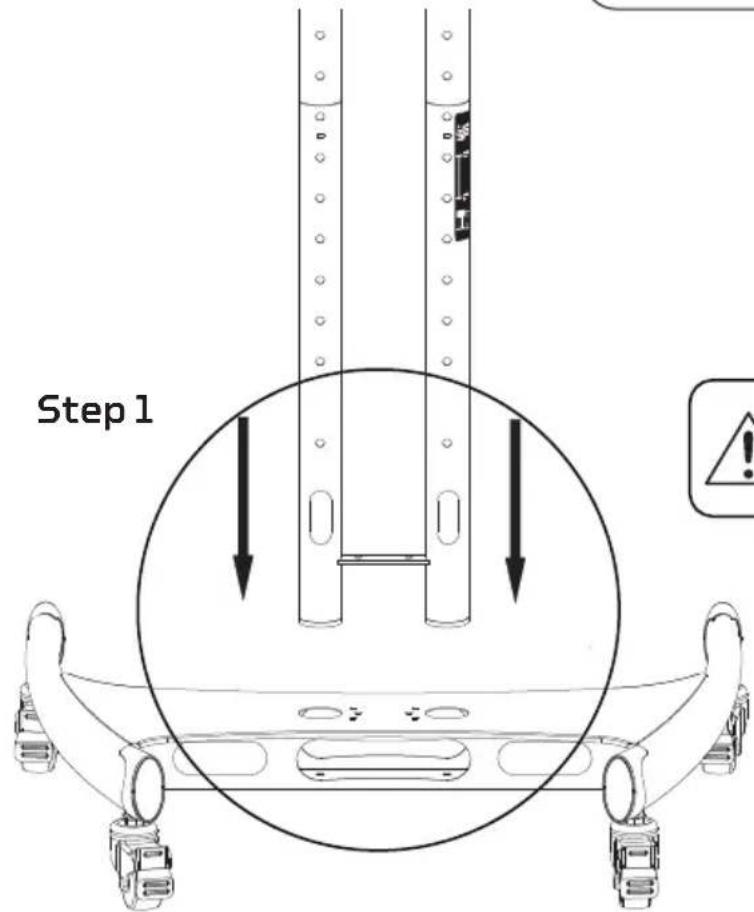

Make sure the cable-management holes are facing the rear of the base.

Adjusting the Riser Height
A/V Shelf Assembly and Installation
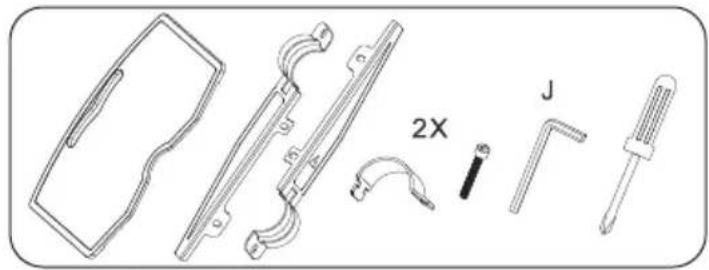
natural_image
Technical line drawings of mechanical components including a bracket, clamps, and screwdriver (no text or symbols)
flowchart
graph TD
    A["Step 1"] --> B["Assembly Step 1"]
    B --> C["Step 2"]
    C --> D["Step 3"]
    D --> E["Step 4"]
    E --> F["End"]
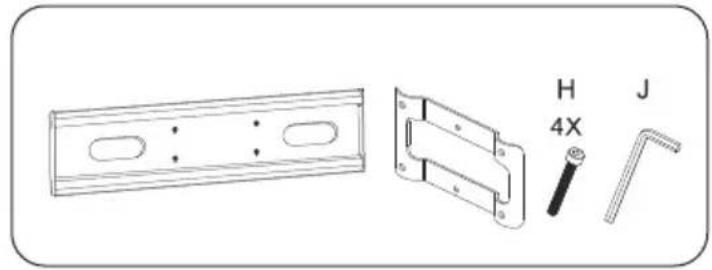
Installing the Display Mount
natural_image
Technical line drawings of a mechanical bracket and mounting bracket components (no text or symbols)
natural_image
Technical line drawing of a mechanical assembly with vertical posts and a bracket, showing no text or symbols.Installing the Display/TV Bracket

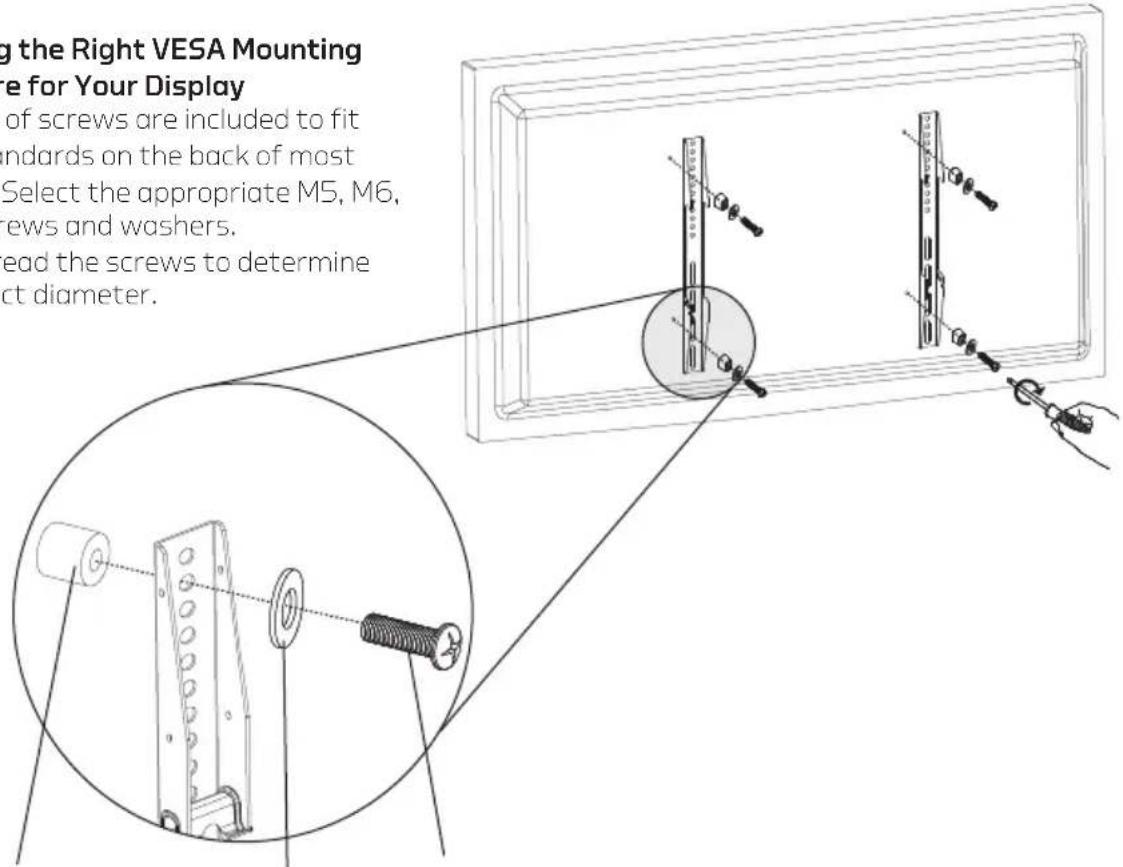
Selecting the Right VESA Mounting Hardware for Your Display
A variety of screws are included to fit VESA standards on the back of most displays. Select the appropriate M5, M6, or M8 screws and washers. Hand-thread the screws to determine the correct diameter.
E (A,B,C)D

If the screw is too short, it may not hold the display. If it's too long, it may damage the display.
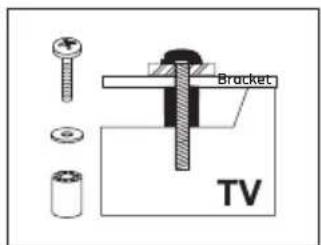
If Your TV Has a Flat Back:
Install the bracket directly to your TV, using only the screws and washers provided.
If Your TV Has a Curved Back or Recessed Mounting:
Install the spacer between the bracket and your TV. Then fasten with the screws and washers until secure.


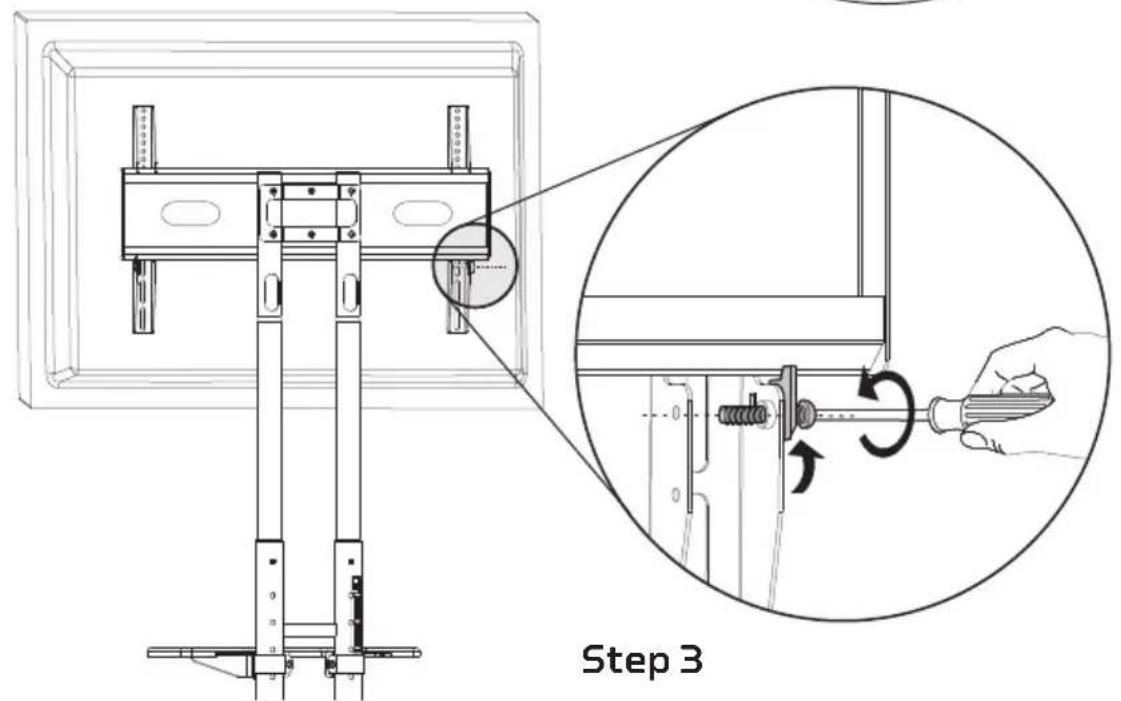
Mounting the TV to the Display Mount

natural_image
Simple line drawing of a screwdriver (no text or symbols)Step 1

natural_image
Technical diagram showing a mechanical assembly with a magnified inset illustrating the process of tool movement (no text or symbols present)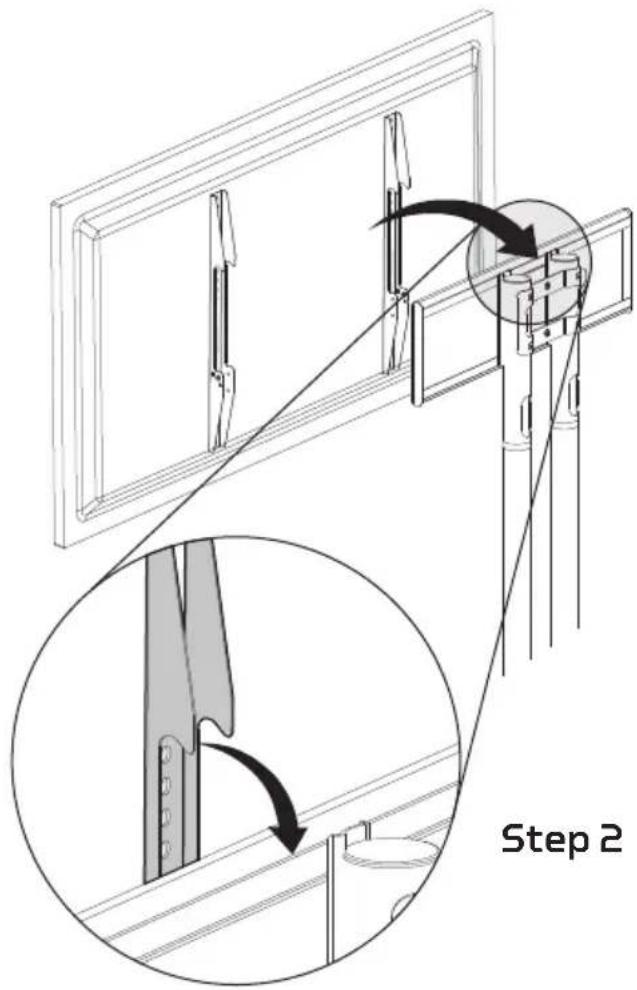
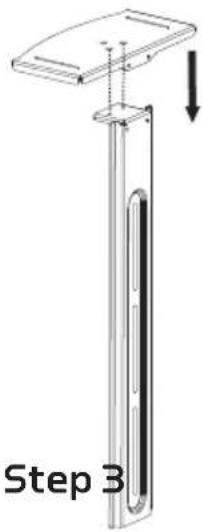
Camera Tray Attachment

natural_image
Three technical line drawings of mechanical parts: a pen-like tool, a notebook with holes, and a screwdriver (no text or symbols)

natural_image
Diagram of a mechanical assembly with a vertical support and a hand holding a tool, showing no text or symbols.Step 1 Step 2 Step 3


TV Height Adjustment

natural_image
Simple line drawing of a bent tool or bracket with label 'J' (no other text or symbols)
Important! Adjusting the TV height is at minimum a two-person job. These steps must be done by at least two people.
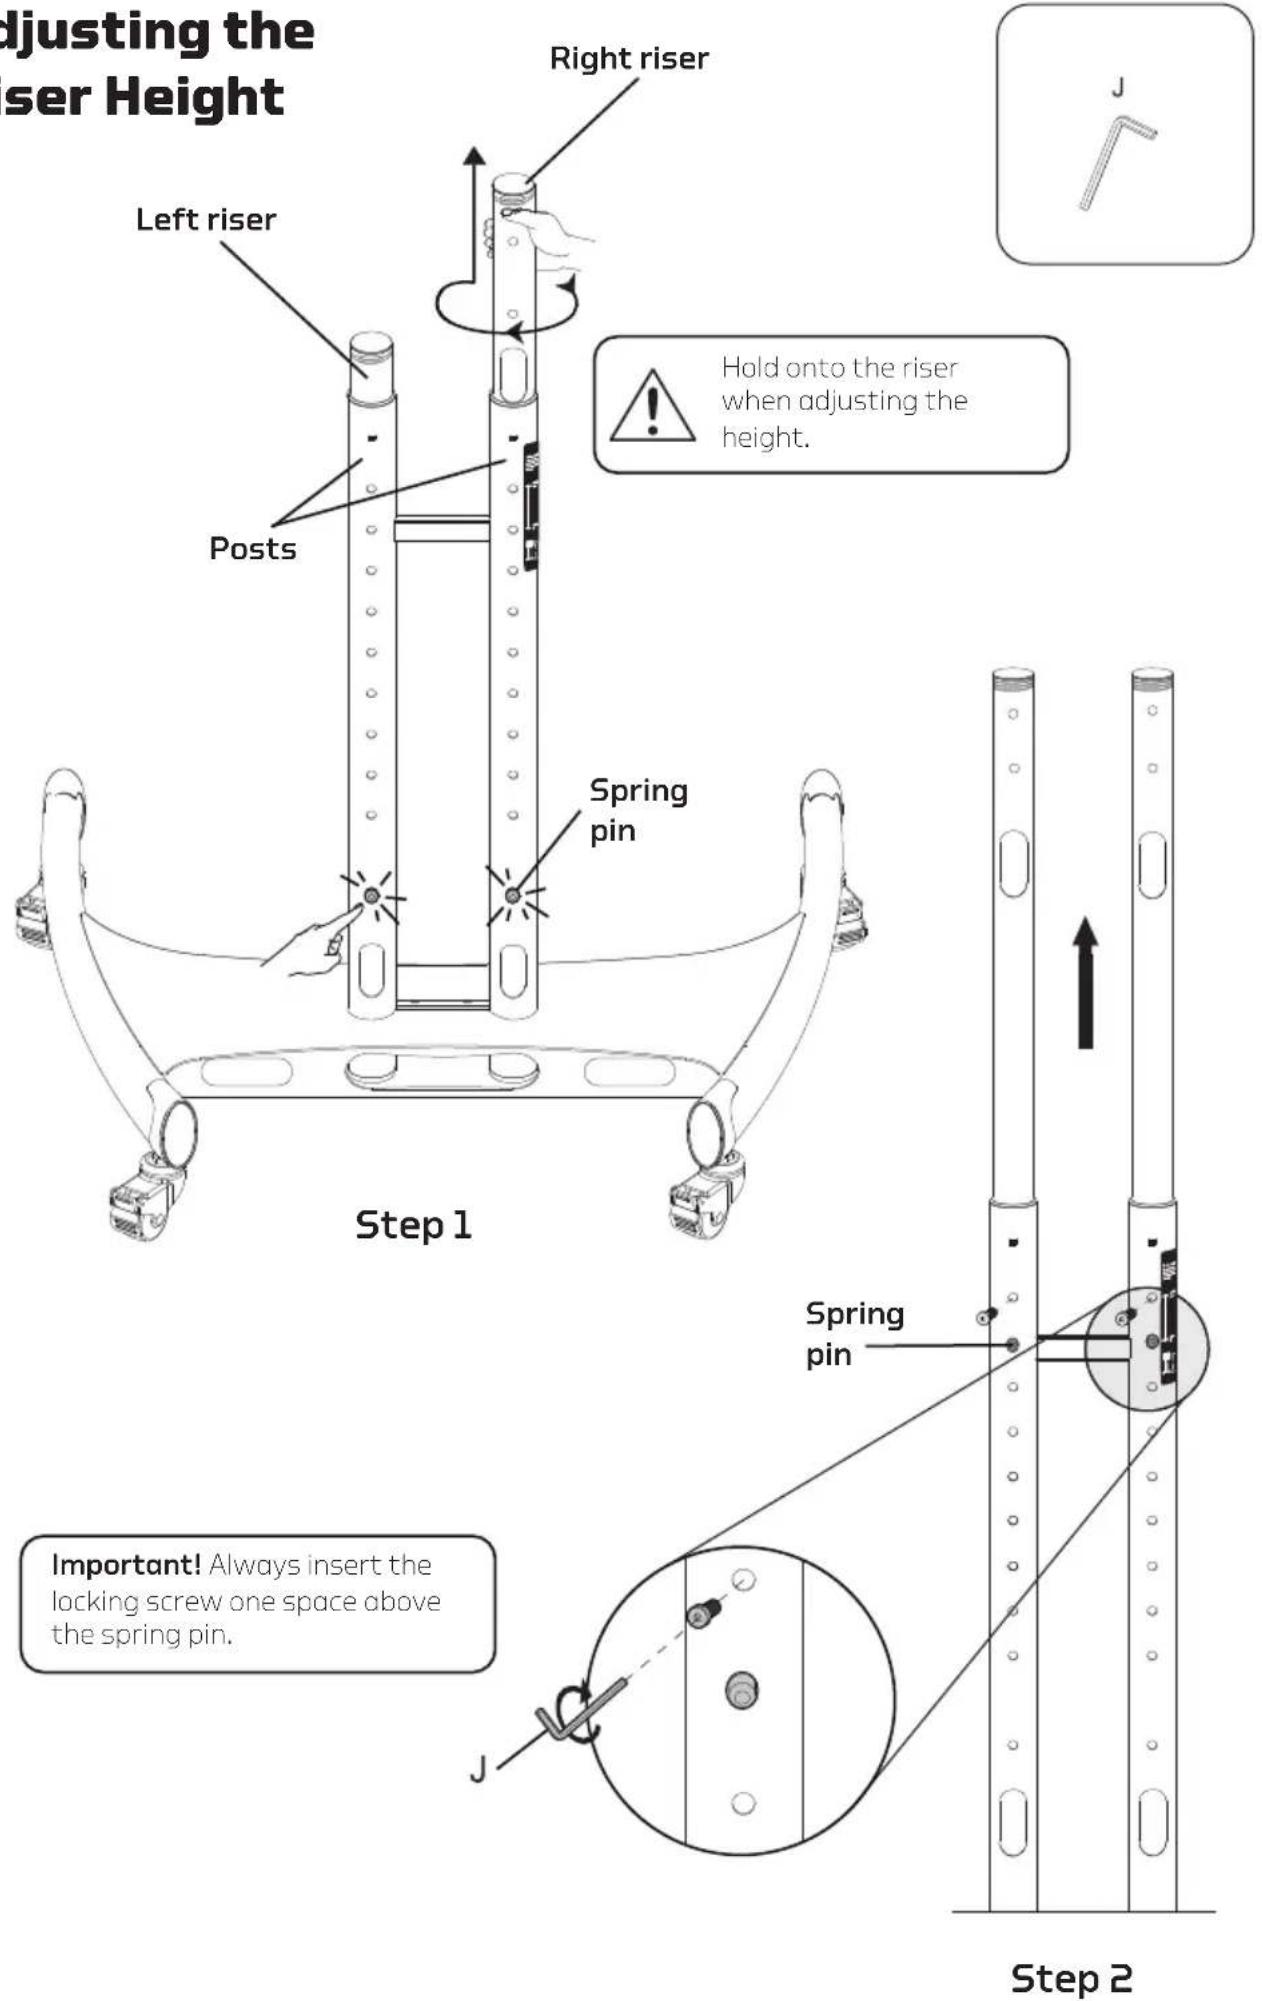
- Lock the casters.
- Unplug all connected devices.
Caution: Make sure the cables have enough slack to move the risers up or down. - Hold the TV while your partner removes the security screws and presses the spring pins.
- Move the risers to the desired height until the spring pins pop into their holes. Then reinsert the security screws.

FIVE-YEAR LIMITED WARRANTY
This GABOR product is warranted to the original purchaser to be free from defects in materials and workmanship under normal consumer use for a period of five (5) years from the original purchase date or thirty (30) days after replacement, whichever occurs later. The warranty provider's responsibility with respect to this limited warranty shall be limited solely to repair or replacement, at the provider's discretion, of any product that fails during normal use of this product in its intended manner and in its intended environment. Inoperability of the product or part(s) shall be determined by the warranty provider. If the product has been discontinued, the warranty provider reserves the right to replace it with a model of equivalent quality and function.
This warranty does not cover damage or defect caused by misuse, neglect, accident, alteration, abuse, improper installation or maintenance. EXCEPT AS PROVIDED HEREIN, THE WARRANTY PROVIDER MAKES NEITHER ANY EXPRESS WARRANTIES NOR ANY IMPLIED WARRANTIES, INCLUDING BUT NOT LIMITED TO ANY IMPLIED WARRANTY OF MERCHANTABILITY OR FITNESS FOR A PARTICULAR PURPOSE. This warranty provides you with specific legal rights, and you may also have additional rights that vary from state to state.
To obtain warranty coverage, contact the Gabor Customer Service Department to obtain a return merchandise authorization ("RMA") number, and return the defective product to Gabor along with the RMA number and proof of purchase. Shipment of the defective product is at the purchaser's own risk and expense.
For more information or to arrange service, visit www.madebygabor.com or call Customer Service at 212-594-2353.
Product warranty is provided by the Gradus Group.
www.gradusgroup.com
Gabor is a registered trademark of the Gradus Group.
© 2020 Gradus Group LLC. All Rights Reserved.

GABOR®
A Gradus Group Brand
- Thank you for choosing Gabor.
- Safety Warnings
- Product Specifications
- Installing the Base Caps
- Installing the Casters
- Setting Up the Risers
- Attaching the Riser Post
- Installing the Display Mount
- Installing the Display/TV Bracket
- Selecting the Right VESA Mounting Hardware for Your Display
- If Your TV Has a Flat Back:
- If Your TV Has a Curved Back or Recessed Mounting:
- Mounting the TV to the Display Mount
- Camera Tray Attachment
- TV Height Adjustment
- FIVE-YEAR LIMITED WARRANTY
Brand : Gabor
Model : FPC-85
Category : Flat Screen Mount