BS7OBH500 - Baby monitor Oricom - Free user manual and instructions
Find the device manual for free BS7OBH500 Oricom in PDF.


| Product Type | Baby Monitor |
| Brand | Oricom |
| Model | BS7OBH500 |
| Category | Video Baby Monitor |
| Camera Dimensions (Approx.) | 10 x 10 x 5 cm |
| Parent Unit Dimensions (Approx.) | 12 x 8 x 3 cm |
| Weight (Camera) | 200 g |
| Weight (Parent Unit) | 250 g |
| Power Supply | AC adapter (100-240V) and rechargeable battery |
| Battery Type (Parent Unit) | Lithium-ion rechargeable |
| Battery Life | Up to 8 hours (continuous use) |
| Frequency | 2.4 GHz FHSS |
| Range | Up to 300 meters (open area) |
| Display | 2.8" color LCD |
| Night Vision | Infrared LEDs for clear night viewing |
| Two-Way Talk | Built-in microphone and speaker |
| Temperature Sensor | Displays room temperature (in °C/°F) |
| Lullabies | Pre-loaded lullabies with volume control |
| Sound Activation | Vox mode with sensitivity adjustment |
| Alerts | Low battery, out of range, temperature |
| Maintenance | Clean with a soft, dry cloth; avoid liquids |
| Safety | Meets international safety standards; includes wall mount |
| Spare Parts | Available from Oricom support or authorized dealers |
| Repairability | Replaceable battery; professional repair recommended |
| General Information | Free user manual available for download in PDF |
Frequently Asked Questions - BS7OBH500 Oricom
User questions about BS7OBH500 Oricom
0 question about this device. Answer the ones you know or ask your own.
Ask a new question about this device
Download the instructions for your Baby monitor in PDF format for free! Find your manual BS7OBH500 - Oricom and take your electronic device back in hand. On this page are published all the documents necessary for the use of your device. BS7OBH500 by Oricom.
USER MANUAL BS7OBH500 Oricom
natural_image
Product photo of a white oricom remote control device displaying a baby image, alongside a modern digital camera (no visible text or symbols on device body)USER'S GUIDE
5" Smart HD Baby Monitor with Night Light
Model: OBH500
The features described in this user's guide are subject to modifications without prior notice.
Welcome...
to your new Oricom Wi-Fi® Video Baby Monitor!
Thank you for purchasing the Wi-Fi® Video Baby Monitor. Now you can see and hear your baby sleeping in another room or you can monitor your older children in their play room. Our Connected Baby Monitor let you see your baby from the parent unit, or from your smartphone. Watch over and communicate with your baby from anywhere in the world.
Please keep your original dated sales receipt for your records. For warranty service of your Oricom product, you will need to provide a copy of your dated sales receipt to confirm warranty status. Registration is not required for warranty coverage.
For product related questions, please contact:
Australia:
(02) 4574 8888 / Monday - Friday 8am - 6pm AEST
Email: support@oricom.com.au / www.oricom.com.au
New Zealand:
0800 674 266 / Monday - Friday 10am - 8pm NZST
Email: support@oricom.co.nz
Visit www.oricom.com.au to download the User Guide with instructions, answers to frequently asked questions, and more to help you get the most from your product.
Inside the Box
- 1 x Parent Unit
- 1 x Baby Unit (Wi-Fi® Camera)
- 1 x Magnetic Mount
• 1 x Power adaptor for Parent Unit
• 1 x Power adaptor for Baby Unit
Overview of the Parent Unit
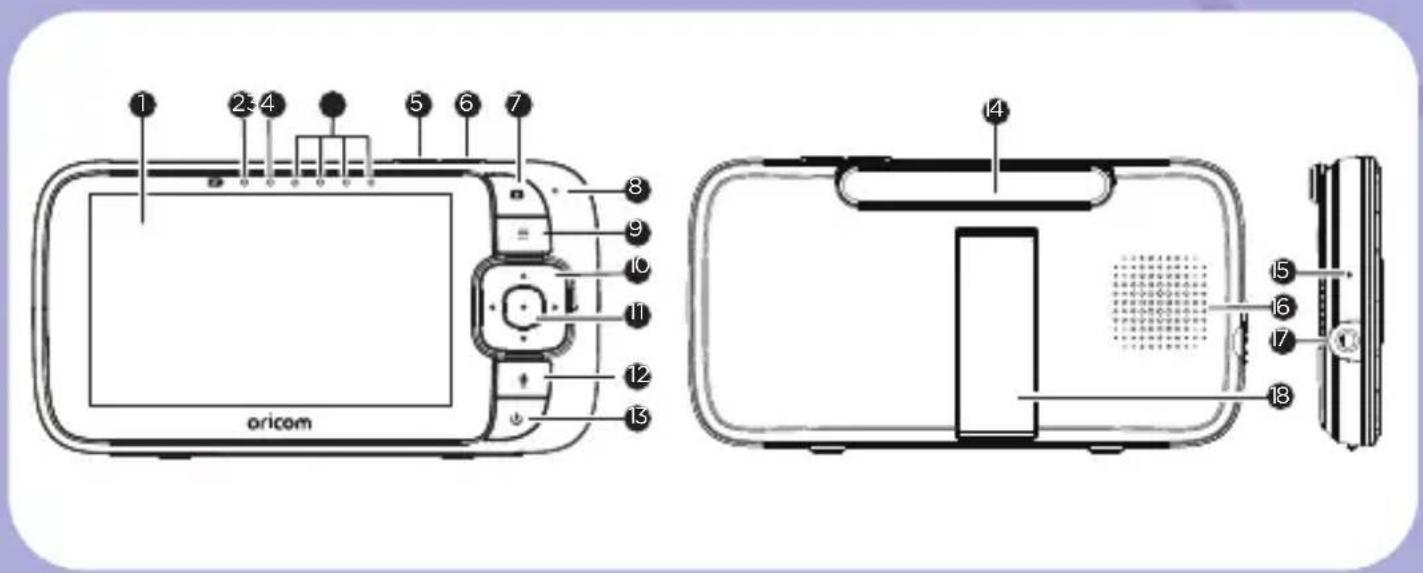
- Display (LCD screen)
- Charging LED
Red when the parent unit is Charging.
- Parent Unit ON/OFF indicator
- Audio Level LEDs (Green, Amber, Red, Red)
- Volume Down
Press to decrease Volume level.
- Volume Up
Press to increase Volume level.
- VIDEO ON/OFF button
Press to turn the LCD screen ON/OFF (Note: audio is maintained.)
- Microphone
- MENU button
Press to open / close the Menu options.
- Navigation button
Move Up/Down/Right/Left menu options.
Move the image upward/ downward/left/right.
- OK button
- TALK button
Press and hold to speak to your baby.
- Power button
Press and Hold to turn the Parent Unit ON/OFF.
- Antenna
- RESET button (recessed - use small pin)
- Speaker
- Power Socket
- Stand
Parent Unit menu icons
 | Signal Level (4 Levels) |
 | Night Vision Mode (Video also changes to Black/White). |
| [020Z] | Talk Mode On. |
| [X022] | Indicates the screen off timer is set. |
 | Volume Level Control (8 Levels). |
| [TX44] | No Baby Unit detected. |
 | Battery Level Indication (4 Levels). |
| [XK8Z] | Zoom Level Control (1X, 1.2X, 1.5X, 2X). |
 | LCD Brightness Level Control (8 Levels). |
| [6Y2X] | Lullaby Control (10 Song Selections). |
[3060] | Alarm Setting (6h, 4h, 2h, OFF)Indicates alarm is on, when flashing indicates the alarm time has expired. |
[Y220]   | Temperature scale select (°C/°F)Readings display in BLUE, will turn RED if >29 °C / 84 °F or <14 °C / 57 °F.Displays HH °C / °F if >36 °C / 97 °F.Displays LL °C / °F if <1 °C / 34 °F. |
 | Camera Control [ - (delete) / + (add) / view) / (scan) ]. |
| [40XZ] | Set Screen Off Timer (Off 5 mins, 15 mins, 30 mins). |
| [W0AZ] | View multiple cameras on screen. Available when you have more than 1 Baby Unit (Camera). |
Overview of Your Baby Unit
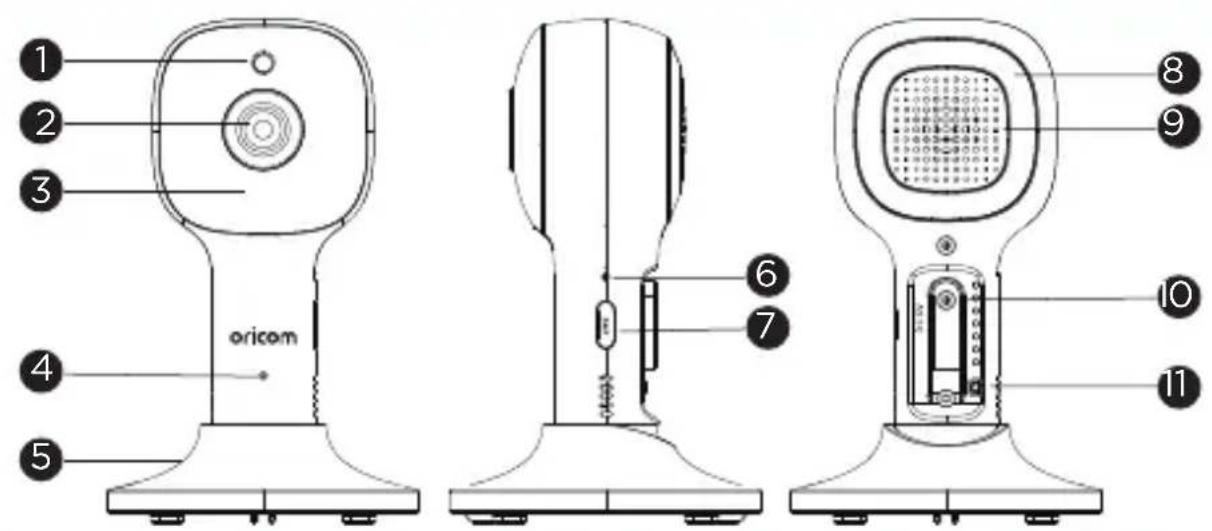
- Photo Sensor (Night Vision Mode)
- Camera Lens
- Infrared LEDs (x 8, for night vision)
- High Sense Microphone
-
Magnetic mount
-
Power/Link indication
- PAIR button
- Night Light
- Speaker
- Power Socket
- Temperature Sensor
Important guidelines for installing your Digital Video Baby Monitor
- To use your Baby Unit and Parent Unit together, you must be able to establish a link between them, and the range will be affected by environmental conditions.
- Any large metal object, like a refrigerator, a mirror, a filing cabinet, a metallic door or reinforced concrete, between the Baby Unit and Parent Unit may block the signal.
- The signal strength may also be reduced by other solid structures, like walls, or by radio or electrical equipment, such as TVs, computers, cordless or mobile phones, fluorescent lights or dimmer switches.
- Other 2.4GHz products, such as wireless networks (Wi-Fi® routers), Bluetooth™ systems, microwave ovens or other Baby Monitors, may cause interference with this product, so keep the Baby Monitor at least 1.5m away from these types of products, or switch them off if they appear to be causing interference.
- If the signal is weak, try moving the Parent and/or the Baby Unit to different positions in the rooms.
Table of contents
- Safety Instructions 8
- Getting Started 10
2.1 Connecting the Power Supply of the Baby Unit....10
2.2 Fixing magnetic mount on the wall .....10
2.3 Connecting the Power Supply of the Parent Unit. 11
2.4 Desktop Stand of the Parent Unit....11
2.5 Registration (Pairing)....12
- Using the Baby Monitor 13
3.1 Setting Up....13
3.2 Night Vision Mode....13
3.3 Talk Mode....13
3.4 Video ON/OFF....13
3.5 Temperature Display (HH °C / °F or LL °C / °F) 13
- Parent Unit Menu Options 14
4.1 Volume 14
4.2 Brightness 14
4.3 Zoom....14
4.4 Audio Playlist ....14
4.4.1 Lullaby/Soothing Sounds Playback....14
4.4.2 Audio Book Playback....15
4.4.3 Personal Recording Playback....15
4.4.4 Volume Level of Audio Playback....15
4.5 Alarm....15
4.6 Camera Control....16
4.6.1 Add (pair) a camera....16
4.6.2 View a camera....16
4.6.3 Delete a camera....17
4.6.4 Scan camera....17

4.7 Temperature....17
4.8 Power Save mode....18
4.9 View multiple cameras on screen 18
5. Wi-Fi® Internet Viewing 19
5.1 Minimum System Requirements ....19
5.2 Getting started - Connecting Devices....19
5.3 Setup....20
5.4 User Account and Camera Setup on Android™ or Apple devices. 20
5.4.1 Connect the Camera....20
5.4.2 Download HubbleClub for Partners App....20
5.4.3 Sign up with Hubble on your smart device....21
5.4.4 Add the Camera to your account 22
6. Procedure for Resetting the Camera....25
- Disposal of the Device (environment) 25
- Cleaning 26
- Help....27
- General Information 34
- Technical Specifications .... 38
1. Safety Instructions

WARNING:
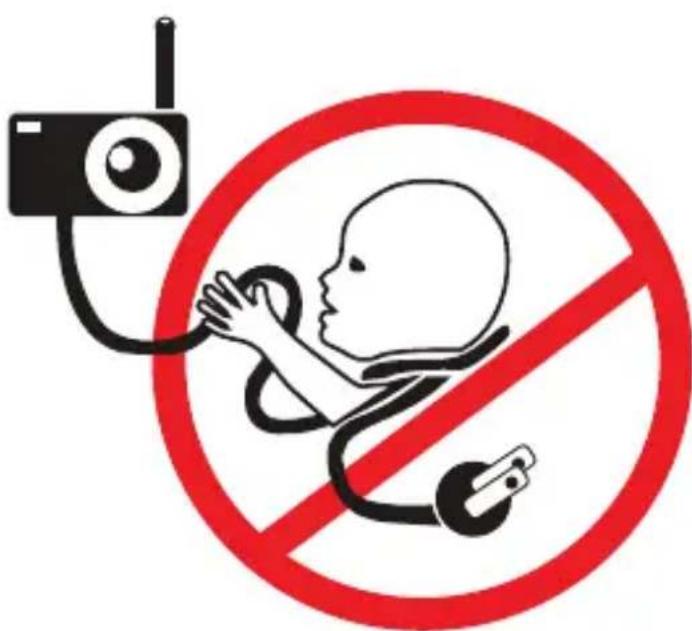
Strangulation Hazard: Children have STRANGLED on cords. Keep this cord out of the reach of children (more than 1m away). Never use extension cords with AC Adaptors. Only use the AC Adaptors provided.

Wi-Fi® CAMERA UNIT SET UP & USE:
- Choose a location for the Baby Unit that will provide the best view of your baby in his/her cot.
- Place the Baby Unit on a flat surface, such as a dresser, bureau or shelf, or mount the Baby Unit on a wall securely using the keyhole slots in the underside of the stand.
- NEVER place the Baby Unit or cords within the cot.
WARNING
This Baby Monitor is compliant with all relevant standards regarding electromagnetic fields and is, when handled as described in the User's Guide, safe to use. Therefore, always read the instructions in this User's Guide carefully before using the device.
- Adult assembly is required. Keep small parts away from children when assembling.
• This product is not a toy. Do not allow children to play with it.
• This Baby Monitor is not a substitute for responsible adult supervision. - Keep this User's Guide for future reference.
- Keep the cords out of reach of children.
- Do not cover the Baby Monitor with a towel or blanket.
- Test this monitor and all its functions so that you are familiar with it prior to actual use.
- Do not use the Baby Monitor in damp areas or close to water.
- Do not install the Baby Monitor in extreme cold or heat, direct sunlight, or close to a heat source.
- Only use supplied power adaptors. Do not use other chargers or power adaptors as this may damage the device and battery.
- Do not touch the plug contacts with sharp or metal objects.
- Connect the power adaptors to easily accessible electrical sockets.
CAUTION
The Parent Unit includes a built-in, lithium-ion rechargeable battery pack, which is not user-accessible. If you think the battery needs replacing, please contact Oricom Support. Do not try to replace battery yourself. Risk of fire, explosion or other hazard if replaced by a non genuine Oricom battery.

2. Getting Started
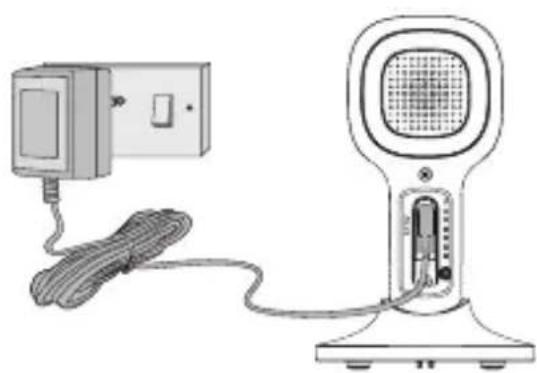
2.1 Connecting the Power Supply of the Baby Unit
natural_image
Illustration of a portable electronic device connected to a cable, with a digital display unit visible (no text or symbols)- Insert the DC plug of the power adaptor into the DC socket on the back of the Baby Unit.
- Connect the other end of the power adaptor to mains power.
- The baby unit turns on and the power indicator lights in Green colour.
Note
Only use the supplied power adaptor (DC5V/1000mA).
2.2 Fixing magnetic mount on the wall
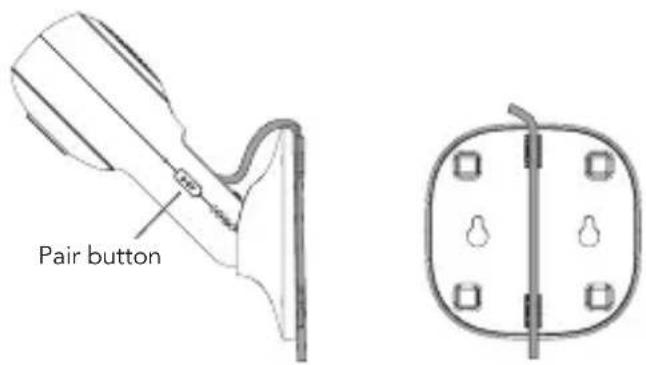
• Mark the position of the screw holes on the wall.
- Install wall anchors (Not provided) suitable for the wall type and mounting screws if needed.
- Fasten the mounting screws (Not provided) on the wall.
- Position the cable behind the base as per image before hooking the base on the wall.

2.3 Connecting the Power Supply of the Parent Unit.
natural_image
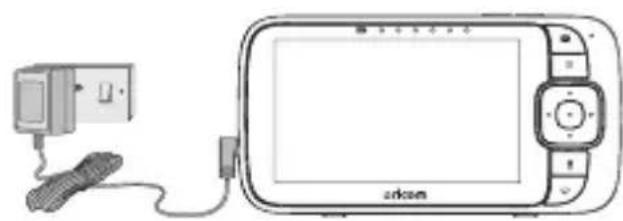
Line drawing of a portable electronic device connected to a cable and a power adapter (no text or symbols visible)- Connect the small plug of the power adaptor to the parent unit and the other end to the mains power. Only use the included adaptor (5VDC/1000mA).
- Press and hold the POWER button ⏻ to turn ON.
NOTE
- An internal rechargeable battery (Lithium ion battery 2100mAh) allows portability to the parent unit. The battery provides up to 4 hours operation of the Parent Unit. We recommend charging the parent unit battery for at least 4 hours before first use, and when the Parent Unit indicates the battery is low.
- When the battery is low, the battery icon ☐ turns RED, and the Parent Unit will beep every 15 seconds. The battery needs to be recharged; it will take 4 hours to charge fully.
2.4 Desktop Stand of the Parent Unit
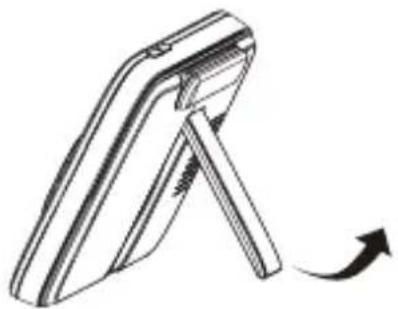
- Flip out the stand on the back of the Parent Unit.
natural_image
Line drawing of a mobile phone with a stand and arrow indicating rotation (no text or symbols)2.5 Registration (Pairing)
The Baby Unit is pre-registered to your Parent Unit. You do not need to register it again unless the Baby Unit loses its link with the Parent Unit. To re-register your Baby Unit, or register a new Baby Unit, follow the procedure below:
- Press the button to access the menu.
-
Press the ◀ LEFT button or ▶ RIGHT button until ⊕ is highlighted, the - (delete) / + (add) / Ⓞ (view) / ⚙ (scan) menu will display.
-
Press the ▲ UP button or ▼ DOWN button to select + (add), and press the ● button to confirm.
-
Camera 1 / 2 / 3 / 4 will display. Press the ▲ UP button or ▼ DOWN button to select the desired Camera, and press the ● button to start the pairing process.
Note: If a camera is currently paired with the Parent Unit, its camera location (with a * against it) cannot be selected for a new registration.
- Press and hold the PAIR button on the back of the Baby Unit until the Parent Unit finds the camera, beeps and PAIR OK appears on the screen. The video from the camera will then appear.
Note:
A camera can only be registered to one Parent Unit at any one time.
3. Using the Baby Monitor
3.1 Setting Up
Place the Baby Unit in a convenient location (e.g. on a table) and point the camera lens towards the area you want to monitor. Adjust the angle of the Baby Unit's camera until you are satisfied with the image shown on the Parent Unit.
Note:
Do not place the Baby Unit within the baby's reach! If there is inter-ference with the picture or sound, try moving the units to different locations, and ensure they are not close to other electrical equipment.
3.2 Night Vision Mode
The Baby Unit has 8 high-intensity infrared LEDs for picking up clear images in the dark. When the built-in Light sensor on the top of the Unit detects a low level of ambient light, the LEDs will automatically activate and the screen on the Parent Unit will display in black and white. The 🍒 icon will be displayed at the top of the screen.
3.3 Talk Mode
Press and hold the TALK button 🎯 on the Parent Unit to talk to your baby through the Baby Unit's loudspeaker.
The 🔔 icon will be displayed at the top of the LCD screen.
3.4 Video ON/OFF
Press ☐ display On/Off button to turn the LCD screen on or off, audio will remain on while screen is off.
3.5 Temperature Display (HH °C / °F or LL °C / °F)
The temperature reading from the temperature sensor at the back of the Baby Unit will be displayed at the top of the LCD screen. The readings will turn RED if the temperature goes above 29^ C / 84^ F or below 14^ C / 57^ F. The reading will change to HH ^ C / ^ F if the temperature goes above 36^ C / 97^ F and to LL ^ C / ^ F if the temperature goes below 1^ C / 34^ F.
4. Parent Unit Menu Options
4.1 Volume
Press the + or - button to adjust the volume level.
The 📋 icon will display and you can select the desired volume from level 0\~8. (The default volume level setting is level 4, and level 0 is OFF.)
4.2 Brightness
-
Press the button to access the menu.
-
Press the ◀ LEFT button or ▶ RIGHT button until ⚙ is highlighted.
-
Press the ▲ UP button or ▼ DOWN button to select the desired brightness from level 1 \~ 8. (The default brightness is level 4.)
4.3 Zoom
-
Press the button to access the menu.
-
Press the ◀ LEFT button or ▶ RIGHT button until ⊕ is highlighted
-
Press the ▲ UP button or ▼ DOWN button to select 1X to 2X zoom.
4.4 Audio Playlist
You can playback audio content - Lullabies, Soothing Sounds and Audio Books on the Baby Unit. The audio content can be downloaded and stored in the Baby Unit via Hubble for Partners App. You have 10 preloaded lullabies/soothing sounds and 8 audio books in the Baby Unit.
4.4.1 Lullaby/Soothing Sounds Playback
-
Press the button then Scroll Left/Right to select option in the menu.
-
Scroll ▲ Up or ▼ Down to select ♩ and press the button to confirm.
-
Press ▲UP button or ▼DOWN button to view the desired Lullaby/ Soothing Sounds. The song names appear on the screen.
-
Press the ● button to play the selection.

4.4.2 Audio Book Playback
-
Press the button then Scroll Left/Right to select option in the menu.
-
Scroll ▲ Up or ▼ Down to select 📊, and press the ●button to confirm.
-
Press ▲UP button or ▼DOWN button to view the desired Audio Book. The book titles appear on the screen.
-
Press the ● button to play the selection.
4.4.3 Personal Recording Playback
The unit allows playback of a personal audio recording to soothe your baby, before playback, please record a personal audio recording via HubbleClub for Partners App.
-
Press the ≡ button then Scroll Left/Right to select option in the menu.
-
Scroll ▲ Up or ▼ Down to select 🔊, and press the ● button to confirm.
-
Press ▲UP button or ▼DOWN button to select the desired personal recording.
-
Press the ●button to play the selection to soothe your baby.
4.4.4 Volume Level of Audio Playback
-
Press the button then Scroll Left/Right to select option in the menu.
-
Scroll ▲ Up or ▼ Down to select 📋, and press the ● button to confirm.
-
Press ▲UP button or ▼DOWN button to select the volume level of audio playback.
4.5 Alarm
-
Press the button to access the menu.
-
Press the ◀ LEFT button or ▶ RIGHT button until 🔒 is highlighted.
-
Press the ▲UP button or ▼DOWN button to select alarm off, after 2 hours, 4 hours or 6 hours.
4.6 Camera Control
4.6.1 Add (pair) a camera
- Press the button to access the menu.
-
Press the ◀ LEFT button or ▶ RIGHT button until ⊕ is highlighted, the - (delete) / + (add) / Ⓞ (view) / (scan) menu options will display.
-
Press the ▲ UP button or ▼ DOWN button to select + (add), and press the ● button to confirm.
-
Camera 1 / 2 / 3 / 4 will display. Press the ▲ UP button or ▼ DOWN button to select the desired Camera, and press the ● button to start searching for a camera unit.
Note: If a camera is currently paired with the Parent Unit, its camera location (with a * against it) cannot be selected for a new registration.
- Press and hold the PAIR button on the back of the Baby Unit until the Parent Unit finds the camera, beeps and PAIR OK appears on the screen. The video from the camera will then appear.
Note:
A camera can only be registered to one Parent Unit at any one time.
4.6.2 View a camera
- Press the button to access the menu.
-
Press the ◀ LEFT button or ▶ RIGHT button until ⊕ is highlighted, the - (delete) / + (add) / Ⓞ (view) / (scan) menu will display.
-
Press the ▲ UP button or ▼ DOWN button to select Ⓞ (view), and press the ● button to confirm.
-
Camera 1 / 2 / 3 / 4 will display, press the ▲ UP button or ▼ DOWN button to select the desired Camera, and press the ● button to view the picture from that camera.
Note:
Only camera locations with a * can be selected.
TIP
You can also press the ● button repeatedly to select the available camera options from 1 / 2 / 3 / 4 , ⏻ (scan).

4.6.3 Delete a camera
- Press the button to access the menu.
-
Press the ◀ LEFT button or ▶ RIGHT button until ⊕ is highlighted, the - (delete) / + (add) / Ⓞ (view) / ⚙ (scan) menu will display.
-
Press the ▲ UP button or ▼ DOWN button to select - (delete), and press the ● button to confirm.
-
Camera 1 / 2 / 3 / 4 will display, press the ▲ UP button or ▼ DOWN button to select the desired Camera, and press the ● button.
-
Press the ▲ UP button or ▼ DOWN button to select √, then press the ● button to delete that registration.
Note:
You are not allowed to delete the camera if there is only one registered camera.
4.6.4 Scan camera
This function is only available when you have more than 1 Baby Unit (Camera).
- Press the button to access the menu.
-
Press the ◀ LEFT button or ▶ RIGHT button until ⊕ is highlighted, the - (delete) / + (add) / Ⓞ (view) / (scan) menu will display.
-
Press the ▲ UP button or ▼ DOWN button to select ⏻ (scan), and press the ● button to confirm.
-
The screen will then display images from different registered cameras in a loop of Camera 1 / 2 / 3 / 4 , changing about every 12 seconds.
TIP
You can also press the ●button repeatedly to select the available camera options from 1 / 2 / 3 / 4 , ⏻ (scan).
4.7 Temperature
- Press the button to access the menu.
- Press the ◀ LEFT button or ▶ RIGHT button until 🔍 is highlighted.
- Press ▲ UP / ▼ DOWN to select °C or °F.
4.8 Power Save mode
- Press the button to access the menu.
- Press the ◀ LEFT button or ▶ RIGHT button until 🔒 is highlighted.
- Press the ▲ UP button or ▼ DOWN button to select auto video off after 5 mins, 15 mins or 30 mins (screen timer active when in battery mode only).
Note:
The audio is still on, you can press the power key or touch the screen to resume video feed.
4.9 View multiple cameras on screen
This function is only available when you have more than 1 Baby Unit (Camera). When the Split Screen function is On, you can view multiple cameras on the screen.
- Press the ≡ button to access the menu.
- Press the ◀ LEFT button or ▶ RIGHT button until □ is highlighted.
-
Press ▲ UP button or ▼ DOWN button to select Split Screen On √ Off x.
-
When the Split Screen function is On, you can press the ◀ LEFT button / ▶ RIGHT button / ▲ UP button / ▼ DOWN button to switch between cameras to hear the audio from the selected camera.
5. Wi-Fi® Internet Viewing
5.1 Minimum System Requirements
Android™ System
• Version 8.0 or above
iPhone®/iPad® iOS
• Version 12.0 or above
High Speed (Wi-Fi®) Internet
- At least 0.6 Mbps upload bandwidth per camera (you can test your internet speed on this site: http://www.speedtest.net)
5.2 Getting started - Connecting Devices
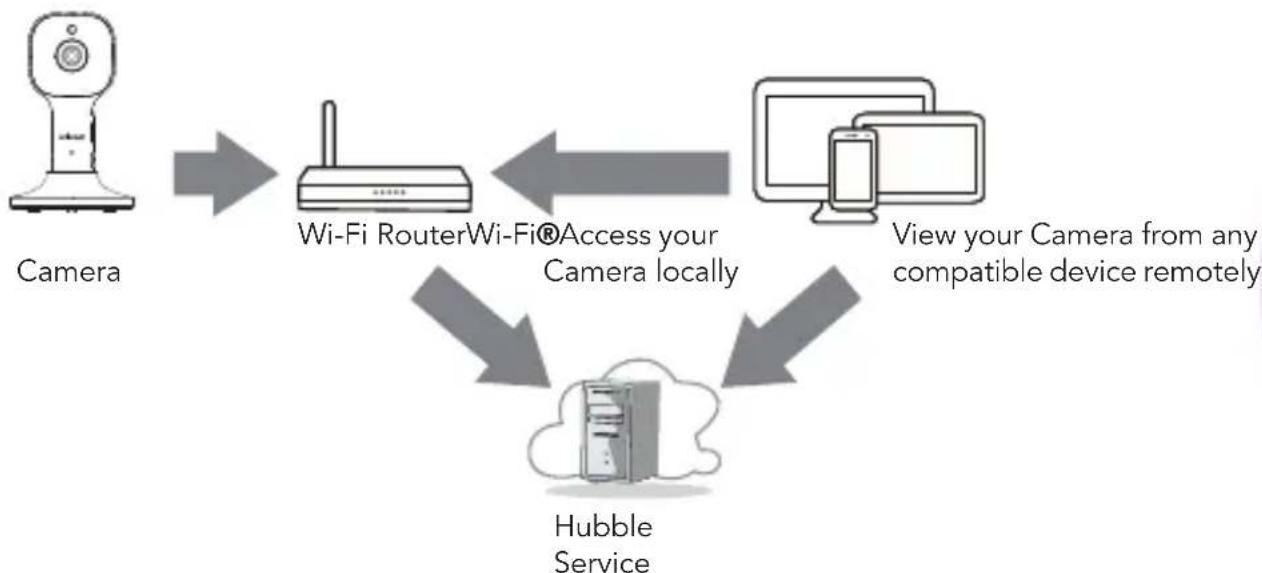
How does it work?
flowchart
graph TD
    A["Camera"] --> B["Wi-Fi RouterWi-Fi® Access your Camera locally"]
    B --> C["Computer monitor"]
    C --> D["Hubble Service"]
    D --> E["View your Camera from any compatible device remotely"]
When a user tries to access the Camera, our Hubble server authenticates the user's identity and permits access to the Camera.
5.3 Setup
Connect the Wi-Fi® Camera to the Power Adaptor, then plug into mains power. The Camera must be within range of the Wi-Fi® router with which you want to connect. Make sure the password of the router is available for entering during the in-app setup process.
Status of LED Indication:
- Pair / Setup state: LED is Flashing Green.
- Unconnected state: LED is Flashing Red.
- Connected state: LED is Solid Green.
Note: You can only setup via a compatible smartphone or tablet only.
5.4 User Account and Camera Setup on Android™ or Apple devices.
What you need
• Wi-Fi® Camera Unit
• Power adaptor for the Camera
• Device with Android™ system version 8.0 and above
- Or iPhone®/iPad® with iOS version 12.0 and above
5.4.1 Connect the Camera
- Switch the parent unit off before connect the camera to Wi-Fi®.
- Connect the power adaptor to mains power and insert the plug into the power socket on the back of the Camera Unit, DO NOT switch the power on at the power point yet.
5.4.2 Download HubbleClub for Partners App
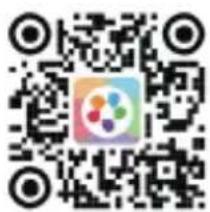
- Scan the QR code with your smart device and download the HubbleClub for Partners App from the App Store for iOS devices or from the Google Play™ Store for Android™ devices.
• Install the HubbleClub for Partners App on your device.

5.4.3 Sign up with Hubble on your smart device
- Ensure that your smart device is connected to your Wi-Fi® router.
- Run HubbleClub for Partners App, tap Create Account with Hubble (fig.1), read through the Privacy Policy, Terms and Conditions, by signing up you agree to our terms of service, tap Done (fig.2).

fig.1
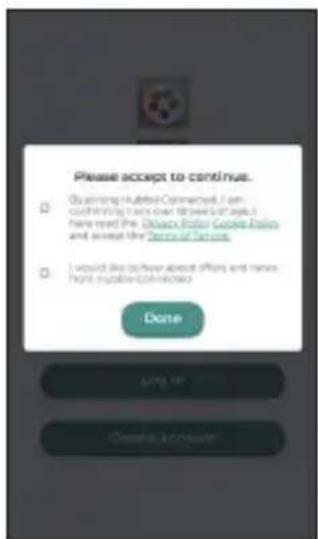
fig.2
- Follow the steps to enter your account information and sign up with Hubble (fig.3-6).
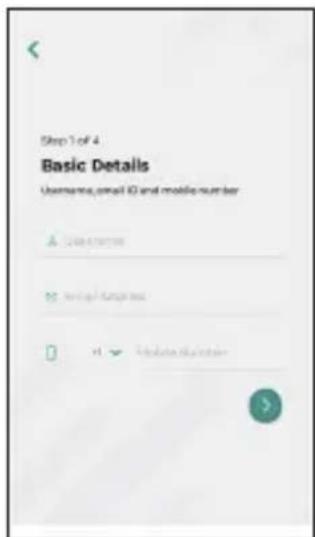
fig.3
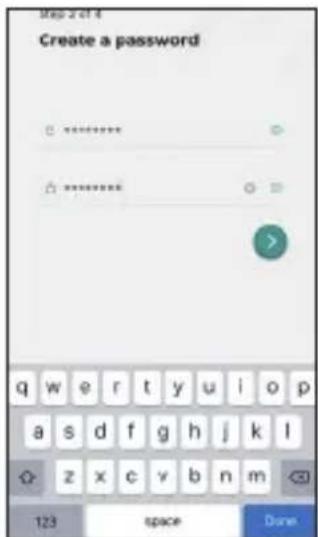
fig.4
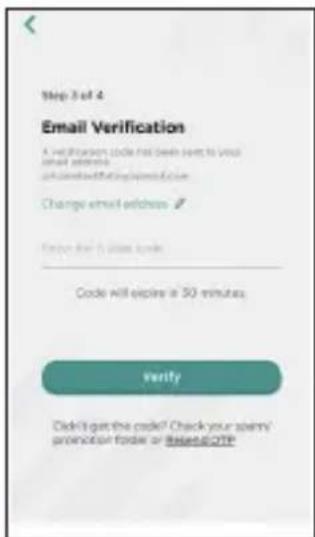
fig.5
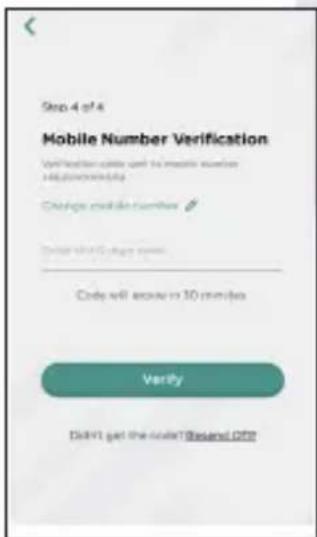
fig.6
Note: If you already have a HubbleClub for Partners App account, please tap Log in with Hubble to go to the next steps.

5.4.4 Add the Camera to your account
- Log in your Hubble Account by entering "User Name" and "Password" (fig.7).
- Tap Add Your Device on the screen of your device to add new Camera (fig.8)
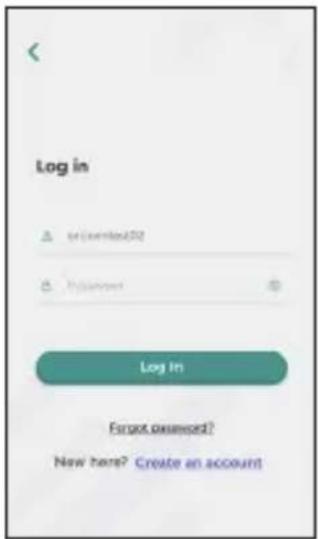
fig.7
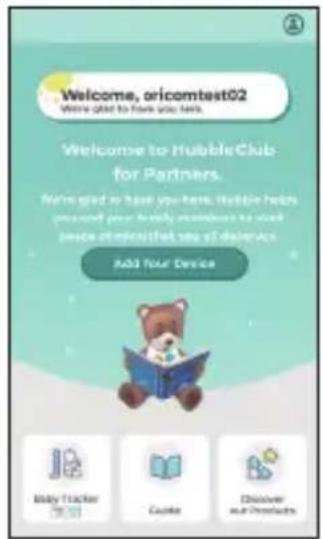
fig.8
- Tap Oricom brand and select your device for setting up by tapping Oricom baby moniotor (fig.9-10).
- Tap OBH500 to add the new camera (fig.11).
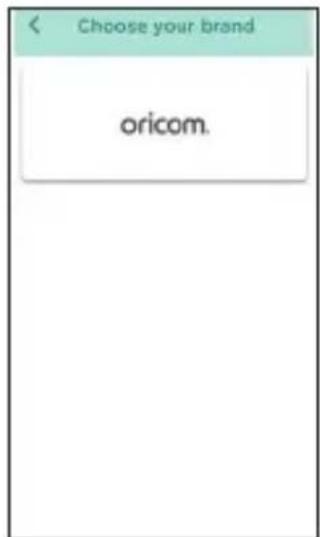
fig.9
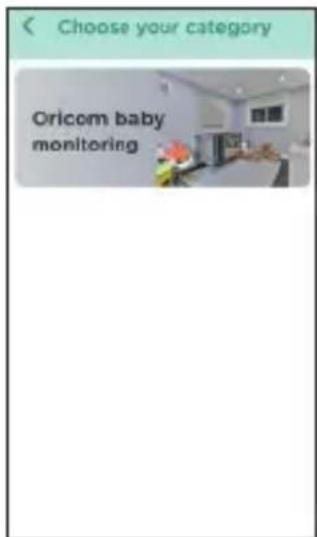
fig.10
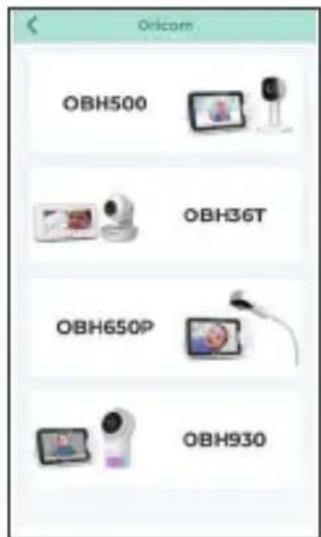
fig.11

- The following setup instructions will appear on the screen, select your Wi-Fi network and enter "Password" (fig.12).
- Power on your camera and wait for the LED to flash Red on the camera. Press and hold the PAIR button on the side of Camera, you will hear a voice prompt "Ready for Pairing" then tap Next (fig.13)
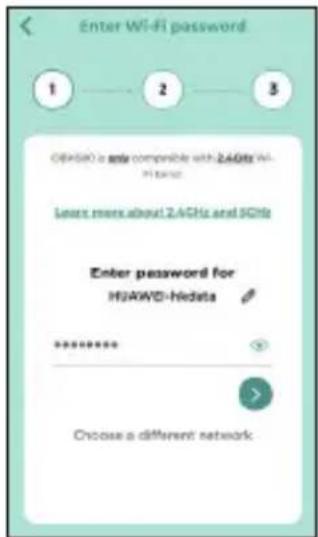
fig.12
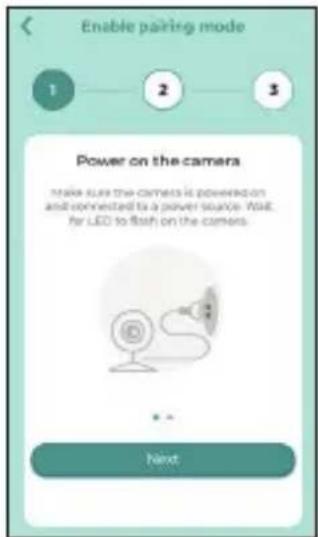
fig.13
- Tap Generate QR code on your device and hold the QR code 15 to 30cm in front of Camera until you hear confirmation message "Scanning Success" from your device. (fig.14, fig.15)
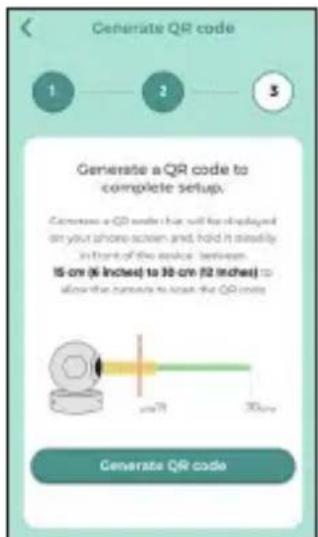
fig.14
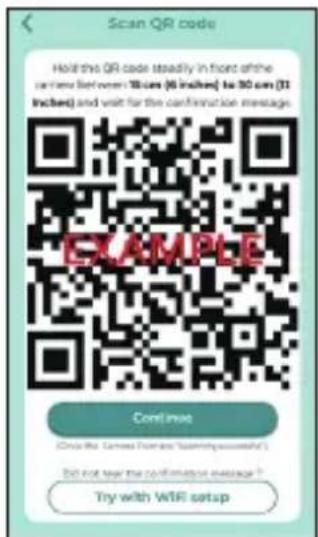
fig.15

- It will take a few minutes for the Camera to connect to the Wi-Fi® network before showing the connection status (fig.16).
• The Camera has been successfully connected, name your Camera (fig.17).
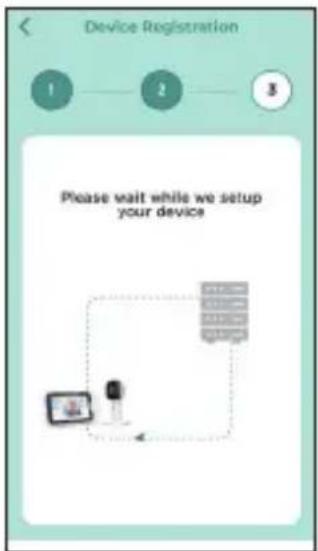
fig.16
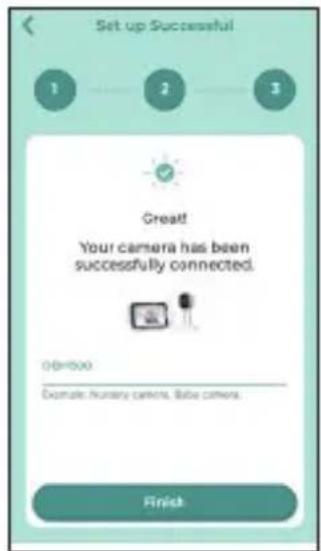
fig.17
Note: If connection fails, please tap Retry and repeat the steps starting from 5.4.4.
- Add your baby's profile to track your baby growth by tapping Create New Profile (fig.18).
- Enter your baby information and tap Done to create profile (fig.19).
- Select one of the profiles for your baby when using the Camera (fig. 20).
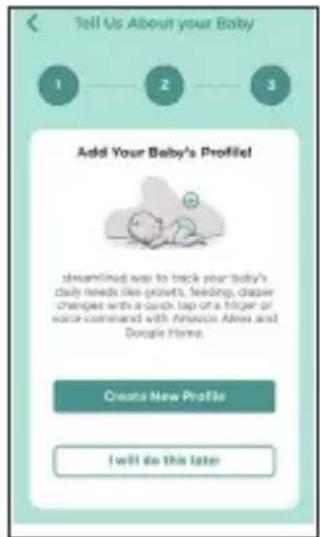
fig.18
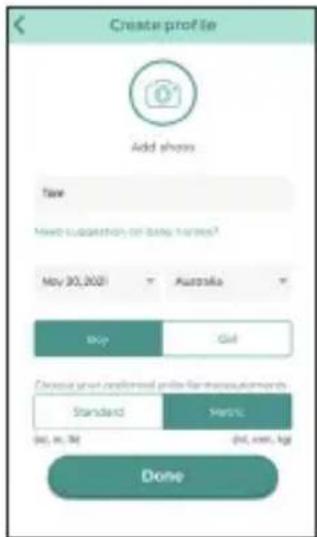
fig.19
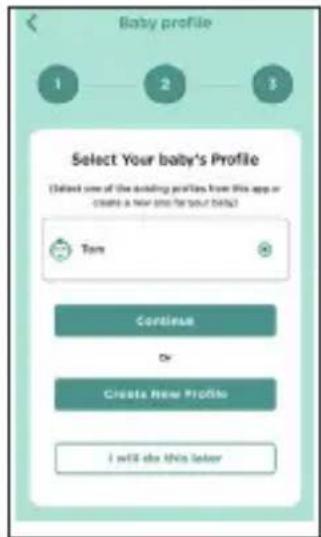
fig.20

6. Procedure for Resetting the Camera
Note: If your Camera is moved from one router (e.g. home) to another (e.g. office) or you have Camera setup issues, then the Camera must be reset. Please reset the Camera with the following procedure:
- Disconnect from power, press and hold the PAIR button, plug in the power connection and continue to hold the pair button for approximately 20 seconds, you will then hear a long beep, release PAIR button and wait for the Camera Unit to complete an internal reset procedure. The Red LED will begin to flash when the Camera Unit is reset successfully.
- You can add your Camera again by following the steps in section 5.4.4.
7. Disposal of the Device (environment)
At the end of the product life cycle, you should not dispose of this product with normal household waste. Take this product to a collection point for the recycling of electrical and electronic equipment. The symbol on the product, user's guide and/or box indicates this.
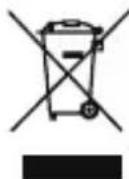
Some of the product materials can be re-used if you take them to a recycling point. By reusing some parts or raw materials from used products you make an important contribution to the protection of the environment.
Please contact your local authorities in case you need more information on the collection points in your area.
The internal battery should be disposed of with the Parent unit in an environmentally-friendly manner according to your local regulations.
8. Cleaning
Clean the Baby Monitor with a slightly damp cloth or with an anti-static cloth. Never use cleaning agents or abrasive solvents.
Cleaning and care
- Do not clean any part of the product with thinners or other solvents and chemicals – this may cause permanent damage to the product which is not covered by our warranty.
- Keep the Baby Monitor away from hot, humid areas or strong sunlight, and don't let it get wet.
- Every effort has been made to ensure high standards of reliability for your Baby Monitor. However, if something does go wrong, please do not try to repair it yourself – contact Customer Service for assistance.
IMPORTANT
Always switch off and disconnect the power adaptor before cleaning your baby monitor.
9. Help
Display
No display
- Try recharging the battery.
- Reset the Units. Unplug both Units electrical power, then plug them back in.
- Press and hold the ON/OFF button ⏻ on the Parent Unit for 3 seconds to switch it ON.
- Check that the correct camera is selected, Change the camera number, if needed.
- Is the video display turned on? Press the VIDEO ON/OFF button 🔒 to turn it ON.
- When operating using battery only, the display will turn off after 5 minutes or 15 minutes or 30 minutes to save power (depending on video settings). The Unit is still active and will give you audio alerts. You can reactivate the screen by pressing any button.
Registration
If the Baby Unit has lost its link with the Parent Unit
- If the Baby Unit is too far away it may be going out of range, so move the Baby Unit closer to the Parent Unit.
- Reset both the Parent Unit and Baby Unit by disconnecting them from the electrical power. Wait about 15 seconds before reconnecting. Allow up to one minute for the Baby Unit and the Parent Unit to re-connect.
• See 2.5 Registration (Pairing), if there is a need to re-register the Units.
Interference
Noise interference on your Parent Unit
- Your Baby and Parent Units may be too close. Move them further apart.
- Make sure there is at least 1 to 2m between the 2 Units to avoid audio feedback.
-
If the Baby Unit is too far away, it may be out of range. Move the Baby Unit closer to the Parent Unit.
-
Make sure that the Baby and Parent Units are not near other electrical equipment, such as a television, computer or cordless/mobile telephone. Move the Baby Unit or Parent Unit 1m away from other electrical equipment.
- Use of other 2.4 GHz products, such as wireless networks (Wi-Fi® routers), Bluetooth™ systems, or microwave ovens, may cause interference with this product. Keep the Baby Unit or Parent Unit at least 1m away from these types of products, or switch them off if they appear to be causing interference.
- If the signal is weak, try moving the Parent and/or Baby Unit to different positions in the room.
Noise interference on your device
- To avoid background noise or echoes, ensure that there is enough distance between Parent unit and Camera Unit.
- Use of other 2.4 GHz products, such as Bluetooth™ systems or microwave ovens, may cause interference with this product. Keep the Wi-Fi® Camera Unit at least 1m away from these types of products, or switch them off if they appear to be causing interference.
Lost connection In App
- Check your Wi-Fi® settings. If necessary, reset your Wi-Fi® router. Ensure that the Wi-Fi® Camera Unit is switched ON. Wait a few minutes for the Camera Unit connection to be complete with your Wi-Fi® network.
If you forgot your password
- If you do not remember your Hubble for partners App password, tap Forgot Password and submit your e-mail address. A new password will be sent to your e-mail address.
Troubleshooting for Wi-Fi® Internet Viewing
| Category Problem Description / Error | Solution |
| Account I am unable to login even after registration. | Please check your user name and password. |
| Account I receive an error message saying: "Email ID is not registered". | Please ensure that you have registered with us. Tap Create Account to create an account. |
| Account What do I do if I forgot my password? | Click on the "Forgot Password" link on https://app.hubbleconnected.com/#lostpassword OR on your AndroidTM or iOS application. An email will be sent to your registered email address. |
| Account I am unable to receive a new password although I have used the "Forgot password" option. | 1. The e-mail might have been sent to your Junk Mail Folder. Please check your Junk Mail Folder.2. There might be a delay in getting your e-mail. Please wait a few minutes and refresh your email account. |
| Connectivity Issues | I get a message: We are having problems accessing your camera. This could be due to lack of internet connection. Please wait and try again later. | 1. Please try again in a few minutes.This could be because of any issue with your internet connection.2. If the problem remains, please restart your Camera to check if this fixes the problem.3. Please restart your WIFI Router. |
| Viewing Camera | When I am in "remote mode", the video stops after 5 minutes. How do I view for longer? | When you are accessing your Camera via a network different from your home network (over the internet) your video times out after 5 minutes.You can click on the Camera again from the AndroidTM/iOS application to start streaming again.If you are accessing from your webbrowser, then you can press on the Reload button to start viewing your Camera video stream again. |
| Features The sound alert setting threshold is not right. | You can Adjust Sound Sensitivity to trigger notifications under Camera Setting menu. | |
| Setting Up While I am adding a new Camera to my account, I am not able to find any Cameras to add. | If you are trying to add a Camera which has previously been added into your account or another account, you will first have to reset the Camera. This can be done by following the re-setting procedure stated in section 6 of this guide.Switch the parent unit off before connecting the camera to Wi-Fi®. | |
| General What | is the significance of the camera LED? | Pair / Setup state: LED is Flashing Green.Unconnected state: LED is Flashing Red-connected state: LED is Solid Green.Green: The camera is live streaming.LED Off - No Power to camera. |
| Connectivity issues | I am not able to access my Camera. | Please check if the Camera is within Wi-Fi® range. Please try to move the Camera closer to the router for better Wi-Fi® connectivity and try again. |
| Setting Up During setup on devices for AndroidTM and iOS, I am not able to find my Camera during the last step and the setup fails. | Please reset the Camera to setup mode and try again. Press and hold the PAIR button on the side of the camera until you hear a beep and voice prompt 'Ready for pairing'.When the Camera LED is off, this indicates that it is in setup mode.Add camera in HubbleClub for Partners App. | |
| Connectivity Issues | Even though I am accessing my Camera from the same Wi-Fi® network, I still find my Camera is shown as remote. I can only access it for 5 minutes at a time. | Please check your wireless router settings. For example, for Buffalo brand routers there is an option called Wireless Isolation. Please disable this option. |
| Camera When | I try to view the Camera, I get a prompt for Camera firmware upgrade. What should I do? | Please upgrade your firmware. This takes around 5 minutes. We push upgrades from time to time to improve the Camera features. |
| General Which | platforms are supported for accessing my Camera? | Minimum requirement: AndroidTM 8.0 iPhone®/iPad® iOS version 12.0 |
| General I do not hear any sound when I am accessing a remote Camera. | You can tap on the speaker icon in the video stream screen to hear audio. By default the audio is not ON when you are accessing a remote Camera. | |
| General What | is the meaning of “Local Camera” and “Remote Camera”? | When you are accessing your Camera from the same wireless network (Home) in which it is configured, it is a Local Camera. When you are accessing your Camera away from your home it is a Remote Camera. You may be using 3G, 4G or 4G LTE or a Wi-Fi® connection outside of your home. |
| General How | do I download the App for Android^TM and iOS devices? | Android^TM :- Open the Google Play Store on your Android^TM device.- Select Search-Type in "HubbleClub for Partners-The results will show the Hubble App- Select to install itiOS Device:- Open the App Store^TM - Select Search-Type in "HubbleClub for Partners-The results will show the Hubble App- Select to install it |
| Setting up Wh | en the video is cut off, the application attempts to reconnect and this results in lost sound and choppy video. | You will need to turn off the Auto Lock function of your device to ensure continuous video/audio streaming. |
| Features How | many users can access the Camera at one time? | If you are accessing in Local Mode, two users are supported, after two users all streaming will go through the remote server. This allows for unlimited user access to a single Camera at one time. |
| Connectivity issues | I found interference caused by my other webcam devices. | Video streaming performance is related to internet bandwidth, especially if you have 2 or more video streaming devices that are working through the same router. |
English
10. General Information
Express Warranty (Australia)
This Express Warranty is provided by Oricom International Pty Ltd ABN 46086 116 369, Unit 1, 4 Sovereign Place, South Windsor NSW 2756, herein after referred to as "Oricom".
Oricom warrants that the product is free from defects in materials or workmanship during the Express Warranty Period. This Express Warranty does not extend to any product from which the serial number has been removed or was purchased outside of Australia.
The benefits of this Express Warranty are in addition to other rights and remedies you may have under the Australian Consumer Law. Our goods come with guarantees that cannot be excluded under the Australian Consumer Law. You are entitled to a replacement or refund for a major failure and compensation for any other reasonably foreseeable loss or damage. You are also entitled to have the goods repaired or replaced if the goods fail to be of acceptable quality and the failure does not amount to a major failure. In the event of a minor failure, Oricom reserves the right to choose to repair or replace the product.
The Express Warranty Period will be a period of 24 months beginning on the date of purchase of the product evidenced by your dated sales receipt. You are required to provide proof of purchase as a condition of receiving Express Warranty services.
You are entitled to a replacement product or repair of the product at our discretion according to the terms and conditions of this document if your product is found to be faulty within the Express Warranty Period.
This Express Warranty extends to the original purchaser only and is not transferable.
Products distributed by Oricom are manufactured using new materials or new and used materials equivalent to new in performance and reliability. Spare parts may be new or equivalent to new. Spare parts are warranted to be free from defects in material or workmanship for thirty (30) days or for the remainder of the Express Warranty Period of the Oricom branded product in which they are installed, whichever is longer. During the Express Warranty Period, Oricom will where possible repair and if not replace the faulty product or part thereof. All component parts removed under this Express Warranty become the property of Oricom. In the unlikely event that your Oricom product has a recurring failure, Oricom may always, subject to the Competition and Consumer Act 2010, at its discretion, elect to provide you with a replacement product of its choosing that is at least equivalent to your product in performance.
No change to the conditions of this Express Warranty is valid unless it is made in writing and signed by an authorised representative of Oricom.
Oricom will not be liable under this Express Warranty, and to the extent permitted by law will not be liable for any defect, loss, damage or injury arising out of or in connection with a:
- Failure by you to adhere to the warnings and follow the instructions set out in this user guide for the proper installation and use of the product;
- Willful misconduct or deliberate misuse by you of the product;
- Any external cause beyond our control, including but not limited to power failure, lightning or over voltage; or
- Modification to the product or services carried out on the product by anyone other than Oricom or Oricom's authorised service provider.
How to make a claim under your Express Warranty in Australia
Oricom has a simple warranty process for you to follow:
- Please call or email our Customer Support Team, 02 4574 8888 or support@oricom.com.au.
- A Customer Support Team member will verify after troubleshooting with you if your product qualifies under warranty. If so, they will give you a Product Return Authorisation number.
- We will then email a Return Authorisation form and a Repair Notice (if necessary), together with instructions on how to return the product for warranty service.
Please note that if a Customer Support Team member advises that your product does not qualify for return, this warranty does not apply to your product. Products that are authorised to be returned to Oricom in Australia must include all of the following:
• A completed Return Authorisation form
- A copy of your Proof of Purchase (please keep your original copy)
- The faulty product, including all accessories.
Send the approved returns to:
Oricom International Pty Ltd
Locked Bag 658
South Windsor NSW 2756 Australia
Please note that this Express Warranty excludes expenses incurred by you in returning any faulty product to us. You must arrange and pay any expenses incurred (including postage, delivery, freight, transportation or insurance of the product) to return the faulty product to us, however, we will arrange delivery of the repaired or replaced faulty product to you.

Important Information - Repair Notice
Please be aware that the repair of your products may result in the loss of any user-generated data (such as stored telephone numbers, text messages and contact information). Please ensure that you have made a copy of any data saved on your product before sending for repair. Please also be aware that products presented for repair may be replaced by refurbished products or parts of the same type rather than being repaired.
Oricom Customer Support
Oricom have a trained and dedicated team of Customer Support Representatives, each with the knowledge and resources to assist in answering your questions quickly and efficiently.
Oricom Support - Australia
For all product enquiries, troubleshooting or to discuss the range of Oricom products, feel free to contact Oricom or visit our website for answers to frequently asked questions.
(02) 4574 8888 / Monday - Friday 8am – 6pm AEST Email: support@oricom.com.au / www.oricom.com.au
Oricom Support - New Zealand
0800 674 266 / Monday - Friday 10am - 8pm NZST Email: support@oricom.co.nz
11. Technical Specifications
BABY UNIT
| Frequency | 2400 MHz to 2483.5 MHz |
| Image sensor colour C | MOS 2M Pixels |
| IR LED 8 pcs | |
| Operating Temperature | 5°C to 40°C |
| Power Adaptor: Input: | 100-240V AC, 50/60Hz, 300mA;Output: 5.0V DC, 1000mA |
PARENT UNIT
| Frequency | 2400 MHz to 2483.5 MHz |
| Display 5" diagonal TFT LCD | |
| Display Colour 16.7M colour LCD | |
| Operating Temperature | 5°C to 40°C |
| Brightness Control 8 steps | |
| Volume Control 8 steps | |
| Power Adaptor: Input: | 100-240V AC, 50/60Hz, 300mA;Output: 5.0V DC, 1000mAWARNINGUse only with provided power supply. |
| Battery (built-in) 3.8V, | 2100mAh Lithium-Ion Polymer, rechargeable battery pack.WARNINGDo not attempt to replace the battery, contact Oricom Customer Support if it needs replacing. |
Specifications are subject to change without prior notice.
oricom.
All rights reserved
Ref: 2021-12-16
Printed in China
Version 3.0
R-NZ


- USER'S GUIDE
- Welcome...
- to your new Oricom Wi-Fi® Video Baby Monitor!
- Inside the Box
- Overview of the Parent Unit
- Parent Unit menu icons
- Overview of Your Baby Unit
- Important guidelines for installing your Digital Video Baby Monitor
- Table of contents
- Wi-Fi® Internet Viewing 19
- Procedure for Resetting the Camera....25
- Safety Instructions
- WARNING:
- Wi-Fi® CAMERA UNIT SET UP & USE:
- WARNING
- CAUTION
- Getting Started
- Connecting the Power Supply of the Baby Unit
- Note
- Fixing magnetic mount on the wall
- Connecting the Power Supply of the Parent Unit.
- Desktop Stand of the Parent Unit
- Registration (Pairing)
- Note:
- Using the Baby Monitor
- Setting Up
- Night Vision Mode
- Talk Mode
- Video ON/OFF
- Temperature Display (HH °C / °F or LL °C / °F)
- Parent Unit Menu Options
- Volume
- Brightness
- Zoom
- Audio Playlist
- Lullaby/Soothing Sounds Playback
- Audio Book Playback
- Personal Recording Playback
- Volume Level of Audio Playback
- Alarm
- Camera Control
- Add (pair) a camera
- View a camera
- TIP
- Delete a camera
- Scan camera
- Temperature
- Power Save mode
- View multiple cameras on screen
- Wi-Fi® Internet Viewing
- Minimum System Requirements
- Android™ System
- iPhone®/iPad® iOS
- High Speed (Wi-Fi®) Internet
- Getting started - Connecting Devices
- How does it work?
- Setup
- Status of LED Indication:
- User Account and Camera Setup on Android™ or Apple devices.
- What you need
- Connect the Camera
- Download HubbleClub for Partners App
- Sign up with Hubble on your smart device
- initial access
- Add the Camera to your account
- Procedure for Resetting the Camera
- Disposal of the Device (environment)
- Cleaning
- Cleaning and care
- IMPORTANT
- Help
- Display
- No display
- Registration
- If the Baby Unit has lost its link with the Parent Unit
- Interference
- Noise interference on your Parent Unit
- Noise interference on your device
- Lost connection In App
- If you forgot your password
- General Information
- Express Warranty (Australia)
- How to make a claim under your Express Warranty in Australia
- Important Information - Repair Notice
- Oricom Customer Support
- Oricom Support - Australia
- Oricom Support - New Zealand
- Technical Specifications
Brand : Oricom
Model : BS7OBH500
Category : Baby monitor