
LIVA Z7 PLUS - Desktop computer ECS - Free user manual and instructions
Find the device manual for free LIVA Z7 PLUS ECS in PDF.


| Product Type | Desktop Computer (Mini PC) |
| Processor | Intel Celeron N-series or Pentium |
| Graphics | Intel UHD Graphics |
| Memory | 1 x DDR4 SO-DIMM slot, up to 8GB |
| Storage | 1 x M.2 SATA SSD slot |
| Operating System | Windows 10 / 11 Pro or Home |
| Wireless Connectivity | Wi-Fi 802.11ac, Bluetooth 4.2 |
| Ports | 2 x USB 3.0, 1 x USB Type-C, 2 x HDMI, 1 x Gigabit Ethernet, 1 x Audio jack |
| Power Supply | 12V DC, external power adapter (included) |
| Dimensions (W x D x H) | 13.8 x 9.4 x 3.5 cm (5.43 x 3.70 x 1.38 in) |
| Weight | Approximately 0.5 kg (1.1 lb) |
| Cooling System | Fanless design (passive cooling) |
| VESA Mount | Supports VESA mount (bracket included) |
| Intended Use | Home office, media center, digital signage, thin client |
| Cleaning Instructions | Use dry cloth; avoid liquids and aerosol cleaners |
| Safety Precautions | Use only supplied power adapter; avoid exposure to heat or moisture |
| Spare Parts / Upgrades | RAM and SSD are user-upgradable; other parts not intended for replacement |
| Repairability | Limited to memory and storage upgrades; contact ECS for service |
Frequently Asked Questions - LIVA Z7 PLUS ECS
User questions about LIVA Z7 PLUS ECS
0 question about this device. Answer the ones you know or ask your own.
Ask a new question about this device
Download the instructions for your Desktop computer in PDF format for free! Find your manual LIVA Z7 PLUS - ECS and take your electronic device back in hand. On this page are published all the documents necessary for the use of your device. LIVA Z7 PLUS by ECS.
USER MANUAL LIVA Z7 PLUS ECS
natural_image
Black electronic device with ventilation slots and USB ports, no visible text or symbols on the body
Preface
Copyright
This publication, including all photographs, illustrations and software, is protected under international copyright laws, with all rights reserved. Neither this manual, nor any of the material contained herein, may be reproduced without written consent of the author.
Version 1.0
Disclaimer
The information in this document is subject to change without notice. The manufacturer makes no representations or warranties with respect to the contents hereof and specifically disclaims any implied warranties of merchantability or fitness for any particular purpose. The manufacturer reserves the right to revise this publication and to make changes from time to time in the content hereof without obligation of the manufacturer to notify any person of such revision or changes.
Trademark Recognition
Windows ^® 11 are registered trademarks of Microsoft Corp.
Other product names used in this manual are the properties of their respective owners and are acknowledged.
Federal Communications Commission (FCC)
This equipment has been tested and found to comply with the limits for a Class B digital device, pursuant to Part 15 of the FCC Rules. These limits are designed to provide reasonable protection against harmful interference in a residential installation. This equipment generates, uses, and can radiate radio frequency energy and, if not installed and used in accordance with the instructions, may cause harmful interference to radio communications. However, there is no guarantee that interference will not occur in a particular installation. If this equipment does cause harmful interference to radio or television reception, which can be determined by turning the equipment off and on, the user is encouraged to try to correct the interference by one or more of the following measures:
- Reorient or relocate the receiving antenna
- Increase the separation between the equipment and the receiver
- Connect the equipment onto an outlet on a circuit different from that to which the receiver is connected
- Consult the dealer or an experienced radio/TV technician for help
Any changes or modifications not expressly approved by the grantee of this device could void the user's authority to operate the equipment. This equipment complies with FCC radiation exposure limits set forth for an uncontrolled environment. This equipment should be installed and operated with minimum distance 20cm between the radiator & your body.
6E- According to section 3.3 of KDB 987594 D01
Operation of transmitters in the 5.925-7.125 GHz band is prohibited for control of or communications with unmanned aircraft systems.
The terms HDMI, HDMI High-Definition Multimedia Interface, and the HDMI Logo are trademarks or registered trademarks of HDMI Licensing Administrator, Inc.
Declaration of Conformity
This device complies with part 15 of the FCC rules. Operation is subject to the following conditions:
• This device may not cause harmful interference, and
- This device must accept any interference received, including interference that may cause undesired operation.
We hereby certify that the above product has been tested by us with the listed standards and found in compliance with the council EMC directive 2014/30/EU.
EN 55032 Electromagnetic compatibility of multimedia equipment - Emission requirements
☐ EN 55035 Electromagnetic compatibility of multimedia equipment - Immunity requirements
☐ EN 61000-3-2 Electromagnetic Compatibility (EMC)
Part 3-2: Limits-Limits for harmonic current emissions (equipment input current 16A per phase)
☐ EN 61000-3-3 Electromagnetic Compatibility (EMC)
Part 3-3: Limits-Limitation of voltage changes, voltage fluctuations and flicker in public low voltage supply systems, for equipment with rated current 16A per phase and not subject to conditional connection
M600 Complies below directives:
RED (Radio Equipment Directive) (2014/53/EU)
EN 301-489-1 V2.2.3: 2019-11
EN 301 489-17 V3.2.4: 2020-09
☐ ETSI EN 300 328 V2.2.2
ETSI EN 301 893 V2.1.1
ETSI EN 300 440 V2.2.1
ETSI EN 303 687 V1.1.1
EN 50663: 2017 or EN 62479: 2010
EN 50665: 2017 or EN 62311: 2020
EN 62368 Safety for information technology equipment including electrical business Equipment
□ CE marking

 | AT BE BG CZ DK EE DE | ||||
| CY IE IT EL ES FR LV | |||||
| LT LU HU MT NL PL PT | |||||
| RO SI $K FI SE HR UK(NI) |

UKCA marking

Safety Precautions - Static Electricity
Follow these simple precautions to protect yourself from harm and the products from damage.
- To avoid electrical shock, always disconnect the power from the PC chassis before manual handling. Do not touch any components on the CPU card or other cards while the PC is powered on.
- Disconnect the power before making any configuration changes. A sudden rush of power after connecting a jumper or installing a card may damage sensitive electronic components
Safety Instructions
- Read these safety instructions carefully.
- Retain this user manual for future reference.
- Disconnect the equipment from all power outlets before cleaning. Use only a damp cloth for cleaning. Do not use liquid or spray detergents.
- For pluggable equipment, the power outlet socket must be located near the equipment and easily accessible.
- Protect the equipment from humidity.
- Place the equipment on a reliable surface during installation. Dropping or letting the equipment fall may cause damage.
- Ensure that the voltage of the power source is correct before connecting the equipment to a power outlet.
- If you use an extension cord, make sure that the total ampere rating of the devices
- Position the power cord away from high-traffic areas. Do not place anything over the power cord.
- If any of the following occurs, have the equipment checked by service personnel:
- The power cord or plug is damaged.
– Liquid has penetrated the equipment. - The equipment has been exposed to moisture.
-
The equipment is malfunctioning, or does not operate according to the user manual.
– The equipment has been dropped and damaged.
— The equipment shows obvious signs of breakage. -
Do not leave the equipment in an environment with a storage temperature of below -40^ ( -40^ ) or above 85^ ( 185^ ) as this may damage the components. The equipment should be kept in a controlled environment.
-
All cautions and warnings on the equipment should be noted.
-
If the equipment is not used for a long time, disconnect it from the power source to avoid damage from transient overvoltage.
-
Do not use or expose this product around magnetic fields as magnetic interference may affect the performance of the product.
-
Do not expose this product to high levels of direct sunlight, high humidity or wet conditions.
-
Never pour liquid into an opening. This may cause fire or electrical shock.
-
Make sure you leave plenty of space around the system for ventilation
-
CAUTION: Batteries are at risk of exploding if incorrectly replaced. Replace only with the same or equivalent type as recommended by the manufacturer. Discard used batteries according to the manufacturer's instructions.
-
This product is intended to be supplied by an power supply or dc source with SELV output, rated 20V/6A minimum and Tma 40 degree. If you need further assistance, please contact ECS for further information.
-
Ensure that the voltage of the power source is correct before connecting the equipment to a power outlet. The power outlet socket should have a grounded connection.
-
For use in pollution free environments and indoor use.
-
This equipment is not suitable for use in locations where children are likely to be present.
-
If the equipment is used in a manner not specified by the ECS, the protection provided by the equipment may be impaired.
-
The equipment contains no user-serviceable parts. Do not open, Return to manufacturer for servicing.
-
This is open type equipment and should be installed in a suitable enclosure.
-
This unit is intended to be supplied by a certified DC power source suitable for use at 40.0 °C min. and the altitude of operation = 5000m, whose output meets ES1, is rating as per ratings: 20V/6A min.
-
Use this product in environments with ambient temperatures between -5^ and 40^ .

Caution: Hot surface. Do not touch for Top Heatsink.
Safety cautions and warnings
The equipment inside should be serviced only by a trained service technician. Do not operate your equipment with any cover(s) removed. The equipment is not intended to be installed and used in a home, school or public area accessible to the general population; and thumbscrews should be tightened with a tool after both initial installation and subsequent access to the panel.
Nordic Lithium Cautions (for lithium-ion batteries)

CAUTION:
Danger of explosoin if battery is incorrectly replace only with the same or equivalent type recommended by the manufacturer. Dispose of used batteries according to the manufacturer's instructions.
Warning

Do not ingest battery, Chemical Bum Hazard
This Product contains a coin/button cell battery. If the coin/button cell battery is swallowed, it can cause severe internal burns in just 2 hours and lead to death.
Keep new and used batteries away from children.
If battery compartment does not close securely, stop using the product and keep it away from children.
If you think batteries might have be swallowed or placed inside any part of the body, seek immediate medical attention.
Elitegroup Computer Systems Co., Ltd 9F, No. 22-1, Sec. 3, Zhongshan N. Rd., Zhongshan Dist., Taipei City 104427, Taiwan (R.O.C.) +886-2-2162-1177
ECS Europe Office
Noorderhoeve 8, 2993 TP,
Barendrecht, The Netherlands
Preface....i
Chapter 1
Introducing the PC
Introduction....1
Specification 2
Front I/O 3
Rear I/O 4
Side I/O 5
Install the VESA Mount 6
Packing Contents 7
Chapter 2
Installing the PC
System Quick Installation 9
Chapter 3
Using BIOS
About the Setup Utility....11
The Standard Configuration....11
Entering the Setup Utility.... 11
Using BIOS....12
BIOS Navigation Keys.... 12
Main Menu 14
Advanced Menu 15
Chipset Menu 25
M. I. B. X Menu 29
Security Menu 34
Boot Menu 35
Exit Menu.... 36
Chapter 4
Trouble Shooting
Trouble shooting and problem solution.... 39
Chapter 1 Introducing the PC
Introduction
LIVA Z7 PLUS is an ideal personal computer (Mini PC) electronic product Rich I/O design and paired with the new generation Intel Meteor Lake-H processor, supporting high-capacity DDR5 Memory (Max 96GB (48GB*2)) And paired with M.2 SSD, the overall combination can show better performance.
LIVA Z7 PLUS is designed as a personal computer (Mini PC), taking up only 117 x 117 x 50.4 mm 4.61x 4.61 inches x 1.98 inches). Sturdy iron casing not only provides excellent protection EMI, shock/vibration, hot and cold for reliable operation. LIVA Z7 PLUS provides up to 2 LAN (1G/2.5G), 3 type C (1*USB 3.2 Gen 2x2/2* USB 4.0 Gen 2x2), USB 3.2, 3 USB 2.0, 2 HDMI 2.0, 1 DC IN.

Front View

natural_image
Back view of a black electronic device showing ports and connectors (no readable text or symbols)Rear View

Note: ID design may vary.
Specifications
| CPU • Intel® 14th Gen Meteor Lake-H Processors 28W (U7/U5) |
| Memory • 2 x SO-DIMMs, DDR5 5600MHz, up to 96GB |
| Storage • 1 x M.2 2280 Key M NVMe SSD• 1 x M.2 2242 Key M NVMe SSD |
| Wireless • 1 x Intel WLAN 802.11ax (WIFI M.2 1216 AX211) |
| LAN • 1 x Intel i226-V 2.5G LAN• 1 x Intel i219V 1.0G LAN |
| Video Output • 2 x HDMI 2.1 ports, TMDS 4k@60Hz(1 x HDMI port w/ CEC function) |
| Front I/O • 3 x USB 3.2 Gen2x1 Type A Ports• 1 x USB 2.0 Port• 1 x USB 3.2 Gen2x2 Type C Port |
| Rear I/O • 2 x USB 4 Gen2x2 Type-C (to DP) Ports• 2 x HDMI 2.1 Ports• 2 x USB 2.0 Ports• 1 x 2.5GbE + 1x 1.0GbE LAN• 1 x DC-In |
| Side I/O • 1 x Kensington Lock |
| Dimensions (mm) • 117 x 117 x 50.4 m |
| OS Support • Windows 11 / Linux |
| Power Supply • 20V, 6A/120W for U5/U7 |
| Others • Support HDMI CEC• Operation Temp.: 0 ~ 40°C |
Front I/O

- Power Button Press the power button to turn the system on and off.
- USB 3.2 Gen2x1 Ports Connecting USB 3.2 Gen2x1 compatible devices.
- USB 3.2 Gen 2x2 Port Connecting USB 3.2 Gen2x2 compatible device.
- USB 2.0 Port Connecting USB 2.0 compatible device.
Rear I/O
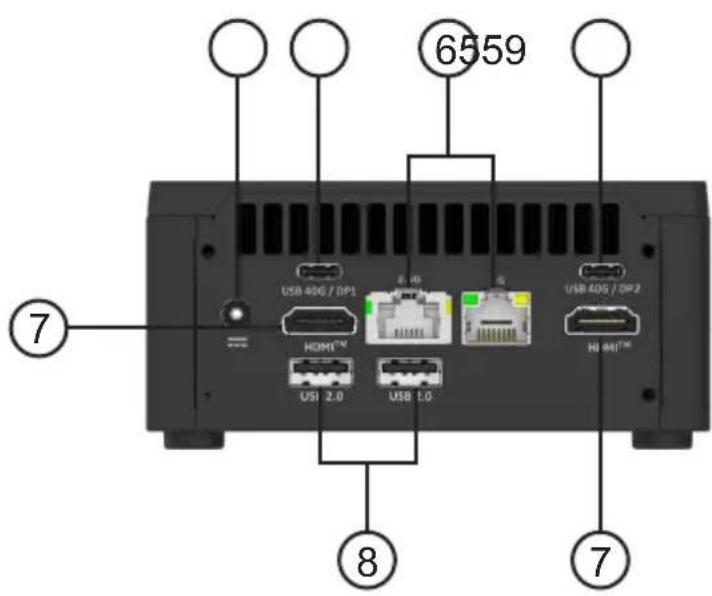
- USB 4.0 ports Connecting USB 4.0 compatible devices.
- LAN Ports Connecting the Network.
- HDMI Ports Connecting a display device to the HDMI ports.
- USB 2.0 Ports Connecting USB 2.0 compatible devices.
- DC-In Jack It is used for power cable.
Side I/O

natural_image
Black LVM device with ventilation slots and ports, labeled with number 10 (no text or symbols on the device itself)- Kensington Lock A chassis ground refers to a ground connection that connects all of the metal parts to the earth ground.
Install the VESA Mount
Current design, both VESA bracket and chassis bottom cover been design in an arrow stamping mark. Refer to below picture, Arrow mark on bottom cover to show system front face telling user/OP how to align the bottom cover when assembly.
Arrow mark on VESA bracket to show the orientation fixing onto monitor/wall.
The mounting screws between system and VESA bracket already fool-proof design. It is recommended to emphasize in user manual.

natural_image
3D diagram showing a device with internal components and a separate view of a circular component (no text or symbols)Packing Contents


natural_image
Pure mechanical component diagram with concentric circles and mounting holes (no text or symbols)Quick Installation Guide VESA Mount
natural_image
Exterior view of a black hard drive with attached cable and connector (no visible text or symbols)
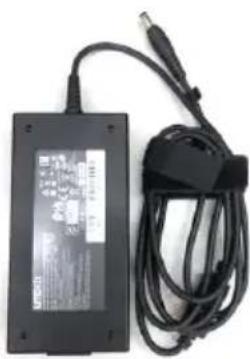
Adapter 120W power cord

NOTE: Please contact us immediately if any of the items is damaged or missing. (Memory, SSD and WIFI module are required to be purchased additionally.)
Memo
Chapter 2 Installing the PC
System Quick Installation
- Connecting HDMI device.
natural_image
Computer monitor displaying a snowy mountain scene under a blue sky with clouds (no visible text or symbols)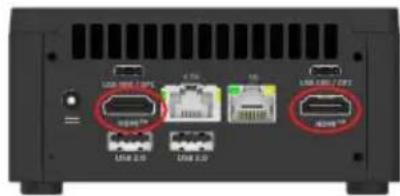
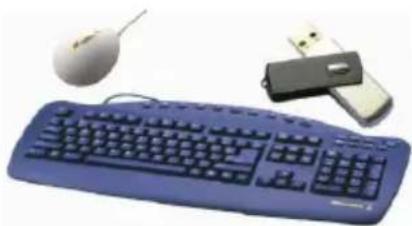
- The USB connectors are used for attaching USB devices, such as mouse, keyboard, printer, scanner and other USB-compatible device.
natural_image
Blue keyboard, mouse, and USB drive (no text or symbols visible)
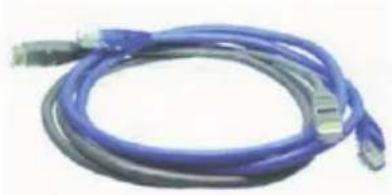
- Attaching Ethernet cable here. (LAN Connector)
natural_image
Coiled blue and gray cable with connectors (no text or symbols visible)
- Connecting Power. (DC jack)

natural_image
Electricity charger with attached cable and connector (no visible text or symbols)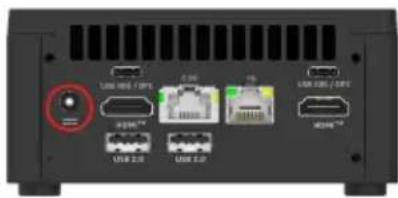
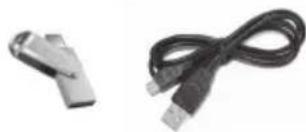
- Connecting USB device.

natural_image
Exterior view of a modern office building (no signage)
natural_image
Two USB connectors shown side by side, one with a metallic connector and the other with black cables (no text or symbols visible)
About the Setup Utility
The computer uses the latest “American Megatrends Inc.” BIOS with support for Windows Plug and Play. The CMOS chip on the motherboard contains the ROM setup instructions for configuring the motherboard BIOS.
The BIOS (Basic Input and Output System) Setup Utility displays the system's configuration status and provides you with options to set system parameters. The parameters are stored in battery-backed-up CMOS RAM that saves this information when the power is turned off. When the system is turned back on, the system is configured with the values you stored in CMOS.
The BIOS Setup Utility enables you to configure:
- Hard drives, diskette drives and peripherals
• Video display type and display options - Password protection from unauthorized use
• Power Management features
The settings made in the Setup Utility affect how the computer performs. Before using the Setup Utility, ensure that you understand the Setup Utility options.
This chapter provides explanations for Setup Utility options.
The Standard Configuration
A standard configuration has already been set in the Setup Utility. However, we recommend that you read this chapter in case you need to make any changes in the future.
This Setup Utility should be used:
- when changing the system configuration
- when a configuration error is detected and you are prompted to make changes to the Setup Utility
- when making changes to the Power Management configuration
- when changing the password or making other changes to the Security Setup
Entering the Setup Utility
When you power on the system, BIOS enters the Power-On Self Test (POST) routines. POST is a series of built-in diagnostics performed by the BIOS. After the POST routines are completed, the following message appears:
Press DEL to enter SETUP
Using BIOS
When you start the Setup Utility, the main menu appears. The main menu of the Setup Utility displays a list of the options that are available. A highlight indicates which option is currently selected. Use the cursor arrow keys to move the highlight to other options. When an option is highlighted, execute the option by pressing
Some options lead to pop-up dialog boxes that prompt you to verify that you wish to execute that option. Other options lead to dialog boxes that prompt you for information.
Some options (marked with an icon) lead to submenus that enable you to change the values for the option. Use the cursor arrow keys to scroll through the items in the submenu.
In this manual, default values are enclosed in parenthesis. Submenu items are denoted by an icon >> .

The default BIOS setting for this motherboard apply for most conditions with optimum performance. We do not suggest users change the default values in the BIOS setup and take no responsibility to any damage caused by changing the BIOS settings.
BIOS Navigation Keys
The BIOS navigation keys are listed below:
| KEY FUNCTION | |
| ESC Exits the current menu | |
| ↑↓→← | Scrolls through the items on a menu |
| +/- Change Opt. | |
| Enter Select | |
| F1 General Help | |
| F2 Previous Value | |
| F3 Optimized Defaults | |
| F4 Save & Exit | |

- For the purpose of better product maintenance, the manufacture reserves the right to change the BIOS items presented in this manual. The BIOS setup screens shown in this chapter are for reference only and may differ from the actual BIOS. Please visit the manufacture's website for updated manual.
- In this Gui BIOS, you can operate by mouse or keyboard. Click: select item; Double click: enter; Right click: exit.
Default
Select the default icon and press
Advanced
Select the advanced icon and press
Exit
Select the exit icon and press
Main Menu
This menu shows the information of BIOS and enables you to set the system language, date and time.
| Main | Advanced Chipset M.I.B.X Security Boot Exit | |||
| BIOS InformationSystem Language [English]System Time [15:46:09]BIOS Version 24.05.30 | [Thu 05/30/2024] System Date | Choose the system default languageDate | ||
| →← : Select Screen↓↓ : Select ItemEnter : Select+/- : Change Opt.F1 : General HelpF2 : Previous ValuesF3 : Optimized DefaultsF4 : Save & ExitESC : Exit | ||||
| Version 2.22.1291 Copyright (C) 2024 AMI | ||||
System Language (English)
This item is used to set system language.
System Date & Time
The Date and Time items show the current date and time on the computer. If you are running a Windows OS, these items are automatically updated whenever you make changes to the Windows Date and Time Properties utility.
Advanced Menu
The Advanced menu items allow you to change the settings for the CPU and other system.
| Main Advanced Chipset M.I.B.X Security Boot Exit | |
| LAN ConfigurationPC Health StatusPower Management SetupACPI SettingsCPU ConfigurationSATA ConfigurationUSB ConfigurationSuper IO ConfigurationTrusted Computing | LAN Configuration Parameters |
| →←: Select Screen↓↓: Select ItemEnter : Select+/- : Change Opt.F1 : General HelpF2 : Previous ValuesF3 : Optimized DefaultsF4 : Save & ExitESC : Exit | |
| Version 2.22.1291 Copyright (C) 2024 AMI | |
» LAN Configuration
The item in the menu shows the LAN-related information that the BIOS automatically detects.
| Advanced Aptio Setup - AMI | |
| LAN ConfigurationOnboard LAN Controller (I226-V) [Enabled]Onboard LAN Controller (I219-V) [Enabled] | Enabled/Disabled Onboard LAN Controller |
| →←: Select Screen↑↓: Select ItemEnter: Select+/-: Change Opt.F1: General HelpF2: Previous ValuesF3: Optimized DefaultsF4: Save & ExitESC: Exit | |
| Version 2.22.1291 Copyright (C) 2024 AMI | |
Onboard LAN Controller (I226-V) (Enabled)
Use this item to enable or disable Onboard LAN controller (I226-V).
Onboard LAN Controller (I229-V) (Enabled)
Use this item to enable or disable Onboard LAN controller(1229-V).
Press
» PC Health Status
On motherboards support hardware monitoring, this item lets you monitor the parameters for critical voltages, temperatures and fan speeds.
| Aptio Setup - AMI | |
| Advanced | |
| PC Health StatusCPU Temperature 39°CPCH Temperature 32°CVR Temperature 35°CSSD Temperature 32°CFan air vent Temperature 29°CCPU Fan Speed 3346 RPMDC Input Voltage 19.038VCore Voltage 0.832VDIMM Voltage 1.091VTCC Activation Temperature (DTS) 110 | →←: Select Screen↑↓: Select ItemEnter: Select+/-: Change Opt.F1: General HelpF2: Previous ValuesF3: Optimized DefaultsF4: Save & ExitESC: Exit |
| Version 2.22.1291 Copyright (C) 2024 AMI | |
System Component Characteristics
These items display the monitoring of the overall inboard hardware health events, such as CPU & DIMM voltage, CPU & System fan speed...etc.
- CPU Temperature
- PCH Temperature
- VR Temperature
- SSD Temperature
• Fan air vent Temperature - CPU Fan Speed
- DC Input Voltage
- Core Voltage
- DIMM Voltage
TCC Activation Temperature (DTS) (110)
This item is used to set the value from the factory TCC Activation Temperature.
Press
» Power Management Setup
This page sets up some parameters for system power management operation.
| Aptio Setup - AMI | |
| Power Management SetupResume By RING [Disabled]Resume By USB [Disabled]Resume By RTC Alarm [Disabled]EUP Function [Enabled] | About Resume byPCI-E/LAN/Ext. USB3.X PME |
| →←: Select Screen↑↓: Select ItemEnter: Select+/-: Change Opt.F1: General HelpF2: Previous ValuesF3: Optimized DefaultsF4: Save & ExitESC: Exit | |
| Version 2.22.1291 Copyright (C) 2024 AMI | |
Resume By RING (Disabled)
An input signal on the serial Ring Indicator (RI) line (in other words, an incoming call on the modem) awakens the system from a soft off state.
Resume By USB (Disabled)
This item allows you to enable or disable the USB device wakeup function from S3 mode.
Resume By RTC Alarm (Disabled)
The system can be turned off with a software command. If you enable this item, the system can automatically resume at a fixed time based on the system's RTC (realtime clock). Use the items below this one to set the date and time of the wake-up alarm. You must use an ATX power supply in order to use this feature.
EUP Function (Enabled)
This item allows user to enable or disable EUP support.
Press
» CPU Configuration
The item in the menu shows the CPU Configuration.
| Aptio Setup - AMI Advanced | |
| CPU ConfigurationIntel(R) Core(TM) Ultra 7 155H Processor Speed 2000 MHzID 0XA06A4Microcode Revision 17VMX SupportedSMX/TXT SupportedHyper-Threading [Enabled]Intel (VMX) Virtualization Technology [Enabled]Package C State Limit [Auto]Enhanced Halt (C1E) [Enabled]Intel(R) Spead Shift Technology [Enabled] | Enable or Disable Hyper-Threading Technology. |
| →←: Select Screen↑↓: Select ItemEnter : Select+/- : Change Opt.F1 : General HelpF2 : Previous ValuesF3 : Optimized DefaultsF4 : Save & ExitESC : Exit | |
| Version 2.22.1291 Copyright (C) 2024 AMI | |
Intel(R) Core(TM) Ultra 7 155H
This item shows the information of the CPU type.
Processor Speed (2000 MHz)
This item shows the current processor speed.
ID (0XA06A4)
This item shows the rating vision of the processor.
Microcode Revision (17)
This item shows the revision of Microcode.
VMX (Supported)
This item shows your computer supports VMX or not.
SMX/TXT (Supported)
This items show your computer supports SMX/TXT or not.
Hyper-Threading (Enabled)
This item is only available when the chipset supports Hyper-threading and you are using a Hyper-threading CPU.
Intel (VMX) Virtualization Technology (Enabled)
When enabled, a VMM can utilize the additional hardware capabilities provided by Vandor Pool Technology.
Package C State Limit (Auto)
Use this item to set the package C state limit.
Enhanced Halt (C1E) (Enabled)
Enable/Disable C1E. When enabled, CPU will switch to minimum speed when all cores enter C-State.
Intel(R) Speed Shift Technology (Enabled)
This item shows your compututer supports Intel speed shift technology or not.
Press
» SATA Configuration
This page provides the information and configuration for SATA storages.
| Aptio Setup - AMI Advanced | |
| SATA ConfigurationSATA Mode Selection [AHCI]SATA Port1Not Present▶ NVMe Configuration | Determines how SATA controller (s) operate. |
| →←: Select Screen↑↓: Select ItemEnter: Select+/-: Change Opt.F1: General HelpF2: Previous ValuesF3: Optimized DefaultsF4: Save & ExitESC: Exit | |
| Version 2.22.1291 Copyright (C) 2024 AMI | |
SATA Mode Selection (AHCI)
Use this item to select SATA mode.
SATA Port 1 (Not Present)
This motherboard supports two SATA channels, each channel allows one SATA device to be installed. Use these item to configure each device on the SATA channel.
▶ NVMe Configuration
NVMe Device Options Settings.
| Aptio Setup - AMI Advanced | |
| NVMe controller and Drive informationBus:1 Dev:0 Func:0 PLEXTOR PX-256M9PeGNNVMe Size 256.0GB | |
| →←: Select Screen↓: Select ItemEnter : Select+/- : Change Opt.F1 : General HelpF2 : Previous ValuesF3 : Optimized DefaultsF4 : Save & ExitESC: Exit | |
| Version 2.22.1291 Copyright (C) 2024 AMI | |
NVMe controller and Drive information
This item shows NVMe device information (Model Name, Size).
Press
Press
» USB Configuration
Use this item to show the information of USB configuration.
| Aptio Setup - AMI | |
| Advanced | |
| USB ConfigurationAll USB Devices [Enabled] | USB Support Parameters |
| →←: Select Screen↑↓: Select ItemEnter : Select+/- : Change Opt.F1 : General HelpF2 : Previous ValuesF3 : Optimized DefaultsF4 : Save & ExitESC : Exit | |
| Version 2.22.1291 Copyright (C) 2024 AMI | |
All USB Devices (Enabled)
Use this item to enable or disable all USB devices.
Press
» Super IO Configuration
Use this item to show the information of Super IO configuration.
| Aptio Setup - AMI | |
| Advanced | |
| Super IO Configuration | |
| Super IO Chip IT5571 | |
| EC Firmware Version 1.00 | →←: Select Screen↑↓: Select ItemEnter: Select+/-: Change Opt.F1: General HelpF2: Previous ValuesF3: Optimized DefaultsF4: Save & ExitESC: Exit |
| Version 2.22.1291 Copyright (C) 2024 AMI | |
Super IO Chip (IT5571)
This item shows the information of the super IO chip.
EC Firmware Eersion (1.00)
This item shows the information of EC firmware version.
» Trusted Computing
Use this item to show the information of trusted computing configuration.
| Aptio Setup - AMI | |
| TPM 2.0 Device FoundFirmware Version : 700.19Vendor : INTCTPM Support [Enabled]Active PCR banks SHA256Available PCR banks SHA256, SHA384, SM3SHA256 PCR Bank [Enabled]SHA384 PCR Bank [Disabled]SM3_256 PCR Bank [Disabled]Pending operation [None]Platform Hierarchy [Enabled]Storage Hierarchy [Enabled]Endorsement Hierarchy [Enabled]Physical Presence Spec Version [1.3]TPM 2.0 InterfaceType [CRB] | Enables or Disables BIOS support for security device, O.S. will not show Security Device.TCG EFI protocol and INT1A interface will not be available. |
| →←: Select Screen↑↓: Select ItemEnter : Select+/- : Change Opt.F1 : General HelpF2 : Previous ValuesF3 : Optimized DefaultsF4 : Save & ExitESC : Exit | |
| Version 2.22.1291 Copyright (C) 2024 AMI | |
TPM Support (Enabled)
Use this item to enable or disable the TPM support. O.S. will not show TPM. Reset of platform is required.
Active PCR banks (SHA256)
Use this item to show the Active PCR banks.
Available PCR banks (SHA256, SHA384, SM3)
Use this item to show the Available PCR banks.
SHA256 PCR Bank (Enabled)
Use this item to enable or disable the SHA256 PCR bank.
SHA384 PCR Bank (Disabled)
Use this item to enable or disable the SHA384 PCR bank.
SM3\_256 PCR Bank (Disabled)
Use this item to enable or disable the SM3_256 PCR bank.
Pending operation (None)
Schedule an Operation for the Security Device. NOTE: Your Computer will reboot during restart in order to change State of Security Device.
Platform Hierarchy (Enabled)
Use this item to enable or disable the platform hierarchy.
Storage Hierarchy (Enabled)
Use this item to enable or disable the storage hierarchy.
Endorsement Hierarchy (Enabled)
Use this item to enable or disable the Endorsement hierarchy.
Physical Presence Spec Version (1.3)
Use this item to show the Physical Presence Spec Version.
TPM 2.0 Interface Type (CRB)
Use this item to select the communication interface to TPM 20 device.
Press
Chipset Menu
The chipset menu items allow you to change the settings for the North Bridge chipset, South Bridge chipset and other system.
| Aptio Setup - AMI | |
| Main Advanced Chipset M.I.B.X Security Boot Exit | |
| System Agent Configuration PCH Configuration ME Configuration | System Agent (SA) Parameters. |
| →←: Select Screen ↑↓: Select Item Enter: Select +/-: Change Opt. F1: General Help F2: Previous Values F3: Optimized Defaults F4: Save & Exit ESC: Exit | |
| Version 2.22.1291 Copyright (C) 2024 AMI | |
» System Agent Configuration
Scroll to this item and press
| Chipset Aptio Setup - AMI | |
| System Agent Configuration IGD Memory [64M] GNA Device [Enable] NPU Device [Enable] | Select DVMT 5.0 Pre-Allocated (Fixed) Graphics Memory size used by the Internal Graphics Device. |
| HDMI CEC Control | →←: Select Screen ↑↓: Select Item Enter: Select +/-: Change Opt. F1: General Help F2: Previous Values F3: Optimized Defaults F4: Save & Exit ESC: Exit |
| Version 2.22.1291 Copyright (C) 2024 AMI | |
IGD Memory (64M)
This item shows the information of the IGD (Internal Graphics Device) memory.
GNA Device [Enable]
Use this item to enable or disable SA GNA Device.
NPU Device [Enable]
Use this item to enable or disable SA NPU Device.
▶ HDMI CEC Control
Scroll to this item to view the following screen:
| Chipset\Aptio Setup - AMI | |
| HDMI CEC ControlHDMI CEC Power On/Off [Disabled] | Enabled/Disabled HDMI CEC Power On/Off |
| →←: Select Screen↑↓: Select ItemEnter : Select+/- : Change Opt.F1 : General HelpF2 : Previous ValuesF3 : Optimized DefaultsF4 : Save & ExitESC : Exit | |
| Version 2.22.1291 Copyright (C) 2024 AMI | |
HDMI CEC Power ON/Off [Disabled]
This item enables or disables HDMI CEC function.
Press
» PCH Configuration
Scroll to this item and press
| Chipset\Aptio Setup - AMI | |
| PCH ConfigurationRestore AC Power Loss Power OffAudio ConfigurationHD Audio [Enabled] | Select AC power state when power is re-applied after a power failure. |
| →←: Select Screen↑↓: Select ItemEnter: Select+/-: Change Opt.F1: General HelpF2: Previous ValuesF3: Optimized DefaultsF4: Save & ExitESC: Exit | |
| Version 2.22.1291 Copyright (C) 2024 AMI | |
Restore AC Power Loss (Power Off)
This item enables your computer to automatically restart or return to its operating status.
HD Audio (Enabled)
This item enables or disables Azalia HD audio.
Press
» ME Configuration
Scroll to this item and press
| Chipset | |
| Management Engine Technology ConfigurationME Control [Enabled]ME FW Version 18. 0. 5. 2098 | Enabled/Disabled ME Firmware. |
| →←: Select Screen↑↓: Select ItemEnter : Select+/-: Change Opt.F1: General HelpF2: Previous ValuesF3: Optimized DefaultsF4: Save & ExitESC : Exit | |
| Version 2.22.1291 Copyright (C) 2024 AMI | |
ME Control (Enabled)
Use this item to enable or disable the ME Firmware.
ME FW Version (18. 0. 5. 2098)
This item shows the ME FW version.
Press
M. I. B. X Menu
This page enables you to set the clock speed and system bus for your system. The clock speed and system bus are determined by the kind of processor you have installed in your system.
| Aptio Setup - AMI | |
| Main Advanced Chipset M.I.B.X Security Boot Exit | |
| M. I. B. X (MB Intelligent BIOS X)CPU OverClocking ConfigurationIntel(R) Core(TM) Ultra 7 155HProcessor Speed 2000 MHzMemory Frequency 5600 MHzTotal Memory 8192 MB | CPU OverClocking Configuration |
| ← ← : Select Screen↑↓ : Select ItemEnter : Select+/- : Change Opt.F1 : General HelpF2 : Previous ValuesF3 : Optimized DefaultsF4 : Save & ExitESC : Exit | |
| Version 2.22.1291 Copyright (C) 2024 AMI | |
Intel(R) Core(TM) Ultra 7 155H
This is display-only field and displays the information of the CPU installed in your computer.
Processor Speed (2000 MHz)
This item shows the processor speed.
Memory Frequency (5600MHz)
This item shows the information of the memory frequency.
This item shows the information of the total memory.
» CPU OverClocking Configuration
Scroll to this item and press
| Aptio Setup - AMIM. I. B. X | ||
| EIST | [Enabled] | Enhanced Intel SpeedStep Technology |
| Turbo Boost [Enabled] | ||
| Power Limit 1 Override | [Enabled] | |
| Power Limit 1 Value | Maxium | |
| Power Limit 1 Time Window [28] | ||
| Power Limit 2 Override | [Enabled] | |
| Power Limit 2 Value | Maxium | |
| ► Power Limit 3 Settings | ||
| ► Power Limit 4 Settings | ||
| Boot performance mode [Max Non-Turbo Perf...] | ||
| TDP Lock | [Disabled] | |
| CPU Ratio | 20 | |
| P-core Turbo Ratio Limit Ratio0 (T) | 48 | →←: Select Screen↑↓: Select ItemEnter: Select+/-: Change Opt.F1: General HelpF2: Previous ValuesF3: Optimized DefaultsF4: Save & ExitESC: Exit |
| P-core Turbo Ratio Limit Ratio1 (T) | 48 | |
| P-core Turbo Ratio Limit Ratio2 (T) | 48 | |
| P-core Turbo Ratio Limit Ratio3 (T) | 48 | |
| P-core Turbo Ratio Limit Ratio4 (T) | 46 | |
| P-core Turbo Ratio Limit Ratio5 (T) | 46 | |
| E-core Turbo Ratio Limit Ratio0 (T) | 38 | |
| E-core Turbo Ratio Limit Ratio1 (T) | 38 | |
| E-core Turbo Ratio Limit Ratio2 (T) | 38 | |
| E-core Turbo Ratio Limit Ratio3 (T) | 38 | |
| Version 2.22.1291 Copyright (C) 2024 AMI | ||
EIST (Enabled)
This item allows users to enable or disable the EIST (Enhanced Intel SpeedStep Technology).
Turbo Boost (Enabled)
Use this item to enable or disable the turbo boost.
Power Limit 1 Override (Enabled)
Use this item to enable or disable the Power Limit 1 Override. If this option is disabled, BIOS will program the default values for Power Limit 1.
Power Limit 1 Value (Maximum)
Power limit 1 in Milli Watts and stepsize is 125mW .XE SKU: Any value can be programmed. Overclocking SKU: Value must be between Max and Min Power Limits (specified by PACKAGE_POWER_SKU_MSR). Other SKUs: This value must be between Min Power Limit and TDP Limit. If value is 0, BIOS will program TDP value.
Power Limit 1 Time Window (28)
Power limit 1 Time Window value in seconds. The value may vary from 0 to 128. If the value is 0, default values will be programmed (28 sec for Mobile and 1 sec for Desktop). Indicates the time window over which TDP value should be maintained.
Power Limit 2 Override (Enabled)
Use this item to enable or disable the Power Limit 2 Override. If this option is disabled, BIOS will program the default values for Power Limit 2.
Power Limit 2 Value (Maximum)
Power limit 2 value in Milli Watts and stepsize is 125mW. If the value is 0, BIOS will program this value as 1.25*TDP. Processor applies control policies such that the package power does not exceed this limit.
» Power Limit 3 Settings
Scroll to this item and press
| Aptio Setup - AMIM. I. B. X | |
| Power Limit 3 SettingsPower Limit 3 Override [Disabled] | Enable/DisablePower Limit 3 override. If this option is disabled, BIOS will leave the default values for Power Limit 3 and Power Limit 3 Time Window. |
| → ← : Select Screen↑↓ : Select ItemEnter : Select+/- : Change Opt.F1 : General HelpF2 : Previous ValuesF3 : Optimized DefaultsF4 : Save & ExitESC : Exit | |
| Version 2.22.1291 Copyright (C) 2024 AMI | |
Power Limit 3 Override (Disabled)
Use this item to enable or disable the Limit 3 Override. If this option is disabled, BIOS will leave the default values for Power Limit 3 and power limit 3 time window.
Press
» Power Limit 4 Settings
Scroll to this item and press
| Aptlo Setup - AMIM. I. B. X | |
| Power Limit 4 SettingsPower Limit 4 Override [Enabled]Power Limit 4 Power Limit 4 Lock 120000 [Disabled] | Enable/DisablePower Limit 4 override. If this option is disabled, BIOS will leave the default values for Power Limit 4. |
| →←: Select Screen↑↓: Select ItemEnter : Select+/-: Change Opt.F1 : General HelpF2 : Previous ValuesF3 : Optimized DefaultsF4 : Save & ExitESC : Exit | |
| Version 2.22.1291 Copyright (C) 2024 AMI | |
Power Limit 4 Override (Enabled)
Use this item to enable or disable the Limit 4 Override. If this option is disabled, BIOS will leave the default values for Power Limit 4 and power limit 4 time window.
Power Limit 4 (120000)
Use this item to set the value of Power Limit 4.
Power Limit 4 Lock (Disabled)
Use this item to enable or disable Power Limit 4 lock.
Press
Boot Performance mode (Max Non-Turbo Perfor...)
Use this item to select the performance state that the BIOS will set before OS handoff.
TDP Lock (Disabled)
This item allows you to enable or disable the Package TDP lock.
CPU Ratio (20)
This item allows you to control CPU ratio.
P-core Turbo Ratio Limit Ration 0/1/2/3/4/5 (48/48/48/48/46/46)
Use these items to set the P-coreTurbo Ratio Limit Ratio value.
E-core Turbo Ratio Limit Ration 0/1/2/3 (38/38/38/38)
Use these items to set the E-coreTurbo Ratio Limit Ratio value.
Press
Security Menu
This page enables you to set setup administrator password and user password.
| Aptio Setup - AMI | |
| Main Advanced Chipset M. I. B. X Security Boot Exit | |
| Administrator PasswordAdministrator Password Status Not InstallUser Password Status Not InstallSystem Mode state SetupSecure Boot state Not ActiveSecure Boot [Enabled]Secure Boot Mode [Standard] | Set Administrator Password→←: Select Screen↑↓: Select ItemEnter: Select+/-: Change Opt.F1: General HelpF2: Previous ValuesF3: Optimized DefaultsF4: Save & ExitESC: Exit |
| Version 2.22.1291 Copyright (C) 2024 AMI | |
Administrator Password Status (Not Install)
This item shows administrator password installed or not.
User Password Status (Not Install)
This item shows user password installed or not.
System Mode state (Setup)
This item shows system mode setup or not.
Secure Boot state (Not Active)
This item allows you to enable or disable the secure boot state.
Secure Boot (Enabled)
This item is used to control the secure boot flow, it is possible only if system runs in User Mode.
Secure Boot Mode (Standard)
This item is used to select the secure boot mode.
Boot Menu
This page enables you to set the keyboard NumLock state.
| Aptio Setup - AMI | |
| Main Advanced Chipset M. I. B. X Security Boot Exit | |
| Boot ConfigurationFast Boot [Disabled]Bootup NumLock State [On]Quiet Boot [Enabled]FIXED BOOT ORDER PrioritiesBoot Option #1 [Hard Disk]Boot Option #2 [NVME: Windows Boot...]Boot Option #3 [CD/DVD]Boot Option #4 [USB Floppy]Boot Option #5 [USB CD/DVD]Boot Option #6 [USB Hard Disk: UEFI...]Boot Option #7 [USB Key]Boot Option #8 [Network]Boot Option #9 [Other Device]UEFI NVME Drive BBS PrioritiesUEFI USB Hard Disk Drive BBS PrioritiesBoot Option #1 [Windows Boot Manag...] | Enable or disables Boot with initialization of a minimal set of devices required to launch active boot option. Has no effect for BBS boot options. |
| ← : Select Screen↑↓ : Select ItemEnter : Select+/- : Change Opt.F1 : General HelpF2 : Previous ValuesF3 : Optimized DefaultsF4 : Save & ExitESC : Exit | |
| Version 2.22.1291 Copyright (C) 2024 AMI | |
This item enables or disables boot with initialization of a minimal set of device required to launch active boot option. Has no effect for BBS boot options.
Bootup NumLock State (On)
This item enables you to select NumLock state.
Quiet Boot (Enabled)
This item enables or disables quiet boot.
These items show the boot priorities.
▶UEFI NVME Drive BBS Priorities
This item enables you to specify the sequence of loading the operating system from the installing NVME drive. Press
▶UEFI USB Hard Disk Drive BBS Priorities
This item enables you to specify the sequence of loading the operating system from the installing USB Hard Disk drive. Press
Exit Menu
This page enables you to exit system setup after saving or without saving the changes.
| Aptio Setup - AMI | |
| Main Advanced Chipset M. I. B. X Security Boot Exit | |
| Save Changes and ExitDiscard Changes and ExitSave Changes and ResetDiscard Changes and ResetSave OptionsSave ChangesDiscard ChangesRestore DefaultsSave as User DefaultsRestore User DefaultsBoot OverrideWindows Boot Manager (PLEXTOR PX-256M9PeGN)UFFI: KingstonDataTraveler 3.0PMAP, Partition 1 (Kingsto... | Exit system setup after saving the changes. |
| →← : Select Screen↑↓ /Click : Select ItemEnter/Dbl Click : Select+/- : Change Opt.F1 : General HelpF2 : Previous ValuesF3 : Optimized DefaultsF4 : Save & ExitESC/Right Click : Exit | |
| Version 2.22.1291 Copyright (C) 2024 AMI | |
Save Changes and Exit
This item enables you to exit the system setup after saving the changes.
Discard Changes and Exit
This item enables you to exit system setup without saving any changes.
Save Changes and Reset
This item enables you to reset system setup after saving the changes.
Discard Changes and Reset
This item enables you to reset system setup without saving any changes.
Save Options
This item enables you to save the options that you have made.
Save Changes
This item enables you to save the changes that you have made.
Discard Changes
This item enables you to discard any changes that you have made.
Restore Defaults
This item enables you to restore defaults to all the setup options.
Save as User Defaults
This item enables you to save the changes that you have made as user defaults.
This item enables you to restore the user defaults.
Boot Override
Use this item to select the boot device.
Updating the BIOS
You can download and install updated BIOS for this motherboard from the manufacturer's Website. New BIOS provides support for new peripherals, improvements in performance, or fixes for known bugs. Install new BIOS as follows:
1 If your motherboard has a BIOS protection jumper, change the setting to allow BIOS flashing.
2 If your motherboard has an item called Firmware Write Protect in Advanced BIOS features, disable it. (Firmware Write Protect prevents BIOS from being overwritten.)
3 Prepare a bootable device or create a bootable system disk. (Refer to Windows online help for information on creating a bootable system disk.)
4 Download the Flash Utility and new BIOS file from the manufacturer's Web site. Copy these files to the bootable device.
5 Turn off your computer and insert the bootable device in your computer. (You might need to run the Setup Utility and change the boot priority items on the Advanced BIOS Features Setup page, to force your computer to boot from the bootable device first.)
6 At the fs0:> prompt, type the Flash Utility program name and the file name of the new BIOS and then press
7 When the installation is complete, remove the bootable device from the computer and restart your computer. If your motherboard has a Flash BIOS jumper, reset the jumper to protect the newly installed BIOS from being overwritten. The computer will restart automatically.
This concludes Chapter 3. Refer to the next chapter for information on the software supplied with the motherboard.
Memo
Chapter 4 Trouble Shooting
Troubleshooting and problem solution
After assembling the PC for the first time you may experience some start up problems. Before calling for technical support or returning for warranty, this chapter may help to address some of the common questions using some basic troubleshooting tips.
a) Boot up failed.
-
Use the specified adapter provided by ECS
-
Check whether the adapter has been plugged in.
-
Check the connection between adapter and the system.
-
Check that the power button can be pushed normally. If it is successfully power on, the white light from LED will show up.
-
If the boot up problem still exists after these checking steps, please turn to local dealer or repair center for further customer service.
b) Black screen or no image is displayed on the monitor.
-
Check whether the monitor has been turned on or works normally on other system.
-
Check whether the system has been power on successfully.
-
Check the cable is securely inserted into rear IO ports(VGA/HDMI) and also at monitor side (VGA/HDMI).
-
If the display problem still exists after checking steps, please turn to local dealer or repair center for further customer service.
c) Display Error
- Check whether the driver is correctly installed in "Device Manager". If there is yellow mark or unknown devices message shown in the list, please reinstall the driver via the official Driver DVD.

- From the BIOS setting, try to disable the Smartfan function to let the fan run at default speed. Doing a Load Optimised Default will also disable the Smartfan.

d) Wire LAN connecting failed.
-
Check whether the LAN driver is correctly installed in "Device Manager". If there is yellow mark or unknown devices message shown in the list, please reinstall the driver via the official Driver DVD.
-
Ensure the LAN cable is securely inserted to the RJ45 port and the LED light flashes normally.
-
Check IP address.
-
If the LAN connection problem still exists after these checking steps, please turn to local dealer or repair center for further customer service.
e) Wireless LAN connecting failed
-
Check whether the WLAN card driver is correctly installed in "Device Manager". If there is yellow mark or unknown devices message shown in the list, please reinstall the driver via the official Driver DVD.
-
Check the WIFI in your working area is well functional and has good reception.
-
If the WIFI connection problem still exists after these checking steps, please turn to local dealer or repair center for further customer service.
f) No sound from audio combo jack
- Check whether the audio driver is correctly installed in "Device Manager". If there is yellow mark or unknown devices message shown in the list, please reinstall the driver via the official Driver DVD.
- After connecting the speaker or header phone, adjust audio setting in Control panel> Hardware and sound.

Note: Due to chipset limitation, the mic function of audio codec AL282 can be only compatibel to iPhone devices.
- If the audio problem still exists after these checking steps, please turn to local dealer or repair center for further customer service.
Memo
- Preface
- Copyright
- Disclaimer
- Trademark Recognition
- Federal Communications Commission (FCC)
- Declaration of Conformity
- Safety Precautions - Static Electricity
- Safety Instructions
- Safety cautions and warnings
- Nordic Lithium Cautions (for lithium-ion batteries)
- Warning
- Preface....i
- Chapter 1
- Introducing the PC
- Chapter 2
- Installing the PC
- Chapter 3
- Using BIOS
- Chapter 4
- Trouble Shooting
- Chapter 1 Introducing the PC
- Introduction
- Specifications
- Front I/O
- Rear I/O
- Install the VESA Mount
- Packing Contents
- Chapter 2 Installing the PC
- System Quick Installation
- About the Setup Utility
- The Standard Configuration
- Entering the Setup Utility
- BIOS Navigation Keys
- Default
- Advanced
- Exit
- Main Menu
- System Language (English)
- System Date & Time
- Advanced Menu
- » LAN Configuration
- » PC Health Status
- System Component Characteristics
- TCC Activation Temperature (DTS) (110)
- » Power Management Setup
- Resume By RING (Disabled)
- Resume By USB (Disabled)
- Resume By RTC Alarm (Disabled)
- EUP Function (Enabled)
- » CPU Configuration
- Intel(R) Speed Shift Technology (Enabled)
- » SATA Configuration
- SATA Mode Selection (AHCI)
- SATA Port 1 (Not Present)
- ▶ NVMe Configuration
- NVMe controller and Drive information
- » USB Configuration
- All USB Devices (Enabled)
- » Super IO Configuration
- Super IO Chip (IT5571)
- EC Firmware Eersion (1.00)
- » Trusted Computing
- TPM Support (Enabled)
- Active PCR banks (SHA256)
- Available PCR banks (SHA256, SHA384, SM3)
- SHA256 PCR Bank (Enabled)
- SHA384 PCR Bank (Disabled)
- SM3\_256 PCR Bank (Disabled)
- Pending operation (None)
- Platform Hierarchy (Enabled)
- Storage Hierarchy (Enabled)
- Endorsement Hierarchy (Enabled)
- Physical Presence Spec Version (1.3)
- TPM 2.0 Interface Type (CRB)
- Chipset Menu
- » System Agent Configuration
- IGD Memory (64M)
- GNA Device [Enable]
- NPU Device [Enable]
- ▶ HDMI CEC Control
- HDMI CEC Power ON/Off [Disabled]
- » PCH Configuration
- Restore AC Power Loss (Power Off)
- HD Audio (Enabled)
- » ME Configuration
- ME Control (Enabled)
- ME FW Version (18. 0. 5. 2098)
- I. B. X Menu
- Intel(R) Core(TM) Ultra 7 155H
- Processor Speed (2000 MHz)
- Memory Frequency (5600MHz)
- » CPU OverClocking Configuration
- EIST (Enabled)
- Turbo Boost (Enabled)
- Power Limit 1 Override (Enabled)
- Power Limit 1 Value (Maximum)
- Power Limit 1 Time Window (28)
- Power Limit 2 Override (Enabled)
- Power Limit 2 Value (Maximum)
- » Power Limit 3 Settings
- Power Limit 3 Override (Disabled)
- » Power Limit 4 Settings
- Power Limit 4 Override (Enabled)
- Power Limit 4 (120000)
- Power Limit 4 Lock (Disabled)
- Security Menu
- Administrator Password Status (Not Install)
- User Password Status (Not Install)
- System Mode state (Setup)
- Secure Boot state (Not Active)
- Secure Boot (Enabled)
- Secure Boot Mode (Standard)
- Boot Menu
- Bootup NumLock State (On)
- Quiet Boot (Enabled)
- ▶UEFI NVME Drive BBS Priorities
- ▶UEFI USB Hard Disk Drive BBS Priorities
- Exit Menu
- Save Changes and Exit
- Discard Changes and Exit
- Save Changes and Reset
- Discard Changes and Reset
- Save Options
- Save Changes
- Discard Changes
- Restore Defaults
- Save as User Defaults
- Boot Override
- Updating the BIOS
- Chapter 4 Trouble Shooting
- Troubleshooting and problem solution
- a) Boot up failed.
- b) Black screen or no image is displayed on the monitor.
- c) Display Error
- d) Wire LAN connecting failed.
- e) Wireless LAN connecting failed
- f) No sound from audio combo jack
Brand : ECS
Model : LIVA Z7 PLUS
Category : Desktop computer