OT100E - Oven Khind - Free user manual and instructions
Find the device manual for free OT100E Khind in PDF.


| Product Type | Electric Oven |
| Model | OT100E |
| Brand | Khind |
| Voltage | 220-240V~50/60Hz |
| Power Consumption | 2200W |
| Capacity | 100 Litres |
| Net Weight | 16.2 kg |
| Product Dimensions | 682 x 560 x 425 mm |
| Door Type | Tempered Glass Door |
| Heating Elements | Upper and Lower |
| Functions | Convection, Rotisserie, Upper Heat, Lower Heat, Combination |
| Temperature Control | Adjustable thermostat |
| Timer | Up to 15 minutes (mechanical timer with bell) |
| Accessories Included | 2 Baking Trays, 1 Bake Rack, Rotisserie Spit, Rotisserie Spit Handle, Tray Handle |
| Safety Features | Hot surface warning, automatic shut-off when timer ends, supervision required |
| Cleaning Instructions | Wipe with soft cloth and neutral cleaner; wash rack and tray in hot water |
| Usage | Household use only |
| Warranty | Refer to manufacturer |
Frequently Asked Questions - OT100E Khind
User questions about OT100E Khind
0 question about this device. Answer the ones you know or ask your own.
Ask a new question about this device
Download the instructions for your Oven in PDF format for free! Find your manual OT100E - Khind and take your electronic device back in hand. On this page are published all the documents necessary for the use of your device. OT100E by Khind.
USER MANUAL OT100E Khind
natural_image
Abstract grayscale graphic with white silhouettes of a globe and a human figure, no text or symbols present.Electric Oven/电烘炉/Oven Elektrik
Instruction Manual / 说明指示书/Buku Panduan
Please read this manual carefully before operating this product. Keep this manual handy for further reference. 请在使用此产品前,详读此说明书。并将之收藏以作日后参考。
Safety and Warning Information
- Carefully read all instructions before operating this appliance.
- Do not use this appliance if the cord or plug is damaged, or if this unit is malfunctioned or damaged in any way.
-
This appliance is not intended for use by persons (including children) with reduced physical, sensory or mental capabilities, or lack of experience and knowledge, unless they have been given supervision or instruction concerning use of the appliance by a person responsible for their safety.
Children should be supervised to ensure that they do not play with the appliance. -
If the supply cord is damaged, it must be replaced by the manufacturer, its service agent or similarly qualified persons in order to avoid a hazard.
-
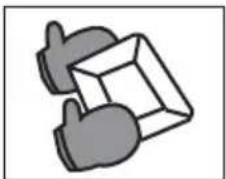
CAUTION! The temperature of accessible surfaces may be high when the appliance is operating. Do not touch the appliance's surface during and after operating, it will be very hot! Always wear oven insulated gloves when inserting or removing food from the appliance.
natural_image
Illustration of two stylized hand gestures exchanging a cardboard box (no text or symbols)
CAUTION! Hot Surface
- This appliance is intended for household use only. Do not use the appliance other than its intended use.
- The appliance is not intended to be operated by means of an external timer or separate remote-control system.
- Do not place the appliance near a hot gas or electric burner.
- Allow 4 inches of free space clearance on all sides when operating the appliance to provide adequate air circulation.
- Do not cover Baking Tray or any part of the appliance with metal foil (to prevent overheating). The metal foil can be used for wrapping the food to be baked on the baking tray.
- Be careful when removing hot tray or when disposing hot grease or other liquids.
- Do not leave the appliance unattended while broiling or roasting food.
- Oversized food or metal containers must not be inserted into the appliance as they may cause fire or electric shocks.
- Do not place any items on top of the appliance while in operation. Inflammable liquids can cause fire.
- Extreme caution must be exercised while using containers other than ceramic or metal in the appliance.
- Do not place the following materials in the appliance when operating.
1) Cardboard
2) Plastic bag
3) Other combustible materials. - Do not store materials or utensils in the appliance other than the accessories provided.
Cleaning & Maintenance
- Always switch off the appliance, unplug from the mains and let the appliance is cooled down when the appliance is not in use or before cleaning or before putting on or taking off accessories.
- To clean the appliance, wipe with a soft cloth or sponge dipped in neutral cleaning solution. Do not use a hard brush, it may scratch surfaces.
- Wash baking rack & baking tray in hot water with a sponge after each use.
- Do not use abrasive cleaner like thinner or solvent to clean the appliance.
Parts Identification
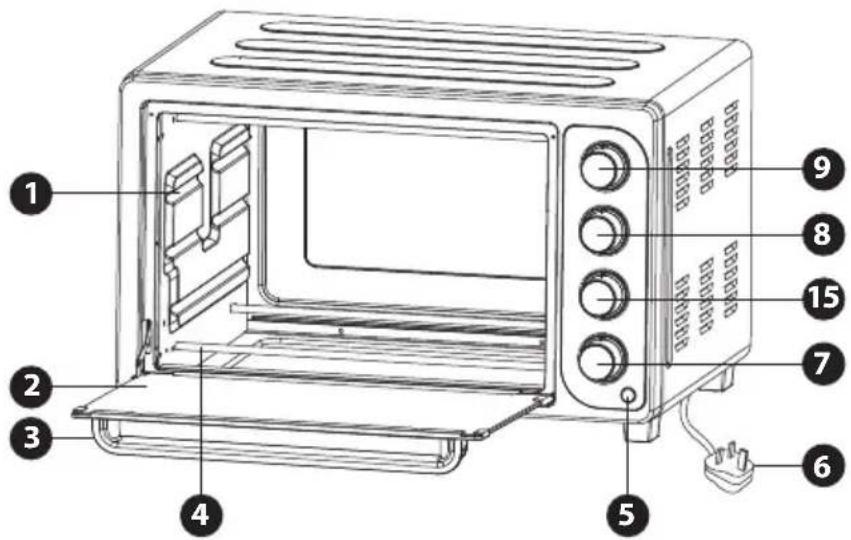
- Rack Support Guides
- Tempered Glass Door
- Door Handle
- Heating Element
- Power ON Indicator
- Power Cord
- Timer Selector Knob
- Cooking Function Selector Knob
- Temperature Selector Knob
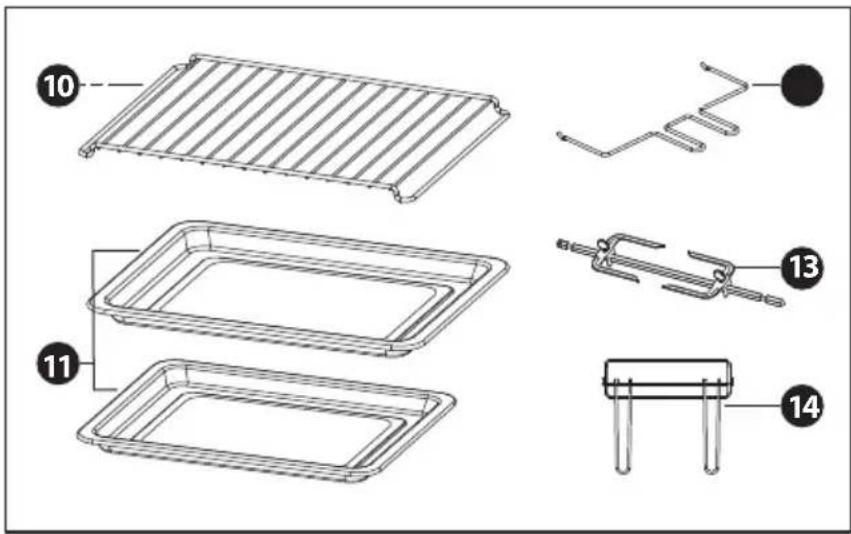
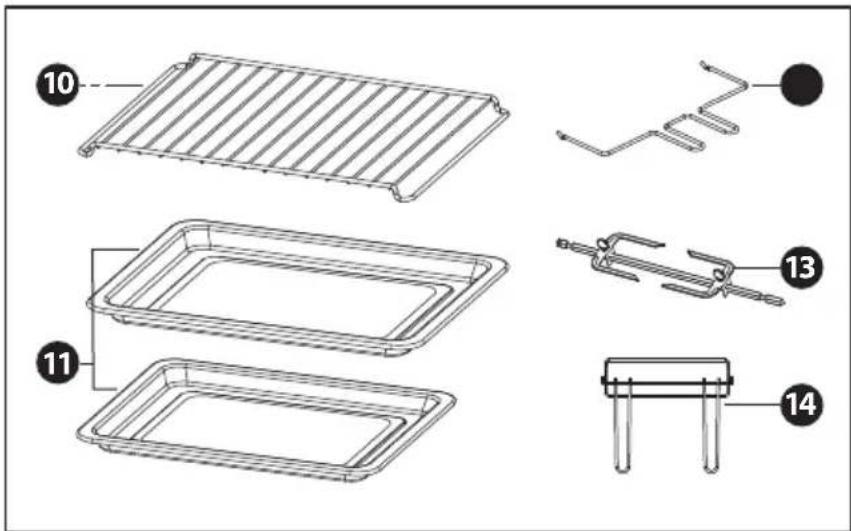
- Bake Rack
- Baking Tray x2
- Rotisserie Spit Handle
- Rotisserie Spit
- Tray Handle
- Heating Selector Knob
*Pictures are for illustration purpose only.
Specifications
| Model | : OT100E |
| Voltage | : 220-240V~50/60Hz |
| Power | : 2200W |
| Capacity | : 100 Litres |
| Net Weight | : 16.2kg |
| Product Dimension | : 682 x 560 x 425mm |
*Specifications are subject to change without prior notice.
How To Use
natural_image
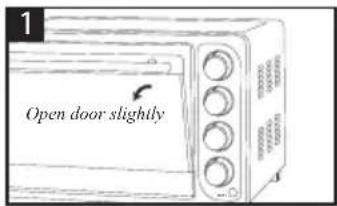
Illustration of a microwave oven with a hand holding an electrical outlet (no text or symbols)- When using for the first time: Wipe interior surfaces and accessories with wet cloth. Open door slightly, select both Upper and Lower heating Elements and set time to 15 minutes. In a few minutes, some smoke and smell may come out of the appliance. Do not worry. It is normal.
- Prepare food to be cooked. Allow the appliance to preheat for 15 minutes.
(For the appliance to heat up to selected temperature)
- Spread oil or magazine on baking tray before placing food. Insert baking tray into oven. Close door.
- Select required temperature and time for cooking.
- When Food is cooked on baking rack, insert baking tray into the lowest shelves. Latch to prevent oil grease dripping onto lower heater.
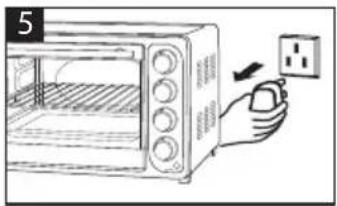
- Adjust all Selectors to OFF position after use. Unplug from AC mains.
flowchart
graph TD
    A["Position1"] --> B["Position2"]
    B --> C["Position3"]
    C --> D["Position4"]
    style A fill:#f9f,stroke:#333
    style B fill:#ccf,stroke:#333
    style C fill:#cfc,stroke:#333
    style D fill:#fcc,stroke:#333
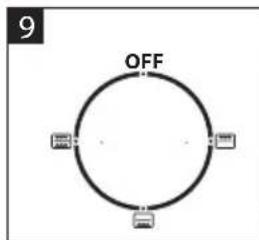
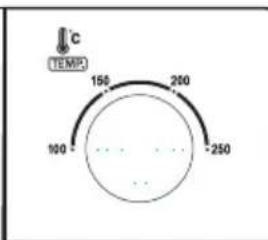
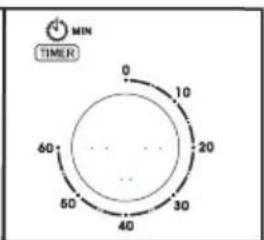
Step 1
Step 2
Step 3
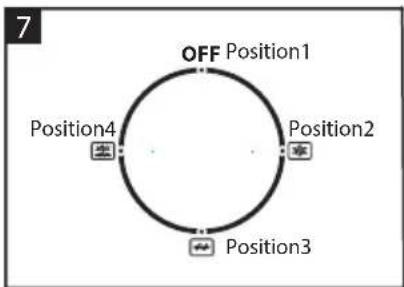
- Cooking Function Selector Knob
The Heat Selector control the operation of the Upper and Lower Heater Elements.
Position1 - OFF
Position2 - Operates Convection.
Position3 - Operates Rotisserie.
Position4 - Operates both Convection and Rotisserie.
- Power ON indicator : illuminated whenever oven is turned on.
Bake rack : use in broiling and roasting meat, poultry, fish and various types of food.
Rotisserie spit : use to roast a variety of meat and poultry.
Rotisserie spit handle : to remove hot rotisserie spit from oven.
- Heating Selector Knob
Step 1 - Set your desired heating way (top, bottom or both).
Step 2 - Select required cooking temperature.
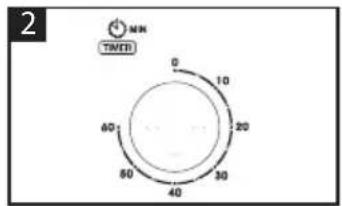
Step 3 - Select required cooking time. Turn the knob clockwise to set the time. Bell rings at the end of cooking time.
How to use
# Cooking Tips
1) Lower Heating Element: for baking cake, pies, cookies.
2) Upper & Lower Heating Element & Convection: for toasting bread, pizza, fish, steak, poultry, chicken, etc., with more even heating.
3) Upper Heating Element & Convection: for broiling fish, steak, poultry, etc., with more even heating.
4) Upper & Lower Heating Element: for baking bread, muffins, pizza etc.
5) Upper Heating Element & Rotisserie: for broiling meat loaf, steak, poultry, chicken, etc., spinning the food.
6) Upper & Lower Heating Element & Convection & Rotisserie : for toasting meat loaf, steak, poultry, chicken, etc., spinning the food with more even heating.
10. Rotisserie Cooking Function
- Insert Rotisserie Spit as shown in diagram A and B.
- Tip: Do not cook more than 3.5 kg of food with Rotisserie Function.
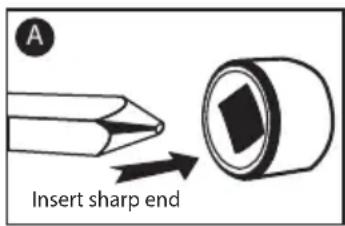
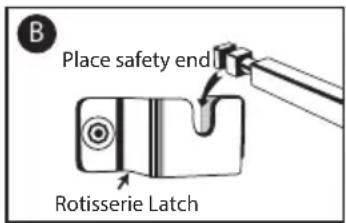
- Select cooking temperature, heat source, function & time to start cooking.
# Cooking Tips
1) Prepare chicken and insert rotisserie spit into chicken (or other food). Then secure chicken with the clamp attached with rotisserie spit. Use satay stick (or other device) to bind chicken wings to body. Insert rotisserie spit with food secured (see diagram No.10). Select rotisserie and upper heater. Select required temperature. Select required time.
2) Defrost function. Recommendation setting: set the temperature to 100^ C, select lower heating element & convection function. Defrosting time: 40 to 50 minutes, depending on the size of the food. You may also refer to the recommended defrosting instruction available in food packaging.
Note
Rotisserie may stop turning during cooking operations. This is because the desired temperature is achieved and power to the heater is cut off. When temperature drops, the appliance will resume power to the heater and rotisserie will turn again. The rotisserie will also stop turning when the pre set time is reached.
To set cooking time less then 10 minutes, please turn the timer selector knob exceed the 10 minutes first and then return to the desired time setting.
natural_image
Illustration of two stylized hands holding a cardboard box (no text or symbols)
BERHATI-HATI! Permukaan Panas
Brand : Khind
Model : OT100E
Category : Oven