
IVDFI400/1 - Dishwasher ILVE - Free user manual and instructions
Find the device manual for free IVDFI400/1 ILVE in PDF.


| Product Type | Built-in Dishwasher |
| Brand | Ilve |
| Model | IVDFI400/1 |
| Dimensions (H x W x D) | 85 x 60 x 60 cm |
| Weight | 45 kg |
| Power Supply | 220-240 V, 50 Hz, 10 A |
| Energy Efficiency Class | A++ |
| Number of Place Settings | 14 |
| Noise Level | 44 dB |
| Wash Programs | Eco, Intensive, Rapid, Glass, 90 min |
| Drying System | Heat exchanger |
| Interior Material | Stainless steel |
| Adjustable Racks | Yes (upper basket height adjustable) |
| Cutlery Basket | Removable, with fold-down sections |
| Child Lock | Yes |
| Overflow Protection | AquaStop |
| Filter Type | Self-cleaning microfilter |
| Maintenance | Clean filters monthly, descale every 3 months |
| Spare Parts Availability | Racks, filters, spray arms, heating element |
| Repairability Index | 7.5 / 10 |
Frequently Asked Questions - IVDFI400/1 ILVE
User questions about IVDFI400/1 ILVE
0 question about this device. Answer the ones you know or ask your own.
Ask a new question about this device
Download the instructions for your Dishwasher in PDF format for free! Find your manual IVDFI400/1 - ILVE and take your electronic device back in hand. On this page are published all the documents necessary for the use of your device. IVDFI400/1 by ILVE.
USER MANUAL IVDFI400/1 ILVE
Thank you for choosing this product.
This User Manual contains important information on safety and instructions intended to assist you in the operation and maintenance of your appliance.
Please take the time to read this User Manual before using your appliance and keep this book for future reference.
| Icon Type Meaning | |
 | WARNING Serious injury or death risk |
 | RISK OF ELECTRIC SHOCK Dangerous voltage risk |
 | FIRE Fire risk |
 | CAUTION Injury or property damage risk |
 | IMPORTANT / NOTE Operating the system correctly |
CONTENTS
1.SAFETY INSTRUCTIONS .... 1
1.1. General Safety Warnings .... 1
1.2. Installation Warnings .... 1
1.3. During Use....2
2.INSTALLATION 6
2.1. Machine Positioning ....6
2.2. Water Connection 6
2.3. Water Inlet Hose 6
2.4. Drain Hose....6
2.5. Electrical Connection ....7
2.6. Fitting the Machine Undercounter ....7
3.TECHNICAL SPECIFICATIONS 8
3.1. General Appearance....8
3.2. Technical Specifications ....8
4.BEFORE USING THE APPLIANCE 9
4.1. Setting 10
4.2. Detergent Usage 10
4.3. Filling the Detergent 11
4.4. Using Combined Detergents 11
4.5. Rinse-aid Usage 11
4.6. Filling the Rinse-aid and Setting 11
5.LOADING YOUR DISHWASHER ....11
5.1. Recommendations.... 11
5.2. Alternative Basket Loads 13
6.PROGRAMME TABLE 14
7. THE CONTROL PANEL.... 15
7.1. Changing a Programme ....15
7.2. Cancelling a Programme ....16
7.3. Switching the Machine Off 16
8.CLEANING AND MAINTENANCE 17
8.1. Cleaning the Machine and Filters ...... 17
8.2. Spray Arms 17
9.TROUBLESHOOTING 18
10.PRACTICAL INFORMATION 20
11. THE PRODUCT FICHE 21
1. SAFETY INSTRUCTIONS
1.1. General Safety Warnings
- Read these instructions carefully before using your appliance and keep this manual for future reference.
⚠️ Please check the packaging of your machine before installation and the outer surface of the machine once the packaging has been removed. Do not operate the machine if it appears damaged or if the packaging has been opened. - Packaging materials protect your machine from any damage that might occur during transportation. The packaging materials are environmentally friendly as they are recyclable. Use of recycled material reduces raw material consumption and decreases waste production.
This appliance can be used by children aged from 8 years and above, and by persons with reduced physical, sensory or mental capabilities or lack of experience and knowledge if they have been given supervision or instruction concerning the use of the appliance in a safe way and understand hazards involved. Children should not be allowed to play with the appliance.
⚠️ Remove packaging and keep it out of reach of children.
⚠️ Keep children away from detergents and rinse aids.
There may be some residue left in the machine after washing. Keep children away from the machine when it is open.
1.2. Installation Warnings
- Choose a suitable and safe place to install your machine.
- Only original spare parts should be used with the machine.
⚠️! Unplug the machine before installation.
⚠️ Your machine must only be installed by an authorised service agent. Installation by anyone other than an authorised agent may cause your warranty to be void.
⚠️ Check that the indoor electrical fuse system is connected in line with safety regulations.
All electrical connections must match the values on the plate.
⚠️! Ensure the machine does not stand on the electrical supply cable.
⚠️Never use an extension cord or a multiple socket connection.
⚠️ The plug should be accessible after the machine is installed.
• After installation, run your machine unloaded for the first time.
The machine must not be plugged in during positioning.
⚠️ Always use the coated plug supplied with your machine.
△△! If the electrical cable is damaged, it should only be replaced by a qualified electrician.
1.3. During Use
- This machine is for domestic use only; do not use
- it for other purposes. Commercial use will void the guarantee.
Do not stand, sit or place loads on the open door of the dishwasher.
⚠️ Only use detergents and rinse aids produced specifically for dishwashers. Our company is not responsible for any damage that may occur due to misuse.
⚠️Do not drink water from the machine.
Due to the danger of explosion, do not place any chemical dissolving agents into the machine's washing section.
- Check the heat-resistance of plastic items before washing them in the machine.
⚠️ Only put items in the machine which are suitable for dishwashing, and take care not to overfill the baskets.
⚠️Do not open the door while the machine is in operation, hot water may spill out. Safety devices ensure the machine stops if the door is opened.
⚠️ The machine door should not be left open. It may cause accidents.
⚠️Place knives and other sharp objects in the cutlery basket in a blade-down position.
⚠ In the case of a malfunction, repair should only be performed by an authorised service company, otherwise the warranty will be void.
△! Before repair work, the machine should be disconnected from the mains. Do not pull the cable to unplug the machine. Switch off the water tap.
Operation at a low voltage will cause a decline in performance levels.
⚠ For safety, disconnect the plug once a program has finished.
To avoid an electric shock, do not unplug the machine with wet hands.
⚠️! Pull the plug to disconnect the machine from the mains, never pull on the cord.
RECYCLING
- Some machine components and packaging consist of recyclable materials.
- Plastics are marked with the international abbreviations:(>PE<, >PP<, etc.)
- The cardboard parts consist of recycled paper. They can be put into waste paper containers for recycling.
- Material unsuitable for domestic waste must be disposed of at recycling centres.
- Contact your local recycling centre to obtain information about disposal of different materials.
PACKAGING AND THE ENVIRONMENT
- Packaging materials protect your machine from damage that may occur during transportation. The packaging materials are environmentally friendly as they are recyclable. The use of recycled material reduces raw material consumption and therefore decreases waste production.
CE Declaration of Conformity
We declare that our products meet the applicable European Directives, Decisions and Regulations and the requirements listed in the standards referenced.
Disposal of your old machine
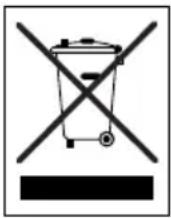
The symbol on the product or on its packaging indicates that this product may not be treated as household waste. Instead, it shall be handed over to the applicable collection point for the recycling of electrical and electronic equipment. By ensuring this product is disposed of correctly, you will help prevent potential negative consequences for the environment and human health, which could otherwise be caused by inappropriate waste handling of this product. For more detailed information about recycling of this product,
please contact your local city office, your household waste disposal service or the shop where the product was purchased.
2. INSTALLATION
2.1. Machine positioning
When positioning the machine, place it in an area where dishes can be easily loaded and unloaded. Do not put the machine in an area where the ambient temperature falls below 0^ C.
Read all warnings located on the packaging before removing the packaging and positioning the machine.
Place the machine close to a water tap and drain. Take into consideration that the connections will not be altered once the machine is in position.
Do not hold the machine by its door or panel.
Leave an adequate distance around the machine to allow ease of movement when cleaning.

Ensure the water inlet and outlet
hoses are not squeezed or trapped and that the machine does not stand on the electrical cable while positioning.
Adjust the feet so the machine is level and balanced. The machine should be placed on flat ground otherwise it will be unstable and the door of the machine will not close properly.
2.2. Water connection
We recommend fitting a filter to your water inlet supply in order to prevent damage to your machine due to contamination (sand, rust, etc.) from indoor plumbing. This will also help prevent yellowing and deposit formation after washing.
2.3. Water inlet hose
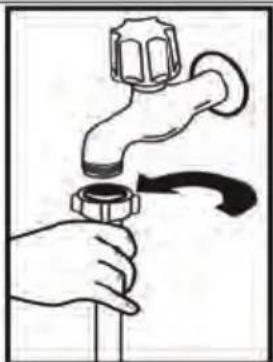
natural_image
Illustration of a hand holding a faucet with a valve, no text or symbols present
WARNING: Use the new water inlet hose supplied with your machine, do not use an old machine's hose.

WARNING: Run water through the hose before connecting.

WARNING: Connect the hose directly the water inlet tap. The pressure plied by the tap should be a minimum 03 MPa and a maximum of 1 MPa. If pressure exceeds 1 MPa, a pressure of valve must be fitted between the section.

WARNING: After the connections are made, turn the tap on fully and check for water leaks. Always turn off the inlet tap after a wash program has ed.
natural_image
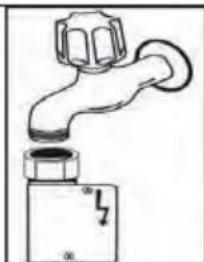
Simple line drawing of a faucet with a valve and base (no text or symbols)
An Aquastop water spout is available some models. Do not damage it or it to become kinked or twisted.
2.4. Drain Hose
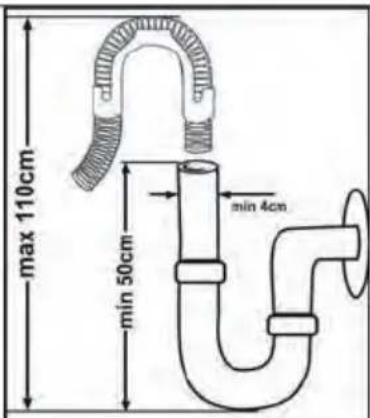
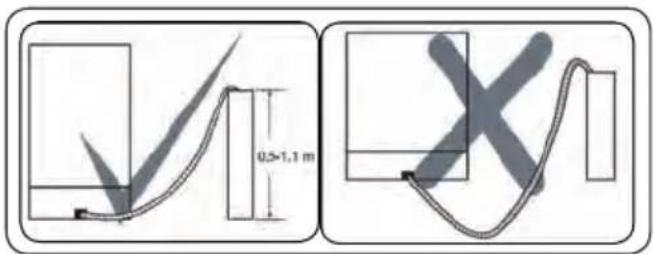
Connect the water drain hose directly to the water drain hole or to the sink outlet spigot. This connection should be minimum 50 cm and maximum 110 cm from the floor.

IMPORTANT: Items will not wash properly if a drain hose longer than 4 m is used.
2.5. Electrical connection

WARNING: Your machine is set to operate at 220-240 V. If the mains voltage supply to your machine is 110 V, connect a transformer of 110/220 V and 3000 W between the electrical connection.

The earthed plug of the machine must be connected to an earthed outlet supplied by suitable voltage and current.

In the absence of earthing installation, an authorised electrician should carry out an earthing installation. In the case of use without earthing installed, we will not be responsible for any loss of use that may occur.

The indoor fuse current value should be 10-16 A.
3. TECHNICAL SPECIFICATIONS
natural_image
Close-up of a mechanical component with a numbered arrow pointing to a circular component (no text or symbols visible)3.1. General appearance
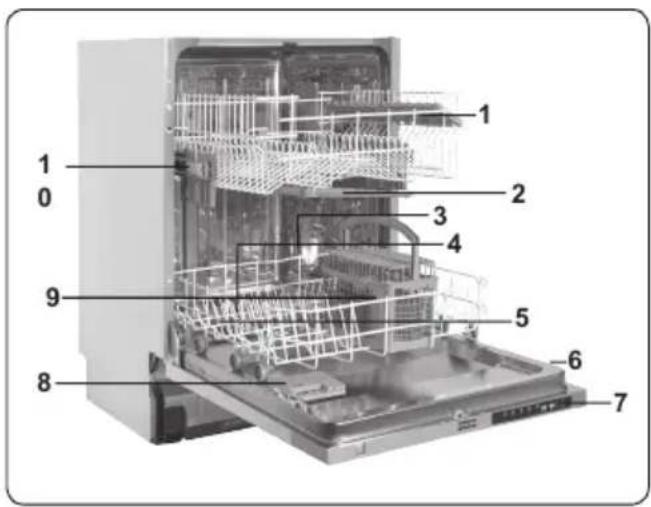
- Upper basket with racks
- Upper spray arm
- Lower basket
- Lower spray arm
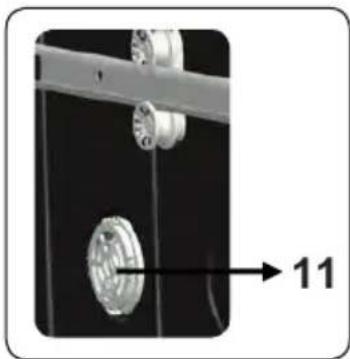
- Filters
- Rating plate
- Control panel
- Detergent and rinse-aid dispenser
- Cutlery basket
10. Upper Cutlery Basket
- Super Active Drying Unit: This system provides better drying performance for your dishes.
3.2. Technical specifications
| Capacity | 13 place settings |
| Dimensions | |
| Height | 850(mm) |
| Width | 598(mm) |
| Depth | 598(mm) |
| Net weight | 38kg |
| Operating voltage / frequency | 220-240V 50 Hz, |
| Total current (A) | 10(A) |
| Total power (W) | 1900(W) |
| Water supply pressure | Maximum: 1 (Mpa) Minimum: 0.03 (Mpa) |
4.1. Detergent usage
Only use detergents specifically designed for domestic dishwashers.
Add the recommended amount of detergent for the selected programme to ensure the best performance.
Keep your detergents in cool, dry places out of reach of children.
See the detergent manufacturer's instructions for a further information.
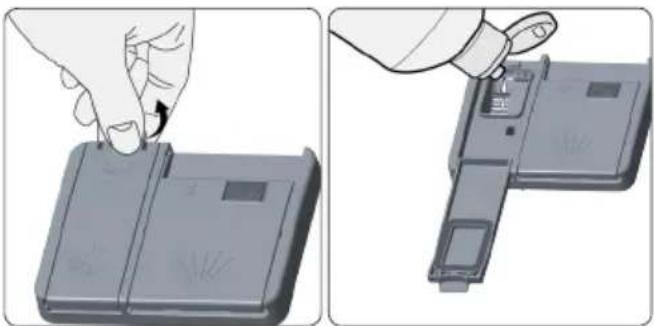
4.2 Filling the detergent
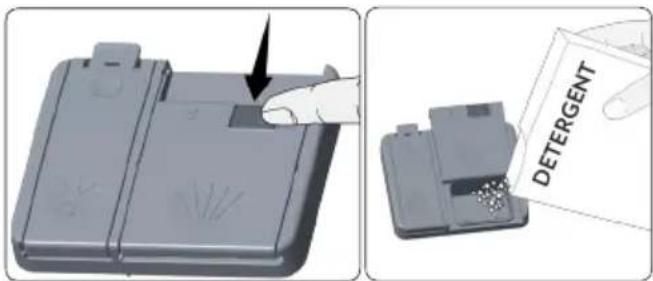
Push the latch to open the dispenser and pour in the detergent.
Close the lid and press it until it locks in place. The dispenser should be refilled just before the start of each programme. If the dishes are heavily soiled, place additional detergent in the pre-wash detergent chamber.
4.3. Using combined detergents
These products should be used according to the manufacturer's instructions.
Never put combined detergents into the interior section or the cutlery basket.
Combined detergents contain not only the detergent but also rinse-aid, replacement substances and additional components depending on the combination.
We recommend you do not use combined detergents in short programmes.
Please use powder detergents in such programmes.
If you encounter problems when using combined detergents, please contact the detergent manufacturer.
When you stop using combined detergents, make sure that rinse aid setting set to correct level.
4.4. Rinse-aid usage
Rinse-aid makes dishes sparkle and helps them to dry without spotting. Rinse-aid is required for stain-free utensils and clear glasses. Use only rinse-aid for domestic dishwashers.
4.5 Filling the rinse-aid and setting
To fill the rinse aid compartment, open the rinse-aid compartment cap. Fill the compartment with rinse aid to the MAX level and then close the cap. Be careful not to overfill the rinse aid compartment and wipe up any spills.
In order to change the rinse aid level, follow the below steps before turning on the machine:
- Touch the programme button and hold it down.
• Turn on the machine. - Hold down the programme button until "rA" disappears.
- The machine will display the current setting.
- Set the level by touching the programme button.
- Switch off the machine to save the setting.
The factory setting is "4".
If the dishes are not drying properly or are spotted, increase the level. If blue stains form on your dishes, decrease the level.
natural_image
Illustration showing a hand inserting a device into a rectangular device, with no visible text or symbols.| Level | Brightener Dose | Indicator |
| 1 | Rinse-aid not dispensed | r1 is shown on the display |
| 2 | 1 dose is dispensed | r2 is shown on the display |
| 3 | 2 doses are dispensed | r3 is shown on the display. |
| 4 | 3 doses are dispensed | r4 is shown on the display. |
| 5 | 4 doses are dispensed | r5 is shown on the display. |
5. LOADING YOUR DISHWASHER
For best results, follow these loading guidelines.
We recommend that you place large items (pots, pans, lids, plates and bowls) which are heavily soiled in the lower basket.
The upper basket is designed for delicate and lighter dishware such as glasses, coffee and tea cups and saucers. Position the dishes so that they will not get moved by the spray of water.
Cutlery should be placed in the cutlery basket. Items should be loaded individually into the appropriate slots with their handles downwards. Long utensils should be placed horizontally on the baskets.

WARNING: Take care not to obstruct
the rotation of spray arms.
5.1. Recommendations
Remove any coarse residue on dishes before placing the dishes in the machine. Start the machine with full load.

Do not overload the drawers or place dishes in the wrong basket.

WARNING: Always place sharp ils with the sharp point down and open ils with their openings down.
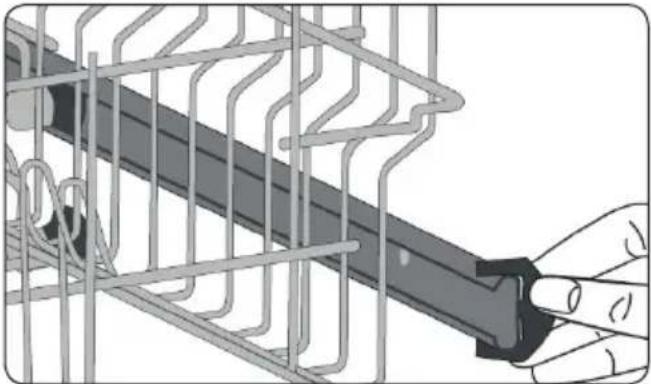
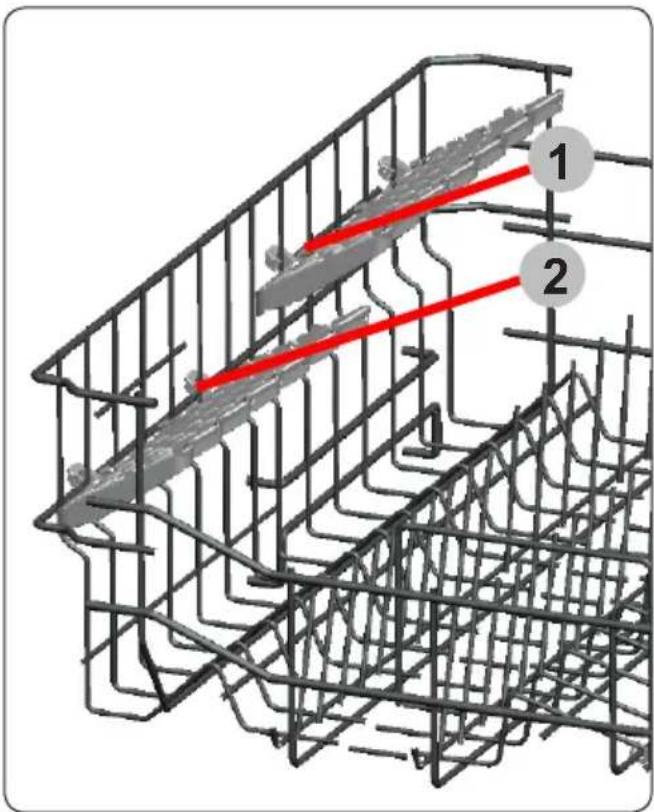
Upper Basket
The upper basket includes a mechanism which enables the height of the basket to be adjusted up (1) or down (2) without having to remove the basket. Hold the basket on both sides and pull it up or push it down, ensuring both sides of the upper basket are in the same position.
natural_image
Illustration of a hand holding a tool interacting with a wire mesh structure (no text or symbols visible)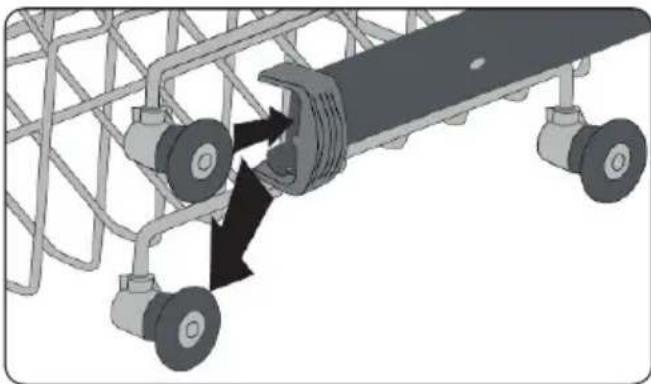
natural_image
Diagram of a mechanical assembly with two wheels and a central component, showing directional arrows (no text or symbols)Height Adjustable Rack (peg type)
The height adjustable racks enable glasses and cups to be placed on or under the racks. The racks can be adjusted to 2 different heights. Cutlery and utensils can also be placed on the racks horizontally.
5.2. Alternative Basket Loads Lower Basket
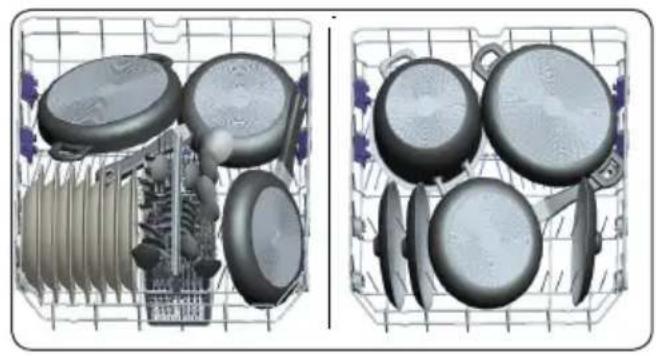
natural_image
Two 3D-rendered kitchen utensils in a grid, one open and one filled with various kitchenware (no text or symbols visible)Top basket
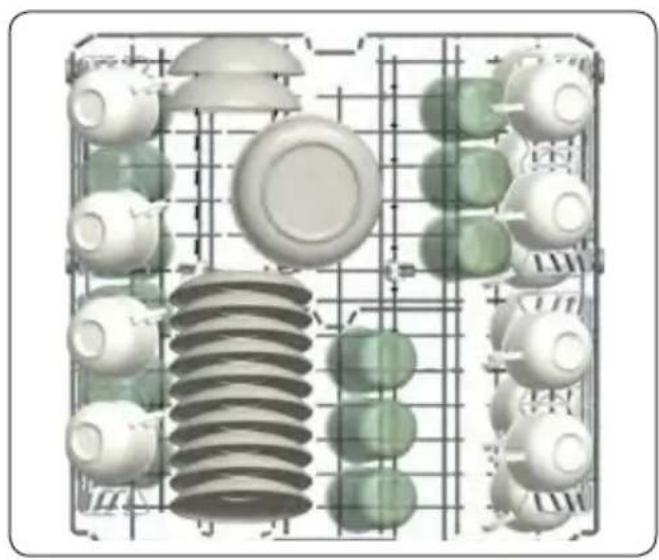
natural_image
3D diagram of a grid-based mechanical or electrical component layout with no visible text, numbers, or symbols.Incorrect loads
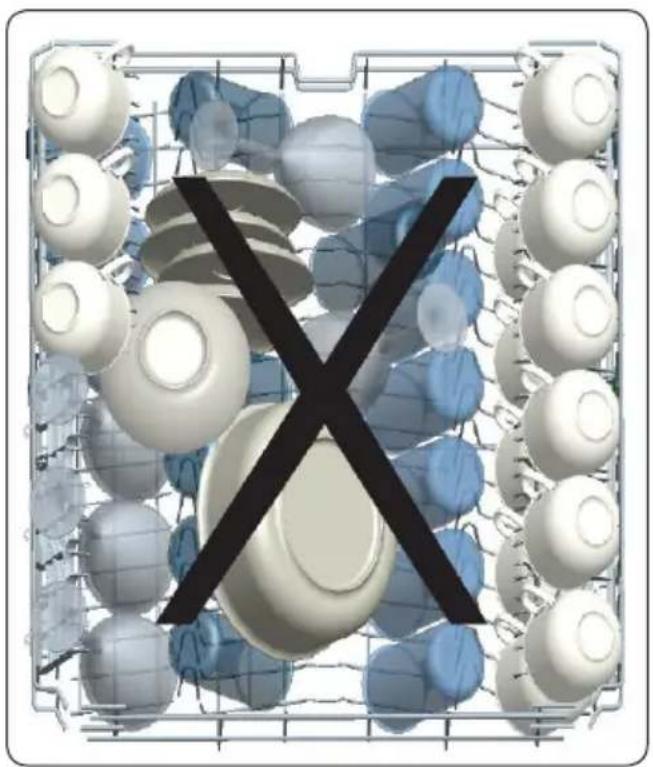
natural_image
3D rendered image of a grid with white and blue circular objects, overlaid with a black 'X' symbol (no text or labels)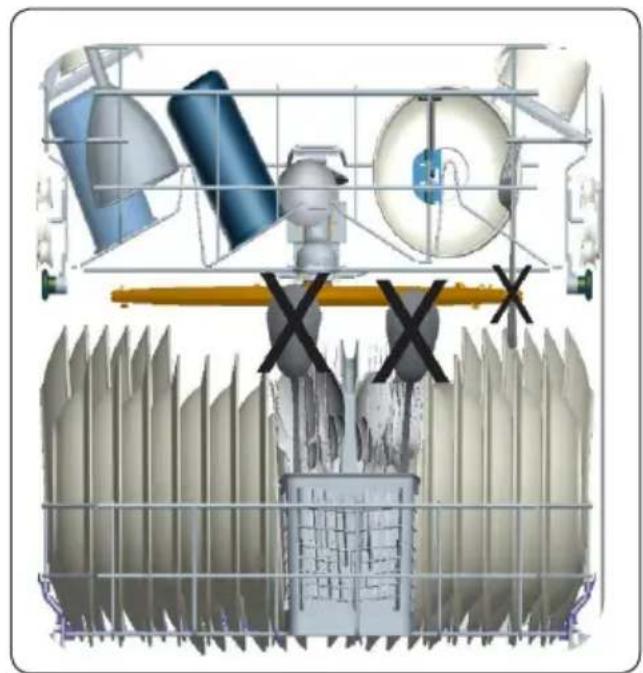
natural_image
Technical diagram of a mechanical assembly with components and cross symbols (no readable text or labels)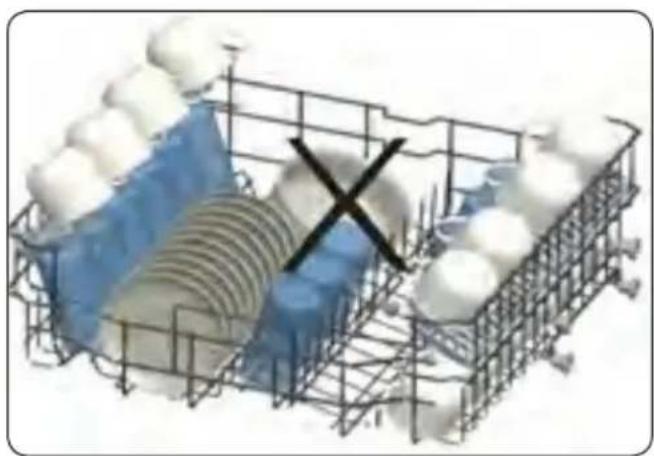
natural_image
3D wireframe model of a grid structure with embedded spheres and a central X mark (no text or symbols)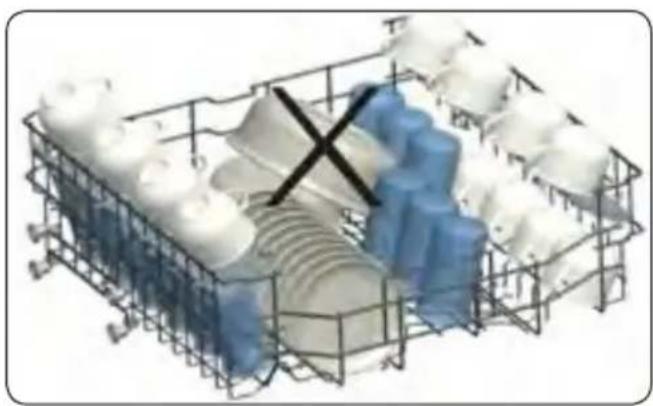
natural_image
3D wireframe model of a container with white and blue spherical objects, no text or symbols visible6. PROGRAMME TABLE
| Programme | Duration (min) | Description |
| Mini 14' 14 | Fastest programme for lightly soiled and recently used dishes. Suitable for 4 place settings. | |
| Quick 30' 30 | For lightly soiled dishes and a quick wash. | |
| Eco (Reference) | 143 Standard programme for normally soiled, daily-used dishes. | |
| Super 50' 50 | For normally soiled, daily-used dishes with a faster programme. | |
| Hygiene 154 | High-temperature, disinfecting programme for heavily soiled dishes. | |
| Intensive (Model Depending) | 115 | For heavily soiled dishes. |
| Auto Intensive (Model Depending) | 115-91 | Automatic programme for heavily soiled dishes. |
* If your model has turbidity sensor it has Auto Intensive program instead of Intensive program.

NOTE: THE PROGRAMME DURATION MAY CHANGE ACCORDING TO THE
AMOUNT OF DISHES, THE WATER TEMPERATURE, THE AMBIENT TEMPERATURE AND SELECTED ADDITIONAL FUNCTIONS.
- Only use powder detergent for short programmes.
- Short programmes do not include drying.
- To assist drying, we recommend slightly opening the door after a cycle is complete.
7. THE CONTROL PANEL
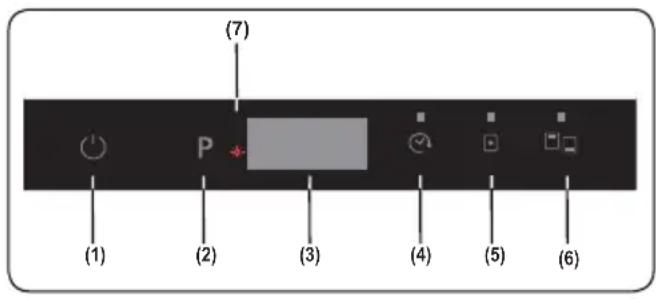
Press the On/Off touch button (1) for 1 second to switch the machine on. Two dashes will appear on the Programme Display.
Select the programme most suitable for your dishes using the Programme touch button (2). The selected programme will show on the Programme Display (3), from P1 to P6. The selected programme will show for 3 seconds, then its duration will show for 1 second, alternately.
Additional functions can also be selected. The programme will start automatically when the door is closed.

NOTE: Press the Tablet Detergent on (5) when using combined detergents contain and rinse aid.

NOTE: Press the Half Load button (6) reduce the duration of a programme, and before decrease your energy and water assumption.

NOTE: If your dishwasher includes an LED function, the InfoLED will indicate status of the programme in operation. In operation, the InfoLED will be on, in the programme is complete the LED will switch off.

NOTE: If you decide not to start the acted programme, please see the changing a Programme" and "Cancelling a programme" sections.

NOTE: When there is insufficient rinse the Rinse Aid Lack Warning Indicator will illuminate to indicate the rinse aid mber needs filling.
Delaying a Programme
Press the Delay Start touch button to delay the start time of a programme for 1 hour up to 19 hours. Pressing the button once will delay the start time for 1 hour, and continuing to press will increase the delay time. The programme can be selected first and the delay duration after, or vice versa. To cancel the delayed start, either set the delay timer to "0h", or press and hold the Programme touch button for 3 seconds. The display will show a countdown of how many seconds to hold the button for, "3-2-1", in order to cancel the delay.

NOTE: Press and hold the Delay touch on to change the delay time faster. The of change is proportional to how long button is held for. Pressing the Delay t touch button for a long period of time stop the counter at "h:00".
7.1. Changing a Programme
Follow the steps below to change the programme while in operation.
1- Open the door and press the Programme touch button (2) to select a new programme. If the door is opened during operation, the time remaining of the programme will show on the display (3).
2- After the door is closed, the newly selected programme will resume the course of the old programme.

NOTE: Open the door slightly at first top a wash programme before it is complete in order to avoid water spillage.
7.2. Cancelling a Programme
Follow the steps below to cancel a programme while in operation or in standby mode.
1- After the door is closed, the water discharge process will start and continue
for 30 seconds. A buzzer will sound 5 times when the programme is cancelled.

NOTE: When the door is opened after ogramme is complete, the buzzer sound stop and '0' will show on the display (3).
Switching the Machine Off
A buzzer will sound 5 times when a programme is complete. You can then switch your machine off using the Power On/Off touch button (1).

NOTE: Do not open the door before a gramme is complete.

NOTE: Leave the door of your machine open slightly at the end of a wash programme, or select the Energy Save section before starting a programme, in order to speed up drying.

NOTE: If the door of the machine opened or the power is cut during ration, the programme will restart when door is closed or the power returns.
| OPTIONAL PROGRAMS | Delayed Start | Half Load | Tablet |
| Mini 14' | √ | √ | |
| Quick 30'40°C | √ | √ | √ |
| Eco | √ | √ | √ |
| Express 50'65°C | √ | √ | √ |
| Hygiene 60°C | √ | √ | √ |
| Intensive65°C | √ | √ | √ |
“-” Function cannot be selected “√” Function can be selected.
Compatibility between Options
| OPTIONS Delayed Start | Half Load | Tablet |
| Delayed Start | ✓ | |
| Half Load | ✓ | |
| Tablet | ✓ | ✓ |
8. CLEANING AND MAINTENANCE
Cleaning your Dishwasher is important to maintain the machine's service life.
Oil and limescale may build up in your Dishwasher over time. If this occurs:
- Fill the detergent compartment but do not load any dishes. Select a programme which runs at high temperature and run the Dishwasher empty. If this does not clean your Dishwasher sufficiently, use a cleaning agent designed for use with dishwashers.
- Wipe the door seals regularly with a damp cloth to remove any accumulated residue.
8.1. Cleaning machine and filters
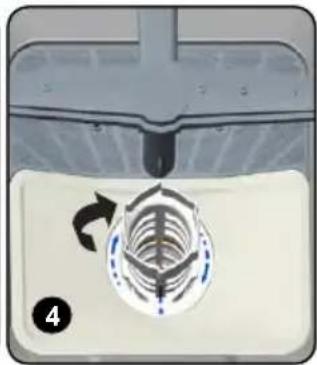
Clean the filters and spray arms at least once a week. If any food waste remains on the coarse and fine filters, remove them and clean them thoroughly with water.
a) Micro Filter
b) Coarse Filter
c) Metal Filter
natural_image
Close-up of a mechanical component with a circular knob and directional arrow (no text or symbols visible)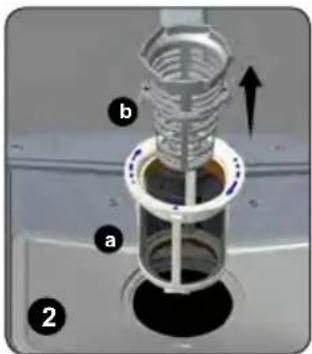
natural_image
Cross-sectional diagram of a laboratory apparatus with labeled parts (a, b, 2), no readable text or symbols beyond labels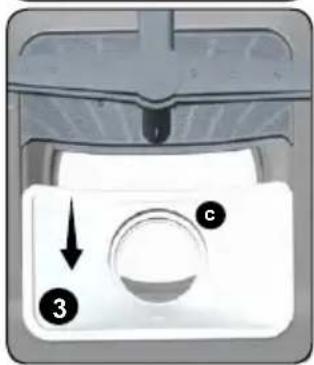
natural_image
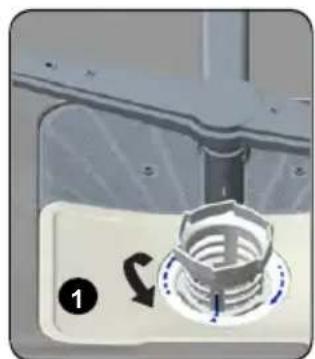
Close-up of a mechanical component with a circular component and directional arrow (no text or symbols)To remove and clean the filter combination, turn it counter clockwise and remove it by lifting it upwards (1). Pull the coarse filter out of the micro filter (2). Then pull and remove the metal filter (3). Rinse the filter with lots of water until it is free of residue. Reassemble
the filters. Replace the filter insert, and rotate it clockwise (4).
- Never use your Dishwasher without a filter.
- Incorrect fitting of the filter will reduce the washing effectiveness.
- Clean filters are necessary for proper running of the machine.
8.2. Spray arms
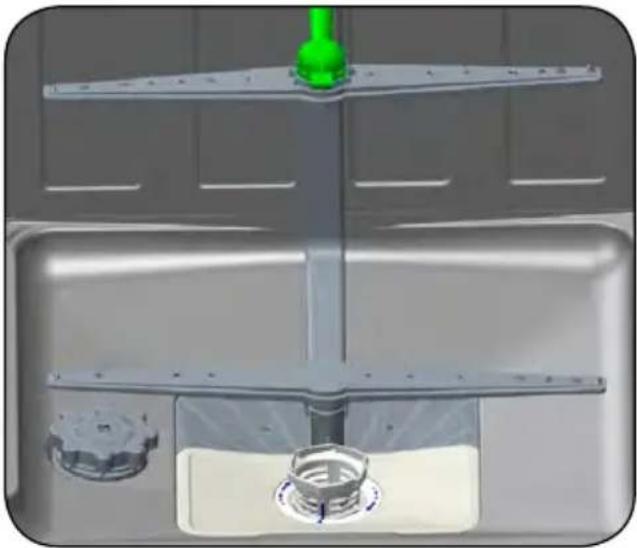
Make sure that the spray holes are not clogged and that no food waste is stuck to the spray arms. If there is any clogging, remove the spray arms and clean them under water. To remove the upper spray arm undo the nut holding it in position by turning it clockwise and pulling it downwards. Make sure that the nut is properly tightened when refitting the upper spray arm.
natural_image
3D rendering of a mechanical assembly with a green handle and central component (no visible text or symbols)9. TROUBLESHOOTING
| FAULT POSSIBLE CAUSE TROUBLESHOOTING | ||
| The programme does not start. | Your Dishwasher is not plugged in. Plug your Dishwasher in. | |
| Your Dishwasher is not switched on. | Switch your Dishwasher on by pressing the On/Off button. | |
| Fuse blown. Check your indoor fuses. | ||
| Water inlet tap is closed. Turn on the water inlet tap. | ||
| Your Dishwasher door is open. Close the Dishwasher door. | ||
| Water inlet hose and machine filters are clogged. | Check the water inlet hose and machine filters and make sure they are not clogged. | |
| Water remains inside the machine. | Water drain hose is clogged or twisted. | Check the drain hose, then either clean or untwist it. |
| The filters are clogged. Clean the filters. | ||
| The programme is not finished yet. Wait until the programme is finished. | ||
| Machine stops during washing. | Power failure. Check mains power. | |
| Water inlet failure. Check water tap. | ||
| Shaking and hitting noises are heard during a wash operation. | The spray arm is hitting the dishes in the lower basket. | Move or remove items blocking the spray arm. |
| Partial food wastes remain on the dishes. | Dishes placed incorrectly, sprayed water not reaching affected dishes. | Do not overload baskets. |
| Dishes leaning against each other. | Place dishes as instructed in the section on loading your dishwasher. | |
| Not enough detergent used. | Use the correct amount of detergent, as instructed in the programme table. | |
| Wrong wash programme selected. | Use the information in the programme table to select the most appropriate programme. | |
| Spray arms clogged with food waste. | Clean the holes in the spray arms with thin objects. | |
| Filters or water drain pump clogged or filter misplaced. | Check the drain hose and filters are correctly fitted. | |
| Whitish stains remains on dishes. | Not enough detergent used. | Use the correct amount of detergent, as instructed in the programme table. |
| Rinse aid dosage and/or water softener setting set too low. | Increase rinse aid and/or water softener level. | |
| Dishes do not dry. | Drying option is not selected. Select a programme with a drying option. | |
| Rinse aid dosage set too low. Increase rinse aid dosage setting. | ||
| Rust stains form on the dishes. | Stainless-steel quality of the dishes is insufficient. | Use only dishwasher-proof sets. |
| A poor mains grounding. Consult a qualified electrician immediately. | ||
| Detergent remains in the detergent compartment. | Detergent was added when the detergent compartment was wet. | Make sure detergent compartment is dry before use. |
AUTOMATIC FAULT WARNINGS AND WHAT TO DO
| TROUBLE CODE | POSSIBLE FAULT WHAT TO DO | |
| F5 Insufficient water | Make sure the water inlet tap is open and water is flowing. | |
| Separate the inlet hose from the tap and clean the filter of the hose. | ||
| Contact for service if the error continues. | ||
| F3 Continuous water input Close the tap and contact for service. | ||
| F2 Inability to discharge water | Water discharge hose and filters may be clogged. | |
| Cancel the program. | ||
| If the error continues, contact for service. | ||
| F8 Faulty heater Contact for service. | ||
| F1 Overflow | Unplug the machine and close the tap. | |
| Contact for service. | ||
| F7 Overheating failure Contact for service. | ||
| F6 Faulty temperature sensor | Contact for service. | |
| FE | Faulty electronic card | Contact for service. |
10. PRACTICAL INFORMATION
- When the machine isn't in operation:
- Disconnect the plug and close the tap.
- Leave the door slightly open to prevent odour formation.
- Select the dry option to remove water droplets.
- Place dishes in the machine properly to achieve the best energy consumption, washing and drying performance. Please see the programme and consumption table for more information.
- Rinse dirty dishes before placing them in the dishwasher.
- Only use the Prewash programme when necessary.
- Do not place the machine near a refrigerator because it will reach high temperatures.
- If the machine is located in an area that is at risk of freezing, close the tap, disconnect the inlet hose from the tap and drain the water inside the hose and the machine completely.

tr
Montaj kilavuzu
en
Assembly instructions
nl
de
Montageanweisung
SV
Monteringsanvisning
Montage-Voorschriften
da
Monteringsvejledning
1
fi
fr
Assennus objeet
pt
Instruções de montagem
Instructions de montage
lt
Istruzioni per il montaggio
CS
Montážni návod
es
Instrucciones de montaje
2
ops.(+50) H= 870-920 mm
3
4
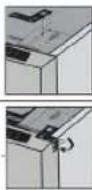
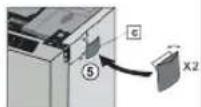
5
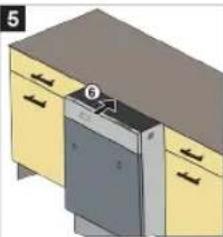
natural_image
3D illustration of a kitchen drawer with a door handle and labeled component (no text or symbols)6
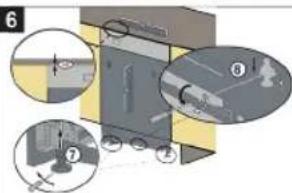
ops.(+50) H= 870-920 mm
7
8
natural_image
3D diagram of a kitchen appliance with a yellow cabinet and a paper sheet, showing a 3:8 kg weight (no text or symbols on the main components)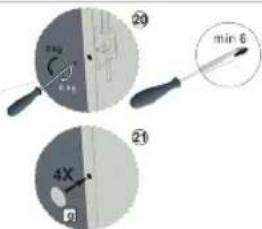
9
10
natural_image
3D diagram of a cabinet with drawers and a measuring tool, showing internal components and directional arrows (no text or symbols)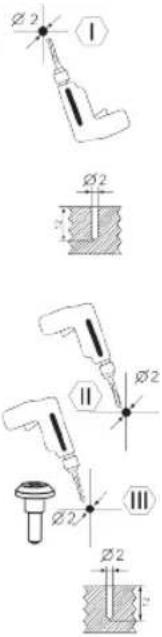
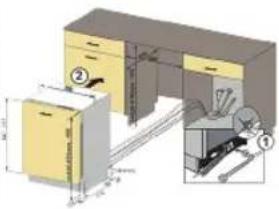
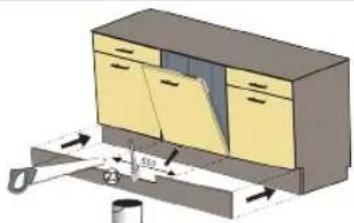
INSTALLATION OF FULL BUILT-IN DISHWASHERS UNDER THE COUNTER
INSTALLATION OF FULL BUILT-IN DISHWASHERS UNDER THE COUNTER
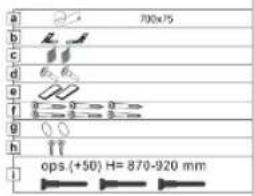
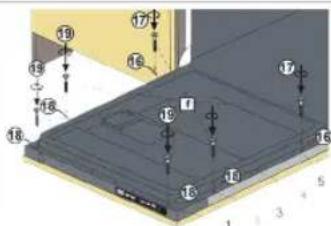
Use the following items supplied in the document bag of the appliance for the installation of the semi and full built-in dishwashers.
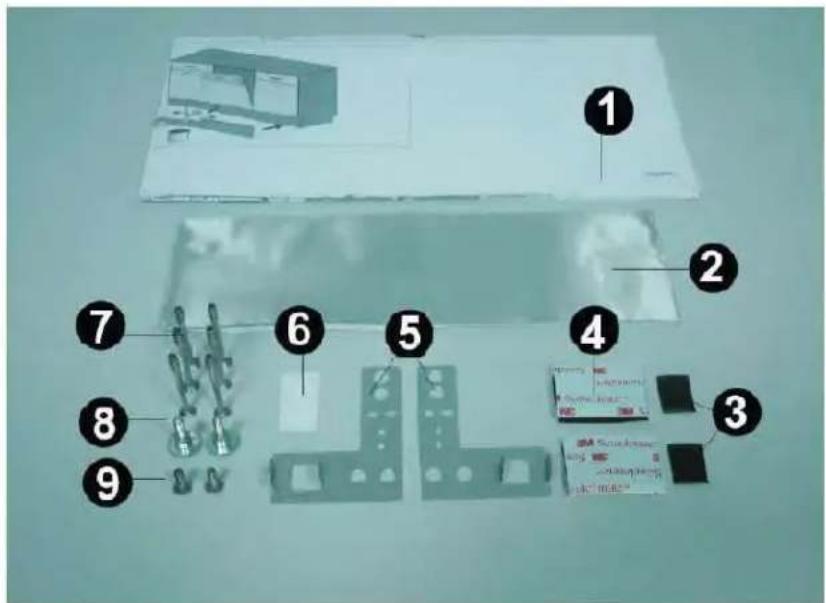
1 – Installation plan : manual describing the installation of the appliance under the counter.
2 - Vapour-proof foil
3 - Side retaining sticker (2 pcs)
4 - Board retaining sticker (2 pcs)
5 - Counter mounting plate, right and left
6 - Spring adjustment mechanism hole cover (2 pcs)
7 - Screw 4x42.5 YHB wallboard (4 pcs for semi built-in, 6 pcs for full built-in products)
8 - Board mounting screw (2 pcs)
9 - Screw 4x15 YHB wallboard (2 pcs)
Materials to be used in the installation process are
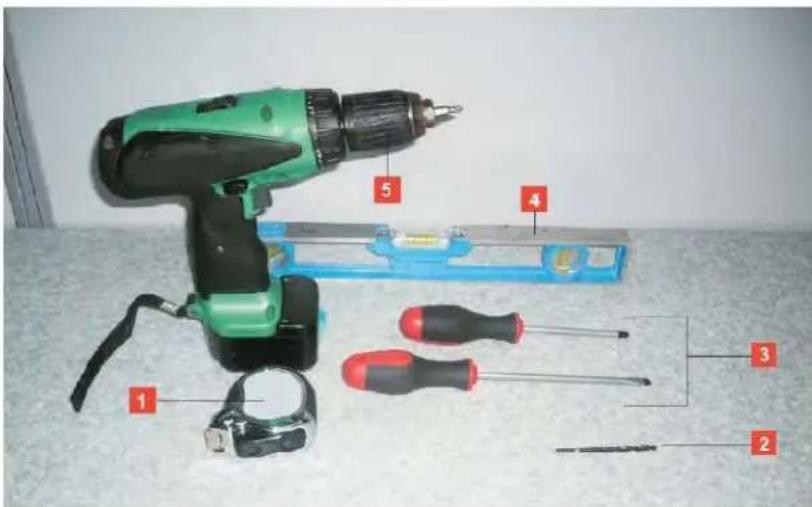
1- Tape measure
2 - Drill bit ( ∅ 2 )
3 - Flat head and Phillips screwdriver
4 - Water gauge
5 - Charged drill
Intall your semi built-in appliance under the counter according to semi built-in installation instructions supplied with your appliance. Installation manual includes the dimensions of the counter and board to be installed in fornt of the appliance. Consider these dimensions before starting the installation.
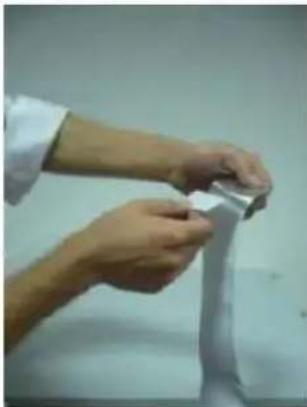
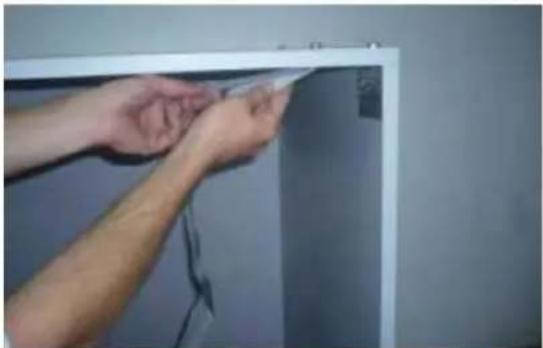
1- If the counter that you will install the appliance is made of wood, stick the aluminum foil supplied in the document bag under the counter. (This prevents the vapour occurred by the opening and closing of your appliance's door from affecting the counter)
natural_image
Close-up of hands holding a small metallic object, possibly a tool or component (no visible text or symbols)Open the aluminum foil carefully as shown in the picture.
natural_image
Close-up of hands installing or adjusting a white panel on a wall, no visible text or symbolsStick the aluminum foil under the counter that you place the appliance so that there is no clearance with the end of the counter as shown in the figure.
natural_image
Plain white rectangular frame with a thin vertical seam, no text or symbols visibleBefore placing the appliance under the counter:
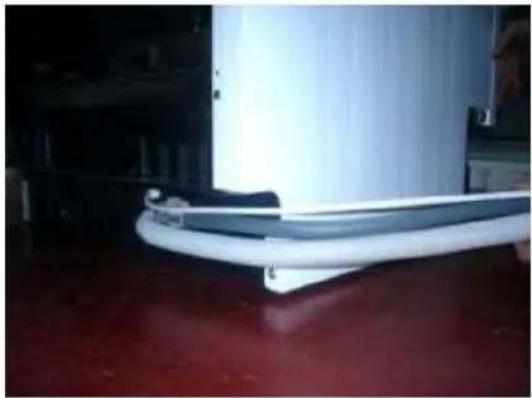
natural_image
Close-up of a white cylindrical device with a curved base, placed on a red floor against a dark background (no visible text or symbols)1 – Collect the discharge and water supply hoses and supply cord at the rear of your appliance (as shown in the figure) to prevent damage to them during installation under the counter.
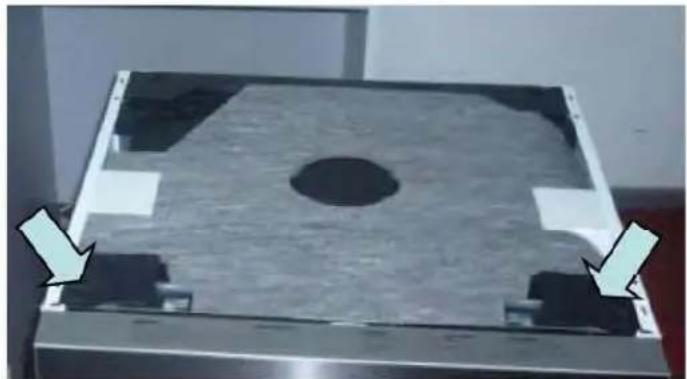
natural_image
Metallic rectangular component with a central hole and four corner supports, shown with directional arrows pointing to the edges (no text or symbols visible)2 – Install the counter mounting plates to the upper panel support bracket rubbers.
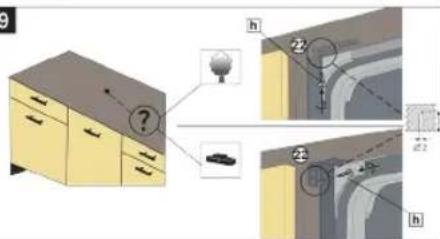
* At this stage, the counter mounting plates are installed in two ways according to the material (wood, granite, marble etc.) of the under counter that the appliance will be installed.
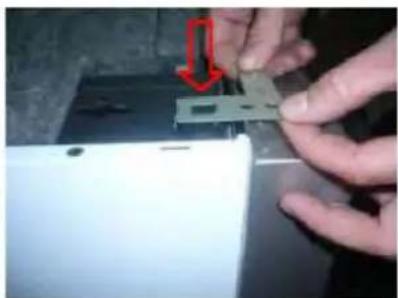
natural_image
Close-up of hands installing a component on a white electronic device (no visible text or symbols)a) If the counter is made of wood, install the counter mounting plates so that the ends of the plates are faced inwards as shown in the figure.
* If the counter is made of wood, install the appliance to the upper side of the counter.
b) If the counter is made of a material like marble, granite, etc., install the counter mounting plates so that the ends of the plates are faced outwards as shown in the figure.
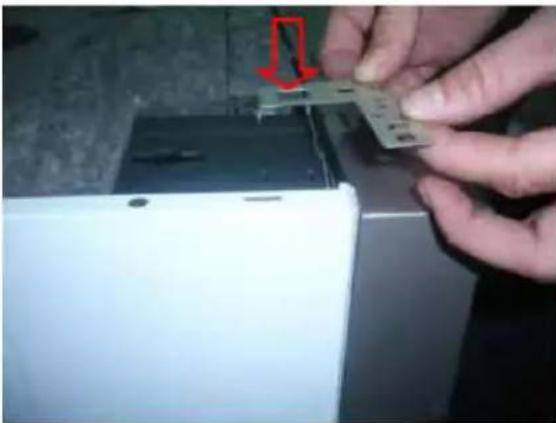
natural_image
Close-up of hands installing a small electronic component on a device (no visible text or symbols)Crimp the from the point shown with an arrow in the figure after installing the counter mounting plate.
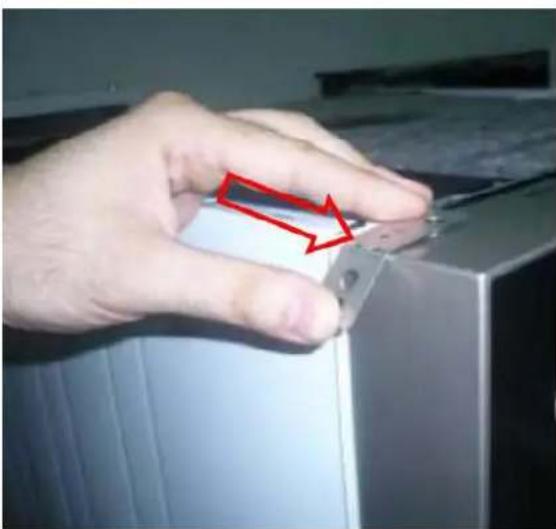
natural_image
Close-up of a hand holding a small electronic component, with a red arrow pointing to the part (no visible text or symbols)3 - Stick the side retaining stickers to the left and right panels of the appliance. The dimensions of the stickers are given in the installation manual.
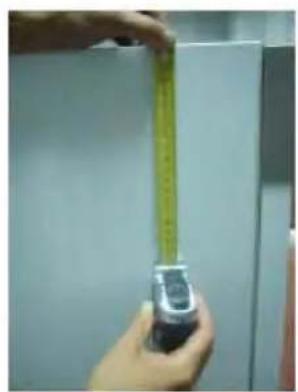
natural_image
Close-up of hands holding a green measuring tape against a white cabinet (no text or symbols visible)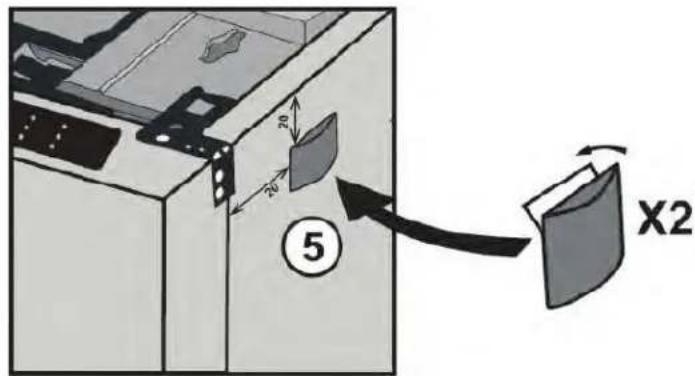
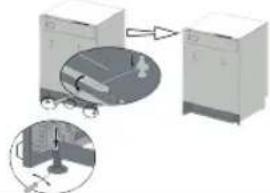
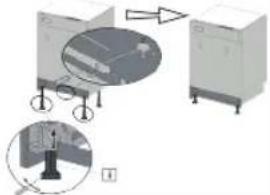
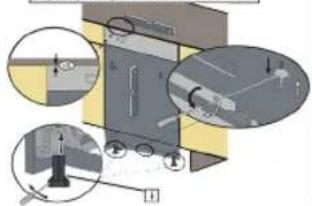
4- Place the appliance under the counter properly. Adjust the legs of the appliance so that the appliance is level with the upper panel of the counter, use a water gauge to check that the appliance is raised equally in all directions.
natural_image
White refrigerator with closed lid and front panel, placed on red floor (no visible text or symbols)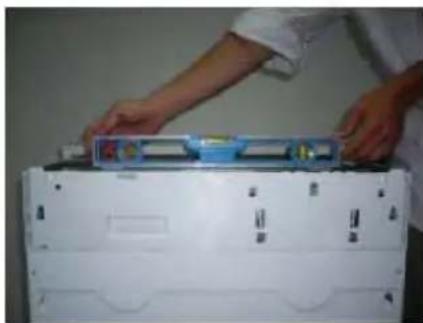
natural_image
Person installing or adjusting a white electronic device with a blue and yellow component (no visible text or symbols)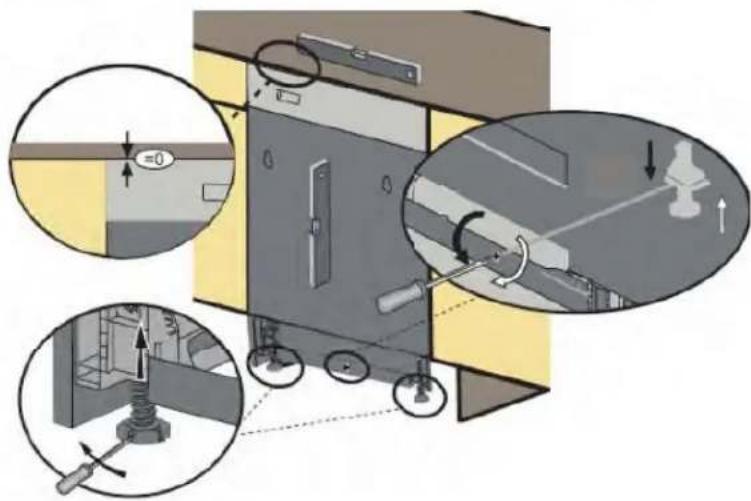
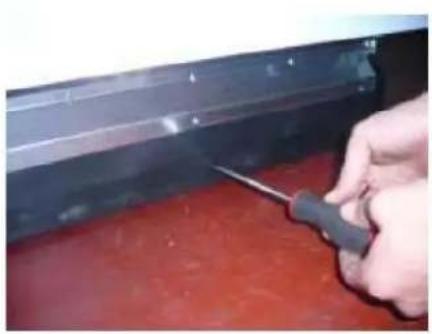
Use a flat head screwdriver to adjust the rear leg of your appliance. You can adjust the height of the appliance by turning the screwdriver right or left.
natural_image
Close-up of a hand using a screwdriver to work on a red surface near a black metal bracket (no text or symbols visible)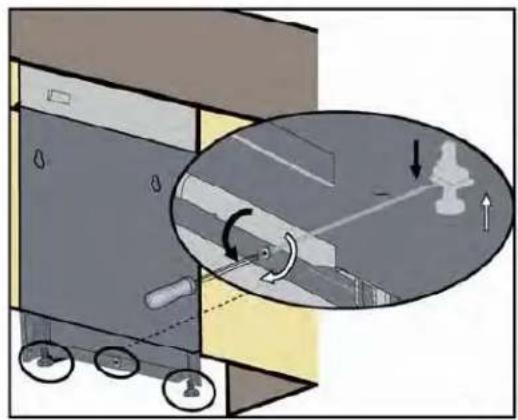
natural_image
Diagram showing a vehicle interior with a magnified view of a road intersection and directional arrows (no text or symbols)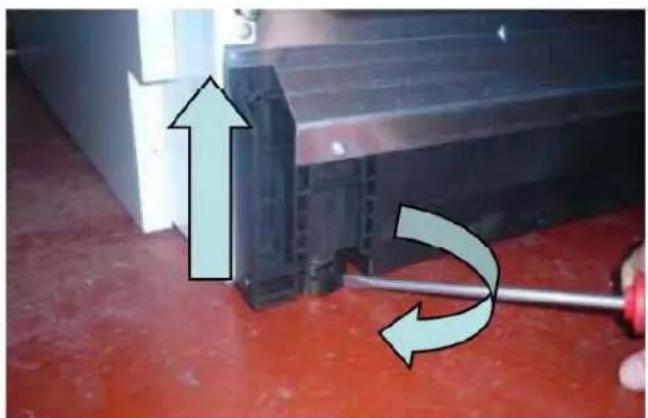
natural_image
Close-up of a mechanical component with directional arrows indicating motion or movement (no text or symbols visible)You can raise your appliance by turning the front legs of your appliance right or left as shown in the figure.
5 – Place the installation manual on the furniture properly.
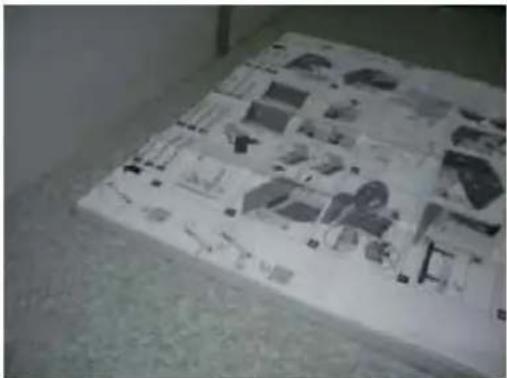
natural_image
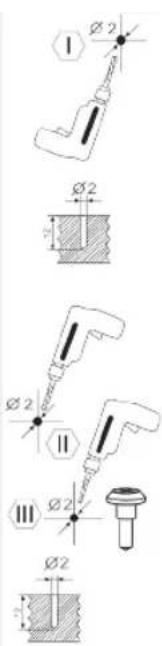
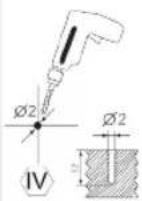
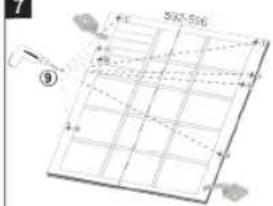
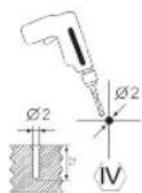
Grid of small electronic components laid out on a flat surface, no visible text or symbols6 - Drill screw holes on the furniture from the points shown on the installation manual. . (use drill bits ∅ 2 )
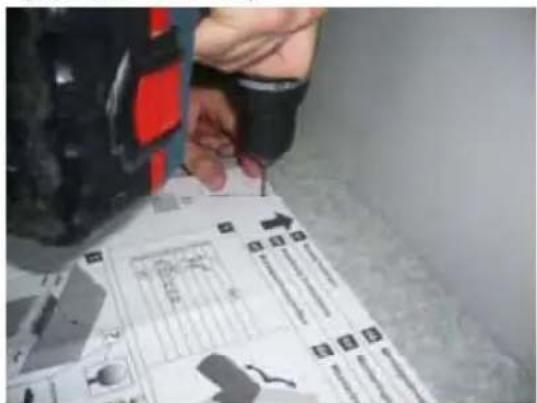
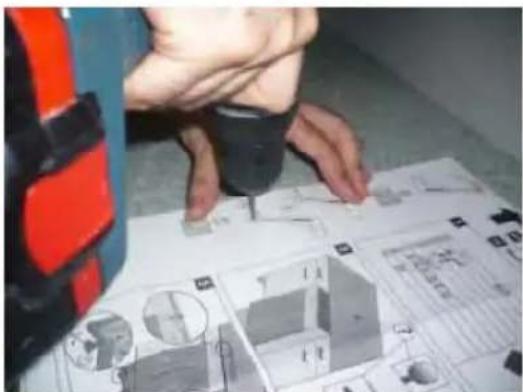
natural_image
Person using a tool to write or print a 3D architectural model (no visible text or symbols)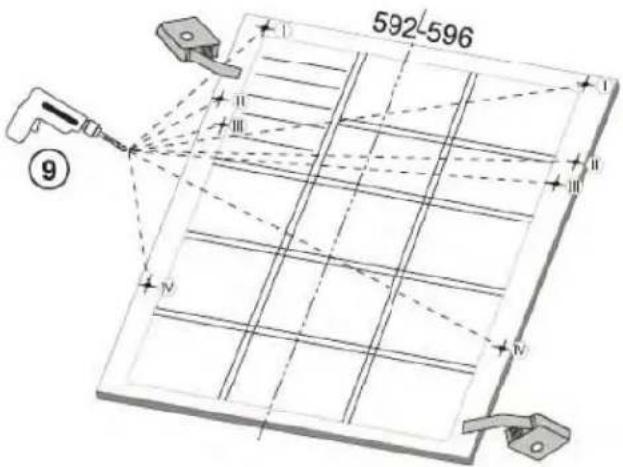
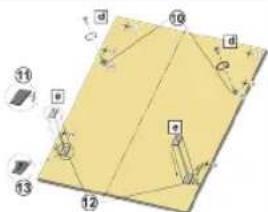
7 - Place the wood mounting screws to the screw holes you have drilled before, then stick the stickers with the specified dimensions.
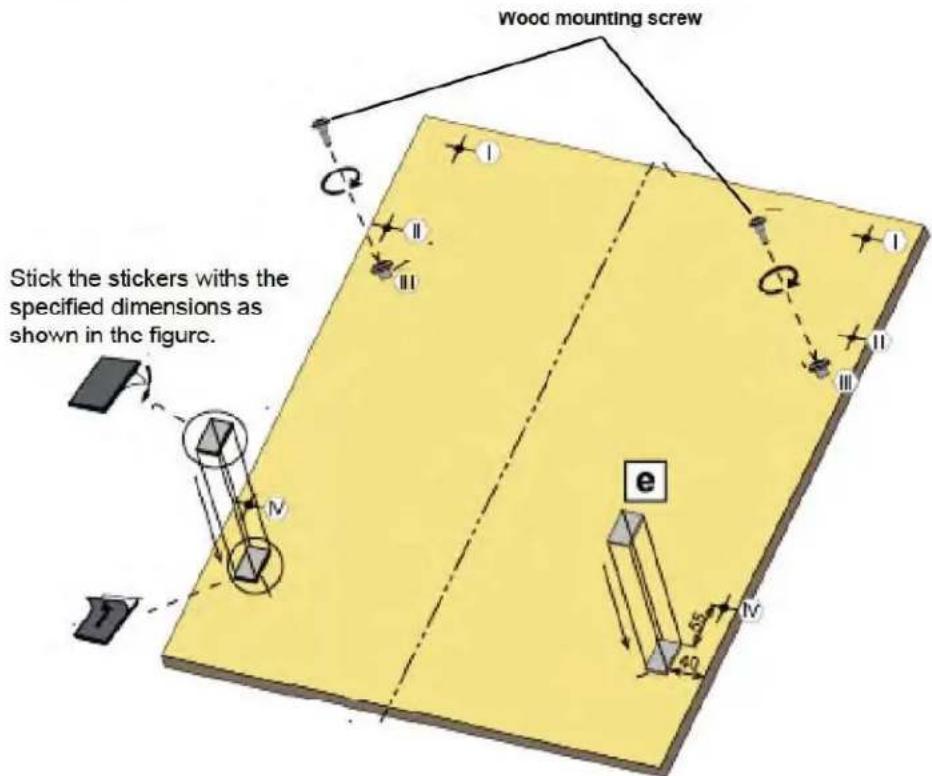
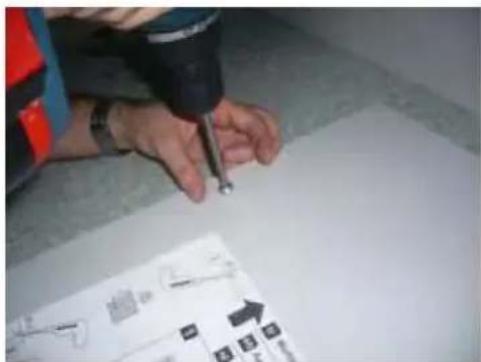
natural_image
Person using a drill pen on a tiled floor, with a small diagram showing a grid layout (no readable text or symbols)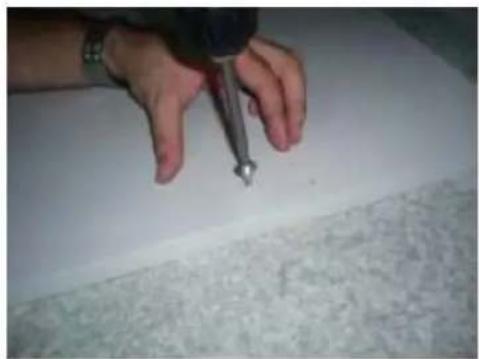
natural_image
Close-up of hands using a pen to draw or mark a small object on a white surface (no text or symbols visible)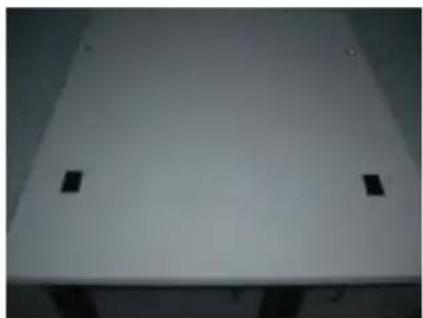
natural_image
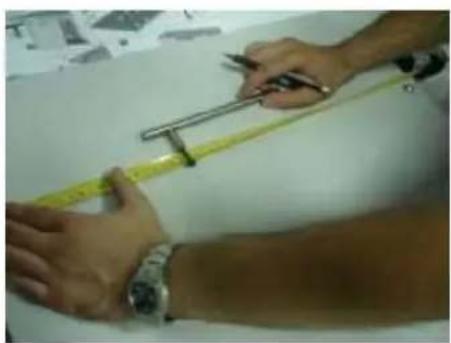
Plain white rectangular object with two small black square markers on top (no text or symbols visible)8 – When you are installing the door handles on the furniture, take the required measurements to ensure that the door handle is matched with the other drawers and covers on the counter, and drill your furniture according to these measurements.
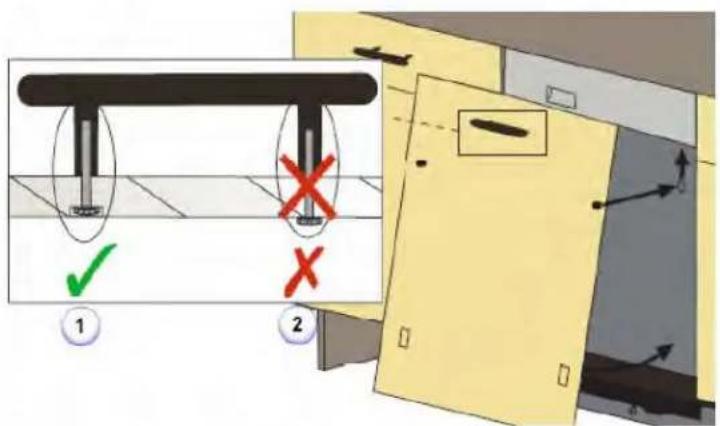
When you are securing the door handle to your furniture:
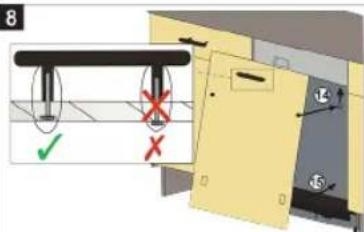
Make sure that the mounting screw head of the door handle is embedded to the furniture (figure 1). (An installation as shown in figure 2 will cause problems when you are installing the furniture to the outer door plate of your appliance.)
natural_image
Close-up of hands measuring a yellow tape with a ruler, no visible text or symbols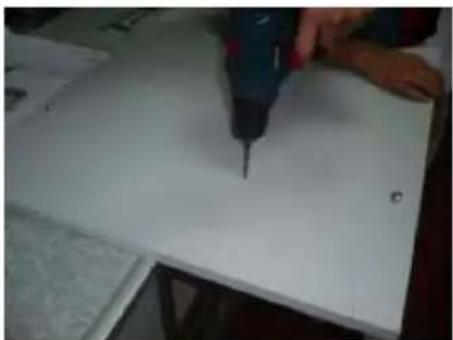
natural_image
Close-up of a hand using a power drill on a white surface, no visible text or symbolsAdjust your furniture according to the door handle you have selected.
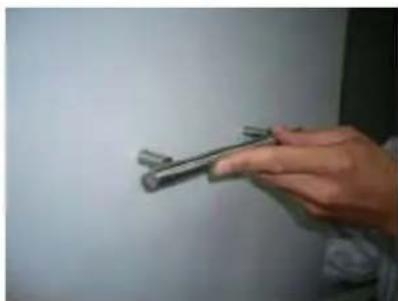
natural_image
Hand holding a metallic tool against a plain wall (no text or symbols visible)9 – Place the wood mounting screws so that they are aligned with their holes on the outer plate of the door. Ensure that the furniture is aligned and level with the sticks; then secure the lower part of the furniture by leaning it against the outer plate of the door.
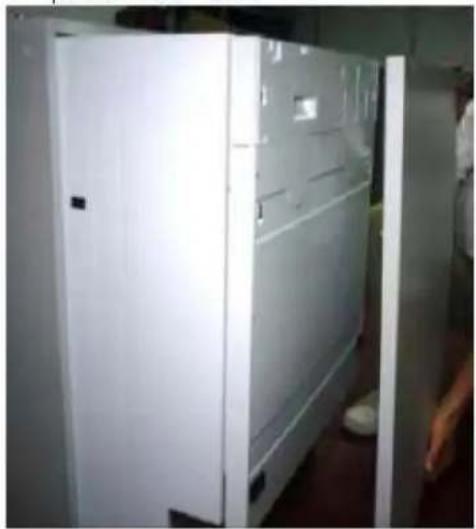
natural_image
Exterior view of a white refrigerator with open lid and side panel, no visible text or symbols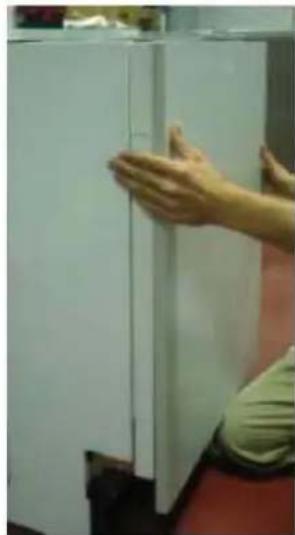
natural_image
Person holding a white cabinet or cabinet with a hand extending the door (no visible text or symbols)- Proceed as shown in the pictures.
natural_image
Interior view of a room with a person standing near a window (no visible text or symbols)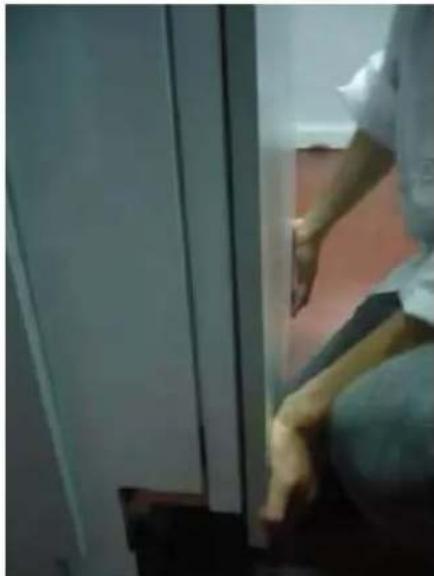
natural_image
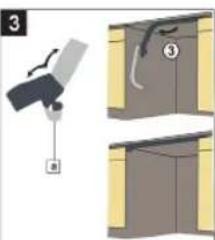
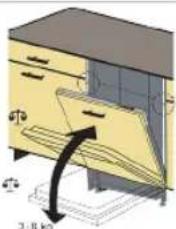
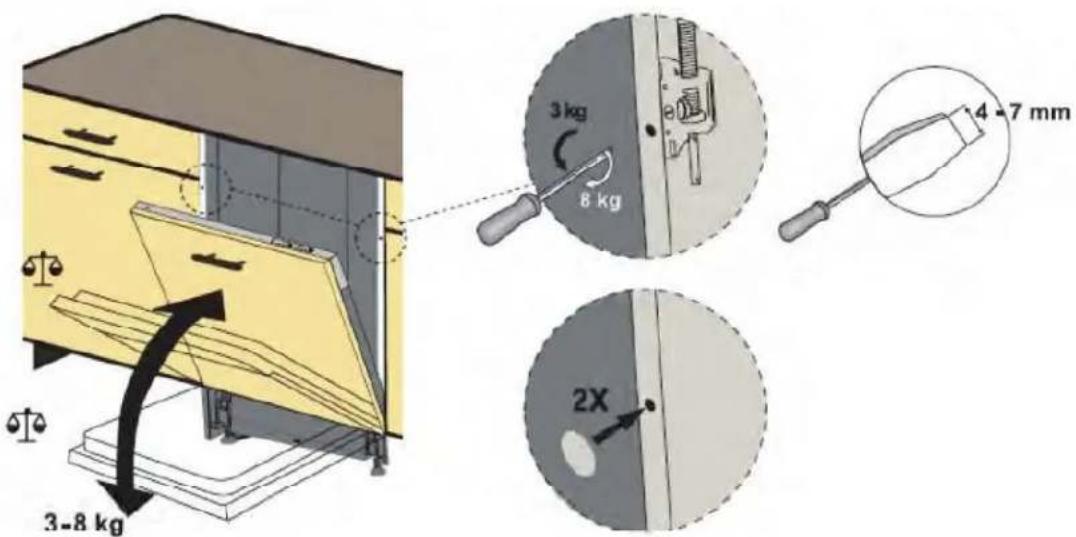
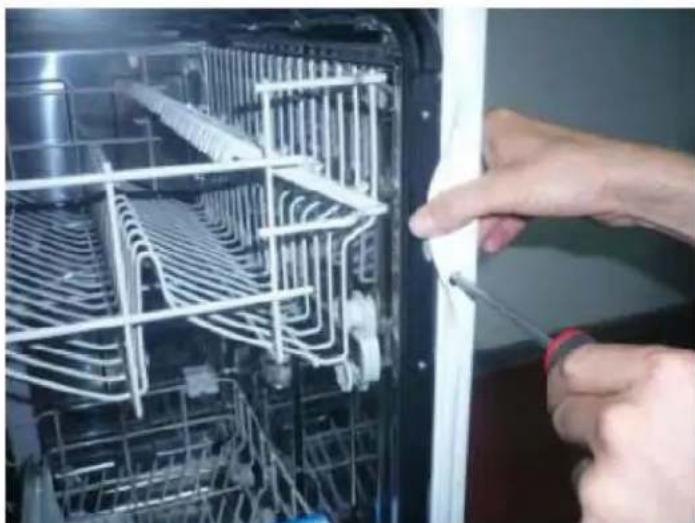
Interior view of a room with a person seated near a window (no visible text or symbols)11 – After installing the furniture, adjust the door of your appliance according to the weight of the installed furniture.
Adjust the door of your appliance as shown in the figure using a flat head screwdriver.
natural_image
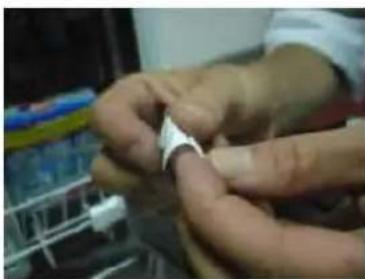
Close-up of hands installing or adjusting a white appliance into a rack, no visible text or symbols12 – After adjusting the door hinge springs according to the furniture you installed the appliance, plug the adjustment holes on the side panels by sticking the caps supplied with your appliance.
natural_image
Close-up of hands performing a medical procedure on a patient's hand (no visible text or symbols)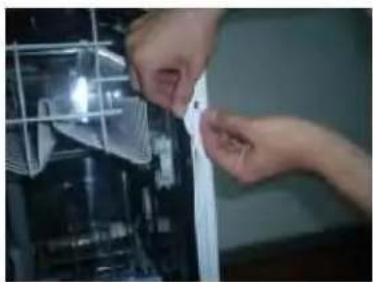
natural_image
Close-up of hands installing or adjusting a white plastic component on a dark mechanical device (no visible text or symbols)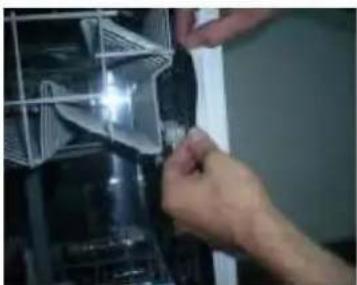
natural_image
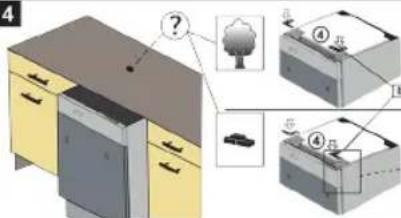
Close-up of hands installing or adjusting a transparent plastic panel on a dark surface (no visible text or symbols)13 – Install your appliance to the upper panel of the counter as shown in figure 1 if the counter you install your appliance is made of wood, and to the side walls as shown in figure 2 if the counter you install your appliance is made of marble etc.
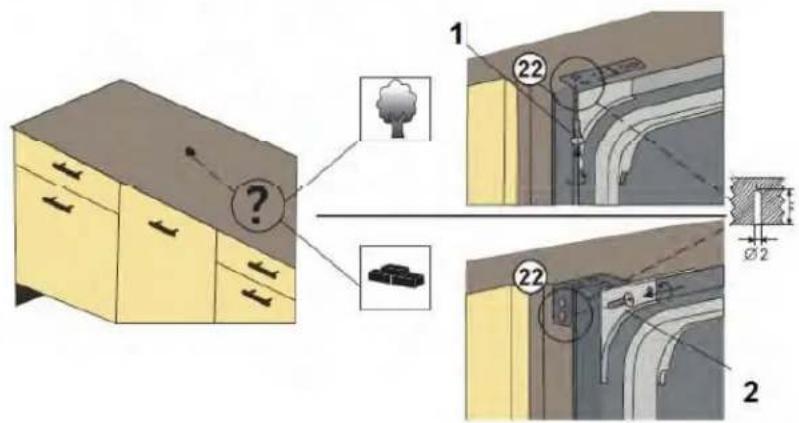
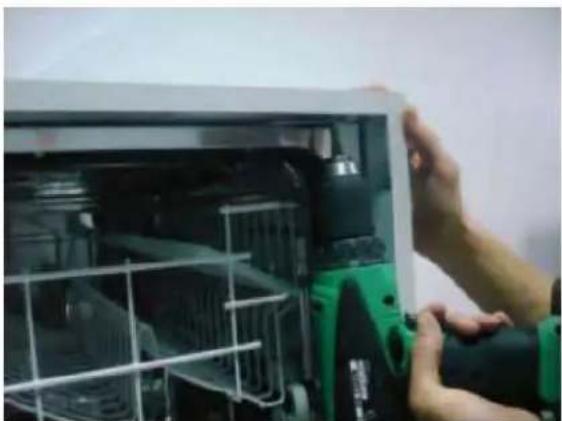
natural_image
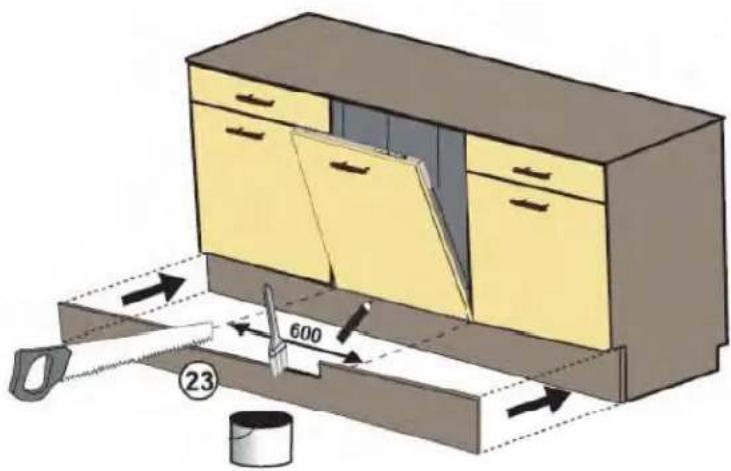
Close-up of hands installing or adjusting a green electric oven with visible internal structure (no text or symbols)14- Finally, you should adjust the base according to the counter you have installed your appliance. Place the base cut according to the height of the other cupboards, and check whether the door can be opened or not. If the door of your appliance contacts the base, cut the contacting area of the base to ensure that the door can be opened or closed easily.
ILVE LIMITED WARRANTY

LIVE WITH
ILVE
Eurolinx Pty Limited A.B.N. 50 001 473 347 trading as ILVE ("ILVE")
Office: 48-50 Moore Street, Leichhardt N.S.W 2040
Post: Locked Bag 3000, Annandale, N.S.W 2038
P: 1300 MY ILVE (694 583)
WARRANTY REGISTRATION
Your ongoing satisfaction with your ILVE product is important to us. We ask that you complete the enclosed Warranty Registration Card and return it to us so that we have a record of the ILVE products you purchased. Alternatively you can register on line (see registration card for details)
PRIVACY
ILVE respects your privacy and is committed to handling your personal information in accordance with the National Privacy Principles and the Privacy Act 1988 (Cth). A copy of the ILVE Privacy Policy is available at www.ilve.com.au. ILVE will not disclose any personal information set out in the Warranty Registration Card (“Personal Information”) without your consent unless required by:
-
law;
-
any ILVE related company;
-
any service provider which provide services to ILVE or assist ILVE in providing services (including repair and warranty services) to customers. Our purpose in collecting the Personal Information is to keep a record of the ILVE product purchased by you, in order to provide a better warranty service to you in the unlikely event that there is a problem with your ILVE product. ILVE may contact you at any one or more of the address, email address or telephone numbers set out in the Warranty Registration Card. Please contact ILVE on 1300 694 583 should you not wish to be contacted by ILVE.
WARRANTY
1. Warranty
ILVE warrants that each ILVE product will remain, for a period of twenty four (24) months computed from the date of purchase of the ILVE product, free from defects arising in the manufacture of the ILVE product (“Warranty”). Except for consumer guarantees set out in the Competition and Consumer Act 2010 (Cth) (“Act”), ILVE does not make any further warranties or representations in relation to ILVE products.
2. What is not Covered by the Warranty.
The Warranty does not apply if an ILVE product is defective by a factor other than a defect arising in the manufacture of the ILVE product, including but not limited to:
(a) damage through misuse (including failure to maintain, service or use with proper care), neglect, accident or ordinary wear and tear (including deterioration of parts and accessories and glass breakage);
(b) use for purpose for which the ILVE product was not sold or designed;
(c) use or installation which is not in accordance with any specified instructions for use or installation;
(d) use or operation after a defect has occurred or been discovered;
(e) damage through freight, transportation or handling in transit (other than when ILVE is responsible);
(f) damage through exposure to chemicals, dusts, residues, excessive voltage, heat, atmospheric conditions or other forces or environmental factors outside the control or ILVE;
(g) repair, modification or tampering by the purchaser or any person other than ILVE, an employee of ILVE or an authorised ILVE service contractor;
(h) use of parts, components or accessories which have not been supplied or specifically approved by ILVE.
(i) damage to surface coatings caused by cleaning or maintenance using products not recommended in the ILVE product handbook provided to the purchaser upon purchase of the ILVE product;
(j) damage to the base of an electric oven due to items having been placed on the base of the oven cavity or covering the base, such as aluminium foil (this impedes the transfer of heat from the element to the oven cavity and can result in irreparable damage); or
(k) damages, dents or other cosmetic imperfections not affecting the performance of the ILVE in respect of an ILVE product purchased as a “factory second” or from display. The Warranty does not extend to light globes used in ILVE products.
3. Domestic Use
Each ILVE product is made for domestic use. This Warranty may not extend to ILVE products used for commercial purposes; under those circumstances the warranty period is limited to 3 month.
- Time for Claim under the Warranty
You must make any claim under this Warranty within
twenty eight (28) days after the occurrence of an event which gives rise to a claim pursuant to the Warranty, by booking a service call on the telephone number below.
- Proof of Purchase
Customers must retain proof of purchase in order to be eligible to make a warranty claim in respect of an ILVE product.
Continued over...
ILVE LIMITED WARRANTY

LIVE WITH
ILVE
6. Claiming under the Warranty
Customers will bear the cost of claiming under this Warranty unless ILVE determines the expenses are reasonable, in which case the customer must claim those expenses by providing written evidence of each expense to ILVE at the address on the Warranty Registration Card.
7. Statutory Rights
(a) These terms and conditions do not a ect your statutory rights.
(b) The limitations on the Warranty set out in this document do not exclude or limit the application of the consumer guarantees set out in the Act or any other equivalent or corresponding legislation in the relevant jurisdiction where to do so would:
(i) contravene the law of the relevant jurisdiction; or
(ii) cause any part of the Warranty to be void.
(c) ILVE excludes indirect or consequential loss of any kind (including, without limitation, loss of use of the ILVE product) and (other than expressly provided for in these terms and conditions) subject to all terms, conditions and warranties implied by custom, the general law, the Act or other statute.
(d) The liability of ILVE to you for a breach of any express or non-excludable implied term, condition or warranty is limited at the option of ILVE to:
(i) replacing or repairing the defective part of the ILVE product;
(ii) paying the cost of replacing or repairing the defective part of the ILVE product;
(iii) replacing the ILVE product; or
(iv) paying the cost of replacing the ILVE product.
(e) Our goods come with guarantees that cannot be excluded under the Australian Consumer Law.
You are entitled to a replacement or refund for a major failure and for compensation for any other reasonably foreseeable loss or damage. You are also entitled to have the goods repaired or replaced if the goods fail to be of acceptable quality and the failure does not amount to a major failure.
8. Defects
Any part of an ILVE product deemed to be defective and replaced by ILVE is the property of ILVE. ILVE reserves the right to inspect and test ILVE products in order to determine the extent of any defect and the validity of a claim under the Warranty.
*To locate your closest ILVE authorised service agent please contact ILVE on 1300 694 583,
customercare@eurolinx.com.au or visit
http://ilve.com.au/support/service/
IMPORTANT!
All warranty service calls must be booked via the customer care department. The team can be contacted on 1 300 85 64 11 option 1 or customercare@eurolinx.com.au
Service is delivered through a network of Service Agents. If the Appliance is located outside our normal Service Area of our agents you, the Customer will need to bear the cost of travel outside that area.
If you are unable to provide proof of purchase, the fault is not covered under warranty or the product is found to be working to specification you may be required to bear the full cost of the service visit
08042016
WARRANTY REGISTRATION CARD
08042016
Please complete and send to ilve at: REPLY PAID 83617 LEICHHARDT NSW 2040
| Last Name: First Name: | ||
| Address: | ||
| State: Postcode: Email: | ||
| Home Phone: Mobile: | ||
| Purchase Date: / / (Please attach proof of purchase to validate warranty) | ||
| MODEL NUMBER | SERIAL NUMBER(if you cannot locate the serial number please call ILVE on 1300 85 64 11) |
| 1 | |
| 2 | |
| 3 | |
| 4 |


- Thank you for choosing this product.
- CONTENTS
- 1.SAFETY INSTRUCTIONS .... 1
- 2.INSTALLATION 6
- 3.TECHNICAL SPECIFICATIONS 8
- 4.BEFORE USING THE APPLIANCE 9
- 5.LOADING YOUR DISHWASHER ....11
- 6.PROGRAMME TABLE 14
- THE CONTROL PANEL.... 15
- SAFETY INSTRUCTIONS
- General Safety Warnings
- Installation Warnings
- During Use
- RECYCLING
- PACKAGING AND THE ENVIRONMENT
- CE Declaration of Conformity
- Disposal of your old machine
- INSTALLATION
- Machine positioning
- Water connection
- Water inlet hose
- Drain Hose
- Electrical connection
- TECHNICAL SPECIFICATIONS
- General appearance
- Upper Cutlery Basket
- Detergent usage
- Filling the detergent
- Using combined detergents
- Rinse-aid usage
- Filling the rinse-aid and setting
- LOADING YOUR DISHWASHER
- Recommendations
- Upper Basket
- Height Adjustable Rack (peg type)
- PROGRAMME TABLE
- THE CONTROL PANEL
- Delaying a Programme
- Changing a Programme
- Cancelling a Programme
- Switching the Machine Off
- CLEANING AND MAINTENANCE
- Cleaning machine and filters
- Spray arms
- TROUBLESHOOTING
- PRACTICAL INFORMATION
- INSTALLATION OF FULL BUILT-IN DISHWASHERS UNDER THE COUNTER
- ILVE LIMITED WARRANTY
- WARRANTY REGISTRATION
- PRIVACY
- WARRANTY
- Warranty
- What is not Covered by the Warranty.
- Domestic Use
- Claiming under the Warranty
- Statutory Rights
- Defects
- IMPORTANT!
Brand : ILVE
Model : IVDFI400/1
Category : Dishwasher