
ATT-E10 - Turntable AKAI - Free user manual and instructions
Find the device manual for free ATT-E10 AKAI in PDF.


User questions about ATT-E10 AKAI
0 question about this device. Answer the ones you know or ask your own.
Ask a new question about this device
Download the instructions for your Turntable in PDF format for free! Find your manual ATT-E10 - AKAI and take your electronic device back in hand. On this page are published all the documents necessary for the use of your device. ATT-E10 by AKAI.
USER MANUAL ATT-E10 AKAI
Turntable with USB recording
INSTRUCTION MANUAL
IMPORTANT SAFETY INSTRUCTIONS
- Read Instructions - All the safety and operating instructions should be read before this product is operated.
- Retain Instructions — The safety and operating instructions should be retained for future reference.
- Hood Warnings — All warnings on the appliance and in the operating instructions should be adhered to.
- Follow Instructions — All operating and use instructions should be followed.
- Water and Moisture — The appliance should not be used near water - for example, near a bathtub, washbowl, kitchen sink, laundry tub, in a wet basement, or near a swimming pool, and the like.
-
Carts and Stands — The appliance should be used only with a cart or stand that is recommended by the manufacturer. An appliance and cart combination should be moved with care. Quick stops, excessive force, and uneven surfaces may cause the appliance and cart combination to overturn.
-
Wall or Ceiling Mounting — The product should not be mounted to a wall or ceiling.
-
Host — The appliance should be situated away from heat sources such as radiators, heat registers, stoves, or other appliances (including amplifiers) that produce heat.
-
Power Sources – This product should be operated only from the type of power source indicated on the rating label. If you are not sure of the type of power supply to your home, consult your product dealer or local power company. For products intended to operate from battery power, or other sources, refer the operating instructions.
-
Power-Cord Protection — Power-supply cords should be routed so that they are not likely to be walked on or pinched by items placed upon or against them, paying particular attention to the cord in correspondence of plugs, convenience receptacles, and the point where they exit from the appliance.
-
Cleaning - The appliance should be cleaned only as recommended by the manufacturer. Clean by wiping with a cloth slightly damp with water. Avoid getting water inside the appliance.
-
Non-use Periods — The power cord of the appliance should be unplugged from the outlet when left unused for a long period of time.
-
Object and Liquid Entry—Care should be taken so that objects do not fall and liquids are not spilled into the enclosure through openings.
-
Damage Requiring Service - The appliance should be serviced by qualified service personnel when:
A. The power-supply cord or the plug has been damaged; or
B. Objects have fallen, or liquid has been spilled into the appliance; or
C. The appliance has been exposed to rain: or
D. The appliance does not appear to operate normally or exhibits a marked change in performance; or
B. The appliance has been dropped, or the enclosure damaged.
-
Servicing — The user should not attempt any service to the appliance beyond that described in the operating instructions. All other servicing should be referred to qualified service personnel.
-
Ventilation - Slots and openings in the cabinet are provided for ventilation and to ensure reliable operation of the product and to protect it from overheating, and these openings must not be blocked or covered. The openings should never be blocked by placing the product on a bed, sofa, rug, or other similar surface. This product should not be placed in a built-in installation such as a bookcase or rack unless proper ventilation is the manufacturer's instructions have been adhered to.
-
Attachments - do not use attachments not recommended by the product manufacturer as they may cause hazards.
-
Accessories - Do not place this product on an unstable cart, stand, tripod, bracket, or table. The product may fall, causing serious injury to a child or adult, and serious damages to the product. Use only with a cart, stand, tripod, bracket, or table recommended by the manufacturer, or sold with the product. Any mounting of the product should follow the manufacturer's instructions, and should use a mounting necessary recommended by the manufacturer.
-
Lightning - For added protection for this product during a lightning storm, or when it is left unattended and unused for long periods of time, unplug it from the wall outlet and disconnect the antenna or cable system. This will prevent damage to the product due to lightning and power-line surgeons.
-
Replacement Parts - When replacement parts are required, be sure the service technician has used replacement parts specified by the manufacturer or have the same characteristics as the original part. Unauthorized substitutions may result in fire, electric shock, or other hazards.
-
Safety Check – Upon completion of any service or repairs to this product, ask the service technician to perform safety checks to determine that the product is in proper operating condition.
SPECIFICATIONS
GENERAL
| Model: | ATT-B10 |
| Dimensions: | 350 (W) x 255(D) x 110(H)mm |
| Weight: | 3.10Kg |
| Power supply: | Dual Voltage: DC 115V~60Hz/230V~50Hz, User Selectable |
| Power consumption: | 5W |
| Standard test condition: | Ambient Temperature: 23 +/- 2 degC |
| Relative Humidity: | 65% +/- 5% |
| NOTE: Measurements can be carried out between 5 degC to 35 degC and 45% to 85% relative humidity. | |
1
TURNTABLE SECTION:
| Type | 3-speed full manual |
| Motor | DC motor |
| Driving Method | Belt drive |
| Turable Flattur (Plastic) | 198mm dia. |
| Speeds | 33 1/3, 45, 78rpm |
| S/N Ratio | More than 50dB |
| Starting Time | Less than 1 sec with 33 1/3 |
| Braking Time | Less than 1 sec. with 33 1/3 |
| Time for Speed Change | Less than 1 sec. from 33 1/3 to 45 rpm. |
TONE ARM SECTION:
| Type | Steel tone arm with |
| Appliable Cartridge Weight | 3.5~8.5g |
| Anti-aktoring Range | 0-4g |
| Frequency Response | 20Hz~20KHz |
| Channel Separation | More than 15dB |
| Recozzneoded stylus pressure | 4 to 6 grams |
| Channel Separation | More than 15dB |
| Channel balance (at 1kHz) | below 1 dB |
| Tracking Force adjustment Range | 3~4g |
| Effective Arm Length | 185mm |
| Tracking Error Angle | Less than 3 degree |
FUNCTIONS:
1.Playback speed: 33.3, 45,78 RPM
2.Built-in Stereo Speaker
- Headphone
4.Aux-in
5.RCA audio out
6.USB/SD Card Reader
-
Record vinyl to SD Card or USB Drive
-
Plays 7", 10" & 12" Records
DESCRIPTION

2
- Lock catch
2.Dust cover
3.45-rem Acceptor
-
Power Light
-
Power Switch/Volumes control
-
Headphone jack
-
SD connector
-
USB connector
-
Speakers
-
Tone arm
-
Cartridge & needle
-
Carrying handle
-
Turntable Platter


- Mode: REC/USB/SD
- Next music
- Pause / play button/ DEL
- Previous music
- Aux in jack
- R channel
- L channel
- DC power jack
INITIAL SET-UP
MAINS CONNECTION
Ensure that the mains voltage of your home corresponds to the operating voltage of the unit. Your unit is ready to be connected to a mains voltage of 5V DC adapter.
AMPLIFIER CONNECTION (if required)
Whilst you can listen to your new turntable using the built-in speakers you may wish to connect it to your existing Hi Fi system. Connect the audio plugs to the Line input on your mixer or amplifier using an RCA cable (not supplied).
● Red plug into R channel input.
● White plug into L channel input.
PLAYING A RECORD
- Place the record of your choice on the turntable. If required, do not forget to place the adaptor on the record spindle.
- Choose the desired playing speed using the speed selection switch between 33, 45 and 78rpm.
●Turn on the Rotary Power Switch, note that this also controls volume.
●Release the tone arm lock.
● Raise the arm with your hand lightly. - Place the stylus vertically over the first track of the record, the turnstable will start turning automatically.
- Put down the stylus slowly on to the record to play.
- When a record comes to the end, the turntable will stop automatically if the auto-stop switch is in the ON position. If the switch is in the
off position then it will keep revolving until
● the tone arm is returned to the tone arm rest,
● Lift up the tone arm and put it on the rest when finished. - Replace the protective cap on the stylus and close the tone arm lock.
●Turn off power at mains
USB FLASH DRIVE AND SD CARD READER RECORDING
(lift up the tone arm and put it on the rest)
HOW TO RECORD TO A FLASH DRIVE
3
- Insert a USB flash drive or a SD card reader to the turntable's aside USB port.
■Play your RECORDS
To start recording, press and hold the "USB/REC" for about 2 seconds; The beep indicates recording.
●Lower tone arm onto the record; the record will play and the song will record.
- When finished, press "USB/REC" for about 2 seconds to stop recording. Twice beep indicates stop.
To record more songs, repeat Steps #3-5 above. When you finished, raise the toncarm and return it to the armolip.
HOW TO PLAYBACK FROM A FLASH DRIVE
Connect a USB flash drive or a SD card reader with MP3 to the turntable's aside USB port.
- Press the "USB/REC" the first recoding song will play.
- Press "|<<" or ">>|" to skip to the previous/next song.
Note: Songs will play in alphabetical order by file name within each fokler on the drive. QUICK PLAY FLASH will scan through the drive's folders/subfolders for playable music files in the following order:
(1) Songs recorded by the turntable that are located in the "RECORD0" folder.
(2) Songs in the root directory.
(3) Songs in other folders/subfolders (including any hidden or .Trust folders).
- When you plug the recorder songs, you can press the MODE button conversion.
- When you want to clear the track recording, press and hold the DEL key to clear, other USB original documents will not be removed.
AUX IN FUNCTION
(Lift up the tone arm and put it on the rest)
● Insert mix in cable, other function cannot work.
MAINTENANCE
REPLACING THE STYLUS
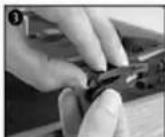
-Refer to the figures 1-8
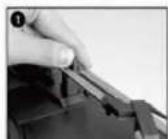
Push the arm lock to
release the tone-arm.

Take off cap of cartridge to
expose the needle out.
Separate the cartridge from
the socket lightly.

Take off the audio-line from
the cartridges completely.


To fit a new one just in opposite deals, insert the audio-line accordingly, and install the cartridge to the socket lightly.
Note: Please exercise extreme care whilst performing this operation so as to avoid the tone arm and audio line wires from any damage.
4
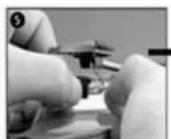
INSTALLING A NEW STYLUS CARTRIDGE
-Refer to the figures 5 & 6

natural_image
Close-up of hands using a tool to adjust or install a component, no visible text or symbolsNOTES
We advise you to clean your records with an anti-static cloth to gain maximum enjoyment from them and to make them last. We would also point out that for the same reason your stylus should be replaced periodically (approximately every 250 hours) Dust the stylus from time to time using a very soft brush dipped in alcohol (brushing from back to front of the cartridge)
WHEN TRANSPORTING YOUR RECORD PLAYER DO NOT FORGET TO:
- Replace the protective cap on the stylus.
Put the rest clip into the pick-up arm.
DISPOSAL
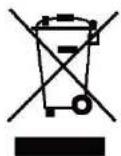
The meaning of the symbol on the material, its accessory or packaging indicates that this product shall not be treated as household waste. Please, dispose of this equipment at your appliable collection point for the recycling of electrical and electronic equipment waste in the European Union and Other European Countries which there are separate collection disposal of this product, you will help, which could otherwise be caused by unmanageable natural resources. Please do not therefore dispose of your old electrical and electronic equipment with your house waste. For more detailed information about recycling of this product, please contact your local city office, your household waste disposal service or the shop where you purchased the product.
5
AKAI
ATT-E10

PICK-UP CU USB MANUAL DE UTILIZARE
6
INSTRUCTIUNI IMPORTANTE DE SIGURANTA
Applicable Cartridge Weight
Anti-patinera
Frocventa de respuns
Separares canalelor
Gama de presiune
Balsans (1a 1kHz)
Tracking Force adjustment Range
Tracking Error Angle
FUNCTII:
- Viteza de redare: 33.3, 45,78 RPM
2.Difuzor stereo incorporat
3.Casti
4.Aux-In
- desire audio RCA
6.Cifitor USB/Card SD
natural_image
Close-up of hands using a tool to adjust or apply a component, no visible text or symbolsNOTA



- IMPORTANT SAFETY INSTRUCTIONS
- SPECIFICATIONS
- TURNTABLE SECTION:
- TONE ARM SECTION:
- FUNCTIONS:
- DESCRIPTION
- INITIAL SET-UP
- MAINS CONNECTION
- AMPLIFIER CONNECTION (if required)
- PLAYING A RECORD
- USB FLASH DRIVE AND SD CARD READER RECORDING
- HOW TO PLAYBACK FROM A FLASH DRIVE
- AUX IN FUNCTION
- MAINTENANCE
- NOTES
- DISPOSAL
- AKAI
- ATT-E10
- PICK-UP CU USB MANUAL DE UTILIZARE
- INSTRUCTIUNI IMPORTANTE DE SIGURANTA
- FUNCTII:
- NOTA
Brand : AKAI
Model : ATT-E10
Category : Turntable