
OMC15E1 - Heating Omega Altise - Free user manual and instructions
Find the device manual for free OMC15E1 Omega Altise in PDF.


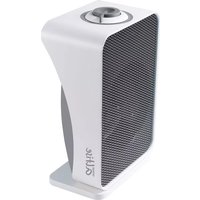
| Product Type | Fan Heater |
| Model | OMC15E1 |
| Brand | Omega Altise |
| Power (Watt) | 1500W |
| Voltage | 220-240V ~ 50Hz |
| Dimensions (H x W x D) | 25 cm x 20 cm x 15 cm |
| Weight | 1.5 kg |
| Heating Element | PTC ceramic |
| Temperature Control | Adjustable thermostat |
| Fan Speeds | 2 speeds (low/high) |
| Oscillation | Yes, 70° wide |
| Safety Features | Overheat protection, tip-over switch |
| Housing Material | ABS plastic |
| Color | White/Black |
| Noise Level | < 45 dB |
| Energy Efficiency | Class II |
| Cleaning | Wipe with dry cloth; do not immerse |
| Repairability | Spare parts available via authorized service |
| Certifications | CE, RoHS |
| Warranty | 2 years |
Frequently Asked Questions - OMC15E1 Omega Altise
User questions about OMC15E1 Omega Altise
0 question about this device. Answer the ones you know or ask your own.
Ask a new question about this device
Download the instructions for your Heating in PDF format for free! Find your manual OMC15E1 - Omega Altise and take your electronic device back in hand. On this page are published all the documents necessary for the use of your device. OMC15E1 by Omega Altise.
USER MANUAL OMC15E1 Omega Altise
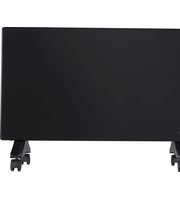
Micathermic Column Heater
Installation and
Operating Instructions
(Please read before using the heater)

natural_image
White electric heater with mesh grille and control panel (no visible text or symbols)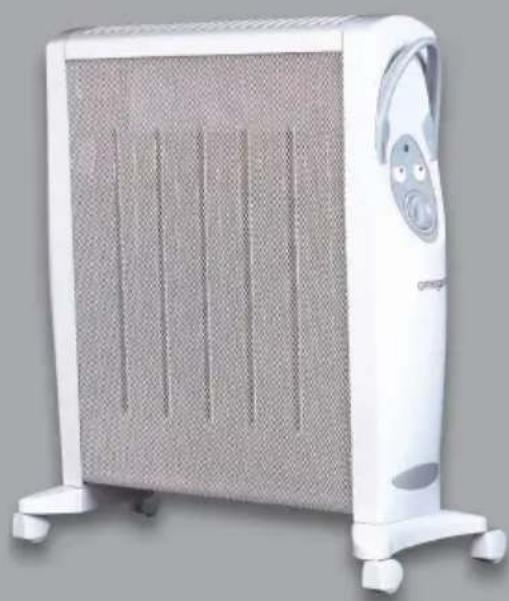
natural_image
White electric heater with mesh grille and control panel (no visible text or symbols)(Images indicative only)
CONTENTS
Introduction and Features
Specifications
Remove Packaging
Important Safeguards
Installation
Operation
Cleaning and Storage
Trouble Shooting.
MICATHERMIC COLUMN HEATERS
Micathermic technology provides both radiant and convection heat releases at the same time resulting in quick effective and efficient heat distribution throughout room.
Heat radiating from the heater not only heats the air but also objects and walls in the surrounding area.
SPECIAL FEATURES
- Ultra-fast heating - reaches maximum heat output within 60 seconds
- Thermostatic control
- Degrees of protection: Splashproof to IP24 standards
- Temperature control setting
- 24 Hour timer
- Safety thermal cut-off
– Safety tip over switch for added protection - Completely silent operation
- No oil leakage
- No dehumidifying
SPECIFICATIONS
Voltage rating:
240V AC, 50Hz, all, models
Power consumption:
600W/900W/1500W (OMC15E1)
900W/1500W/2400W (OMC24E1)
Unit size:
44cm (L) x 65cm (H) x 25cm (W) (OMC15E1)
59cm (L) x 65cm (H) x 23cm (W) (OMC24E1)
Unit weight:
5.2 kg (OMC15E1)
7.8 kg (OMC24E1)
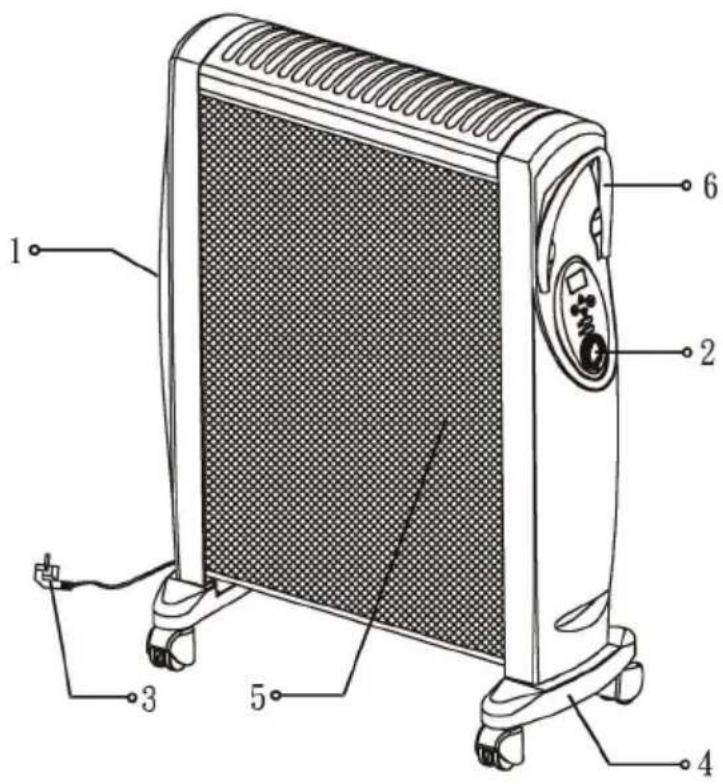
(1) On/off switch
(2) Thermostat knob to adjust temperature
(3) Power cord and plug
(4) Feet and castors
(5) Metal grid
(6) Built in handle

Control panel

REMOVE PACKAGING

Please read instructions before using the heater.
(1) Take heater out of the box and remove the polyfoam and polybag.
(2) Inside are:
- 1 polybag containing product and user manual
- 2 feet supports in individual polybags inserted in polyfoam
- 4 castors in individual polybags inserted in polyfoam
(3) Save the packaging to store the heater when not in use.
IMPORTANT SAFEGUARDS
PLEASE READ INSTRUCTIONS BEFORE USING THE HEATER.
(1) To avoid burns, do not touch the hot surfaces of the heater when it is in use. Use handle when moving this heater. keep combustible materials, such as drapery and other furnishings at least 900mm from the front of the heater and away from the side and the rear.
(2) Do not allow children or infirm persons to use this heater without proper supervision.
(3) Do not use outdoors.
(4) This heater can be used in bathrooms, laundry areas or similar indoor locations. Never locate the heater where it may be reached from a bathtub, basin or shower.
(5) This heater will become hot during use. DO NOT use the heater in areas where petroleum, paint and cleaning solvents or any other flammable liquids are used or stored.
(6) Do not insert foreign objects into any ventilation or exhaust opening as this may
cause and electric shock, fire or damage to the heater.
(7) Always unplug the heater when not in use.
(8) The use of an extension cord is not recommended, however if its use is unavoidable then the conductor wire inside the cord must be at least 1mm in diameter and rate not less than 13 amp.
(9) Do not run the cord under carpet and do not cover it with throw rugs, runners or the like. Place the cord away from a traffic area and where it will not be tripped over.
(10) Never use a damaged cord or plug. If damaged they must be returned to an Authorised Eurolux Service Agent.
(11) Connect the heater to properly grounded outlets only.
(12) Use the heater only as described in this manual. Any other use not recommended by the manufacturer may cause fire, electric shock or injury to persons.
(13) Do not use this heater with a programmer, timer or any other device that switches the heater on automatically.
(14) The heater must not be located immediately below a power outlet.
(15) Do not cover this heater with any items as this may cause over heating.
(16) Do not use this heater in the immediate surroundings of a bath, shower or swimming pool.
(17) Caution: In order to avoid hazards due to inadvertent resetting of the thermal cut-out, this appliance must not be connected to power through an external switching device, such as a timer, or connected to a circuit that is regularly switched on and off by that utility.
(18) Do not use the heater on the floor without mounting the feet.
WARNING: DO NOT USE THE HEATER ON THE FLOOR WITHOUT MOUNTING THE FEET.
- Insert the plastic shaft of the castors into the feet supports.
- Insert the feet support on each side of the heater using the built-in clips.
OPERATION

Please read instructions before using the heater.
(1) Ensure that the Thermostat Control Knob is on 'Snowflake'. Make sure the ON/OFF switch is off.
(2) Plug the power cord into a suitable electrical outlet (Rated not less than 13 amp)
(3) Turn the ON/OFF switch to on.
(4) The heater will operate by default in MANUAL mode and 'Display' will show the room temperature and 'MANUAL' symbol..... If 'ON' and 'OFF' time have been set, the 'ON' and 'OFF' symbols will be displayed.
(5) For the heater to start operating, the user must select a power, 'Power 1', 'Power II' or 'Power I+II'. The indicator lights PI and PII show the power selected. If PI+PII are on, power in use is PIII.
(6) Choose a thermostat knob position set at a higher temperature than the room temperature. In a short time, heat will come out of the heater.
You can adjust the thermostat temperature from 5 to 32 degrees Celsius anytime while the heater is turned on. Select temperature by turning the knob clockwise (higher temperature) and anti-clockwise (lower temperature). When the room temperature reaches the selected temperature, heater will turn off automatically.
(7) Press 'MODE' button to set and use the timer.
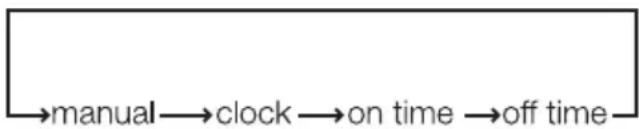
flowchart
graph LR
    A[" "] --> B["manual"]
    B --> C["clock"]
    C --> D["on time"]
    D --> E["off time"]
(8) To set the timer, press MODE once. LCD screen displays the clock 00:00, glittering. Press +/- to set the time, press the keys once, minutes will scroll up or down one by one, keep the keys depressed and minutes will scroll up or down in 10 minute increments. Once you set the desired time, press the SET button to confirm it, the LCD will stop glittering.
(9) To set the heater to start working, go to the 'ON TIME' mode. The LCD displays the clock 00:00, glittering. Press +/- to set the time, press the keys once, minutes will scroll up or down unit-by-unit, keep the keys depressed and minutes will scroll up or down in 10 minute increments. Once you set the desired 'ON TIME', press the 'SET' button to confirm it, the LCD will stop glittering.
(10) To set the time for the heater to stop working, go to the 'OFF TIME' mode. The LCD displays the clock 23:59 glittering. This is the default OFF time. Press +/- to set the time, press the keys once, minutes will scroll up or down unit-by-unit, keep the keys depressed and minutes will scroll up or down in 10 minute increments. Once you set the desired 'OFF TIME', press the 'SET' button to confirm it, the LCD will stop glittering.
(11) It is possible to choose the working power for a specific 'ON/OFF' time. Select a 'Power I', 'Power II' or 'Power I+II' button, then press 'SET' button to confirm. If 'ON/OFF' times are already saved, the program will start using the last power confirmed. If there are no 'ON/OFF' times saved, after confirming the power do again steps 8 and 9 above.
(12) When it is ‘ON TIME’, heater starts heating using the confirmed power, the corresponding power indicator light is on. User can change the power by choosing a new power. When it is ‘OFF TIME’, heater stops heating.
(13) User has to press the 'SET' button after selecting power; otherwise the previously set power cannot be overridden.
(14) In Manual and timer mode, heater can be switched off by pressing the 'ON/OFF' button.
(15) To select the anti-frost function, turn the knob to 'snowflake' symbol position. When temperature falls to or below 5^ C, heater starts working and the 'Power I' and 'Power II' indicating lights are on.
(16) Once ‘ON’ and ‘OFF’ times are set, heater will stat and stop daily at the set times unless the ‘ON/OFF’ switch at the bottom of the control end cap is switched off.
(17) When the power is resumed, the 'SET ON/OFF' times are still operational but not the clock time. User has to re-set the clock time to have the timer function operates.
In manual mode, press the 'SET' button for a few seconds and 'SET ON/OFF' times are discarded.
CLEANING
(1) Before cleaning, turn off the heater, unplug the power cord and allow the heater to cool down.
(2) Do not immerse the heater, power cord and plug in water or other liquid. Do not pour water or other liquid over the heater.
(3) Use a vacuum cleaner to remove dust and lint on the metal grid of the heater.
(4) Wipe the heater with a dry cloth to remove dust and a damp cloth (not wet) to clean off stains.
(5) Do not use detergents, abrasive cleaning powder or polish of any kind on the body of the heater, as these can damage the heater.
STORAGE
Store the heater in a cool dry place. To prevent dust and dirt getting in the heater use the old packaging to repack the unit.
If the heater is not used regularly or if it is stored uncovered, the heater may produce small amounts of smoke and/or smell upon first use. This is normal, it is due to the accumulation of humidity and dust on the heating element.
TROUBLE SHOOTING
IF YOUR HEATER IS NOT WORKING THEN CHECK THE FOLLOWING:
HEATER NOT WARM:
(1) Check if the heater is turned on or not.
(2) Check the Thermostat Control Knob is on maximum position or not.
(3) Check if any objects are covering the heater.
HEATER NOT OPERATING:
(1) Check if the power cord is plugged into an electrical outlet or not.
(2) Check if the electrical supply in the main house or the main fuse is working or not.
(3) Make sure the power switch is on.
(4) Check the Thermostat Control Knob is on maximum position.
If after you have carried out the above checks the heater is still not working then return it to your nearest Authorised Eurolux Service Agent.
IMPoRtant:
Do not attempt to try and fix the heater yourself as any tampering will invalidate the warranty. Repairs carried out improperly by unqualified persons may create serious consequences for the user and the heater.
When your heater has reached the end of its life please dispose of it correctly by contacting your local authority for recycling advice in your area.
warranty
THIS WARRANTY IS VALID IN AUSTRALIA ONLY
Note
Please complete the following details when you unpack the product and retain this card with the purchase invoice or sales docket.
Warranty
These products are covered by a Warranty in addition to all rights available to you by statute. The warranty is for a period of twenty four (24) months from the date of purchase, subject to the following conditions. The Warranty covers rectification free of charge of any fault arising from defective materials or components, or faulty workmanship or assembly. The product will be repaired or replaced at the option of Omega Appliances.
The conditions abovementioned are:
-
that the purchaser carefully follows all instructions packed with the product;
-
That the purchaser carefully follows the installation instructions provided and complies with electrical wiring regulations, gas and/or plumbing codes;
-
that the purchaser carefully follows the instructions provided in the owner's handbook relating to the proper use and care of the product and does not use the product for any purpose other than the domestic use for which it has been designed.
-
that the product was purchased and is installed in Australia.
-
that the Warranty does not extend to:
(a) optional glass lids for hobs apart from claims which relate to mechanical or physical damage thereof at the date of purchase;
(b) light globes;
(c) damage to ceramic glass caused by liquid or solid spillovers, lack of maintenance, or impact;
(d) damage to surface coatings caused by cleaning or maintenance using products not recommended by the owner's handbook;
(e) defects caused by normal wear and tear, accident, negligence, alteration or misuse;
(f) a product not in the possession of the original purchaser;
(g) a product dismantled, repaired or serviced by any serviceman other than an authorised employee of Omega Appliances.
- The provision of service under this Warranty is limited by the boundary of the City in which you live. Such travelling outside of the City limits will incur commercial costs to be paid by you, regulated by the number of kilometres travelled beyond the City limits.
Nothing herein contained shall be construed in any way as excluding or limiting your rights under the Trade Practices Act 1974 or corresponding state legislation.
For service, please contact your local Omega-Smeg office or the dealer/retailer from whom you purchased the product. If you are unable to establish the date of purchase, or the fault is not covered by this Warranty, or if the product is found to be in working order, you will be required to bear all service call charges.
PRODUCT TYPE:
MODEL NUMBER:
SERIAL NUMBER:
DATE OF PURCHASE:......
INVOICE/SALES DOCKET NO:......
PURCHASER'S NAME:......
ADDRESS:
RETAILER'S/DEALER'S NAME:
ADDRESS:
Omega Appliances
Division of M.E.A. Pty. Ltd.
ACN: 001 375 686
104 Vanessa Street
Kingsgrove
NSW 2208
1300 739 033
- Micathermic Column Heater
- Installation and
- Operating Instructions
- CONTENTS
- MICATHERMIC COLUMN HEATERS
- SPECIAL FEATURES
- SPECIFICATIONS
- REMOVE PACKAGING
- Please read instructions before using the heater.
- IMPORTANT SAFEGUARDS
- OPERATION
- CLEANING
- STORAGE
- TROUBLE SHOOTING
- IMPoRtant:
- warranty
- THIS WARRANTY IS VALID IN AUSTRALIA ONLY
- Note
Brand : Omega Altise
Model : OMC15E1
Category : Heating