
SC-6200AU6A - Air conditioner Seiki - Free user manual and instructions
Find the device manual for free SC-6200AU6A Seiki in PDF.


| Product Type | Air Conditioner |
| Model | SC-6200AU6A |
| Brand | Seiki |
| Cooling Capacity | 6200 BTU/h |
| Power Supply | 115V / 60Hz |
| Power Consumption | 600W (approx.) |
| Refrigerant | R410A |
| Energy Efficiency Ratio (EER) | 10.3 (approx.) |
| Noise Level (Indoor) | 52 dB (approx.) |
| Noise Level (Outdoor) | 62 dB (approx.) |
| Dimensions (W x D x H) | 18.5 x 13.4 x 11.8 in (approx.) |
| Weight | 35 lbs (approx.) |
| Modes | Cool, Fan, Dry, Sleep |
| Fan Speeds | High, Low |
| Timer | 24-hour on/off |
| Remote Control | Yes (included) |
| Filter | Washable |
| Maintenance | Clean filter every 2 weeks |
| Safety Features | Overheat protection, auto restart |
| Installation Type | Window or portable (check manual) |
Frequently Asked Questions - SC-6200AU6A Seiki
User questions about SC-6200AU6A Seiki
0 question about this device. Answer the ones you know or ask your own.
Ask a new question about this device
Download the instructions for your Air conditioner in PDF format for free! Find your manual SC-6200AU6A - Seiki and take your electronic device back in hand. On this page are published all the documents necessary for the use of your device. SC-6200AU6A by Seiki.
USER MANUAL SC-6200AU6A Seiki
natural_image
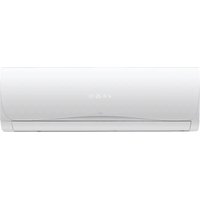
Exterior view of a modern air conditioner unit with digital display and fan inset (no text or symbols)INSTRUCTION MANUAL
Please read this manual carefully before using, and keep it for future reference.
CONTENTS
| General | Safety | |
| Product | Overview | |
| Remote | Control | |
| Remote | Control Use | |
| Operations | ||
| Troubleshooting | ||
| Specifications | ||
| Customer | Service |
9
1:
13
GENERAL SAFETY
Read this manual thoroughly before you start using the Split system air con.
Store this manual, the completed warranty card, your receipt and the product packaging. The safety precautions instructions reduce the risk of fire, electric shock and injury when correctly complied to.
Please follow all instructions and take notice of all warnings.
IMPORTANT INFORMATION
This unit comes with separate manual on installation for use by an appropriately qualified installer. Do not try to install on your own, this will expose you to danger and void the warranty. It is your responsibility to ensure the unit is installed by a qualified technician, they should check that it is earthed in accordance with regulations and install a thermomagnetic circuit breaker.
Please follow instruction when installing this product in accordance with the instruction manual. This product must be positioned in a sufficiently stable location, it can be potentially hazardous due to falling when mounted and can cause injury, particularly to children if it positioned incorrectly.
- Before installing this Aircon, make sure your outlet voltage corresponds to the voltage stated on the power supply rating label
- Do not use a damaged power cord, plug or loose outlet. Doing so may cause an electric shock.
- Do not plug several devices into the same outlet. Doing so may cause the outlet to overheat and start a fire. Make sure the outlet is readily accessible during operation of the equipment.
- Do not bend, twist or kink the power cord excessively.
- Do not allow anything to rest on or roll over the power cord.
Doing so may cause a fire or an electric shock.
- Do not run the power cord near heat-producing appliances such as radiators, stoves or irons. The excessive heat could melt the insulation and expose live wires, resulting in fire or electric shock.
- Do not expose the air conditioner to water. The electrical insulation could be damaged and cause electrocution. Do not touch the unit when barefoot or parts of your body are wet or damp.
- Do not cover the ventilation openings of the product with items such as newspapers, tablecloths, curtains etc or insert objects into the slots available on the products.
As this could result in the product temperature rising and could cause a fire.
GENERAL SAFETY INSTRUCTIONS (Cont.)
- If you notice any unusual odors or smoke around the unit, immediately disconnect the unit from the outlet and contact the service center. Failure to do so may result in fire or electric shock.
- When not using the unit for long periods of time or when you are moving the unit please ensure to disconnect the power supply from the wall socket.
- Please beware that Dust could accumulate over time on the unit and cause it to generate heat and or deteriorate insulation, which in turn may result in an electrical fire.
- The product is not intended for use by persons (including children) with reduced physical, sensory or mental capabilities, or young children of any age, They must be supervised by a person responsible for their safety.
- Batteries from the remote control must be only removed by an adult, the adult must ensure to keep them out of reach of infants and children. Seek medical attention immediately if a child has swallowed a battery.
- To maintain the product do not use any chemical or cleaning agent or wet cloth, please only ensure to utilize a dry cloth to wipe it down from marks or dust and only after unplugging the product from the power socket.
- Always use the air con with the air filter mounted. Using it without the air filter can cause accumulation of dust or waste on the inner parts of the device with possible subsequent failters.
- Do not direct airflow directly onto plants or animals, as long exposure can affect them.
- Please ensure to contact our call center for any repair or service required for the products not doing so will make warranty on your product void.
- We assume not liability for any eventual damages to property or injury to persons caused by misuse of the product or noncompliance with these instructions.
Please make sure upon positioning this product, the place is:
- Not wet or damp and Well ventilated
- Away from direct sunlight or heaters.
- Away from splashes or food.
- Protected from excessive dust or grease.
- Do not place containers with liquids, if liquid falls inside the products it may result in short-circuit, fire or electric shock.
- Do not place small metallic objects on top of the unit or block the openings as it will reduce operating efficiency of the air con with failures or damages.
PLEASE REFER TO THE INSTALLATION MANUAL ON SAFETY INSTRUCTION SPECIFIC TO EACH OF THE INDOOR AND OUTDOOR UNITS.
PRODUCT OVERVIEW

flowchart
graph TD
    A["Indoor Unit"] --> B["Air return grid"]
    B --> C["Takes in the indoor air"]
    A --> D["Operational performance/indications"]
    D --> E["Lelf/right air flow direction adjusting fin"]
    D --> F["Up/down air flow direction adjusting flap"]
    A --> G["Air outlet"]
    G --> H["Air blows out from here"]
    A --> I["Air filter"]
    I --> J["Removes dust or dirt out of the inlet air"]
    A --> K["Drain tube"]
    K --> L["Drain the water dehumidified out of the air"]
    M["Outdoor Unit"] --> N["Air inlet at sides & rear surface"]
    N --> O["Air discharge vent"]
    P["Refrigerant piping connection, Electric wiring cord"] --> O
    Q["Setting temperature, timer time and malfunction code indicator"] --> R["88"]
REMOTE CONTROL

flowchart
graph TD
    A["Temperature indicator"] --> B["INDUCE"]
    B --> C["SWEET indicator"]
    B --> D["TURBO indicator"]
    B --> E["Key lock indicator"]
    B --> F["FAN SPEED indicator"]
    B --> G["ON/OFF button"]
    B --> H["FAN SPEED button"]
    B --> I["TURBO button"]
    B --> J["SLEEP button"]
    B --> K["CLEAN button"]
    B --> L["FOLLOW ME button"]
    B --> M["TURBO"]
    B --> N["SLEEP"]
    B --> O["CLEAN"]
    B --> P["FOLLOW ME button"]
    B --> Q["TURBO"]
    B --> R["SLEEP"]
    B --> S["CLEAN"]
    B --> T["FOLLOW ME button"]
    B --> U["TURBO"]
    B --> V["SLEEP"]
    B --> W["CLEAN"]
    B --> X["FOLLOW ME button"]
    A --> Y["SET TEMPERATURE button"]
    Y --> Z["This button sets the room temperature."]
    A --> AA["MODE button"]
    AA --> AB["This button changes the operation mode: AUTO, COOL, DRY, HEAT, FAN."]
    A --> AC["SWING button"]
    AC --> AD["This button changes the flap mode: natural flow, swing or fixed wind."]
    A --> AE["AIR FLOW button"]
    AE --> AF["This button used for selection of the left/right air flow direction, whenever pressed the in flap will swing or fix. (It) just work on three-dimensional air flow model."]
    A --> AG["TIMER button"]
    AG --> AH["This button is used to the switch-on or switch-off and the timer time."]
    A --> AI["HOLD button"]
    AI --> AJ["Press this button to lock or unlock the keyboard."]
    A --> AK["SET Temperature indicator indicates the set temperature"]
REMOTE CONTROL USE
- Point the remote control at the unit, then press the ON/OFF button.
Press the mode button, then select your desired mode: AUTO, COOL, DRY, HEAT or FAN. - Press the SET TEMPERATURE buttons to increase or decrease the readings until your desired temperature is displayed. The room temperature range is from 16°C to 32°C. (It will automatically default to 25°C and is non-adjustable in AUTO or DRY modes.)
- Press the FAN SPEED button to choose the air rate you want. LOW, MED or HI will be symbolized by the number of blocks under the fan icon. If you select AUTO, the fan and block icons will flash.
- Press the SWING button to choose the up/down air flow direction you want: NATURAL FLOW, SWING or FIXED. (It will automatically be set to FIXED air flow direction in DRY mode).
- Press the AIR FLOW button to choose the left/right direction button you want: SWING, FIXED.
To be in compliance EN61000-3-11, the product should be connected to a supply of the system impedance |Zsys|=0.141 ohms or less. Before connecting the product to your power network, please consult with your electric supplier to ensure the power network is above requirement.
OPERATIONS
TURBO OPERATION
Press TURBO during COOL or HEAT operation, and the air rate will be set to high. Press the TURBO button again to cancel the mode.
Note: During turbo mode, air rate cannot be changed.
TIMER OPERATION
Setting Turn off time.
Set the time for the unit to turn off
- While the air-conditioner is working, press the TIMER button, and the air-conditioner will go into timer switch-off mode.
- Press the TIMER button again to set the desired time for the air-conditioner to turn itself off. The timer can be set from a range of 1 hour to 24 hours. Each time the button is pressed, the number on the display will move up by one.
- Once the timer has been set, the digits shown on the screen will count down by 1 for each hour that has elapsed., indicating the remaining time prior to the unit switching off.
Setting Turn On Time
Set the time for the unit to turn on.
- While the air-conditioner is in standby mode, press the TIMER button, and the airconditioner will go into timer switch-on mode.
- Press the TIMER button again to set the desired time for the air-conditioner to turn itself on. The timer can be set from a range of 1 hour to 24 hours. Each time the button is pressed, the number on the display will move up by one.
- Once the timer has been set, the digits shown on the screen will count down by 1 for each hour that has elapsed., indicating the remaining time prior to the unit switching on.
To cancel a current timer mode, simply press the TIMER button to delete the mode.
OPERATIONS (Cont.)
SLEEP MODE
Use this mode to reduce operation sound while sleeping.
- Press the SLEEP button once and air flow sound from the indoor unit will be decreased.
- Press the SLEEP button again to turn Sleep mode off.
NOTE:
- Use sleep mode when you are going to bed. If this mode is used during the day, the functionality may be reduced due to the ambient temperature being too high.
- During operation of cooling mode, the room temperature setting will be raised gradually by 2ircC higher than the set temperature once the unit is in sleep mode.
- During operation of heating mode, the room temperature setting will be dropped gradually by 5ircC lower than the set temperature once the unit is in sleep mode.
OPERATIONAL PRINCIPLES OF HEATING MODE
- The unit absorbs heat from the outdoor air and transfers it indoors to heat the room air. The heating capabilities through this principle of heat pumping alters with the variations of temperature of the outdoor air.
- It will only take a short amount of time for hot air circulation to raise the room temperature.
- If the temperature outdoors is extremely low, this system can be used together with other heating devices, as long as good ventilation is provided.
Defrosting
When the outdoor temperature is very low, and the humidity is very high, frosting will occur due to the heat exchange of the outdoor unit, which can have negative impacts on the efficiency of the heating performance. In such cases, the automatic defrosting function will come into play.
The heating operation will be stopped for 5-10 minutes to do the defrost.
- The fans of both indoor and outdoor units will stop.
- During defrosting, the outdoor unit may product steam. This is caused by rapid defrosting and is not a performance failure.
- Upon completion of the defrosting process, heating operations will resume.
OPERATIONS (Cont.)
The air conditioner must be turned on and unplugged before any maintenance is carried out.
- Check to see if there are any objects or materials blocking any air intakes or outlets of both the indoor and outdoor units.
- Check the installation stand to ensure there is no corrosion or rust.
- Check to see that the air filter is clean.
- While reconnecting the power, ensure it is plugged in securely.
- Put new batteries into the remote controller.
DURING SEASON OPERATION
- Remove the air-filter screen from the unit.
- Gently press the two lower ends of the grid to open it.
- Gently pull up on the air filter screen and take it out in the direction of your body.
- Clean the air filter screen (if dirty) with lukewarm water and allow it to air dry.
- Reinstall the air filter screen. (Never use the unit without the filter in place)
- Regularly wipe the air conditioner clean with a soft, dry cloth.
- Set the temperature to 30irc C and operate the unit in fan status for about half a day.
- Stop the unit, then unplug it from the power supply.
- Clean, then reinstall the air filter.
- Clean the indoor and outdoor units.
- Take the batteries out of the remote controller.
Note: if the air filter screen is blocked by dust or dirt, the cooling or heating performance will be a ected, with the power consumption and operational noise being increased.
Therefore, the air filter screen should be cleaned regularly.
TROUBLSHOOTING
| The air conditioner will not operate at all. | ||
Is the unit plugged in? 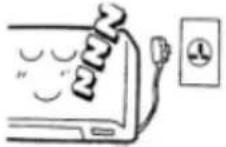 | Is the timer on function active? 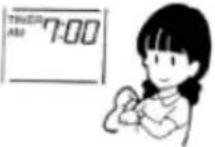 | Has there been a power failure or a blown fuse?  |
| Poor Cooling or Heating Performance | ||
Is the room temperature setting set correctly? suitable TEMP  | Are the air-filters clogged? 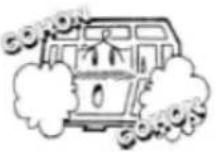 | Are windows and doors open? 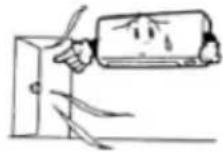 |
| Poor Cooling Performance | ||
Is direct sunlight entering the room?  | Is there a heat source in the room? 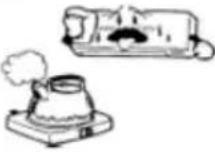 | Are there too many people in the room? 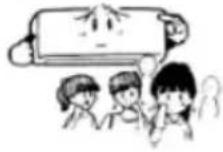 |
SPECIFICATIONS
| Capacity | COOLING 6200W (6.2kW) | |
| HEATING 6300W (6.3kW) | ||
| Max. Current Input | COOLING 8.3 A | |
| HEATING 7.9 A | ||
| Max. Power Input | COOLING 1905 W | |
| HEATING 1800 W | ||
| Room Size Suitability | 33-38 m2 | |
| Rated Voltage and Frequency | 220-240V AC / 50Hz | |
| Ingress Protection | OUTDOOR UNIT IP24 | |
| Net Weight | INDOOR UNIT | 16 kg |
| OUTDOOR UNIT 56 kg | ||
| Max. Pressure | DISCHARGE 4.2 MPa | |
| SUCTION 1.3 MPa | ||
| Refrigerant Type | TYPE R410A | |
| QUANTITY 2150 g | ||
| Noise Level | INDOOR UNIT 42-48 dB(A) | |
| OUTDOOR UNIT 56 dB(A) | ||
| Dimensions | INDOOR UNIT (mm) 302 (h) x 1080 (w) x 220 (d) | |
| OUTDOOR UNIT (mm) 700 (h) x 870 (w) x 310 (d) | ||
SEIKI™
CUSTOMER HELPLINE:
1300 296 699
DISTRIBUTED BY:
AYONZ PTY LTD
- INSTRUCTION MANUAL
- CONTENTS
- GENERAL SAFETY
- IMPORTANT INFORMATION
- GENERAL SAFETY INSTRUCTIONS (Cont.)
- Please make sure upon positioning this product, the place is:
- PLEASE REFER TO THE INSTALLATION MANUAL ON SAFETY INSTRUCTION SPECIFIC TO EACH OF THE INDOOR AND OUTDOOR UNITS.
- PRODUCT OVERVIEW
- REMOTE CONTROL
- REMOTE CONTROL USE
- OPERATIONS
- TURBO OPERATION
- TIMER OPERATION
- Setting Turn off time.
- Setting Turn On Time
- OPERATIONS (Cont.)
- SLEEP MODE
- NOTE:
- OPERATIONAL PRINCIPLES OF HEATING MODE
- Defrosting
- DURING SEASON OPERATION
- TROUBLSHOOTING
- SEIKI™
Brand : Seiki
Model : SC-6200AU6A
Category : Air conditioner