Kirribilli TV Unit - TV Stand Koala - Free user manual and instructions
Find the device manual for free Kirribilli TV Unit Koala in PDF.


| Product Type | TV Stand |
| Brand | Koala |
| Model | Kirribilli TV Unit |
| Material | Timber |
| Assembly Required | Yes |
| Number of Legs | 2 |
| Number of Adjustable Shelves | 2 |
| Top Shelf Weight Capacity | 60 kg (evenly distributed) |
| Adjustable Shelf Weight Capacity (per shelf) | 10 kg (evenly distributed) |
| Lower Shelf Weight Capacity (per shelf) | 20 kg (evenly distributed) |
| Outer Shelf Weight Capacity (per shelf) | 5 kg (evenly distributed) |
| Wall Anchors Included | Yes (lanyards) |
| Care Instructions | Dust weekly with dry cloth; avoid direct sunlight; clean spills immediately with dry cloth. |
| Cleaning Warnings | Do not use abrasive cloths, concentrated detergents, or silicon-based wood polishes. |
| Safety Warning | Use wall anchors to prevent tipping; discourage children from climbing. |
| Package Includes | Top panel, side panels (x2), back panel, bottom panel, middle shelf divider, shelves (x2), legs (x2), support rods (x2), lever bolts (x2), gumnuts (x4), shelf support pins (x8), wall lanyards (x2), small dowels (x4), large dowels (x4) |
| Tools Required | None (all hardware included) |
| Wood Variation | Natural timber may have variation in grain, color, and knots; color may change over time. |
| Recycling | Please recycle packaging and product at end of life. |
Frequently Asked Questions - Kirribilli TV Unit Koala
User questions about Kirribilli TV Unit Koala
0 question about this device. Answer the ones you know or ask your own.
Ask a new question about this device
Download the instructions for your TV Stand in PDF format for free! Find your manual Kirribilli TV Unit - Koala and take your electronic device back in hand. On this page are published all the documents necessary for the use of your device. Kirribilli TV Unit by Koala.
USER MANUAL Kirribilli TV Unit Koala
natural_image
Technical line drawing of a two-level table structure with no text or symbolsKIRRIBILLI TV UNIT
g ,go Y
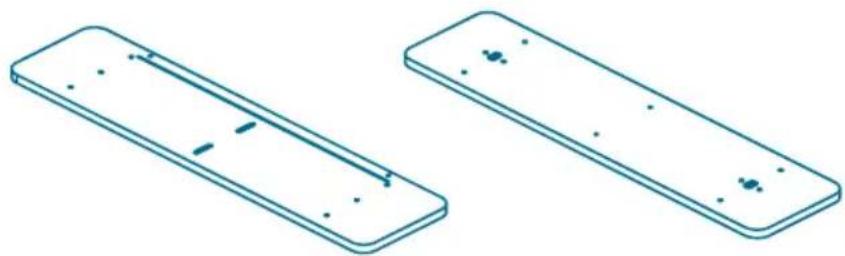
natural_image
Two isometric views of a rectangular electronic component with mounting holes and internal features (no text or symbols)Top panel
x1
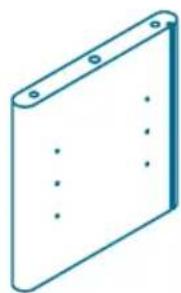
natural_image
Isometric line drawing of a rectangular panel with mounting holes and internal dot pattern (no text or symbols)Side panel
x2
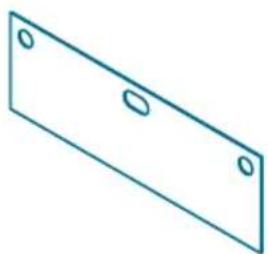
natural_image
Simple line drawing of a rectangular plate with two circular holes (no text or symbols)Back panel
x1
Bottom panel
x1
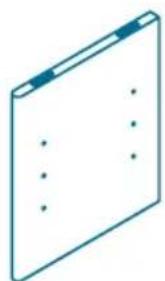
natural_image
Simple line drawing of a rectangular object with internal dots and a blue tab (no text or symbols)Middle shelf divider
x1
natural_image
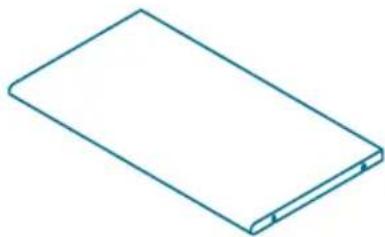
Isometric line drawing of a rectangular electronic component or panel (no text or symbols)Shelf
x2
What's in the box\*:
*Not to scale
Click the button to watch the assembly video

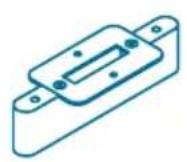
Legs
x2

Support rod
x2

Lever bolt
x2

Bottom panel Gumnut
x2

Shelf support pin
x8

Wall lanyard Gumnut
x2
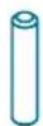
Small dowel
x4
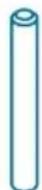
Large dowel
x4
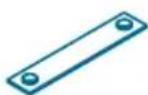
Wall lanyard
x2
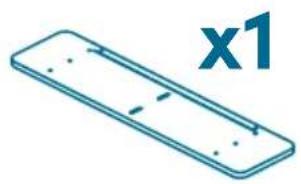
- Place the top panel face down on a flat surface.
Click the button to watch the assembly video

natural_image
Isometric view of a rectangular electronic component with mounting holes and a labeled section 'x1' (no text or symbols on the part itself)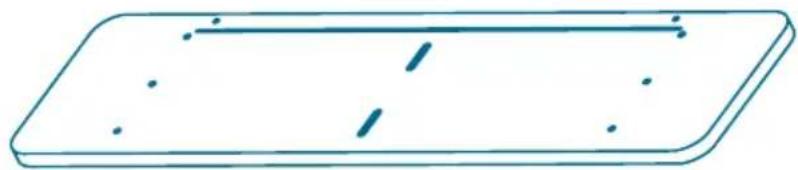
natural_image
Simple 3D diagram of a rectangular plate with internal lines and dots, no text or symbols present- Insert the small dowels into the holes shown.
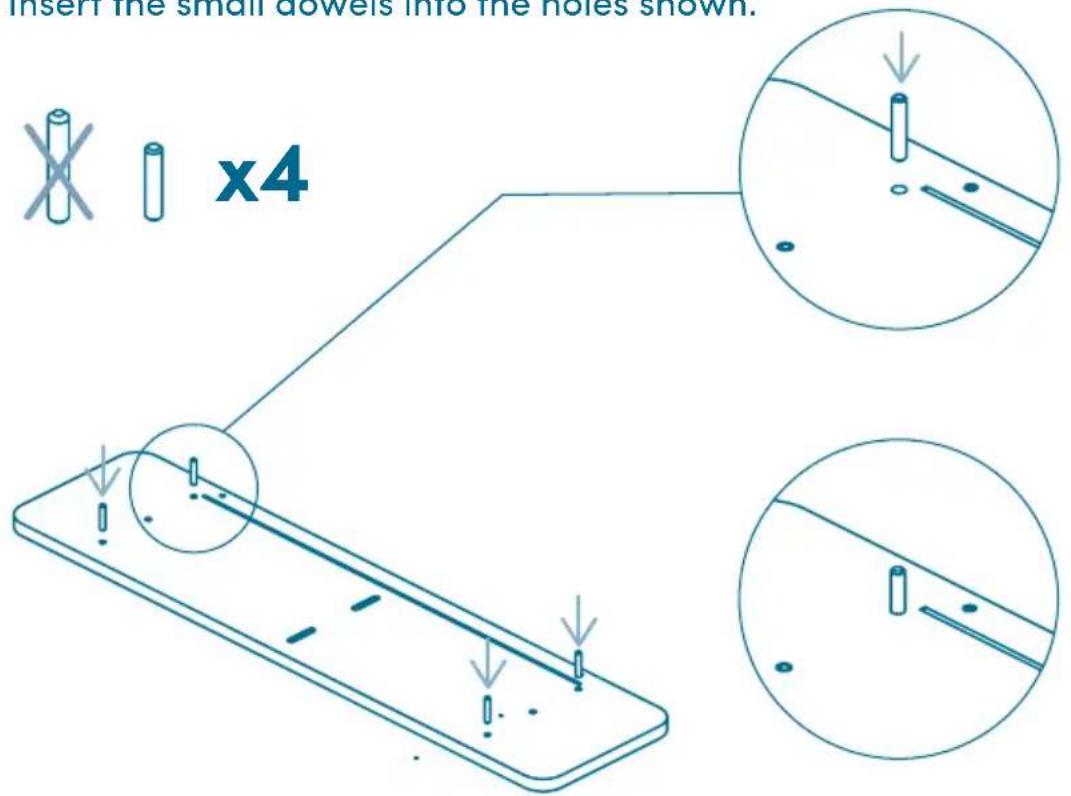
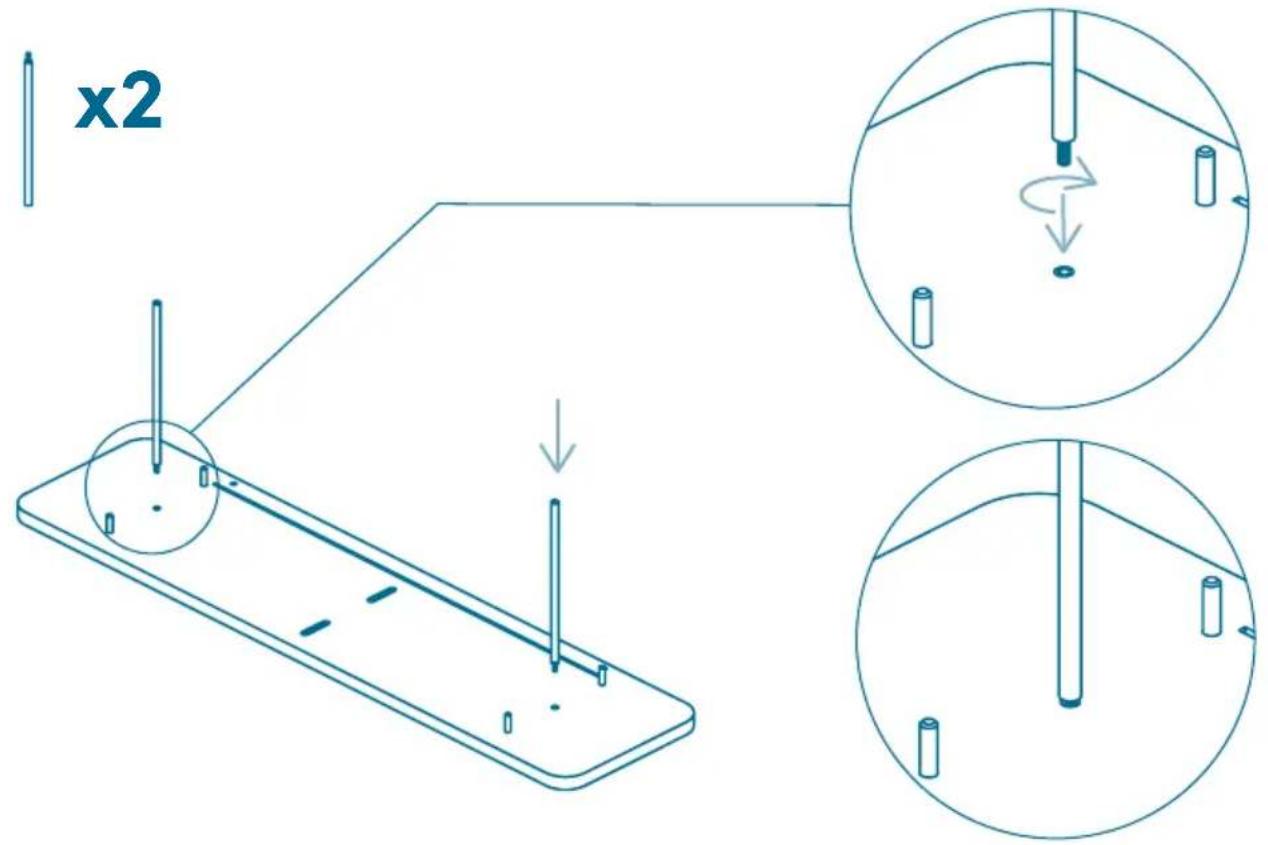
3. Screw the support rods into the top panel.
Click the button to watch the assembly video

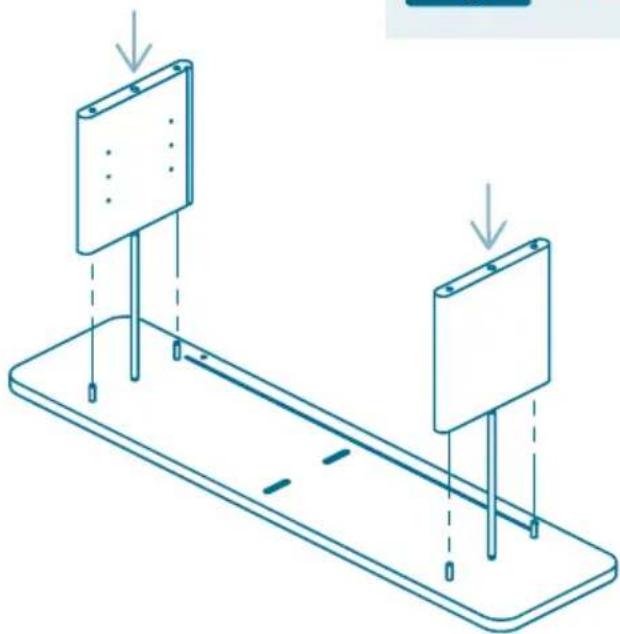
4. Slide the side panels over the support rods.

x2

NOTE - make sure the grooves align
natural_image
Isometric diagram of two rectangular panels mounted on a base, with arrows indicating direction (no text or symbols)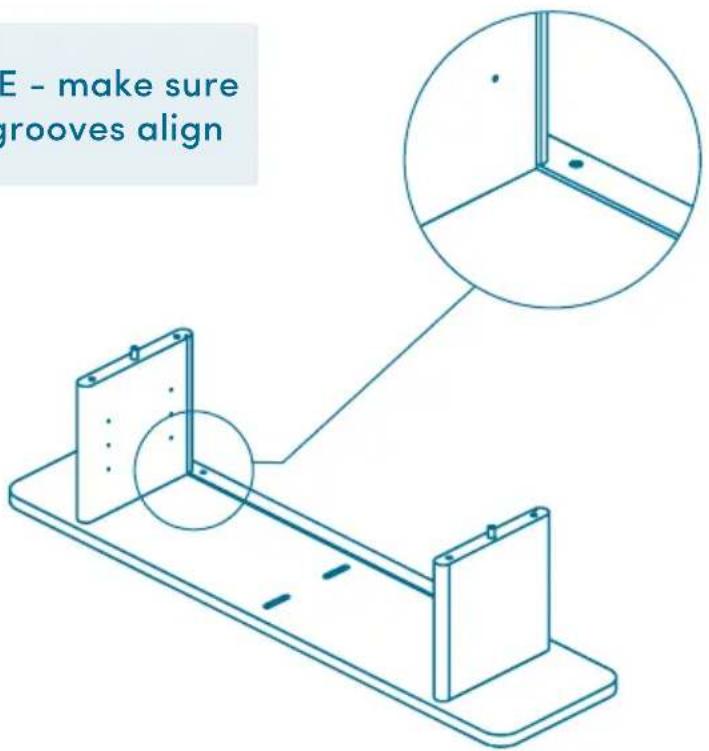
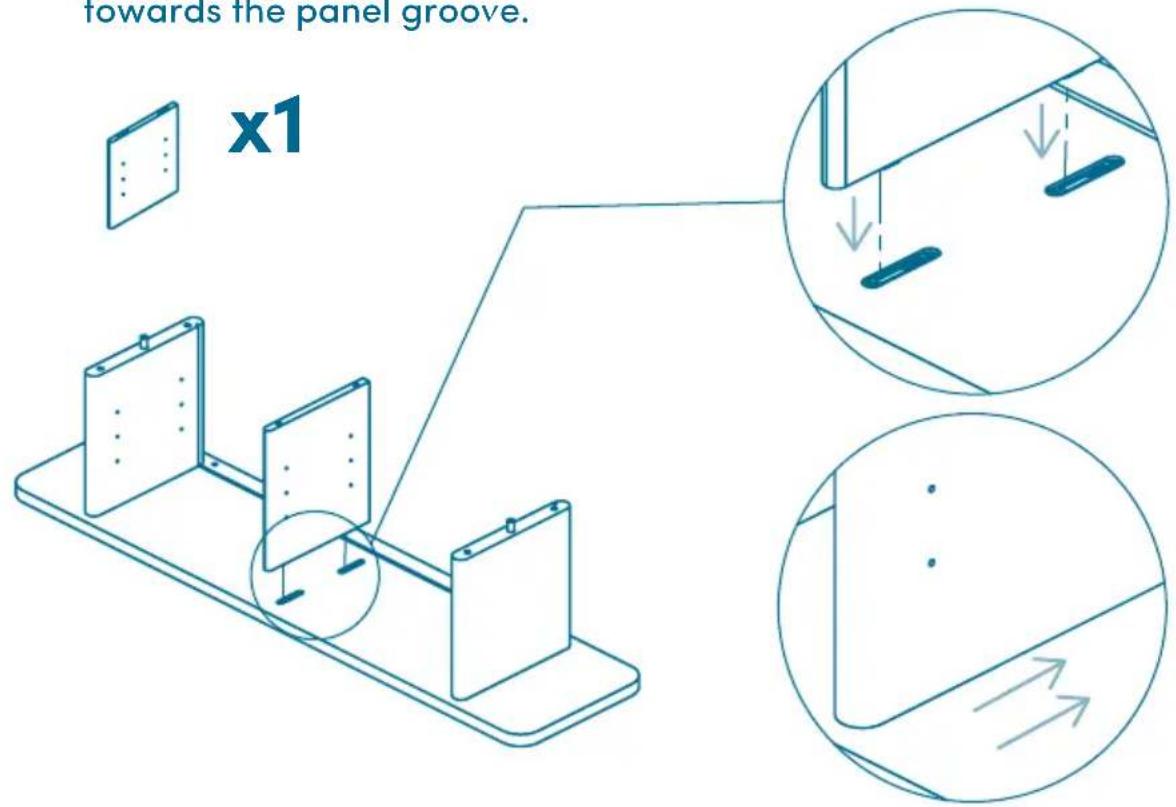
- Insert the middle shelf divider by aligning the panel connectors. to lock it in, push the divider down and towards the panel groove.
Click the button to watch the assembly video

- Insert the back panel using the grooves in the side and top panel.
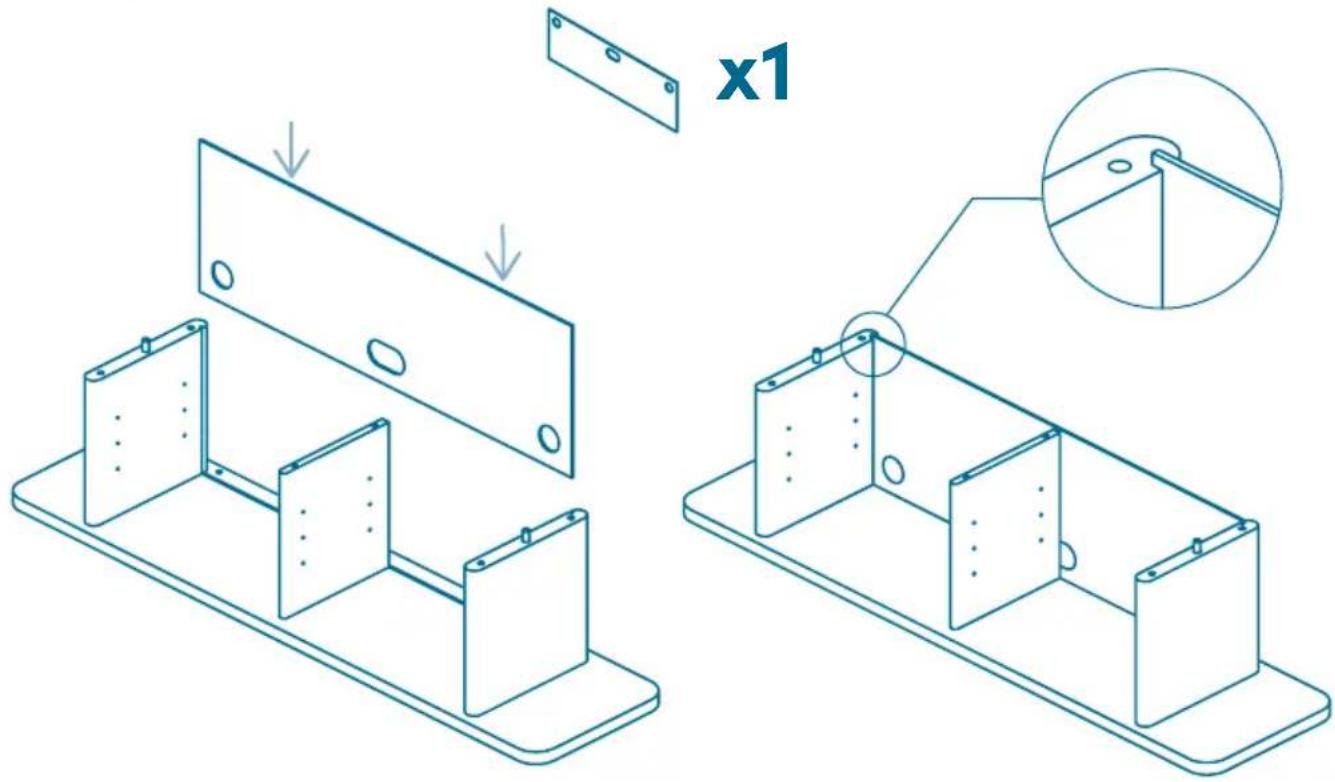
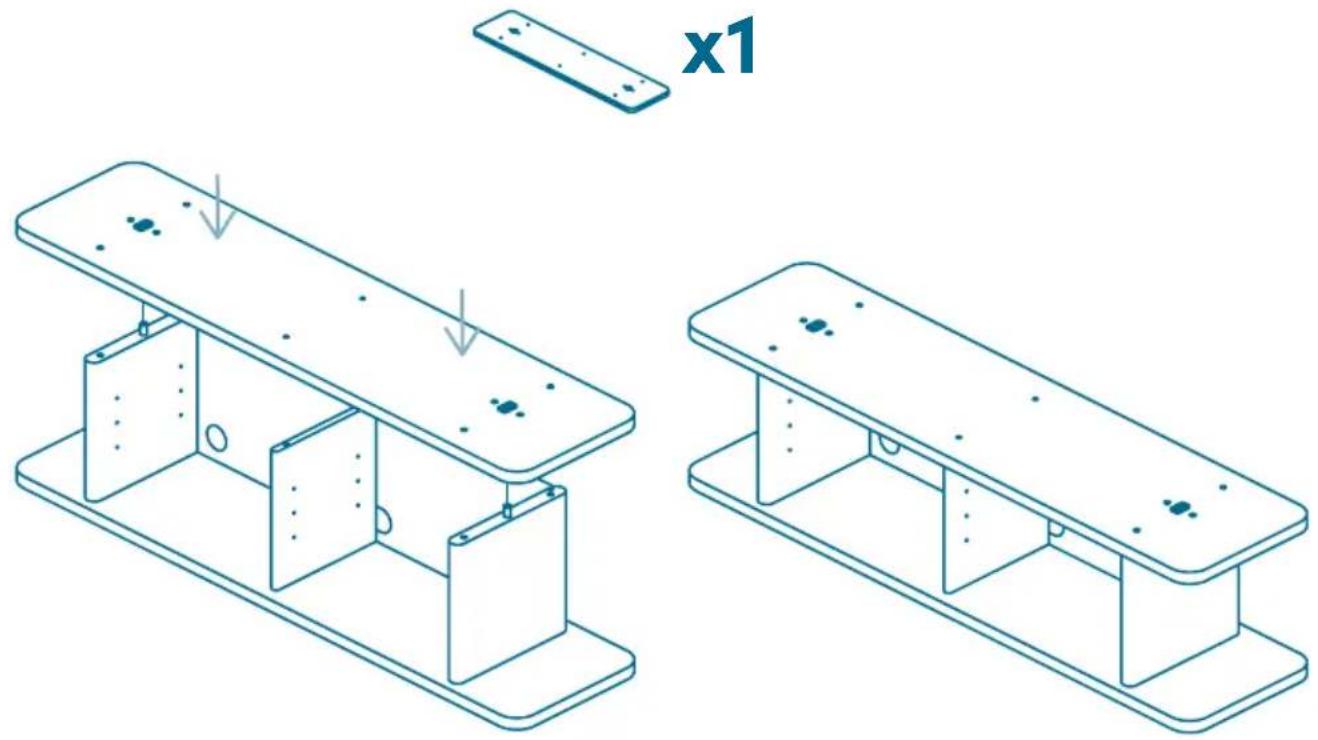
7. Lower the base panel onto the side panels and middle divider.
Click the button to watch the assembly video

natural_image
Technical line drawings of two mechanical assembly components with mounting holes and internal compartments, showing structural details (no text or symbols)8. Insert the larger dowels into the holes shown.
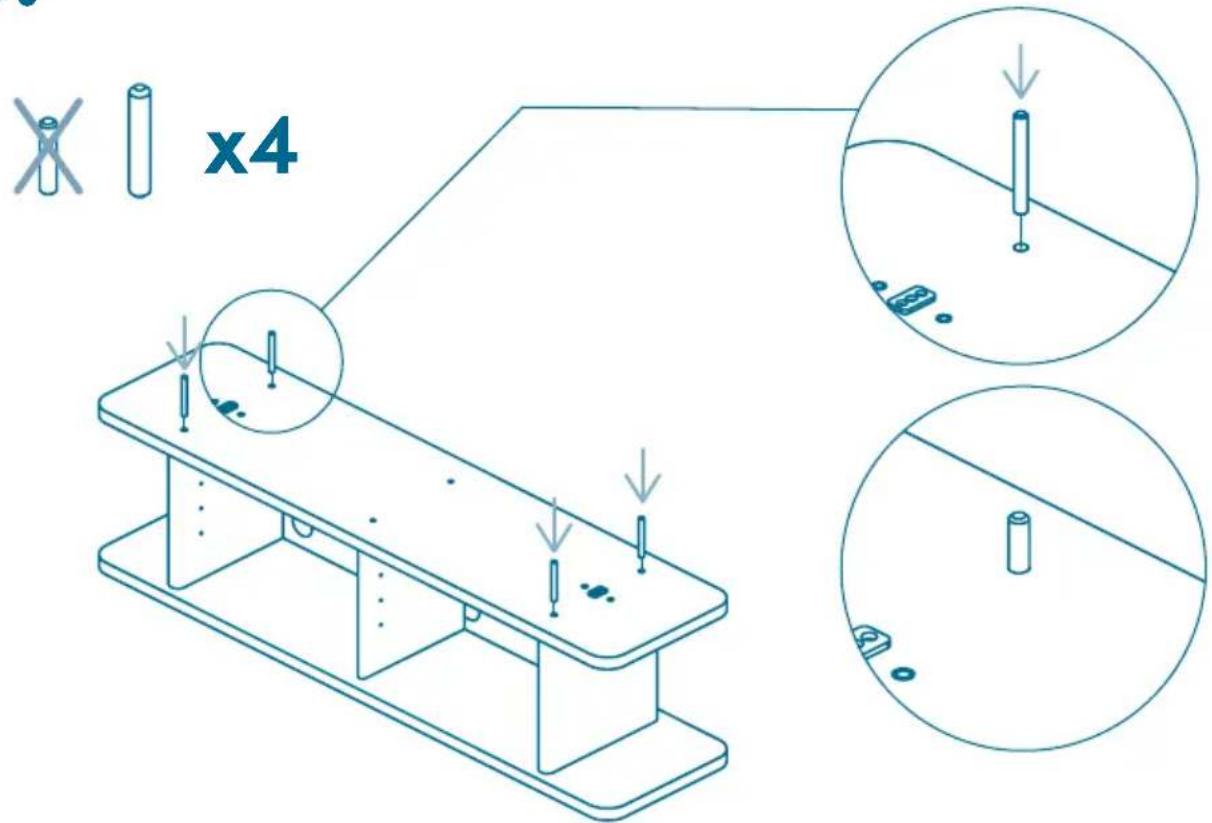
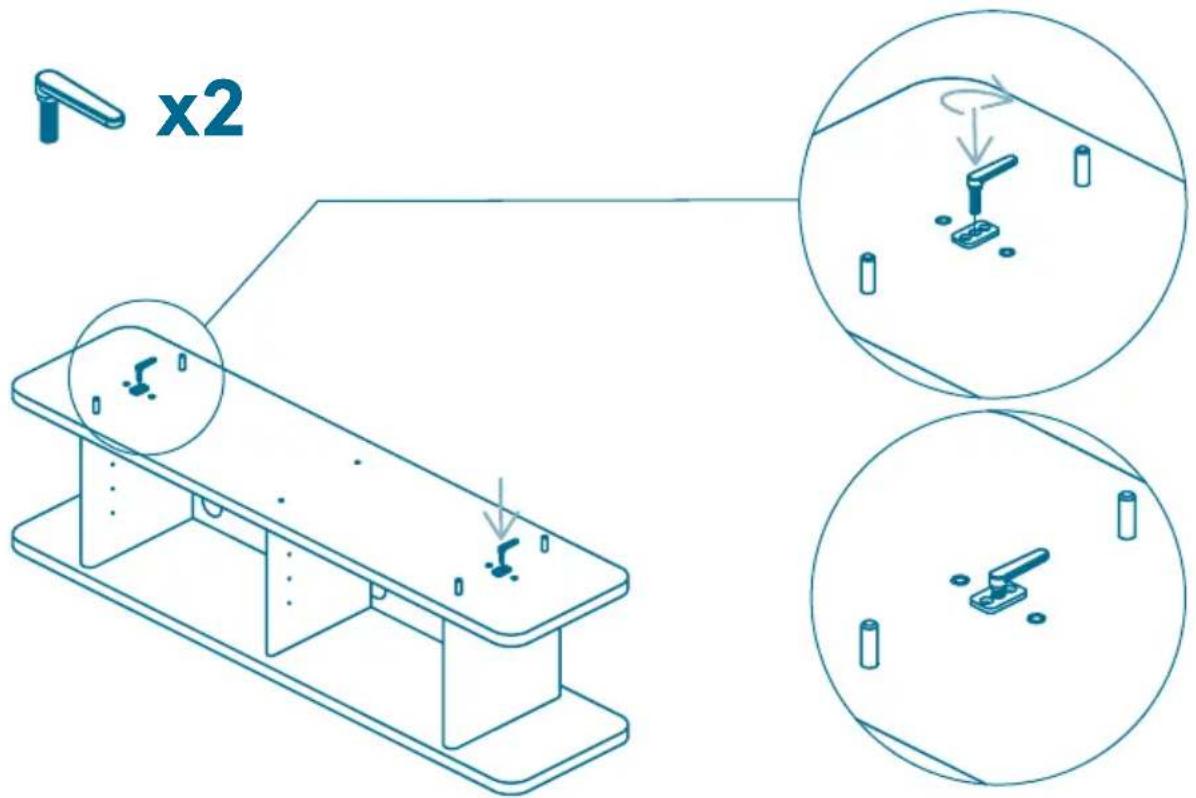
9.
Secure the base panel using the lever bolts. Once tight, pull and realign the lever into the direction of the dowels
Click the button to watch the assembly video

10. Insert the side support leg using the dowels to align.
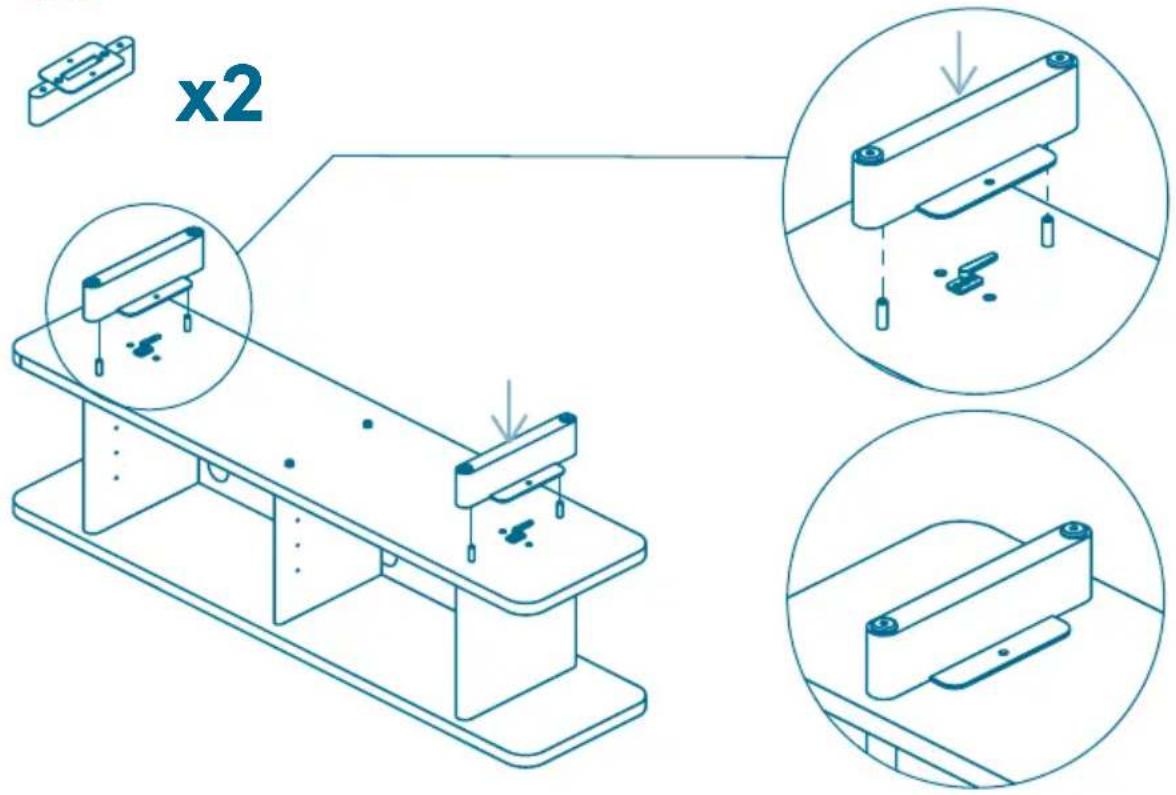
- Secure the side support legs using the Gumnuts provided.
Click the button to watch the assembly video

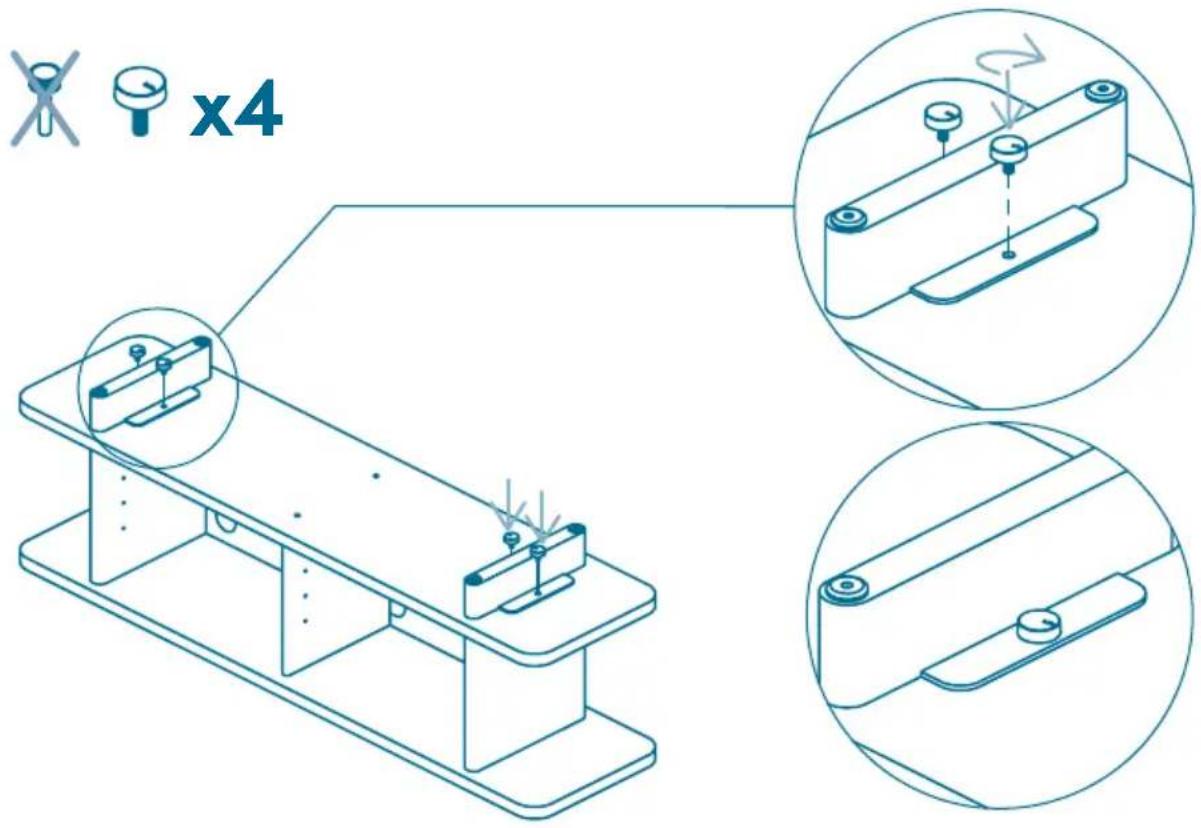
- Screw in the bottom panel Gumnuts.
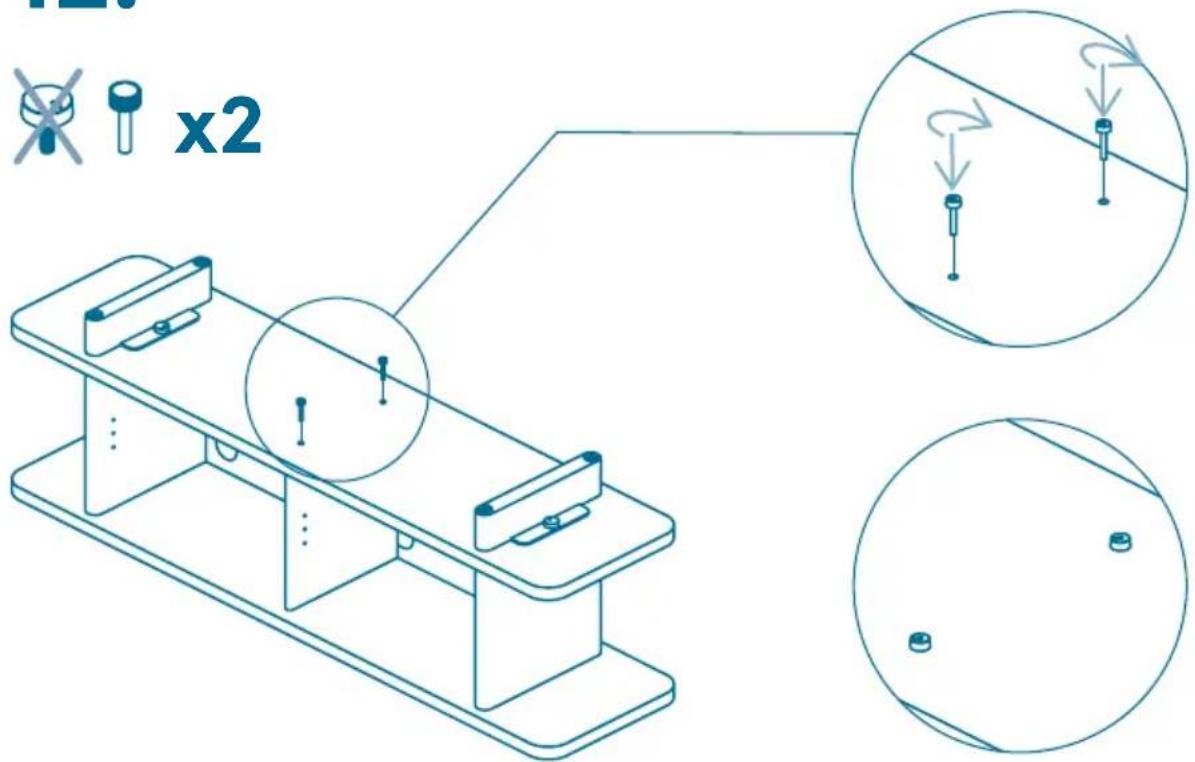
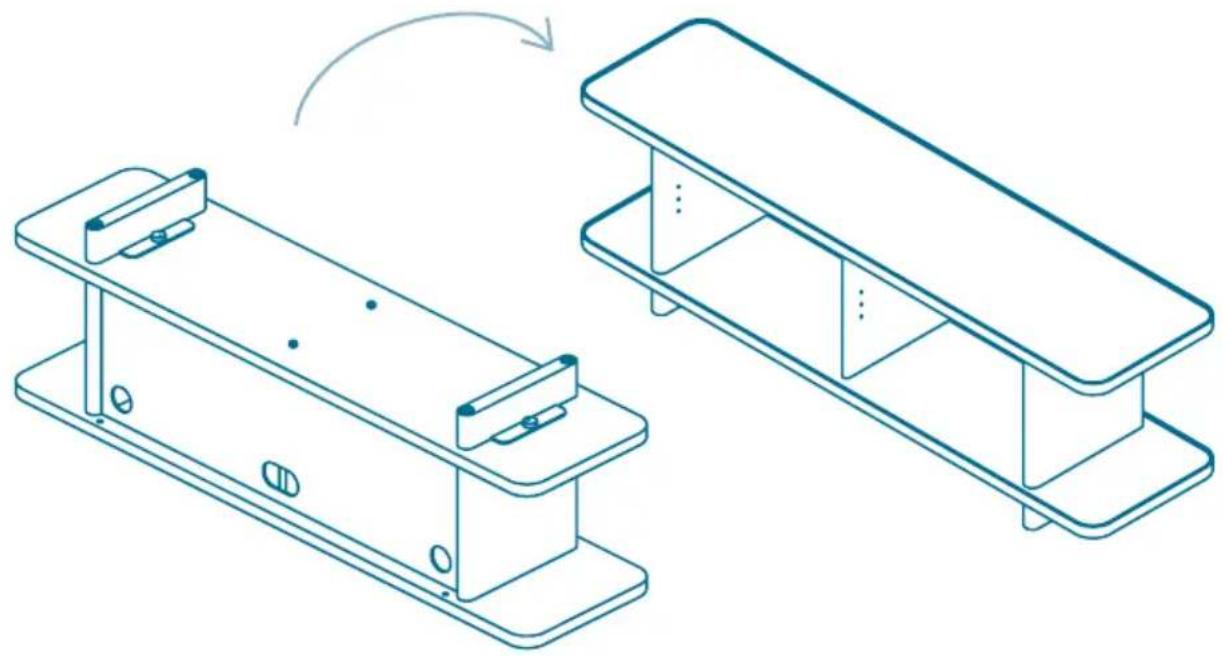
13.
Flip the TV unit into the upright position.
Click the button to watch the assembly video

natural_image
Technical line drawing of two mechanical components with mounting brackets and mounting holes, showing a transformation or assembly process (no text or symbols present)14.
Insert the shelf support pins into the desired shelf setting.
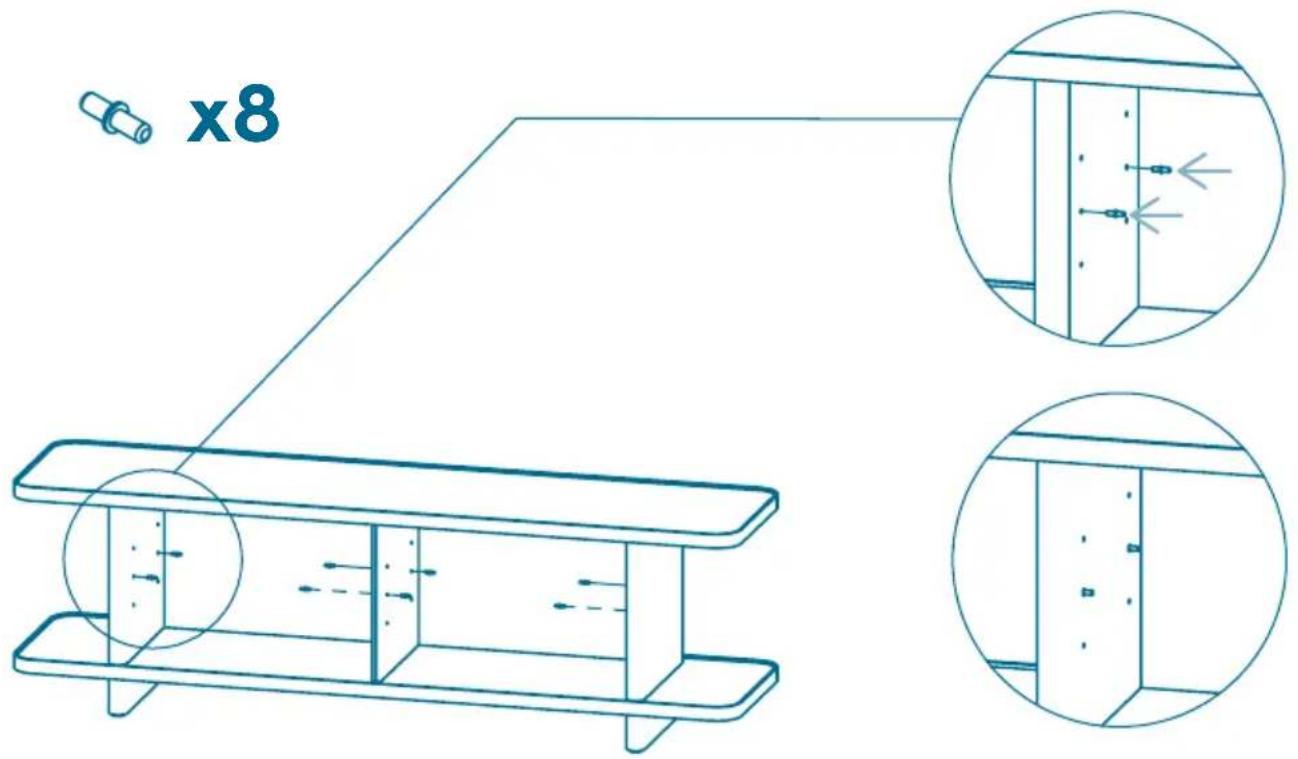
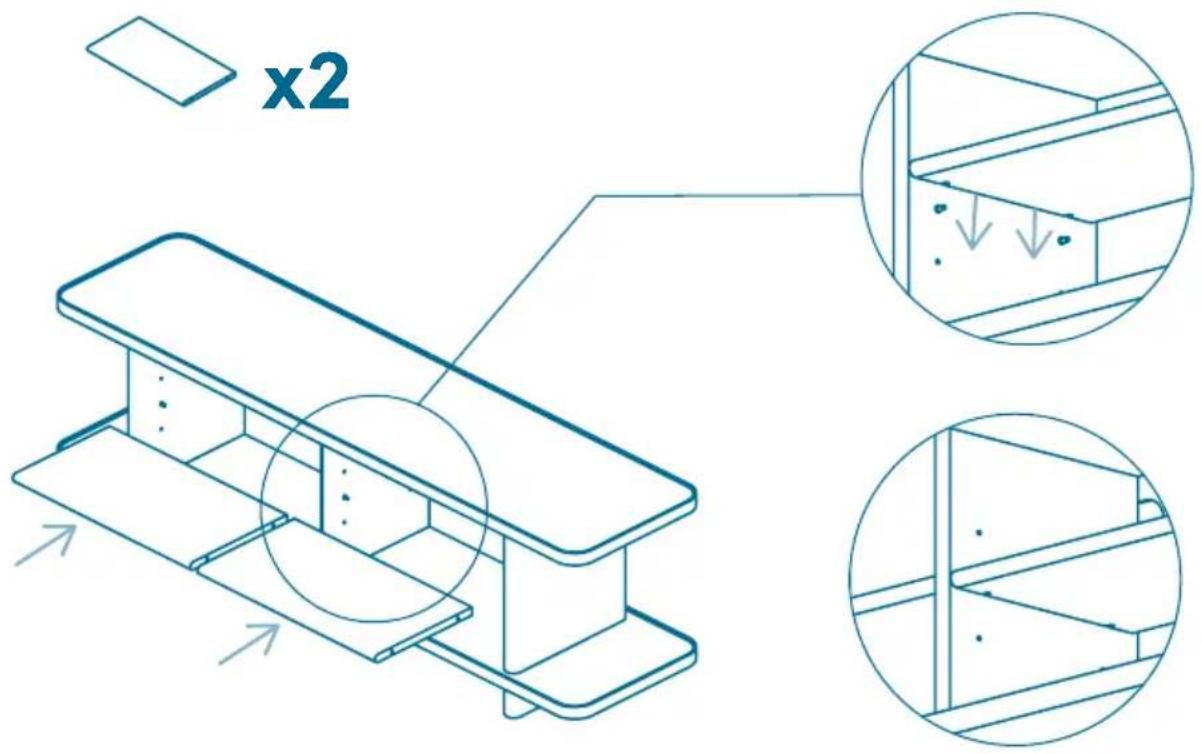
15. Insert the shelves, making sure they sit on the support pins.
Click the button to watch the assembly video

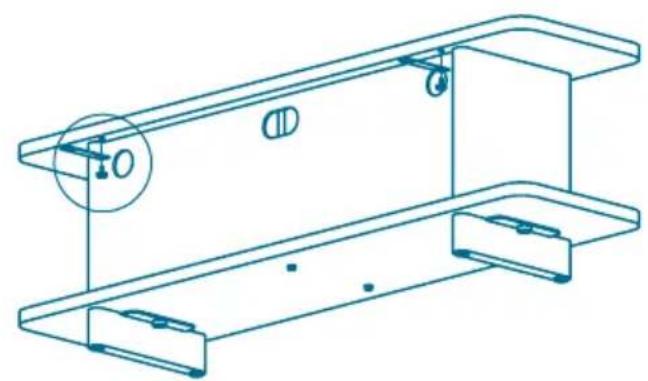
16. Fasten the wall mount lanyards to the rear using the Gumnuts provided.
natural_image
Technical line drawing of a structural beam with circular and rectangular components (no text or symbols)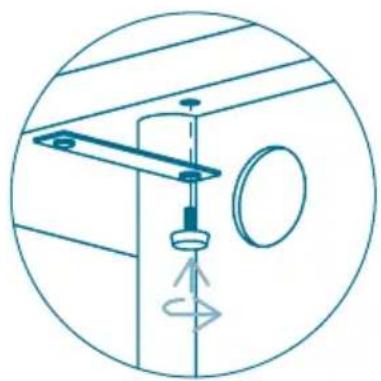
natural_image
Technical diagram of a ceiling fixture with a hanging component and rotating arm (no text or symbols)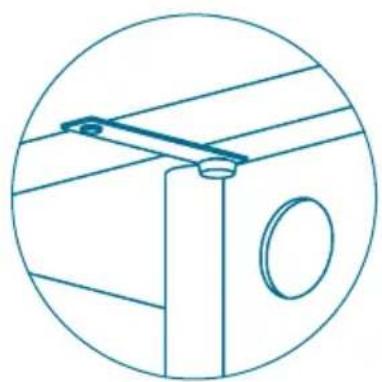
natural_image
Pure technical line drawing of a mechanical or electrical component without any text, numbers, or symbolsProduct Information and Care
TIMBER
Regular Care (Weekly)
- Dust surface with a dry cloth or duster in the direction of the natural grain.
- Protect from direct sunlight.
Cleaning
- Treat spills as soon as possible, wipe down with clean dry cloth.
- Do not use abrasive cloths, concentrated detergents, silicon based wood polishes.
Good to Know
- Timber is a natural product and there will be variation in grain, colour and features such as knots. Over time the colour of timber will naturally change.
SAFETY AND USE
- While we design and engineer this product to be stable, we strongly recommend you use the anchors (lanyards) provided to secure it to a wall.
- Anchor TVs to the wall not to the furniture.
- Seek advice from a hardware store or qualified tradesman on the best hardware to use to secure the anchor to your wall type. If you are renting, talk to your agent or landlord about installing the wall anchors.
- Be aware that uneven or soft floor surfaces can affect furniture stability.
• Discourage small children from climbing on the furniture.
Maximum Weight Capacity Per Shelf
• Top: 60kg evenly distributed.
- Adjustable Shelves: 10kg evenly distributed.
- Lower Shelves: 20kg evenly distributed.
- Outer Shelves: 5kg evenly distributed.
natural_image
Line drawing of a trash bin with an open lid and a recycling symbol indicating waste sorting (no text or labels)don't forget to recycle.
- g ,go Y
- What's in the box\*:
- Screw the support rods into the top panel.
- Slide the side panels over the support rods.
- Lower the base panel onto the side panels and middle divider.
- Insert the larger dowels into the holes shown.
- 9.
- Insert the side support leg using the dowels to align.
- 13.
- 14.
- Insert the shelves, making sure they sit on the support pins.
- Fasten the wall mount lanyards to the rear using the Gumnuts provided.
- Product Information and Care
- TIMBER
- Regular Care (Weekly)
- Cleaning
- Good to Know
- SAFETY AND USE
- Maximum Weight Capacity Per Shelf
Brand : Koala
Model : Kirribilli TV Unit
Category : TV Stand