
Cook4Me CY7018 - Frying Pan TEFAL - Free user manual and instructions
Find the device manual for free Cook4Me CY7018 TEFAL in PDF.


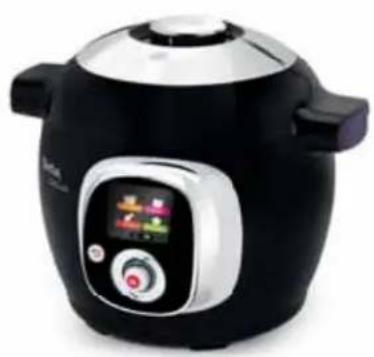
| Product Type | Intelligent Multicooker / Pressure Cooker |
| Brand | Tefal |
| Model | Cook4Me CY7018 |
| Total Capacity | 6 L |
| Usable Capacity | 4 L |
| Pressure Levels | Low: 40 kPa (109°C), High: 70 kPa (115°C) |
| Heating Element | Built-in heating plate with mobile central part |
| Control Type | Digital control panel with display and buttons |
| Cooking Programs | Quick cooking, browning, reheating, keep warm, delayed start |
| Preset Menus | Ingredients menu (meat, fish, vegetables, fruit, rice & cereals), Recipes menu (50+ recipes), Favourites menu |
| Maximum Filling Level | 4 L for liquid plus ingredients; half full for rice/pulses |
| Minimum Liquid for Steaming | 200 ml |
| Cooking Bowl Material | Non-stick coating |
| Accessories | Steam basket, condensation collector, stand for steam basket |
| Safety Features | Lid lock indicator, pressure indicator, safety valve, decompression ball, metal plate with seal |
| Cleaning | Bowl and steam basket dishwasher safe; metal plate and valve parts hand washable; condensation collector washable |
| Maintenance | Replace sealing gasket every 3 years (by approved service centre) |
| Power Cord | Removable supply cord |
| Warranty | Standard manufacturer warranty (details not specified) |
| Weight | Approx. 6.5 kg |
| Dimensions | Approx. 35 x 30 x 30 cm |
Frequently Asked Questions - Cook4Me CY7018 TEFAL
User questions about Cook4Me CY7018 TEFAL
0 question about this device. Answer the ones you know or ask your own.
Ask a new question about this device
Download the instructions for your Frying Pan in PDF format for free! Find your manual Cook4Me CY7018 - TEFAL and take your electronic device back in hand. On this page are published all the documents necessary for the use of your device. Cook4Me CY7018 by TEFAL.
USER MANUAL Cook4Me CY7018 TEFAL
Cook 4 me
Step by step pre-programmed recipes cooked in minutes



Intelligent multicooker
That cooks for you
SAFETY INSTRUCTIONS
Take the time to read all the following instructions carefully
- Read these instructions for use carefully before using your appliance for the first time. Any use which does not conform to these instructions will absolve the manufacturer from any liability and invalidate the guarantee.
- Indoor use only.
- For cleaning your appliance, please refer to instructions for use. You can wash the cooking bowl and steam basket in soapy hot water or in the dishwasher.
Clean the body of the appliance using a damp cloth. - Do not immerse the appliance in water or any other liquid.
- Improper use of the appliance and its accessories may damage the appliance and cause injury.
- Do not touch hot parts of the appliance. After use, the heating element surface is subject to residual heat after use.
- For your safety, this appliance conforms to all applicable standards and regulations (Low Voltage Directive, Electromagnetic Compatibility, Food Compliant Materials, Environment, ...).
- This appliance is not intended for use by persons (including children) with reduced physical, sensory
or mental capabilities, or lack of experience and knowledge, unless they have been given supervision or instruction concerning use of the appliance by a person responsible for their safety. Children should be supervised to ensure that they do not play with the appliance.
- If the supply cord is damaged, it must be replaced by the manufacturer, its service agent or similarly qualified persons in order to avoid a hazard. Do not replace the power cord supplied with other cords.
- This appliance is intended for domestic household use only. It is not intended to be used in the following applications, and the guarantee will not apply for:
- staff kitchen areas in shops, offices and other working environments;
farm houses;
by clients in hotels, motels and other residential type environments;
-bed and breakfast type environments. - This appliance shall not be used by children. Keep the appliance and its cord out of reach of children.
- Appliances can be used by persons with reduced
physical, sensory or mental capabilities or lack of experience and knowledge if they have been given supervision or instruction concerning use of the appliance in a safe way and if they understand the hazards involved.
• Children shall not play with the appliance.
- Place the appliance on a flat stable, heatproof work surface, away from any water splashes or any sources of heat.
- Never place or use the appliance close to a wall or below a wall cupboard as the steam produced by the appliance can cause damage.
- Do not place your appliance near a heat source in operation (hab, household appliance, etc.).
- Do not fill your appliance to more than the MAX mark on the bowl. Do not fill it more than half full for food that expands during cooking, such as rice, dried vegetables. Reduce the volume of water to avoid the risk of boiling over.
- When in operation, never leave the appliance unattended.
- Please follow the recommendations on the volume of food and water to avoid the risk of boiling over which can damage your appliance and cause injury.
- Before using your appliance, check that the manometric rod and the safety valve are clean (see section Cleaning and maintenance).
- Do not place any foreign objects in the pressure release system. Do not replace any of the safety device yourself.
- When you open the lid, first unlock it by holding the lid open/close handle. Then position your arms in alignment with the side carrying handles, hold each side lid handle with your hands and raise the lid.
- Be careful also about the risk of scalding from the steam coming out of the appliance when you open the lid. First open the lid very slightly to allow the steam to escape gently.
- Never force the appliance open. Make sure that the inside pressure has returned to normal. Do not open the lid when the appliance is under pressure. To do so, see page 46 «Problem & Solutions» section «The lid does not open once the steam is released».
- Use only the appropriate spare parts for your model. This is particularly important for the sealing gasket, the cooking bowl and its safety devices.
-
Do not damage the sealing gasket. If it is damaged, have it replaced in an Approved Service Centre.
-
The heat source necessary for cooking is included in the appliance.
- Do not place the appliance in a heated oven or on a hot hob. Do not place the appliance close to an open flame or a flammable object.
- Do not heat the cooking bowl with any other heat source than the heating plate of the appliance and do not use any other bowl. Do not use the cooking bowl with other appliances.
- Move the appliance with great care when it is under pressure. Do not touch the hot surfaces.
Use the carrying handles when moving it and wear oven gloves, if necessary. Do not use the lid handle to lift the appliance. - Do not use the appliance for other than the intended purpose.
- This appliance is not a steriliser. Do not use it to sterilise jars.
- The appliance cooks food under pressure, in two different modes: low pressure (40 kPa, i.e. 109°C) or high pressure (70 kPa, i.e. 115°C). Incorrect use may cause risks of burns due to steam.
-
Make sure that the appliance is properly closed before bringing it up to pressure (see Instructions for use).
-
Do not use the appliance empty, without its bowl or without liquid inside the bowl if using a mode cooking under pressure. This could cause serious damage to the appliance.
- After cooking meat which has an outer layer of skin (such as ox tongue), which could swell due to the effects of pressure, do not pierce the skin after cooking if it appears swollen: you could get burnt. Pierce it before cooking.
- When cooking food with a thick texture (chick peas, rhubarb, compotes, etc.), shake the appliance slightly before opening it to ensure that the food or cooking juices do not spurt out.
- Do not use the appliance to deep fry food in oil. Only browning is allowed.
- In browning mode, be careful of risks of burns caused by spattering when you add food or ingredients into the hot bowl.
-
During cooking and automatic steam release at the end of cooking, the appliance releases heat and steam. Keep your face and hands away from the appliance to avoid scalding. Do not touch the lid during cooking.
-
Do not use a cloth or anything else between the lid and the housing to leave the lid ajar. This can permanently damage the gasket.
- Do not touch the safety devices, except while cleaning and maintaining the appliance in accordance with the instructions given.
- Make sure that the bottom of the cooking bowl and the heating element are always clean. Make sure that the central part of the heating plate is mobile.
- Do not fill up the interior body of your appliance without its cooking bowl.
- Use a plastic or wooden spoon to prevent any damage to the non-stick coating of the bowl. Do not cut food directly in the cooking bowl.
- If a great deal of steam is released from the rim of the lid, unplug the power cord at once and check whether the safety devices are clean. If necessary, send the appliance to an Approved Service Centre for repair.
- Do not carry the appliance by holding it by the
handles of the removable bowl. Always use the two side handles on the housing of the appliance. Wear oven gloves if the appliance is hot. For more safety, make sure that the lid is locked before transporting the appliance.
- If pressure is released continuously through the valve of the appliance (for more than 1 minute) while pressure cooking, send the appliance to a Approved Service Centre for repair.
- Do not use a damaged appliance. Take it to your Approved Service Centre.
- The guarantee does not cover the normal wear and tear of the cooking bowl.
- In accordance with current regulations, before disposing of an appliance no longer needed, the appliance must be rendered inoperative (by unplugging it and cutting off the supply cord).
- Use only spare parts sold in an Approved Service Centre. SAVE THESE INSTRUCTIONS CAREFULLY.

Environment protection fi rstl
① Your appliance contains valuable materials which can be recovered or recycled.
Leave it at a local civic waste collection point.

CONTENTS
P. 8-9 INGREDIENTS & RECIPES PROGRAMS
P. 10-11 BEFORE USE
P. 12-15 USE AND OPERATION
P. 16 ON/OFF MENU
P.17 SETTINGS MENU
P. 18-23 QUICK COOKING/BROWNING REHEATING/KEEP WARM/DELAYED START
P. 24-25 INGREDIENTS MENU
P. 26-27 INGREDIENTS MENU (white rice)
P. 28-29 COOKING GUIDE
P. 30-33 RECIPES MENU
P. 34-37 FAVOURITES MENU
P. 38-39 GOLDEN RULES OF COOKING
P. 40-45 CLEANING & MAINTENANCE
P. 46 TROUBLESHOOTING
EPC03 Series
Low pressure 40kPa (109°C) / High pressure: 70kPa (115°C) APPLIANCE CAPACITY: 6L / USEABLE CAPACITY: 4L Built-in heating



Control panel

Cooking bowlReturn button

Warning indicator for pressure and locking



Beef Chicken Lamb Park
Cadd Fish King prawns (raw) Mussels Scallops
Brown rice - Basmati Bulgur wheat Quinoa White nce - Basmati White nce - Long grain

Apples
Asparagus
Autegines
Buccoli (florers)
Brussels sprouts
Butternut squash
Cabbage (gre
Cabbage (red)
Caulfl over (fl orts)
Celery
Courgettes
Green Beans
Locks
Mushrooms
Parsnips
Pears
Peds frozen
Peapers (only colour) Ratrices (new)
Polices (old)
Runner beans
Spinac
Swede
Sweet potatoes
- 2017年
RECIPE LISTINGREDIENTS
www.tefal.co.uk

Asian pork meatballs
Butternut, secash soup
Celery and stilton soup
DAR
Toumous
Chicken vegetable soup
Dental & Shipped Socolon Soup
-10.01.29 A.E. 501p
(1) INVATI AND CONTERIOR ENDE
(2) 现金的会计处理
(1) 2017.12.31

loss modifications curry
Beer Latinos
Boer Benyuk Shi Tny
Butternut squash, lettuce
C. H. K. V. C. H. L. I. M. T. G. H. P. S. T. U. V. W. X. Y. Z. A. B. C. D. E. F. G. H. I. J. K. L. M. N. O. P. Q. R. S. T. U. V. W. X. Y. Z. A. B. C. D. E. F. G. H. I. J. K. L. M. N. O. P. Q. R. S. T. U. V. W. X. Y. Z. A. B. C. D. E. F. G. H. I. J. K. L. M. N. O.
C:\Ker\Turkite\Thi\N
God into a summer series
Farmers chicken
Garnion joint
Greec Lamb
Green that chicken curry
Kenna chicken wings
Lambrogen josh curry
Lamb's banks
(1) 2017年1月1日
10.425 Ami Ane
Flights chicken reads
Fors spore ribs
Pot roast cider chicken
Quinoa & feto, salad
Sausage and been stew
Spring lamb stew
Sweet and sour por
Sweet chili sauce
100%
The open and great look

Bread and butter pudding.
Cabinet pudding
Chocolate croissant pudding
Lame fruce
Jam sponge puddings
Molten chocolate puddings
Reals in red mine


To open the appliance, turn the open/ close handle on top of the lid, until the marking is in line with the open padlock.
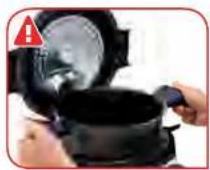
Install the appliance on a flat dry surface that is not hot. Remove all the packaging, socks or different accessories inside and outside the appliance.
Remove the appliance from its packaging and read the instructions carefully before using the appliance for the first time.


CLEAN THE DIFFERENT COMPONENTS
1 Cooking bowl
Metal plate with non-removable seal
3 Valve cover
4 Condensation collector
5 Steam basket
6 Decompression ball

BEFORE USEBE
HOW TO REMOVE THE METAL PLATE:
Keep the metal plate taking it by the seat, and is sure that the central nut in an anti-cutaneous direction. Remove the nut and keep it in a soft press. Press the spring loaded screw spindle to release the metal plate. Remove the metal plate.
HOW TO TAKE THE VALVE COVER OFF: from the silver metal is undeput (in case).
Tree limit it slightly to end of Ever the water cover, paving special attention to the inside (check that there is no left over foods.
HOW TO
DISM ANTLE
AND REASSEMBLE
THE METAL PLATE
ACCESSING THE DECOMPRESSION BALL:
When the lie is completely cut, turn the ball cover, and covers, so as to bring the L marker into position. Left off the cover Remises the ball, and gently clean it along with its coat, with white and same washing-up liquid. Dry the ball using a soft cloth, then part it back in oval form. Put the ball cover back in pote, and the marker L in position. Look it by turning the ball cover so that the marker is opposite the pictogram "closed."
Note: The metal decompression ball may still be hot even when the lid has cooled
PUTTING THE METAL PLATE BACK IN PLACE:
Grip the metal plate by the seal as shown in the air tube. One up the metal pipe with the nominal street spoke and press if flot outlines the underside of the Id. Put the nut back on with the flat slide marking the metal plate and turn it clockwise, tightening it as far as it will go
PUTTING THE VALVE COVER BACK: Face the valve cover as shown in the picture.
(egaging the model) Line up the interior circle shops with the three hooks and then push on that the valve cover clips on you should have a "lick" sign all). The valve cover must be close up against the inside of the lid.
The notches on the rotating inner part of the lid must be correctly aligned with the notches on the rim of the bowl otherwise the lid will not lock when closed.

USE
INTERFACE CONTROLS


SELECT CONFIRM


BACK RESTART
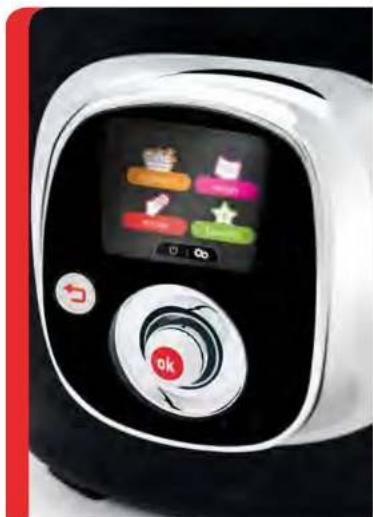

OPERATION

When turning on for the first time, you will first see the settings menu:
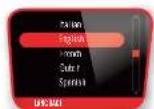

Select your language


Select your country

USE USE

Never use the appliance without the cooking bowl

OPEN THE LID:
To open the appliance, turn the open/close handle so that the marking is in line with the open padlock. Never try to force the lid to open if it is stuck.
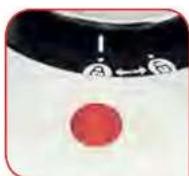
OPEN: CLOSE INDICATOR:
When the indicator flashes, the lid is locked. When the indicator remains on constantly, the appliance is pressurised; you can no longer open it.

INSTALLING THE
CONDENSATION COLLECTOR: Check that the condensation collector is empty then install it behind the appliance.

When using your appliance for the first time, the bowl may release a slight odour. This is normal. When cooking under pressure it is normal for Cook4Me to vent steam during cooking. After each use check the safety valve and manometric rod move freely and clean if necessary as instructed on page 42.
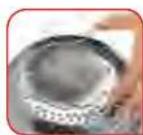


INSTALLING THE STAND
UNDER THE STEAM BASKET: Pinch the stand between your thumb and index finger to install it under the steam basket as shown.

POSITIONING THE BOWL IN THE APPLIANCE:
Wipe the bottom of the cooking bowl. Make sure there are no food remains or liquid under the bowl or on the heating plate.
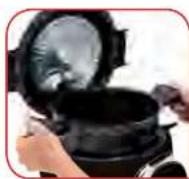
Then install the bowl in the appliance by positioning the bowl handles into the slots.


ON/OFF MENU
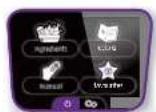
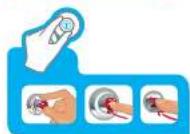
Select and confirm
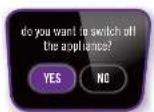

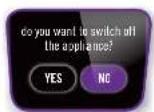
Pressing ON/OFF will allow you to switch the appliance on and off


SETTINGS


N.B.: each confirmation
takes you back to the
main menu.
N.B. away if the event
N.D.: even if the sound is deactivated, the alert
sounds remain active.


«language / country»


Select your language


Select your country
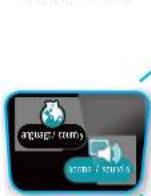


Select the «screen / sounds» setting
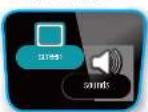


Select screen: Adjust the light


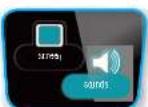


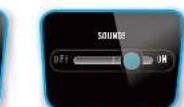

Select »sounds» Adjust the volume

MANUAL MENU
COOKING MODE
QUICK COOKING
MANUAL MENU:
With the manual menu, you set the cooking yourself. Select the cooking mode: browning, quick cooking, reheat or keep warm, as well as the cooking time.
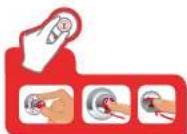
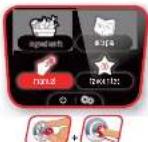
Select the manual men

Select the cooking* mode

Insert the bowl then add the ingredients
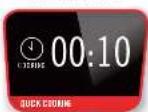

Set the cooking time Select immediate or delayed start (p.23)


Close and bolt the lid

MANUAL MENU
COOKING MODE
QUICK COOKING
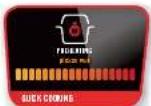
The preheating time will vary between 3-10 minutes depending on the quantity of food, the quantity of liquid and and whether the food is fresh or frozen.

Cooking has started (the cooking time counts up)

Cooking has finished
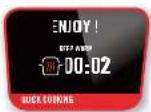
Its ready to eat! The appliance automatically goes to keep warm mode
[Non-Text]
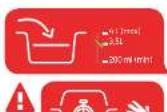
Note: 4 litre max and 200 ml min capacity for quick cooking.
Do not touch the hot appliance during cooking.


MANUAL MENU
COOKING MODE

+
Select the
«manual» menu

+
Select the
"browning" function

Open the lid
BROWNING REHEAT


Insert the bowl
+
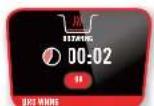
The cooking time counts up
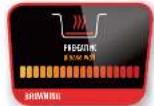
The appliance is preheating (This can take up to 5 minutes)

→
C
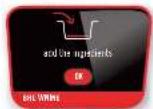
Add the ingredients

+
To stop browning select yes and then either stop or quick cooking

MANUAL MENU
COOKING MODE

+
Select the «manual» menu
+
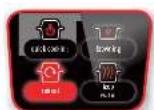
Select the «reheat» mode

Insert the bowl
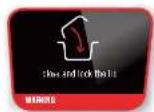
Close and lock the lid
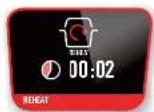
Reheat has started

Press OK to interrupt


Do you want to stop reboot?
To stop reheating select yes. Ensure food is piping hot before serving

MANUAL MENU
COOKING MODE
KEEP WARM


Select the «manual» menu
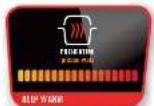
The appliance is preheating

Select the "keep warm" function
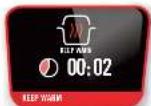
The keeping warm function has started
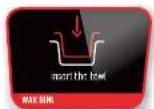
Insert the bowl
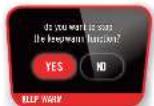

To stop the keep warm function, press the 'back' button and select 'yes'
MANUAL MENU
COOKING MODE
DELAYED START The delayed start feature is only possible with the manual menu «quick cooking and the ingredients menu «Fruit & vegetables» or «Rice & Cereals»

Do not use delayed start for recipes containing meat, chicken, fish, milk or eggs as these foods can deteriorate if left at room temperature before cooking.
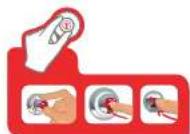

Select «delayed start»
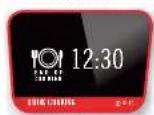
Select the end of cooking
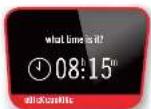
Select the current time (using the 24 hour clock)

Delayed start is programmed
Note: The delayed start time always includes 15 minutes for the appliance to prevent.
INGREDIENTS MENU
INGREDIENTS MENU:
With the ingredients menu, cook single ingredients without having to program the cooking mode or time; Cook/Me provides you with instructions for different weights and types of ingredients: meat, fish, vegetables, fruit and cereals.
The guides on pages 28 & 29 give you advice on how to prepare fruit and vegetables for use with the ingredients menu and suggested cuts of meat.
Note: The weights displayed on the Cook4Me are the prepared weight of the ingredients.


Select the
«Ingredients» menu


Select the quantity of ingredients


Select fruits & vegetables
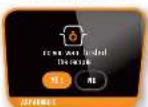


Select the
ired ingredient

Follow the instructions on screen


INGREDIENTS MENU
INGREDIENTS MENU: (continuation)
INGREDIENTS MENU: (continuation)
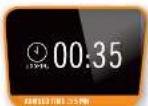
The recommended cooking time is displayed. You can adjust the cooking time to your personal taste by turning the OK button


Select immediate or delayed start (p 17)
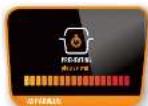
The appliance is preheating
Note: depending on the type of ingredient and the quantity the preheating time will take between 3-10 minutes

Cooking has started
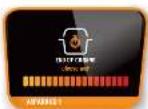
Cooking has finished its ready to eat! The appliance automatically goes to keep warm mode
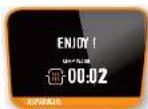
Note: The delayed start can be used on the Ingredients Menu with the Fruit & Vegetables and Rice & Cereals programs.

INGREDIENTS RECIPE
WHITE RICE
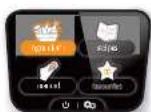

Select the ingredients menu


Select "rice and cereals"
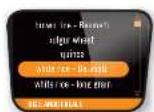

Select "white rice"
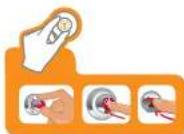
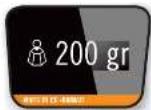

Select the desired rice quantity (min. 200g)


Start the recipe


Follow the instructions on the screen and in the Rice and Cereals Cooking Guide


The recommended
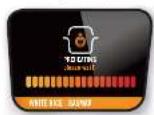
The appliance is preheating (takes 5-10 minutes)

Cooking has finished


Select «immediate start»

Cooking has started
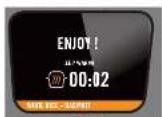

It's ready to call The appliance automatically goes to keep warm made

| COOKING GUIDE FOR RICE AND CEREALS | ||
| Weights (g) | Recommended quantity cold water (ml) | |
| Bulgar Wheat | 200 g 300 ml | |
| 300 g 400 ml | ||
| 400 g 500 ml | ||
| 500 g 600 ml | ||
| 600 g 700 ml | ||
| Garlics | 200 g 500 ml | |
| 300 g 600 ml | ||
| 400 g 750 ml | ||
| 500 g 800 ml | ||
| 600 g 850 ml | ||
| Brown Rice - Scarries* | 200 g 350 ml | |
| 300 g 500 ml | ||
| 400 g 650 ml | ||
| 500 g 725 ml | ||
| 600 g 800 ml | ||
| White Rice - Scarries & Lang Grains* | 200 g 300 ml | |
| 300 g 450 ml | ||
| 400 g 600 ml | ||
| 500 g 675 ml | ||
| 600 g 750 ml | ||
| COOKME MEAT & CHICKEN COOKING GUIDE | ||
| I the cooking times for most care appropriate and may need adjustment depending on the degree of doescees you prefer. When cooking joints we recommend keeping them to rest covered with it for 10 minutes before coming. | ||
| Ingredient | Type | Supported cuts of meat/choice |
| Snail | Branal | Boneless joints of beef such as broiler, tap drops, walking and dining parts. |
| Pieces | Cranberry steak, baking steak, table steak, cooking pices. | |
| Chicken | White bread / Turkey | |
| Pieces with bone | Chicken dinner cat, chicken legs, chicken trails, chicken wings. | |
| Lamb | Branal | Boneless joints of leg or shoulder, mlle pines. |
| Pieces | Blood limb shoulder or leg. | |
| Pieces with bone | Lamb drops, limb cutles. | |
| Pops | Branal | Boneless joints of leg & shoulder. For bone parts a break the cooking time slightly. |
| Pieces | Blood pork shoulder or leg. | |
| Pieces with bone | Pork drops. | |
COOKAME FRUIT & VEGETABLES COOKING GUIDE
| Ingredients | Transmitter (FM) or swineed in basket (ST) | Preparation Type | Ingredients | Transmitter (FM) or swineed in basket (ST) | Preparation Type |
| Avaples ST | wedges | Use 6 ft furnace, apple variety, such as Brakum, brownley variety, not recommended to be the doing cooking. Feed apples for 2.5 cm thick wedges | ST | steers Cut into 5 smolles | |
| ST | whole | ||||
| Asparagus | ST | whole small sizes: 4 to 10 mm diameter) white, white stone 12-15 mm diameter) | Choose fresh kitchen stores. Time to 7 cm width to 1 inch drawing boxes. Choose fresh kitchen stores. Time to 17 cm width to 1 inch drawing boxes. Choose small asburgins that hit the outside staming basket | ST | whole |
| Autoglosses | ST | whole | ST | whole for the green beans reduce cooking time by 1 min | |
| ST | meal with bread to cooking. Cost 200 g green beans with 400 ml of rice. Cost 300 g green beans with 500 ml of water. Cost 400 g green beans with 600 ml of water. Cost 500 g green beans with 700 ml of water | ||||
| Bathedral BMS | ST | whole/farmal mids/mixed | Turn-off off out, 2.5 cm of bark ring, White collar, bending to the dark Creek using 11 inches/week. Tails to be the cooking. Sweet/soft snacks | ST | whole Cut into 5 smolles |
| ST | whole Cut into 5 smolles | ||||
| Sonicot | ST | flutes Cut | two small forches of every bag | ST | whole Cut into 5 smolles |
| Roasted Sprouts | ST | whole | Adjust making time according to use of brown/sprouts. Pepper only cut out | ST | whole Cut into 5 smolles |
| Butter meat pastries | ST | green Cut | 2.5 cm primes Cook shoes because either by smoking in the cooked or mixed on method using 200 ml water. Use green brochings. Sooic clothing and spring green trim. Solid made a table with cooking used cook grims quickly 1 minute. | ST | whole Cut into 5 smolles |
| Cabbage wedge(ST) or TV | ST or BM | streaked | Cook shoes because either by smoking in the cooked or mixed on method using 200 ml water. Use green brochings. Sooic clothing and spring green trim. Solid made a table with cooking used cook grims quickly 1 minute. | ST | whole Cut into 5 smolles |
| Cranole | ST | small whole | Choose smaller sizes at schools until they took up to prepare the times such as Chalmang specialty | ST | whole Cut into 5 smolles |
| ST | sticks Cut into 1 cm blocks | ST | whole Cut into 5 smolles | ||
| Cotton sow | ST | flutes Cut and small flows of brown sow | ST | whole Cut into 5 smolles | |

RECIPES MENU
With the recipes menu, choose from over 50 savoury or sweet recipes divided into four categories: starters & sides/ main dishes / desserts / express recipes.
You can go back to the initial menu by pressing the return button for 30 seconds, or back one step by pressing the return button once.


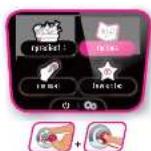
Select the
recipes menu
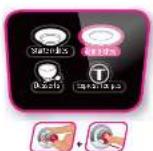
Select the type of recipe

Select the recipe


Select the number of servings


Show recipe
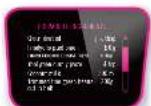

Prepare the ingredients

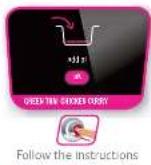


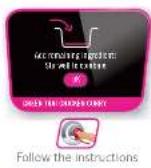

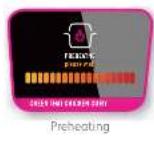
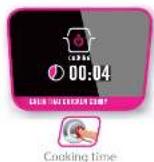



RECIPES MENU
SWEET CHILLI
SALMON


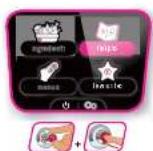
Select the
recipes menu


Select the
number of servings

Select the
type of recipe


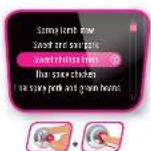
Select
a recipe


Prepare the ingredientsShow recipe
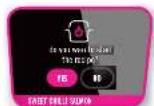


Start the recipe Follow the instructions


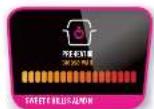

Preheating

Cooking time

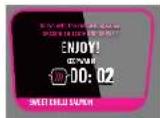
Its ready to eat!Cooking has finished


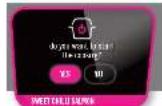
Start the cooking


FAVOURITES MENU
SAVE
A RECIPE AS A FAVOURITE
FAVOURITES MENU:
With the favourites menu, create a link to your favourite recipes in the recipes menu.
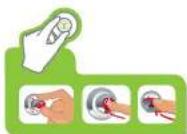


Select the «favourites» menu


Select the recipe you want to appear as a favourite


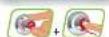
Select «add» Select the


Select the number of servings


type of recipe


Select the required cooking time

FAVOURITES MENU


You can change the name of the recipe
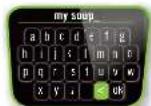

Use < to delete
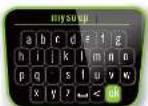
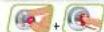
Select OK to confirm Save the favourite

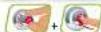


FAVOURITES MENU
PREPARE
A RECIPE
ALREADY
SAVED AS
A FAVOURITE
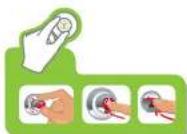
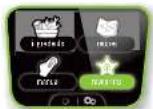

Select the «favourites» menu


Select «my list»
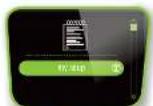
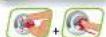
Select the recipe that you want to prepare


Follow the instructions as for a normal recipe

FAVOURITES
DELETE
A RECIPE FROM THE FAVOURITES MENU


Select the «favourites» menu


Select delete


Select the recipe
you want to delete
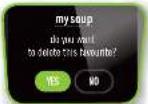

Follow the instructions
CHANGING
THE NAME OF THE RECIPE




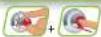
Select the «favourites» menu
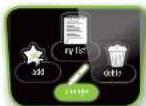

Select the «change» menu


Select the recipe whose name you want to change

GOLDEN RULES OF COOKING WITH YOUR COOK4ME
• Always use plastic or wooden utensils to avoid damaging the non-stick coating of the cooking bowl. Never cut food in the bowl.
Liquid quantities
- Programs that cook under pressure – quick cooking, ingredients menu and recipes menu – always require some liquid. See the cooking guides on pages 28-29 for advice on the quantity of liquid to use or follow the instructions on the Cook4me display screen.
- Always use a liquid that gives off steam when boiled e.g. water, stock, wine, beer, cider, etc. Never use oil or fat. Do not used milk as it can froth up under pressure.
- When steaming foods in the basket always use a minimum of 200 ml of water in the Cook4Me.
Maximum Filling level
- The ingredients plus liquid must not exceed the maximum filling level.
- Some foods such as rice and pulses (e.g. dried beans and dried peas) swell up and tend to froth during cooking and the bowl should not be more than half full with these ingredients and liquid.
Foods which require special care when cooking in Cook4Me • See the point above about cooking rice & pulses.
• Take care when cooking fruit which froths during pressure
cooking, such as stewed apple. Instead steam some fruits, such as apple, in the steaming basket instead.
- Never cook dumplings in the Cook4Me under pressure, as they could rise up and block the safety devices.
Cooking times
- The cooking times programmed into the Cook/Me are only a guide and can be adjusted to your personal taste by manually adjusting the advised cooking time.
- For the programs that cook under pressure – quick cooking, ingredients menu and recipes menu – the pressure cooking time will vary according to the size of the individual pieces or thickness of the food, not the weight.
• To prevent overcooking with delicate foods such as vegetables, fruit and fish the suggested cooking times may need slight adjustment for your personal taste.
Cook4Me Meat & Chicken Cooking Tips
- Choose meat joints of an even shape and thickness to ensure they cook evenly. Boneless joints which are tied into an even cylindrical shape are ideal.
- The maximum recommended weight for meat joints is 1 kg. - The maximum recommended weight for a whole chicken is 1.5 kg.
- Choose pieces of meat, such as chops, cubed meat for stews, of the same size and thickness to ensure they cook evenly.
- Before browning meat joints dry the outside with kitchen paper towel if it is moist on the outside. This helps reduce spitting during browning.
- Use about 1/2 - 1 tablespoon sunflower or vegetable oil when browning joints of meat.
- During browning, turn joints or meat using a spatula so it browns on all sides. Take care as hot oil may spit from the bowl. For pieces of meat, e.g. chops, or chicken, e.g. drumsticks, brown in batches, if necessary.
- After browning, take care when adding liquid to the hot bowl as it may spit or give off hot steam.
- Meat or joints with a layer of fat on the outside, such as chops or pork joints, will not turn crisp when cooked in the Cook4Me. Adapting your own recipes for use in Cook4Me
- For the programs that cook under pressure – quick cooking and ingredients menu – reduce the liquid quantity when adapting a conventional recipe as there is less evaporation in Cook4Me.
- The cooking time will be shorter than in a conventional oven or on the hob. Find a similar recipe in the Recipe Menu as a guide to the cooking time.
- Recipes are best thickened after cooking using Instant Thickening Granules available in larger supermarkets and are usually sold in the aisle near to cornfl our. Just stir the
thickening granules into the boiling hot dish or liquid until all the granules dissolve and the liquid thickens. Alternatively, blend comfl our with a little cold liquid to form a smooth paste (see packet instructions for advice on quantities); stir into the hot dish and then bring to the boil in a separate saucepan.
• To remove any unpleasant odours left in the Cook4Me after cooking strong foods, such as fish or curry, clean the appliance afterwards including dismantling the metal plate and cleaning all safety parts. Reassemble and leave the lid open for a few hours.
About the recipe program
- The cooking times in the recipes are approximate and may need adjustment to suit your personal taste.
- Eggs used in the recipes are medium size unless stated otherwise.
- All spoon measures are level unless stated otherwise. - The weight stated in the recipes are for the prepared weight of the food, for example, 100 g sliced carrots is the weight of carrots after peeling and trimming off the top and bottom.
- The recipes have been specifically developed for use in Cook4Me. If the recipes are prepared in an appliance other than this, the results and cooking times may vary.

Note: To ensure the correct operation of your Cookme, follow these cleaning and maintenance instructions after each use.

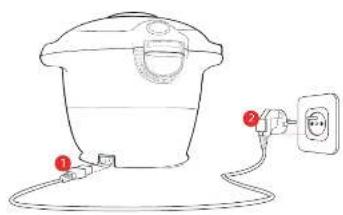
Once you have finished cooking your dish, disconnect the appliance to clean. Clean the appliance after each use.
[NO TEXT]
![TEFAL Cook4Me CY7018 - [NO TEXT] - 1](/content/2026/05/935675/images/97357a3b7610552348bc32652f62f9dd30c840e5f9705a8a6c3142d6c9a02624.jpg)
![TEFAL Cook4Me CY7018 - [NO TEXT] - 2](/content/2026/05/935675/images/f255817127755ae3aa375e4b0b42fa9e122702fd1857a9560525f3ccf912e5b5.jpg)
![TEFAL Cook4Me CY7018 - [NO TEXT] - 3](/content/2026/05/935675/images/b331cb95373773d279f5b603c9211ca3d8186e65f5088a19c4cbe07aaa536c40.jpg)
You can wash the cooking bowl and steam basket in hot water and washing up liquid or in the dishwasher. Clean the body of the appliance using a damp cloth.
After several washes in the dishwasher, the exterior of the bowl may become discoloured.
CLEANING AND MAINTENANCE CLEANING AND MAINTEN
![TEFAL Cook4Me CY7018 - [NO TEXT] - 4](/content/2026/05/935675/images/6dec710d5e5b1bc30ac69da76c821b4f27d821e0d541cb75d34a641f98dc3473.jpg)
![TEFAL Cook4Me CY7018 - [NO TEXT] - 5](/content/2026/05/935675/images/f540b5d5f11a2c33bec6b76fcc1b74e80f41961c0d93c3dbaacc1c8afd3e67e8.jpg)
![TEFAL Cook4Me CY7018 - [NO TEXT] - 6](/content/2026/05/935675/images/3e8726c4bd2d2b0d249833bcd3e213855b807d9bc5c1d4a92cd73a893bcb831d.jpg)
After each use, remove the condensation collector and wash carefully in soapy water or in the dishwasher. Take care to dry it well. Return to its original position.
![TEFAL Cook4Me CY7018 - [NO TEXT] - 7](/content/2026/05/935675/images/84f4becded58e6a2f223423d8a0ab72ad0f85dd5638c431081c08791fa734c72.jpg)
![TEFAL Cook4Me CY7018 - [NO TEXT] - 8](/content/2026/05/935675/images/1eeaff1feb24791a83a9fbfec11a7811b1945045e738e0263bcf6d457fbb4748.jpg)
To clean the metal plate, by hand or in the dishwasher, you need to remove the valve cover.
1 Unscrew the screw at the centre of the metal plate and keep it in a safe place
Take off the metal plate
3 Remove the valve cover
CLEANING IN THE DISHW ASHER: You can place the metal plate in the dishwasher, without removing the valves. After placing in the dishwasher, remove the decompression ball and blow in the pipe to check that it is not blocked. Dry the ball and its support carefully using a soft cloth.
![TEFAL Cook4Me CY7018 - [NO TEXT] - 9](/content/2026/05/935675/images/3234e18e212c0f6bde74510887efd13c79c2e8767ace83d118d9e2a298207d80.jpg)
CLEANING BY HAND:
You can clean the metal plate using washing up liquid and hot water. Firstly, remove the ball then clean completely. Dry the ball and its support using a soft cloth.



Do not clean any part of the Cook4Me with abrasive sponges or wire wool.

CLEANING AND MAINTENANCE CLEANING AND MAINTEN

Before reinitialing the ball, check that the pipe is not blocked by blowing into it, from the opposite side to the picture above.

Press on the internal part of the safety valve spring, from the opposite side to the picture shown above, to check that it is not clogged.

Check that the monometric rod (above) is not blocked and correctly positioned. Clean if necessary.


Clean the outside of the appliance's lid using a damp sponge. Clean the silencing pressure valve at the back of the lid. Pull out the valve cover from the lid, then take out the valve and clean it under running water. Reassemble the valve and return it to its original position in the lid.
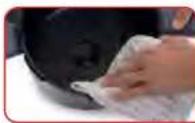


Clean the upper part of the cooking bowl using a damp cloth. Clean the area behind the condensation collector using a damp cloth. Rinse the condensation collector and replace.
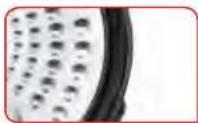


Clean the seal on the metal plate using a damp cloth then rinse thoroughly. Do not use sharp objects.
Note: The seal is non-removable from the metal plate.

CLEANING AND MAINTENANCE CLEANING AND MAINTEN

Replace the watertight seal at least every three years. This operation can only be performed by an Approved Service Centre.
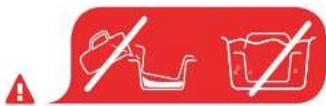
- In the event of accidental immersion of the appliance or if water is split directly on the heating element when the bowl is not in position, take the appliance to an Approved Service Centre.

Do not store the appliance with the lid dosed. Leave open or half open or slightly ajar. This will prevent unpleasant colours.
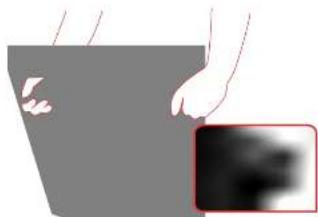
To carry the appliance, close the lid and lock it.
UK Helpline Information 0845 602 1454
PROBLEMS POSSIBLES CAUSES SOLUTION
| The list does not close | There are foreign bodies between the bowl and the heating pole. Remove the boat, check that the heating plate, centred element and under the bowl are deans. Check that the one's element can move around. |
| The lid open close handle is not correctly positioned Check that the metal plate monitor the flighing screw are not properly installed or fully sighted. Check that the metal plate has a completely open. Check that the end is fully lightened and that the fixtures on the sliding iron part of the lid are correctly aligned with the needles on the rim of the bowl one then by looking the lid closed. The end must be in bed with the flat or dark holding the metal plate. | |
| The appliance does not depleting it | The bell covers are not in place. Let the appliance can open pretty and then secure the metal plate and correctly position the metal plate filled in the lead position. |
| The nonometric red is still in the high point on. After ensuring that no more steam is released and that the appliance is completely cut, insect a fine metal stower into the hole located between the open handle and the slancing hole. Be careful of hot steam being restricted once the sower is pushed in. When to some steam is released, try to open the appliance. | |
| The appliance does not become preserved | Check that the sand, purple safety pole and nonmechanical bed clean. Check your appliance by following the cleaning and more necessary instructions in the boat. |
| Check that the bed is locked and the marking is properly aligned with the closed pocket. Check that the mechanical bed can move around and in heads settling. Check the main engine and oil movement in the Clearing and Manther snow section. | |
| The decompression bricks are not preconditioned correctly or only. Check but the bricks are correctly positioned and that the crew is in the locked position. Clean and dry, the bell and its support. | |
| ERROR CODES | Code 24: the pressure drop remains while pressure cooling Code 21 and 26: pressure tape is too noisy. And blocks to your seat (boxer, blocks or liquid source) SB-100m or a time and waitout the recipe. |
| Steam is released from the space of the building cooking stairs | The seat of the metal plate and for the edges of the board are dirty. Clean the sides of the bowl and scanning a dome cloth. Do not use any sheep instruments. Wear, cuts and deflection of the seat. The feed must be charged at least every 3 years. Take your appliance to an Approved Service Centre. |
| Base edge changed from your appliance to an upstream service table. | |
| The out for the metal plate was not tightened enough. Fully tighten the out to the metal plates is correctly posted. The nut must be fitted with the hot stick fading the metal plate. | |
| Water flows before the oppliance | The condensation collection is not in position or a floating flow. Make sure that the condensation collection is properly positioned behind the appliance and that the two above and a low side. The bed must be filled with the lid now so far as well as cold. Check that the board is not too hot with head or that foods have been cooked which arecondise safety Instrument pagesed. |
| The indicator is not flashing of dots not come on | The LED is no longer working on the lid is not completely looked. Check that the appliance is fully locked. Take your appliance to an Approved Service Centre if the problem continues. |
| The control panel does not fight up | The appliance is not connected or is not clearly. Check but the power level in corner set both in the appliance and the means. Check that the appliance is not on strictly by pressing the circles button. |
| The appliance is damaged. Take your appliance to an Approved Service Centre. | |
| Consonator appears on the machine | There is concentration on the lid. Let the appliance dry in lunch or for a few hours. |
| The manual plane must be removed, it is blocked | The ball covers was not used positioned on the metal plate. Up when then on the main plate, heavy handling looked up with the double door and then pots. Check that the back cover and decomposition be left correctly placed and on its necessary wall. |
NOTES
Tefal


- COOK 4 ME
- SAFETY INSTRUCTIONS
- TAKE THE TIME TO READ ALL THE FOLLOWING INSTRUCTIONS CAREFULLY
- ENVIRONMENT PROTECTION FI RSTL
- CONTENTS
- EPC03 SERIES
- HOW TO
- DISM ANTLE
- AND REASSEMBLE
- THE METAL PLATE
- ACCESSING THE DECOMPRESSION BALL
- PUTTING THE METAL PLATE BACK IN PLACE
- PUTTING THE VALVE COVER BACK: FACE THE VALVE COVER AS SHOWN IN THE PICTURE
- OPEN THE LID
- OPEN: CLOSE INDICATOR
- INSTALLING THE
- INSTALLING THE STAND
- POSITIONING THE BOWL IN THE APPLIANCE
- MANUAL MENU
- INGREDIENTS MENU
- GOLDEN RULES OF COOKING WITH YOUR COOK4ME
- COOKING TIMES
- [NO TEXT]
- CLEANING BY HAND
- NOTES
Brand : TEFAL
Model : Cook4Me CY7018
Category : Frying Pan