
PHMD55 - Detector Pyle - Free user manual and instructions
Find the device manual for free PHMD55 Pyle in PDF.


| Product Type | Metal Detector |
| Brand | Pyle |
| Model | PHMD55 |
| Power Source | 6 x AA alkaline batteries (not included) |
| Display | LCD digital screen with target ID categories (Iron, Mid Range, Silver/Copper) and depth sensitivity indication |
| Detection Modes | Motion Mode and Non-Motion (Pinpoint) Mode |
| Discrimination Levels | 4 levels: ALL METAL, eliminate iron, eliminate medium conductivity metals, eliminate both iron and medium metals |
| Sensitivity Adjustment | Adjustable via '+' and '-' keys; depth gauge shows relative depth |
| Pinpoint Mode | Yes, press and hold PINPOINT button for non-motion pinpointing |
| Target ID Categories | Iron (low tone), Mid Range (medium tone), Silver/Copper (high tone) |
| Audible Tones | Low, medium, high frequencies corresponding to metal type |
| Depth Indication | Depth segments on LCD (e.g., DEPTH-2) showing relative depth |
| Waterproof Search Coil | Yes, coil can be submerged; main unit not waterproof |
| Headphone Jack | Yes, 3.5mm jack for earphones |
| Assembly | Tool-free; adjustable tube length, cable winding around arm |
| Weight | Approximately 2.5 lbs (1.13 kg) with batteries |
| Dimensions (approx.) | Length: 42 inches (107 cm) extended; coil diameter: 8 inches (20 cm) |
| Color | Black with gray accents |
| Automatic Shut-off | Yes, after 10 minutes of inactivity with audible warning |
| Low Battery Indication | Yes, cursor on LCD display |
| Operating Environment | Outdoor use; avoid electrical interference sources |
| Recommended Maintenance | Keep dry, clean with soft cloth, store in cool place, remove batteries if not used for long periods |
Frequently Asked Questions - PHMD55 Pyle
User questions about PHMD55 Pyle
0 question about this device. Answer the ones you know or ask your own.
Ask a new question about this device
Download the instructions for your Detector in PDF format for free! Find your manual PHMD55 - Pyle and take your electronic device back in hand. On this page are published all the documents necessary for the use of your device. PHMD55 by Pyle.
USER MANUAL PHMD55 Pyle
natural_image
Person in protective gear using a metal detector on a beach with ocean waves in the background (no text or symbols visible)Waterproof Search Coil, Pin-Point Detect, Adjustable Sensitivity, Headphone Jack

natural_image
Close-up of a black metal detector with a digital display and a circular coil, labeled 'Mode' in the corner (no other text or symbols)Model:
PHMD55
TERMINOLOGY
The following terms are the common terminologies among the metal detector.
Motion Mode
Continuously moving the search coil is one of the circuit operation modes within the metal detector's built-in detection technologies. You have to move the search coil during detecting -- preferably in a overlapping 'painting' pattern. Generally speaking, motion detection mode can reduce the effect of misleading / unwanted soil mineralization detection, and will have a better discrimination ability for more sought after findings.
Non-Motion Mode
This is your other metal detection option included within the detector's circuitry operation modes. When searching, you need not move the search coil continuously, as long as your hover to locate and zero-in on your finding. When the metal detector locates the object in non-motion mode, the detector cannot discriminate the metal categories -- in other words, the discrimination levels do not function as in motion mode.
Elimination
To eliminate a particular metal while detecting is based on the user's preference. While searching the operator can distinguish the specified metal, based on the metal detector's reaction to the search coil's response (a different sound in tone and/or lighting indication can be differentiated). Please note, not all metal detectors feature a diverse and/or wide array of detection elimination options and differentiation.
Discrimination
The detector creates sounds in different tones and/or gives different display and/or light indications to different metal types. Discrimination also has the somewhat similar ability to also eliminate or 'zero-in' on the location/detection of select metals. This is referred to as "discriminating". Discrimination is one of the most important features of the metal detector (a different sound in tone and/or lighting indication can be differentiated). Please note, not all metal detectors feature a diverse and/or wide array of detection elimination options and differentiation..
Metals
The common metals are alloys, such as copper, due to the different character composition of different metals, they are most generally divided and grouped by categories like: red copper, brass, bronze, etc. However, the same metals can provide different detection / metal detector indication -- and vice versa, different metals can provide similar detection / metal detector indication. With a same metal, due to the different composition, shape and differences in the degree of oxidation, resulting in electrical conductivity or magnetic permeability are not the same, as in the metal detector, there are more often different responses.
Iron
Iron is a common metal, it's usually not the dedicated detection target. Undesirable iron objects include iron nails, bolts, old cans, caps, etc. Valuable relics and sought after materials can also be composed of iron, such as old armaments, old armature, etc. So, it may be best to pay attention to everything you detect!
Ferrous Metals
It is the metal which is made of, or containing, iron.
Trash metals
Caps, pull-tabs, s-caps from beverage containers are the most bothersome trash items for treasure hunters while metal detecting, you should wish, to preferably, eliminate them when searching and detection. But some other valuable objects may have a magnetic signature similar to the above trash metals, and will also be eliminated when selecting discriminating levels. Discriminate carefully and once again, it may be best to pay attention to everything you detect!
Pinpoint Targeting
Pinpoint targeting is the process of determining the exact location of a buried metal object. As in the motion detection mode, you need move the search coil continuously when searching and it's hard to determine the exact location of the buried metals during pinpoint targeting. Using the non-motion detection technology, it allows the search coil to center align with the location of the buried metal and narrow-down a more relevant and exact location of your finding.
Ground Balance
Because the metals and objects are buried in the earth, the mineralization that occurs in the soil will affect the detection ability and signal frequency. The integrated ground balance detector technology will, to the best of it's ability, eliminate or weaken the shielding effect of the mineralized soil. The ground balance system contains an internal ground balance adjustment for regulation of such instances (a different sound in tone and/or lighting indication can be differentiated). Please note, not all metal detectors feature a diverse and/or wide array of detection elimination options and differentiation..

Assembly
To assemble the metal detector does not require any special tools.
Turn clockwise to relax the end of bend-shape tube sleeve, and insert the tube which connect search coil into the sleeve. Adjusting the length, so you can stand comfortably and straighten your arms. Lock the sleeve anti-clockwise when the search coil is from the ground about 1/2 inches.
Assembly
Wind the cable around the aluminum tube arm, keep the elastic moderately tight/loose, so that the cable won't sway or interfere with operation and clothing. Tighten appropriately the two ends nuts, and adjust the search coil location to let the search coil be parallel with the ground. Be careful not to mistake the search coil location.

Battery
Please use 6 Alkaline 'AA' batteries.
Slide the cover labeled “OPEN” on the battery tray cover slot in the direction of the arrow, to pull out the battery cover. Then insert the 6 x 'AA' batteries into the compartment as indicated by the polarity symbols marked inside the compartment. Be sure to observe proper polarity when inserting batteries.
Once the batteries are inserted correctly, replace the battery cover. You will hear a beep tone. Don't mix the new and old batteries.
Control Panel and LCD screen

natural_image
Technical line drawing of a device rear panel with battery cells and a top view showing internal components (no text or symbols)
LCD Digital Display Screen
During detecting, the metal targets are divided into three categories by the target identification cursor.
SILVER - Higher conductivity metals, such as silver, aluminum and copper
(Such as coins: .25 cents, 50 cents and 1 U.S. dollar coin can be illuminated at this point)
MID RANGE - Medium conductivity metals,
(Such as pull-tabs, 5 cents nickel coin, 1 cent zinc coin and many other European coins can be illuminated at this point. Generally golden rings can be also illuminated at this point.)
IRON - Low conductivity metals
(Such as iron and all types of other ferrous metals.)
Depth Sensitivity Indication - 'DEPTH-SENS'
Press the “SENSITIVITY” '+' and '-' keys to adjust the metal detector's sensitivity adjustment. The depth gauge only shows the relative depth of the metal objects, rather than the precise depth.
*Generally, treasure hunters set it to the highest level, if there is much electromagnetic interference around or the soil is highly mineralized, the detector will sound an erratic tone, and if this happens, then you should reduce the detector's sensitivity.
Press the PINPOINT button on the handle, and the PINPOINT cursor will appear on the digital display. The metal detector will now be in the Non-Motion mode, you should be able to locate and pinpoint the metal target beneath the search coil.
*The metal detector also features a low battery indication cursor, this displays and warns you of low battery.
Three kinds of Audible Tones
The detector will sound three frequencies of sounds “low, medium, high” tones. The sensitivity ruler mark is displayed in three different segments, which indicates the current state / activity sensitivity level of the metal detector. (Can can use your own metals and adjust the discrimination levels accordingly to hear the different audible frequency tones created by different metal types). The metal type and / or target indication cursor on the metal detector LCD display screen will be illuminated accordingly.
| Target Categories | Indication Tone | TARGET ID Indication |
| Iron nail | Low tone | IRON is illumined & flickers for 5 seconds |
| Pull-tabs and 5 cents nickel coin | Medium tone | MID RANGE is illumined & flickers for 5 seconds |
| 25 cents | High tone | SILVER COPPER is illumined & flickers for 5 seconds |
(4) Level Discrimination Modes
When powering on the unit, it is automatically set to the ALL METAL mode. Press the “MODE” button, to have the ability to eliminate the metals that you don’t want, keep pressing the button to adjust the modes.
(4) Level Discrimination Modes
| (4) Modes | Indication Sound | TARGET ID Indication | The Eliminated Metals |
| Initial state High tone | Not illumined Can’t eliminate any metals | ||
| Press “MODE” Until Set Low tone | Iron is illumined | NOTCH I and Iron are eliminated | |
| Press “MODE” Until Set Medium tone | Mid range is illumined | NOTCH II ,Pull-tabs and nickel coins are eliminated | |
| Press “MODE” Until Set | Low and medium tones | Iron and Mid range are all illumined | NOTCH III, Iron, pull-tabs and nickel coins are eliminated at the same time |
| Press “MODE” Until Set High tone | Not illumined | Can’t eliminate any metals and is in ALL METAL mode | |
The above four modes are all activated in the metal detector motion mode, it means you should move the search coil at a certain speed and 'painting' pattern, in order to detect and discriminate optimally.
PINPOINT Mode
Press and hold down the red “PINPOINT” button on the handle, the detector will switch to non-motion mode, and it no longer has the discrimination ability. Now, the PINPOINT cursor will be displayed and the target identification cursor will be rendered useless. The sensitivity cursor turns into signal strength indication cursor.

Note: The times of the indication tone is in correlation with the sensitivity level, which means when the sensitivity is at the fourth level, the detector should also sound four times.
When operating the metal detector, be sure to avoid close proximity with familiar and known metal objects - as you intend to find unknown or hidden metal objects. The metal detector is also prone to interference from electronic device and frequency wave generating technologies. Avoid electro-magnetic interference and keep the unit away from cellphones, smart devices, TVs, computers, etc.
Powering On
Press the POWER ON button, the detector will sound three frequencies of low, medium and high tones, the liquid crystal display shows the discrimination mode and the sensitivity.
*When the TARGET ID is not illuminated, that indicates the metal detector is in the 'ALL METAL' mode.
*Whichever 'DEPTH-SENS' segment is highlighted, that indicates the metal detector has detected an object within that depth range. The approximate depth will be displayed

All Metal Mode
When turning on the unit, the detector will be in the 'ALL METAL' Mode. This is the general / typical metal detector mode that provides indication of any recognizable and compatible metal object found.
| Operation | Indication tone | LCD TARGET ID | LCD DEPTH-SENS | LCD Chart Note | |
| Turn on | Turn on indication | Nothing displayed | SENS-3 is illuminated | 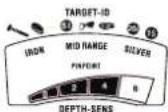 | If the height of the metal sample from the search coil is changed, the lighted segment numbers of the LCD depth cursor will be changed correspondingly. |
| Sweep iron nail low tone | The IRON is illuminated and flickers | DEPTH-2 is illuminated and flickers |  | ||
| Sweep 5¢ or pull-tabs | medium tone | MID RANGE is illuminated and flickers | DEPTH-2 is illuminated and flickers |  | |
| Sweep 25¢ high tone | SILVER illuminated and flickers | DEPTH-2 is illuminated and flickers | 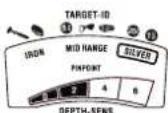 | ||
Eliminate Iron - Elimination:
| Operation | Indication | LCD TARGET ID | LCD DEPTH-SENS | LCD Chart Note | |
| Press MODE button | Three low tones | IRON is lighted | SENS-3 is illuminated |  ---- ---- | Press the MODE button, the sound times is the same with the sensitivity level, which means when the sensitivity is at the fourth level, the detector will sound four times low tone. |
| Sweep iron nail | No tone | IRON flickers once | SENS-3 flicker once |  ---- ---- | |
| Sweep 5¢ or pull-tabs | medium tone | MID RANGE is illuminated and flickers | DEPTH-2 is illuminated and flicker |  ---- ---- | |
| Sweep 25¢ high tone | SILVER is illuminated and flickers | DEPTH-2 is illuminated and flicker | 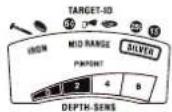 |
Eliminate Medium Conductivity Metals - Elimination:
| Operation Indication tone | LCD TARGET ID | LCD DEPTH-SENS | LCD Chart | |
| Press MODE button | Three medium tones | MID RANGE is illuminated | SENS-3 is illuminated |  |
| Sweep iron nail low tone | IRON is illuminated and flickers | DEPTH-2 is illuminated and flickers |  | |
| Sweep 5¢ or pull-tabs | No tone sound | MID RANGE flickers once | SENS-3 flickers once | 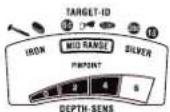 |
| Sweep 25¢ | high tone | SILVER is illuminated and flickers | DEPTH-2 is illuminated and flickers |  |
Eliminate the iron and the medium conductivity metals at the same time:
| Operation Indication tone | LCD TARGET ID | LCD DEPTH-SENS | LCD Chart Note | |
| Press MODE button | It sounds low, medium and high tones (repeats three times) | IRON and MID RANGE are illuminated at the same time | SENS-3 is illuminated |  |
| Sweep iron nail,5¢ and pull-tabs in turn | no tone | IRON and MID RANGE flickers once | SENS-3 flickers once |  |
| Sweep 25¢ | high tone | SILVER is illuminated and flickers | DEPTH-2 is illuminated and flickers |  |
*When detecting objects with the PINPOINT Mode, the closer your search coil center comes to the object, and the closer in distance between the center of the search coil and the sought-after object, the louder audible frequency tone will be heard from the metal detector's speakers.
Basic Operation
This metal detector is an equipment intended to be used outdoors. Please remember familiar and nearby 'known' metals and electrical equipment will bring interference signals and provide false readings by your metal detector. Field detection can include more complications when detecting. Factors included are the composition of the regional soil, the object type, size, shape and the oxidation degree of the underground metals, and soil, will all affect the detection, discrimination and pinpoint targeting results. This manual and user instruction only describe the general and typical steps / practices of the field detection. The operator should familiarize himself with tested detecting styles, movement and 'tips' when metal detecting. As with everything, accumulating user experience over time will lead to more knowledgeable detection habits, and hopefully improved metal detector results.
Note: If you are metal detecting with a partner, in order to avoid the interference, please keep at least 10 feet apart -- especially if your partner has a metal detector.
*Once you've set the sensitivity and discrimination mode settings, settings will remain unchanged until you power the unit off.
Motion detection
When detecting using the moving 'Motion Mode', you should sweep the search coil at a constant (fairly slow and steady) speed, and let the search coil remain parallel with the ground floor surface. Preferred height distance of the coil from the ground floor surface is about 1/2 inches (1.5cm) directly above the ground surface.


natural_image
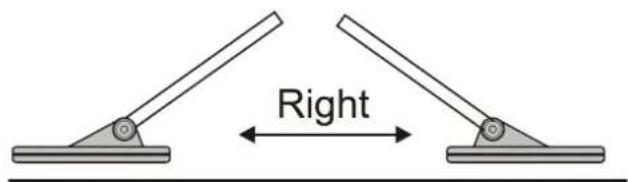
Simple line drawing of a robotic hand and a multi-arm tool (no text or symbols)*For optimum metal detecting performance, never sweep the search coil as if it were a pendulum. Avoid 'angling' the search coil from the detecting ground floor surface.
Most worthwhile metal objects will provide a repeatable signal, if the signal will not be repeated when hovering over, it is more than likely trash metals (or possibly over-oxidized materials). When a clear sounding tone is heard, you can get the approximate target type and target depth on the LCD digital display screen.
Some practice and experience may be needed to develop the proper metal detector 'sweeping' style. Just like your fingerprint, your sweeping / metal detector scanning movement will develop over time and will help to optimize your metal detector's performance and your technique in general. If the search coil is swept too slowly, the unearthed objects may not respond or be recognized by the metal detector -- the same goes if you sweep too quickly past the objects. Another re-sweep or 'pass-over' can always help confirm the presence of an existing metal but a unique and ideal sweeping style is what you're after. Proper scanning also involves smooth, even swipes of the search coil, that includes overlapping already partially scanned areas as you
continue moving forward. Take the time to practice and experiment the ideal sweeping speed and style. Learning, experimenting and discovering is all a part of the experience and you will gradually develop metal detecting skills and sought-after habits over time.
Pinpoint your finding
When there is a clear signal to show you the location of the buried target objects, you can make an “X” scan at this zone, generally the bottom of the intersection point is the target object.

natural_image
Diagram showing a mechanical device interacting with a textured surface, no text or symbols presentPinpointing and PINPOINT Mode
While searching in the motion mode, you should move the search coil evenly, consistently and persistently. However, if you run into an instance where you cannot determine exactly where to dig, or to narrow down the area, and determine a more exact location of the object, you can refer to the PINPOINT mode.
Press and hold down the red PINPOINT button. The TARGET ID cursor on the LCD is disappear, and the PINPOINT cursor will be lighted. Let the search coil approach the ground and continue your metal detection. Once a possible object is located, press the PINPOINT button again to rescan and confirm the finding, doing so allows the detector to become self-balanced, and the PINPOINT cursor is lighted, the depth cursor is extinguished.
*Automatic power saving and turn-off mode activates and warns you with an audible double-beep warning after every 10 minutes when not in use.
Caution
In areas with heavy traffic, please do not wear earphones while detecting, in case an accident occurs.
Always obtain permission before searching any site.
Keep away from the areas that may have buried electrical or gas lines / cables.
Do not detect in private property, military owned areas or where you do not receive permission to detect. When digging out the target, use a reasonable digging method that will not damage or cause harm to yourself or any possible object within the surface area.
Try your best as to not destroy the vegetation, cause damage to any animals / insects.
Take care of mother nature!
Troubleshooting
| SYMPTOM | SOLUTION |
| No power, there is no indication on the LCD display, there is no sound when powering on | 1.Be sure batteries are installed correctly.2.Be sure battery cover is closed correctly.3.Replace the batteries. |
| Sound heard is an irregular tone, or the target identification cursor chatters / distorts | Make sure there are no electromagnetic interference sources present, such as power lines, cables, electronic fences, etc.Keep away from areas that are prone to cause interference or you can reduce the detector's sensitivity. |
| The signal is unstable and the position of the target identification cursor is changing | 1.Scan at a different angle, in order to determine whether you can get a more stable signal.2.If the target is buried deeply, you could try to increase the sensitivity or speed up the search coil scanning speed, hovering over the designated area. .3.Maybe more than one metal targets are buried, you could try to increase the sensitivity or set different discrimination ranges when scanning.4.Maybe you found a severely oxidated target, or the ground contains some type of magnetic field or mineralized content.Attempt to decrease the sensitivity and continue scanning. |
| Using PINPOINT mode. when approaching the ground, the unit automatically sounds a tone | 1.The soil is magnetic, Press the PINPOINT button again, and reduce the sensitivity -- and scan the area again.2.There are large metal objects under the ground. |
PYLE®
PyleAudio.com
PYLE AUDIO INC.
1600 63rd.Street
Brooklyn N.Y. 11204


- TERMINOLOGY
- Motion Mode
- Non-Motion Mode
- Elimination
- Discrimination
- Metals
- Iron
- Ferrous Metals
- Trash metals
- Pinpoint Targeting
- Ground Balance
- Assembly
- Battery
- Control Panel and LCD screen
- LCD Digital Display Screen
- Depth Sensitivity Indication - 'DEPTH-SENS'
- Three kinds of Audible Tones
- Level Discrimination Modes
- PINPOINT Mode
- Powering On
- All Metal Mode
- Basic Operation
- Motion detection
- Pinpoint your finding
- Pinpointing and PINPOINT Mode
- Caution
- PYLE®
Brand : Pyle
Model : PHMD55
Category : Detector