
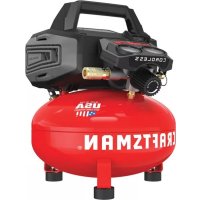
218.10012 - Compressor Craftsman - Free user manual and instructions
Find the device manual for free 218.10012 Craftsman in PDF.


| Product Type | Air Compressor |
| Brand | Craftsman |
| Model | 218.10012 |
| Category | Compressor |
| Dimensions (L x W x H) | 18 x 12 x 12 inches |
| Weight | 30 lbs |
| Power Supply | 120V AC, 60 Hz |
| Motor Power | 2 HP (peak) |
| Tank Capacity | 6 gallons |
| Maximum Pressure | 150 PSI |
| Pump Type | Oil-free |
| Maintenance | Drain tank daily; replace air filter as needed |
| Safety Features | Pressure relief valve, thermal overload protection |
| Accessories Included | 1/4 inch NPT quick coupler |
| Repairability | Replaceable regulator, filters, and safety valve |
| Warranty | 1 year limited |
Frequently Asked Questions - 218.10012 Craftsman
User questions about 218.10012 Craftsman
0 question about this device. Answer the ones you know or ask your own.
Ask a new question about this device
Download the instructions for your Compressor in PDF format for free! Find your manual 218.10012 - Craftsman and take your electronic device back in hand. On this page are published all the documents necessary for the use of your device. 218.10012 by Craftsman.
USER MANUAL 218.10012 Craftsman
natural_image
Technical line drawing of an air compressor unit with hoses and control panel (no text or labels)CAUTION:
Before using this product, read this manual and follow all its Safety
Rules and Operating Instructions.
• Safety Instructions
• Installation & Operation
• Maintenance & Storage
- Troubleshooting Guide
- Parts List
g
Transform SR Brands Management LLC Hoffman Estates, IL 60179, U.S.A.
08/08/2019
g
g
g
g
g
g
g
g
g
g
g
g
g
g
g
g
g
TABLE OF CONTENTS
g
g
Page
Warranty .... see below
Safety Symbols 1
Important Safety Instructions & Guidelines....1
Specifications 2
Glossary 2
Duty Cycle....2
Parts & Features ....3
Installation & Assembly 4
Operating Procedures....6
Maintenance ....7
Storage 7
Troubleshooting Guide ....8
Exploded View. 9
Parts List 10
Service Number....Back Cover
g
g
g
CRAFTSMAN LIMITED WARRANTY
FOR ONE YEAR from the date of sale, this product is warranted against any defects in material or workmanship.
WITH PROOF OF SALE return a defective product to the retailer from which it was purchased for free replacement.
This warranty applies for only 90 days from the date of sale if this product is ever used while providing commercial services or if rented to another person.
This warranty gives you specific legal rights, and you may also have other rights which vary from state to state.
Transform SR Brands Management LLC, Hoffman Estates, IL 60179
Safety Instructions
The information listed below should be read and understood by the operator. This information is given to protect the user while operating and storing the air compressor. We use the symbols below to allow users to recognize important information about their safety.
| DANGER!Indicates an imminently hazardous situation which, if not avoided, will result in death or serious injury. | CAUTION!Indicates a potentially hazardous situation which, if not avoided, may result in minor or moderate injury. |
| WARNING!Indicates a potentially hazardous situation which, if not avoided, could result in death or serious injury. | NOTICEIndicates a potentially hazardous situation which, if not avoided, may result in property damage. |
Important Safety Instructions and Guidelines Save all instructions
WARNING! This product contains chemicals known to the state of California to cause cancer, birth defects and/or other reproductive harm. www.P65Warnings.ca.gov
Improper operation or maintenance of this product could result in serious injury and/or property damage. Read and understand all of the warnings and safety instructions provided before using this equipment.
| NOTICE | The air compressor should be operated on a dedicated 15 Amp circuit. If the circuit does not have 15 free Amps available, a larger circuit must be used. Always use more air hose before utilizing extension cords. All extension cords used must be 12 gauge with a maximum length of 25 ft. The circuit fuse type must be a time delay. Low Voltage could cause damage to the motor. |
Risk of Moving Parts | If the air compressor is in operation, all guards and covers should be attached or installed correctly. If any guard or cover has been damaged, do not operate the equipment until the proper personnel has correctly repaired the equipment. The power cord should be free of any moving parts, twisting and/or crimping while in use and while in storage. |
Risk of Burns | There are surfaces on your air compressor that, while in operation and thereafter, can cause serious burns if touched. The equipment should be allowed time to cool before any maintenance is attempted. Items such as the compressor pump and the outlet tube are normally hot during and after operation. |
Risk of Falling | Operation of the air compressor should always be in a position that is stable. Never use the air compressor on a rooftop or elevated position that could allow the unit to fall or be tipped over. Use additional air hose for elevated jobs. |
Risk from Flying Objects | Always wear ANSI Z87.1 approved safety glasses with side shields when the air compressor is in use. Turn off the air compressor and drain the air tank before performing any type of maintenance or disassembly of the hoses or fittings. Never point any nozzle or sprayer toward any part of the body or at other people or animals. |
Important Safety Instructions & Guidelines
Risk to Breathing | Avoid using the air compressor in confined areas. Always have adequate space (12 inches) on all sides of the air compressor. Also keep children, pets, and others out of the area of operation. This air compressor does not provide breathable air for anyone or any auxiliary breathing device. Spraying material will always need to be in another area away from the air compressor to not allow intake air to damage the air compressor filter. |
Risk of Electrical Shock | Never utilize the air compressor in the rain or wet conditions. Any electrical issues or repairs should be performed by authorized personnel such as an electrician and should comply with all national and local electrical codes. The air compressor should also have the proper three prong grounding plug, correct voltage, and adequate fuse protection. |
Risk of Explosion or Fire | Never operate the compressor near combustible materials, gasoline or solvent vapors. If spraying flammable materials, locate the air compressor at least 20 feet away from the spray area. Never operate the air compressor indoors or in a confined area. |
Risk of Bursting | Always drain the air compressor tank daily or after each use. If the tank develops a leak, then replace the air compressor. Never use the air compressor after a leak has been found or try to make any modifications to the tank. Never modify the aircompressor's factory settings which control the tank pressure or any other function. |
Specifications
Pump Oil-lube direct drive
Motor 1.0 HP (Induction)
Bore 1.65"
Stroke 1.26"
Voltage Single Phase .....120 VAC
Minimum Circuit Requirement .....15 Amps
Glossary
CFM: Cubic feet per minute.
SCFM: Standard cubic feet per minute; a unit of measure for air delivery.
PSIG: Pounds per square inch gauge; a unit of measure for pressure.
ASME: American Society of Mechanical Engineers.
California Code: Unit may comply with California Code 462 (I) (2)/(M) (2).
Cut-In Pressure: The air compressor will automatically start to refill the tank when the pressure drops below the prescribed minimum.
B
g
g
Air Tank Capacity 3 Gallons
Cut-in Pressure 105 PSI
Cut-out Pressure 135 PSI
SCFM @ 90 PSI....2.4
Oil Capacity 90 mL or 3 oz.
Oil Type . SAE 30 Non-detergent Semi Synthetic
g
g
Cut-Out Pressure: The point at which the motor stops when the tank has reached maximum air pressure.
Code Certification: Products that bear one or more of the following marks: UL, CUL, ETL, CSA, have been evaluated by OSHA-certified independent safety laboratories and meet the applicable Underwriters Laboratories Standards for Safety.
Duty Cycle
This is a 50% duty cycle air compressor. Do not run the air compressor more than 30 minutes of one hour. Doing so could damage the air compressor.
g
g
g
g
g
g
g
g
g
g
g
g
Parts & Features
See figures below for reference.
Air Intake Filter
Provides clean air to the pump and must always be kept free of debris. Check on a daily basis or before each use.

The image contains a single, continuous horizontal line, which is a stylistic or background element. According to Rule 2, such elements must be ignored by the OCR result. Therefore, the corrected OCR text is:
[Empty string]

Oil sight gauge

Regulator
The pressure coming from the air tank is controlled by the regulator. To increase the pressure, turn the knob clockwise, and to decrease the pressure, turn the knob counterclockwise.
Check valve
When the pump is not in operation, the valve closes to retain air pressure inside the tank. An internal component.
g
g
g
g g
g
g
Installation & Assembly
WARNING!
Before performing any maintenance, turn the compressor off, unplug from power source, bleed air from tank and allow unit to cool. Personal injuries can occur from moving parts, electrical sources, compressed air or hot surfaces. If unsure of assembly instructions or you experience difficulty in the assembly contact a Sears or other qualified service dealer.
Assembly
- Remove air compressor, manual, air filter assembly, and accessories from packaging.
- Remove the plastic plug from the compressor intake port. (see diagram below)
- Install the filter in the compressor intake port. (see diagram below)
-
Remove the oil fill cap from the crankcase and fill until the oil reaches the top of the red dot in the sight glass. Oil capacity is 2.7 oz. (see below) Use SAE 30 Non-detergent Semi Synthetic oil (API CG/CD heavy duty motor oil). Under extreme cold weather conditions use SAE-10 weight oil.
-
Replace the oil fill cap.
g

g
4
Installation
Location of the Air Compressor
The air compressor should always be located in a clean, dry and well-ventilated environment. The unit should have at minimum, 12 inches of space on each side. The air filter intake should be free of any debris or obstructions. Check the air filter on a daily basis to make sure it is clean and in working order.
Grounding Instructions
This product must be grounded. In the event of an electrical short circuit, grounding reduces the risk of electric shock by providing an escape wire for the electric current. This product is equipped with a cord having a grounding wire with an appropriate grounding plug. (See figure below.) The plug must be plugged into an outlet that is properly installed and grounded in accordance with all local codes and ordinances. Check with a qualified electrician or service personnel if these instructions are not completely understood or if in doubt as to whether the tool is properly grounded.

WARNING!
Improper installation of the grounding plug will result in a risk of electric shock. If repair or replacement of the cord or plug is necessary, do not connect the grounding wire to either flat blade terminal. The wire with insulation having an outer surface that is green with or without yellow stripes is the grounding wire. Check with a qualified electrician or serviceman if the grounding instructions are not completely understood, or if in doubt as to whether the product is properly grounded. Do not modify the plug provided; if it will not fit the outlet, have the proper outlet installed by a qualified electrician.
This product is for use on a circuit having a nominal rating of 120 Volts and is factory-equipped with a specific electric cord and plug to permit connection to a proper electric circuit.
Make sure that the product is connected to an outlet having the same configuration as the plug. No adapter should be used with this product. If the product must be reconnected for use on a different type of electric circuit, qualified service personnel should make the reconnection.
Extension Cords
Use only a 3-wire extension cord that has a 3-blade grounding plug, and a 3-slot receptacle that will accept the plug on the product. Make sure your extension cord is in good condition. When using an extension cord, be sure to use one heavy enough to carry the current your product will draw. Cords must not exceed 25 feet and #12 AWG must be used. An undersized cord will cause a drop in line voltage resulting in loss of power and overheating.
g
Break-In Procedures
No break-in procedure is required by the user. This product is factory tested to ensure proper operation and performance.g
Operating Procedures
Daily Start-Up Procedures
- Set the Auto-On/Off lever to the Off position.
- Inspect the air compressor, air hose, and any accessories/tools being used for damage or obstruction. If any of these mentioned items are in need of repair/replacement, contact your local authorized service dealer before use.
- Close the drain valve.
- Check the oil level of the pump.
- Connect the air hose to the quick connect socket on the regulator assembly by inserting the quick connect plug on the air hose into the quick connect socket. The quick connect socket collar will snap forward and lock
between the socket and plug. To release the air hose, push the collar back on the quick connect socket.
- Plug the power cord into the proper receptacle.
- Turn the Auto-On/Off lever to the On-Auto position and the compressor will start and build air pressure in the tank to cut-out pressure and then shut off automatically.
- Adjust the regulator to a PSI setting that is needed for your application and be sure it is within the safety standards required to perform the task. If using a pneumatic tool, the manufacturer should have recommendations in the manual for that particular tool on operating PSI settings.
- The air compressor is now ready for use.
the plug into place providing an airtight seal

debris buildup in the valve.
Daily Shut-Down Procedures
- Set the Auto-On/Off lever to the Off position.
- Unplug the power cord from the receptacle.
- Set the outlet pressure to zero on the regulator.
- Remove any air tools or accessories. When draining the tank, always use ear and eye protection. Drain the tank in a suitable location; condensation will be present in most cases of draining.
- Open the drain valve allowing air to bleed from the tank. After all of the air has bled from the tank, close the drain valve to prevent
CAUTION!
When draining the tank, always use ear and eye protection. Drain the tank in a suitable location; condensation will be present in most cases of draining.
WARNING!
Water that remains in the tank during storage will corrode and weaken the air tank which could cause the tank to rupture. To avoid serious injury, be sure to drain the tank after each use or daily.
Maintenance
NOTE: Any service procedure not covered in the maintenance schedule should be performed by qualified service personnel. Contact a Sears or other qualified service dealer.
WARNING!
The air compressor should be turned off, unplugged from the power source, air bled from the tank and allowed time to cool before any maintenance is performed.
CAUTION!
To ensure efficient operation and longer life of the air compressor unit, a routine maintenance schedule should be followed. The following schedule is geared toward a consumer whose compressor is used in a normal working environment on a daily basis.
| Maintenance Schedule | |
| Items to Check/Change | Before each use or daily |
| Check Tank Safety Valve | X |
| Overall Unit Visual Check | X |
| Check Air Filter | X |
| Drain Tank | X |
| Check Power Cord for Damage | X |
| gChange Oil | after first 50 hrs |
| after every 100 hrs | |
| Check Oil Level | X |
Storage
For storing the air compressor, be sure to do the following:
- Turn the unit off and unplug the power cord from the receptacle.
- Remove all air hoses, accessories, and air tools from the air compressor.
-
Perform the daily maintenance schedule.
-
Open the drain valve to bleed all air from the tank.
- Close the drain valve.
- Store the air compressor in a clean and dry location.
NOTES
Troubleshooting Guide
WARNING!
The air compressor should be turned off and unplugged from the power source before any maintenance is performed as well as the air bled from the tank and the unit allowed time to cool. Personal injuries could occur from moving parts, electrical sources, compressed air, or hot surfaces.
| PROBLEM POSSIBLE | CORRECTION |
| Air leaks at the check valve or at the pressure relief valve. | A defective check valve results in a constant air leak at the pressure relief valve when there is pressure in the tank and the compressor is shut off. Drain the tank, then remove and clean or replace the check valve. |
| Air leaks between head and cylinder. | Be sure of proper torque on head bolts. If leak remains, contact a service technician. |
| Air leak from safety valve. | Operate the safety valve manually by pulling on the ring. If the valve continues to leak when in the closed position, it should be replaced. |
| Pressure reading on the regulated pressure gauge drops when an accessory is used. | If there is an excessive amount of pressure drop when the accessory is used, replace the regulator.NOTE: Adjust the regulated pressure under flow conditions (while accessory is being used). It is normal for the gauge to show minimal pressure loss during initial use of the tool. |
| Excessive tank pressure. | Move the Auto-On/Off lever to the Off position. If the unit doesn't shut off, unplug it from the power source and contact a service technician. |
| Motor will not start. Make sure power cord is plugged in and the switch is on. Inspect for the proper size fuse in your circuit box. If the fuse was tripped, reset it and restart the unit. If repeated tripping occurs, replace the check valve or contact a service technician. | |
| Excessive moisture in the discharge air. | Remove the water in the tank by draining after each use. High humidity environments will cause excessive condensation. Utilize water filters on your air line.NOTE: Water condensation is not caused by compressor malfunction. Be sure the compressor's air output is greater than your tool's air consumption rate. |
| Air leaks from the tank body or tank welds. | Never drill into, weld or otherwise modify the air tank or it will weaken. The tank can rupture or explode. Compressor cannot be repaired. Discontinue use of the air compressor. |
Craftsman Air Compressor Model 218.10012 Exploded View

g
Craftsman Air Compressor Model 218.10012 Parts List
| Key | Kit | Part No. | Part Name | Qty |
| 1 B 45.329 | Screw SHCS | M6 x 30 mm 4 | ||
| 2 C 45.092 | Washer, Lock | 6 mm 8 | ||
| 3 B 3.154 | Cylinder Head | 1 | ||
| 4 B 40.001A Exhaust Elbow 1 | ||||
| 5 C 41.005 | Air Filter 1 | |||
| 6 A 35.008H Gasket, Cylinder Head 1 | ||||
| 7 B 11.001 | Valve Plate, 47 | 1 | ||
| 8 B 34.001 | Valve Reed, 51 | 2 | ||
| 9 A 35.001 | Gasket, valve plate, 47 | 1 | ||
| 10 | A | 35.008I | Gasket, cylinder upper | 1 |
| 11 | A 10.001C Cylinder, ø42*32 | 1 | ||
| 12 | B 45.140C Screw, SHCS M6 x 20 mm | 1 | ||
| 13 | A 35.008D Gasket, cylinder lower | 1 | ||
| 14 | C 45.066 Washer, tooth lock, 8 | 2 | ||
| 15 | C 45.231 Nut, M8 | 4 | ||
| 16 | A 27.036 Capacitor, Running, 50UF/250V | 1 | ||
| 17 | A 27.007 Capacitor, Starting, 200UF/125V | 1 | ||
| 18 | C 45.110 Screw, round head, phillips, M3 x 6 mm | 1 | ||
| 19 | C 45.095 Washer, lock 3 mm | 1 | ||
| 20 | A 04.129 Motor, Assembly | 1 | ||
| 21 | B 12.001 Eccentric | 1 | ||
| 22 | B 45.079A Nut, M6 | 1 | ||
| 23 | B 3.007 Rod, Connecting | 1 | ||
| 24 | B 28.001 Piston, ø42 | 1 | ||
| 25 | B 30.001 Piston, pin Dia. 12 x 34 mm | 1 | ||
| 26 | B 46.005 Ring, Snap, 12 mm | 2 | ||
| 27 | B 29.001 Ring, scraper, Dia. 42 mm 1 | |||
| 28 | B 29.001 Ring, compression, Dia. 42 mm | 2 | ||
| 29 | C 36.022 Baffle, rubber | 1 | ||
| 30 | C 03.006 Cover, crankcase | 1 | ||
| 31 | C 33.001 Gauge, oil sight with seal | 1 | ||
| 32 | C 45.085 Screw, hex flange head M5 x 12 mm | 10 | ||
| 33 | C 26.004 Oil fill cap with O ring | 1 | ||
| 34 | B 04.019 Centrifugal switch | 1 | ||
| 35 | C | 45.108 | Screw, round head phillips, M5 x 10 mm | 2 |
| 36 | C | 45.069 | Washer, Lock 5 mm | 2 |
| 37 | C | 04.016B | Fan, plastic | 1 |
| 38 | C | 46.015 | Ring, snap 15 | 1 |
| 39 | C | 06.400 | Shroud | 1 |
| 40 | B | 21.033 | Switch, pressure, 105-135 psi | 1 |
| 41 | C | 21.04 | Strain relief 6W-3 | 2 |
| 42 | C | 42.020 | Nipple, 1/4" NPT x 30 mm | 1 |
| 43 | C | 42.028 | Nipple, 1/4" NPT x 48 mm | 1 |
| 44 | B | 25.005 | Cyclo-Regulator | 1 |
| 45 | B | 42.080 | Coupler, Quick connect, 1/4" NPT | 1 |
| 46 | A | 24.019A | Valve, safety, 140 psi, ASME, 1/4" NPT | 1 |
| 47 | B | 23.066 | Pressure Gage, 1.5", 1/8" NPT, 270 psi | 1 |
| 48 | B | 23.067 | Pressure Gage, 2", 1/4" NPT, 270 psi | 1 |
| 49 | A | 08.089B | Tank, 3 Gallon | 1 |
| 50 | C | 37.008 | Grip, handle | 1 |
| 51 | B | 38.001A | Check valve | 1 |
| 52 | C | 39.020 | Drain valve, 1/4" NPT | 1 |
| 53 | C | 45.064 | Washer, flat, 8 | 8 |
| 54 | C | 15.014 | Isolator, Rubber | 4 |
| 55 | C | 45.228 | Bolt, Hex Head, M8 x 20 mm | 4 |
| 56 D | 46.029 / 46.029A | Washer, flat, Copper 10, Cu/Fe 2 | ||
| 57 D | 44.003 | Nut, compression, G3/8 2 | ||
| 58 D | 43.001 | C Tube, with fin, outlet, OD 10 mm 1 | ||
| 59 E | 43.001 | H Tube, relief, outlet, OD 6 mm 1 | ||
| 60 E | 44.001 | Nut, hex compression, G1/8 1 | ||
| 61 F | 22.034 | Cord, Power, SJT16*2M 1 | ||
| 62 F | 46.050 | Terminal, Y type, 1.5-4U 2 | ||
| 63 F | 46.051 | Terminal, O Type, 1.5-4O 1 | ||
Note: Any part/kit field without a number is not available.
Descriptions are provided for reference only. The Kit #
column means that the part being offered is only in a kit.
One of each part per kit is included.
CRAFTSMAN®
For product questions or to order replacement parts call
1-877-636-0533
g
g
g
g
- TABLE OF CONTENTS
- CRAFTSMAN LIMITED WARRANTY
- Safety Instructions
- Important Safety Instructions and Guidelines Save all instructions
- Specifications
- Glossary
- Duty Cycle
- Parts & Features
- Air Intake Filter
- Regulator
- Check valve
- Installation & Assembly
- WARNING!
- Assembly
- Installation
- Location of the Air Compressor
- Grounding Instructions
- Extension Cords
- Break-In Procedures
- Operating Procedures
- Daily Start-Up Procedures
- Daily Shut-Down Procedures
- CAUTION!
- Maintenance
- Storage
- NOTES
- Troubleshooting Guide
- CRAFTSMAN®
Brand : Craftsman
Model : 218.10012
Category : Compressor