
MCSDRY35W1 - Tumble dryer Magic Chef - Free user manual and instructions
Find the device manual for free MCSDRY35W1 Magic Chef in PDF.


| Product Type | Compact Tumble Dryer |
| Brand | Magic Chef |
| Model | MCSDRY35W1 |
| Capacity | 3.5 cu. ft. |
| Dimensions (W x H x D) | 23.6" x 27.5" x 21.5" |
| Net Weight | 49.5 lbs (22.5 kg) |
| Power Supply | 120V AC, 60Hz |
| Current Rating | 12 Amperes |
| Plug Type | 3-prong grounded plug |
| Drying Modes | Normal, Eco, Sensor Dry, Timer |
| Temperature Settings | Cool, Warm, Hot, Air Dry |
| Timer Range | 0 to 200 minutes |
| Sensor Dry | Auto moisture sensing for efficient drying |
| Anti-Wrinkle Feature | Yes, for easier ironing |
| Lint Filter | Removable, clean before/after each use |
| Air Intake Filter | Removable, clean before/after each use |
| Installation Options | Freestanding or wall-mounted (kit included) |
| Venting Requirement | Must be vented outdoors (kit not included) |
| Leveling Legs | 4 adjustable legs |
| Warranty | 1 year parts and labor |
| Safety Features | Grounding, child lock (not specified), automatic shut-off |
| Maintenance | Clean lint filter and air intake filter regularly, unplug before cleaning |
Frequently Asked Questions - MCSDRY35W1 Magic Chef
User questions about MCSDRY35W1 Magic Chef
0 question about this device. Answer the ones you know or ask your own.
Ask a new question about this device
Download the instructions for your Tumble dryer in PDF format for free! Find your manual MCSDRY35W1 - Magic Chef and take your electronic device back in hand. On this page are published all the documents necessary for the use of your device. MCSDRY35W1 by Magic Chef.
USER MANUAL MCSDRY35W1 Magic Chef
2.6 / 3.5 Cu. Ft.
Compact Dryer
User's Manual
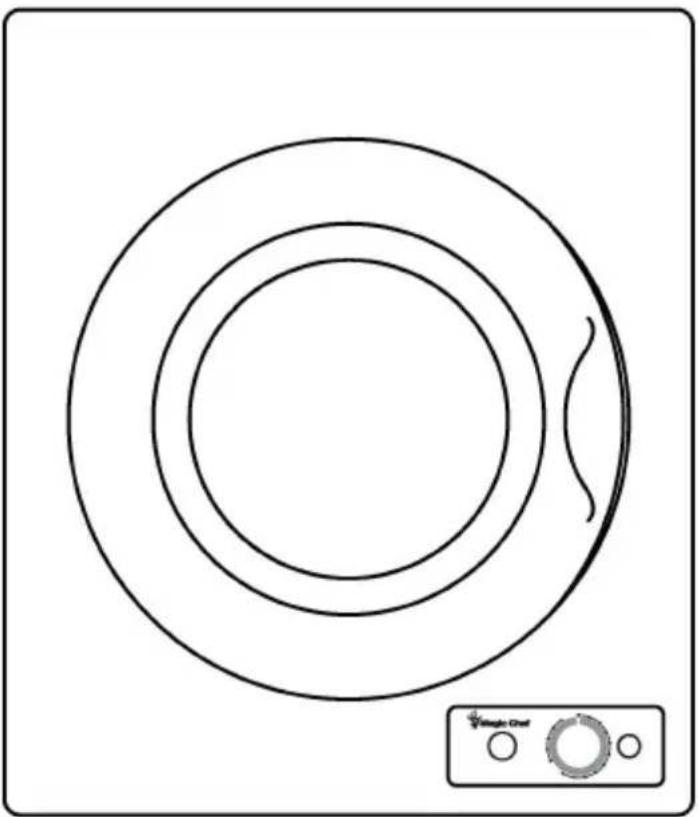
natural_image
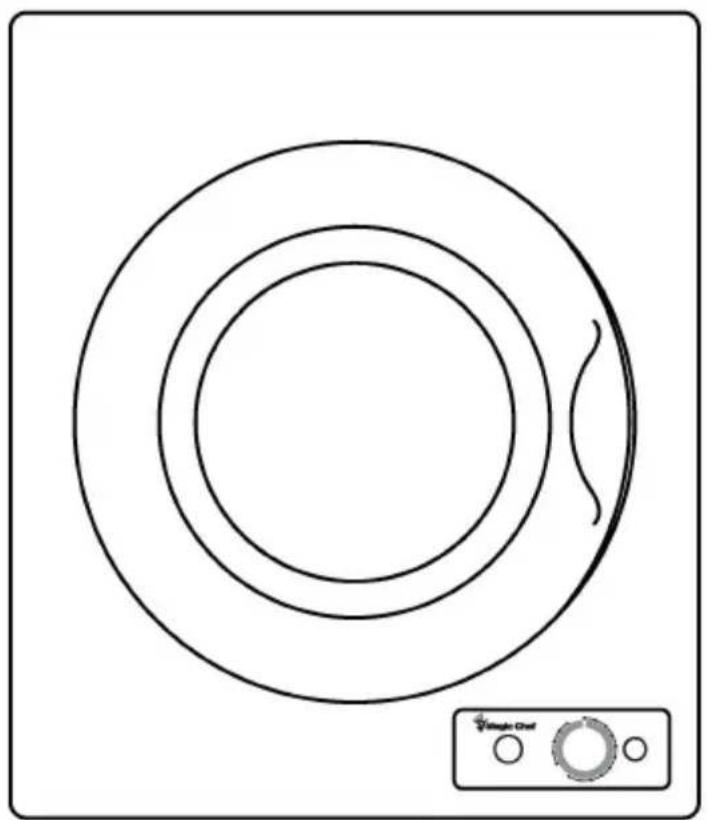
Simple line drawing of concentric circles with a small wavy line and a labeled control panel (no text or symbols on the circles)
PRODUCT REGISTRATION
Thank you for purchasing a Magic Chef product. The first step to protect your new product is to complete the product registration on our website: www.mcappliance.com/register. The benefits of registering your product include the following:
I. Registering your product will allow us to contact you or regarding a safety notification or product update.
2. Registering your product will allow for more efficient warranty service processing when warranty service is required.
3. Registering your product could act as your proof of purchase in the event of insurance loss.
Once again, thank you for purchasing a Magic Chef product.
CONTENTS
PRODUCT REGISTRATION.... 2
PRECAUTIONS....4
IMPORTANT SAFETY INSTRUCTIONS.... 5
SPECIFICATIONS ....7
PARTS AND FEATURES....8
INSTALLATION 9
OPERATION....12
CARE AND MAINTENANCE.... 17
TROUBLESHOOTING....19
WARRANTY....20
PRECAUTIONS
READ THIS GUIDE CAREFULLY
The user guide is intended to help you operate and maintain your new appliance properly. Keep it handy to answer your questions, and if you do not understand certain aspects or you need additional help, please call Magic Chef® Customer service at 888-775-0202. Be sure to keep proof of the original purchase date (i.e. sales receipt) with this guide to establish the warranty period.
GROUNDING INSTRUCTIONS
This appliance must be grounded. In the event of an electrical short circuit, the grounding plug reduces the risk of electric shock by providing and escape wire for electric current. This appliance is equipped with a power cord that has a grounding wire with a grounding plug. The plug must be plugged into an electrical outlet that is properly installed and grounded.
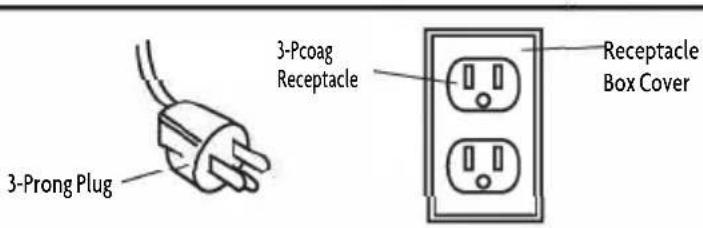
This appliance requires a standard 120 Vo lt, 60 Hz electrical outlet with a 3-prong ground receptacle. To prevent accidental injury, the cord should be cured behind the appliance and not left exposed or dangling.
WARNING: Improper use of grounding plug and/or outlet can result in a risk of electric shock. Consult a qualified electrician or service grounding instructions are not completely unders tood, if dou bt exists as to whether the appliance is properly grounded, or either:
- If it is necessary to use an extension cord, use only a 3-wire extension cord that has a
- 3-blade grounding plug, and a 3-slot receptacle that will accept the plug on the appliance. The marked rating of tension cord shall be equal to or greater than the electrical rating of the appliance.
he power supply cord is too short, have a qualified electrician or serviceman i install an out let near the appliance.

WARNING: DO NOT cut or remove t
he third (ground) prong from t
he power cord under any
circumstances.
IMPORTANT SAFETY INSTRUCTIONS
This manual contains Safety Instructions, Installation and Operating Instructions, and Troubleshooting Tips. Please carefully read this manual before using your dryer for instructions on how to use and maintain the product properly. Be sure to follow the safety instructions to avoid injury or damage to the product.
Keep this manual. When passing on/selling the device to a third party, the manual must be handed over along with the device. Before calling for service, please make sure unit is installed and being used correctly, and read the troubleshooting section.
⚠ WARNING: When using your appliance, follow the precautions listed below:
NOTE: Specifications may change at any time without notice.
- Read all instructions before using the appliance.
- Risk of child entrapment and suffocation; never allow children to operate, play with, or crawl inside the appliance.
- This appliance must be grounded. Connect only to a properly grounded outlet. See the “GROUNDING INSTRUCTIONS” section found on page 4.
- Install or locate the appliance only in accordance with the provided installation instructions.
- DO NOT place the dryer in steamy rooms or where the dryer is directly exposed to rain. Moisture may destroy the electrical insulation causing an electrical shock hazard. The appliance is intended for indoor use only. DO NOT use outdoors.
- Use the dryer only for its intended use as described in the user guide. This type of dryer is specifically designed to dry clothes. It is not designed for industrial or laboratory use.
- As with any appliance, close supervision is necessary when used around children or incapacitated persons.
- DO NOT operate the dryer if it has a damaged power cord or plug, if it is not working properly, or if it has been damaged or dropped in any manner.
- The dryer should be serviced only by qualified service personnel. Contact the nearest authorized service facility for examination, repair, or adjustment.
- DO NOT tamper with or modify the controls.
- DO NOT cover or block any openings on the appliance.
- DO NOT put your hand in the spin basket during operation. The spin basket is rotating at a high speed and the rotating parts may cause injury to your hand.
- DO NOT immerse the power cord or plug in water.
- Keep the cord away from all heated surfaces.
- DO NOT store or use gasoline or any other flammable vapors and liquids in the vicinity of this or any other appliance. The fumes can create a fire hazard or explosion.
-
When cleaning the surfaces of the door and the frame, use only mild, nonabrasive soaps or detergents applied with a sponge or soft cloth. Never clean appliance parts with flammable fluids. The fumes can create a fire hazard or explosion.
-
Packaging material can be dangerous for children. There is a risk of suffocation! Keep all packaging materials away from children.
- DO NOT unplug your appliance by pulling on its power cord. ALWAYS grasp the plug firmly and pull it straight out from the outlet. DO NOT bend, tie, or twist the power cord, or hang it over or near a sharp object.
- DO NOT operate the unit or handle the plug with wet hands.
- ALWAYS turn off and unplug from outlet before servicing, changing accessories or cleaning the unit. Allow unit to cool down completely before cleaning, moving or servicing. Turning the unit off does not disconnect it from the power source.
- DO NOT operate this dryer unless all enclosure panels are properly installed.
READ AND FOLLOW THIS SAFETY INFORMATION CAREFULLY SAVE THESE INSTRUCTIONS
SPECIFICATIONS
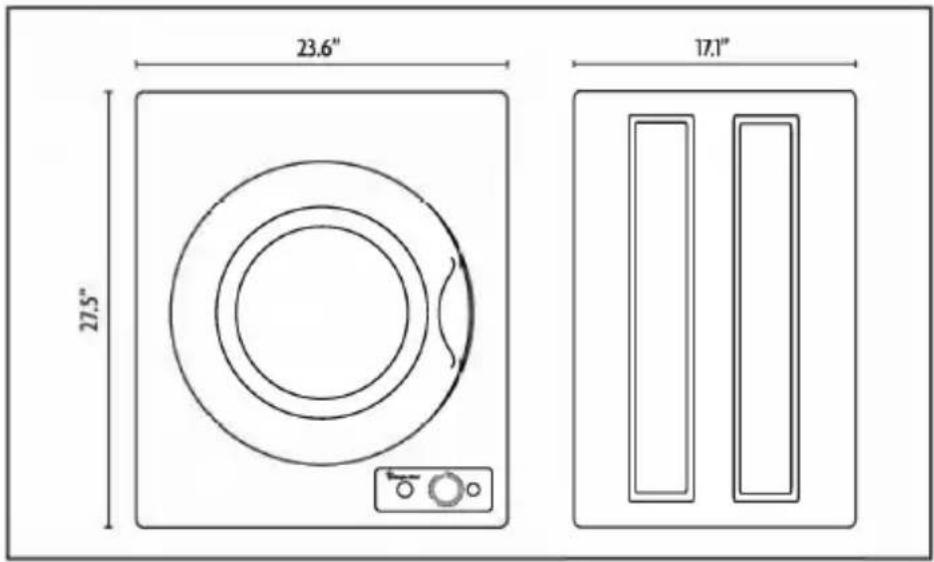
Figure 1
MCSDRY1S
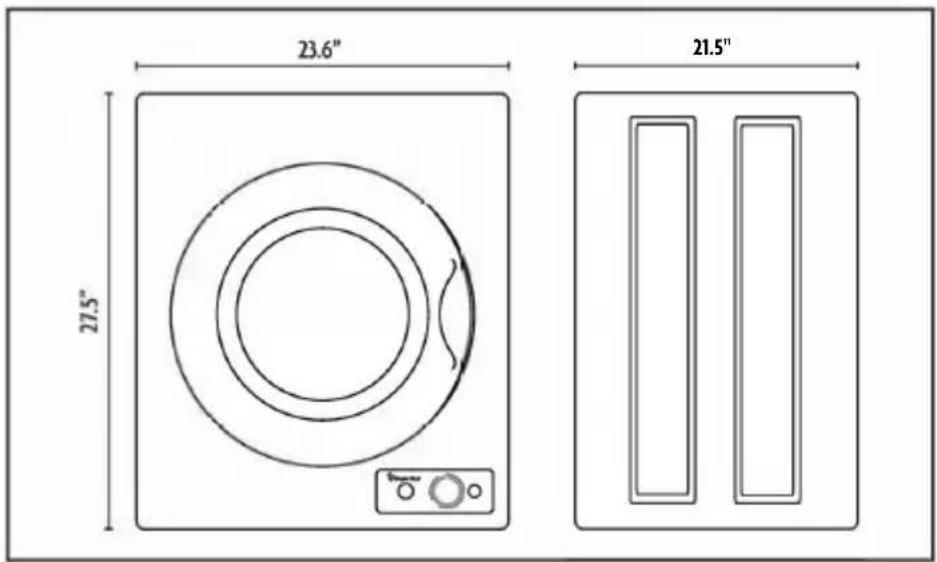
MCSDRY35W1
Figure 2
| Model Number MCSDRY1S MCSDRY35W1 | ||
| Power Supply | 120V AC, 60Hz | 120V AC, 60Hz |
| Capacity | 2.6 cu. ft. | 3.5 cu. ft. |
| Dimensions (WxHxD) | 23.6" x 27.5" x 17.1" (59.9 x 69.9 x 43.4 cm) | 23.6" x27.5"x21.5" (59.9 x 69.9 x 54.6 cm) |
| Net Weight | 48.4 lbs (22.0 kg) | 49.5 lbs. (22.5 kg) |
* Due to continuing product development, specifications and design may be subject to change without prior notice.
PARTS AND FEATURES
FRONT
The appearance of your model may slightly differ from the illustrations in this manual.
a. Door
b. Window
c. Door Gasket
d. Drum
e. Air Intake Shroud
f. Timer
g. Sensor Dry
h. Mode
Figure 3
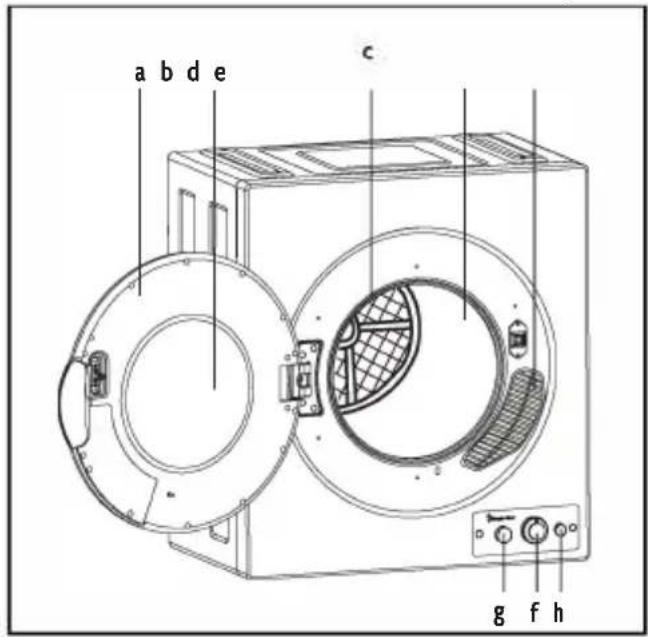
Figure 4
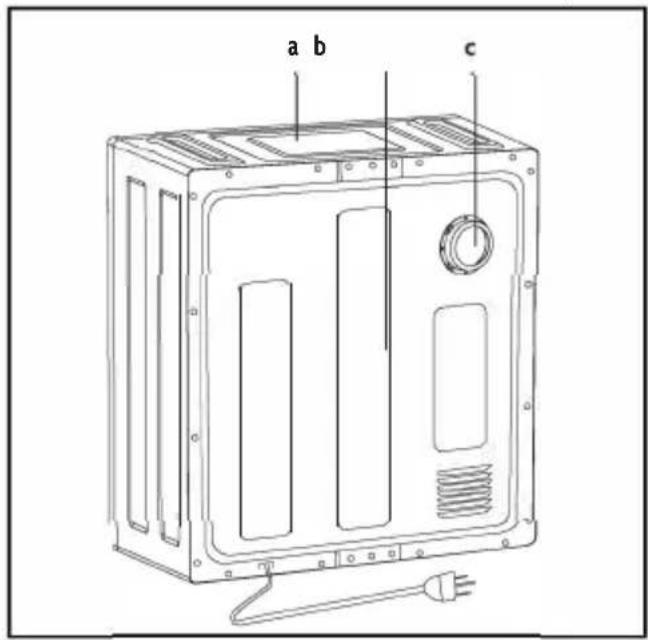
BACK
The appearance of your model may slightly differ from the illustrations in this manual.
a. Dryer Housin
b. Back Cover
c. Exhaust Vent
INSTALLATION
LOCATION
- Examine the dryer after unpacking. Check for damage such as a misaligned or broken door or dents in the cavity. If any damage is visible, DO NOT install, and notify your dealer immediately.
- Check to ensure that you have the wall-mounting kit and four (4) leveling legs.
- Install the dryer on a flat, level surface. If the surface is uneven, adjust the leveling legs. If you are going to wall mount your dryer, use the included wall-mounting kit.
- Install the dryer away from direct sunlight; direct sunlight may affect the acrylic coating, plastic and electrical components. The room temperature should not fall below 32°F.
-
Check the ventilation. DO NOT block the air vents, especially when the dryer is installed on a carpeted floor. If the air vents are blocked during operation, the dryer may overheat and eventually fail. For proper ventilation, allow at least 5 inches of space between the dryer top, sides, rear, and adjacent surfaces. Ensure adequate space for ventilation.
It is recommended that the unit be vented outdoors. (Ventilation Kit not included.) -
Install the dryer away from heating appliances and water taps. Keep the dryer away from heat, steam, or splashing liquids. Never splash water onto the control panel. These things can adversely affect the wiring and electrical conduction contacts of the dryer.
-
Check the power supply.
a) Check your local power source. The demand of the current of approximately 12 Amperes, 120 Volts, and a 60 Hz grounded outlet.
b) A short power-supply cord is provided to reduce the risks resulting from becoming entangled in or tripping over a longer cord. Ensure that the dryer does not stand on its power cord.
c) Use of an extension cord is not recommended. If an extension cord is used:
- The marked electrical rating of the cord set or extension cord should be at the very least equal to the electrical rating of the appliance.
- The extension cord must be a grounding type, 3-w ire cord.
- A longer cord should be arranged so that it will not drape over the appliance where it can be pulled on by children or tripped over unintentionally.
d) Plug the dryer into a properly installed receptacle box that is fully grounded.
DO NOT under any circumstances modify, cut or remove the third (ground) prong from the power cord. Any questions concerning power and/or grounding should be directed toward a certified electrician or an authorized service center.
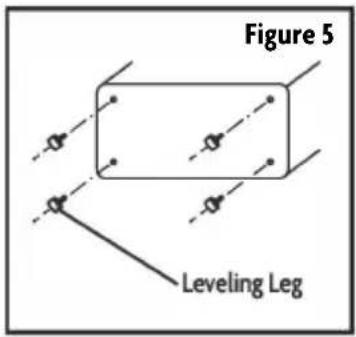
ADJUSTING THE LEVELING LEGS
The dryer is shipped with a bag containing the user guide and four (4) leveling legs. See the illustration to the right to install and adjust the leveling legs.
If the dryer is placed on an uneven or weak surface, noise or vibrations will occur from the appliance. If the floor is uneven, adjust the height level of the leveling legs accordingly. DO NOT insert pieces of wood or any other objects under the legs.
WALL-MOUNTING INSTRUCTIONS
| Tools and Parts Required for Plaster and/or Wood Installation (Not Included) | |
| Drill & Drill Bit | 1 |
| Phillips Head Screwdriver | 1 |
| Expanding Wall Anchor 8 | |
| Wooden Slats 2 | |
| Wall-Mounting Kit Includes | |
| Wall-Mounting Hooks | 2 |
| 1” Phillips Head Screws | 4 |
| Plastic Spacers | 2 |
| 1⁄2” Phillips Flat Head Screws | 4 |
| Exhaust Connector | 1 |
| Wall-Mounting Instructions | ||
| * | NOTE: It is recommended to complete the following procedure with at least 2 people.NOTE: As wall materials vary, the supplied hardware for fixing to the wall may be inappropriate for your wall type. Consult your local hardware / home improvement center for suggestions on the necessary hardware for your particular wall type. | |
| 1 | Determine the position where you will be installing the mounting hooks.This dryer is not designed to sit on top of your washing machine.A minimum of 2 inches is required between the top of the dryer and the ceiling above to allow easy installation and adequate spacing for exhaust.If mounting above a top load washing machine, allow sufficient spacing to open the lid of the washer. In the case of a front loading washer, allow sufficient breathing space. | |
| 2 | Although the supplied mounting hooks can be installed directly to the wall using the existing wooden studs, the preferred method of installation is using wooden slats that provide a flat, level installation surface and added stability to the whole wall installation. | |
| 3 | Use two wooden slats (not included) between the studs to mount the hooks.Recommended wooden slat size is 23" (L) x 31⁄2" (H) x 1" (D).When using the wooden slats to install on drywall material, you must use expansion wall anchor bolts to safely secure the slats to the drywall. | Figure 6iding Wall Anchor 8 x 2"Wooden Slats 23" (L) x 3 1⁄2" (H) x 1" (D)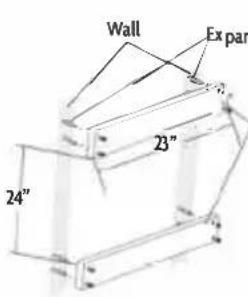 |
| 4 | Install the wall-mounting hooks to the wooden slats installed in the previous step. Using the (4) 1" Phillips head screws included, affix the mounting hooks to the wooden slats as shown in the diagram to the right. | 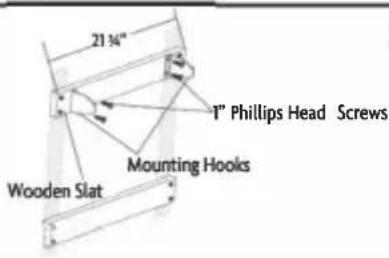 | Figure 7 | |
| 5 | Install the exhaust pipe as shown in the illustration by lining it up with the connector on the back of the dryer and turning it clockwise so the tabs on the exhaust pipe fit into the slots on the connector.For a downward exhaust, join the sections (1) pointing downward.For an upward exhaust, join the sections (2) pointing upward | 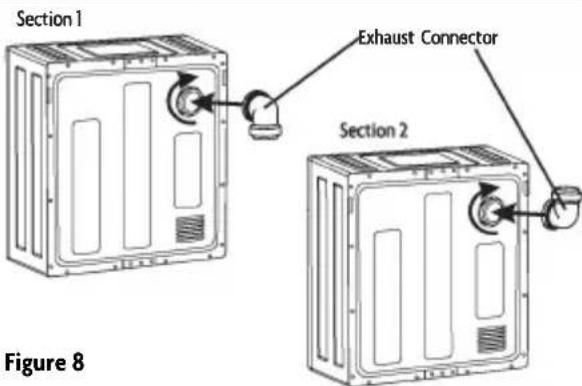 | ||
| 6 | Install the lower wall spacers (included) using the (4) 1⁄2" long Phillips flat head screws (included).These spaces are required when installing the unit on the wall to allow the necessary ventilation for efficient operation.Failure to install the spacers will both reduce the ventilation needed to operate your unit as well as put the appliance in a tilted position on the wall which could present a possible unstable wall installation. | 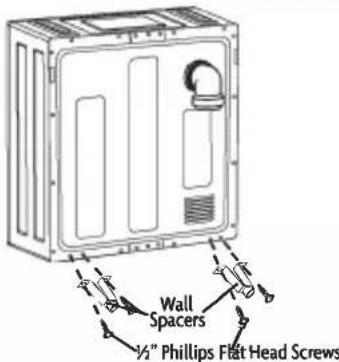 | Figure 9 | |
| 7 | Mounting the dryer to the wall hanging assembly.With the assistance of a 2nd person, lift the dryer and align the mounting holes at the rear of the dryer with the mounting hooks.Tilting the dryer to a 45° angle, insert the hanging brackets into the mounting holes on the dryer as shown in the figure to the right.Once the dryer mounts are in place, slowly lower the dryer in place and check all installation points for stress or weakened contact. | 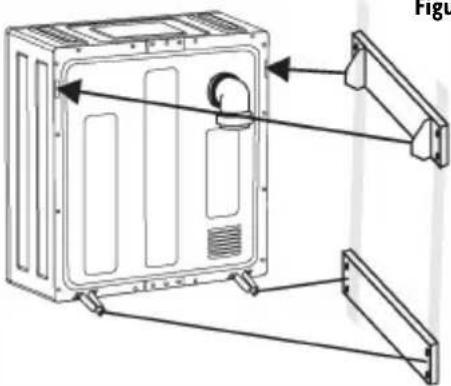 | ||
OPERATION
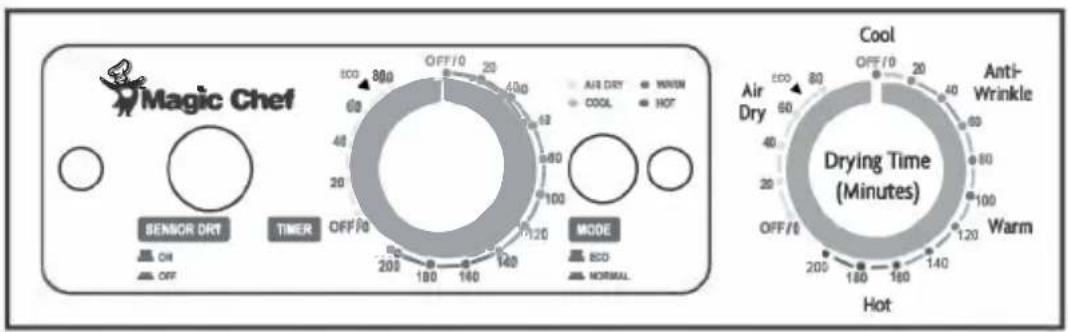
CONTROL PANEL
Figure 11
MODE SELECTOR
NORMAL: By default, the dryer operated under the 'NORMAL' mode (the mode button is pressed), in combination with the presets,
'SENSORY DRY' and 'TIMER', for optimal drying performance. The 'SENSORY DRY' function can be adjusted to your drying needs by using the dial and temperature guidelines.
ECO: The Dryer operates using an energy-saving mode, independent of the 'SENSORY DRY' and the 'TIMER' functions. The dryer will automatically run in 'ECO' mode for a total duration of 270 minutes. The dryer will begin air drying the laundry for 150 minutes with cool air, followed by another 120 minutes using hot air by activating the heating element. Simply open and load the dryer, close the door, then depress the 'Mode' button, and the dryer will run in the 'ECO' mode.
The timer knob should be set to 70 minutes in the green section to prevent the unit from continued running after the
ECO Mode cycle. If the timer does move past the OFF/0 position while the ECO mode is running, the dryer will continue running until the timer reaches 'OFF/0' at the top of the dial. If this occurs, it can be manually stopped.
When the unit is running in ECO mode, opening and the door will not affect remaining time. The unit will remember the remaining time and resume drying in ECO mode. If the unit loses power or is turned off, ECO mode will reset and restart.
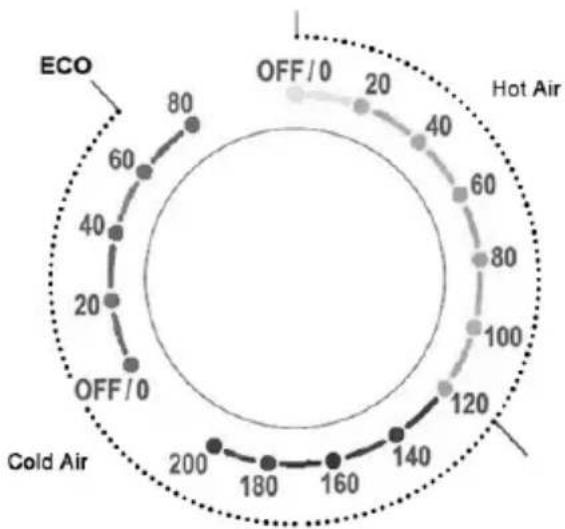
radar
| Condition | Value | |---|---| | ECO | 80 | | Off/0 | 20 | | Hot Air | 40 | | Off/0 | 60 | | Off/0 | 80 | | Off/0 | 100 | | Off/0 | 120 | | Off/0 | 140 | | Cold Air | 200 | | Cold Air | 180 | | Cold Air | 160 | | Cold Air | 140 |Figure 12
SENSORY DRY SELECTOR
ON: When the drying time reaches 120 minutes, the sensor dry function measures the moisture and humidity levels during the cycle and automatically adjusts the heating time for a more efficient drying performance. As a result, the dryer may stop generating heat in advance of the 'TIMER' preset, but the preset cycle continues by pushing cool air until the drying time finished in the 'OFF/0' position. OFF: The dryer operates according to the time set by the 'TIMER' until the preset finished in the 'OFF/0' position.
TIME SETTING
OFF: When the 'TIMER' is in the 'OFF/0' position, power is not supplied to the unit. Turning the dial clockwise to the desired program will start the dryer.
COOL: This setting is generally used to cool items that have just been dried to help prevent creasing. It will generate cool air, instead of the motor pushing heat into the drum of the dryer.
ANTI-WRINKLE: For laundry loads that are difficult to iron (e.g. cotton shirts and linen), set the 'TIMER' between 30-60 minutes, depending on the load size. Once the cycle stops, the items will still contain moisture, thereby making the ironing process easier.
WARM: This setting is used to dry and cool, and depending on the material, leave items wrinkle free. Set the 'TIMER' by turning the dial clockwise between 60-150 minutes.
HOT: This setting is used for drying large quantities or bulky items (i.e. the dryer drum is more than 1/2 full). Set the 'TIMER' by turning the dial clockwise to 50• minutes.
AIR DRY: This setting is used without any heat to freshen items by letting cool air move through it (e.g. clothes that have been stored for an extended period of time).
NOTE: ALWAYS make sure items being dried have gone through the Spin cycle in the washing machine first.
NOTE: This is a 120 volt dryer. Drying times will be longer than a 220 volt dryer
DRYING TIME REFERENCE
| Drying Capacity | Approximate Drying Times |
| 3 Lbs. (1.4 kgs.) | 30 Minutes |
| 5 Lbs. (2.3 kgs.) | 60 Minutes |
| 7 Lbs. (3.2 kgs.) | 120 Minutes |
| 9 Lbs. (4.1 kgs.) | 200 Minutes |
NOTE: Load weights and respective drying times are approximate.
SORTING AND LOADING LAUNDRY
For the best results, your laundry should be sorted properly. Separate the lint shedders (e.g. chenille and terry cloth) from the lint collectors (e.g. synthetics, flannels, velvets, and corduroys). Separate non-colorfast from light colored items, heavy fabrics from lightweight fabrics, and permanent press from heavy, bulky items.
Delicate clothes, especially those with ribbon or lace, should be placed in a mesh bag before drying to prevent tangling.
NOTE: Before drying, check all pockets. If nails, coins, or pins remain in pockets, the objects may damage the dryer and/or clothes. Place your laundry into the dryer evenly. Uneven laundry may cause noise or vibrations.
Clothes with zippers, buckles buttons or fasteners should be closed or turned inside out to reduce the impact of noise between the metal the dryer's drum.
DO NOT TUMBLEDRY: Read all permanent care labels carefully. If the care label on the garment reads "Drip Dry"; "Line Dry"; or "Dry Flat": DO NOT dry the garments in the dryer. In addition, certain materials will melt or become dangerously flammable if heated, while other garments may lose their shape. Other items that should not be tumble dried are the following:
- Garments that have been dry cleaned at home.
- Garments made from wool, unless the garment manufacturer recommends it.
- Garments with fiberglass materials.
- Garments containing vinyl, rubber, plastic or similar materials, including bras, tennis shoes, rubber galoshes, bath mats, rugs, bibs, baby pants, plastic bags, pillows, etc., as they may melt or burn. Under certain circumstances, some rubber materials, when heated, can produce fire by spontaneous combustion.
NOTE: DO NOT use fabric softeners or related products that help eliminate static, unless recommended by the manufacturer of the fabric softener or related products.
FABRIC CARE
For optimum results, load the dryer with cloths of similar fabric, weight and construction.
Check for stains that may not have been removed in washing. The dryer heat may permanently set some stains.
Separate dark and light colored items, like you do when washing laundry.
DRYING TIME: The drying time depends on many factors, such as the type of fabric. In addition, the drying duration is dependent on how dry you want the laundry to be when taken out of the dryer.
DRYER ADDED FABRIC SOFTENERS: Certain dryer added fabric softeners may cause damage to automatic dryers. Therefore, only use fabric softeners with written assurance from the manufacturer that their softeners can safely be used in your dryer.
SINGLE ITEMS: Use the timed drying mode when there is only one item to be dried. This is because the moisture sensor in the automatic drying mode may disable the heating element too early in the cycle, thereby failing to adequately dry the garment.
OVERDRYING GARMENTS: When using the timed drying mode, it is possible to overdry the garments, especially if the timer has been set too long. This can cause the fabrics to wrinkle, shrink, or feel harsh. Synthetic materials can also become charged with static electricity.
NOTE: Refer to the Fabric Care Chart on page 16 for commonly used fabric care symbols.
NOTE: Always remove the laundry load from the dryer as soon as possible.
FABRIC CARE CHART
| Fabric Care Symbol | Definition |
| [27KV] | Resistant material |
| [123V] | Delicate fabric |
| [68V] | May be washed at 200°F/95°C |
| [48V6] | May be washed at 140°F/60°C |
| [K822] | May be washed at 105°F/40°C |
| [266] | May be washed at 85°F/30°C |
 | Item may be hand washed |
| [25HV2] | Dry clean only |
| [2788] | Can be bleached in cold water |
| [3X88] | Do not bleach |
| [4HV3A] | Can be ironed at 392°F/200°C max |
| [45YA] | Can be ironed at 302°F/150°C max |
| [2242] | Can be ironed at 212°F/100°C max |
| [0Y24] | Do not iron |
| [17DA] | Dry clean with any solvent |
| [1477] | Dry clean with perchloride, lighter fuel, pure alcohol or R113 only |
| [174C] | Dry clean with aviation fuel, pure alcohol or R113 only |
| [058K] | Do not dry clean |
| [1628] | Dry flat |
| [1878] | Can be hung to dry |
| [XY18] | Dry on clothes hanger |
| [0Y09] | Tumble dry, normal heat |
| [2248] | Tumble dry, reduced heat |
 | Do not tumble dry |
CARE AND MAINTENANCE
UNIT
The dryer should be cleaned regularly, including the control panel, with a soft cloth and non-abrasive household detergents. The use of harsh detergent or abrasives is not recommended. Do not pour water on the dryer or control panel. Use a soft cloth to dry the surfaces. Failure to maintain the dryer in a clean condition could lead to deterioration of the surface which could adversely affect the life of the appliance and possibly result in a hazardous situation.
NOTE: Unplug the power cord before cleaning any part of the dryer.
LINT FILTERASSEMBLY
The dryer should be cleaned regularly, including the lint filter assembly. Refer to the Lint Filter Assembly chart when cleaning the filter assembly.
NOTE: Unplug the power cord before cleaning any part of the dryer.
| Lint Filter Assembly | ||||
| 1 | Remove the lint filter by using the four (4) grip holes in the filter assembly to rotate the filter (in either direction) until you feel a bump, then pull it outwardNOTE: The lint filter assembly must be installed when operating the dryer. The lint filter assembly must be cleaned before and after each use | |||
| 2 | The lint filter assembly consists of three (3) parts: exhaust vent shroud, lint filter, and exhaust filter. | 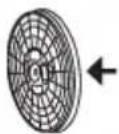 Exhaust Vent Shroud Exhaust Vent Shroud | 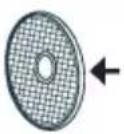 Lint Filter Lint Filter | 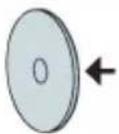 Exhaust Filter Exhaust Filter |
| 3 | Separate the three (3) parts of the assembly and clean the individual pieces using a soft brush or a vacuum cleaner.Do not damage the filter assembly. | 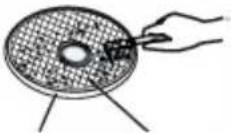 Lint Filter Lint Filter | [Lint Filter] | 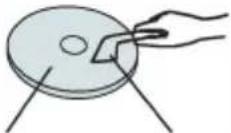 Dust Cleaner Dust Cleaner |
| 4 | Reassemble the filter assembly in the following order: exhaust filter - lint filter - exhaust vent shroud. Align the entire assembly with the recessed position in the back of the drum and press firmly until the entire filter assembly is secured | 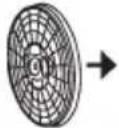 Exhaust Vent Shroud Exhaust Vent Shroud | 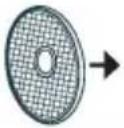 Lint Filter Lint Filter | 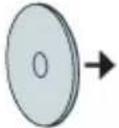 Exhaust Filter Exhaust Filter |
AIR INTAKE FILTER
The dryer should be cleaned regularly, including the air intake filter. Refer to the Air Intake Filter chart when cleaning the filter.
NOTE: Unplug the power cord before cleaning any part of the dryer.
| Air Intake Filter | ||
| 1 | Remove the air intake filter by pulling outward while holding the filter housing by its top and bottom. NOTE: The air intake filter must be installed when operating the dryer. The air intake filter must be cleaned before and after each use. | |
| 2 | The air intake filter consists of two (2) parts: filter housing and air intake filter. | Filter Housing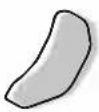 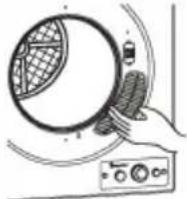 Air Intake Filter Air Intake Filter |
| 3 | Remove the air intake filter inside the filter housing. Clean the filter using a soft brush or a vacuum cleaner. | 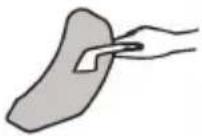 Cleaning the Air Intake Filter Cleaning the Air Intake Filter |
| 4 | Reassemble the air intake filter inside the filter housing, then reinstall the filter housing by pushing the housing upwards with your thumb until the latch is secured to the dryer. | Filter Housing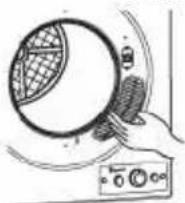 |
TROUBLESHOOTING
Before you call for service, refer to following checklist for common problems:
| The 'TIMER' dial will not rotate | The dryer is not plugged in.The circuit breaker tripped or a fuse blew. Check for a blown circuit fuse or tripped main circuit breaker in your house.The door is not closed. |
| The dryer does not operate | The dryer is not plugged in.The circuit breaker tripped or a fuse blew. Check for a blown circuit fuse or tripped main circuit breaker in your house.The door is not closed. |
| The dryer drum does not rotate | The dryer is not plugged in.The circuit breaker tripped or a fuse blew. Check for a blown circuit fuse or tripped main circuit breaker in your house.The door is not closed. |
| The laundry is not completely dry | Verify the presets used for 'TIMER', 'MODE', and 'SENSOR DRY'.Clean the filter.Reduce the laundry load in the dryer. Do not overload the dryer.Dry these items further in the timed drying mode for 10+ minutes.Ensure the items are not knotted or bulked together.The dryer is not located in a properly ventilated area.Make sure your washer's spin cycle is extracting water properly. |
NOTE: If the problem persists, contact Magic Chef® Customer Service: 1-888-775-0202 for assistance.

LIMITED WARRANTY
MC Appliance Corporation warrants each new Portable Dryer to be free from defects in material and workmanship, and agrees to remedy any such defect or to furnish a new part(s), at the company's option, for any part(s) of the unit that has failed during the warranty periodat Parts and labor expenses are covered on this unit for a period of one year from the date of purchaserat A copy of the dated sales receipt/invoice is required to receive warranty service, replacement or refundrat This warranty covers appliances in use within the contiguous United States, Alaska, Hawaii and Puerto Ricorat This warranty does not cover the following:
- Damages due to shipping damage or improper installation
• Damages due to misuse or abuse
• Content losses due to failure of the unit
• Inside components such as filters, etc.
• Repairs performed by unauthorized service agents - Service calls that do not involve defects in material and workmanship such as instruction on proper use of the product or improper installation
- Replacement or resetting of house fuses or circuit breakers
- Failure of this product if used for purposes other than its intended purpose
- Disposal costs of failed units not returned to our factory
- Any delivery or installation costs incurred as the result of a unit that fails to perform as specified
- Expenses for travel and transportation for product service if your appliance is located in a remote area where service by an authorized service technician available
- The removal and reinstallation of your appliance if it is installed in an inaccessible location or is not installed in accordance with published installation instructions
• Refunds for non-repairable products are limited to the price paid for the unit per the sales receipt
LIMITATIONS OF REMEDIES AND EXCLUSIONS
Product repair in accordance with the terms herein, is your sole and exclusive remedy under this limited warranty. Any and all implied warranties including merchantability and fitness for a particular purpose are hereby limited to one year or the shortest period allowed by law. MC Appliance Corporation is not liable for incidental or consequential damages and no representative or person is authorized to assume for us any other liability in connection with the sale of this product. Under no circumstances is the consumer permitted to return this unit to the factory without the prior written consent of MC Appliance Corporation.
Some states prohibit the exclusion or limitation of incidental or consequential damages, or limitations on implied warranties. This warranty gives you specific rights, and you may also have other rights which very from state to state.
| Model | Parts | Labor | Type of Service |
| MCSDRY1S | One Year | One Year | Carry In |
| MCSDRY35WI | One Year | One Year | Carry In |
For Service or Assistance, please call 888-775-0202. Or visit us on the web at www.mcappliance.com to request warranty service or order parts.

CNA International, Inc. d/b/a MC Appliance Corporation. All rights reserved. Magic Chef® is a registered trademark of CNA International, Inc.

Secadora compacta de 2.6 / 3.5 pies cubicos
Manual del usuario
natural_image
Simple line drawing of concentric circles with a small wavy line and a labeled control panel (no text or symbols on the circles)
REGISTRACION DEL PRODUCTO
Figura 2
MCSDRY35W1
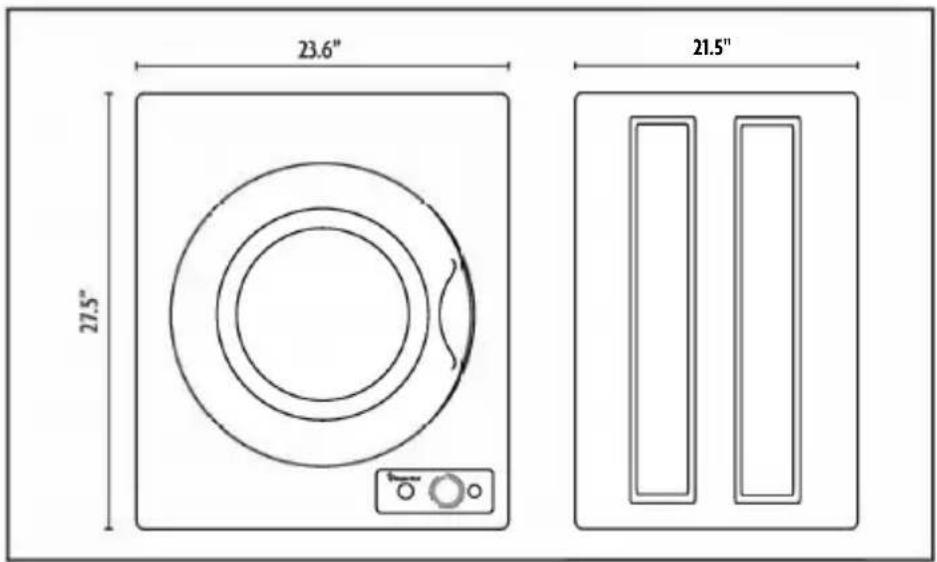
| Modelo | MCSDRY1S MCSDRY35W1 | |
| Fuente de alimentacion | 120V AC, 60Hz | 120V AC, 60Hz |
| Capacidad | 2.6 cu. ft. | 3.5 cu. ft. |
| Dimensiones de la unidad (WxHxD) | 23.6” x 27.5” x 17.1” (59.9 x 69.9 x 43.4 cm) | 23.6” x27.5”x21.5” (59.9 x 69.9 x 54.6 cm) |
| Peso neto | 48.4 lbs (22.0 kg) | 49.5 lbs. (22.5 kg) |
- / 3.5 Cu. Ft.
- Compact Dryer
- PRODUCT REGISTRATION
- CONTENTS
- PRECAUTIONS
- READ THIS GUIDE CAREFULLY
- GROUNDING INSTRUCTIONS
- IMPORTANT SAFETY INSTRUCTIONS
- READ AND FOLLOW THIS SAFETY INFORMATION CAREFULLY SAVE THESE INSTRUCTIONS
- SPECIFICATIONS
- PARTS AND FEATURES
- FRONT
- BACK
- INSTALLATION
- LOCATION
- ADJUSTING THE LEVELING LEGS
- WALL-MOUNTING INSTRUCTIONS
- OPERATION
- CONTROL PANEL
- MODE SELECTOR
- SENSORY DRY SELECTOR
- TIME SETTING
- DRYING TIME REFERENCE
- SORTING AND LOADING LAUNDRY
- FABRIC CARE
- FABRIC CARE CHART
- CARE AND MAINTENANCE
- UNIT
- LINT FILTERASSEMBLY
- AIR INTAKE FILTER
- TROUBLESHOOTING
- LIMITED WARRANTY
- LIMITATIONS OF REMEDIES AND EXCLUSIONS
- Secadora compacta de 2.6 / 3.5 pies cubicos
- REGISTRACION DEL PRODUCTO
Brand : Magic Chef
Model : MCSDRY35W1
Category : Tumble dryer