
GN35LD - Monitor Viotek - Free user manual and instructions
Find the device manual for free GN35LD Viotek in PDF.


| Product Type | Curved Gaming Monitor |
| Model Number | GN35LD |
| Screen Size | 35 inches |
| Curvature | 1800R |
| Aspect Ratio | 21:9 |
| Resolution | 2560 x 1080p |
| Refresh Rate | 144Hz |
| Backlight | E-LED |
| Typical Brightness | 300 cd/m² |
| Contrast Ratio | 2000:1 |
| Response Time | OD4MS (1ms MPRT) |
| Viewing Angle | 178° (H) / 178° (V) |
| Connectivity | DP, HDMI, DVI, Audio Out |
| Stand Adjustment | Height Adjustment |
| VESA Mounting | Yes (bracket included) |
| Power Input | AC 100-240V, 50/60Hz, 2.5A |
| Dimensions (with Stand) | 32.97 x 15.94 x 20.66 inches |
| Net / Gross Weight | 20.57 lbs / 29.56 lbs |
| Operating Temperature | 32°F to 122°F (0°C to 50°C) |
| Storage Temperature | -4°F to 140°F (-20°C to 60°C) |
| Warranty | 1 Year Limited Hardware Warranty |
| Box Contents | Monitor, Stand (stem, base, cover), Power Cable, DP Cable, Screws, Allen Key, Screwdriver, User Manual |
| Special Features | AMD FreeSync, LED Effects, Gameplus, PIP/PBP, OSD Menu |
| Clean & Care | Dry soft cloth; avoid alcohol or ammonia |
Frequently Asked Questions - GN35LD Viotek
User questions about GN35LD Viotek
0 question about this device. Answer the ones you know or ask your own.
Ask a new question about this device
Download the instructions for your Monitor in PDF format for free! Find your manual GN35LD - Viotek and take your electronic device back in hand. On this page are published all the documents necessary for the use of your device. GN35LD by Viotek.
USER MANUAL GN35LD Viotek
In order to continue serving our customers and providing the best products, our product information including our user manuals may receive updates from time to time. Please check our website for the latest user manuals and product materials.
Table of Contents
Section 1: Safety Precautions ....4
Section 2: Box Contents ....5
Section 3: Product Overview....6
3.1 – Monitor Buttons ......6
3.2 – Monitor Ports....6
Section 4: Stand Installation ....7
Section 5: Wall Mounting ......9
Section 6: Connectivity Options....10
6.1 - Connecting the Power Cable 10
6.2 - Connecting Your Earphones....10
6.3 – DP Connectivity ....11
6.4 – HDMI Connectivity....11
6.5 – DVI Connectivity ...... 11
Section 7: Basic Operation ......12
Section 8: Indicator Light....12
Section 9: OSD Setup....13
9.1 – OSD Menu Functions ..... 14
Section 10: LED Effects System Console 16
Section 11: GAMEPLUS Adjustment....17
Section 12: Troubleshooting....17
12.1 – PIP (Picture in Picture) Input Information....19
12.2 – PBP (Picture by Picture) Resolution Information....19
Section 13: Specifications ....20
13.1 - Resolution Compatibility for DVI/DP 20
Section 14: 1 Year Limited Hardware Warranty....21
Section 1: Safety Precautions
Read and observe the following warnings and information below.
- Before cleaning, always unplug your monitor. It is recommended that you use dry cloth or lightly damp cloth to clean your monitor. Dry cloth is, however, the safest. If using damp cloth, wait for your monitor to completely dry before plugging it in again.
- Do not use alcohol or ammonia-based cleaner and/or liquids to clean your monitor.
- This monitor features ventilation openings on the back of the unit. Avoid blocking these openings to prevent the monitor from overheating.
- Avoid placing this monitor near any heat sources e.g: portable heaters or heating vents, as this may cause damage to your monitor.
- Do not spray cleaner and or any kind of liquid directly onto the monitor's screen or any part of the monitor.
- Do not insert anything into any part of the monitor especially the ventilation openings.
- Always make sure your monitor is placed on a secure, level surface to prevent it from falling and sustaining damage.
- Unplug your monitor during any extended periods of non-use.
- Do not place heavy items on the monitor or monitor cables.
- Do not attempt to disassemble or remove parts from the monitor. Any disassembly or modification etc. not performed by an authorized technician can result in damage to the monitor and/or possible exposure to high voltage electricity which may lead to serious injury or death.
VIOTEK shall not be held responsible for injury or damage of products or persons due to failure to adhere to the aforementioned precautions or any others noted hereafter.
Section 2: Box Contents

Monitor x 1 Stand Stem x 1 (with Attached Bracket)

Stand Base x 1 Cover Base x 1

Cover x 1

NO. 1 Screw x 1
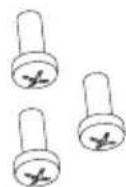
NO. 2 Screws x 3

NO. 3 Screws x 4 (for Wall Mounting)

Power Cable x 1 (AC 100-240V, 50/60Hz)
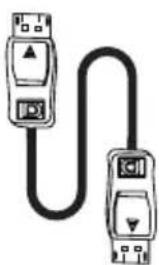
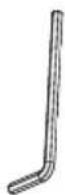
DP Cable x 1 Screwdriver x 1 Allen Key x 1

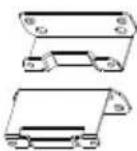
UP & DOWN
Converter x 2
(for Wall Mounting)
User Manual x 1
Section 3: Product Overview
3.1 - Monitor Buttons

1 M Menu Button: Press to display the OSD menu or enter sub-menus.
2 ▼ Down Button: Press to move down in the menus.
3 ▲ Up Button: Press to move up in the menus.
4 E Exit Button: Press to exit.
5 Power Button: Press to turn the monitor on/off.
6 LED Indicator: Changes colors to indicate status. Refer to Section 8.

E button can also be used to switch between two color gamuts when a compatible graphics card and either HDMI or DP connections are in use.
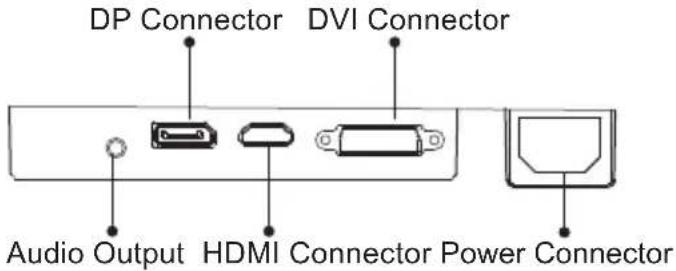
3.2 – Monitor Ports
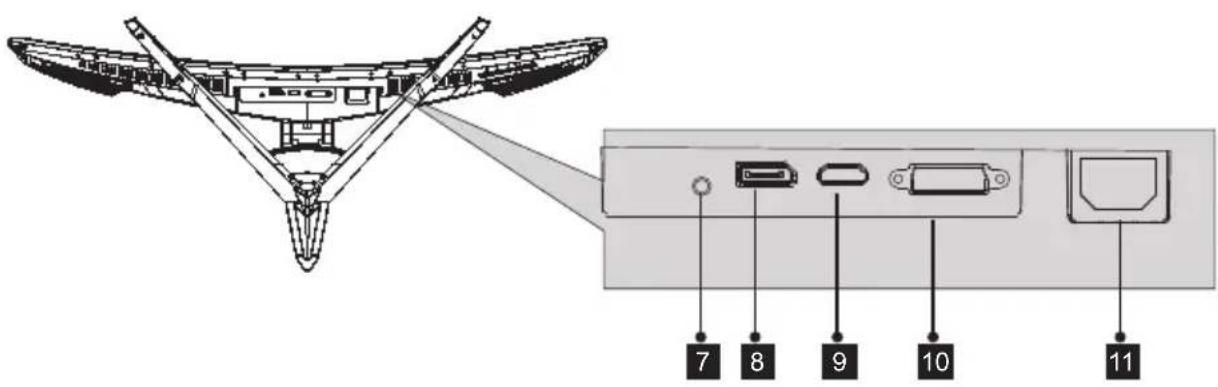
7 Audio Output: Insert the audio cable for output of audio signals.
8 DP Connector: Insert one end of the DP cable into the computer's DP output and connect the other end to the monitor's DP port.
9 HDMI Connector: Insert one end of the HDMI cable into the computer's HDMI output and connect the other end to the monitor's HDMI port.
10 DVI Connector: Insert one end of the DVI cable into the computer's DVI output and connect the other end to the monitor's DVI port.
11 Power Connector: Insert the Power Cable to supply power to the monitor.
Section 4: Stand Installation

Keep the foam over the monitor before attaching the stand. Follow the steps below to finish the installation.
- Open the package, take out the product with foam still attached, and gently place it on a desktop or table.
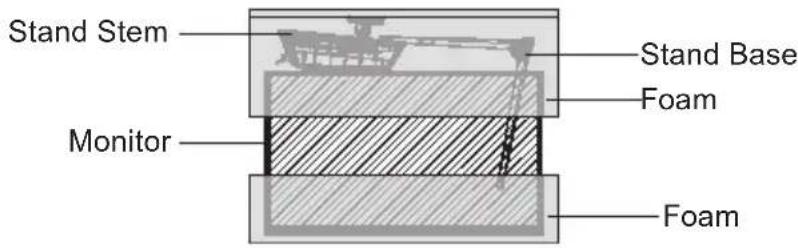
- Take out the two parts of the stand and use the included allen key and a NO. 1 screw to attach them.

se only the NO. 1 screw provided.


- Take out the cover base, insert it into the stand near the base and secure it with three NO. 2 screws. Next, place the cover over the cover base and press lightly to secure.

se only the NO. 2 screws provided.

- Take out the monitor and remove the foam.

- Align the stand stem's bracket with the opening on the back of the monitor. Carefully insert the bracket into the opening, top first then bottom. The pieces should click into place.
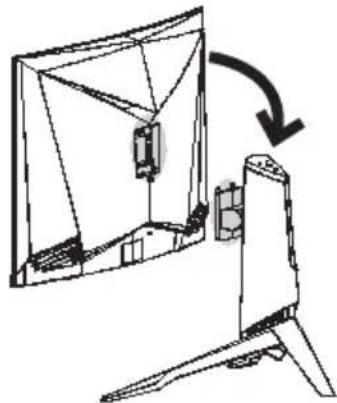
- Place the monitor on your desktop or table after completing the installation and carefully pull or push it up or down to adjust the height.
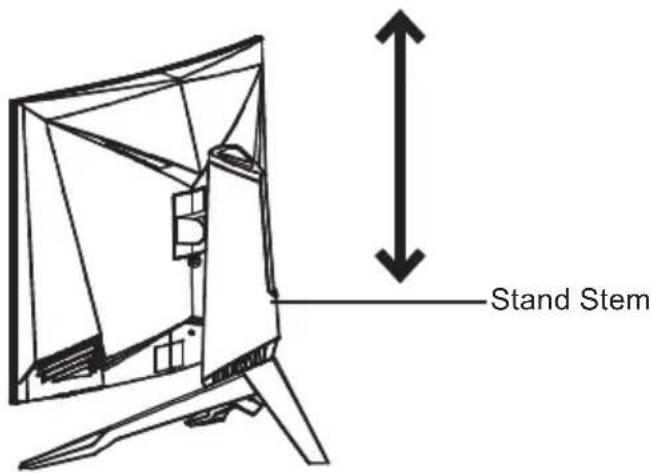
- Press the button to remove the monitor from the bracket and easily unmount it.


To avoid damaging the screen, don't press down on the screen while placing it on the desktop or table.
Section 5: Wall Mounting
- Open the package, take out the product with foam still attached, and gently place it on a desktop or table. If the monitor was attached to the stand, remove the stand.

- Remove the original screws x 4 (1) from the opening in the back of the monitor and install the UP & DOWN converters with the NO. 3 screws provided.

Do not discard the original screws. They are needed to secure the rear panel for the stand installation. Refer to Section 4.


- Follow the directions received with your mounting base (not included) and install the monitor on the wall.


Section 6: Connectivity Options
6.1 – Connecting the Power Cable
Connect the included power cable to the power connector, and then plug the other end into an AC outlet.

6.2 – Connecting Your Earphones
When earphones are plugged in, no sound will be emitted from the speakers.


Listening to loud audio for prolonged periods of time may permanently damage your hearing.
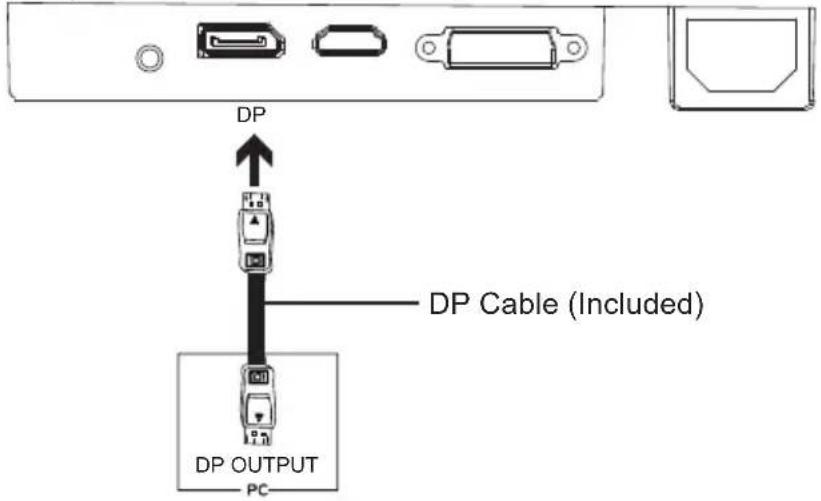
6.3 - DP Connectivity
In order for the Monitor to receive DP signals from the computer, use the DP cable to connect the Monitor to the computer.
6.4 – HDMI Connectivity
In order for the Monitor to receive HDMI signals from the computer, use the HDMI cable to connect the Monitor to the computer.

6.5 – DVI Connectivity
In order for the Monitor to receive DVI signals from the computer, use the DVI cable to connect the Monitor to the computer.

Section 7: Basic Operation
- Insert one end of the DP cable into your PC's graphics card. DVI or HDMI may also be used. These cables are not included.

For optimal refresh rate (or "performance"), it is recommended to use a DP (display port) or DVI-D dual link cable with the Monitor's corresponding connector.
- Connect the other end of the cable to the corresponding connector on your Monitor. See the image below.
-
Connect the power cable to your Monitor then connect the other end to your power source. It is recommended that you use a surge protector with adequate voltage if a wall outlet cannot be reached directly.
-
Locate the power button on the Monitor and press it to turn the Monitor on.

If you cannot locate the power button, please refer to the Product Overview Section on page 5.
AMD FreeSync™
If desired, you can use the monitor's AMD FreeSync™ feature. The feature itself is on by default. In order to use this feature, please note you must have hardware with AMD FreeSync™ capability, a DP cable, and the latest graphic drivers. To use this feature, connect the appropriate cable to the DP connectors on both the computer and Monitor. After connecting, you will receive a prompt to enable the feature on your computer.
Section 8: Indicator Light
This light is located on the bottom of the monitor.
Light Bottom View
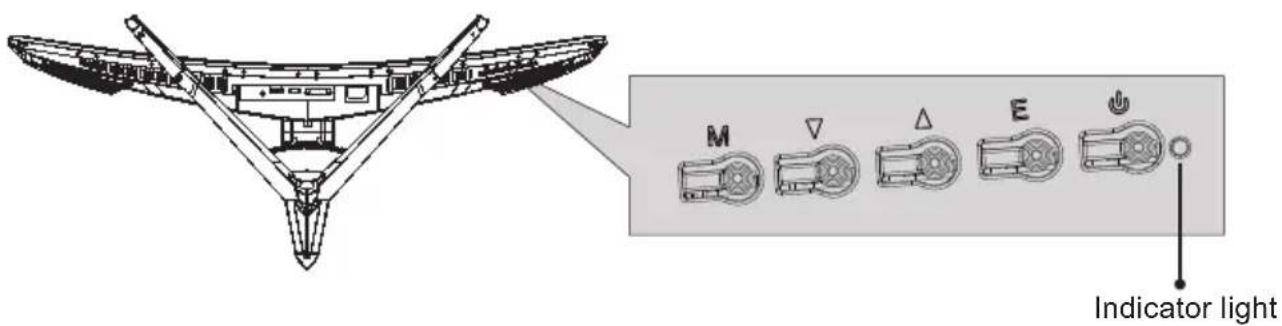
Solid blue/green/white light indicates power is on and the monitor is operating normally. Flashing blue light indicates no video source has been detected. Red light indicates that no horizontal or vertical signal has been detected or power is low. Please ensure your computer is on and all video cables are fully inserted and/or connected.
Section 9: OSD Setup
The On-Screen Display (OSD) Menu may be used to adjust your monitor's settings and appears on screen after turning on the monitor and pressing the M button.

When using the monitor for the first time, settings will automatically adjust to optimal settings according to your computer's configuration and parts etc.
- Press any one of the buttons (M, ▼, ▲, E, ⏻) to activate the navigation window (Figure 1).

Figure 1
- Press M button to enter the OSD screen (Figure 2).

Figure 2
- Press or to browse functions.
a. Highlight the functions you want to set, and press M to enter the sub-menu.
b. Press for the browse the sub-menu, and press M to highlight the functions you want to set.
c. Press ▼ or ▲ to highlight the options, and press M to confirm the settings and exit the current screen.
4. Press E to exit the current screen.
9.1 – OSD Menu Functions
| Main Menu | Sub-Menu | Options | Description |
| Input Source | DVI | NONE | Select the DVI signals input |
| HDMI NONE Select the HDMI signals input | |||
| DP NONE Select the DP signals input | |||
| Brightness/Contrast | Brightness 0~100 Adjust display brightness | ||
| Contrast 0~100 Adjust display contrast | |||
| DCR | On | Turn on DCR function | |
| Off | Turn off DCR function | ||
| Color Setting | Gamma | Gamma 2.0 | Set the display Gamma add-in |
| Gamma 2.2 | |||
| Gamma 2.4 | |||
| Picture Mode | Standard, Text, Movie, Game, FPS, RTS | Set a preset display scene mode | |
| Color Temperature | Warm, Cool, User | Set the display color temperature mode | |
| USER | Red, Green, Blue | Customize the display screen RGB component according to preference | |
| Low Blue Light | 0~100 | Set the display blue light filtering function | |
| Hue/Saturation | Hue, Saturation | Set the hue and saturation of the display | |
| Picture Quality Setting | Bypass | On, Off | Turn the bypass function on/off |
| Sharpness | 0~100 Set display sharpness | ||
| Response Time | Off, High, Middle, Low | Increase the response time of the monitor | |
| Noise Reduction | Off, High, Middle, Low | Reduce the interference of image noise caused by signal source interference | |
| Super-Resolution | Off, High, Middle, Low | When the resolution of the display screen is low, this function can be turned on to enhance the image resolution | |
| Dynamic Luminous Control | On, Off | Compensate for gray scale display screen and strengthen the expression of gray scale | |
| FreeSyncTM | On, Off | Turn the FreeSyncTM function on/off | |
| Display | Aspect Ratio | Wide Screen, 4:3, Auto | Set the display ratio |
| DP Version | DP 1.1, DP 1.2 | Set the display DP version | |
| Audio Mute On | Off Turn the Mute mode on/off | ||
| Volume 0-100 Set the audio volume | |||
| Audio Source HDMI, DP Display the input signals from (HDMI or DP) | |||
| Multi-Window M | Multi-Window Off, PIP Mode, PBP 2Win | Select the corresponding combination of PIP/PBP according to the number of input signal channel. | |
| PIP Size Small, Medium, Large | Adjust the PIP/PBP display window size | ||
| PIP Position | Top Right, Top Left, Bottom Right, Bottom Left | Adjust the PIP/PBP window position | |
| Swap | NONE | Swap the two channel signal source of only the PIP/PBP 2 screens function | |
| Other | Language | English, 简体中文, 한국어, Español | Set OSD language |
| OSD H-Position | 0-100 Adjust the OSD horizontal position | ||
| OSD V-Position | 0-100 Adjust the OSD vertical position | ||
| OSD Transparency | 0-100 Set the OSD overall transparency | ||
| OSD Time Out | 5-100 Set how long the OSD remains open after non-use | ||
| OSD Rotation | Normal, 90, 180, 270 | When the user flips the display, this function can also flip the OSD to achieve the best display angle | |
| Reset | Reset monitor configurations | ||
Section 10: LED Effects System Console
- Press any one of the buttons (M, ,▼, E, ) to activate the navigation window.
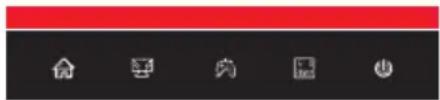
- Press button to enter the LED Effects System Console menu.
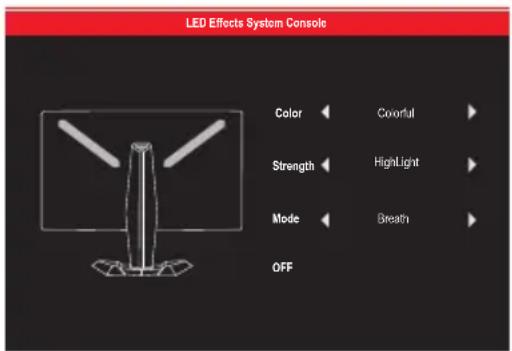
-
Press ▼ or to select the settings.
-
Highlight the desired option, and press M to confirm the setting.
- Press E to exit the current settings.
| Items Options | Description | |
| Color | Colorful, White, Purple, Blue, Cyan, Green, Yellow, Red | Select the the desired color for the LED lights on the back of the monitor. |
| Strength | High Light, Normal, Soft | Adjust the strength of the LED lights. |
| Mode | Breath, Normal, Flicker | Select the display mode for LED lights. |
| NA ON, OFF | Turns the | LED lights on/off. |

Color options can only be set if Breathe Mode has been selected.
Section 11: GAMEPLUS Adjustment
- Press any one of the buttons (M, ▼, E) to activate the navigation window.

- Press ▲ button to switch between Gameplus modes. According to the needs of your game, choose the corresponding game icon. These game icons are primarily designed to optimize your aim during shooting games, though they can be used for other scenarios.


Section 12: Troubleshooting
The screen is blank
- Be sure the Power Button has been pressed to turn the monitor on.
- Confirm the brightness and contrast settings are set normally.
- Check if the Indicator Light is flashing. If so, this indicates there is no signal from your video source.
- If your source is a notebook or laptop, be sure that its settings are in mirror mode and the device itself is powered on.
The image is out of focus
- Ensure the video cable is inserted properly at both ends.
The screen is flashing
- Try an alternative power source. If the current one is insufficient, it may be causing this issue.
- Ensure devices such as non-shielded speakers, fluorescent lighting, AC transformers, table fans etc. are a safe distance away from your screen to avoid magnetic disturbances.
The color bleeds or visual effects appear unusual.
- If your screen is all red or blue, or any colors disappear, check to see that the cable is properly inserted. A loose connection can cause a bad signal.
- Try connecting to another video source for comparison.
The screen appears to be scrolling, rolling, or moving unusually.
- Check that your source frequency is within 55-76Hz.
- Reconnect and ensure your video source cable is secure.
The monitor needs cleaning
- Make sure the monitor has been powered off before cleaning.
• Always use soft, non-abrasive cloth when cleaning. - Use dry, non-abrasive cloth to gently remove debris or dust.
- If necessary, lightly dampen a non-abrasive cloth with water and gently clean the surface.
- Never use alcohol or ammonia-based cleaning solutions.
- Never spray liquid directly onto any part of the monitor.
The indicator light does not work
- Check if the power is on.
- Check if the power line is connected to a power source.
Cannot plug and play.
- Inspect if the monitor is compatible with PC.
- Inspect if the graphics card is compatible with the monitor.
- Inspect if the pins in the interface are curved.
Dim image
- Adjust the brightness and contrast ratio.
Image jitter/moire pattern
- Nearby electric equipment may interfere with the monitor.
Light indicator is on or flashing, but there is no image displayed on screen
- Check if the monitor power is on.
- Check if the graphics card is installed properly.
- Check if the signal line connects securely with the monitor.
- Check if the pins in the interface are curved.
- Press the Caps Lock key to inspect if the PC is working well.
Color shortage (red, green, or blue)
- Inspect if the pins in the interface are curved.
Image position is not centered/the size is not right
- Please adjust Clock or Auto setting.
Color difference (colors are not optimized)
- Adjust RGB color or reset color temperature.
12.1 – PIP (Picture in Picture) Input Information
| Mode Home Screen Input Source | Picture in Picture Additional Input Source | Interchange Window | Picture Mode | ||
| DP HD | MI DVI | ||||
| Mode 1 DP X O O O O | |||||
| Mode 2 HDMI O X O O O | |||||
| Mode 3 DVI O O X O O | |||||
Note: "O" means this feature is supported while "X" means it is not supported.
12.2 – PBP (Picture by Picture) Resolution Information
While using this feature and in order to obtain an optimal viewing experience, it is recommended to set both panels to the same resolution.

At this resolution, tearing and visual deformation should be minimized.
Section 13: Specifications
| Item Detail | |
| Model Number GN35LD | |
| Screen Size 35” | |
| Curvature 1800R | |
| Viewing Angle 178° (H)/178° (V) | |
| Aspect Ratio 21:9 | |
| Resolution 2560 x 1080p | |
| Backlight E-LED | |
| Typical Brightness 300 | |
| Default Color Temperature 6500 | |
| Contrast Ratio 2000:1 | |
| Dot Pitch 0.0126 * 0.0126 in | |
| Response Time | OD4MS |
| Refresh Rate | 144Hz |
| Output | Audio |
| Signal Input | DP; DVI; HDMI |
| Power | AC 100-240V, 50/60Hz 2.5A |
| OSD Language | English, 简体中文, 한국어, Español |
| Environmental Temperature & Humidity | Operating temperature: 32°F to 122°F |
| Storage temperature: -4°F to 140°F | |
| Operating relative humidity: RH 10% to 90% (non-condensation) | |
| Height Adjustment Yes | |
| VESA Mounting | Need VESA additional bracket |
| Dimension (With Stand) | 32.97 x 15.94 x 20.66 in |
| Weight (Net/Gross Weight) | 20.57 lbs/29.56 lbs |
13.1 - Resolution Compatibility for DVI/DP
System Requirements below are the minimum system requirements for your GN35LD monitor. The requirements are recommended in order to properly use all of the monitor's features and ensure high-quality picture. Minimum Requirements Operating System: Windows® 7 / Windows® 8 / Windows® 10 64-bit (latest service pack) or higher, Processor (CPU): Intel® Core™ i5 or AMD Phenom™ II X3 or higher, Graphics Card: NVIDIA® GeForce® GTX 950 or AMD Radeon™ R9 380 or higher, Memory: 6 GB RAM* All trademarks and registered trade names are the property of their respective owners.
Section 14: 1 Year Limited Hardware Warranty
Your GN35LD Curved Gaming Monitor ("Product") includes a One Year Limited Hardware Warranty ("Warranty"). The Warranty covers product defects in materials and workmanship under normal use. This Warranty is limited to residents of the United States and Canada only and is available only to original purchasers. This Warranty gives you speciyc legal rights and you may also have other rights which vary from state to state. This Warranty starts on the date of your purchase and lasts for one year (the "Warranty Period"). The Warranty Period is not extended if the Product is repaired or replaced. We may change the availability of this limited warranty at our discretion, but any changes will not be retroactive. Warranty services are provided by Warranty Pro ('WP'). If a hardware defect arises and a valid claim is received within the Warranty Period, at its option and to the extent permitted by law, WP will: (1) repair the hardware defect by using new or refurbished parts that are equivalent to new in performance and reliability; or (2) exchange the Product with a product that is new or refurbished which is substantially equivalent to the original product. This Warranty is for one replacement only of like-items and does not cover items out of production if the product is no longer made or stocked. This Warranty is not assignable or transferable. The original purchaser may call WP's toll-free number at 1-855-229-9472 for service request. When a product or part is exchanged, any replacement item becomes your property and the replaced item becomes WP's property. This warranty only covers technical hardware defectiveness during the warranty period and under normal use conditions. WP does not warrant uninterrupted or error-free operation of this Product. This Warranty does not cover any damage due to: (a) transportation; (b) storage; (c) improper use; (d) failure to follow the product instructions or to perform any preventive maintenance; (e) modiycations; (f) unauthorized repair; (g) normal wear and tear; or (h) external causes such as accidents, abuse, or other actions or events beyond our reasonable control. Important: Do not disassemble the Product. Disassembling the Product will void this Warranty. Only WP or a party expressly authorized by WP should perform service on this Product. DISCLAIMER OF WARRANTY: THE REMEDIES DESCRIBED ABOVE ARE YOUR SOLE AND EXCLUSIVE REMEDIES AND OUR ENTIRE LIABILITY FOR ANY BREACH OF THIS LIMITED WARRANTY. OUR LIABILITY SHALL UNDER NO CIRCUMSTANCES EXCEED THE ACTUAL AMOUNT PAID BY YOU FOR THE DEFECTIVE PRODUCT, NOR SHALL WE UNDER ANY CIRCUMSTANCES BE LIABLE FOR ANY CONSEQUENTIAL, INCIDENTAL, SPECIAL OR PUNITIVE DAMAGES OR LOSSES, WHETHER DIRECT OR INDIRECT.SOME STATES DO NOT ALLOW THE EXCLUSION OR LIMITATION OF INCIDENTAL OR CONSEQUENTIAL DAMAGES, SO THE ABOVE LIMITATION OR EXCLUSION MAY NOT APPLY TO YOU.THE DURATION AND REMEDIES OF ALL IMPLIED WARRANTIES, INCLUDING WITHOUT LIMITATION THE WARRANTIES OF MERCHANTABILITY AND FITNESS FOR A PARTICULAR PURPOSE ARE LIMITED TO THE DURATION OF THIS EXPRESS LIMITED WARRANTY.
DECLARATION OF CONFORMITY
This device complies with Part 15 of the FCC Rules.
Operation is subject to the following two conditions: (1) This device may not cause harmful interference, and (2) this device must accept any interference received, including interference that may cause undesired operation.
FCC RELATED INFORMATION:
This equipment has been tested and found to comply with the limits for a Class B digital device, pursuant to Part 15 of the FCC Rules. These limits are designed to provide reasonable protection against harmful interference in a residential installation. This equipment generates, uses, and can radiate radio frequency energy and, if not installed and used in accordance with the instructions, may cause harmful interference to radio communications. However, there is no guarantee that interference will not occur in a particular installation. If this equipment does cause harmful interference to radio or television reception, which can be determined by turning the equipment off and on, the user is encouraged to try to correct the interference by one or more of the following measures:
- Reorient or relocate the receiving antenna.
- Increase the separation between the equipment and receiver.
- Connect the equipment into an outlet on a circuit different from that to which the receiver is connected.
- Consult the dealer or an experienced radio/TV technician for help.
The manufacturer is not responsible for any radio or TV interference caused by unauthorized modifications to this equipment. Such modifications could void the user's authority to operate the equipment.
VIOTEK®
COPYRIGHT © 2017 VIOTEK. ALL RIGHTS RESERVED.

- TABLE OF CONTENTS
- SECTION 1: SAFETY PRECAUTIONS
- SECTION 2: BOX CONTENTS
- SECTION 3: PRODUCT OVERVIEW
- 3.1 - MONITOR BUTTONS
- 3.2 – MONITOR PORTS
- SECTION 4: STAND INSTALLATION
- SECTION 5: WALL MOUNTING
- SECTION 6: CONNECTIVITY OPTIONS
- 6.1 – CONNECTING THE POWER CABLE
- 6.2 – CONNECTING YOUR EARPHONES
- 6.3 - DP CONNECTIVITY
- 6.4 – HDMI CONNECTIVITY
- 6.5 – DVI CONNECTIVITY
- SECTION 7: BASIC OPERATION
- AMD FREESYNC™
- SECTION 8: INDICATOR LIGHT
- SECTION 9: OSD SETUP
- SECTION 10: LED EFFECTS SYSTEM CONSOLE
- SECTION 11: GAMEPLUS ADJUSTMENT
- SECTION 12: TROUBLESHOOTING
- THE SCREEN IS BLANK
- THE IMAGE IS OUT OF FOCUS
- THE SCREEN IS FLASHING
- THE COLOR BLEEDS OR VISUAL EFFECTS APPEAR UNUSUAL
- THE SCREEN APPEARS TO BE SCROLLING, ROLLING, OR MOVING UNUSUALLY
- THE MONITOR NEEDS CLEANING
- THE INDICATOR LIGHT DOES NOT WORK
- CANNOT PLUG AND PLAY
- DIM IMAGE
- IMAGE JITTER/MOIRE PATTERN
- LIGHT INDICATOR IS ON OR FLASHING, BUT THERE IS NO IMAGE DISPLAYED ON SCREEN
- COLOR SHORTAGE (RED, GREEN, OR BLUE)
- IMAGE POSITION IS NOT CENTERED/THE SIZE IS NOT RIGHT
- COLOR DIFFERENCE (COLORS ARE NOT OPTIMIZED)
- 12.1 – PIP (PICTURE IN PICTURE) INPUT INFORMATION
- 12.2 – PBP (PICTURE BY PICTURE) RESOLUTION INFORMATION
- 13.1 - RESOLUTION COMPATIBILITY FOR DVI/DP
- SECTION 14: 1 YEAR LIMITED HARDWARE WARRANTY
- DECLARATION OF CONFORMITY
- FCC RELATED INFORMATION
- VIOTEK®
Brand : Viotek
Model : GN35LD
Category : Monitor