
41701 - Breast Pump GIMA - Free user manual and instructions
Find the device manual for free 41701 GIMA in PDF.


| Product Type | Electric Breast Pump |
| Model | 41701 (LD-202) |
| Dimensions (L x W x H) | 129 x 129 x 55 mm |
| Weight (without batteries) | Approx. 265 g (9.35 oz) |
| Power Source | 4 AA batteries or Medical AC Adapter (DC6.0V, 1000mA) (adapter not included) |
| Battery Life | Approximately 1.5 hours |
| Vacuum Levels | Stimulation mode: 10 levels (-60~-130 mmHg); Expression mode: 10 levels (-60~-250 mmHg) |
| Cycles Per Minute | Stimulation mode: 100 C.P.M.; Expression mode: 29~73 C.P.M. |
| Breastshield Sizes | 24 mm (27 mm also available, one size included) |
| Additional Functions | Automatic power-off after 30 min inactivity, automatic storage of last vacuum level, two modes (Stimulation and Expression) |
| Intended Use | Household use, expressing and collecting breast milk from lactating mothers, single user only |
| Safety Features | Do not use while pregnant; inspect parts before each use; clean and sanitize before first use; do not share; use only recommended attachments |
| Cleaning | Boil parts (except motor unit and adapter) for 5 min before first use; wash after each use; dishwasher safe on upper rack; air dry; no solvents or abrasives |
| Maintenance | Avoid dropping, extreme temperatures; clean with mild detergent; do not use petrol/thinners; remove batteries if not used for extended period |
| Included Parts | Breastshield, pump body, valves, white membranes, breastmilk bottles, bottle stand, motor unit, connection tube, seal cover, elastic diaphragm, seal seat, seal hoops, plugs, dome cap, nipple, screw ring, lids, power adapter (recommended, not provided) |
| Warranty | Gima 12-month standard B2B warranty |
| Certifications | EN 60601-1-11, EN 60601-1-2 (EMC), IEC/EN60601-1, ISO 13485 |
| Ingress Protection | IP21 |
| Classification | Internal Powered Equipment, Type BF |
| Operating Environment | Temperature 5°C~40°C, Humidity 15~93%RH, Pressure 700~1060 hPa |
| Storage Environment | Temperature -20°C~55°C, Humidity 15~93%RH |
| Expected Service Life | 400 hours |
| Disposal | Do not dispose with domestic waste; follow WEEE directives |
Frequently Asked Questions - 41701 GIMA
User questions about 41701 GIMA
0 question about this device. Answer the ones you know or ask your own.
Ask a new question about this device
Download the instructions for your Breast Pump in PDF format for free! Find your manual 41701 - GIMA and take your electronic device back in hand. On this page are published all the documents necessary for the use of your device. 41701 by GIMA.
USER MANUAL 41701 GIMA
No.365, Wuzhou Road,
Yuhang Economic Development Zone,
Hangzhou city, 311100 Zhejiang, China
Made in China

Shanghai International Holding Corp. GmbH (Europe)
Eiffestrasse 80, 20537, Hamburg, Germany
Importato da / Imported by / Importé par /
Unit Illustration 25
Installation Instructions 26
Product Assembly....26
Battery Installation 29
The Power Adapter....30
Using the breast bump....31
Pumping 32
Size of Breastshield....33
Cleaning 34
Trouble Shooting 35
Maintenance 35
Specifications 37
Explanation of symbols 38
Electromagnetic Compatibility Information....38
Product Description
Thank you for purchase and use LD-202 electric breast bump. The electric breast pump is electric powered suction device used to express and collect breast milk from lactating mother.
This product follows a baby's natural nursing rhythm. The unique design can help you to express breast milk quickly and comfortably. Please read this manual carefully before using stimulation and expression mode. Press the power button, the breast pump automatically starts up in stimulation mode. This is a single use product that should not be shared between moms.
Two mode technology of Stimulation and Expression
This product has stimulation and expression mode. Press the power button, the breast pump automatically starts up in stimulation mode.
If no action is taken during stimulation mode, after two minutes, the pump will automatically change to the expression mode.
Stimulation mode
Fast sucking/pumping rhythm to stimulate the milk ejection reflex and to start the milk flowing.
Expression mode
Slower sucking/pumping rhythm for gentle and efficient milk removal as quickly as possible.
Intended use
- This breast pump is for household use only. As the pump is compact and discrete to use, you can take it with you anywhere, allowing you to express milk at your own convenience and maintain your milk supply.
- If your breasts are engorged (painful or swollen), you can express a small amount of milk before or between feeds to ease the pain and to help your baby latch on more easily.
- If you are separated from your baby and wish to continue to breastfeed when you are reunited, you should express your milk regularly to stimulate your milk supply.
Safety Notice

Caution
- Use the product only for its intended use as described in this manual.
- Please check that all the parts of breast bump is in before using.
- Do not use attachments not recommended by the manufacturer.
- Do not attempt to remove the breastshield from your breast while pumping. Turn the breastpump off and break the seal between your breast and breast- shield with your finger, then remove breastshield from your breast.
- Never use the breast pump while you are pregnant, as pumping can induce labor.
- Inspect all appropriate pump components before each use.
- Clean and sanitize all parts that come in contact with your breast and breastmilk prior to first use.
- Wash all parts that come in contact with your breast and breastmilk after every use.
- For hygienic reasons, this product is intended for use by a single user.
- Do not allow children or pets to play with the motor unit, the adapter or accessories.
- Remove the batteries if they are not going to be used for an extended period of time.
- Although the breast pump is compliant with applicable EMC directives, it may still be susceptible to excessive emissions and/or may interfere with other equipment. A consequence can be that the breast pump turns off or goes into error mode. To prevent interference, keep other electric equipment away from the breast pump during expressing.
- Do not use the device in the MR environment.
| Power adapter use attention points |
| Use only the power adapter that comes with the product. |
| Make sure the voltage of the power adapter is compatible with the power source. |
| This product should never be left unattended when plugged into an electrical outlet. |
| Always unplug the breast pump immediately after use. |
Unit Illustration

- 1 × Seal cover 7. 1 × Pump body 13. 2 × Plugs
- 1 × Connection tube 8. 2 × Valves 14. 1 × Dome cap
- 1 × Elastic diaphragm 9. 4 × White membranes 15. 1 × Nipple
- 1 × Seal seat 10. 1 × Breastmilk bottles 16. 1 × Screw ring
- 4 × Seal hoops 11. 1 × Bottle stand 17. 2 × Lids
- 1 × Breastshield 12. 1 × Motor unit 18. 1 × Power Adaptor
(recommended, not provided)
Installation Instructions
Product Assembly
Note: Make sure you have cleaned and optionally disinfected the appropriate parts of the breast pump.
After cleaning, follow these steps to assemble your collection units:
Step 1:
Insert the breastshield into the funnel-shaped section of the pump body. Two breastshield sizes are available: 24mm and 27mm. You can find the size on the breastshield itself.


24mm

27mm
Step 2:
Please install the white membrane on valve smoothly. Make sure the white membrane won't curl up.
Step 3:
Insert the valve into the pump body from underneath. Push the valve in as far as possible.
Step 4:
Screw the pump body clockwise onto the bottle until it is securely fixed.
![graph TD A["Initial Spray Gun"] --> B["Intermediate Spray Gun"] B --> C["Final Spray Gun"]](/content/2026/05/933513/images/e675d708f6c1766c5afee8f9959583f03c14a294c033c47d00ae1b9ccea522ee.jpg)
Step 5:
Put the Elastic diaphragm into the seal seat,make sure the diaphragm edge and seal seat edge close fitting. Then seal by the seal cover make it as a sealed isolation assembly. If there is no “O” - shaped sealing ring on the plug at the bottom of the sealing seat ,please set the seal hoop into the groove in the plug position.
![graph TD A["Top Component"] --> B["Bottom Component"] B --> C["Top Component"] C --> D["Bottom Component"] D --> E["Top Component"] E --> F["Bottom Component"] F --> G["Top Component"]](/content/2026/05/933513/images/e72ffb8eb95ec37b8497628afc35fe33ca044ef3f9349deb0441b78b87a2eea0.jpg)
Figure 5-1 Figure 5-2 Figure 5-3 Figure 5-4
Step 6:
Make one side of connection tube without plug insert into seal cover and make another side of connection tube insert into motor unit. Then insert the whole isolation assembly into connector.

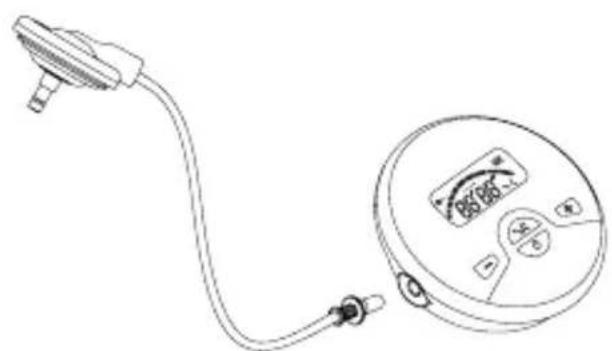
Figure 6-1 Figure 6-2


Figure 6-4
Battery Installation
This product can use 4 AA alkaline batteries as power supply. Please install the battery according to the direction of the battery polarity shown at the bottom of the unit.


Do not reverse polarity.
Do not mix old and new batteries.
Do not mix alkaline, standard(carbon-zinc) or rechargeable batteries.
Each set of batteries will provide approximately 1.5 hours of pumping time. For battery operation, the motor unit LCD will display the battery symbol 📄.
If the battery symbol flashes, which means the battery remaining is not enough for breast bump normal work, please replace the batteries.
The Power Adapter
Although the design of the product can be used in the battery inside the unit power adapter, meanwhile, we recommend that remove the battery before use the power adapter. If you need to use power adapter when you using battery, please shut down the breast bump then access external power supply and turn on the product. When the external power supply is used, the battery symbol will not show on the screen. At the same time the external power symbol will light up.
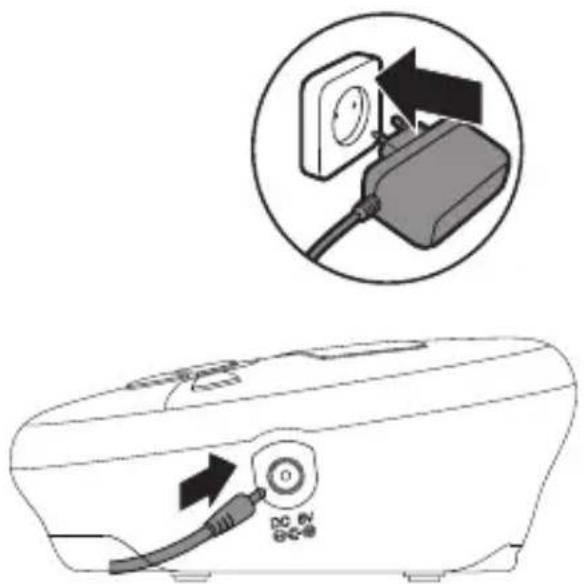

Please don't insert or pull out the power adapter with wet hand.
Please don't plug the power adapter with the power supply for a long time.
Using the breast bump
Display information and button function

- The external power supply indicator
- Pumping level indicator
- Continuity work time, "minute" in front, "second" behind
- Stimulation mode
- Expression mode
- Battery indicator
- Level increasing direction
Reduce pumping level

Stimulation/Expression mode switch button
Increase pumping level
Power button. The button can be pressed to turn off the unit in any mode when the unit is turned on.
Pumping
Relax in a comfortable chair (you may wish to use cushions to support your back).
a. Press the assembled pump body against your breast. Make sure that your nipple is centered. Hold the breastshield onto your breast with your thumb and index finger. Support your breast with the palm of your hand.

b. Press the button, the breast pump automatically starts up in stimulation mode as per preset level and the stimulation indicator lights up. If the breast bump used before without cut off power supply, the breast bump will express at last set suction level.
c. Once your milk starts flowing, please press the “Stimulation/Expression” button to enter into expression mode. You can switch the stimulation mode and expression mode by press the “Stimulation/Expression” button as per your requirement. If no action is taken during stimulation mode, after two minutes, the pump will automatically change to the expression mode.
d. Depending on your own personal comfort, you can press the “+” or “-” button to adjust the suction level. Long press the button can help you adjust the level quicker.
e. Close the bottle with a lid after pumping. Turn off the breast pump.
Disassemble and clean the parts that contact breast and milk.

Please keep the airway clear and unobstructed during sucking, prevent air path blocked.
Use bottle holder to prevent the bottle from tipping over. Do not fill the bottle too full to or prevent overfilling and spillage. The unit can turn off the power itself about 30 minutes no operation.

Size of Breastshield
Make sure that your nipple fits correctly in the breast shield. Not too tight, it is important that the nipple can move freely, while expressing breast milk. The breast-shield should not be too large, because this can cause pain or less effective expression. Two breast shield sizes are available: 24mm and 27mm. There's one size breast shield come with the product.
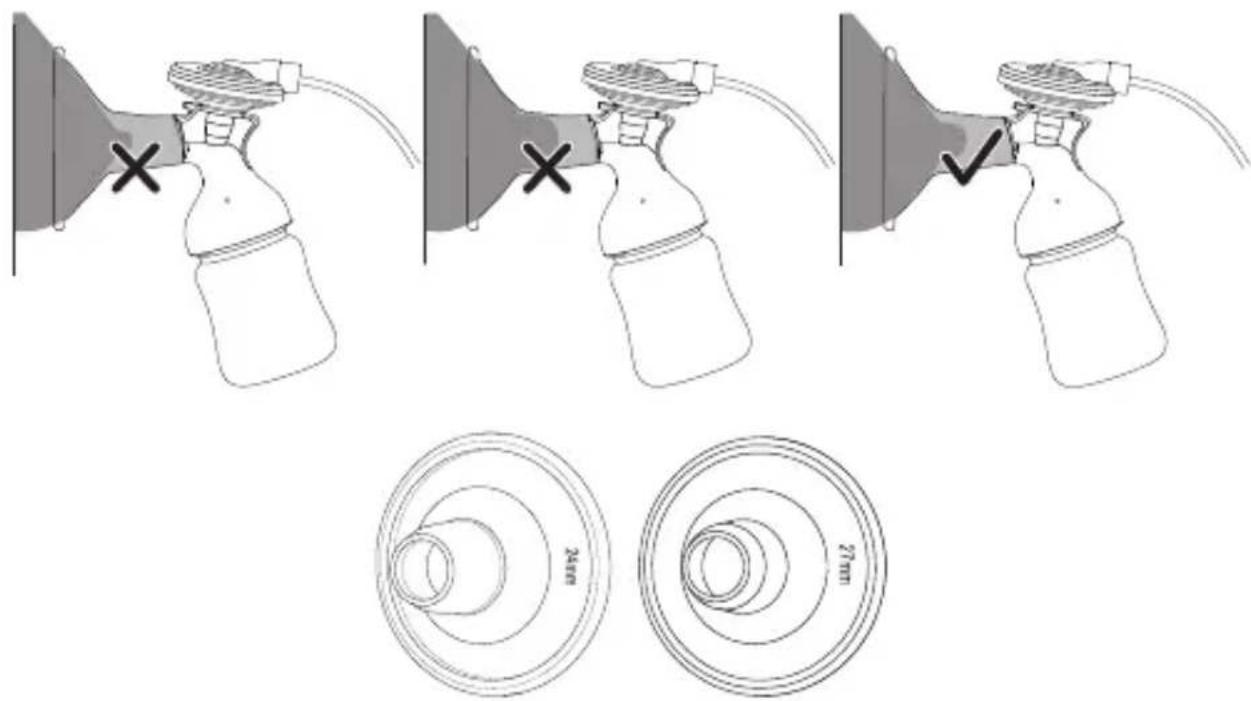
24mm 27mm

If there is any pain or discomfort during pumping, please consider to choose a larger or smaller size.
Cleaning
Caution
- Clean and sanitize the parts below before using your pump for the first time.
- Only use drinking-quality tap or bottled water for cleaning.
- Take apart and wash all parts that come in contact with the breast and breastmilk immediately before and after use to avoid dry up of milk residues and to prevent growth of bacteria.
- Please disassemble all parts which require clean to make sure cleaning thoroughly.
- Please place parts on a clean environment to avoid being polluted.
- Never put breastpump motor unit and AC adapter in water or a sterilizer, as you can cause permanent damage to the breastpump.
Cleaning before use
- Take apart and wash/sanitize all parts that come in contact with the breast and breastmilk.
- Put all seperated parts into pot. Fill in the pot with enough drinking- quality tap or bottled water to cover all parts.
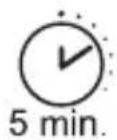
- Bring the water to boil. Place parts in boiling water for 5 minutes.
- Allow water to cool and gently remove the parts from the water.
Be careful and don't scald your skin. -
Place the parts neatly on a clean paper towel or in a clean drying rack and allow them to air dry. Avoid using cloth towels to dry the parts because they can carry germs and bacteria that are harmful to your baby.
-
Breastshiled
- Values
- White membranes
- Nipple
- Breastmilk bottle and lid

Cleaning after use
- Take apart and wash all parts that come in contact with the breast and breastmilk.
- Rinse in cool water all separated parts that came in contact with breast and breast-milk in order to remove breastmilk residue.
- Place the parts neatly on a clean paper towel or in a clean drying rack and allow them to air dry.
IMPORTANT
The flanges and milk storage containers can also be washed on upper rack of a standard, household dishwasher. DO NOT use solvents or abrasives. Allow to air dry on a clean surface. DO NOT put parts in Steam Bottle Sterilizers or Microwave Sterilizer Bags.
Trouble Shooting
| Abnormal phenomenon | Cause analysis Solutions | |
| Low or No Suction | Connection points is loose | Inspect all connection points to ensure attachment is secure |
| The valve is chipped or cracked or there's holes or tears on membrane is | Replace valve and/or membrane prior to pumping | |
| Breastshield size is not fit | Replace a appropriate size breastshield | |
| Shows “Err” Power problems | Please replace batteries or power adapter. | |
| Battery symbol flash Voltage is too low Please replace batteries | ||
Maintenance
-
Avoid dropping, slamming, or throwing the unit.
-
Avoid extreme temperatures. Do not expose unit directly under sunshine.
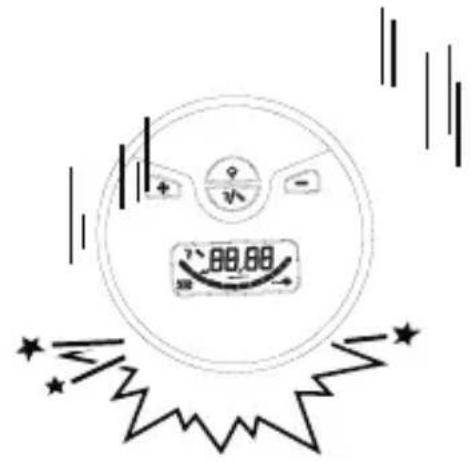

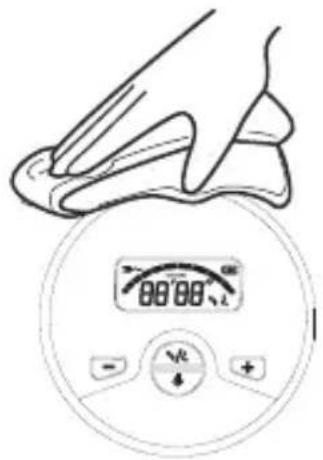
- When cleaning the unit, use a soft fabric and lightly wipe with mild detergent.
Use a damp cloth to remove dirt and excess detergent.
- Do not use petrol, thinners or similar solvents.

- Remove batteries when not in operation for an extended period of time.

- Do not disassemble product.
Specifications
| Product Description Electric Breast Pump | ||
| Model LD-202 | ||
| Intermittent Vacuum | Stimulate mode Approx. -60~-130mmHg | |
| Expression mode Approx. | -60~-250mmHg | |
| Vacuum Levels | Stimulate mode 10 Levels | |
| Expression mode 10 Levels | ||
| Cycles Per Minute | Stimulate mode 100 C.P.M. | |
| Expression mode 29~73 C.P.M. | ||
| Breastshield Sizes 24mm | ||
| Power Source | 4 AA batteries or Medical AC Adapter (DC6.0V, 1000mA) (recommended, not provided) | |
| Battery Life | Approximately 1.5 hours,different types of batteries may affect battery life | |
| Additional Function | Automatic Power-Off | |
| Automatic storage of the last vacuum level settings | ||
| Unit Weight Approx. 265g (9.35oz) (excluding battery) | ||
| Unit Dimensions 129 x 129 x 55 mm (L x W x H) | ||
| Operating Environment | Temperature | 5°C~40°C (41°F~104°F) |
| Humidity | 15~93%RH | |
| Pressure | 700hPa~1060hPa | |
| Storage Environment | Temperature | -20°C~55°C (-4°F~131°F) |
| Humidity | 15~93%RH | |
| Expected Service Life | Your appliance has been designed and developed with the greatest possible care and has an expected service life of 400 hours. | |
| Ingress Protection Rating IP21 | ||
| Classification | Internal Powered Equipment, Type BF | |
Specifications are subject to change without notice.
This appliance conforms to the following standards:
EN 60601-1-11 Medical electrical equipment — Part 1-11: General requirements for basic safety and essential performance – Collateral Standard: Requirements for medical electrical equipment and medical electrical systems used in the home healthcare environment and complies with the requirements of
EN 60601-1-2 (EMC), IEC/EN60601-1 (Safety) standards. And the manufacturer is ISO 13485 certified.
Explanation of symbols
 | Caution: read instructions (warnings) carefully |  | Authorized representative in the European community |  | Medical Device complies with Directive 93/42/EEC |
 | WEEE disposal |  | Keep away from sunlight |  | Serial number |
 | Product code Lot number |  | Current |  | |
 | Manufacturer Date of ma |  | ure Humidity limit |  | |
 | Temperature limit |  | Follow instructions for use |  | Type BF applied part |
| IP21 | Covering Protection rate |
Electromagnetic Compatibility Information
The device satisfies the EMC requirements of the international standard IEC 60601-1-2. The requirements are satisfied under the conditions described in the table below. The device is an electrical medical product and is subject to special precautionary measures with regard to EMC which must be published in the instructions for use. Portable and mobile HF communications equipment can affect the device. Use of the unit in conjunction with non-approved accessories can affect the device negatively and alter the electromagnetic compatibility. The device should not be used directly adjacent to or between other electrical equipment.
Table 1
| Guidance and declaration of manufacturer-electromagnetic emissions | ||
| The device is intended for use in the electromagnetic environment specified below.The customer or the user of the device should assure that it is used in such an environment. | ||
| Emissions test Compliance Electromagnetic environment - guidance | ||
| Radiated emissionCISPR 11 | Group 1,class B. | The device uses RF energy only for its internal function. Therefore, its emissions are very low and are not likely to cause any interference in nearby electronic equipment. |
| Conducted emissionCISPR 11 | Group 1,class B. | The device is suitable for use in all establishments, including domestic establishments and those directly connected to the public low-voltage power supply network that supplies buildings used for domestic purposes. |
| Harmonic emissionsIEC 61000-3-2 | Class A | |
| Voltage fluctuations/ flicker emissions IEC 61000-3-3 | Complies | |
Table 2
| Guidance and declaration of manufacturer-electromagnetic immunity(For home healthcare environment) | |||
| The device is intended for use in the electromagnetic environment specified below.The customer or the user of the device should assure that it is used in such an environment. | |||
| IMMUNITY test IEC | 60601test leve | Compliance level | Electromagnetic environment-guidance |
| Electrostatic discharge (ESD)IEC 61000-4-2 | ±8 kV contact ±2 kV, ±4 kV, ±8 kV, ±15 kV air | ±8 kV contact ±2 kV, ±4 kV, ±8 kV, ±15 kV air | Floors should be wood, concrete or ceramic tile. If floors are covered with synthetic material, the relative humidity should be at least 30%. |
| Electrostatic transient/burstIEC 61000-4-4 | ±2 kV, 100kHz, for AC power port | ±2 kV, 100kHz, for AC power port | Mains power quality should be that of a typical commercial or hospital environment. |
| SurgeIEC 61000-4-5 | ±0.5kV, ±1kV (differential mode) | ±0.5kV, ±1kV (differential mode) | Mains power quality should be that of a typical commercial or hospital environment. |
| Voltage dips, short interruptions and voltage variations on power supply input linesIEC 61000-4-11 | 0% UT;0,5 cycleAt 0°, 45°, 90°, 135°, 180°, 225°, 270°and 315°0% UT;1 cycle and 70% UT;25/30 cyclesSingle phase:at 0° 0% UT;250/300 cycle | 0% UT;0,5 cycleAt 0°, 45°, 90°, 135°, 180°, 225°, 270°and 315°0% UT;1 cycle and 70% UT;25/30 cyclesSingle phase:at 0° 0% UT;250/300 cycle | Mains power quality should be that of a typical commercial or hospital environment. |
| Power frequency (50/60 Hz)magnetic fieldIEC 61000-4-8 | 30 A/m; 50Hz or 60Hz | 30 A/m; 50Hz or 60Hz | Power frequency magnetic fields should be at levels characteristic of a typical location in a typical commercial or hospital environ-ment. |
Table 3
| Guidance and declaration of manufacturer-electromagnetic immunity(For home healthcare environment) | |||
| The device is intended for use in the electromagnetic environment specified below. The customer or the user of the device should assure that it is used in such an environment. | |||
| IMMUNITY test | IEC 60601 test level | Compliance level | Electromagnetic environment - guidance |
| Conducted RF IEC61000-4-6Radiated RF IEC61000-4-3 | 3V for0.15-80MHz;6V in ISM and amateur radio bands between0.15-80MHz | 3V for0.15-80MHz;6V in ISM and amateur radio bands between0.15-80MHz | Portable and mobile RF communications equipment should be used no closer to any part of the device, including cables, than the recommended separation distance calculated from the equation applicable to the frequency of the transmitter.Recommended separation distance where P is the maximum output power rating of the transmitter in watts (W) according to the transmitter manufacturer and d is the recommended separation distance in metres (m).Field strengths from fixed RF transmitters, as determined by an electromagnetic site survey, a should be less than the compliance level in each frequency range.Interference may occur in the vicinity of equipment marked with the following symbol: where P is the maximum output power rating of the transmitter in watts (W) according to the transmitter manufacturer and d is the recommended separation distance in metres (m).Field strengths from fixed RF transmitters, as determined by an electromagnetic site survey, a should be less than the compliance level in each frequency range.Interference may occur in the vicinity of equipment marked with the following symbol: |
| 385MHz,27V /m | 385MHz,27V /m | ||
| 450MHz,28V /m | 450MHz,28V /m | ||
| 710MHz,745MHz,780MHz9V/m | 710MHz,745 MHz,780MHz9V/m | ||
| 810MHz,870 MHz,930MHz28V/m | 810MHz,870 MHz,930MHz28V/m | ||
| 1720MHz,1845 MHz,1970MHz28V/m | 1720MHz,1845 MHz,1970MHz28V/m | ||
| 2450MHz,28V /m | 2450MHz,28V /m | ||
| 5240MHz,5500 MHz,5785MHz9V/m | 5240MHz,5500 MHz,5785MHz9V/m | ||
Table 4
| Recommended separation distances between portable and mobile RF communications equipment and the device ( For home healthcare environment) | ||
| The device is intended for use in an electromagnetic environment in which radiated therefore disturbances are controlled. The customer or the user of the device can help prevent electromagnetic interference by maintaining a minimum distance between portable and mobile RF communications equipment (transmitters) and the device as recommended below, according to the maximum output power of the communications equipment. | ||
| Rated maximum output power of transmitter W | Separation distance according to frequency of transmitter m | |
| 80 MHz to 800 MHz 800 MHz to 2.7 GHz d = [ 3.5E-1 ] | d = [ 7E-1 ] | |
| 0,01 0.12 0.23 | ||
| 0,1 0.38 0.73 | ||
| 1 1.2 2.3 | ||
| 10 3.8 7.3 | ||
| 100 12 23 | ||
| For transmitters rated at a maximum output power not listed above, the recommended separation distance d in metres (m) can be estimated using the equation applicable to the frequency of the transmitter, where P is the maximum output power rating of the transmitter in watts (W) according to the transmitter manufacturer.NOTE1 At 80 MHz and 800 MHz, the separation distance for the higher frequency range applies.NOTE2 These guidelines may not apply in all situations. Electromagnetic propagation is affected by absorption and reflection from structures, objects and people. | ||

Disposal: The product must not be disposed of along with other domestic waste. The users must dispose of this equipment by bringing it to a specific recycling point for electric and electronic equipment.
GIMA WARRANTY TERMS
The Gima 12-month standard B2B warranty applies.
- PRODUCT DESCRIPTION
- TWO MODE TECHNOLOGY OF STIMULATION AND EXPRESSION
- STIMULATION MODE
- EXPRESSION MODE
- INTENDED USE
- SAFETY NOTICE
- CAUTION
- UNIT ILLUSTRATION
- INSTALLATION INSTRUCTIONS
- PRODUCT ASSEMBLY
- STEP 1
- STEP 2
- STEP 3
- STEP 4
- STEP 5
- STEP 6
- BATTERY INSTALLATION
- THE POWER ADAPTER
- USING THE BREAST BUMP
- PUMPING
- SIZE OF BREASTSHIELD
- CLEANING
- CLEANING BEFORE USE
- CLEANING AFTER USE
- IMPORTANT
- MAINTENANCE
- ELECTROMAGNETIC COMPATIBILITY INFORMATION
- GIMA WARRANTY TERMS
Brand : GIMA
Model : 41701
Category : Breast Pump