
Smart Sub 10 - Subwoofer CANTON - Free user manual and instructions
Find the device manual for free Smart Sub 10 CANTON in PDF.


| Product Type | Powered Subwoofer |
| Model | Canton Smart Sub 10 |
| Dimensions (W x H x D) | 27 cm x 33 cm x 27 cm |
| Weight | 8.4 kg |
| Power Supply | 100–240 V~, 50/60 Hz |
| Max Power Consumption | 200 W |
| Standby Power Consumption | < 0.5 W |
| Frequency Range | Not specified (estimated 30–200 Hz typical for subwoofer) |
| Wireless Connection | 5.8 GHz high-end radio link |
| Wired Input | RCA (Cinch) line input |
| Input Selector Modes | Wireless (Auto), Wired (Auto), Wired (Always On) |
| Auto Power On/Off | Yes (in Auto modes) |
| Pairing | Wireless pairing via connected soundbar or smart speaker menu |
| Guarantee | 2 years for active speakers |
| Cleaning | Dry cloth only; no aggressive or abrasive cleaners |
| Safety | Do not open; no user-serviceable parts. Avoid moisture and heat |
| Intended Use | Indoor use only |
| Environmental Range | 5 °C to 35 °C |
Frequently Asked Questions - Smart Sub 10 CANTON
User questions about Smart Sub 10 CANTON
0 question about this device. Answer the ones you know or ask your own.
Ask a new question about this device
Download the instructions for your Subwoofer in PDF format for free! Find your manual Smart Sub 10 - CANTON and take your electronic device back in hand. On this page are published all the documents necessary for the use of your device. Smart Sub 10 by CANTON.
USER MANUAL Smart Sub 10 CANTON
natural_image
Simple line drawing of a rectangular electronic device with two side legs and a 'ONION' logo on the front face (no text or symbols on body)CANTON®
German loudspeaker tradition
Danke!
1 SUB IN
MFL = Master Front Left
MFR = Master Front Right
MCE = Master Center
MSL = Master Surround Left
MSR = Master Surround Right
FL = Front Left | FR = Front Right | CE = Center
SL = Surround Left | SR = Surround Right | SUB = Subwoofer
German loudspeaker tradition
natural_image
Simple line drawing of a rectangular electronic device with two side legs and a 'ONION' logo at the bottom (no text or symbols on body)CANTON®
German loudspeaker tradition
Thanks!
Thank you very much for choosing the Canton product. You can now look forward to countless hours filled with excellent sound.
Just a few steps and the music can start:
CONTENT:
SAFETY INSTRUCTIONS.... 16
UNPACKING 17
CONNECTION 17
CONNECTION-TERMINAL.... 18
CONNECTION WITH A SPEAKER 19
TECHNICAL DATA 23
DECLARATION OF CONFORMITY 25
GUARANTEE 26
English
Safety Instructions
Read and follow all instructions. Keep these instructions. Observe all warnings and safety instructions. Operate this device only in a moderate climate (not in a tropical climate). Do not operate this device at altitudes above 2000 m above sea level. To avoid the risk of fire or electric shock, the device must not be exposed to rain or moisture. Do not operate this device near water. Do not expose this device to dripping or splashing water. Strong temperature fluctuations lead to condensation (water droplets) in the device. Wait until the moisture has evaporated (at least three hours). Do not place objects filled with liquids (such as vases) on the device. Do not place an open fire, such as lit candles, on or near the device. Do not place the device near heat sources such as radiators, heat accumulators, stoves or other devices (including amplifiers) that generate heat. Avoid direct sunlight. Keep a clearance of at least 5 cm around the device. Never prevent the protective function of polarised or grounded plugs: A polarised plug has two pins, one wider than the other. An earthed plug has a third earthing pin. The wide or third pin is for your safety. If the plug does not fit into your outlet, contact a qualified electrician to replace the obsolete outlet. To avoid electric shock, connect the mains plug only to sockets or extensions where the contact pins can be fully inserted to prevent exposed contact pins. Never touch the signal and mains cable with wet hands. Do not step on or pinch the mains cable, especially not in the area of the plugs, sockets or where the cable is led out of the device. For devices without a mains switch, in which the mains plug or the device mains socket serves as an isolating device, the plug of the mains cable or the device mains socket must be freely accessible at all times. Disconnect the device from the mains during thunderstorms or prolonged periods of non-use. To completely disconnect the device from the power supply, unplug the mains cable from the wall outlet. Where the MAINS plug or an appliance coupler is used as the disconnect device, the disconnect device shall remain readily operable. Always switch off the device before connecting or disconnecting connection cables. Always switch off the device before connecting or disconnecting connection cables. Always pull the plugs and not the cables. Install the device according to the manufacturer's instructions. Always choose a level surface. The device must be in a vertical position. Do not exert force on operating elements, connections and lines. The device may only be operated with the voltage and frequency specified on the device or the type plate. Do not insert any objects or body parts into the openings of the device. Live parts inside the housing could be touched and/or damaged. This can lead to short circuits, electric shocks and fire. Only use fixing materials and accessories that are approved by the manufacturer and/or supplied with the device. Only use trolleys, stands, tripods, holders or tables specified by the manufacturer or sold with the device.
When using a trolley, be careful when moving the trolley/device assembly to prevent damage and injury from tipping over.

Only clean this device with a clean, dry cloth. Do not use any aggressive, alcoholic or abrasive agents for cleaning. To avoid electric shock, do not open the housing! There are no user-serviceable parts in the device. Consult qualified personnel for all repair and maintenance work. This is required when the device has been damaged in any way, such as mains cable or plug damage, liquid or objects have been spilled, exposed to rain or moisture, does not operate normally, or has been dropped. Do not make any changes to the device or accessories. Unauthorised modifications can compromise safety, regulatory compliance or system performance. In this case, the type approval/guarantee may expire.
If sound distortions such as unnatural knocking, throbbing or high-frequency clicking occur during playback, the volume level must be reduced immediately.
To avoid possible hearing damage, do not listen at high levels for long periods of time. Interrupt the playback if you hear ringing or whistling noises in your ears or if you have the impression that you can no longer hear high sounds (even for a short time).
Do not place or lay objects that are sensitive to magnetic fields (e.g. tube TVs, external hard drives, magnetic cards, video cassettes, etc.) on or directly next to the device.
The device and/or the accessory may contain small parts that can be swallowed. Therefore not suitable for children under three years.
This symbol indicates uninsulated dangerous voltages inside the case that are sufficiently strong (amplitude) to cause a fire or electric shock.
This symbol warns you of important operating and maintenance instructions in the accompanying documentation (manual) supplied.
This symbol indicates Class II devices, where protection against electric shock is provided by double or reinforced insulation during specified use and therefore no protective earth connection is required.

UNPACKING
Carefully unpack the Smart SUB 8 and check that the delivery content is complete and undamaged. In case of damage, do not put the article into operation and contact our service department (see reverse side).
Please keep the packaging during the warranty period.
Delivery contents:
1x Smart SUB 8
1x Power cord
1x Short manual
CONNECTION
Place the Smart SUB 8 in the desired location. The distance between the Smart SUB 8 and the device to be connected must not exceed 10 m. Please install the Smart SUB 8 in such a way that it cannot be damaged or cause damage.
Note:
- Please make sure that the Smart SUB 8 is not raised (e.g. on a table) or placed on a ledge (e.g. stairs).
CONNECTION-TERMINAL
![CANTON German loudspeaker tradition SUB IN [WIRED] 1 SUB IN- MODE WIRELESS [POWER AUTO] WIRED [POWER AUTO] WIRED [POWER ON] 2 SERVICE 3 4](/content/2026/05/933066/images/f344570e94c7f2ab30782c6a98e48a45f41521ff1651ba7dc74d013bb6739fbf.jpg)
1 SUB IN
For connecting the subwoofer via cable.
2 SUB IN - MODE (INPUT SELECTOR SWITCH): WIRELESS [POWER AUTO]
= Automatic radio connection
WIRED [POWER ON]
= Operation via cinch cable, Smart SUB 8 remains permanently switched on
WIRED [POWER AUTO]
= Operation via cinch cable, Smart SUB 8 automatically switches on or off in standby mode
3 SERVICE PORT
Use only for Canton customer service.
4 POWER INPUT
For connection to the mains supply.
CONNECTION WITH A SPEAKER
SUB OUT - WIRELESS
In wireless mode, wireless loudspeakers and Smart SUB 8 are connected via a high-end radio link. A frequency of 5.8 GHz guarantees robust and loss-free data transmission. Once the Smart SUB 8 has been successfully connected to the wireless loudspeaker, the Smart SUB 8 is activated and the wireless connection is established automatically. The input selector switch of the Smart SUB 8 must be set to WIRELESS [POWER AUTO] (factory setting). If the wireless loudspeaker is switched off, the Smart SUB 8 switches off automatically and the LED lights up red.
SUB OUT - WIRED
Use this output if the Smart SUB 8 is to be connected via cable. The input selector switch of the subwoofer must now be set to „WIRED [POWER ON]“ if the Smart SUB 8 is always to remain switched on, or to „WIRED [POWER AUTO]“ if it is to switch on or off with the loudspeaker.
Pairing your subwoofer
To control a new wireless subwoofer with a loudspeaker, it must be paired with a smart loudspeaker. The pairing process with the desired loudspeaker can be found here:
English
Wireless connection with Smart Soundbar 9 / Smart Soundbar 10:
Note:
- Before connecting the Smart Sub 8 to the Smart Soundbar, please make sure that the Smart Sub 8 is not connected to the power supply.
1 Press the „M“ menu button on the Smart remote control to access the main menu of the sound bar via the on-screen display on your TV set.
2 Use the ↑ " or ↓" arrow button to navigate to the Wireless Setup [WIS] menu and press the „OK" button to confirm.
3 Select the function Pair Wireless Speakers [WSP] and confirm with the „OK“ button.
4 Use the ↑ " or ↓" arrow button to select the speaker you want to pair. In this case, select [SUB] to pair the wireless subwoofer.
5 Now press the „OK“ button. The status indicator will change to Pairing [PIR]. The screen displays „Pairing“.
6 Now plug the power cord of the Subwoofer into the wall socket and switch it on with the power switch.
7 Approximately 10 - 20 seconds after the subwoofer is turned on, the status changes to „connected“ and [CON] is displayed.
Wireless connection with Smart floorstanding- / compact speakers:
Note:
- Before connecting the Smart Sub 8 to the Smart Soundbar, please make sure that the Smart Sub 8 is not connected to the power supply.
1 On the Smart Speaker (Master), select Wireless Setup [WIS] and press „OK“.
2 Now select the [WSP] function and press „OK“.
3 Use the arrow keys (↑, ↓) to select the master speaker:
MFL = Master Front Left
MFR = Master Front Right
MCE = Master Center
MSL = Master Surround Left
MSR = Master Surround Right
4 To connect another speaker, press „OK“.
5 Use the arrow keys (↑, ↓) to select the speaker you want to pair. The following channels are available:
FL = Front Left | FR = Front Right | CE = Center
SL = Surround Left | SR = Surround Right | SUB = Subwoofer
6 Press the „OK“ button. The display should now show [PIR] „Pairing“.
7 Now plug the power cord of the Subwoofer into the wall socket and switch it on with the power switch.
8 Approximately 10 - 20 seconds after the subwoofer is turned on, the status changes to „connected“ and [CON] is displayed.
English
Wireless connection with Smart Soundbox 3:
Note:
- Before connecting the Smart Sub 8 to the Smart Soundbar, please make sure that the Smart Sub 8 is not connected to the power supply.
1 Press the input select button → for at least 3 seconds.
2 Use the „+“ or „-“ button to navigate to the Wireless Setup [WIS] menu and press the „▶” play/pause button to confirm.
3 Select Pair Wireless Speakers [WSP] and confirm with the Play/Pause button ▶II".
4 The Pair Wireless Speakers menu appears and [MFL] appears on the display (MFL = Master Front Left).
5 Press the play/pause button ▶.
6 Use the „+“ or „-“ button to select the [SUB] subwoofer you want to pair.
7 Now press play/pause button ▶. The status indicator will change to „Pair“ [PIR].
8 Connect the Smart Sub 8 you want to connect to the mains and switch it on.
9 Approximately 10 - 20 seconds after the subwoofer is turned on, the status changes to „connected“ and [CON] is displayed.
TECHNICAL DATA
Power supply
- Operating voltage 100 - 240V\~
– Operating frequency 50 / 60Hz
– Power consumption Standby <0.5W
– Power consumption maximal 200 W
Ambient temperature:
- Minimum 5 °C (41 °F)
- Maximum 35 °C (95 °F)
Signal level:
- Analog Line = max. 2.0 V (effective)
Dimensions:
W: 27 cm
H: 33 cm
D: 27 cm
Weight:
8.4 kg
English
Information on "Intended Use"
The speaker system is designed for indoor use and must not be used outdoors or in a wet environment. Do not make any conversions or modifications to the device. Connect the speaker system as described in the instructions and observe the safety instructions. Only operate the device with the mains voltage and frequency specified on the rating plate.
Information about an environmentally friendly operation
To reduce the power consumption, switch the speaker system to standby mode by pressing the Power „☐” button when not in use. This “saves power” and lowers your electricity bill.

Information about the CE marking
Electrical and electronic devices placed on the market within the European Union must be given a CE mark to indicate that the equipment complies with the applicable requirements (e.g. electromagnetic compatibility or equipment safety).
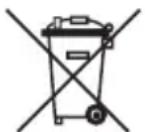
Disposal instructions
According to the EU Directive on Waste Electrical and Electronic Equipment, devices marked with this symbol must not be disposed of together with municipal waste (household waste). Please inform yourself, if necessary, contact your local disposal company or the municipal / city administration about the free disposal for you. It serves the environmental and health protection as well as the saving of (rare) raw materials by recycling (recycling).
Batteries must also not be disposed of together with general household waste. They must be collected separately and returned to a battery collection point. Throw empty batteries into the collection container free of charge, for example, those situated at the trade. Improperly disposed of batteries can harm human and animal health and / or the environment.
EU – Declaration of Conformity
CE labelling
We, the manufacturer / importer
Canton Elektronik GmbH + Co. KG • Neugasse 21–23 • 61276 Weilrod • Germany

German loudspeaker tradition
confirm and declare in sole responsibility that the product
Smart SUB 8
(Closed powered subwoofer with wireless signalling (5.8GHz) and analogue input, together with a multi-range switching power supply.)
is in accordance with the Directives of the European Parliament and of the Council
Directive 2014/53/EU (Radio Equipment)
Directive 2014/35/EU (Low Voltage Directive)
Directive 2011/65/EU (Restriction of the Use of Certain Hazardous Substances)
Directive 2012/19/EU (Waste of Electric and Electronic Equipment)
Directive 2009/125/EG (Ecodesign requirements for Energy-related Products)
Operation is permitted in all countries of the European Union.
A complete Declaration of Conformity can be found at: www.canton.de/en/doc
Legally binding signature:
Guithen Kein
Date: 01 ^st February 2019 Name: Günther Seitz Function: Managing Director
DEU GARANTIE
Above and beyond the legally prescribed warranty period Canton offers a guarantee of 5 years on all its passive loudspeakers. A 2-year guarantee is offered for active and semi-active boxes. The guarantee period begins at the time of purchase and only applies to the purchaser. Guarantee claims will only be accepted if accompanied by the original packaging. The guarantee does not cover damages incurred in transit or damages caused by improper use. The guarantee is not extended if parts are exchanged within the period covered by the guarantee. This applies to all loudspeakers purchased from an authorised Canton dealer. In the event of damage please contact your dealer or the Canton Service department direct.
CANTON®
German loudspeaker tradition
All Statements without guarantee.
Technical changes, typing errors and other errors reserved.
- Danke!
- SUB IN
- Thanks!
- CONTENT:
- English
- Safety Instructions
- UNPACKING
- Delivery contents:
- CONNECTION
- Note:
- CONNECTION-TERMINAL
- CONNECTION WITH A SPEAKER
- SUB OUT - WIRELESS
- SUB OUT - WIRED
- Pairing your subwoofer
- Wireless connection with Smart Soundbar 9 / Smart Soundbar 10:
- Wireless connection with Smart floorstanding- / compact speakers:
- Wireless connection with Smart Soundbox 3:
- TECHNICAL DATA
- Power supply
- Ambient temperature:
- Signal level:
- Dimensions:
- Weight:
- Information on "Intended Use"
- Information about an environmentally friendly operation
- Information about the CE marking
- Disposal instructions
- EU – Declaration of Conformity
- CE labelling
- Smart SUB 8
- DEU GARANTIE
- CANTON®
Brand : CANTON
Model : Smart Sub 10
Category : Subwoofer