KA10DMFAFRA - Deep fryer Kogan - Free user manual and instructions
Find the device manual for free KA10DMFAFRA Kogan in PDF.


| Product Type | Digital Multifunction Air Fryer |
| Model | KA10DMFAFRA |
| Brand | Kogan |
| Capacity | 10 L |
| Power Supply | 220-240 V, 50/60 Hz |
| Rated Power | 1700 W (estimated) |
| Temperature Range | 80°C – 200°C |
| Timer Range | 1 – 99 minutes |
| Control Panel | Digital display with touch buttons |
| Functions | Preheat, Menu selection, DIY, Thaw, Delayed cooking, Keep warm, Rotation, Power selection, Palate selection |
| Preset Menus | Steak, Chicken, Fish, Shrimp, Bake, Nut, Chips, Rotisserie |
| Accessories Included | Baking fork, baking skewer, baking tray, high and low grill, tongs |
| Material | Plastic body, metal inner pot and accessories |
| Safety Features | Auto shut-off, overheat protection, cool-touch handles (lid handle, pot handle) |
| Cleaning & Care | Hand wash with warm soapy water; do not immerse lid; use non-abrasive materials |
| Dimensions (Approx.) | 35 x 35 x 40 cm |
| Weight (Approx.) | 8 kg |
| Usage | Indoor household use only |
| Warranty | Refer to Kogan support |
Frequently Asked Questions - KA10DMFAFRA Kogan
User questions about KA10DMFAFRA Kogan
0 question about this device. Answer the ones you know or ask your own.
Ask a new question about this device
Download the instructions for your Deep fryer in PDF format for free! Find your manual KA10DMFAFRA - Kogan and take your electronic device back in hand. On this page are published all the documents necessary for the use of your device. KA10DMFAFRA by Kogan.
USER MANUAL KA10DMFAFRA Kogan
natural_image
Black and white photo of a black air fryer with digital display and control buttons (no visible text or symbols on the device itself)10L DIGITAL MULTIFUNCTION AIR FRYER
KA10DMFAFRA
SAFETY & WARNINGS
Please handle this product with care and inspect it regularly to ensure it is in good working order.
If the product, power supply cord or plug shows any signs of damage: stop use, unplug and contact Kogan.com support.
- Read all instructions before using the appliance and retain this guide for reference.
- Be sure to use on a heat resistant and even surface, such as a heatproof mat. Do not place directly on a benchtop. Keep the appliance at least 20cm away from the wall, furniture or other flammables.
- Do not touch hot surfaces. The temperature of the outer surface can get very hot while the appliance is in operation. Always use oven gloves when handling hot materials and allow metal parts to cool before cleaning. Allow the appliance to cool thoroughly before removing parts. Always use the handles when moving the appliance.
- Do not use the appliance for other than its intended indoor household use.
- Never place food directly on the bottom of the bowl, as the bottom of the food will not cook evenly. Always use a rack or pan when cooking. Note: Most pans can be used in this oven as long as it is a baking pan and fits comfortably inside the bowl.
- To protect against the risk of electric shock, do not immerse this appliance, cord set or plug in water or any other liquid.
- The appliance is not intended to be operated by means of an external timer or any type of separate remote control system.
- The use of accessories which are not recommended or supplied by Kogan may cause fire, electric shock or injury.
- Do not use an extension cord unless completely necessary with this product. If an extension cord is used please ensure that it has a rating equal or exceeding the rating of this appliance.
- Do not pull or carry by cord, use cord as a handle, close a door on the cord or pull cord around sharp edges or comers. Keep cord from heated surfaces.
- Do not bend or damage the power cord.
- Always unplug the appliance when not in use. To disconnect from the power supply, grip the plug and pull from wall outlet. Never pull by the cord. The plug must be removed from wall outlet before cleaning, servicing, maintenance or moving the appliance.
- Never force the plug into an outlet.
- Do not place the appliance near a hot gas or electric burner.
-
Do not cover the appliance while in use. If it is covered, there is a risk of fire.
-
Improper installation may result in the risk of fire, electric shock or injury to persons.
• If the power cord or plug is damaged, do not use the appliance. - The appliance has no user-serviceable parts contained within. Do not attempt to repair, disassemble or modify the appliance.
- Always operate on a dry level surface. Operating on sinks or uneven surfaces must be avoided.
- Do not clean with metal scouring pads.
- Extreme caution must be used when moving an appliance containing hot oil or other hot liquids.
- Do not move or lift the appliance while the power cord is still connected to wall outlet.
- This appliance is not intended for use by persons (including children) with reduced physical, sensory or mental capabilities, or lack of experience and knowledge, unless they have been given supervision or instruction concerning use of the appliance by a person responsible for their safety. Children should be supervised to ensure that they do not play with the appliance.
- All metal items inside the bowl, such as the low rack, can get very hot during cooking. Please be careful when removing these items from the appliance, always use the tongs supplied.
OVERVIEW
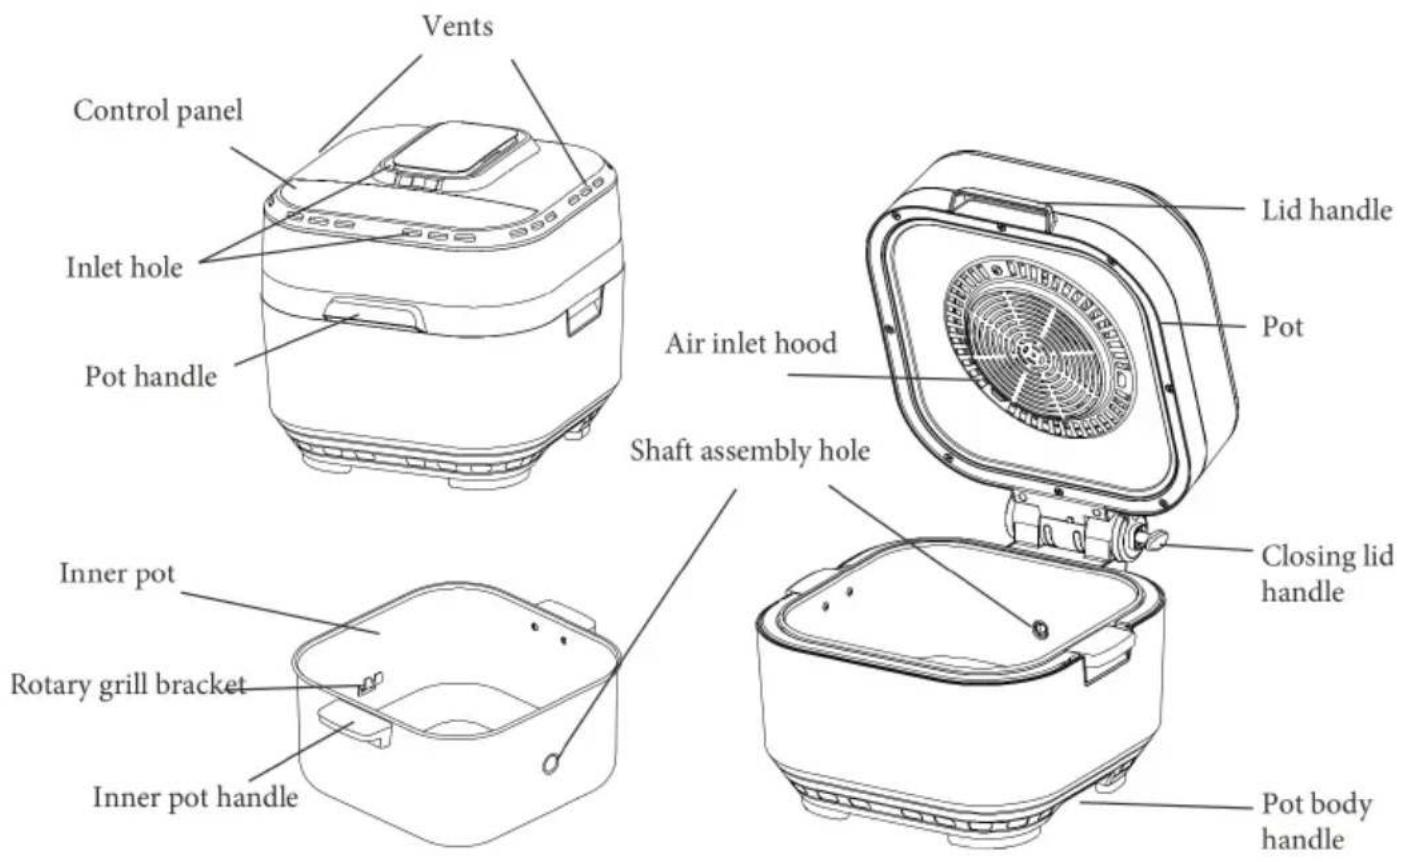
Accessories:
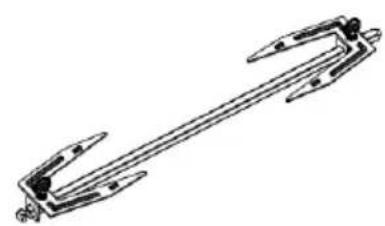
natural_image
Pure mechanical linkage diagram without any text, numbers, or symbolsBaking fork
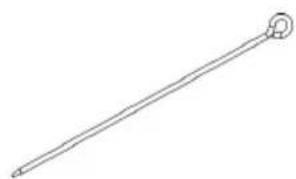
natural_image
Simple line drawing of a long rod with a circular end and a triangular head (no text or symbols)Baking skewer
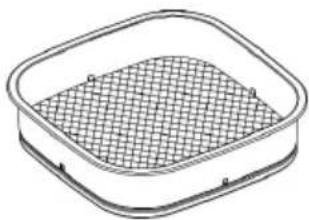
natural_image
Simple line drawing of a square container with a grid-patterned inner area (no text or symbols)Baking tray
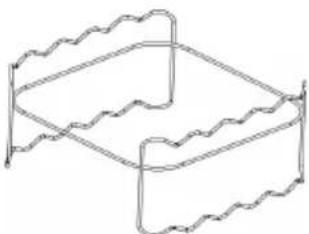
natural_image
Simple line drawing of a rectangular frame with wavy top and bottom edges (no text or symbols)High and low grill
OPERATION
Control panel
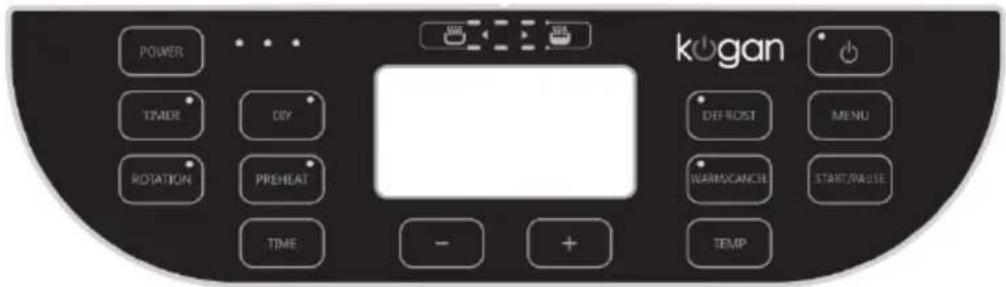
Fryer pot power switch
Power selection key
Menu selection
Appointment function key
Defrost function key
Rotary baking function key
Keep warm or Cancel key
Optional function key
Temperature function Key
Appointment function key
Temperature/Time Increase key
Time function key
Temperature/Time reduction key
Quick cooking guide
| Food | Weight (g) | Time (minutes) | Temperature (°C) | Selection of baking tools | Extra information |
| Chicken | 1200 | 18-22 | 180 | Baking fork or baking tray + grill | Turn Roast |
| Chicken wings | 500-700 | 20-25 | 180 | Baking plate + Grill | |
| Chicken wings | 400-700 | 20-25 | 180 | Baking plate + Grill | |
| Steak | 100-500 | 8-12 | 180 | Baking plate + Grill | Rub a little oil on the surface |
| Homemade fries. | 800 | 33-36 | 180 | Baking plate + Grill | Add 1/2 tablespoons of oil |
| Frozen fries | 500-800 | 15-18 | 200 | Baking plate + Grill | Add 1/2 tablespoons of oil |
| Peanut | 250 | 13-16 | 180 | Baking plate + Grill | Rub a little bit of oil on the surface |
| Sweet | 80-1000 | 50-70 | 180 | Baking plate + Grill |
Opening lid
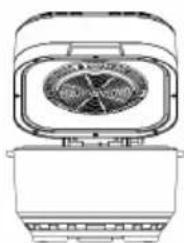
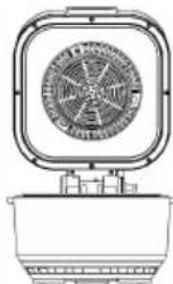
Hold the lid handle (Fig. 1) and raise the lid as per Fig. 2: it will click into place.
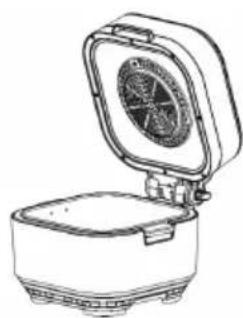
Raise until it clicks into place again (Fig. 3): it will automatically lock.
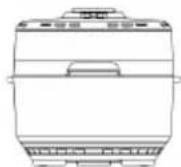
Fig.1
natural_image
Line drawing of a microwave oven with lid and fan (no text or symbols)Fig.2
natural_image
Technical line drawing of a mechanical fan or vent device with no visible text or symbolsFig.3
Closing lid
Raise the handle while pulling the closing lid handle (Fig. 4) down and bring the pot to the plate body (Fig. 1).
The closing lid handle will be automatically reset and may be automatically locked approximately 180mm into pot body (Fig. 2). Do not force the lid: continue to use one hand to raise the lid handle, the other to pull up the right side of the closing lid handle, and then slowly bring the pot to the plate body.
natural_image
Line drawing of a portable electric stove with a fan and lid (no text or symbols)Fig.4
Placing inner pot
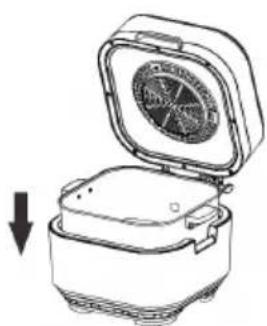
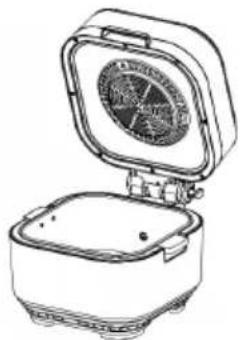
Align the inner pot handle, with the shaft assembly hole at the back of the pot body (Fig. 6). Place evenly with both hands (Fig. 7).
natural_image
Line drawing of a device with an open lid and internal components, showing a downward arrow (no text or symbols)Fig. 6
natural_image
Line drawing of a portable oven with a circular vent on top (no text or symbols)Fig. 7
Using baking tools
Making skewers:
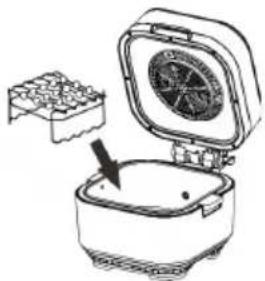
String the ingredients with baking skewers (Fig. 8) and place on grill (Fig. 9) Place grill in inner pot (Fig. 10)
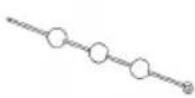
Fig.8
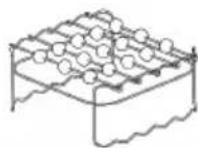
Fig.9
natural_image
Line drawing of a microwave oven with a grid-patterned lid and an arrow pointing to the interior (no text or symbols)Fig.10
Baking French fries, chicken wings, nuts, etc.:
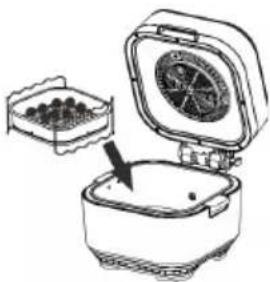
Put baking plate on grill (Fig. 11) and place ingredients in baking plate (Fig.12) Place grill in inner pot (Fig.13)
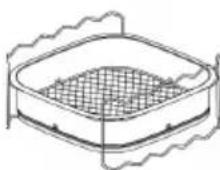
Fig.11
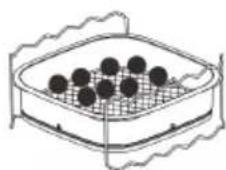
Fig.12
natural_image
Line drawing of a food processor with a lid and tray, showing a cooking step (no text or symbols)Fig.13
Making roast chicken with baking fork:
Use the shaft of the grill to put the chicken on, then clamp the chicken on both sides of the fork and tighten (Fig. 14)
Place grill in the plate as shown (Fig. 15)
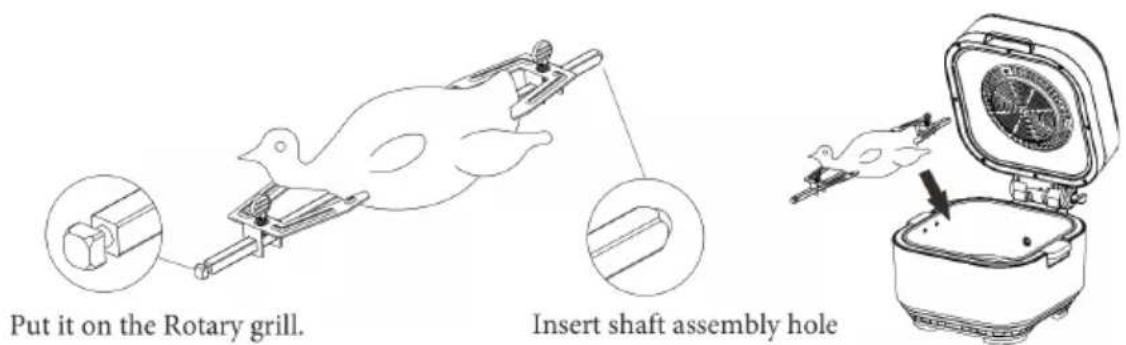
Fig. 14
Fig. 15
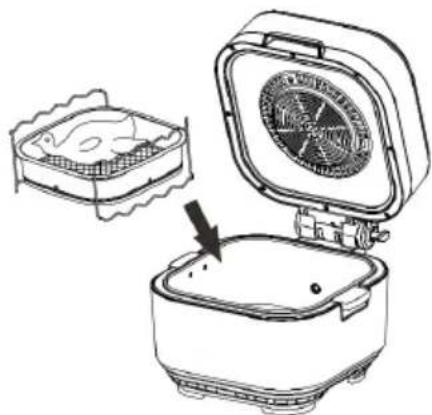
Making roast chicken with baking tray and grill:
Place baking plate in grill (Fig. 11) and put the chicken on the baking plate (Fig. 16) Place grill in plate (Fig. 15)
natural_image
Line drawing of a cooking appliance with a fan and lid, showing a side view of a small container (no text or symbols)Fig. 16
General operation
Insert the plug into a grounded socket and the "power" light will flash.
Open lid, insert food and close lid as described in the Overview section of this manual.
Press the power key to enter standby: the screen will flash, displaying "----".
Click the 'Power' key to exit standby.
Preheat function (optional)
Press Preheat key to set preheating temperature (default 180°). The time is not adjustable. The Preheat lights will flash for 3 seconds. Press "Start/pause" key to start preheating.
Menu selection / DIY
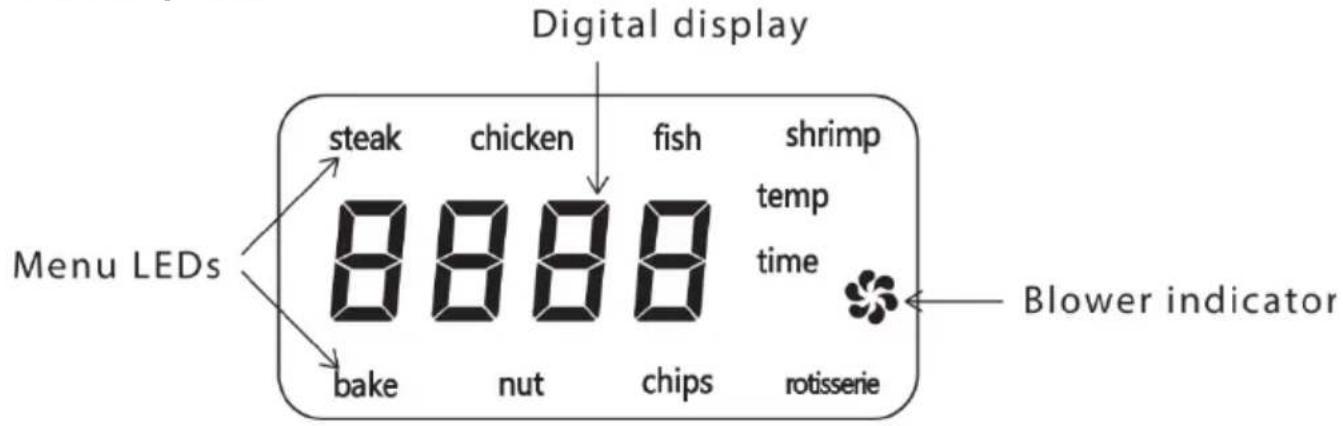
When you press the menu button to select the menu, the corresponding menu icon lights up and the display shows the default working time for the menu.
DIY function: the display will flash the default time (00:30).
Press the Time button, and set the time with the + and - keys (1-99 minutes)
Press the Temperature button and set the time with the + and - keys (80° to 200°)
Select baking method
If using skewer, you can use the Rotate button: the rotate indicator will illuminate.
Other options do not require this.
Power selection
You can use the Power button to select different power levels for heating.
Palate selection
This button changes the taste of produced food.
Begin cooking
Press the Start / Pause button: display will alternate between time and temperature.
You can press Start / Pause again to interrupt cooking function.
Cooking completed
The display will show "----" and beep 5 times.
Keep warm/cancel function
Press during standby state, press to keep warm.
Press during setting to cancel a programme.
Removing food
Open the lid as described in the Overview section of this manual.
Once food is safely cooled, remove along with the grill.
When finished
Press the Power button while in standby to power to power down completely.
Unplug the power cord.
Thawing function
If food needs thawing, you can press the Thaw key while in standby state.
The indicator light will illuminate: default settings are 10 minutes and 70°.
These can be changed; if not, after three seconds the programme will commence.
Delayed cooking
The indicator will flash and display "04:00" (4 hours) by default and can be adjusted in increments of 1 hour (from 1 to 24). Set desired programme and press Start / Pause to begin timer.
CLEANING & CARE
Cleaning
Always allow the appliance to cool completely before cleaning.
Never immerse the lid into liquid.
Always unplug the power cord before cleaning.
It is imperative that the appliance be washed thoroughly after each use.
Do not use any abrasive materials for cleaning.
Cleaning steps:
- Disconnect the power cord and allow the appliance to cool completely before cleaning.
- Wipe the lid clean using a damp cloth rinsed in warm soapy water.
- Wash the bowl and any other accessories in warm soapy water.
Storage
Ensure all parts are thoroughly cleaned and dried before storage.
It is recommended to put the appliance back in the original box and store in a dry and clean area.
NOTES
NOTES
Need more information?
We hope that this user guide has given you the assistance needed for a simple set-up.
For the most up-to-date guide for your product, as well as any additional assistance you may require, head online to help.kogan.com
kogan.com
- 10L DIGITAL MULTIFUNCTION AIR FRYER
- SAFETY & WARNINGS
- OVERVIEW
- Accessories:
- OPERATION
- Quick cooking guide
- Opening lid
- Closing lid
- Placing inner pot
- Using baking tools
- Making skewers:
- Baking French fries, chicken wings, nuts, etc.:
- Making roast chicken with baking fork:
- Making roast chicken with baking tray and grill:
- General operation
- Preheat function (optional)
- Menu selection / DIY
- Select baking method
- Power selection
- Palate selection
- Begin cooking
- Cooking completed
- Keep warm/cancel function
- Removing food
- When finished
- Thawing function
- Delayed cooking
- CLEANING & CARE
- Cleaning
- Cleaning steps:
- Storage
- NOTES
- Need more information?
Brand : Kogan
Model : KA10DMFAFRA
Category : Deep fryer