KA12LDGFRYC - Deep fryer Kogan - Free user manual and instructions
Find the device manual for free KA12LDGFRYC Kogan in PDF.


| Product Type | Deep Fryer |
| Brand | Kogan |
| Model | KA12LDGFRYC |
| Oil Capacity | 2.5 L |
| Dimensions (W x D x H) | 30 x 25 x 25 cm |
| Weight | 3.2 kg |
| Power Supply | 220-240 V, 50/60 Hz, 1800 W |
| Temperature Control | Adjustable thermostat (150-190 °C) |
| Indicator Lights | Power and ready lights |
| Basket Material | Stainless steel with cool-touch handle |
| Non-Stick Coating | Yes, on inner pot |
| Viewing Window | Yes, with steam vent |
| Safety Features | Auto shut-off, overheat protection, cool-touch exterior |
| Cleaning | Removable oil tank and basket are dishwasher safe |
| Maintenance | Wipe exterior with damp cloth; change oil regularly |
| Spare Parts Available | Replacement basket, heating element, thermostat |
| Repairability | Modular design allows part replacement |
| Accessories Included | Frying basket, lid, instruction manual |
Frequently Asked Questions - KA12LDGFRYC Kogan
User questions about KA12LDGFRYC Kogan
0 question about this device. Answer the ones you know or ask your own.
Ask a new question about this device
Download the instructions for your Deep fryer in PDF format for free! Find your manual KA12LDGFRYC - Kogan and take your electronic device back in hand. On this page are published all the documents necessary for the use of your device. KA12LDGFRYC by Kogan.
USER MANUAL KA12LDGFRYC Kogan
natural_image
Exterior view of a modern air fryer with digital display and cut-out of meat (no text or symbols visible)12L XXXL DIGITAL AIR FRYER OVEN
KA12LDGFRYC
Safety & Warnings 3
Components 6
Overview 8
Before First Use 10
Operation 11
Cleaning & Care 16
Troubleshooting 17
FAQ 18
Specifications 19
SAFETY & WARNINGS
Handle this product with care and inspect it regularly to ensure it is in good working order.
If the product, power supply cord or plug shows any signs of damage: stop use, unplug and contact help.Kogan.com for support.
When using an electrical appliance, basic safety precautions should always be followed, including the following:
- Read and retain all instructions for future reference.
- Be sure to use on a heat resistant and even surface, such as a heatproof mat. Do not place directly on a benchtop. Keep the appliance at least 20cm away from the wall, furniture, or other flammables.
- Unplug from the power outlet when not in use and before cleaning. Allow cooling before cleaning or handling, putting on or taking off parts.
- Do not touch hot surfaces. Use handles or knobs.
- To protect against electrical shock, do not place any part of the Air Fryer Oven in water or other liquids. See instructions for cleaning.
- This appliance should not be used by or near children or individuals with certain disabilities.
- Do not operate any appliance with a damaged cord or plug or after the appliance has malfunctioned, has been dropped or damaged in any way, or is not operating properly. Contact help.Kogan.com for examination, repair, or adjustment.
- The use of accessory attachments not recommended by Kogan.com may cause injury.
- Do not use outdoors.
- Do not let the cord hang over the edge of tables or countertops or come into contact with hot surfaces.
- Do not place the appliance on or near a hot gas or electric burner, or in a heated oven.
- Do not use this appliance for anything other than its intended purpose.
- Extreme caution should be exercised when using containers constructed of materials other than metal or glass in the oven.
- To avoid burns, use extreme caution when removing appliance accessories or disposing of hot grease.
- When not in use, always unplug the unit. Do not store any materials other than oven proof accessories recommended by Kogan.com in this appliance.
- Do not place paper, cardboard, plastic, or similar materials inside the appliance.
- Oversize foods and utensils must not be inserted into the appliance, as they may present a risk of fire or electric shock.
- A fire may occur if the appliance is covered, or touching flammable materials such as curtains, draperies, or walls when in operation. Do not store any items on top of the appliance when in operation. Do not operate the appliance under wall cabinets.
- Do not clean with metal scouring pads. Pieces can break off the pad and touch electrical parts, presenting a risk of electric shock.
- Do not attempt to dislodge food when the appliance is plugged into an electrical outlet.
WARNING: To avoid the possibility of fire, NEVER leave the appliance unattended during use.
- Use the recommended temperature settings for all cooking/baking, roasting and air frying.
- Do not rest cooking utensils or baking dishes on the glass door.
- Turn the time and temperature dials to the off position to turn off the appliance.
- Do not operate your appliance in a cupboard or under a wall cabinet. When storing in a cupboard, always unplug the unit from the electrical outlet. Not doing so could create a risk of fire, especially if the appliance touches the walls of the cupboard or the door touches the unit as it closes.
- Extreme caution must be used when moving an appliance containing hot oil or other hot liquids.
- To disconnect from power, turn both the time and temperature dials to “off”, then remove the plug from the wall outlet.
- Fire may occur if the appliance is covered or touching flammable material, including curtains, draperies, walls etc, when in operation. Do not store any item on top of the appliance when in operation.
- A short power-supply cord is provided to reduce the risks resulting from becoming entangled in or tripping over a longer cord.
- Extension cords are available and may be used if care is exercised in their use. If an extension cord is used, the marked electrical rating of the extension cord must be at least as great as the electrical rating of the appliance and the longer cord should be arranged so that it will not drape over edges.
- For household use only, not intended for commercial use.
- Do not cover the air intake vents while the unit is operating.
- Do not cover the air outlet vents while the unit is operating.
- During the cooking process, the fry basket and other accessories will become very hot. When you remove it to check on the progress, make sure you have a trivet or a heat-resistant surface nearby to set it down on. Never place the fry basket directly on a countertop or table.
- Cooking accessories will get hot during the air frying process. Wear oven mitts and handle with care to avoid injury.
Important
- Before first use and after subsequent use, hand wash the Round Basket and other cooking accessories. Then, wipe the outside and inside of the Unit with a warm moist cloth and mild detergent. Finally, preheat the Unit for a few minutes to burn off any residue.
- The cook-top may smoke the first time it is used. It is not defective and the smoke will burn off within a few minutes.
Overheating Protection
Should the inner temperature control system fail, the overheating protection system will be activated and the unit will not function. Should this happen, unplug the power cord. Allow time for the unit to cool completely before repair or storing.
Automatic Shut-Off
The appliance has a built-in shut-off feature, that will automatically shut down the unit when the Timer LED reaches zero. You can manually switch off the appliance by selecting the power button. The fan will continue running for about 20 secs. To cool down the unit.
Electric Power
If the electrical circuit is overloaded with other appliances, your new unit may not operate properly. It should be operated on a dedicated electrical circuit.
Electromagnetic Fields
This appliance complies with all standards regarding electromagnetic fields. If handled properly and according to the instructions in this user guide, the appliance is safe to use based on scientific evidence available today.
COMPONENTS
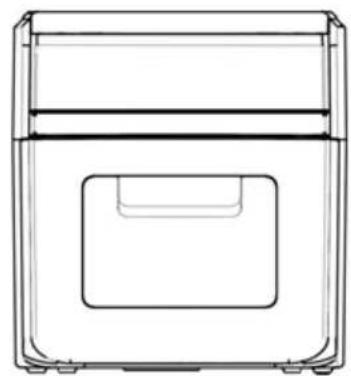
natural_image
Line drawing of a rectangular electronic device casing with a recessed top and bottom (no text or symbols)Air fryer
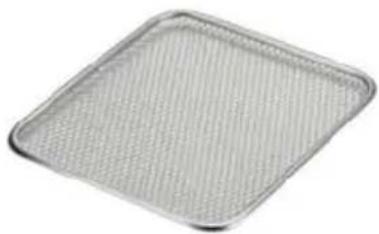
natural_image
Square metal baking tray with a textured surface and mesh border (no text or symbols)Baking tray
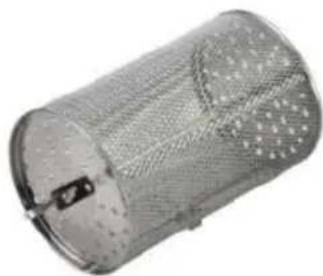
natural_image
Metallic cylindrical device with mesh pattern and a small black connector at the bottom (no visible text or symbols)Rolling cage
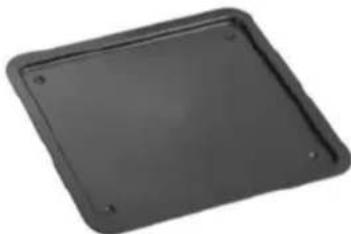
natural_image
Black rectangular object with rounded edges and small holes, resembling a tray or cover (no text or symbols visible)Drip tray
natural_image
Simple line drawing of a horizontal rod with two side supports (no text or symbols)Rotisserie spit assembly
natural_image
Simple line drawing of a zigzag shape with no text or symbolsSpit removal tool
1. Air Fryer / Control Panel
Allows you to control the functions of the unit.
2. Baking Tray
Can be used not only for dehydration but also to cook crispy snacks or reheat items like pizza.
3. Round Basket
Great for fries, roasted nuts and other snacks. Use spit removal tool to place basket into unit.
4. Drip Tray
Keep in place for easy clean-up.
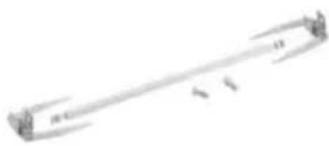
5. Rotisserie Spit Assembly
Used for roasts and whole chicken. Force shaft lengthwise through meat and centre. Slide forks onto shaft from either end into meat, then lock in place with set screws.
There are indentations on the shaft for the set screws. You can adjust the screws closer to the middle if needed but never outward towards the ends.
Note:
Ensure roast or chicken is not too large to rotate freely within the oven. Chicken 2kgs roast: up to 2.5-3kgs (depending on the diameter of the meat. Up to 15cm diameter).
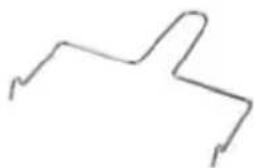
6. Spit Removal Tool
Use to remove cooked roasts and chicken that have been prepared using the rotisserie or skewer methods. Place under rotisserie spit and lift then gently extract the food.
WARNING: Forks, skewers and other metal parts with this unit are sharp and will get extremely hot during use.
Great care should be taken to avoid personal injury. Wear protective oven mitts or gloves.
OVERVIEW
Control Panel
flowchart
graph TD
    A["18"] --> B["★"]
    B --> C["+"]
    C --> D["13"]
    D --> E["2"]
    E --> F["9"]
    F --> G["14"]
    G --> H["1"]
    H --> I["15"]
    I --> J["10"]
    J --> K["3"]
    K --> L["6"]
    L --> M["11"]
    M --> N["4"]
    N --> O["17"]
    O --> P["12"]
    P --> Q["6"]
    Q --> R["7"]
    R --> S["min"]
    S --> T["°C"]
    T --> U["+"]
    U --> V["12"]
    V --> W["17"]
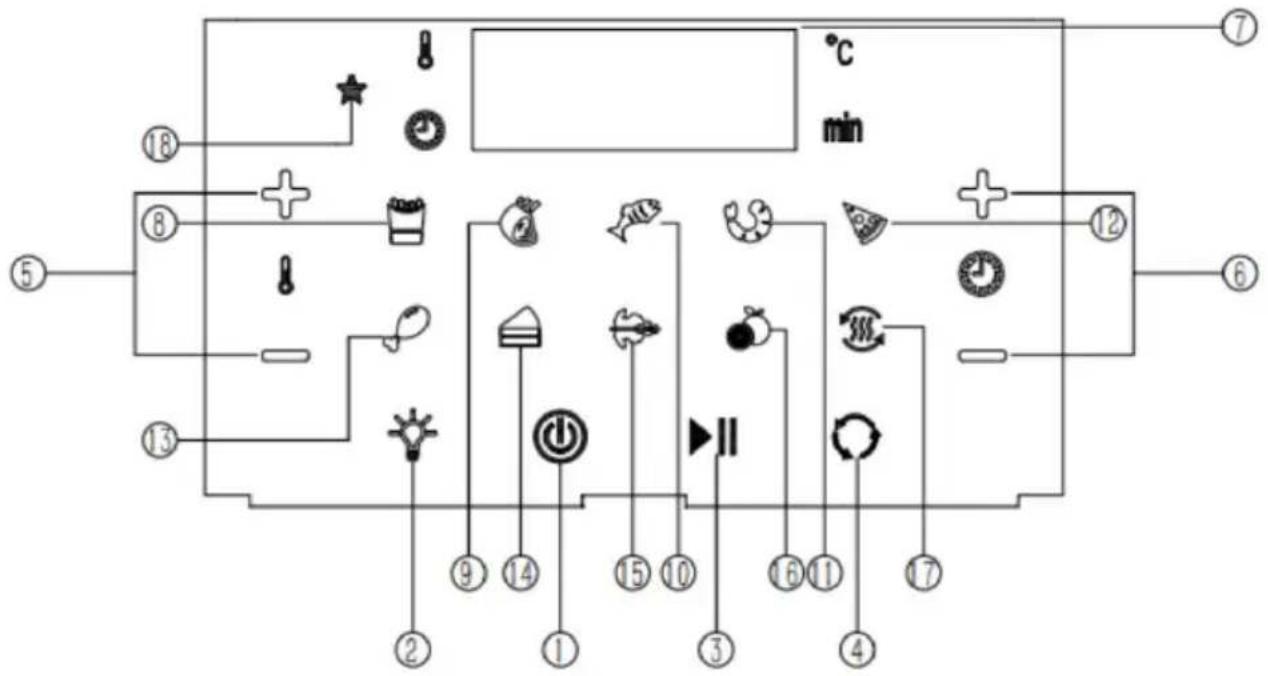
1. Power/Stop Button
Once the unit is plugged in, the power button will light up. Press the power button once will cause the full panel to be illuminated.
Pressing the power button at any time during the cooking process will shut down the unit, causing the display to turn off immediately the running light to go dark within 20 seconds. The fan will continue running for 20 seconds to cool down the unit.
2. Internal Light
Press this button to check on the cooking progress while unit is in operation.
Note:
Opening the door during the cooking process will pause the unit. Internal light will illuminate if the door is opened.
3. Start Button
After selecting a preset program, press this button to commence cooking.
4. Rotation Button
Select this function when cooking anything using the rotisserie spit. This function can be used with any of the presets. The icon will blink during operation.
5. Temperature Control Buttons
These buttons enable you to raise or lower cooking temperature in 5°C increments ranging from 80-200°C.
6. Time Control Buttons
These buttons enable you to select exact cooking time to the minute, from 1-90 mins. in all modes except when dehydrating, which uses 30-min. intervals and an operating time of 2-24 hrs.
7. LED Digital Display
The display will switch between temperature and time Remaining during the cooking process.
8-17. Cooking Presets
Selecting any preset button sets the time and temperature to the preset's default values. The cooking process automatically starts 5 seconds after the preset has been selected or the power button can be pressed after the preset button to start immediately. Note: You may override these presets with time and temperature buttons.
18. Fan icon
This icon will blink during cooking and continue blinking up to 20 seconds once the unit has been shut down.
BEFORE FIRST USE
- Read this user guide material along with all warning stickers and labels.
- Remove all packing materials, labels and stickers.
- Wash all parts and accessories used in the cooking process with warm soapy water.
Note:
Only the accessories are dishwasher safe.
- Wipe the inside and outside of the cooking unit with a clean, moist cloth.
Notes:
- Never wash or submerge the unit in water.
- When using this unit, never fill any cooking vessel with oil or liquid of any kind. This unit cooks with hot air only.
Preparing for Use
Place the appliance on a stable, level, horizontal and heat-resistant surface.
Note:
Before initial use and after subsequent use, hand wash the fry basket and other cooking accessories. Then, wipe the outside and inside of the Unit with a warm moist cloth and mild detergent. Finally, preheat the unit for a few minutes to burn off any residue.
OPERATION
Placing Drip Tray into Unit
- Insert drip tray into the bottom of the unit.
- Using the drip tray in place will make for an easy clean-up.
Placing Baking Trays into unit
- Place the baking trays into the side grooves of the unit.
- Place baking trays closer to the top heating element for faster cooking and added crisp.
Note: Use oven mitts when oven is hot.
Removing Rolling Cage & Rotisserie Spit from Unit
- Open the door of the unit to pause cooking cycle or turn unit off by pressing the power button.
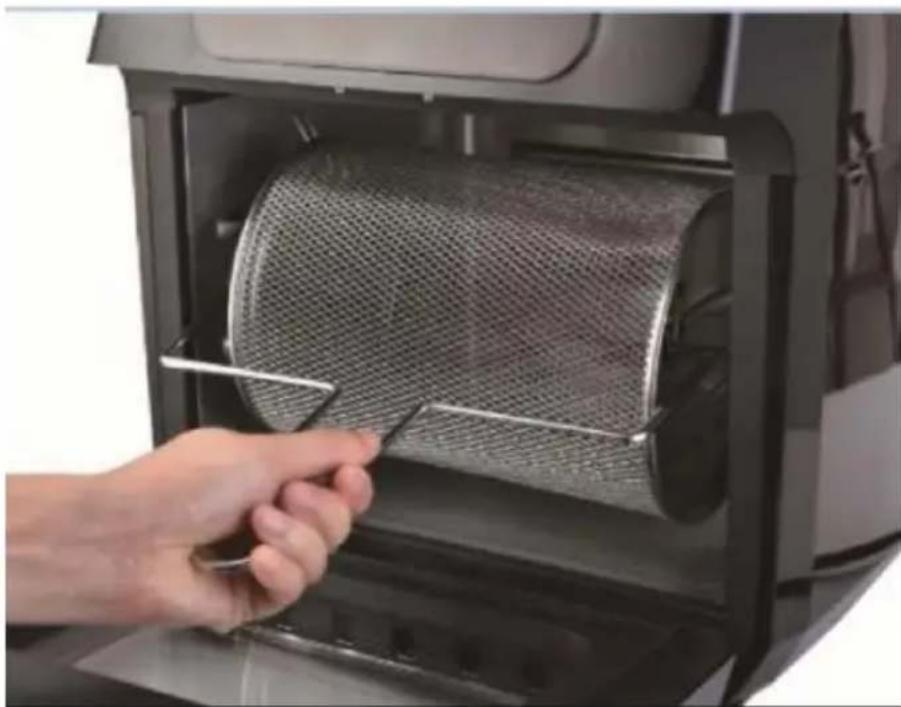
- Insert spit removal tool beneath the rotisserie shaft.
- Lift the right side of the spit removal tool at a slight angle to clear the bracket, then shift to the right until the left side of the shaft slides out of the rotisserie shaft socket.
- Carefully remove the rolling cage or rotisserie spit from the unit.
natural_image
Hand inserting a mesh filter into an air fryer oven (no text or symbols visible)Cooking Presets
Cooking time for whole roasted chicken will vary with weight. Use a meat thermometer to check internal temperature as per chart below.
| Preset Button | Temperature | Time |
| 8. French Fry | 200°C | 15 mins |
| 9. Steaks/Chops | 175°C | 25 mins |
| 10. Fish | 165°C | 15 mins |
| 11. Shrimp | 160°C | 12 mins |
| 12. Pizza | 180°C | 15 mins |
| 13. Chicken | 185°C | 40 mins |
| 14. Baking | 160°C | 30 mins |
| 15. Rotisserie | 190°C | 30 mins |
| 16. Dehydrator | 30°C | 2 hours |
| 17. Reheat | 115°C | 12 mins |
Internal Temperature Meat Chart
This chart should be used to check the internal temperature of cooked meats.
| Food | Type | Internal Temperature |
| Beef & Veal | Ground | 70°C |
| Steaks, Roasts: Medium | 70°C | |
| Steaks, Roasts: Rare | 63°C | |
| Breasts | 75°C | |
| Chicken & Turkey | Ground, stuffed | 75°C |
| Whole bird, legs, thighs, wings | 75°C | |
| Fish & Shellfish | Any type | 63°C |
| Ground | 70°C | |
| Lamb | Steaks, Roasts: Medium | 70°C |
| Steaks, Roasts: Rare | 63°C | |
| Pork | Chops, ground, ribs, roasts | 70°C |
| Fully cooked ham | 60°C |
Manual Cooking
Once you are familiar with your air fry oven, you may want to experiment with your own cooking times and temperatures.
WARNING: Never use a cooking vessel filled with cooking oil or any other liquid with this unit! Fire hazard or personal injury could result.
- Place the ingredients on a baking tray, on one of the rotisserie accessories or in the fry basket.
- Place the tray, fry basket or rotisserie spit into the unit and shut the oven door. Plug the power cord into an electrical outlet.
- Once the food is in place, press the power button once.
- Set the temperature and then the time.
- The unit will automatically start the cooking cycle a few seconds after a function is selected. Alternatively, you can press the power button to begin the cooking process immediately.
Notes:
You may open the oven door to view the rotisserie at any time during the process to check the progress.
Tips:
- Foods that are smaller in size usually require a slightly shorter cooking time than larger ones.
- Large quantities of food only require a slightly longer cooking time than smaller quantities.
- Flipping or turning smaller sized foods halfway through the cooking process ensures that all the pieces are evenly cooked.
- Misting a bit of vegetable oil on fresh potatoes is suggested for a crispier result. When adding a little oil, do so just before cooking.
- Snacks normally cooked in an oven can also be cooked in this air fryer.
- Place a baking tin or oven dish in the air fryer when baking a cake or quiche. A tin or dish is also suggested when cooking fragile or filled foods.
Cooking Chart
The table below will help you select the correct temperature and time for best results. As you become more familiar with the air fryer cooking process, you may adjust these settings to suit your own personal tastes.
| Food Item | Min-Max | Time | Temperature | Comments |
| Thin Frozen Fries | 11/4-3 cups | 15-16 mins | 200°C | |
| Thick Frozen Fries | 11/4-3 cups | 15-20 mins | 200°C | |
| Homemade Fries | 11/4-3 1/4cups | 10-16 mins | 200°C | Add 1/2 tbsp. oil |
| Homemade Potato Wedges | 11/4-3 1/4cups | 18-22mins | 182°C | Add 1/2 tbsp. oil |
| Homemade Potato Cubes | 11/4-3 cups | 12-18mins | 182°C | Add 1/2 tbsp. oil |
| Hash Browns | 1 cup | 15-18mins | 182°C | |
| Potato Gratin | 2 cups | 15-18mins | 200°C | |
| Steak | 1/4-1.1lb | 8-12 mins | 182°C | |
| Pork Chops | 1/4-1.1lb | 10-14mins | 182°C | |
| Hamburger | 1/4-1.1lb | 7-14 mins | 182°C | |
| Sausage Roll | 1/4-1.1lb | 13-15mins | 200°C | |
| Chicken Drumsticks | 1/4-1.1lb | 18-22 mins | 182°C | |
| Chicken Breast | 1/4-1.1lb | 10-15mins | 182°C | |
| Spring Rolls | 1/4-3/4 lb | 15-20mins | 200°C | Use oven-ready |
| Frozen Chicken Nuggets | 1/4-1.1lb | 10-15mins | 200°C | Use oven-ready |
| Frozen Fish Sticks | 1/4-1.1lb | 6-10 mins | 200°C | Use oven-ready |
| Mozzarella Sticks | 1/4-1.1lb | 8-10 mins | 182°C | Use oven-ready |
| Stuffed Vegetables | 1/4-1.1lb | 10 mins | 160°C | |
| Cake | 11/4 cups | 20-25 mins | 160°C | Use baking tin |
| Quiche | 11/2 cups | 20-22 mins | 182°C | Use baking tin/oven dish |
| Muffins | 11/4cups | 15-18 mins | 200°C | Using baking tin |
| Sweet Snacks | 11/2cups | 20mins | 160°C | Use baking tin/oven dish |
| Frozen Onion Rings | 1lb | 15 mins | 200°C |
Note:
These settings are intended to be guidelines, because ingredients differ in origin, size, shape and brand, it cannot guarantee the best settings for your ingredients.
Tip:
- Set the timer to half the time needed for the recipe and the timer will alert you when it's time to flip your food.
- Add 3 minutes to cooking time when starting with a cold appliance.
CLEANING & CARE
Cleaning
- Clean the air fryer after each use.
- The fry basket and other accessories are made of durable stainless steel and are dishwasher safe.
- Never use abrasive cleaning materials or utensils on these surfaces.
- Caked-on food should be soaked for easy removal in warm, soapy water.
Remove the power cord from the outlet and be certain the appliance is thoroughly cooled before cleaning.
- Wipe the outside of the appliance with a warm, moist cloth and mild detergent.
- To clean glass, open the door of the Unit.
- Clean the inside of the appliance with hot water, a mild detergent and a non-abrasive sponge.
- If necessary, remove unwanted food residue from the upper screen with a cleaning brush.
Storages
- Unplug the appliance and let it cool thoroughly.
- Make sure all components are clean and dry.
- Place the appliance in the clean, dry place.
Disposal
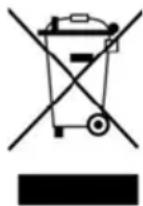
This marking indicates that this appliance should not be disposed with other household wastes. To prevent possible harm to the environment or human health from uncontrolled waste disposal, recycle it responsibly to promote the sustainable reuse of material resources.
TROUBLESHOOTING
| Problem | Possible Cause | Solution |
| Air fryer will not start cooking | 1. The appliance is not plugged in.2. You have not turned the Unit on by setting the preparation time temperature. | 1. Plug power cord into wall socket.2. Set the temperature and time check that door is closed. |
| Food not cooked | 1. The fry basket ls overloaded.2. The temperature ls set too low. | 1. Use smaller batches for more even frying.2. Raise temperature and continue cooking. |
| Food is not fried evenly | Some foods need to be turned during the cooking process. | See ‘Operation’ section in this user guide. |
| White smoke coming from unit | 1. Oil is being used.2. Accessories have excess grease residue from previous cooking. | 1. Wipe down to remove excess oil.2. Clean the fry basket after each use. |
| French fries are not fried evenly | 1. Wrong type of potato being used.2. Potatoes not blanched properly during preparation. | 1. Use fresh. firm potatoes.2. Pat dry to remove excess starch. |
| Fries are not crispy | Raw fries have too much water. | Dry potato sticks properly before misting oil. Cut sticks smaller. Add a bit more oil. Blanch cut potatoes. |
| Display shown | Possible cause | Solution |
| E1 | Broken circuit of the thermal sensor | Contact help.Kogan.com for support. |
| E2 | Short circuit the thermal sensor | Contact help.Kogan.com for support. |
FAQ
- Can I prepare foods other than fried dishes with my air fryer?
You can prepare a variety of dishes, including steaks, chops, burgers and baked goods.
- Is the air fryer good for making or reheating soups and sauces?
Never cook or reheat liquids in the air fryer.
- What do I do if the unit shuts down?
As a safety feature, the air fryer has an Auto Shut-Off feature that prevents damage from overheating. Unplug and allow the unit to cool down. Plug back in and restart with the power button.
- Does the unit need time to heat up?
Preheating is needed when you are cooking from a cold start, add 3 mins. to the cook time to compensate.
- How do to shut off the unit during operation?
Press the power button once or open the door.
- Can I check the food during the cooking process?
You can remove the fry basket at any time while during cooking. During this time, you can flip the contents on the baking trays if needed to ensure even cooking. Time and temperature will resume where you left off.
- Is the air fryer dishwasher safe?
Only the accessories are dishwasher safe. The unit itself containing the heating coil and electronics should never be submersed in liquid of any kind or cleaned with anything more than a hot, moist cloth or nonabrasive sponge with a small amount of mild detergent.
- What happens if the unit still does not work after I have tried all the troubleshooting suggestions?
Never attempt a home repair. Contact help.Kogan.com for support.
SPECIFICATIONS
Supply power 220-240V 50/60Hz
Rated Power 1800W
Capacity 12L
Temperature 80\~200°C
Display LED Touch Screen
Need more information?
We hope that this user guide has given you the assistance needed for a simple set-up.
For the most up-to-date guide for your product, as well as any additional assistance you may require, head online to help.kogan.com
kogan.com
- 12L XXXL DIGITAL AIR FRYER OVEN
- SAFETY & WARNINGS
- WARNING: To avoid the possibility of fire, NEVER leave the appliance unattended during use.
- Important
- Overheating Protection
- Automatic Shut-Off
- Electric Power
- Electromagnetic Fields
- COMPONENTS
- Air Fryer / Control Panel
- Baking Tray
- Round Basket
- Drip Tray
- Rotisserie Spit Assembly
- Note:
- Spit Removal Tool
- OVERVIEW
- Control Panel
- Power/Stop Button
- Internal Light
- Start Button
- Rotation Button
- Temperature Control Buttons
- Time Control Buttons
- LED Digital Display
- 8-17. Cooking Presets
- Fan icon
- BEFORE FIRST USE
- Notes:
- Preparing for Use
- OPERATION
- Placing Drip Tray into Unit
- Placing Baking Trays into unit
- Removing Rolling Cage & Rotisserie Spit from Unit
- Cooking Presets
- Internal Temperature Meat Chart
- Manual Cooking
- WARNING: Never use a cooking vessel filled with cooking oil or any other liquid with this unit! Fire hazard or personal injury could result.
- Tips:
- Cooking Chart
- Tip:
- CLEANING & CARE
- Cleaning
- Storages
- Disposal
- TROUBLESHOOTING
- FAQ
- SPECIFICATIONS
- Need more information?
Brand : Kogan
Model : KA12LDGFRYC
Category : Deep fryer