
LX-K7960A - Karaoke LG - Free user manual and instructions
Find the device manual for free LX-K7960A LG in PDF.


| Product Type | Karaoke System with DVD, CD, Radio, Tape, USB |
| Brand | LG |
| Model | LX-K7960A |
| Dimensions (W x H x D) | 190 x 352 x 295 mm (main unit) |
| Weight (Main Unit) | 5.9 kg |
| Power Consumption | 90 W |
| Power Supply | Refer to main label (AC) |
| Output Power (Front L/R) | 100 W + 100 W (4 Ω, THD 10 %) |
| Output Power (Center) | 50 W (8 Ω, THD 10 %) |
| Output Power (Rear L/R) | 50 W + 50 W (8 Ω, THD 10 %) |
| Output Power (Subwoofer) | 150 W (3 Ω, THD 10 %) |
| Disc Playback | DVD, Video CD, Audio CD, MP3/WMA, JPEG, DivX |
| Radio Tuner | FM (87.5-108 MHz) / AM (522-1620 kHz) |
| Karaoke Features | Mic volume, Echo, Key Control, Tempo, Vocal Cancel, Score, Challenge Mode |
| Audio Connections | AUX In (analog), Optical In, Headphone (3.5mm), Mic jacks (2) |
| Video Connections | Composite Video, S-Video, Component Video (Y Pb Pr) with Progressive Scan |
| USB Port | Front USB for MP3/WMA/JPEG/DivX playback |
| Speaker System | 5.1 channel (Front L/R, Center, Rear L/R, Active Subwoofer) |
| Speaker Impedance | Front 4Ω, Center 8Ω, Rear 8Ω, Subwoofer 3Ω |
| Special Audio Modes | EQ (Normal, POP, Classic, Jazz, etc.), XDSS, XTS Pro, Virtual Sound |
| Remote Control | Included (batteries: 2 x AAA) |
Frequently Asked Questions - LX-K7960A LG
User questions about LX-K7960A LG
0 question about this device. Answer the ones you know or ask your own.
Ask a new question about this device
Download the instructions for your Karaoke in PDF format for free! Find your manual LX-K7960A - LG and take your electronic device back in hand. On this page are published all the documents necessary for the use of your device. LX-K7960A by LG.
USER MANUAL LX-K7960A LG
Please read this manual carefully before operating your set. Retain it for future reference.
Designs and specifications are subject to change without notice for improvement.










Safety Precautions

CAUTION
RISK OF ELECTRIC SHOCK DO NOT OPEN

WARNING: TO REDUCE THE RISK OF ELECTRIC SHOCK
DO NOT REMOVE COVER (OR BACK) NO USER-SERVICEABLE PARTS INSIDE REFER SERVICING TO QUALIFIED SERVICE PERSONNEL.

This lightning flash with arrowhead symbol within an equilateral triangle is intended to alert the user to the presence of uninsulated dangerous voltage within the product's enclosure that may be of sufficient magnitude to constitute a risk of electric shock to persons.

The exclamation point within an equilateral triangle is intended to alert the user to the presence of important operating and maintenance (servicing) instructions in the literature accompanying the appliance.
WARNING: TO REDUCE THE RISK OF FIRE OR ELECTRIC SHOCK, DO NOT EXPOSE THIS PRODUCT TO RAIN OR MOISTURE.
CAUTION: Do not block any ventilation openings. Install in accordance with the manufacturer's instructions.
Slots and openings in the cabinet are provided for ventilation and to ensure reliable operation of the product and to protect it from over heating.
The openings should be never be blocked by placing the product on a bed, sofa, rug or other similar surface. This product should not be placed in a built-in installation such as a bookcase or rack unless proper ventilation is provided or the manufacturer's instruction have been adhered to.
CLASS 1 LASER PRODUCT
CLASS 1 LASER PRODUCT
CLASS 1 LASER PRODUCT
CLASS 1 LASER APPARATUS
CLASS 1 LASER PRODUCT
CAUTION:
This product employs a laser system.
To ensure proper use of this product, please read this owner's manual carefully and retain it for future reference. Should the unit require maintenance, contact an authorized service location—see service procedure.
Use of controls, adjustments, or performance of procedures other than those specified herein may result in hazardous radiation exposure.
To prevent direct exposure to the laser beam, do not try to open the enclosure. Visible laser radiation when open. DO NOT STARE INTO BEAM.
CAUTION: The apparatus shall not be exposed to water, dripping, or splashing, and no objects filled with liquids, such as vases, shall be placed on the apparatus.
CAUTION:
VISIBLE AND INVISIBLE LASER RADIATION WHEN OPEN AND INTERLOCKS DEFEATED
CAUTION concerning the Power Cord
Most appliances recommend they be placed upon a dedicated circuit;
That is, a single outlet circuit which powers only that appliance and has no additional outlets or branch circuits. Check the specification page of this owner's manual to be certain.
Do not overload wall outlets. Overloaded wall outlets, loose or damaged wall outlets, extension cords, frayed power cords, or damaged or cracked wire insulation are dangerous. Any of these conditions could result in electric shock or fire.
Periodically examine the cord of your appliance, and if its appearance indicates damage or deterioration, unplug it, discontinue use of the appliance, and have the cord replaced with an exact replacement part by an authorized servicer.
Protect the power cord from physical or mechanical abuse, such as being twisted, kinked, pinched, closed in a door, or walked upon. Pay particular attention to plugs, wall outlets, and the point where the cord exits the appliance.
Power Save Mode
You can set up the unit into an economic power save mode.
In power-on status, press and hold POWER (STANDBY/ON) button for about 3 seconds.
- Nothing is displayed in the display window when the unit is turned off.
To cancel, press POWER (STANDBY/ON), CLOCK, TIMER or DEMO.
Table of Contents
Introduction
Safety Precautions....2
Table of Contents. 3
Before Use 3
Front Panel/ Rear Panel. 4
Remote Control 5
Preparation
Connections 6-9
Before Operation 10-18
Operation
Operation with DVD and Video CD 18-21
Operation with Audio CD and MP3/WMA Disc 21-22
Programmed Playback 22
Operation with JPEG Disc 23
Operation with DivX Disc 24
Operation with RADIO 25-26
Operation with TAPE 27
Operation with KARAOKE 28-31
Reference
Troubleshooting 32
Language Code List 33
Area Code List 33
Specifications
About Symbols
About the 🔊 symbol display
“🔊” may appear on the TV screen during operation. This icon means the function explained in this owner's manual is not available on that specific DVD video disc.
About the disc symbols for instructions
A section whose title has one of the following symbols is applicable only to the disc represented by the symbol.
DVD DVD
VCD Video CDs
CD Audio CDs
MP3 MP3 disc
WMA WMA disc
JPEG JPEG disc
DivX DivX disc
About the symbols for instructions
Indicates hazards likely to cause harm to the unit itself or other material damage.
N Indicates special operating features of this unit.
Indicates tips and hints for making the task easier.
Before Use
Playable Discs

DVD (8 cm / 12 cm disc)

Video CD (VCD) (8 cm / 12 cm disc)

Audio CD (8 cm / 12 cm disc)
In addition, this unit can play a DVD±R, DVD±RW, SVCD, and CD-R or CD-RW that contains audio titles, MP3, WMA, JPEG or DivX files.

Notes
- Depending on the conditions of the recording equipment or the CD-R/RW (or DVD±R/RW) disc itself, some CD-R/RW (or DVD±R/RW) discs cannot be played on the unit.
- Do not attach any seal or label to either side (the labeled side or the recorded side) of a disc.
- Do not use irregularly shaped CDs (e.g., heart-shaped or octagonal). It may result in malfunctions.

Notes on DVDs and Video CDs
Some playback operations of DVDs and Video CDs may be intentionally fixed by software manufacturers. As this unit plays DVDs and Video CDs according to disc content designed by the software manufacturer, some playback features of the unit may not be available or other functions may be added.
Refer also to the instructions supplied with the DVDs and Video CDs. Some DVDs made for business purposes may not be played on the unit.
Regional code of the DVD player and DVDs
This DVD player is designed and manufactured for playback of region "2" encoded DVD software. The region code on the labels of some
DVD discs indicates which type of player can play those discs. This unit can play only DVD discs labeled "2" or "ALL". If you try to play any other discs, the message "Check Regional Code" will appear on the TV screen.
Some DVD discs may not have a region code label even though their playback is prohibited by area limits.


Note on DTS-encoded CDs
When playing DTS-encoded CDs, excessive audio level may be heard from the analog stereo output. To avoid possible damage to the audio system, turn down the volume before playing back such discs, adjust the volume gradually, and keep the volume level low. To enjoy DTS Digital Surround™ playback, an external 5.1 channel DTS Digital Surround™ decoder system must be connected to the digital output of the unit.
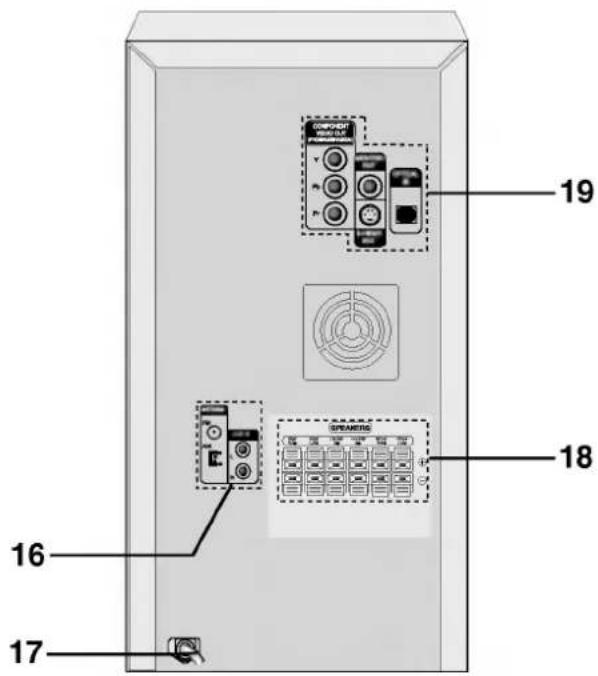
Front Panel/ Rear Panel
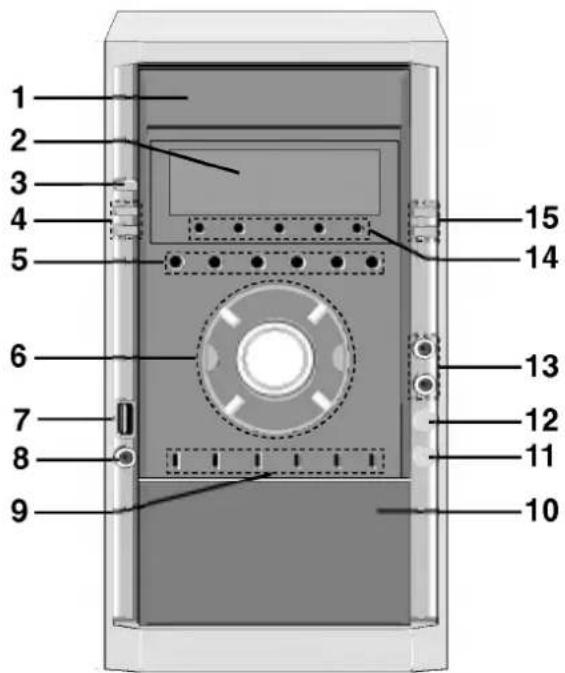
- DISC DOOR
- DISPLAY WINDOW
- POWER (STANDBY/ON) button
- • CLOCK button
- TIMER button
- • SET/CDII button, RDS button (OPTIONAL)
- PRESET (-/+) buttons • TAPE REVERSE PLAY (◀) button
- PLAY (▶) button
- STOP (■) button
- CD SKIP/SEARCH (I◄◄/►►I), TAPE REWIND/FAST FORWARD (I◄◄/►►I), TUNING (-/+) buttons
- FUNCTION SELECT buttons (TUNER, KARAOKE/DVD, TAPE, USB)
- XDSS plus button
- Virtual E.X button • VOLUME knob
- USB connector
- HEADPHONE SOCKET (PHONES) -∅3.5mm
- XTS Pro button
- EQ master button • CD SYNCHRO RECORDING (CD SYNC.) button • MONO/STEREO (MONO/ST.) button
- REC/PAUSE (●/II) button
- AUX button
- ▲ PUSH EJECT position
- WOOFER VOLUME KNOB (WOOFER VOL. -/+ )
- MIC VOLUME KNOB (MIC VOL. -/+)
- MIC JACKS (MIC1, MIC2) - 3.5mm: OPTIONAL
- DISC SELECT buttons (DISC 1, DISC 2, DISC 3, DISC 4, DISC 5)
- OPEN/CLOSE button
MODE/DEMO button
- FM/AM ANTENNA Connector
AUXILIARY INPUT (AUX IN) connector
- POWER CORD
- SPEAKER Connectors
- • COMPONENT VIDEO OUT (PROGRESSIVE SCAN) (Y Pb Pr) Connector
• MONITOR OUT Connector • S-VIDEO OUT Connector • OPTICAL IN Connector
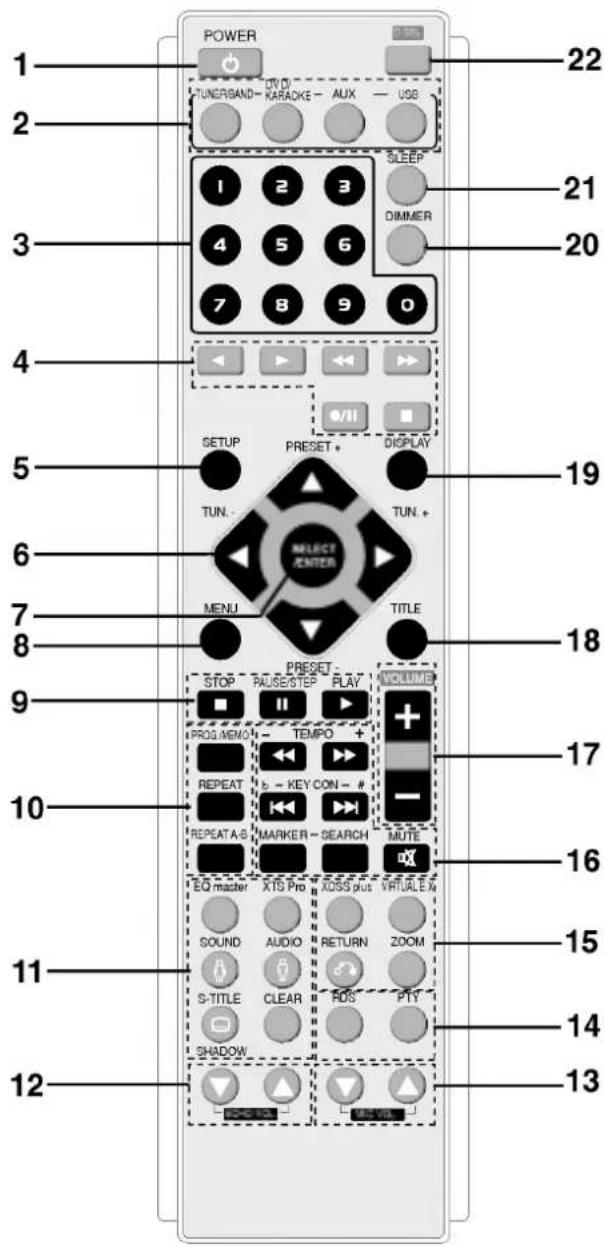
Remote Control
Remote Control Operation Range
Point the remote control at the remote sensor and press the buttons.
• Distance: About 23 ft (7 m) from the front of the remote sensor - Angle: About 30° in each direction of the front of the remote sensor
- POWER button
- FUNCTION SELECT buttons (TUNER/BAND, DVD/KARAOKE, AUX, USB)
- NUMERIC buttons (0-9)
- TAPE FUNCTION buttons
- REVERSE PLAY (◀)
- PLAY (▶)
- REWIND/ FAST FORWARD PLAY (◀◀/▶▶)
- RECORD/ RECORD PAUSE (●/II)
- TAPE STOP (■)
- SET UP button
- • ARROW buttons (▲ / ▼ / ◀ / ▶) (For use in highlighting a selection on a GUI menu screen, TITLE and MENU screen.)
- PRESET (-/+) buttons (▲ / ▼) • TUN. (-/+) buttons (◀ / ▶)
- SELECT/ENTER button
- MENU button (Use the MENU button to display the menu screen included on DVD video discs.)
- STOP (■), PAUSE(■)/ STEP, PLAY (▶) buttons
- PROG./MEMO., REPEAT, REPEAT A-B buttons
- EQ master, XTS Pro, SOUND/FEMALE( ), AUDIO/MALE( ), SUBTITLE (S-TITLE)/SHADOW, CLEAR buttons
- ECHO VOL. (☐/☐) buttons
- MIC VOL. (○/○) buttons
- RDS, PTY buttons (OPTIONAL)
- XDSS plus, VIRTUAL E.X, RETURN, ZOOM buttons
- SCAN (◀◀/▶▶)/ TEMPO (-/+)/ KEY CONTROL (b/#)/ SKIP (I◀◀/▶▶), MARKER, SEARCH, MUTE buttons
- VOLUME (-/+) buttons
- TITLE button (Use the TITLE button to display the title screen included on DVD video discs.)
- DISPLAY button
- DIMMER button
- SLEEP button
- DISC SELECT (D.SEL) button
Remote control battery installation
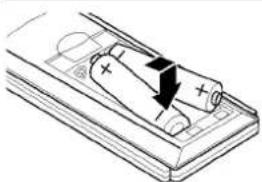
Detach the battery cover on the rear of the remote control, and insert two R03 (size AAA) batteries with + and - aligned correctly.

Do not mix old and new batteries. Never mix different types of batteries (standard, alkaline, etc.).
Connections
Connecting to a TV
• Make one of the following connections, depending on the capabilities of your existing equipment.
Tips
- Depending on your TV and other equipment you wish to connect, there are various ways you could connect the unit. Use one of the connections described below.
- Please refer to the manuals of your TV, VCR, Stereo System or other devices as necessary to make the best connections.

Caution
- Make sure the unit is connected directly to the TV. Select the correct AV input on your TV.
- Do not connect your unit to TV via your VCR. The DVD image could be distorted by the copy protection system.
Video connection
Connect the MONITOR OUT jack from the unit to the VIDEO IN jack on the TV using the video cable supplied (V).
S-Video connection
Connect the S-VIDEO OUT jack on the unit to the S-VIDEO IN jack on the TV using the S-Video cable (S).
Component Video (Color Stream®) connection
Connect the COMPONENT VIDEO OUT (PROGRESSIVE SCAN) jacks from the unit to the corresponding in jacks on the TV using an Y Pb Pr cable (C).
Progressive Scan (ColorStream® pro) connection
- If your television is a high-definition or "digital ready" television, you may take advantage of this unit's progressive scan output for higher video resolution.
- If your TV does not accept the Progressive Scan format, the picture will appear scrambled if you try Progressive Scan on the unit.
Connect the COMPONENT VIDEO OUT (PROGRESSIVE SCAN) jacks from the unit to the corresponding in jacks on the TV using an optional Y Pb Pr cable (C).

Notes
- Set the Progressive to "On" in the Setup menu for progressive signal, see page 15.
![graph TD A["COMPONENT VIDEO / PROGRESSIVE SCAN INPUT"] --> B["C"] A --> C["S"] A --> D["V"] B --> E["Component Video / PROGRESSIVE SCAN INPUT"] C --> E D --> E E --> F["T"] E --> G["Fs"] E --> H["Pr"] E --> I["S-VIDEO IN"] E --> J["VIDEO IN"]](/content/2026/05/928572/images/1c4cae2b787f1e98b6a59f6d383dde77bbb686601cb179cd988a143259c6549b.jpg)
Rear of TV
Connections
Connecting to Antenna
Connect the supplied FM/AM antennas for listening to the radio.
- Connect the AM loop antenna to the AM antenna connector.
- Connect the FM wire antenna to the FM antenna connector.
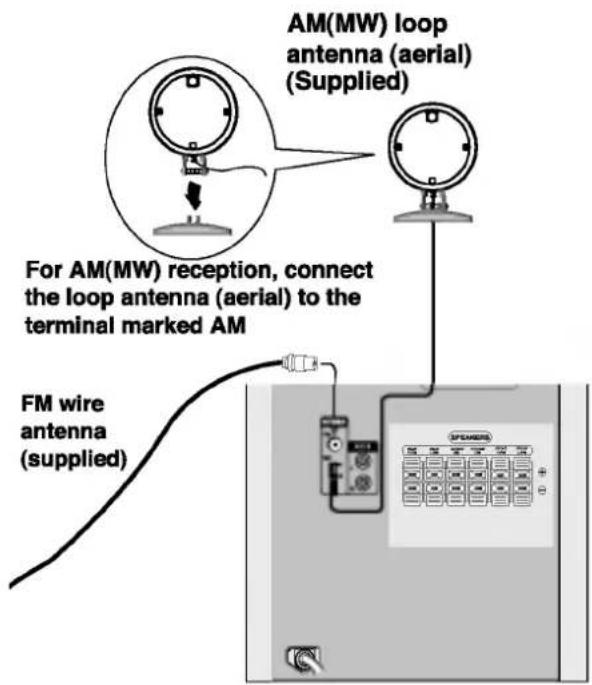

Notes
- To prevent noise pickup, keep the AM loop antenna away from the unit and other components.
- Be sure to fully extend the FM wire antenna. • After connecting the FM wire antenna, keep it as horizontal as possible.
Connecting to Auxiliary Equipment
You can use a VCR or other unit connected to the AUX connector.
This unit receives the analog signal from auxiliary equipment.
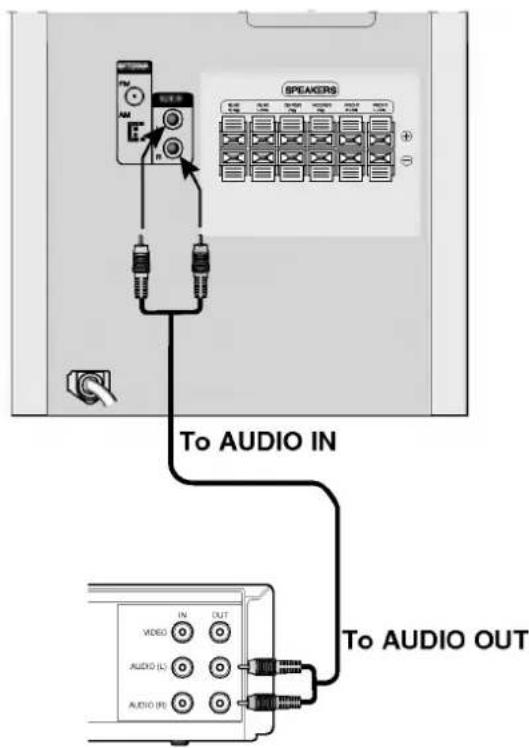
VCR (or Auxiliary Device, etc)
1 Connect a VCR or auxiliary device, etc to the AUX connector. 2 Press the AUX button on the front panel or the remote control until the "AUX" indicator is displayed in the display window.
Connections
Connecting to Optional Equipment
You can use an optical output of a Digital Device to the OPTICAL IN connector.
This unit receives the optical digital signal from optional equipment.
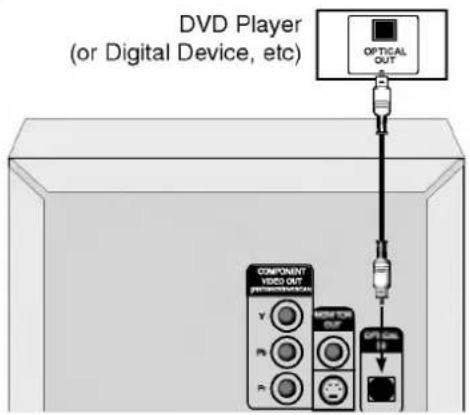
1 Connect an optical output of DVD Player (or Digital Device etc) to the OPTICAL IN connector. 2 Press the AUX button on the front panel or the remote control until the "OPT IN" indicator is displayed in the display window.
Connecting USB
USB Memory, MP3 Player (or Memory Card Reader, etc.)
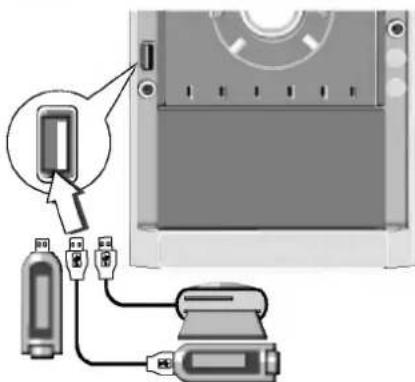
1 Connect the USB port of USB memory (or MP3 player, etc) to the USB connector on the front panel. 2 Select USB function by pressing the USB button on the front panel or the remote control. The "USB" is displayed in the display window.
To Remove the USB from the unit
- Choose a different function mode or press the STOP (■) twice in a row.
- Remove the USB from the unit.
Notes
- Do not extract the USB device while it is in use.
- Music files (MP3/WMA), image files (JPEG), and DivX files can be played. This unit cannot use a USB hub.
Recommended Memory Cards: CompactFlash Card (CFC), Micro Drive (MD), SmartMedia Card (SMC), Memory Stick (MS), Secure Digital Card (SD), MultiMedia Card (MMC), Memory Stick Pro (MS-Pro).
- Compatible with FAT16 and FAT32.
- Only use the memory cards recommended.
Devices that require additional program installation when connected to a computer are not supported.
In the case of a USB HDD, make sure to connect an auxiliary power cord to the USB HDD for proper operation. A primary partition of the drive is supported up to four. If there is an extension partition, it is not supported.
If the USB device has two or more drives, a drive folder is displayed on the screen. To return to the previous menu after selecting a folder, press RETURN.
Digital cameras and mobile phones are not supported.
Connections
Speaker System Connection
Connect the speakers using the supplied speaker cables by matching the colors of the terminals and those of the cords. To obtain the best possible surround sound, adjust the speaker parameters (distance, level, etc.).
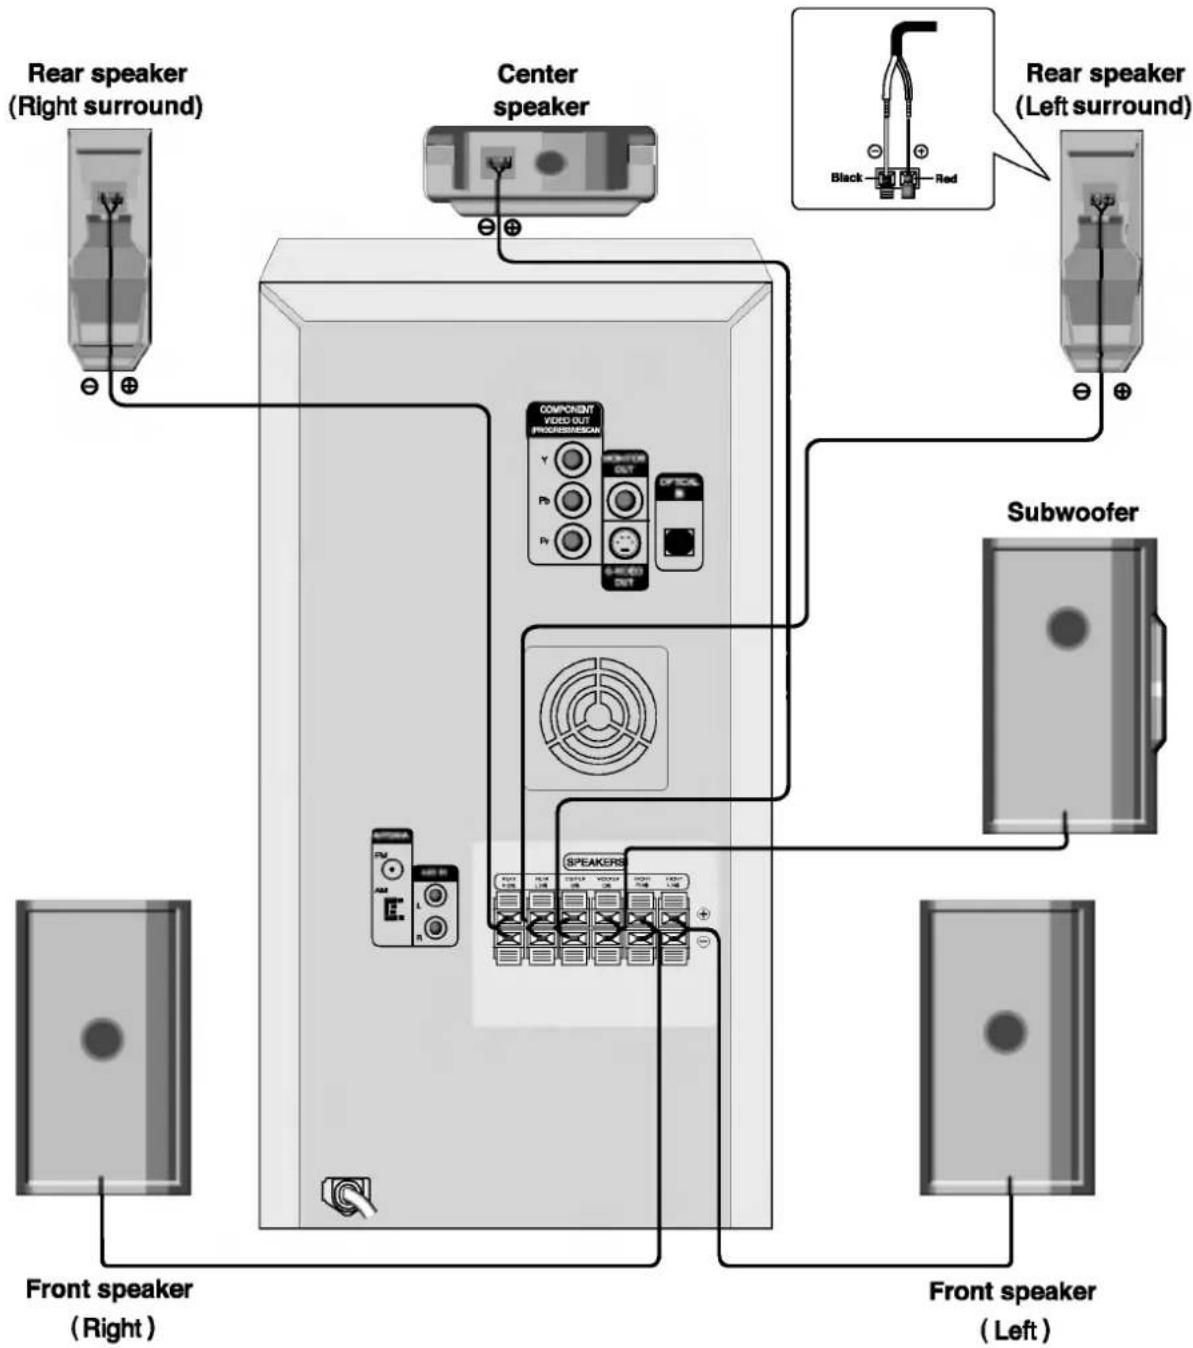

Notes
- Be sure to match the speaker cable to the appropriate terminal on the components: + to + and - to -. If the cables are reversed, the sound will be distorted and will lack bass.
- If you use front speakers with low maximum input rating, adjust the volume carefully to avoid excessive output on the speakers.
- Connect the Front Left/Right speaker correctly. If it is reversed, the sound may be distorted.
Before Operation
Volume Adjustment
- Turn VOLUME knob clockwise to increase the sound level, or counterclockwise to decrease it.
- Press VOLUME + to increase the sound level, or use VOLUME - to decrease it on the remote control.
Subwoofer level Adjustment
Turn WOOFER VOLUME KNOB (WOOFER VOL. -/+) clockwise to increase the sound level on the front panel, or counterclockwise to decrease it. (MIN, -11 \~ +11, MAX steps)
MUTE
Press MUTE to turn off the sound, press again to restore.
"◇x" indicator flashes in the display window.
Headphone Jack
Connect a stereo headphone plug (φ 3.5mm) into the headphone jack.
The speakers are automatically disabled when you plug in headphones (not supplied).
EQUALIZER Effect
You can choose 7 fixed sound impressions and adjust the BASS, MIDDLE and TREBLE.
- You can select a desired sound mode by using the EQ master button on the front panel or the remote control.
When you want to change a sound mode, press the EQ master button repeatedly within 3 seconds.
Each time you press the button, the setting changes in the display window as shown below.
![graph LR A["NORMAL"] --> B["USER EQ"] B --> C["POP"] C --> D["CLASSIC"] E["JAZZ"] --> F["DRAMA"] F --> G["ROCK"]](/content/2026/05/928572/images/9a3cb25ee94c5838919677e066bdbff384e6db2c4c2fafddfb6c8f53799918d2.jpg)
- You can set the BASS, MIDDLE, and TREBLE on the USER EQ mode.
- Select the USER EQ mode by using the EQ master button. "USER EQ" will be displayed in the display window.
- Press the SET/CDII button on the front panel when "USER EQ" is displayed in the display window. "BASS 0" will be displayed in the display window.
- Select the BASS, MIDDLE, or TREBLE you want by pressing the PRESET (-/+) buttons on the front panel.
- Press the TUNING (-/+) buttons on the front panel to set the sound level you want. (MIN, -4 \~ +4, MAX steps)
- Repeat steps 3-4 as above.
- When the sound level is completed, press the SET/CDII button on the front panel.
XDSS (Extreme Dynamic Sound System)
You can improve the sound quality during playback. Press XDSS plus repeatedly on the remote control.
DVD/VCD/DivX/CD NORMAL ↔ XDSS ON
MP3/WMA NORMAL → XDSS ON → MP3 - OPT ON
XTS/XTS pro
Each time you press XTS PRO, the setting changes in the following order.
XTS ON → NORMAL → XTS-P ON → XTS ON ...
- XTS-P ON
The unique sound quality of LG Technology creates the optimum sound for you to play the perfect playback of the original sound and to feel the living sound source.
- XTS ON
When playing a movie with weak bass sound relative to general music, it enhances the sense of sound at the woofer for your satisfaction. In the 2 CH BYPASS mode, it creates a high display effect by playing the sound source through the rear speakers, same as the front speakers.
Notes
- The XTS mode is temporarily disabled when changing from 2.1 CH to 5.1 CH, and it is enabled when changing back to 2.1 CH.
- This function does not work when the microphone is in use.
VIRTUAL sound
Press VIRTUAL E.X to set the VIRTUAL sound.
| Source | Display | Effect |
| 2.1 ch. | VIRTUAL | 3D STEREO |
| 5.1 ch | VIRTUAL | Multichannel sound |
- 3D STEREO
Realtime 3D positioned sound rendering technology with stereo sources, optimized for stereo speakers. Listeners may experience amazing virtual surround effects with their own multimedia players.
- Multichannel sound
The multichannel sound makes a 5.1 ch feel like 10.1 ch sound, therefore this mode provides an emotion that you are involved with the sound and you can feel a detailed sound.
Before Operation
Setting the Clock
1 Press CLOCK. (If the clock requires setting, press and hold CLOCK for more than 2 seconds.) - The hours display begins to blink.
2 Select a 24 hour cycle or 12 hour cycle by pressing ◀◀/▶▶ on the front panel.
(12HR) or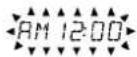
(24HR)
3 Press SET/CDII to confirm the selected hour cycle. 4 Use ◀◀/▶▶ on the front panel to set the correct hours. 5 Press SET/CDII. 6 Use ◀◀/▶▶ on the front panel to set the correct minutes. 7 Press SET/CDII and the correct time is shown in the display window.
Sleep Timer Function
When the sleep timer is set, the unit automatically turns off after the specified time has elapsed.
1 To specify the time delay before the power is turned off, press SLEEP.
In the display window you can see SLEEP 180 for about 5 seconds. This means that the system turns off automatically after 180 minutes.
2 Each time you press SLEEP the setting changes in the following order.
SLEEP 180 → 150 → 120 → 90 → 80 → 70 → 60 → 50 →
40 → 30 → 20 → 10 → OFF (No display) → SLEEP 180...
3 To check the remaining time until the power is turned off.
While the sleep function is active, press SLEEP briefly. The time remaining until the unit turns off is displayed for about 5 seconds.
Note
If you press SLEEP while the sleep time is displayed, the SLEEP time is reset.
To cancel the Sleep Timer setting
If you wish to stop the function, press the SLEEP button repeatedly until "SLEEP 10" appears, and then press SLEEP once again after "SLEEP 10" shows on the display.
Using the Microphone
You can sing along to a music source by connecting a microphone to the unit.
1. Connect your microphone to the MIC socket. "↘" will be shown in the display window.
2. Play the music you want.
3. Sing along with the accompaniment. Adjust the microphone volume by turning the MIC VOLUME KNOB. (MIN, 1-14, MAX steps)
Notes
- When not using the microphone, set the MIC volume knob to minimum or turn off the MIC and remove the microphone from the MIC socket.
- If the microphone is set too near the speaker, a howling sound may be produced. In this case, move the microphone away from the speaker or decrease the sound level by using the MIC volume control.
- If sound through the microphone is extremely loud, it may be distorted. In this case, turn the MIC volume control toward minimum.
To Adjust the ECHO Volume
You can add an echo effect to the sound from the microphones.
Press the ECHO VOL. (☐/☐) button on the remote control to increase or decrease the echo volume. (MIN, 1-14, MAX steps)
DEMO
Press DEMO while the power is off to demonstrate the functions in the display window.
To cancel, press POWER (STANDBY/ON) or DEMO again.
DIMMER
This function dims the LED (Light-emitting diode) of the front panel by half when the power is on.
Press DIMMER once. The LED (Light-emitting diode) of the front panel turns off and the display window darkens by half. To cancel, press the button again.
Before Operation
Timer Function
With the TIMER function, you can have the radio reception, CD play, USB play, and TAPE play turn on and off at the desired time.
1. Press CLOCK to check the current time.
For your reference
If you don't set the clock, the timer function doesn't work.
2. Press TIMER to enter the timer setting mode. "TUNER→DVD/CD→USB→TAPE" flashes in the display window in turn.
For your reference
If you want to correct the previously memorized TIMER setting, press and hold the TIMER button for more than 2 seconds.
- The previously memorized timer setting for ON time and the "①" indicator appear in the display window.
3 Press SET/CDII when the desired function flashes.
4 1. a. When you select the TUNER function, the 'PLAY' and 'REC' indicators flash alternately in the display window for about 3 seconds. 'PLAY' indicator: TUNER play only 'REC' indicator: TUNER play and recording
b. Press SET/CDII when the desired function flashes.
c. Select the previously memorized preset number by pressing ◀◀/▶▶ on the front panel and press SET.
'ON TIME' indicator appears for about 0.5 seconds in the display window and then disappears.
- When you select the DVD/CD, USB, or TAPE function,
'ON TIME' indicator appears for about 0.5 seconds in the display window and then disappears.
5 Set the hour to switch on by pressing ◀◀/▶▶ on the front panel.
6 Press SET/CDII to confirm the turn-on hour.
7 Set the minute to switch on by pressing ◀◀/▶▶ on the front panel.
8 Press SET/CDII to confirm the turn-on minute.
'OFF TIME' indicator appears for about 0.5 seconds in the display window and then disappears.
9 Set the hour to switch off by pressing ◀◀/▶▶ on the front panel.
10 Press SET/CDII.
11 Set the minute to switch off by pressing ◀◀/▶▶ on the front panel.
12 Press SET/CDII.
13 Adjust the volume level by pressing ◀◀/▶▶ on the front panel.
14 Press SET/CDII. "①" appears in the display window and the timer setting has been completed.
15 Turn the system off. The selected timer functions are automatically switched on and off at the preset times.
To cancel or check the timer
Each time the TIMER button is pressed you can select the timer set or cancel. You can also check the timer setting status.
To activate or check the timer, press the TIMER button repeatedly so that "②" appears in the display window.
To cancel the TIMER, press the TIMER button repeatedly so that "②" disappears from the display window.
Notes
- If you insert the DVD, VCD or DivX except audio CD/MP3/WMA on the unit, the timer function will be operated to the TUNER.
• This is not supported in the multi card reader.
Before Operation
Mini Glossary for Audio Stream & Surround mode
dts
Allows you to enjoy 5.1 (or 6) discrete channels of high quality digital audio from DTS program sources such as discs, DVD and compact discs, etc. bearing the trademark. DTS Digital Surround delivers up to 6 channels of deemed audibly indistinguishable from the master (which means identical to the original masters) and results in exceptional clarity throughout a true 360 degree sound field. "Manufactured under license from Digital Theater Systems, Inc. US Pat. No. 5,451,942; 5,956,674; 5,974,380; 5,978,762; and world-wide patents issued and pending. "DTS" and "DTS Digital Surround" are registered trademarks of Digital Theater Systems, Inc. Copyright 1996, 2003 Digital Theater Systems, Inc. All rights reserved."
DIGITAL
The Dolby Digital surround format lets you enjoy up to 5.1 channels of digital surround sound from a Dolby Digital program source. If you play DVDs with the "Dolby Digital" mark, you can enjoy even better sound quality, greater spatial accuracy, and improved dynamic range. Manufactured under license from Dolby Laboratories. "Dolby", "Pro Logic" and the double-D symbol are trademarks of Dolby Laboratories. Confidential Unpublished works. Copyright 1992-1997 Dolby Laboratories. All rights reserved.
PRO LOGIC
Use this mode when playing movies or Dolby Digital 2-channel sources that carry the "DOLBY" mark. This mode provides the effect of being in a movie theatre or live concert hall—an effect with an intensity that can only be obtained through DOLBY PRO LOGIC SURROUND. The effect of the front/back/left/right movement of the sound image, as well as the sense of fixed position in the sound image, is much clearer and more dynamic than before.
PROLOGIC II
Dolby Pro Logic II creates five full-bandwidth output channels from two-channel sources. This is done using an advanced, high-purity matrix surround decoder that extracts the spatial properties of the original recording without adding any new sounds or tonal colorations.
MOVIE mode:
The Movie mode is for use with stereo television shows and all programs encoded in Dolby Surround. The result is enhanced soundfield directionality that approaches the quality of discrete 5.1-channel sound.
MUSIC mode:
The Music mode is for use with any stereo music recordings.
MATRIX mode:
The Matrix mode is the same as the Music mode except that the directional enhancement logic is turned off. It may be used to enhance mono signals by making them seem "larger." The Matrix mode may also find use in auto systems, where the fluctuations from poor FM stereo reception can otherwise cause disturbing surround signals from a logic decoder. The ultimate "cure" for poor FM stereo reception may be simply to force the audio to mono.
BYPASS
Outputs the sound from the front left and right speakers and subwoofer.
Sound Mode DVD VCD CD
You can enjoy surround sound simply by selecting one of the pre-programmed sound fields according to the program you want to listen to.
When DVD is inserted
You can change the Digital Audio Output mode by pressing the AUDIO button on the remote control during playback. Although the DVD contents differ from disc to disc, the following explains the basic operation when this feature is used.
a) After you select 2 channel (For example 📄 or 📋) by pressing AUDIO button, press SOUND button repeatedly.
![graph TD A["Bypass"] --> B["STAGE"] C["MATRIX"] --> B B --> D["MOVIE"] D --> E["MUSIC"] F["arrow"] --> B](/content/2026/05/928572/images/24f4f562c6ac951f7b9462e8a367b534d7bd309010899af9e458ccf57ba26b01.jpg)
b) After you select 5.1 channel (For example 📄 or 📄) by pressing AUDIO button, press SOUND button.
- “●” indicator will be displayed on the TV screen. - “BYPASS” indicator will be only displayed in the display window.
When Video CD is inserted
Each time you press SOUND button, the sound mode of Video CD is changed in the display window in the following order.
BYPASS → ON STAGE → STUDIO → CLUB → HALL → THEATER 1 → CHURCH → PLII MOVIE → PLII MUSIC → PLII MTRX → BYPASS...
Note
After you select the "Bypass" of sound mode by pressing SOUND button, press AUDIO button. The Left, Right and Stereo of audio channel will be displayed on the TV screen.
When CD is inserted
Each time you press the SOUND button, the sound mode of Audio CD changes in the display window in the following order.
BYPASS → ON STAGE → STUDIO → CLUB → HALL → THEATER 1 → CHURCH → PLII MOVIE → PLII MUSIC → PLII MTRX → BYPASS...
For your reference
- The initial sound mode is BYPASS.
- You can identify the encoding format of program software by looking at its packaging.
- Dolby Digital discs are labeled with the logo.
- Dolby Surround encoded programs are labeled with the ☐DOURY logo.
- DTS Digital Surround discs are marked with DTS.
Notes
- When you play sound tracks with 96kHz sampling frequency, the output signals will be converted to 48kHz (sampling frequency).
- When you use a microphone, you can't enjoy 5.1 channel output. Only 2 channel sound will come out due to the influence of the microphone system.
Before Operation

Caution:
Before using the remote control, press the DVD/KARAOKE button to select the device to be operated.
General Explanation
This manual provides basic instructions for operating the unit. Some DVDs may require specific operations or allow only limited operations during playback.
When this occurs, the symbol 🔔 appears on the TV screen, indicating that the operation is not permitted by the unit or is not available on the disc.
On-Screen Display
General playback status can be displayed on the TV screen. Some items can be changed on the menu.
On-screen display operation

Press DISPLAY during playback.

Press ▲ / ▼ to select an item. The selected item will be highlighted.

Press ◀ or ▶ to change the setting of an item.
The number buttons can also be used for setting numbers (e.g., title number). For some functions, press SELECT/ENTER to execute the setting.
Temporary Feedback Field Icons
Repeat title
Repeat sequence

Resume play from this point

Action prohibited or not available

Notes
- Some discs may not provide all of the features on the on-screen display example shown below.
- If no button is pressed for 10 seconds, the on-screen display disappears.
Example: On-Screen Display during playing DVD
| Items | Selection Method | ||
| Title Number |  |  | |
| Chapter Number |  |  | |
| Time search |  | Nur |  ER ER |
| Audio language and Digital Audio Output mode |  |  | |
| Subtitle language |  |  | |
| Angle |  |  | |
| Sound |  |  | |
Example: On-Screen Display during playing VCD
| Items | Selection Method | |
| Track Number |  |  |
| Time |  | [Nun] ER ER |
| Audio Channel |  |  |
| Sound |  |  |
Example: On-Screen Display during playing DivX movie disc
| Items | Selection Method | ||
| Title Number |  |  | |
| Chapter Number |  |  | |
| Time search |  | Num |  ER ER |
| Audio language and Digital Audio Output mode |  |  | |
| Subtitle language |  |  | |
| Sound |  |  | |
Before Operation
Initial Settings
By using the Setup menu, you can make various adjustments to items such as picture and sound. You can also set a language for the subtitles and the Setup menu, among other things. For details on each Setup menu item, see pages 15 to 18.
To display and exit the Menu:
Press SETUP to display the menu. A second press of SETUP will take you back to initial screen.
To go to the next level:
Press ▶ on the remote control.
To go back to the previous level:
Press ◀ on the remote control.
General Operation
1 Press SETUP. The setup menu appears. 2 Use ▲ / ▼ to select the desired option then press ▶ to move to the second level. The screen will show the current setting for the selected item, as well as alternate setting(s). 3 Use ▲ / ▼ to select the second desired option then press ▶ to move to the third level. 4 Use ▲ / ▼ to select the desired setting then press SELECT/ENTER to confirm your selection. Some items require additional steps. 5 Press SETUP or PLAY to exit the setup menu.
LANGUAGE
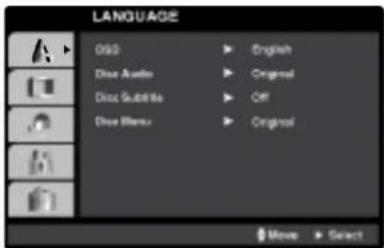
OSD
Select a language for the Setup menu and on-screen display.
Disc Audio / Subtitle / Menu DVD
Select the language you prefer for the audio track (disc audio), subtitles, and the disc menu.
Original: Refers to the original language in which the disc was recorded.
Other: To select another language, press number buttons to enter the corresponding 4-digit number according to the language code list on page 33. If you enter the wrong language code, press CLEAR on the remote control.
DISPLAY
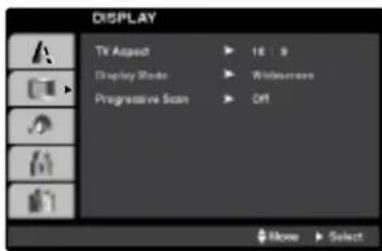
TV Aspect DVD
4:3: Select when a standard 4:3 TV is connected.
16:9: Select when a 16:9 wide TV is connected.
Display Mode DVD
Display Mode setting works only when the TV Aspect mode is set to "4:3".
Letterbox: Displays a wide picture with bands on the upper and lower portions of the screen.
Panscan: Automatically displays the wide picture on the entire screen and cuts off the portions that do not fit.
Progressive Scan DVD
Progressive Scan Video provides higher quality pictures with less flickering.
If you are using the Component Video jacks for connection to a TV or monitor that is compatible with a progressive scan signal, set Progressive Scan to On.
To Turn ON progressive scan:
Connect component out of the DVD to the input of your monitor/television, set your television or monitor to Component Input.
- Select "Progressive Scan" in the DISPLAY menu then press ▶.
- Select "On" using the ▲ / ▼ buttons.
- Press SELECT/ENTER to confirm your selection. The confirm menu will appear.
- When the confirm menu appears on your screen "Cancel" is highlighted as default. Use the 🔊/▶ buttons to highlight "Enter".
- Pressing SELECT/ENTER will set the player to Progressive scan mode.
Caution
Once the setting for progressive scan output is entered, an image will only be visible on a progressive scan compatible TV or monitor. If you set Progressive Scan to On in error, you must reset the unit.
1) Remove any disc from the unit and close the disc tray. See that "NO DISC" is displayed in the display window
2) Press and hold STOP (■) for five seconds then release it. The video output will be restored to the standard setting, and a picture will once again be visible on a conventional analog TV or monitor.
Before Operation
AUDIO
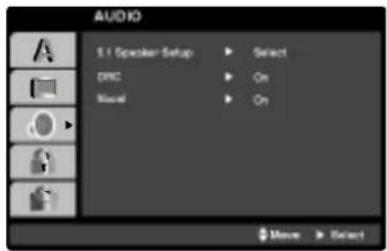
5.1 Speaker Setup DVD
Select speaker settings, including volume balance and distance, or test the speaker settings. Speaker settings are only active on the Analog Multi-Channel Output.
Speaker Setup
Make the following settings for the built-in 5.1 channel surround decoder.
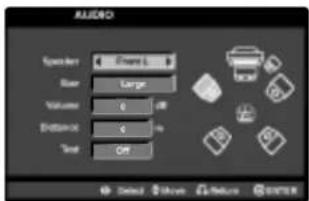
- Press SETUP. The setup menu appears.
- Use ▲ / ▼ to select the AUDIO option then press ▶ to move to the second level.
- Use ▲ / ▼ to select the Speaker Setup option then press ▶ to move to the third level. "Select" is highlighted.
- Press SELECT/ENTER and 5.1 Speaker Setup menu appears.
- Use ◀/▶ to select the desired speaker.
- Adjust options using ▲ / ▼ / ◀ / ▶ buttons.
- Press SELECT/ENTER to confirm your selection. The unit returns to the previous menu.
Speaker
Select a speaker that you want to adjust. [Front speaker (Front L), Front speaker (Front R), Center Speaker (Center), Subwoofer (Woofer), Rear speaker (Rear L), Rear speaker (Rear R)]
Note
Certain speaker settings are prohibited by the Dolby Digital licensing agreement.
Size
Press ◄/▶ to set a mode. (Large, Small or None)
- You can not change the size of the Front L/R speaker which is set to "Large".
- The size of the Subwoofer can be selected to "Large" or "None".
- Since the size of the Center and Rear L/R speaker are fixed to "Small", you can not change settings.
Volume
Press ◄/▶ to adjust the output level of the selected speaker. (-5dB \~ 5dB)
Distance
If you have connected speakers to your DVD Player, setting the Distance lets the speakers know how far the sound has to travel to reach your set listening point. This allows the sound from each speaker to reach the listener at the same time.
Press ◄/▶ to adjust the Distance of the selected speaker (Center, Rear L and Rear R).
Test
Select "All" to test the signals of each speaker. Adjust the volume to match the volume of test signals memorized in the system. (The subwoofer will not work when the size of the subwoofer is set to "None".)
Front L → Center → Front R → Rear R → Rear L → Woofer
Dynamic Range Control (DRC) DVD
With the DVD format, you can hear a program's sound-track in the most accurate and realistic presentation possible, thanks to digital audio technology. However, you may wish to compress the dynamic range of the audio output (the difference between the loudest sounds and the quietest ones). Then, you may listen to a movie at a lower volume without losing dialog intelligibility. Set DRC to On for this effect.
Notes
• The DRC function works only during playback of Dolby Digital recorded discs. - The level of Dynamic Range Compression may differ depending on the DVD disc.
Vocal
DVD
Set Vocal to On only when a multi-channel Karaoke DVD is playing. The karaoke channels on the disc will mix into a normal stereo sound.
Before Operation
LOCK (Parental Control)
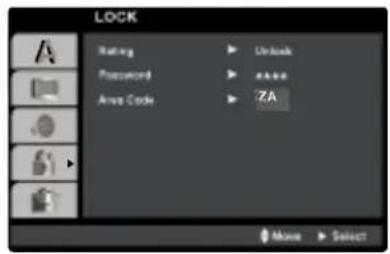
Rating DVD
Some movies contain scenes that may not be suitable for children to view. Many of these discs contain parental control information that applies to the complete disc or to certain scenes on the disc. Movies and scenes are rated from 1 to 8, depending on the country. Some discs offer more suitable scenes as an alternative.
The parental control feature allows you to block access to scenes below the rating you input, thereby preventing your children from being able to view material you believe is unsuitable.
1 Select "Rating" on the LOCK menu then press 2 To access the Rating, Password and Area Code features, you must input the 4-digit security code you created.
If you have not yet entered a security code you are prompted to do so.
Input a 4-digit code and press SELECT/ENTER. Enter it again and press SELECT/ENTER to verify. If you make a mistake before pressing SELECT/ENTER, press CLEAR.
3 Select a rating from 1 to 8 using the ▲ / ▼ buttons.
Rating 1-8: Rating one (1) has the most restrictions and rating eight (8) is the least restrictive.
Unlock
If you select unlock, parental control is not active and the disc plays in full.
Note
If you set a rating for the player, all disc scenes with the same rating or lower are played. Higher rated scenes are not played unless an alternate scene is available on the disc. The alternative must have the same rating or a lower one. If no suitable alternative is found, playback stops. You must enter the 4-digit password or change the rating level in order to play the disc.
4 Press SELECT/ENTER to confirm your rating selection, then press SETUP to exit the menu.
Password (Security Code)
You can enter or change password.
1 Select Password on the LOCK menu then press ▶. 2 Follow step 2 as shown left (Rating). "Change" or "New" is highlighted. 3 Enter the new 4-digit code, then press SELECT/ENTER. Input it again to verify. 4 Press SETUP to exit the menu.
If you forget your Security Code
If you forget your security code you can clear it using the following steps:
1 Select Password on the LOCK menu. 2 Input the 6-digit number "210499" in the setup menu and the security code is cleared. 3 Enter a new code as described above.
Note
Area Code DVD
Enter the code of the country/area whose standards were used to rate the DVD video disc, based on the list in the reference chapter.
1 Select "Area Code" on the LOCK menu then press ▶. 2 Follow step 2 as shown left (Rating).
3 Select the first character using ▲ / ▼ buttons.
4 Shift the cursor using ▶ button and select the second character using ▲ / ▼ buttons.
5 To complete the area code selection, press SELECT/ENTER.
Before Operation
OTHERS
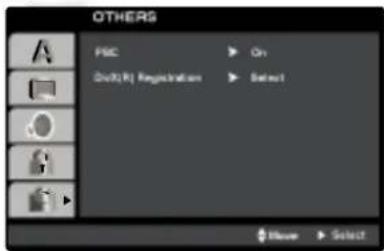
PBC VCD
Set Playback Control (PBC) to On or Off.
On: Video CDs with PBC are played according to the PBC.
Off: Video CDs with PBC are played the same way as Audio CDs.
DivX(R) Registration DivX
You can show the DivX DRM (Digital Right Management) Registration code for your unit only.
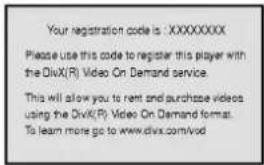
The Registration code is used for VOD (Video-On-Demand) service agent. You can purchase or rental an encrypt movie file.
Notes
If you rent the DivX VOD file, it has several options of viewing limits as show below.
• Display the number which you can watch the file.
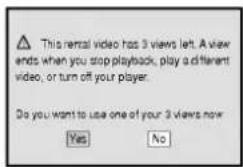
• The rental has been expired.
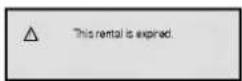
• Display the authorization error.
Operation with DVD and Video CD
Playing a DVD and Video CD
Playback Setup DVD VCD
- Turn on the TV and select the video input source connected to the unit.
- Audio system: Turn on the audio system and select the input source connected to the unit.
1 Press OPEN/CLOSE button to open the disc tray. 2 Load your chosen disc in the tray, with the playback side facing down. 3 Press OPEN/CLOSE button to close the tray. Playback starts automatically. If playback does not start, press PLAY. In some cases, the disc menu might appear instead.
If a menu screen is displayed
The menu screen may be displayed first after loading a DVD or Video CD which contains a menu.
DVD
Use the 🔊/♥/ 🔕/ ▶ buttons to select the title/chapter you want to view, then press SELECT/ ENTER to start. Press TITLE or MENU to return to the menu screen.
VCD
Use the number buttons to select the track you want to view and press RETURN to return to the menu screen. Menu setting and the exact operating procedures for using the menu may differ depending on the disc. Follow the instructions on the each menu screen. You also may set PBC to Off.
Notes
- If parental control is set and the disc is not within the rating settings you must input the password. (See "LOCK" on page 17.) – DVDs may have a region code. Your player will not play discs that have a region code different from your player. The region code for this player is 2 (two).
To Select a disc directly
The unit can automatically play the selected disc.
- Press DISC 1, DISC 2, DISC 3, DISC 4 or DISC 5 on the front panel during playing or stopping.
- Press the D.SEL button on the remote control and then select a disc number you want to play by using the numeric buttons (1-5) on the remote control.
Operation with DVD and Video CD
General Features

Unless stated otherwise, all operations described use the remote control. Some features may also be available in the Setup menu.
Moving to another TITLE DVD DivX
When a disc has more than one title, you can move to another title. Press DISPLAY while playback is stopped then the appropriate number (0-9) or use 🔔/▶ to move to another title.
You can play any title by inputting its number while playback is stopped.
Moving to another CHAPTER/TRACK
DVD VCD DivX
When a title on a disc has more than one chapter or a disc has more than one track, you can move to another chapter/track as follows:
- Press I◀◀ or ▶▶▶ briefly during playback to select the next chapter/track or to return to the beginning of the current chapter/track.
- Press ◀◀ twice briefly to step back to the previous chapter/track.
- To go directly to any chapter during DVD playback, press DISPLAY and press 🔊/♥ to select the chapter/track icon. Then, input the chapter/track number or use 🔊/♥.
Search DVD VCD DivX
1 Press ◀◀ or ▶▶ during playback. The player will now go into SEARCH mode. 2 Press ◀◀ or ▶▶ repeatedly to select the required speed: ◀◀X2, ◀◀X4, ◀◀X8, ◀◀X16, ◀◀X100 (backward) or ▶▶X2, ▶▶X4, ▶▶X8, ▶▶X16, ▶▶X100 (forward). With a DivX/ Video CD, the Search speed changes: ◀◀X2, ◀◀X4, ◀◀X8, ◀◀X16 (backward) or ▶▶X2, ▶▶X4, ▶▶X8, ▶▶X16 (forward). 3 To exit SEARCH mode, press PLAY.
Still Picture and Frame-by-frame playback
DVD VCD DivX
1 Press PAUSE/STEP on the remote control during playback. The player will now go into PAUSE mode. 2 You can advance the picture frame-by-frame by pressing PAUSE/STEP repeatedly on the remote control.
Slow Motion DVD VCD
1 Press PAUSE/STEP on the remote control during playback. The player will now go into PAUSE mode. 2 Use the ◀◀ or ▶▶ to select the required speed: ◀1/2, ◀1/4, ◀1/8 or ◀1/16 [(backward) - DVD only] or ▶1/2, ▶1/4, ▶1/8 or ▶1/16 (forward). 3 To return to normal PLAY, press PLAY.

Slow motion playback in reverse is not applicable for Video CD.
Repeat DVD VCD DivX
You can play a title/chapter/all/track on a disc.
Press REPEAT during playback to select a desired repeat mode.
DVD Video Discs - Repeat Chapter/Title/Off
• Chapter: repeats the current chapter. • Title: repeats the current title. - Off: does not play repeatedly.
DivX/ Video CDs - Repeat Track/All/Off
- Track : repeats the current track
- All : repeats all the tracks on a disc.
- Off: does not play repeatedly.

- On a Video CD with PBC, you must set PBC to Off in the setup menu to use the repeat function (See "PBC" on page 18).
Repeat A-B DVD VCD
To repeat a sequence in a title:
1 Press REPEAT A-B at your chosen starting point. "A - " appears briefly on the TV screen. 2 Press REPEAT A-B again at your chosen end point. "A - B" appears briefly on the TV screen, and the repeat sequence begins. 3 To cancel the sequence, press REPEAT A-B.
Operation with DVD and Video CD
General Features (continued)
Time Search DVD VCD DivX
The Time Search function allows you to start playing at any chosen time on the disc.
1 Press DISPLAY during playback. The on-screen display appears on the screen. The Time Search box shows the elapsed playing time of the current disc. 2 Within 10 seconds, press 🔊 / 🔑 to select the Time Search icon in the on-screen display. The "-:-:-" appears in the Time Search box. 3 Within 10 seconds, use the number buttons to enter the required start time. Enter hours, minutes, and seconds from left to right in the box. If you enter the wrong numbers, press CLEAR to remove the numbers you entered. Then enter the correct numbers. 4 Within 10 seconds, press SELECT/ENTER to confirm the start time. Playback starts from the selected time on the disc. If you enter an invalid time, playback will continue from the current point.
Zoom DVD VCD
The Zoom function allows you to enlarge the video image and to move through the enlarged image.
1 Press ZOOM during playback or still playback to activate the Zoom function. If you press ZOOM repeatedly, the magnification level increases up to four steps. 100% size → 400% size → 800% size → 1600% size → 100% size
2 Use the ▲ / ▼ / ◀ / ▶ buttons to move through the zoomed picture.
Note
The zoom function may not work for some DVDs.
Marker Search DVD VCD DivX
You can start playback from a memorized point. Up to nine points can be memorized. To enter a mark, follow these steps.
1 During disc playback, press MARKER when playback reaches the spot that you want to memorize. The Marker icon will appear on the TV screen briefly.
2 Repeat step 1 to enter up to nine Marker points on a disc.
To Recall a Marked Scene
1 During disc playback, press SEARCH. The MARKER SEARCH menu will appear on the screen. 2 Within 10 seconds, press 🔊/▶ to select a Marker number that you want to recall. 3 Press SELECT/ENTER. Playback will start from the Marked scene. 4 To remove the MARKER SEARCH menu, press SEARCH.
20
To clear a Marked Scene
1 During disc playback, press SEARCH. The MARKER SEARCH menu will appear on the screen. 2 Press ◄/▶ to select the Marker number that you want to erase. 3 Press CLEAR. The Marker number will be erased from the list. 4 Repeat steps 2 and 3 to erase additional Marker numbers. 5 To remove the MARKER SEARCH menu, press SEARCH.
Note
- On a Video CD with PBC, you must set PBC to Off on the setup menu to use the time search function (See "PBC" on page 18).
Special DVD Features
Checking the contents of DVD Video discs: Menus
DVDs may offer menus that allow you to access special features. To use the disc menu, press MENU. Then, press the appropriate number button to select an option. Or, use the / / / / buttons to highlight your selection, then press SELECT/ENTER.
Title Menu DVD DivX
1 Press TITLE. If the current title has a menu, the menu will appear on the screen. Otherwise, the disc menu may appear. 2 The menu can list camera angles, spoken language and subtitle options, and chapters for the title. 3 To remove the title menu, press TITLE again.
Disc Menu DVD DivX
Press MENU. The disc menu is displayed.
Camera Angle DVD
If the disc contains scenes recorded at different camera angles, you can change to a different camera angle during playback.
1 Press DISPLAY and then press the ▲ / ▼ to select an angle. The number of the current angle appears in the display window. 2 Select a desired angle pressing the ◄/► buttons.
Operation with DVD and Video CD
Special DVD Features (continued)
Changing the Audio Language
DVD
DivX
Press AUDIO repeatedly during playback to hear a different audio language or audio track.
Changing the Audio Channel VCD
Press AUDIO repeatedly during playback to hear a different audio channel (STER., LEFT or RIGHT).
Subtitle DVD DivX
Press S-TITLE repeatedly during playback to see the different subtitle languages.
Note
If 🖼 appears, the feature is not available on the disc.
Last Scene Memory DVD
This player memorizes the last scene from the last disc that was viewed. The last scene remains in memory even if you remove the disc from the player or switch off the player. If you load a disc that has the scene memorized, the scene is automatically recalled.
Note
This player does not memorize the scene of a disc if you switch off the player before commencing to play the disc.
Screen Saver
The screen saver appears when you leave the DVD player in Stop mode for about five minutes.
System Select
You must select the appropriate system mode for your TV system. If NO DISC appears in the display window, press and hold PAUSE/STEP on the remote control for more than 5 seconds to be able to select a system (PAL, NTSC or AUTO).
- When the selected system does not coincide with the system of your TV, normal colour picture may not be displayed.
AUTO: Select when the unit is connected with Multi system TV.
NTSC: Select when the unit is connected with NTSC-TV.
PAL: Select when the unit is connected with PAL-TV.
Operation with Audio CD and MP3/WMA Disc
Playing an Audio CD and MP3/WMA
file CD MP3 WMA
The unit can play audio CD and MP3/WMA.
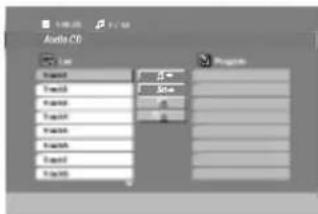
Audio CD
Once you insert an audio CD a menu appears on the TV screen. Press ▲/▼ to select a track then press PLAY or SELECT/ENTER and playback starts.
MP3 / WMA
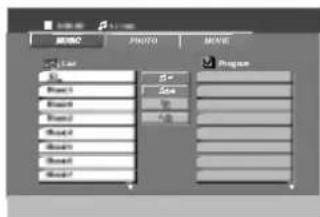
- Press ▲ / ▼ to select a folder, and press SELECT/ENTER to see the folder contents.
- Press ▲ / ▼ to select a track then press PLAY or SELECT/ENTER. Playback starts.
Notes
- If you are in a file list on the MUSIC menu and want to return to the Folder list, use the ▲/▼ to highlight ⏹ on the stop mode and press SELECT/ENTER.
- Press MENU to move to the next page.
- On a CD with MP3/WMA file and JPEG file, you can switch MP3/WMA and JPEG menu. Press TITLE on the stop mode and MP3/WMA or JPEG word on top of the menu is highlighted. Then, use ▲/▶ to select MP3/WMA or JPEG then press SELECT/ENTER.
- The MP3 file name and ID3 TAG should be named using English.
Pause CD MP3 WMA
1 Press PAUSE/STEP during playback. 2 To return to playback, press PLAY or press PAUSE/STEP again.
Moving to another Track CD MP3 WMA
- Press ◀◀ or ▶▶ briefly during playback to go to the next track or to return to the beginning of the current track.
- Press ◀◀ twice briefly to step back to the previous track.
- In case of audio CD, to go directly to any track, enter the track number using the numbered buttons (0-9) during playback.
Operation with Audio CD and MP3/WMA Disc
Repeat Track/All/Off CD MP3 WMA
You can play a title/chapter/all/track on a disc.
1 Press REPEAT when playing a disc. The repeat icon appears.
2 Press REPEAT to select a desired repeat mode.
- Track: repeats the current track
• All: repeats all the tracks on a disc.
- Off (No display) : does not play repeatedly.
Search CD MP3 WMA
1 Press ◀◀ or ▶▶ during playback. The player will now go into SEARCH mode.
2 Press ◀◀ or ▶▶ repeatedly to select the required speed: ◀◀X2, ◀◀X4, ◀◀X8 (backward) or ▶▶X2, ▶▶X4, ▶▶X8 (forward).
3 To exit SEARCH mode, press PLAY.
MP3 / WMA disc compatibility with this player is limited as follows:
- Sampling frequency: within 32 - 48 kHz (MP3), within 24 - 48kHz (WMA)
- Bit rate: within 32 - 320kbps (MP3), 40 - 192kbps (WMA)
- The player cannot read an MP3/WMA file that has a file extension other than ".mp3" / ".wma". • CD-R physical format should be ISO 9660
- If you record MP3 / WMA files using software that cannot create a file system (eg. Direct-CD) it is impossible to playback MP3 / WMA files. We recommend that you use Easy-CD Creator, which creates an ISO 9660 file system.
- File names should have a maximum of 8 letters and must incorporate an .mp3 or .wma extension.
- They should not contain special letters such as / ? * : " < > | etc.
- The total number of files on the disc should be less than 999.
This unit requires discs and recordings to meet certain technical standards in order to achieve optimal playback quality. Pre-recorded DVDs are automatically set to these standards. There are many different types of recordable disc formats (including CD-R containing MP3 or WMA files) and these require certain pre-existing conditions (see above) to ensure compatible playback.
Customers should note that permission is required in order to download MP3 / WMA files and music from the Internet. Our company has no right to grant such permission. Permission should always be sought from the copyright owner.
Programmed Playback CD MP3 WMA
The Program function enables you to store your favorite tracks from any disc in the player memory.
A program can contain 300 tracks (Audio CD/MP3/WMA).
1 Insert a disc.
Audio CD and MP3/WMA Discs:
Audio CD or MP3/WMA menu appears as below.
Audio CD Menu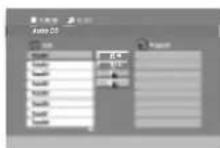
MP3/WMA Menu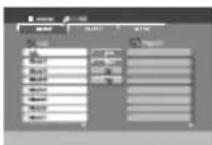
2 Select a track on the List.
3 Press PROG./MEMO.. Or, select "♩→(Add)" icon then SELECT/ENTER to place the selected track on the Program list. Repeat to place additional tracks on the list.
Note
You can add all tracks in the disc. Select "a→ (Add All)" icon then press SELECT/ENTER.
4 Select the track you want to start playing on the Program list.
Tip
Press MENU to move to the next page.
5 Press PLAY or SELECT/ENTER to start.
Playback begins in the order in which you programmed the tracks and "PROG." appears in the display window. Playback stops after all of the tracks on the Program list have played once.
Note
To resume normal playback from programmed playback, select a track from the AUDIO CD (or MP3/WMA) list and then press PLAY.
Repeat Programmed Tracks
You can play a title, chapter, all, or track on a disc.
1 Press REPEAT when playing a disc. The repeat icon appears. 2 Press REPEAT to select a desired repeat mode. - TRACK: repeats the current track - ALL: repeats all the tracks on a disc. - Off (No display): does not play repeatedly.
Erasing a Track from Program List
1 Use ▲ / ▼ / ▶ / ▶ to select the track that you wish to erase from the Program list. 2 Press CLEAR. Or, select " (Delete)" icon then press SELECT/ENTER to place the selected track on the Program list. Repeat to erase additional tracks on the list.
Erasing the Complete Program List
Select "a" (Del all)", then press SELECT/ENTER. The complete Program for the disc is erased.
Note
The programs are also cleared when the disc is removed.
Operation with JPEG Disc
Viewing a JPEG disc JPEG
This unit can play discs with JPEG files.
Before playing JPEG recordings, read the notes on JPEG Recordings on right.
1 Insert a disc and close the tray.
The PHOTO menu appears on the TV screen.
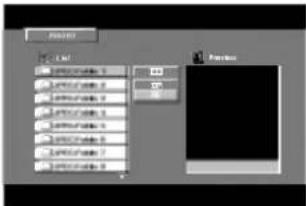
2 Press ▲ / ▼ to select a folder, and press SELECT/ENTER. A list of files in the folder appears.
Tip
If you are in a file list and want to return to the Folder list, use the ▲/▼ buttons on the remote control to highlight “■-” and press SELECT/ENTER to return to the previous menu screen.
3 If you want to view a particular file, press ▲ / ▼ to highlight a file and press SELECT/ENTER or PLAY.
Slide Show starts from the selected file if Speed option is not Off.
While viewing a file, you can press STOP(■) to move to the previous menu (JPEG menu).
Tip
- Press MENU to move to the next page.
- There are four Slide Speed options: ☐ : > (Slow), >> (Normal), >>> (Fast) and II (off). Use / / / to highlight the Speed. Then, use / to select the option you want to use then press SELECT/ENTER.
- If you set Speed option to Off, Slide Show is not active.
Slide Show JPEG
Use ▲ / ▼ / ◀ / ▶ to highlight the ■ (Slide Show) then press SELECT/ENTER.
Moving to another File JPEG
Press ◀◀◀ or ▶▶▶ once during viewing a picture to advance to the next file or to the previous file.
Still Picture JPEG
1 Press PAUSE/STEP during slide show. The player will now go into PAUSE mode. 2 To return to the slide show, press PLAY or press PAUSE/STEP again.
To rotate picture JPEG
Press ▲ / ▼ / ▶ / ▶ during showing a picture to rotate the picture clockwise or counter-clockwise.
Zoom JPEG
The Zoom function allows you to enlarge or reduce the video image.
1 Press ZOOM repeatedly. Zoom on ↔ Zoom off
2 Use the ▲ / ▼ / ▶ / ▶ buttons on the "Zoom on" mode.
JPEG disc compatibility with this player is limited as follows:
- Depending upon the size and number of JPEG files, it could take a long time for the DVD player to read the disc's contents. If you don't see an on-screen display after several minutes, some of the files may be too large — reduce the resolution of the JPEG files to less than 2760 x 2048 pixels and burn another disc.
- The total number of files and folders on the disc should be less than 999.
- Some discs may be incompatible due to a different recording format or the condition of disc.
- Ensure that all the selected files have the ".jpg" extensions when copying into the CD layout.
- If the files have ".jpe" or ".jpeg" extensions, please rename them as ".jpg" file.
- File names without ".jpg" extension will not be able to be read by this DVD player. Even though the files are shown as JPEG image files in Windows Explorer.
Operation with DivX Disc
The unit can play DivX files.
1. Insert a disc and close the tray. The DivX menu appears on the TV screen.
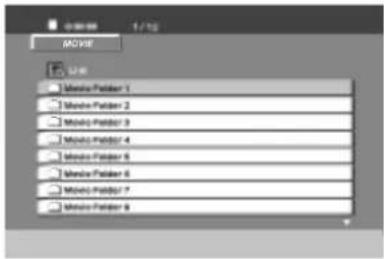
2. Press ▲/▼ to select a folder, and press SELECT/ENTER to see the folder contents.
Tip
If you are in a file list and want to return to the Folder list, use the ▲/▼ buttons on the remote control to highlight “■-” and press SELECT/ENTER to return to the previous menu screen.
3. If you want to view a particular file, press ▲/▼ to highlight a file and press SELECT/ENTER or PLAY. Playback starts.
4. Press STOP (■) to exit.
Notes
- Be sure to select "SUBTITLE ON" mode by pressing the subtitle button every time before playing a DivX file.
- When the subtitle has more than two languages in the file, only the original subtitle is available. • The DivX files in your memory card cannot be played. • The microphone does not work during playing a DivX file.
- You cannot adjust the sound mode and VIRTUAL sound during playing a DivX file.
Notice for displaying the DivX subtitle
If the subtitle does not display properly during playback, press and hold S-TITLE for about 3 seconds, then press S-TITLE to select another language code until the subtitle is displayed properly.
DivX disc compatibility with this player is limited as follows:
• The available resolution size of the DivX file is under 720x576 (W x H) pixels. - The file name of the DivX subtitle is available in 20-40 characters (differs from language). - If there is impossible code to express in the DivX file, it may be displayed as "_" mark on the display. - If the number of screen frames is over 30 per 1 second, this unit may not operate normally. - If the video and audio structure of the recorded file is not interleaved, either video or audio is outputted.
Playable DivX subtitle file
SubRip (*.srt/*.txt), SAMI (*.smi), SubStation Alpha (*.ssa/*.txt), MicroDVD (*.sub/*.txt), SubViewer 2.0 (*.sub/*.txt), VobSub (*.sub)
Playable DivX file
● ".avi", ".mpg", ".mpeg"
Playable Codec format
● "DIVX3.xx", "DIVX4.xx", "DIVX5.xx", "XVID", "MP43", "3IVX", "MP42".
Playable Audio format
● "AC3", "DTS", "PCM", "MP3", "WMA".
- Sampling frequency: within 32 - 48 kHz (MP3), within 24 - 48 kHz (WMA)
- Bit rate: within 32 - 320 kbps (MP3), 40 - 192 kbps (WMA)
Operation with RADIO
Presetting the radio stations
You can preset 50 stations for FM and AM.
Before tuning, make sure that you have turned the volume down to the minimum level.
1 Press TUNER/BAND on the remote control to show either FM or AM in the display window. Or press TUNER on the front panel.
Every time you press this button, AM and FM change alternately.
Select a station you want by pressing
TUNING (-/+) on the front panel or ◄/▶ on the remote control.
Notes
• Automatic Tuning
Press TUNING (-/+) or ▶/ ▶ for more than 0.5 second.
- Scanning stops when the unit tunes in a station.
- Manual Tuning
Press TUNING (-/+) or ◄/ ▶ briefly and repeatedly.
Press PROG./MEMO. on the remote control.
A preset number will flash in the display window.
4 Press ▲ / ▼ on the remote control to select the preset number you want.
5 Press PROG./MEMO. again.
The station is stored.
6 Repeat steps 1 (or 2) to 5 to store other stations.
To clear all memorized stations
Press and hold PROG./MEMO. on the remote control for about two seconds, "ERASE ALL" appears in the display window and then press PROG./MEMO. on the remote control, the stations are cleared.
For your reference
If all stations have already been entered, "FULL" message will appear in the display window for a moment and then a preset number will flash.
To change the preset number, follow the steps 4-5.
To recall preset numbers
Press and hold ▲ / ▼ on the remote control until the desired preset number appears or press the button repeatedly.
Listening to the radio
1 Press TUNER/BAND on the remote control to show either FM or AM in the display window. Or Press TUNER on the front panel. The last received station is tuned in.
2 Press ▲ / ▼ on the remote control repeatedly to select the preset station you want. Each time you press this button, the unit tunes in the next preset station.
3 Adjust the volume by rotating VOLUME CONTROL KNOB (or pressing VOLUME (-/+) on the remote control) repeatedly.
To listen to non-preset radio stations
- For manual tuning, see "Manual Tuning".
- For automatic tuning, see "Automatic Tuning".
To select a preset radio station directly
You can use the number buttons on the remote control to select a preset radio station directly.
For example, to listen to preset station 4, press 4 on the remote control. To listen to preset station 19, press 1 then 9 (within 3 seconds).
To turn the radio off
Press POWER to turn off the unit or select another function mode (DVD/KARAOKE, TAPE, AUX or USB).
For your reference
• If a FM program is noisy
Press MONO/ST. repeatedly so that “(●)” disappears in the display window. There will be no stereo effect, but the reception will improve. Press MONO/ST. again to restore the stereo effect.
• To improve reception
Reposition the supplied antennas.
Operation with RADIO
RDS Function : OPTIONAL
About RDS : OPTIONAL
This unit is equipped with RDS (Radio Data System), which brings a wide range of information from FM radio. RDS is a system for transmitting station call signs or network information, a description of station programme type text message about the station or specifics of musical selection and the correct time.
RDS Tuning : OPTIONAL
When a FM station containing RDS data is tuned in, the unit will automatically display the station's call sign and the RDS indicator will light in the Display Window as well as indicators for the programme type recognition (PTY), Radio Text (RT), Clock Time (CT) and RDS services programme (PS) if transmitted by the station.
RDS Display Options : OPTIONAL
The RDS system is capable of transmitting a wide variety of information in addition to the initial call sign that appears when a station is first tuned. In normal RDS operation the display will indicate the station name, broadcast network or call letters. Pressing RDS on the front panel enables you to cycle through the various data types in the sequence:

- PTY (Programme type recognition)- The programme type is shown in the display window.
- RT (Radio text recognition)- The radio station's name is displayed in the display window.
- CT (Time controlled by the channel)- Enable the unit to receive the actual time and show it on the display window.
- PS (Programme Service name)- The programme title is displayed in the display window.
Note
Some RDS stations may not choose to include some of these additional features. If the data required for the selected mode is not being transmitted, the Display Window will show a PTY NONE, RT NONE, CT NONE, PS NONE message.
Programme Search (PTY) : OPTIONAL
A major benefit of RDS is its ability to encode broadcasts with Programme Type (PTY) codes that indicate the type of material being broadcast. The following list shows the abbreviations used to indicate each PTY along with an explanation of the PTY.
| NEWS | News |
| AFFAIRS | Current Affairs |
| INFO | Information |
| SPORT | Sports |
| EDUCATE | Educational |
| DRAMA | Drama |
| CULTURE | Culture |
| SCIENCE | Science |
| VARIED | Varied Speech Programme |
| POP M | Popular Music |
| ROCK M | Rock Music |
| EASY M | Easy Listening Music |
| LIGHT M | Classical Music |
| CLASSICS | Serious Classical Music |
| OTHER M | Other Music |
| WEATHER | Weather Information |
| FINANCE | Financial Programmes |
| CHILDREN | Children's Programmes |
| SOCIAL | Social Affairs Programmes |
| RELIGION | Religious Broadcasts |
| PHONE IN | Phone-In Programmes |
| TRAVEL | Travel and Touring |
| LEISURE | Leisure and Hobby |
| JAZZ | Jazz Music |
| COUNTRY | Country Music |
| NATION M | National Music |
| OLDIES | Oldies Music |
| FOLK M | Folk Music |
| DOCUMENT | Documentary Programmes |
| TEST | Station Alarm Test Message |
| ALARM 1 | Emergency Broadcast Information |
You may search for a specific Programme Type (PTY) by following these steps:
1 Press TUNER (or TUNER/BAND) to select FM mode. 2 Press PTY on the remote control, the display will show the last PTY in use. 3 Press PTY repeatedly to select a desired PTY. 4 When the PTY is selected, press and hold PTY. The unit will go into an automatic search mode. When a station is tuned, the search will stop.
Operation with TAPE
Basic Playback
1 Press TAPE to select tape function. ("NO TAPE" appears in the display window.) 2 Open cassette deck by pushing to the ▲PUSH EJECT position. 3 Insert a cassette with the tape side to the bottom and then close deck. 4 Press ▶ (or ◀) on the front panel or remote control.
AUTO REVERSE DECK
You can select direction of the cassette you want by pressing MODE.
| Pressing | Display | Function |
| - |  | After the cassette plays front or reverse (backward play) side, stops automatically. |
| Once |  | After the cassette plays front and reverse side, stops automatically. |
| Twice |  | After the cassette of plays six times repeatedly front and reverse side, stops automatically. |
To Stop Play
Press STOP(■) on the front panel or TAPE STOP (■) on the remote control during playback.
To Play Rewind or Fast Forward
After press I◀◀/▶▶ on the front panel or ◀◀/▶▶ on the remote control during playback or stop, press ▶ (or ◀) at the tape position you want.
Recording from Radio, CD or Auxiliary
source
1 Press the function (CD, TUNER/BAND, AUX or USB) you want. 2 Open the cassette deck and insert a blank cassette into the cassette compartment.
To set the recording direction
Press MODE repeatedly to set the recording direction.
3 Press REC/PAUSE (●/II) on the front panel or ●/II on the remote control.
"REC" flashes and holds the cassette in pause mode.
4 Press REC/PAUSE (●/II) on the front panel or ●/II remote control.
The recording is begun.
To pause the recording
Press ●/II (or REC/PAUSE (●/II)) during recording.
To stop the recording
Press STOP(■).
CD- Synchro recording
This feature is a convenient to record tracks from CD to cassette.
1 Select the CD function and load a CD to be recorded. You may wish to program a selection of tracks for recording. 2 Open the cassette deck and insert a blank cassette into the tape tray. 3 Press CD SYNC. in stop mode. "REC" flashes and "CD SYNC" displays in the display window. 4 The synchronized recording is started automatically after about 7 seconds.
Notes
- If you wish to record from the desired track, select the desired track with ◀◀◀/▶▶ before commencing CD synchro recording.
- A function change is not possible during recording.
Operation with KARAOKE
You can play KARAOKE (singing along) with karaoke disc by connecting a microphone to the unit.
You can enjoy KARAOKE with a stereo-recorded disc, even if it is a non-karaoke disc, by reducing the singer's voice.
Karaoke Basic Playback
1 Check if the system is connected. (Refer to the page 6-9.) 2 Turn on the powers of TV (or Amplifier) and DVD Karaoke and enter to the video mode on TV. 3 Press OPEN/CLOSE to open the disc tray and load supplied karaoke disc in the tray with the label facing up. 4 Press OPEN/CLOSE to close the tray. 5 Press DVD/KARAOKE to enter to the karaoke mode.
[TV Screen]
6 Connect the microphone to the MIC 1 or MIC 2 jack. 7 Select the melody number you want by pressing NUMERIC buttons. If you cancel the selected melody number, press the CLEAR. Press PLAY (▶). The selected melody number is played. Sing in tone with microphone. After melody ends, it is stopped automatically and score appears.
Karaoke Advanced Playback
To Adjust MIC Volume
Press the MIC VOL. (☐/☐) on the remote control to increase the microphone volume or decrease it. Or turn MIC VOLUME KNOB (MIC VOL.) on the front panel. (MIN,1 - 14, MAX steps)
Key Control
You can change the key to suit your vocal range. You can adjust the key to 13 steps (6 steps higher, 6 steps lower and the original key).
- The setting appears on the screen.
Press KEY CONTROL (b/#) repeatedly on the remote control to find the key that suits your vocal range.
• To flatten the key one by one, press the KEY CONTROL (b) repeatedly during playback. - To sharp the key one by one, press the KEY CONTROL (#) repeatedly during playback. - To return to the original key, press the KEY CONTROL (b/#) repeatedly to appear the original key.
To Adjust ECHO Volume
You can give an echo effect to the sound from the microphones.
Press the ECHO VOL. (○/○) on the remote control to increase the echo volume or decrease it. (MIN,1 - 14, MAX steps)
Reserving the Songs
You can reserve up to 8 melodies in advance, so you can enjoy them without waiting.
1 Press the NUMERIC buttons to select the melody number you want in the karaoke disc play mode. The melody number appears on the TV screen. 2 Press PROG./MEMO. The melody number is reserved. 3 Repeat steps 1-2. You can reserve up to 8 songs.

After one song finishes playing, the next song will play automatically.
To cancel a reserved song
Each time you press CLEAR, one reserved song will be cancelled.
To cancel or change a wrongly reserved song: Press PROG./MEMO. to move to the desired position, then press CLEAR to cancel the reserved song.
Male/Female Function
If you want to sing a song in a man's or woman's key, press MALE(♂)/FEMALE(♀) repeatedly to change the key.
Tempo Change
You can use this function to play faster or slower.
- Press TEMPO + repeatedly during singing to play faster.
- Press TEMPO - repeatedly during singing to play slower.
Shadow Function
If the Video CD caption and the song's subtitle are mixed up, the song's subtitle may be invisible. In this case, press SHADOW to highlight the song's subtitle.
- It will be highlighted by a background shadow image.
Screen Change Function VCD DVD
This function is used when you want to change the current screen during playing karaoke disc.
Press the DISC SELECT (DISC 1, DISC 2, DISC 3, DISC 4 or DISC 5) during playing karaoke disc. It is played a screen existing another disc.
Operation with KARAOKE
Karaoke MENU Playback
Preparation
Press MENU on the karaoke mode.
The main MENU appears on the screen.
Main MENU (On the TV screen)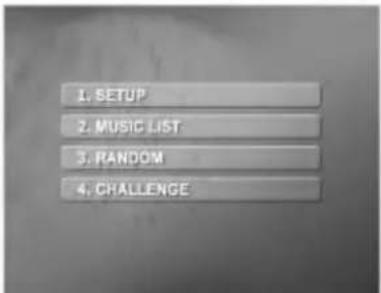
SETUP
1 Select "1. SETUP" by pressing ▲ / ▼ on the main menu. 2 Use 🔊/▶ to select the desired option, and press SELECT/ENTER.
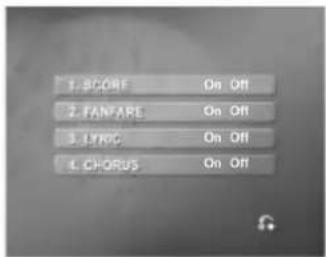
SCORE On/Off
On: When singing by selection of melody, song score comes out after one piece of song is ended.
To cancel it, select the Off.
FANFARE On/Off
On: In condition of POWER ON, scoring fanfare operates. The fanfare sound comes out after singing finished.
To cancel it, select the Off.
LYRIC On/Off
On: When singing by selection of melody, song lyric appears on the TV screen.
To cancel it, select the Off.
CHORUS On/Off
On: When singing by selection of melody, song chorus is heard a sound.
To cancel it, select the Off.
Note
To move to the main menu, press MENU or RETURN.
MUSIC LIST
POP SONGS and CAROLS & KID'S SONGS
1 Select "2. MUSIC LIST" by pressing the ▲ / ▼ on the main menu. The POP SONGS, CAROLS & KID'S SONGS and CLASSICAL MUSIC menu will be shown on the TV screen.
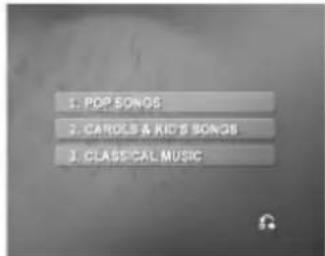
2 Select "1.POP SONGS" or "2.CAROLS & KID'S SONGS" by pressing the ▲ / ▼, and press SELECT/ ENTER. SONG LIST and SINGER LIST menu will be shown on the TV screen.
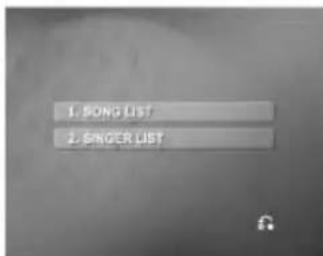
SONG LIST
1 Select "1.SONG LIST" and select the initial of the song title you want by pressing the ▲ / ▼, then press SELECT/ ENTER.
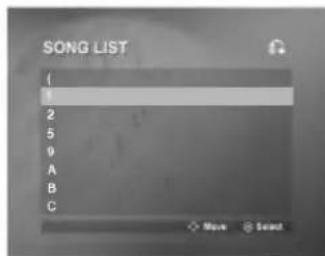
2 Select the song title you want by pressing the ▲ / ♥, and press SELECT/ ENTER.
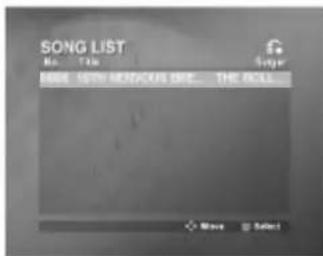
Operation with KARAOKE
SINGER LIST
1 Select "2.SINGER LIST" and select the initial of the singer you want by pressing the / , and press SELECT/ ENTER.
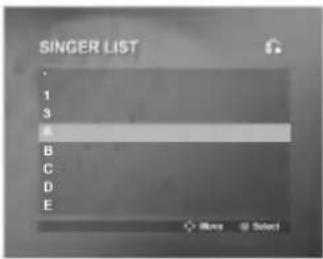
2 Select the singer you want by pressing the ▲ / ▼, and press SELECT/ ENTER.
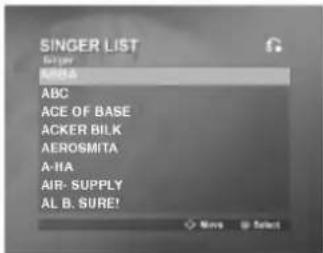
3 Select the song title of the singer you want by pressing the 🔊/♥, and press SELECT/ ENTER.
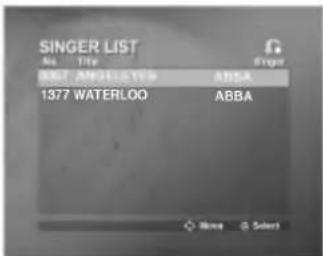
Note
To move the previous mode, select the 📋 by pressing the 🔺/♥, then press SELECT/ ENTER.
CLASSICAL MUSIC
1 Select "3. CLASSICAL MUSIC" by pressing the ▲ / ▼ on the MUSIC LIST menu, then press SELECT/ENTER.
The CLASSIC LIST and COMPOSER LIST menu will be shown on the TV screen.
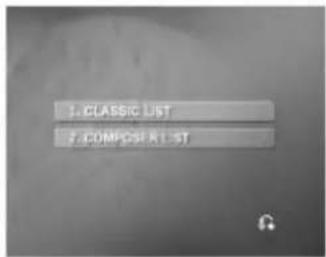
CLASSIC LIST
1 Select "1.CLASSIC LIST" and select the initial of the song title you want by pressing the ▲ / ▼, then press SELECT/ ENTER.
2 Select the song title you want by pressing the ▲ / ♥, and press SELECT/ ENTER.
COMPOSER LIST
1. Select "2. COMPOSER LIST" and select the initial of the composer you want by pressing ▲/▼, then press SELECT/ENTER.
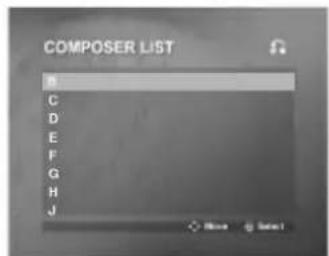
Operation with KARAOKE
2. Select the composer you want by pressing ▲/▼, and press SELECT/ENTER.
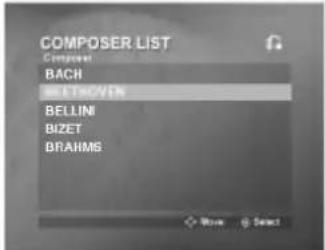
3. Select the song title of the composer you want by pressing ▲/▼, and press SELECT/ENTER.
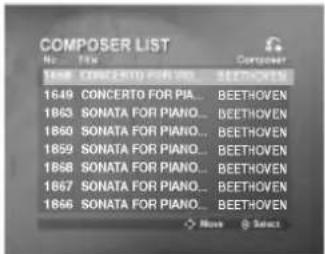
Note
To move to the previous mode, select the 📂 by pressing 🔊/♥, then press SELECT/ENTER.
RANDOM
1. Select "3. RANDOM" by pressing ▲/▼ on the main menu.
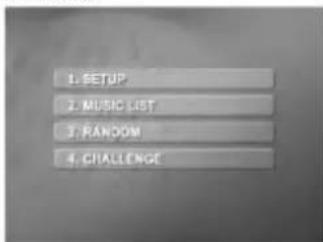
2. Press SELECT/ENTER to begin randomly.
CHALLENGE
It has a function which enjoys a song game dividing by two teams of red team & blue team.
1. Select "4. CHALLENGE" by pressing ▲/▼ on the main menu. It appears as below.
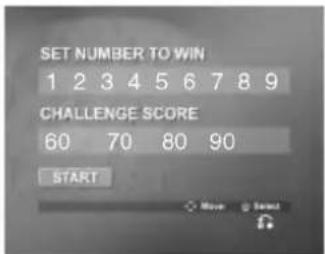
2. Select "SET NUMBER TO WIN" by pressing ▲/▼, and select one of NUMERIC buttons 1~9 by pressing ▲/▼ to select winner's number, then press SELECT/ENTER.
3. Select "CHALLENGE SCORE" by pressing ▲/▼, and select one of 60, 70, 80 or 90 by pressing ▲/▼ to select success score, then press SELECT/ENTER.
4 Select "START" by pressing ▲ / √, then press SELECT/ ENTER. It appears as below.
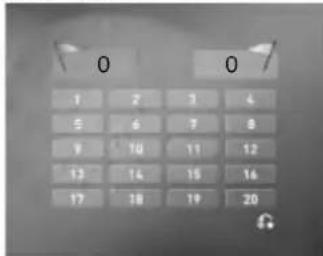
5 Select number you want by pressing ▲ / ▼ and press SELECT/ ENTER. Sing along with the accompaniment.
6 Repeat step 4~5. Change the team of red team or blue team alternately.
7 When reaching the targeted winning number, the "CONGRATULATION!" will be shown on the TV screen. It appears as below.

8 Whether you keep going the song game or not, select "1. YES" or "2. NO" by pressing ▲ / √ as below.
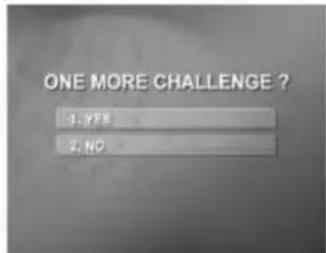
Troubleshooting
Check the following guide for the possible cause of a problem before contacting service.
| Symptom | Cause | Correction |
| No power. | The power cord is disconnected. | Plug the power cord into the wall outlet securely. |
| The power is on, but the unit does not work. | No disc is inserted. | Insert a disc. (Check that the DVD or, audio CD indicator in the DVD display is lit.) |
| No picture. | The TV is not set to receive DVD signal output. | Select the appropriate video input mode on the TV so the picture from the unit appears on the TV screen. |
| The video cable is not connected securely. | Connect the video cable into the jacks securely. | |
| The connected TV power is turned off. | Turn on the TV. | |
| There is no sound or only a very low-level sound is heard. | The equipment connected with the audio cable is not set to receive DVD signal output. | Select the correct input mode of the audio so you can listen to the sound from the unit. |
| The audio cables are not connected securely. | Connect the audio cable into the jacks securely. | |
| The power of the equipment connected with the audio cable is turned off. | Turn on the equipment connected with the audio cable. | |
| The audio connecting cord is damaged. | Replace it with new one. | |
| The playback picture is poor. | The disc is dirty. | Clean the disc. |
| The unit does not start playback. | No disc is inserted. | Insert a disc. (Check that the DVD, or audio CD indicator in the DVD display is lit.) |
| An unplayable disc is inserted. | Insert a playable disc. (Check the disc type, color system and Regional code.) | |
| The disc is placed upside down. | Place the disc with the playback side down. | |
| The disc is not placed within the guide. | Place the disc on the disc tray correctly inside the guide. | |
| The disc is dirty. | Clean the disc. | |
| A menu is on the TV screen. | Press the SET-UP button to turn off the menu screen. | |
| The Rating level is set. | Cancel the Rating function or change the rating level. | |
| Severe hum or noise is heard. | The plugs and jacks are dirty. | Wipe them with a cloth slightly moistened with alcohol. |
| The disc is dirty. | Clean the disc. | |
| The speakers and components are connected poorly. | Connect the speakers and components securely. | |
| The unit is located with too close to the TV. | Move your TV away from the audio components. | |
| Radio stations cannot be tuned in. | The antenna is positioned or connected poorly. | Connect the antenna securely. |
| Adjust the antennas and connect an external antenna if necessary. | ||
| The signal strength of the stations is too weak (when tuning in with automatic tuning). | Tune in the station manually. | |
| No stations have been preset or preset stations have been cleared (when tuning by scanning preset stations). | Preset the stations. | |
| The remote control does not work properly. | The remote control is not pointed at the remote sensor of the unit. | Point the remote control at the remote sensor of the unit. |
| The remote control is too far from the unit. | Operate the remote control within about 23 ft (7 m). | |
| There is an obstacle in the path of the remote control and the unit. | Remove the obstacle. | |
| The batteries in the remote control are exhausted. | Replace the batteries with new ones. | |
| The disc tray is not opened | The DVD/CD function is not selected. | Select the DVD/CD function by pressing DVD/KARAOKE button. And then press the OPEN/CLOSE button. |
Language Code List
Use this list to input your desired language for the following initial settings: Disc Audio, Disc Subtitle, Disc Menu.
| Language | Code | Language | Code | Language | Code | Language | Code |
| Abkhazian | 6566 | Finnish | 7073 | Macedonian | 7775 | Slovenian | 8376 |
| Afar | 6565 | French | 7082 | Malagasy | 7771 | Somali | 8379 |
| Afrikaans | 6570 | Galician | 7176 | Malay | 7783 | Spanish | 6983 |
| Albanian | 8381 | Georgian | 7565 | Malayalam | 7776 | Sudanese | 8385 |
| Ameharic | 6577 | German | 6869 | Maltese | 7784 | Swahili | 8387 |
| Arabic | 6582 | Greek | 6976 | Maori | 7773 | Swedish | 8386 |
| Armenian | 7289 | Greenlandic | 7576 | Marathi | 7782 | Tagalog | 8476 |
| Assamese | 6583 | Guarani | 7178 | Moldavian | 7779 | Tajik | 8471 |
| Azerbaijani | 6590 | Gujarati | 7185 | Mongolian | 7778 | Tamil | 8465 |
| Bashkir | 6665 | Hausa | 7265 | Nauru | 7865 | Tatar | 8484 |
| Basque | 6985 | Hebrew | 7387 | Nepali | 7869 | Telugu | 8469 |
| Bengali; Bangla | 6678 | Hindi | 7273 | Norwegian | 7879 | Thai | 8472 |
| Bhutani | 6890 | Hungarian | 7285 | Oriya | 7982 | Tibetan | 6679 |
| Bihari | 6672 | Icelandic | 7383 | Panjabi | 8065 | Tigrinya | 8473 |
| Breton | 6682 | Indonesian | 7378 | Pashto, Pushto | 8083 | Tonga | 8479 |
| Bulgarian | 6671 | Interlingua | 7365 | Persian | 7065 | Turkish | 8482 |
| Burmese | 7789 | Irish | 7165 | Polish | 8076 | Turkmen | 8475 |
| Byelorussian | 6669 | Italian | 7384 | Portuguese | 8084 | Twi | 8487 |
| Cambodian | 7577 | Japanese | 7465 | Quechua | 8185 | Ukrainian | 8575 |
| Catalan | 6765 | Javanese | 7487 | Rhaeto-Romance | 8277 | Urdu | 8582 |
| Chinese | 9072 | Kannada | 7578 | Rumanian | 8279 | Uzbek | 8590 |
| Corsican | 6779 | Kashmiri | 7583 | Russian | 8285 | Vietnamese | 8673 |
| Croatian | 7282 | Kazakh | 7575 | Samoan | 8377 | Volapük | 8679 |
| Czech | 6783 | Kirghiz | 7589 | Sanskrit | 8365 | Welsh | 6789 |
| Danish | 6865 | Korean | 7579 | Scots Gaelic | 7168 | Wolof | 8779 |
| Dutch | 7876 | Kurdish | 7585 | Serbian | 8382 | Xhosa | 8872 |
| English | 6978 | Laothian | 7679 | Serbo-Croatian | 8372 | Yiddish | 7473 |
| Esperanto | 6979 | Latin | 7665 | Shona | 8378 | Yoruba | 8979 |
| Estonian | 6984 | Latvian, Lettish | 7686 | Sindhi | 8368 | Zulu | 9085 |
| Faroese | 7079 | Lingala | 7678 | Singhalese | 8373 | ||
| Fiji | 7074 | Lithuanian | 7684 | Slovak | 8375 |
Area Code List
Choose an area code from this list.
| Country | Code | Country | Code | Country | Code | Country | Code |
| Afghanistan | AF | Ethiopia | ET | Malaysia | MY | Saudi Arabia | SA |
| Argentina | AR | Fiji | FJ | Maldives | MV | Senegal | SN |
| Australia | AU | Finland | FI | Mexico | MX | Singapore | SG |
| Austria | AT | France | FR | Monaco | MC | Slovak Republic | SK |
| Belgium | BE | Germany | DE | Mongolia | MN | Slovenia | SI |
| Bhutan | BT | Great Britain | GB | Morocco | MA | South Africa | ZA |
| Bolivia | BO | Greece | GR | Nepal | NP | South Korea | KR |
| Brazil | BR | Greenland | GL | Netherlands | NL | Spain | ES |
| Cambodia | KH | Heard and McDonald Islands | HM | Dutch Antilles | AN | Sri Lanka | LK |
| Canada | CA | Hong Kong | HK | New Zealand | NZ | Sweden | SE |
| Chile | CL | Hungary | HU | Nigeria | NG | Switzerland | CH |
| China | CN | India | IN | Norway | NO | Taiwan | TW |
| Colombia | CO | Indonesia | ID | Oman | OM | Thailand | TH |
| Congo | CG | Israel | IL | Pakistan | PK | Turkey | TR |
| Costa Rica | CR | Italy | IT | Panama | PA | Uganda | UG |
| Croatia | HR | Jamaica | JM | Paraguay | PY | Ukraine | UA |
| Czech Republic | CZ | Japan | JP | Philippines | PH | United States | US |
| Denmark | DK | Kenya | KE | Poland | PL | Uruguay | UY |
| Ecuador | EC | Kuwait | KW | Portugal | PT | Uzbekistan | UZ |
| Egypt | EG | Libya | LY | Romania | RO | Vietnam | VN |
| El Salvador | SV | Luxembourg | LU | Russian Federation | RU | Zimbabwe | ZW |
Specifications
General
| Power supply | Refer to the main label. |
| Power consumption | 90 W |
| Net Weight | 5.9 kg |
| External dimensions (W x H x D) | 190 X 352 X 295 mm |
Tuner/Amplifier
| FM | Tuning Range | 87.5 - 108.0 MHz or 65 -74 MHz, 87.5 -108.0 MHz |
| Intermediate Frequency | 10.7 MHz | |
| Signal to Noise Ratio | 60/55 dB (Mono/Stereo) | |
| Frequency Response | 50 - 10000 Hz | |
| AM | Tuning Range | 522 - 1620 kHz or 520 - 1720 kHz |
| Intermediate Frequency | 450 kHz | |
| Signal to Noise Ratio | 30 dB | |
| Frequency Response | 140 - 1800 Hz | |
| Output Power | Front: 100 W + 100 W (4 Ω, THD 10 %), Center: 50 W (8 Ω, THD 10%) | |
| Rear: 50 W + 50 W (8 Ω, THD 10 %), Sub woofer: 150 W (3 Ω, THD 10 %) | ||
| T.H.D | 0.5 % | |
| Frequency Response | 40 - 20000 Hz | |
| Signal-to-noise ratio | 75 dB | |
DVD/VCD/CD player
| Frequency response (audio) | 40 - 20000 Hz | Tape Speed | 3000 ± 3 % (MTT-111. |
| Signal-to-noise ratio (audio) | More than 75 dB (1 kHz) | NORMAL-SPEED) | |
| Signal-to-noise ratio (video) | More than 55 dB (1 kHz) | Wow Flutter | 0.25 % |
| Dynamic range (audio) | More than 80 dB | (TT -111, JIS-WTD) | |
| Video output | 1.0 V (p-p), 75 Ω | F.F/REW. Time | 120 sec (C-60) |
| S-video output | (Y) 1.0 V (p-p), 75 Ω | Frequency Response | 250 - 8000 Hz |
| (C) 0.3 V (p-p), 75 Ω | Signal to Noise Ratio | 43 dB | |
| Component Video output | (Y) 1.0 V (p-p), 75 Ω | Channel Separation | 50 dB (P/B)/45 dB (R/P) |
| (Pb)/(Pr) 0.7 V (p-p), 75 Ω | Erase Ratio | 55 dB (MTT-5511) |
Speakers
| Speaker Name | Front Speaker (L/R) | Center Speaker |
| Type | Bass Reflex 2Way 3Speaker | Bass Reflex 2Way 3Speaker |
| Impedance | 4 Ω | 8 Ω |
| Frequency Response | 60 - 20000 Hz | 150 - 20000 Hz |
| Sound Pressure Level | 85 dB/W (1m) | 85 dB/W (1m) |
| Rated Input Power | 100 W | 50 W |
| Max. Input Power | 200 W | 100 W |
| Net Dimensions (W x H x D) | 190 X 351 X 295 mm | 300 X 109 X 115 mm |
| Net Weight | 4.8 kg | 1.3 kg |
Speaker Name
| Type | Bass Reflex 1Way 1Speaker | Bass Reflex 1Way 1Speaker |
| Impedance | 8 Ω | 3 Ω |
| Frequency Response | 150 - 20000 Hz | 50 - 2000 Hz |
| Sound Pressure Level | 85 dB/W (1m) | 82 dB/W (1m) |
| Rated Input Power | 50 W | 150 W |
| Max. Input Power | 100 W | 300 W |
| Net Dimensions (W x H x D) | 100 X 354 X 117 mm | 190 X 351 X 295 mm |
| Net Weight | 0.9 kg | 4.9 kg |
P/NO:3834RH0137U



- SAFETY PRECAUTIONS
- CAUTION
- CAUTION CONCERNING THE POWER CORD
- POWER SAVE MODE
- TABLE OF CONTENTS
- INTRODUCTION
- PREPARATION
- OPERATION
- REFERENCE
- ABOUT SYMBOLS
- ABOUT THE 🔊 SYMBOL DISPLAY
- ABOUT THE DISC SYMBOLS FOR INSTRUCTIONS
- ABOUT THE SYMBOLS FOR INSTRUCTIONS
- BEFORE USE
- PLAYABLE DISCS
- NOTES
- NOTES ON DVDS AND VIDEO CDS
- REGIONAL CODE OF THE DVD PLAYER AND DVDS
- NOTE ON DTS-ENCODED CDS
- FRONT PANEL/ REAR PANEL
- REMOTE CONTROL
- REMOTE CONTROL OPERATION RANGE
- REMOTE CONTROL BATTERY INSTALLATION
- CONNECTIONS
- CONNECTING TO A TV
- TIPS
- VIDEO CONNECTION
- S-VIDEO CONNECTION
- COMPONENT VIDEO (COLOR STREAM®) CONNECTION
- PROGRESSIVE SCAN (COLORSTREAM® PRO) CONNECTION
- CONNECTING TO ANTENNA
- CONNECTING TO AUXILIARY EQUIPMENT
- VCR (OR AUXILIARY DEVICE, ETC)
- CONNECTING TO OPTIONAL EQUIPMENT
- CONNECTING USB
- TO REMOVE THE USB FROM THE UNIT
- SPEAKER SYSTEM CONNECTION
- BEFORE OPERATION
- VOLUME ADJUSTMENT
- SUBWOOFER LEVEL ADJUSTMENT
- MUTE
- HEADPHONE JACK
- EQUALIZER EFFECT
- XDSS (EXTREME DYNAMIC SOUND SYSTEM)
- XTS/XTS PRO
- VIRTUAL SOUND
- SETTING THE CLOCK
- SLEEP TIMER FUNCTION
- TO CANCEL THE SLEEP TIMER SETTING
- USING THE MICROPHONE
- TO ADJUST THE ECHO VOLUME
- DEMO
- DIMMER
- TIMER FUNCTION
- FOR YOUR REFERENCE
- TO CANCEL OR CHECK THE TIMER
- MINI GLOSSARY FOR AUDIO STREAM & SURROUND MODE
- DTS
- DIGITAL
- PRO LOGIC
- PROLOGIC II
- MOVIE MODE
- MUSIC MODE
- MATRIX MODE
- BYPASS
- SOUND MODE DVD VCD CD
- WHEN DVD IS INSERTED
- WHEN VIDEO CD IS INSERTED
- NOTE
- WHEN CD IS INSERTED
- GENERAL EXPLANATION
- ON-SCREEN DISPLAY
- ON-SCREEN DISPLAY OPERATION
- TEMPORARY FEEDBACK FIELD ICONS
- INITIAL SETTINGS
- TO DISPLAY AND EXIT THE MENU
- GENERAL OPERATION
- LANGUAGE
- OSD
- DISC AUDIO / SUBTITLE / MENU DVD
- DISPLAY
- TV ASPECT DVD
- DISPLAY MODE DVD
- PROGRESSIVE SCAN DVD
- TO TURN ON PROGRESSIVE SCAN
- AUDIO
- SPEAKER SETUP DVD
- SPEAKER SETUP
- SPEAKER
- SIZE
- VOLUME
- DISTANCE
- TEST
- DYNAMIC RANGE CONTROL (DRC) DVD
- VOCAL
- DVD
- LOCK (PARENTAL CONTROL)
- RATING DVD
- UNLOCK
- PASSWORD (SECURITY CODE)
- IF YOU FORGET YOUR SECURITY CODE
- AREA CODE DVD
- OTHERS
- PBC VCD
- DIVX(R) REGISTRATION DIVX
- OPERATION WITH DVD AND VIDEO CD
- PLAYING A DVD AND VIDEO CD
- PLAYBACK SETUP DVD VCD
- VCD
- TO SELECT A DISC DIRECTLY
- GENERAL FEATURES
- MOVING TO ANOTHER TITLE DVD DIVX
- MOVING TO ANOTHER CHAPTER/TRACK
- DVD VCD DIVX
- SEARCH DVD VCD DIVX
- STILL PICTURE AND FRAME-BY-FRAME PLAYBACK
- SLOW MOTION DVD VCD
- REPEAT DVD VCD DIVX
- DVD VIDEO DISCS - REPEAT CHAPTER/TITLE/OFF
- DIVX/ VIDEO CDS - REPEAT TRACK/ALL/OFF
- REPEAT A-B DVD VCD
- GENERAL FEATURES (CONTINUED)
- TIME SEARCH DVD VCD DIVX
- ZOOM DVD VCD
- MARKER SEARCH DVD VCD DIVX
- TO RECALL A MARKED SCENE
- TO CLEAR A MARKED SCENE
- SPECIAL DVD FEATURES
- CHECKING THE CONTENTS OF DVD VIDEO DISCS: MENUS
- TITLE MENU DVD DIVX
- DISC MENU DVD DIVX
- CAMERA ANGLE DVD
- SPECIAL DVD FEATURES (CONTINUED)
- CHANGING THE AUDIO LANGUAGE
- CHANGING THE AUDIO CHANNEL VCD
- SUBTITLE DVD DIVX
- LAST SCENE MEMORY DVD
- SCREEN SAVER
- SYSTEM SELECT
- OPERATION WITH AUDIO CD AND MP3/WMA DISC
- PLAYING AN AUDIO CD AND MP3/WMA
- FILE CD MP3 WMA
- AUDIO CD
- MP3 / WMA
- PAUSE CD MP3 WMA
- MOVING TO ANOTHER TRACK CD MP3 WMA
- REPEAT TRACK/ALL/OFF CD MP3 WMA
- SEARCH CD MP3 WMA
- MP3 / WMA DISC COMPATIBILITY WITH THIS PLAYER IS LIMITED AS FOLLOWS
- PROGRAMMED PLAYBACK CD MP3 WMA
- REPEAT PROGRAMMED TRACKS
- ERASING A TRACK FROM PROGRAM LIST
- ERASING THE COMPLETE PROGRAM LIST
- OPERATION WITH JPEG DISC
- VIEWING A JPEG DISC JPEG
- SLIDE SHOW JPEG
- MOVING TO ANOTHER FILE JPEG
- STILL PICTURE JPEG
- TO ROTATE PICTURE JPEG
- ZOOM JPEG
- JPEG DISC COMPATIBILITY WITH THIS PLAYER IS LIMITED AS FOLLOWS
- OPERATION WITH DIVX DISC
- NOTICE FOR DISPLAYING THE DIVX SUBTITLE
- DIVX DISC COMPATIBILITY WITH THIS PLAYER IS LIMITED AS FOLLOWS
- PLAYABLE DIVX SUBTITLE FILE
- PLAYABLE DIVX FILE
- PLAYABLE CODEC FORMAT
- PLAYABLE AUDIO FORMAT
- OPERATION WITH RADIO
- PRESETTING THE RADIO STATIONS
- TO CLEAR ALL MEMORIZED STATIONS
- TO RECALL PRESET NUMBERS
- LISTENING TO THE RADIO
- TO LISTEN TO NON-PRESET RADIO STATIONS
- TO SELECT A PRESET RADIO STATION DIRECTLY
- TO TURN THE RADIO OFF
- RDS FUNCTION : OPTIONAL
- ABOUT RDS : OPTIONAL
- RDS TUNING : OPTIONAL
- RDS DISPLAY OPTIONS : OPTIONAL
- PROGRAMME SEARCH (PTY) : OPTIONAL
- OPERATION WITH TAPE
- BASIC PLAYBACK
- AUTO REVERSE DECK
- TO STOP PLAY
- TO PLAY REWIND OR FAST FORWARD
- RECORDING FROM RADIO, CD OR AUXILIARY
- SOURCE
- CD- SYNCHRO RECORDING
- OPERATION WITH KARAOKE
- KARAOKE BASIC PLAYBACK
- KARAOKE ADVANCED PLAYBACK
- TO ADJUST MIC VOLUME
- KEY CONTROL
- TO ADJUST ECHO VOLUME
- RESERVING THE SONGS
- TO CANCEL A RESERVED SONG
- MALE/FEMALE FUNCTION
- TEMPO CHANGE
- SHADOW FUNCTION
- SCREEN CHANGE FUNCTION VCD DVD
- KARAOKE MENU PLAYBACK
- SETUP
- SCORE ON/OFF
- FANFARE ON/OFF
- LYRIC ON/OFF
- CHORUS ON/OFF
- MUSIC LIST
- POP SONGS AND CAROLS & KID'S SONGS
- SONG LIST
- SINGER LIST
- CLASSICAL MUSIC
- CLASSIC LIST
- COMPOSER LIST
- RANDOM
- CHALLENGE
- TROUBLESHOOTING
- LANGUAGE CODE LIST
- AREA CODE LIST
- SPECIFICATIONS
Brand : LG
Model : LX-K7960A
Category : Karaoke