
BTDT2-919 - Receiver BRIGMTON - Free user manual and instructions
Find the device manual for free BTDT2-919 BRIGMTON in PDF.


| Product Type | Digital Terrestrial Receiver (DVB-T2) |
| Brand | Brigmton |
| Model | BTDT2-919 |
| Connectivity | HDMI, SCART, Coaxial digital audio, RF input and loop through, USB 2.0 |
| Video Output | HDMI, SCART (composite video) |
| Audio Output | Coaxial digital, SCART (stereo), HDMI |
| Tuner | DVB-T2/T (terrestrial) |
| PVR Function | Yes (requires USB storage) |
| Time Shift | Yes |
| Electronic Program Guide (EPG) | Yes |
| Subtitles | DVB subtitles, Teletext subtitles |
| OSD Languages | Multiple (English, Spanish, etc.) |
| Channel Search | Automatic and manual |
| Media Playback | Yes (via USB: video, audio, images) |
| Software Update | Via USB |
| Power Supply | 5V DC, 1A (external adapter) |
| Remote Control | Infrared, range up to 7m, angle up to 60° |
| LED Display | Yes (channel number or time) |
| Safety | Double insulation, CE certified |
| Dimensions (approximate) | 130 mm x 80 mm x 30 mm |
| Weight (approximate) | 200 g |
| Operating Temperature | Moderate climate (0°C to 40°C) |
Frequently Asked Questions - BTDT2-919 BRIGMTON
User questions about BTDT2-919 BRIGMTON
0 question about this device. Answer the ones you know or ask your own.
Ask a new question about this device
Download the instructions for your Receiver in PDF format for free! Find your manual BTDT2-919 - BRIGMTON and take your electronic device back in hand. On this page are published all the documents necessary for the use of your device. BTDT2-919 by BRIGMTON.
USER MANUAL BTDT2-919 BRIGMTON
natural_image
Abstract black circular logo design on white background (no text or symbols)BRIGMTON
surfing technology
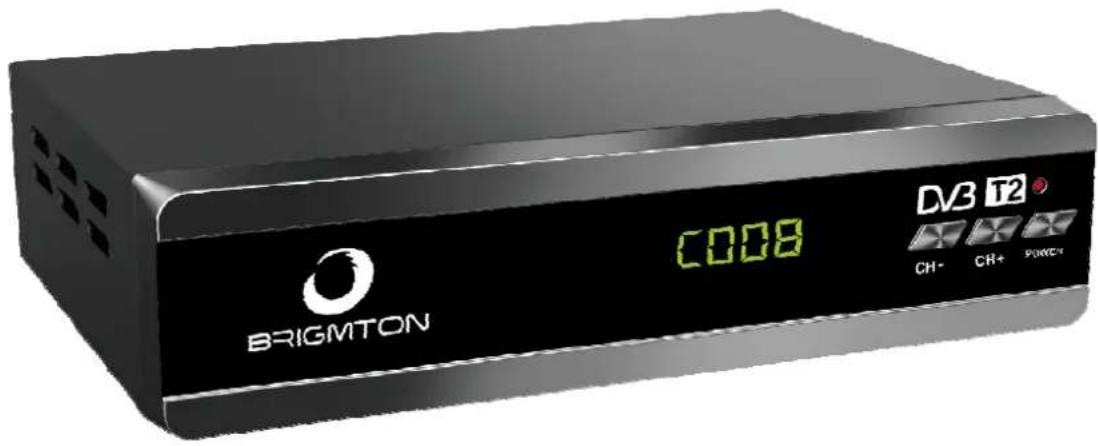
FIGURA 2.1
2.2 GUÍA DE PROGRAMAS ELECTRÓNICOS (EPG)
FIGURA 2.4 MENÚ SUBTÍTULOS
FIGURA 2.5 MENÚ SUBTÍTULOS TTX
FIGURA 3.2 BÚSQUEDA AUTOMÁTICA
FIGURA 3.4 BÚSQUEDA MANUAL
| Preference | ||
| OSD Language | English | > |
| OSD Timeout | 3s | > |
| OSD Transparency | 0% | > |
| 1st Preferred Subtitle | English | > |
| 2nd Preferred Subtitle | English | > |
| Hard Hearing | Off | > |
| 1st Preferred Audio | English | > |
| 2nd Preferred Audio | English | > |
FIGURA 3.6 MENÚ PREFERENCIA
3.2.1 Lenguaje OSD
FIGURA 3.7 MENÚ LENGUAJE OSD
FIGURA 3.8 MENÚ TIEMPO DE ESPERA OSD
3.2.3 Transparencia OSD
FIGURA 3.9 MENÚ TRANSPARENCIA OSD
FIGURA 3.9 MENÚ SUBTÍTULO PREFERIDO
FIGURA 3.10 PROBLEMAS AUDITIVOS
3.3 Configuración
FIGURA 3.12
FIGURA 3.21
EMC Directive 2004/108/EC
EN 55032:2015
EN 61000-3-2:2014
EN 61000-3-3:2013
EN 55 020:2007+A12:2016
EN 55032:2015
natural_image
Abstract black circular logo design with curved and angular elements (no text or symbols)BRIGMTON
surfing technology
INSTRUCTION MANUAL
TDT2 - PVR - TIME SHIFT - HDMI
BTDT2-919
SECURITY
- Read these instructions.
- Keep these instructions.
- Pay attention to all warnings.
- Follow all instructions.
- Do not use this equipment near water.
- Clean only with a dry cloth.
- Do not place near heat sources such as radiators, heat registers, stoves, or any other apparatus (including amplifiers) that produce heat.
- Use this product only with the type of power indicated on the label. If you are not sure of the type of power in your home, consult your local company. Disconnect the unit from the power supply before servicing it and before any installation procedure.
- Protect the power cord from damage and stress.
- Use only accessories specified by the manufacturer.
- Unplug the device during lightning storms or when you stop using it for a long period of time.
- Refer all repairs to qualified service personnel. Service is required when the device has been damaged in any way, including damage to the power cord or plug. If the unit has been exposed to liquids or moisture, it has been dropped or is not functioning properly.
- Do not impede the flow of air in the unit, blocking the ventilation slots.
- Attention should be paid to the environmental aspects of battery disposal.
- Use the equipment in a moderate climate.
CAUTION: To reduce the risk of fire or electric shock, DO NOT expose the equipment to rain or moisture.
WARNING: Batteries should not be exposed to excessive heat, such as direct sunlight, fire, etc.

SECURITY
WARNING :
- The appliance should not be exposed to dripping or splashing and no objects should be placed on the appliance with liquids, such as vases.
- Batteries should not be exposed to excessive heat, such as sunlight, fire or the like.
This symbol indicates that there are dangerous voltages that constitute a risk of electric shock within this unit

This symbol indicates that there are important operating and maintenance instructions in the literature that accompanies this unit.

This symbol indicates that this product incorporates double insulation between the hazardous mains voltage and the parts accessible to the user. When performing maintenance, use only identical replacement parts.
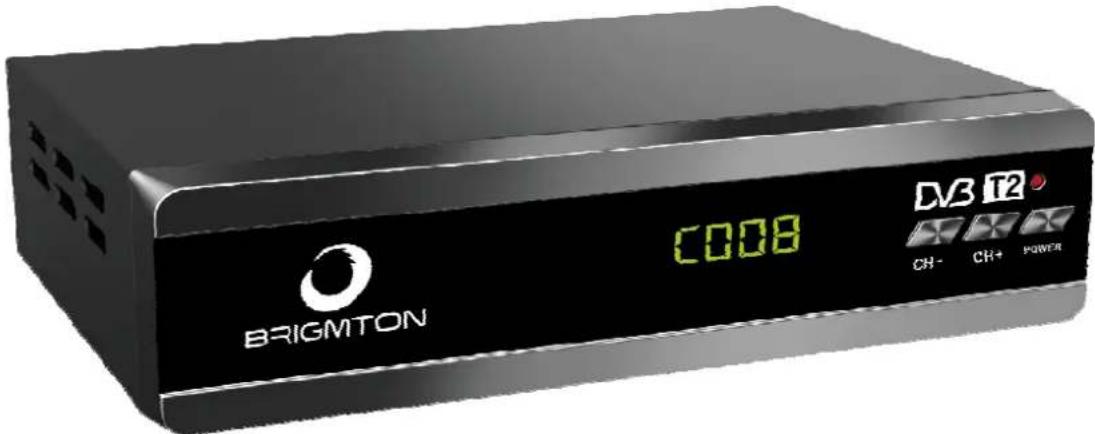
FRONT AND REAR PANEL
(1) POWER FUNCTION: PRESS TO TURN ON / OFF THE MAIN POWER SUPPLY.
(2) DOWN CHANNEL: USED TO CHANGE CHANNELS WITHOUT USING THE REMOTE CONTROL.
(3) UP CHANNEL: USED TO CHANGE CHANNELS WITHOUT USING THE REMOTE CONTROL.
(4) LED DISPLAY: USED TO SHOW THE CHANNEL NUMBER OR TIME.
(5) REMOTE CONTROL SENSOR: USED TO RECEIVE THE SIGNAL FROM THE REMOTE CONTROL.
(6) USB: FOR SOFTWARE UPDATE AND MEDIA PLAYBACK.
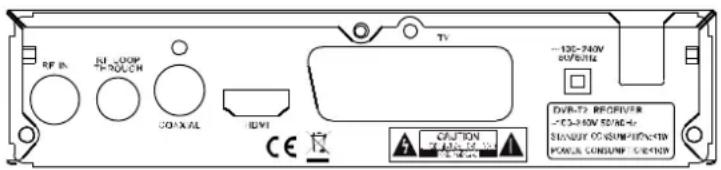
(1) RF IN: This connector connects to your external antenna.
(2) RF BRAKING THROUGH: This connector will feed the RF signal to your TV or other video system,
(3) AV
(4) Coaxial: emits digital audio.
(5) HDMI: High Definition audio and video output used to connect to an HDMI device.
CONNECTION OF THE SYSTEM
For a basic connection from your set-top box to your TV, you can use the SCART connection. For a higher quality connection, use a direct HDMI connection, as shown below. Connect an audio amplifier. The use of coax is optional.
REMOTE CONTROL
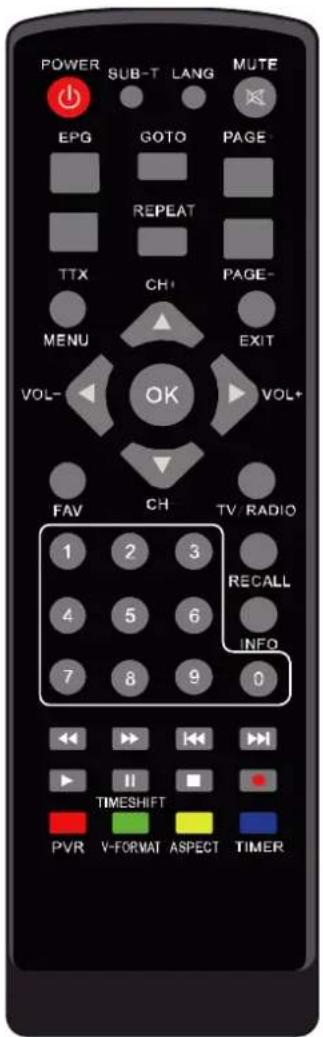
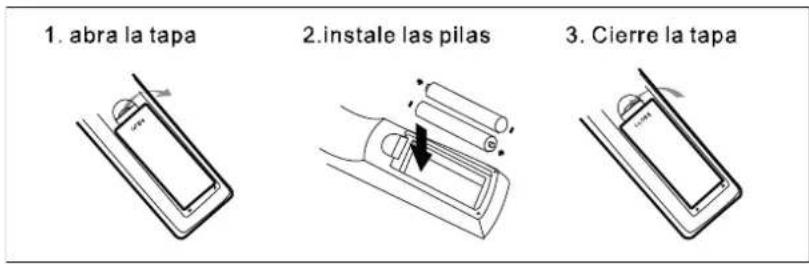
Inserting the batteries
Remove the battery cover on the back of the remote control and place 2 AAA batteries inside the compartment. Make sure that the polarities of the batteries match the polarity markings inside the compartment.
Using the remote control
To use the remote control, point towards the front of the digital decoder. The remote control has a range of up to 7 meters from the decoder at an angle of up to 60^ .
The remote control will not work if your route is blocked.

Sunlight or very bright light will decrease the sensitivity of the vote control.
FUNCTIONING
The first installation will make some important configurations. It contains several options such as language, country (area), time zone, active antenna, LCN, as you can see in figure 2.1:
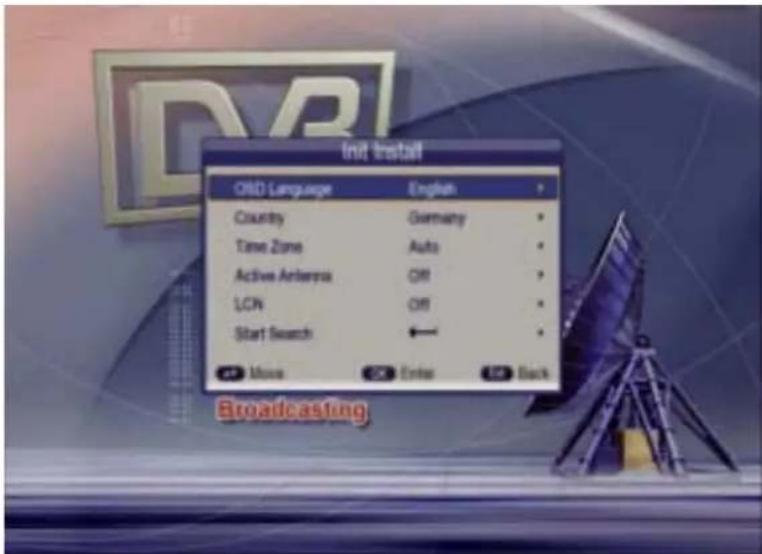
2.1
2.2 ELECTRONIC PROGRAMS GUIDE (EPG)
You can press the (EPG) button on the remote control to enter the EPG page and learn more about the programs that will be played. As shown in the following figure, the Now / Next button, Press (EXIT) or (EPG) to mute the EPG menu.
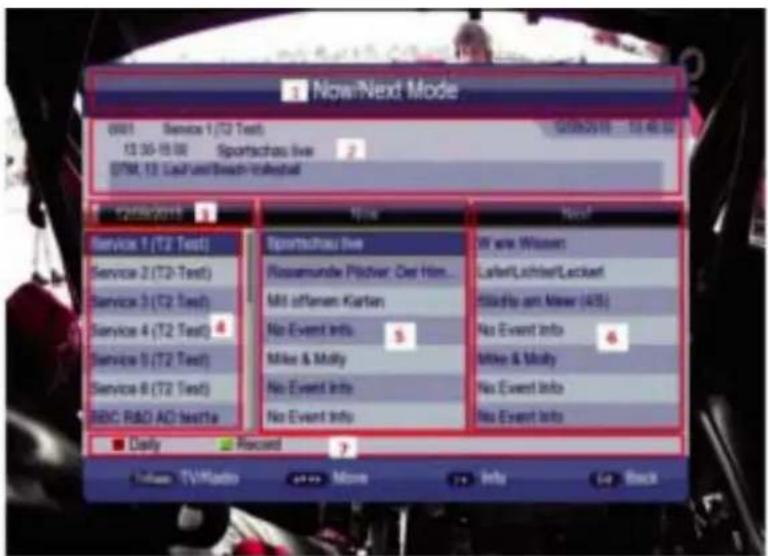
2-1 MENÚ EPG
There are 7 parts:
- Label 1 shows the current status of EPG.
- Label 2 shows the current program information and time.
- Label 3 shows detail of the date.
- Label 4: The (UP / DOWN) button can change different channels. Press the (PAGE - / + ) button to change to a differentLa etiqueta 5 muestra información actual del programa de reproducción (NOW). Presione UP
AND DOWN). The button can change is status NOW and NEXT.
- Label 6 shows the program information of the next time interval (NEXT).
- Tag 7 shows the information of the current track
2.3 TELETEXT
Press the (TEXT) button to enter the teletext menu, as shown in Figure 2.3.
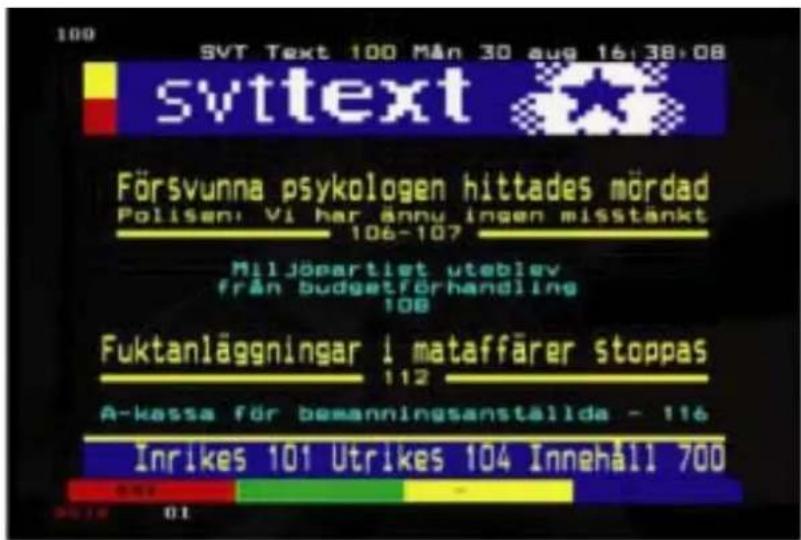
The default set of subtitles is closed. Press the SUBTITLE button, enter the subtitle menu as shown in figure 2.4.
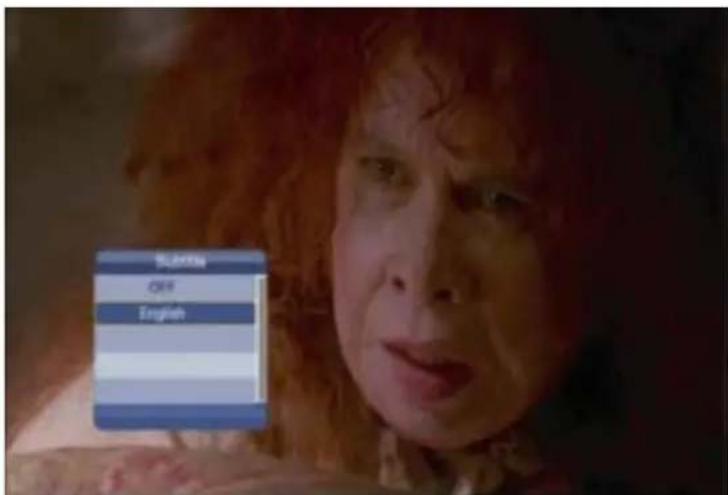
2.4
Press the UP / DOWN button to select the language.
2.4 SUBTITLE TTX
The default TTX subtitle set is closed. Press the SUBTITLES button and enter the subtitle menu as shown in figure 2.5.
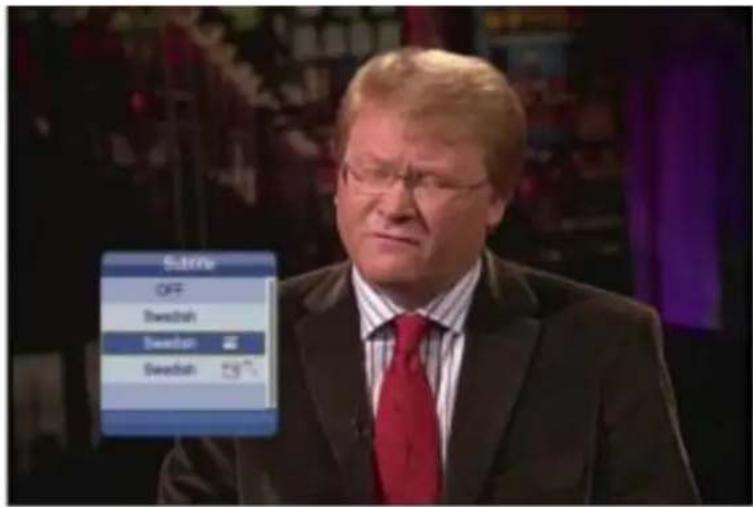
2.5
3. Introduction of the Main Menu
3.1 Installation
To help use the installation antenna and the search program as shown in 3.1.
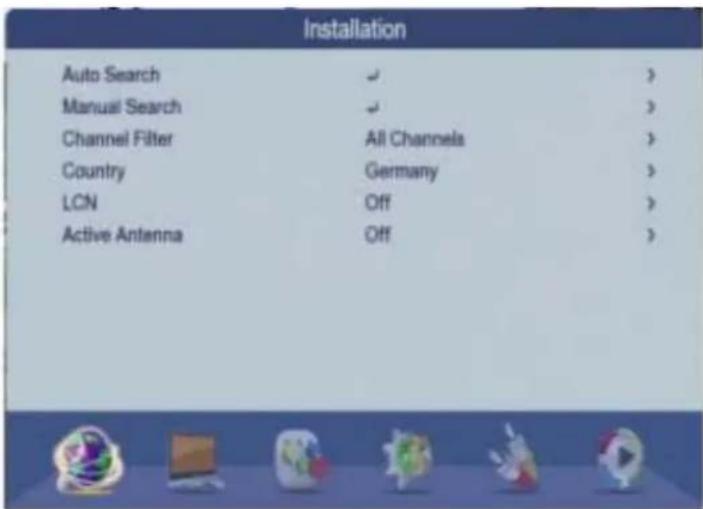
3.1
- Audio search
- Manual search
- Channel filter: just look for the free program or search the entire program.
- Country: select the country
- LCN: logical channel number
- Active antenna: antenna feed
3.1.1 Automatic search
The automatic search element is used to search the TV / Radio program according to the list of frequencies as shown in section 3.2.
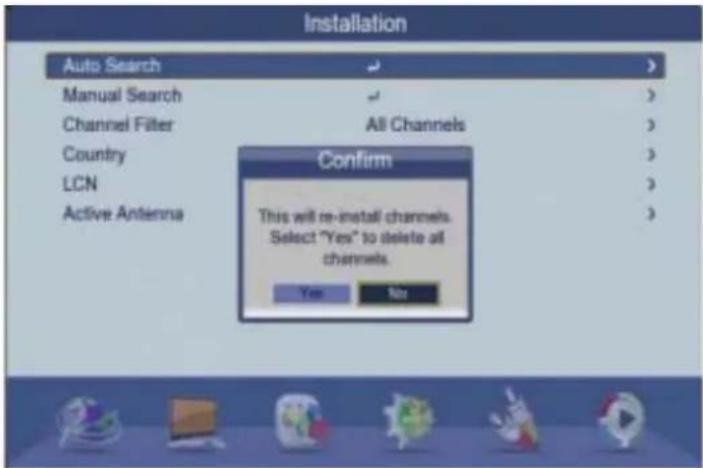
3.2
The system will search for the program and save it automatically as in figure 3.3:
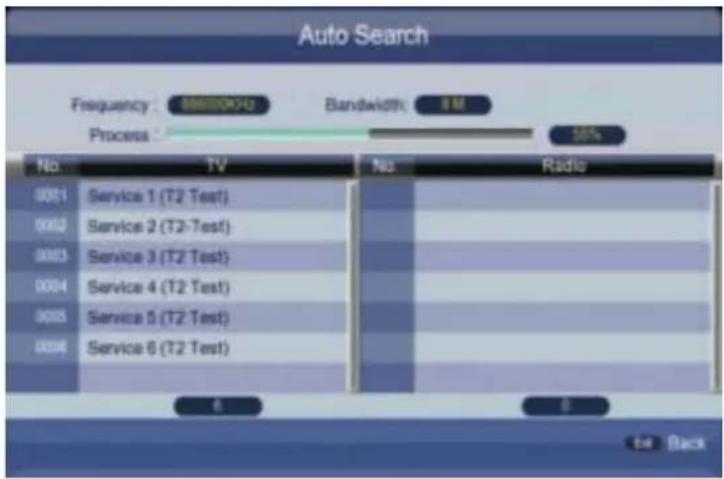
3.3
3.1.2 Manual search
It can be used to search for programs according to the specific frequency. Select the item and enter in the menu as in figure 3.4.
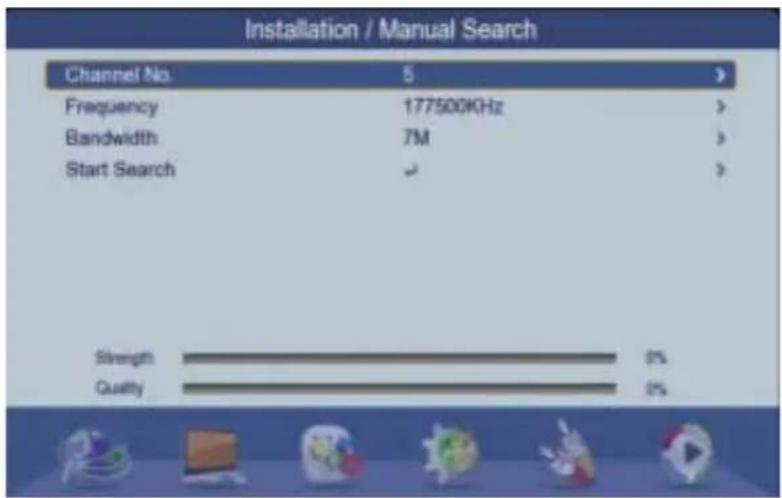
3.4
There are three configurations:
(1) Channel number
(2) Frequency (KHz): the predetermined frequency is 177143 KHz. You can enter the number directly.
(3) Bandwidth: select Bandwidth between 6 MHz, 7MHz and 8MHz by default.
Press start search button.
Finished search The system will save the program and the back menu (installation).
3.1.3 Channel filter
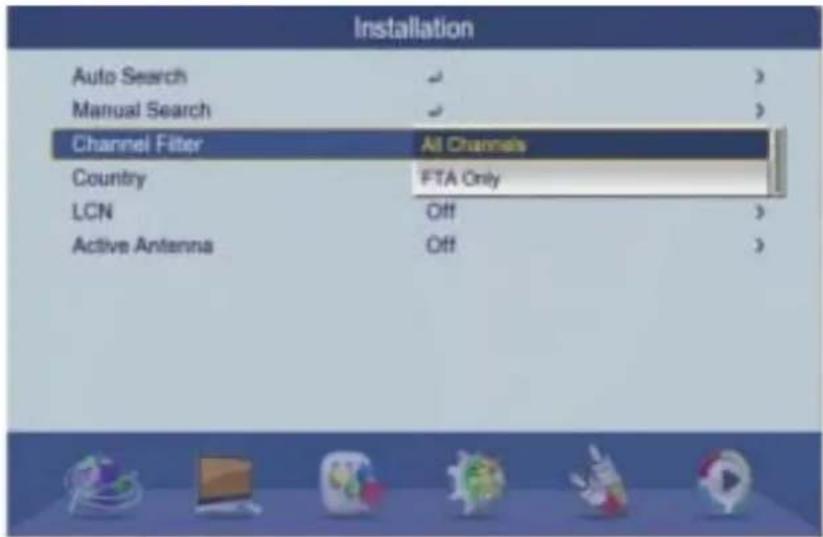
3.5
Press the UP / DOWN button to change the different item, then press the ENTER button to select it. Just look for the free program or look for free + encrypt. The Country program is used to select the Country. The LCN
element is used to establish the logical order of the channel. The Active Antenna item is used to activate / deactivate the active antenna. The system will turn off the power when it is activated and the antenna is disconnected.
3.2 Preference
The Preference menu is used to configure the language and audio settings as shown in Figure 3.6.
| Preference | ||
| OSD Language | English | > |
| OSD Timeout | 3s | > |
| OSD Transparency | 0% | > |
| 1st Preferred Subtitle | English | > |
| 2nd Preferred Subtitle | English | > |
| Hard Hearing | Off | > |
| 1st Preferred Audio | English | > |
| 2nd Preferred Audio | English | > |
3.6
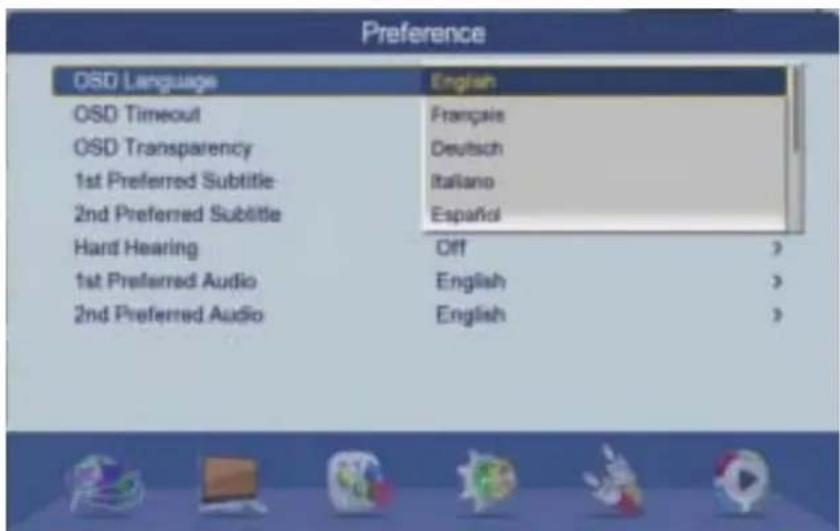
3.2.1 OSD language
It is used to configure the menu language as shown in figure 3.7.
3.7
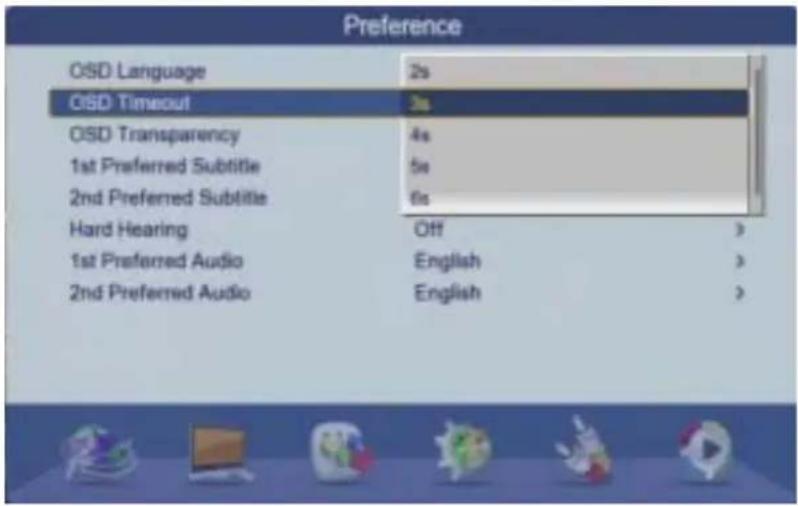
3.2.2 OSD wait time
It is used to configure the menu display time as shown in figure 3.8.
3.8
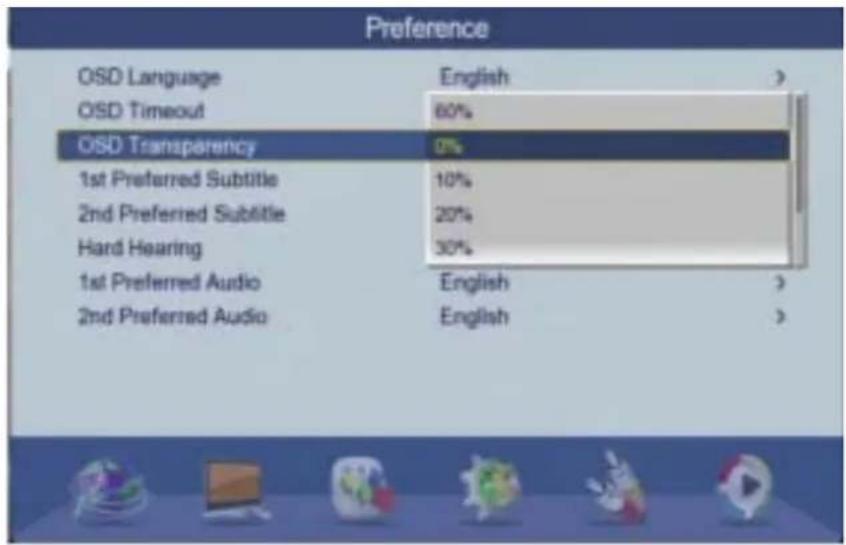
3.2.3 OSD Transparency
It is used to adjust the transparency of the main menu as shown in figure 3.9.
3.9
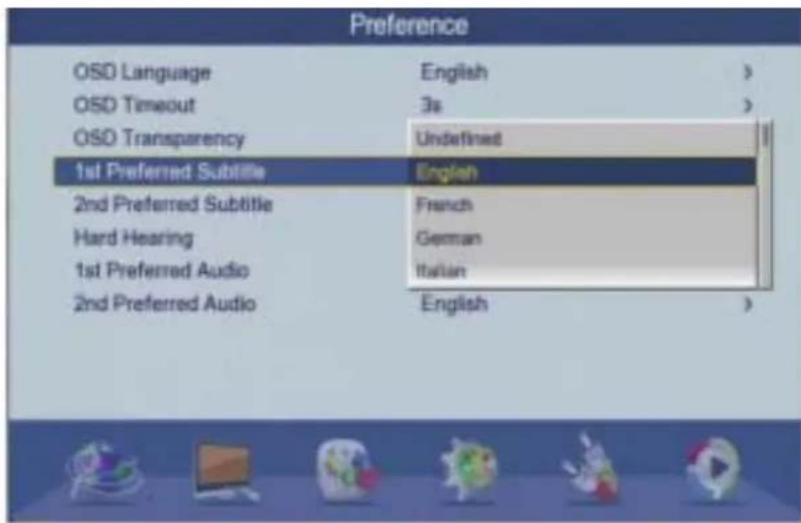
3.2.4 Favorite subtitle
It is used to configure the default subtitle language as shown in Figure 3.9.
3.9
3.2.5 Hearing problems
This item is used to configure users with hearing problems with special subtitles. It depends on whether the transmission operator has support for such a function, as shown in Figure 3.10.
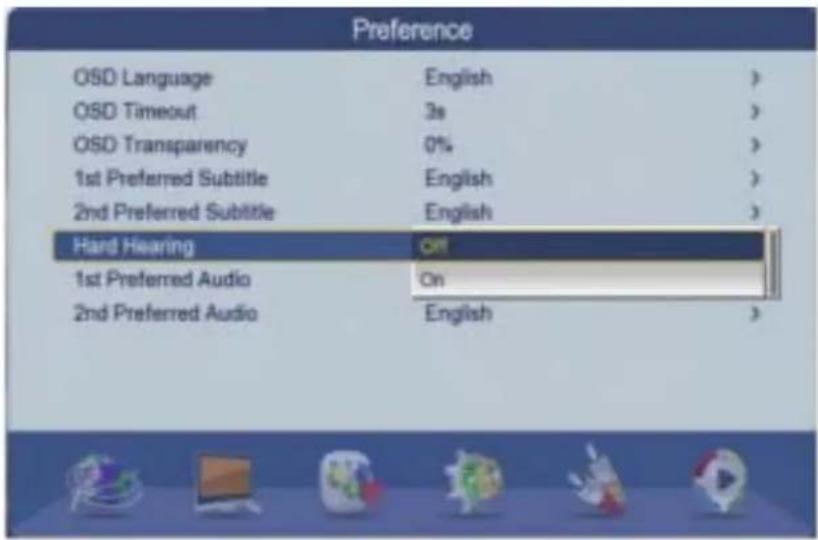
3.10
3.3 Configuration
It is used to perform the configuration of the system as shown in Figure 3.11.
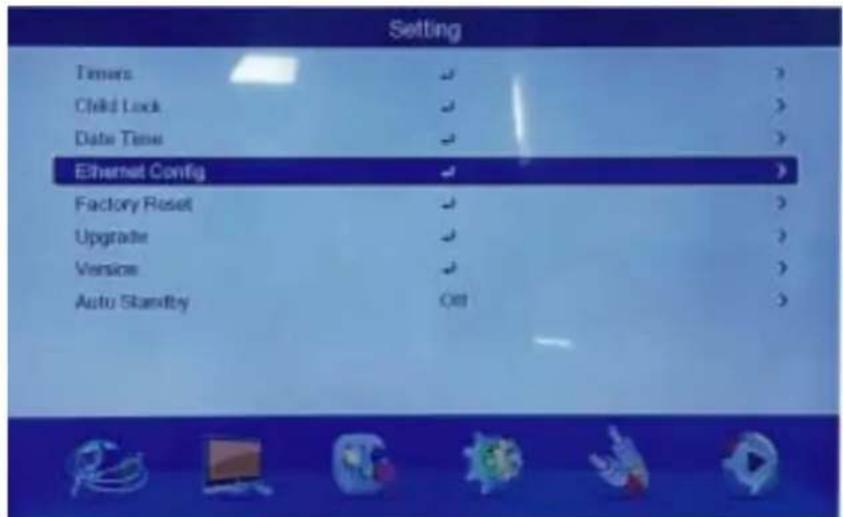
3.10
3.3.1 Choose the configuration. Then choose Ethernet / Config as shown in Figure 3.12.
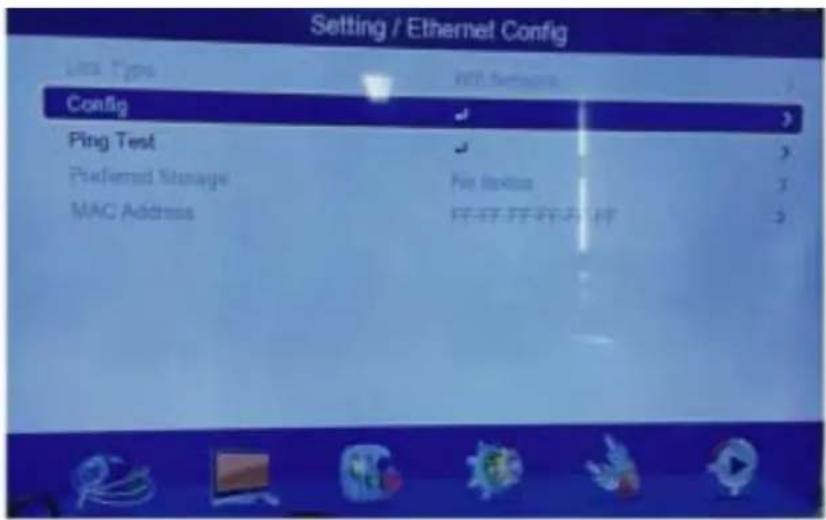
3.12
3.4 Media center
As seen in figure 3.13.
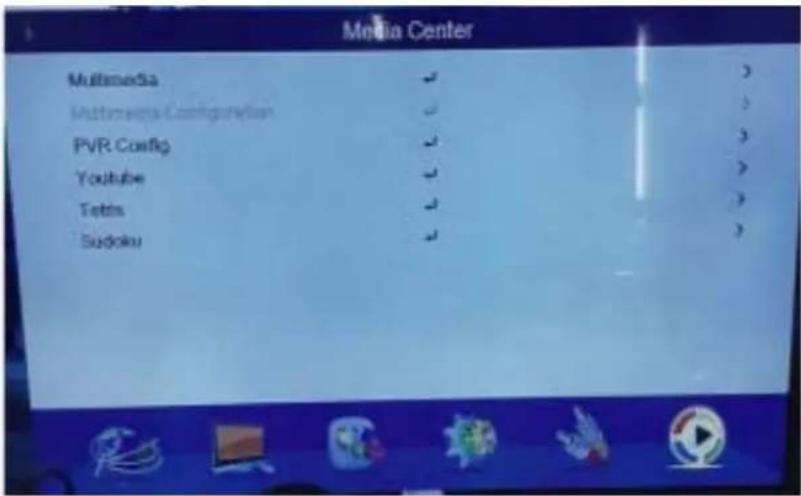
3.13 PVR CONFIG
3.4.3 Search
3.6.7 Broadcasting control
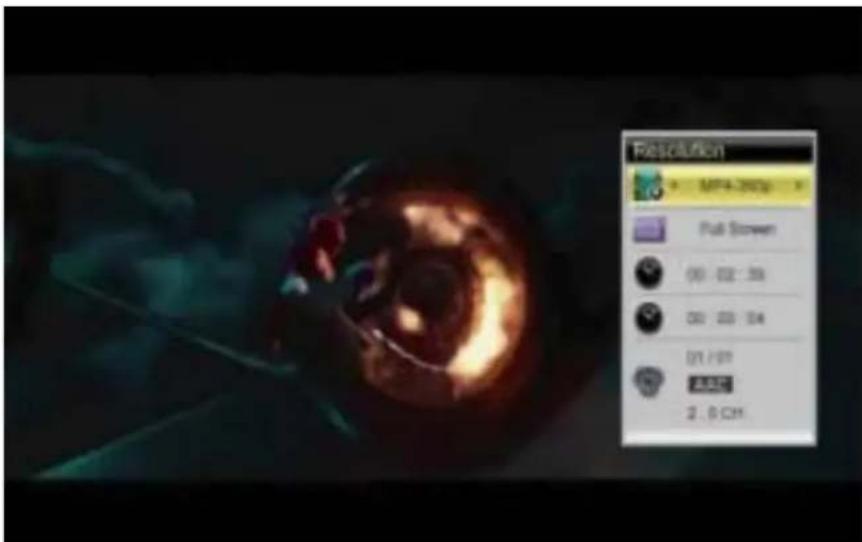
You can use the Recall or Stop key to exit, return the main interface. Press the Repeat key to start or cancel the video, you can use the Pause key to pause. Use FF for x2 for accelerated playback and Playback for normal speed.
3.6.8 Broadcasting options
In the process, you can use the INFO button to open a menu of options and the video format switch. The other for the mp4 format video, you can use the jump time for the first time.
3.20
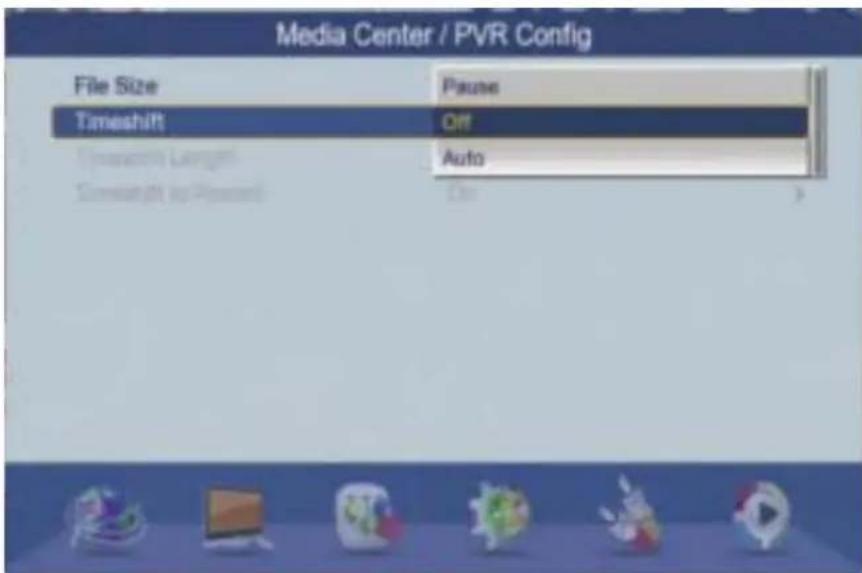
3.7 Change of time
The time change function is used to play the old schedule program. There are three ways, as shown in Figure 3.21.
3.21
"Features can change without notice"
BRIGMTON
surfing technology
IMPORTED
FERSON ELECTRÓNICA, S.A.
CIF: A-41111881
SANTA CLARA DE CUBA 12
TEL/FAX: 954256645/954256822
SEVILLA
ESPAÑA
Ferson Electrónica, S.A. declares under our responsibility that the equipment meets the requirements indicated in the following directives:
DIRECTIVAS EMC
Low Voltage Directive 2014/35/EU
EN 60065:2014
EMC Directive 2004/108/EC
EN 55032:2015
EN 61000-3-2:2014
EN 61000-3-3:2013
EN 55 020:2007+A12:2016
EN 55032:2015
Description of apparatus:
Model BRIGMTON BTDT2-919
BRIGMTON
Tunner
Made in China
- BRIGMTON
- GUÍA DE PROGRAMAS ELECTRÓNICOS (EPG)
- Lenguaje OSD
- Transparencia OSD
- Configuración
- INSTRUCTION MANUAL
- SECURITY
- WARNING :
- FRONT AND REAR PANEL
- CONNECTION OF THE SYSTEM
- REMOTE CONTROL
- Inserting the batteries
- Using the remote control
- FUNCTIONING
- ELECTRONIC PROGRAMS GUIDE (EPG)
- TELETEXT
- SUBTITLE TTX
- Introduction of the Main Menu
- Installation
- Automatic search
- Manual search
- Channel filter
- Preference
- OSD language
- OSD wait time
- OSD Transparency
- Favorite subtitle
- Hearing problems
- Configuration
- Media center
- Search
- Broadcasting control
- Broadcasting options
- Change of time
- DIRECTIVAS EMC
Brand : BRIGMTON
Model : BTDT2-919
Category : Receiver