
Ballistix - Memory Card Crucial - Free user manual and instructions
Find the device manual for free Ballistix Crucial in PDF.


| Product Type | Memory Module (RAM) |
| Brand | Crucial |
| Series | Ballistix |
| Form Factor | DIMM (288-pin) |
| Memory Type | DDR4 |
| Capacity Options | 8GB, 16GB, 32GB |
| Speed Options | 2400 MHz, 2666 MHz, 3000 MHz, 3200 MHz |
| CAS Latency | CL16 (for 3200 MHz) |
| Voltage | 1.35V (standard for DDR4) |
| Heat Spreader | Aluminum heat sink with black or white design |
| Pin Configuration | 288-pin |
| Dimensions (per module) | Approx. 133.35 mm x 31.25 mm |
| Weight (per module) | Approx. 30 g |
| Warranty | Limited lifetime warranty |
| Compatibility | Desktops with DDR4 slots |
| Overclocking Support | XMP 2.0 |
| Operating Temperature | 0°C to 85°C |
| Storage Temperature | -55°C to 100°C |
| Lead-Free | RoHS compliant |
Frequently Asked Questions - Ballistix Crucial
User questions about Ballistix Crucial
0 question about this device. Answer the ones you know or ask your own.
Ask a new question about this device
Download the instructions for your Memory Card in PDF format for free! Find your manual Ballistix - Crucial and take your electronic device back in hand. On this page are published all the documents necessary for the use of your device. Ballistix by Crucial.
USER MANUAL Ballistix Crucial
natural_image
3D technical illustration of a dual-chamber RAM module with multiple square slots and mounting holes (no text or symbols)Install Guide
Memory Module Installation
Equipment needed
- Memory module(s)
- Non-magnetic-tip screwdriver (for removing the cover on your computer)
- Your system’s owner’s manual
Installation process
-
Make sure that you are working in a static-safe environment. Remove any plastic bags or papers from your work space.
-
Shut down your system and make sure the power is completely off before unplugging the power cable from your computer. For laptops, then remove the battery.
-
Hold the power button for 3–5 seconds to discharge residual electricity.
-
Remove your computer's cover. Refer to your owner's manual for how to do this.
-
To protect your new memory modules and your system's components from static damage during the installation process, touch any of the unpainted metal surfaces on your computer's frame before handling and installing memory.
- Using your system's owner's manual, locate your computer's memory expansion slots. Do not use any tools in the removal or installation of memory modules.
- Insert your new memory module(s) in accordance with the illustrations in this guide. Align the notch(es) on the module with the notch(es) in the slot, and then press the module down until the clips on the slot snap into place. (It can take 20 to 30 pounds of pressure to install a module.) Fill the memory slots on your computer starting with the highest density (i.e. put the highest density module in bank 0).
- Once the module(s) have been installed, replace the cover on your computer and reconnect the power cord or battery. Installation is now complete.
DIMM installation

natural_image
Illustration of hands installing a rack frame with a magnified inset showing the mechanism (no text or symbols present)Using firm, even pressure, push DIMM into slot until clips snap into place. Do not assist clips.
SODIMM installation
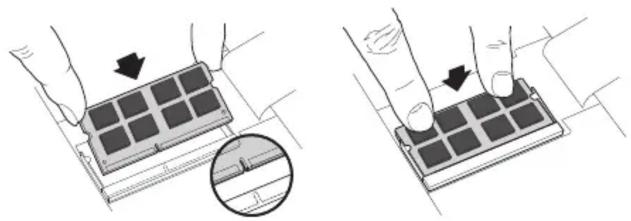
natural_image
Two-step diagram showing hand positioning of a grid device on a base, with arrows indicating movement (no text or symbols present)Firmly push the SODIMM in at a 45-degree angle, and then push down until clips snap into place. When it is fully seated in the slot, one-sixteenth of an inch or less of the gold pins will be visible.
Helpful hints & troubleshooting tips
If your system does not boot, check the following:
- If you receive an error message or hear a series of beeps, your system may not be recognizing the new memory. Remove and reinstall the modules to ensure they are securely seated in the slots.
- If your system won't boot, check all of the connections inside your computer. It is easy to bump a cable and pull it out of its connector, disabling devices such as your hard drive or CD-ROM. If your system still won't reboot, contact Crucial Technical Support.
- When restarting your system, you may get a message prompting you to update the configuration settings. Refer to your owner's manual for information. If you are still unsure, please call Crucial Technical Support for assistance.
- If you get a memory mismatch message, follow the prompts to enter the Setup menu, and then select Save and Exit. (This is not an error—some systems must do this to update the system settings.)
If you have any issues with installation, contact Crucial support with any questions or concerns.
Helpful Memory Support Resources
North and South America
http://www.crucial.com/usa/en/support-memory
Europe
United Kingdom:
http://uk.crucial.com/gbr/en/support-memory
European Union:
http://eu.crucial.com/eur/en/support-memory
France:
http://www.crucial.com/usa/en/support-memory
China:
http://www.crucial.cn/安装指南
Japan:
http://www.crucial.jp/jpn/ja/support-memory
www.crucial.com/support/memory
©2017 Micron Technology, Inc. All rights reserved. Information, products, and/or specifications are subject to change without notice. Neither Crucial nor Micron Technology, Inc. is responsible for omissions or errors in typography or photography. Micron, the Micron logo, Crucial, the Crucial logo, and The memory & storage experts are trademarks or registered trademarks of Micron Technology, Inc. All other trademarks are the property of their respective owners.
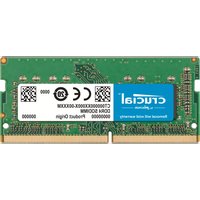
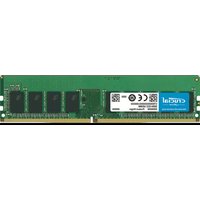
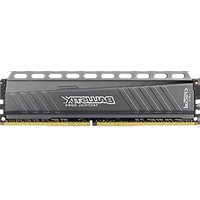
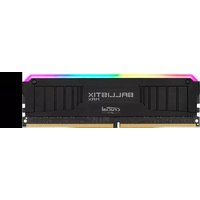
Brand : Crucial
Model : Ballistix
Category : Memory Card