
DVS7920 - DVD Player / VCR LG - Free user manual and instructions
Find the device manual for free DVS7920 LG in PDF.


| Type | DVD Player / VCR Combo |
| Model | LG DVS7920 |
| Dimensions (W x H x D) | 430 x 85 x 293 mm |
| Weight | 4.8 kg |
| Power Requirements | AC 200-240V, 50 Hz |
| Power Consumption | 23 W |
| Playable Discs | DVD, Video CD, Audio CD, MP3/WMA, JPEG, DVD-R/RW, CD-R/RW, Kodak Picture CD |
| VCR Features | Hi-Fi Stereo, Long Play (LP) mode, Timer Recording (up to 7 events), Instant Timer Recording (ITR), Automatic Tracking, CM Skip, OPR (Optimum Picture Response) |
| DVD to VHS Copy | One-button copy via COPY button (except copy-protected discs) |
| Simultaneous Operation | Watch DVD while recording TV to VCR |
| Remote Control | Controls both DVD and VCR decks |
| Video Outputs | Component (Y Pb Pr), S-Video, SCART (AV1), Composite (via SCART) |
| Audio Outputs | Analog stereo (RCA), Digital optical (TOSLINK) |
| Parental Control | Rating (1-8) with password protection |
| Dynamic Range Control (DRC) | Compresses audio dynamic range for low-volume listening |
| Screen Saver | Activates after 5 minutes in stop mode |
| Last Condition Memory | Remembers last playback position |
| Operating Temperature | 5°C to 35°C |
| Operating Humidity | 5% to 90% |
| Accessories Included | Remote control, SCART cable, audio/video cables, user manual |
Frequently Asked Questions - DVS7920 LG
User questions about DVS7920 LG
0 question about this device. Answer the ones you know or ask your own.
Ask a new question about this device
Download the instructions for your DVD Player / VCR in PDF format for free! Find your manual DVS7920 - LG and take your electronic device back in hand. On this page are published all the documents necessary for the use of your device. DVS7920 by LG.
USER MANUAL DVS7920 LG
Safety Precautions / Important notes on controlling this unit


CAUTION: TO REDUCE THE RISK OF ELECTRIC SHOCK DO NOT REMOVE COVER (OH BACK) NO USER-SERVICEABLE PARTS INSIDE REFER SERVICING TO QUALIFIED SERVICE PERSONNEL.

This lightning flash with arrowhead symbol within an equilateral triangle is intended to alert the user to the presence of uninsulated dangerous voltage within the product's enclosure that may be of sufficient magnitude to constitute a risk of electric shock to persons.

The exclamation mark within an equilateral triangle is intended to alert the user to the presence of important operating and maintenance (servicing) instructions in the literature accompanying the product.
WARNING: TO REDUCE THE RISK OF FIRE OR ELECTRIC SHOCK, DO NOT EXPOSE THIS PRODUCT TO RAIN OR MOISTURE.
CAUTION:
This Digital Viced Disc Player employs a Laser System. To ensure proper use of this product, please read this owner's manual carefully and retain for future reference, should the unit require maintenance, contact an authorized service location-

Notes on copyrights:
It is forbidden by law to copy, broadcast, show, broadcast via cable, play in public, or rent copyright material without permission.
This product features the copy protection function developed by Macrovision. Copy protection signals are recorded on some discs.
This product incorporates copyright protection technology that is protected by method claims of certain U.S. patents and other intellectual property rights owned by Macrovision Corporation and other rights owners. Use of this copyright protection technology must be authorized by Macrovision Corporation, and is intended for home and other limited viewing uses only unless otherwise authorized by Macrovision Corporation. Reverse engineering or disassembly is prohibited.
SERIAL NUMBER: The serial number is found on the back of this unit. This number is unique to this unit and not available to others. You should record requested information here and retain this guide as a permanent record of your purchase.
Model No.
Serial No.
Features:
- Complete versatility to play DVD, VCDs, audio CDs or VHS Tapes.
- Watch a DVD while recording a TV show to the VCR.
• Remote controls both DVD and VCR decks. - Records from DVD to VHS (unless DVD is copy protected with Macrovision).
• Hi-Fi Stereo VCR.
Important notes on controlling this unit
This unit uses one set of controls to operate both DVD
Contents
Introduction
Safety Precautions .... 2 Important notes on controlling this unit .... 2
Table of Contents 3
Before Use 4-5
Playable Discs....4 Discretions....5
Notes on Discs 5
Notes on Discs About Symbols 5
Front Panel and Display Window 6
Remote Control....7
Rear Panel 8
Preparation
Connections 9-10
Connecting to a TV & Decoder (or Satellite) ..... 9
Before Operation - VCR part 11-15
Tuning in a video channel on your TV....11
Using your VCR very first time 11
Setting the clock Manually 12
To set the colour system 12
How to using the main menu 13
Tuning in TV Stations Automatically ..... 13 Tuning in TV Stations Manually ..... 14
Tuning in TV Stations Manually 14 Changing the other of TV Stations 15
Changing the other of TV Stations .... 15 Deleting TV stations.... 15
Before Operation - DVD part 16-19
General Explanation. 16
On-Screen Display....16
Initial Settings 17-19
- Initial Settings General Operation....17
• Language 17
• Picture....17
• Sound 18
- Others 18
- Parental Control. 19
Operation
Operation with Tape 20-22
Operation with Audio CD and MP3/WMA Disc .. 26-27
Playing an Audio CD and MPS/WMA Disc ..... 26
• Note on MP3/WMA Recordings ..... 26
- Pause 27
- Moving to another Track 27
- Repeat Track/All/Off....27
- Search....27
- Random 27
- Repeat A-B 27
• 3D Surround ..... 27
- Changing the Audio Channel 27
Operation with JPEG Disc....28
Viewing a JPEG disc 28
- Moving to another file 28
• Still Picture 28
• To flip the picture 28
• To rotate picture 28
• Notes on JPEG Recordings 28
Programmed Playback 29
Programmed Playback with Audio CD and MP3/WMA Discs . 29
Programmed Playback with Video CD 29
- Repeat Programmed Tracks .... 29
- Erasing a Track from Program list ..... 29
- Erasing the Complete Program list....29 Additional Operation - VCR part 30-31
On Screen Display....30
Tape Counter Memory Stop 30
Child Lock 30
Video Doctor (Self-Diagnosis) 30
ez (easy) repeat....30
Hi-Fi Stereo Sound System 31
Wide Screen Compatibility 16:9....31
To set the decoder 31 ditional Operation PVD post 22
Additional Operation - DVD part....32 Last Condition Memory: 32
Last Condition Memory 32 Screen Saver 32
Screen Saver 32 Special Recording 33
Copying from DVD to VCR....33
Recording from another video recorder ..... 33
Before Use
playable Discs
| DVDVIDEO ^TM | DVD(8 cm / 12 cm disc) |
| COMPACTDISCCONIAL VIDEO | Video CD (VCD)(8 cm / 12 cm disc) |
| COMPACTDISCCONIAL AUDIO | Audio CD(8 cm / 12 cm disc) |
In addition, this unit can play a DVD-R, DVD±RW, Kodak PICTURE CD and CD-R or CD-RW that contains audio titles, MP3, WMA or JPEG files and SVCD also.
Notes
- Depending on the conditions of the recording equipment or the CD-R/RW (or DVD-R/±RW) disc itself, some CD-R/RW (or DVD-R/±RW) discs cannot be played on the unit.
- Do not attach any seal or label to either side (the labeled side or the recorded side) of a disc. - Do not use irregular shaped CDs (e.g., heart-shaped or octagonal). It may result in malfunctions.
Notes on DVDs and Video CDs
Some playback operations of DVDs and Video CDs may be intentionally fixed by software manufacturers. As this unit plays DVDs and Video CDs according to disc content designed by the software manufacturer, some playback features of the unit may not be available, or other functions may be added. Refer also to the instructions applied with the DVDs and Video CDs. Some DVDs made for business purposes may not be played on the unit.
Disc-related terms
Title (DVD only)
The main film content or accompanying feature content or additional feature content, or music album. Each title is assigned a title reference number enabling you to locate it easily.
Chapter (DVD only)
Sections of a picture or a musical piece that are smaller than titles.
A title is composed of one or several chapters. Each chapter is assigned a chapter number, enable you to locate the chapter you want. Depending on the disc, no chapters may be recorded.
Track (Video CD and audio CD only)
Sections of a picture or a musical piece on a video CD or an audio CD. Each track is assigned a track number, enabling you to locate the track you want.
Scene
On a video CD with PBC (Playback control) functions, moving pictures and still pictures are divided into sections called "Scenes". Each scene is displayed in the menu screen and assigned a scene number, enabling you to locate the scene you want. A scene is composed of one or several tracks.
Types of video CDs
There are two types of video CDs:
Video CDs equipped with PBC (Version 2.0)
PBC (Playback control) functions allow you to interact with the system via menus, search functions, or other typical computer-like operations. Moreover, still pictures of high resolution can be played if they are included in
Before Use (Cont'd)
Precautions
Handling the unit
When shipping the unit
The original shipping carton and packing materials come in handy. For maximum protection, re-pack the unit as it was originally packed at the factory.
When setting the unit
The picture and sound of a nearby TV or radio may be distorted during playback. In this case, position the unit away from the TV or radio, or turn off the unit after removing the disc.
To keep the surface clean
Do not use volatile liquids, such as insecticide spray, near the unit. Do not leave rubber of plastic products in contact with the unit for a long period of time. They will leave marks on the surface.
Cleaning the unit
To clean the cabinet
Use a soft, dry cloth. If the surfaces are extremely dirty, use a soft cloth lightly moistened with a mild detergent solution. Do not use strong solvents, such as alcohol, benzine, or thinner, as these might damage the surface of the unit.
To obtain a clear picture
The DVD player is a high-tech, precision device. If the optical pick-up lens and disc drive parts are dirty or worn down, the picture quality will be poor. Regular inspection and maintenance are recommended after every 1,000 hours of use. (This depends on the operating environment.)
Storing discs
After playing, store the disc in its case.
Do not expose the disc to direct sunlight or sources of heat, or leave it in a parked car exposed to direct sunlight, as there may be a considerable temperature increase inside the car.
Cleaning discs
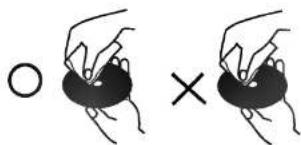
Fingerprints and dust on the disc can cause poor picture quality and sound distortion. Before playing, clean the disc with a clean cloth. Wipe the disc from the center out.
natural_image
Illustration of two hands holding a circular object with an 'O' and a cross, no text or symbols presentDo not use strong solvents such as alcohol, benzine, thinner, commercially available cleaners, or anti-static spray intended for older vinyl records.
About Symbols
About the Ⓧ symbol display
" ⊗ " may appear on the TV screen during operation. This icon means the function explained in this owner's manual is not available on that specific DVD video disc.
About the disc symbols for instructions
Front Panel and Display Window
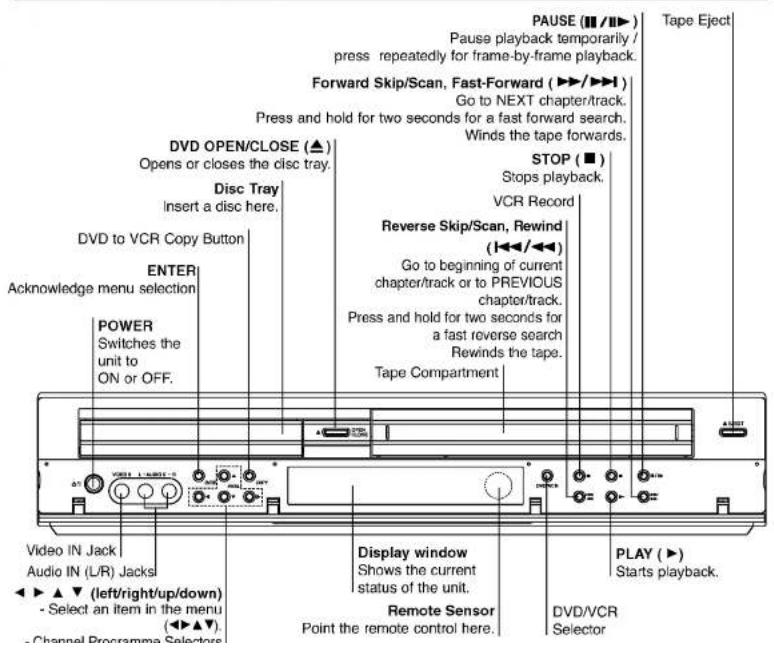
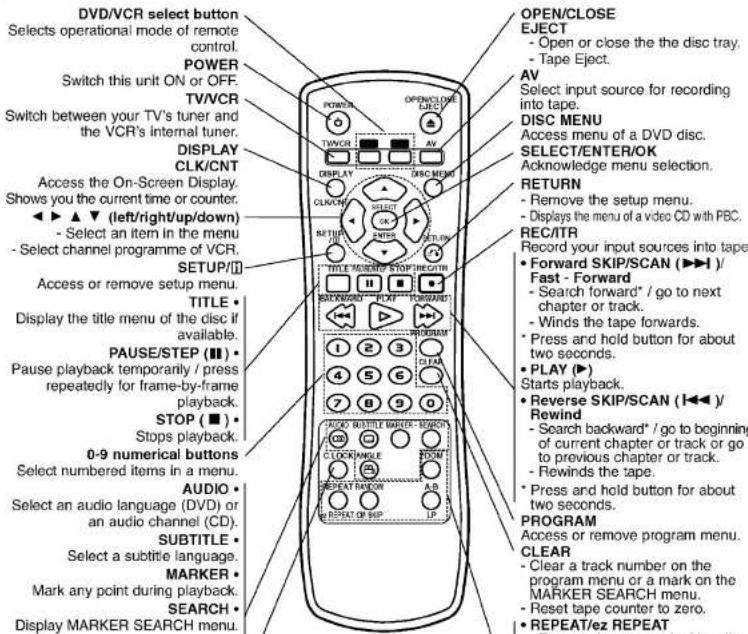
Remote Control

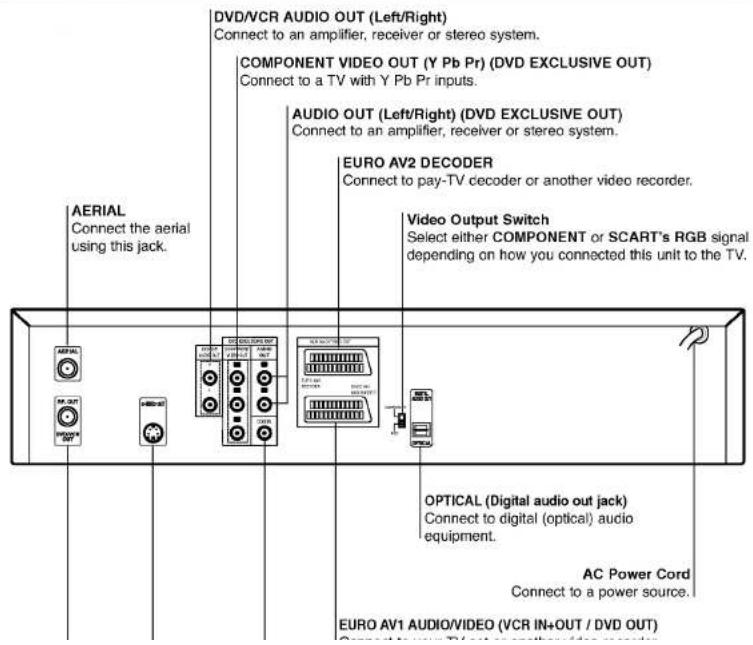
Rear Panel
Connections

Tips
- Depending on your TV and other equipment you wish to connect, there are various ways you could connect the unit.
- Please refer to the manuals of your TV, Stereo System or other devices as necessary to make the best connections.
- For better sound reproduction, connect this unit's AUDIO OUT jacks to the audio in jacks of your amplifier, receiver, stereo or audio/video equipment. See "Connecting to optional equipment" on page 10.

Caution
- Make sure this unit is connected directly to the TV. Set the TV to the correct video input channel.
- Do not connect this unit's AUDIO OUT jack to the phono in jack (record deck) of your audio system.
Connecting to a TV & Decoder
(or Satellite)
- Make one of the following connections, depending on the capabilities of your existing equipment.
- When using the COMPONENT VIDEO OUT jacks, set TV's INPUT to COMPONENT VIDEO. When using the S-VIDEO OUT jack, set the TV's INPUT to S-VIDEO.
Basic connection (AV)
1 Connect the EURO AV1 AUDIO/VIDEO on the rear panel of this unit to the SCART input socket on the TV using a SCART lead.
2 Some TV broadcasters transmit encoded television signals which you can only see with a purchased or
DVD exclusive out connection
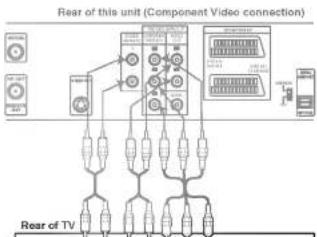
- Component Video (Color Stream®) connection
1 Connect the COMPONENT VIDEO OUT jacks on the DVD Player to the corresponding in jacks on the TV using an Y Pb Pr cable.
2 Connect the Left and Right AUDIO OUT or DVD/VCR AUDIO OUT jacks of the DVD Player to the audio left/right in jacks on the TV using the audio cables.
• S-Video connection
1 Connect the S-VIDEO OUT jack on this unit to the S-Video input jack on the TV using the S-Video cable.
2 Connect the Left and Right AUDIO OUT or DVD/VCR AUDIO OUT jacks of the DVD Player to the audio left/right in jacks on the TV using the audio cables.
flowchart
graph TD
    A["Central Module"] --> B["Component Video Connection"]
    B --> C["Main Component"]
    C --> D["Audio Components"]
    C --> E["Video Components"]
    C --> F["Audio Controls"]
    C --> G["Video Components"]
    C --> H["Audio Signals"]
    C --> I["Video Signals"]
    style A fill:#f9f,stroke:#333
    style B fill:#ccf,stroke:#333
    style C fill:#cfc,stroke:#333
    style D fill:#fcc,stroke:#333
    style E fill:#cff,stroke:#333
    style F fill:#ffc,stroke:#333
    style G fill:#cfc,stroke:#333
    style H fill:#fcc,stroke:#333
    style I fill:#ffc,stroke:#333
Connections (Cont'd)
Connecting to Optional Equipment
Connecting to an amplifier equipped with two channel analog stereo or Dolby Pro Logic II /Pro Logic
Connect the Left and Right AUDIO OUT jacks on this unit to the audio left and right in jacks on your amplifier, receiver or stereo system, using the audio cables.
Connecting to an amplifier equipped with two channel digital stereo (PCM) or to an Audio/Video receiver equipped with a multi-channel decoder (Dolby Digital™, MPEG 2 or DTS)
1 Connect this unit's DIGITAL AUDIO OUT jack (COAXIAL) to the corresponding in jack on your amplifier. Use an optional coaxial audio cable.
2 You will need to activate this unit's digital output. (See "Digital Audio Output" on page 18).
Digital Multi-channel sound
A digital multi-channel connection provides the best sound quality. For this you need a multi-channel Audio/Video receiver that supports one or more of the audio formats supported by your unit (MPEG 2, Doloy Digital and DTS). Check the receiver manual and the logos on the front of the receiver.
Warning:
Due to the DTS Licensing agreement, the digital output will be in DTS digital out when DTS audio stream is selected.
Notes
- If the audio format of the digital output does not match the capabilities of your receiver, the receiver will produce a strong, distorted sound or no sound at all. - To see the audio format of the current DVD in the On-Screen Display, press AUDIO.
Before Operation - VCR part
Tuning in a video channel on your TV
Notes
- The output frequency of this video recorder (VCR) is set at UHF channel 36. If channel 36 is already used by another TV station, or if the picture is distorted, you can change the transmitter channel of your VCR. Stages 5 \~ 8 will show you how to change the output frequency of your VCR.
- Your TV receives signals from the video recorder (VCR) like another TV station. You have to select a channel number on your TV and tune it in so that you may watch video tapes. If you have used a SCART cable then your TV should already have a dedicated video channel built into it, usually called AV.
1 Make sure that you have correctly installed your VCR as described earlier in this book. Press POWER to turn on your VCR. Turn on your TV.
2 Insert a pre-recorded video tape into your VCR and press PLAY on the remote control. Select a TV channel number on which you wish to watch video's. Don't worry if you don't have a video-tape to play at this stage! If you switch your VCR on and continue stages 3 - 4, instead of seeing video playback tune your TV until you see a bright blue screen.
3 Tune this channel until the video picture is sharp and the sound is clear. If you have used a SCART cable you will not have to tune your TV, simply select the AV channel. The AV channel is already pre-tuned for optimum video playback on your TV.
7 Press PROG. ▲ or ▼ to select another video channel. You may select any channel number between 22 and 68. You can also set it to "OFF" if there is any interference when your TV is connected to the VCR with a SCART lead.
8 Select a TV channel number on which you wish to watch video's. Press ⏻/1 on the front of your VCR when you have finished. Tune this channel so that a bright blue screen appears. Store this channel on your TV.
Notes
Make sure that you have correctly installed your VCR and successfully tuned in a dedicated video channel on your TV. If you do not tune in a dedicated video channel on your TV you will be unable to view and record video tapes!
Using your VCR very first time
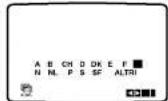
Following picture will display on the TV screen when you have just connected your video recorder for the very first time.
To make tuning TV stations, please follow stages 3 to 4 as shown "ACMS" (see p.13).
Before Operation - VCR part
Setting the clock Manually
The clock in your VCR controls time and date settings for your VCR.
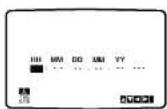
The clock is set automatically during ACMS (Automatic Channel Memory System) when your VCR detects a channel that broadcasts a Teletext signal. If the broadcast signal is weak the clock will not be set and will require setting manually.
1 Press i. Press
Press OK.
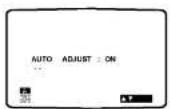
The auto adjust mode can be set to "OFF" by pressing
▲ or ▼ if you want to set the time manually.
Press OK.
To set the colour system
1 Press I.
2 The main menu will appear on the TV screen.
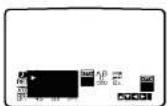
3 Press ◀ or ▶ to select the SYSTEM and press OK.
4 Press ▲ or ▼ to select according to the COLOUR system used.
5 Press i to remove the menus from the TV screen.
2 Use the numbered buttons on the remote control to alter the HOURS, MINUTES, DAY, MONTH and YEAR.
Before Operation - VCR part
How to using the main menu
This VCR can easily be programmed by using the menus displayed on screen.
The menus are controlled from the Remote Control Handset.
1 Switch on your TV set and video recorder by pressing the POWER button.
2 Press i button. The main menu will appear on the TV screen.
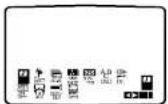
- REC - Timer recording setting (see p. 22).
- PR SET - Manual tuning setting (see p. 14).
- ACMS - ACMS (Automatic Channel Memory System) (see p. 13).
• TIME DATE - Date & clock setting (see p. 12). - SYSTEM - To set the Colour TV System (see p. 12).
- ABC OSD - To change the language setting for OSD. You can select the language among English, Deutsch, Français, Italiano, Español, Dutch and Portuguese.
- Dr. - To check a problem with your VCR (see p. 30).
■ F. OSD ON/OFF - To display the operational mode of your VCR (see p. 30).
Tuning in TV Stations Automatically
If the TV broadcast signal is weak your VCR may not detect the necessary information and will be and to store them correctly. To overcome this problem please turn to the MANUAL TUNING section on page 14.
1 Press POWER to turn on your VCR.
Press i button.
The main menu will appear on the TV screen.
Press ◀ or ▶ to select the ACMS.
Press OK.
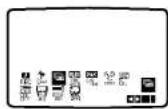
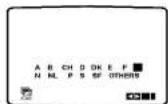
3 Press ◀ or ▶ to select COUNTRY. (A: Austria, B: Belgium, CH: Switzerland, D: Germany, DK: Denmark, E: Spain, F: France, I: Italy, N: Norway, NL: Netherlands, P: Portugal, S: Sweden, SF: Finland, Others) Press OK again to start the automatic tuning process.
Before Operation - VCR part
Tuning in TV Stations Manually
In certain areas of the country broadcast signals may be too weak for your VCR's automatic tuning process to find or assign TV stations correctly. You must tune in these weaker broadcast stations manually in order for your VCR to store them.
1 Press i. The mai
The main menu will appear on the TV screen. Press ▶ or ▶ to select the PR SET
Press OK.
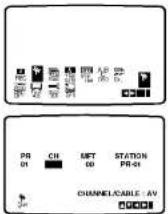
2 Press i. The sta
The station table will appear.
Press ▲ or ▼ to select the programme number that you want to tune (for example, PR 09).
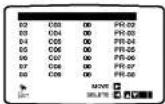
5 Press▶ to select STATION so that you may name your TV station.
Press OK.
The TV station name list will appear.
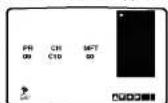
6 Press ▲ or ▼ to select a station name from the list. Press OK to select it.

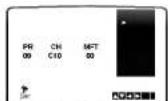
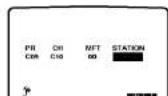
7 You can change a TV station name manually rather than using the "standard" names.
Press ▶
Press ▲ or ▼ to select letters and numbers for the new station name.
Press ◀ or ▶ to move back and forth between
characters
Press OK.
Before Operation - VCR part
Changing the order of TV Stations
After tuning TV stations into your VCR you may wish to change the order in which they are stored without having to retune them against! The instructions given on this page will show you how you can simply move them into your desired order.
1 Press i. The main menu will appear on the TV screen. Press ◀ or ▶ to select the PR SET. Press OK.
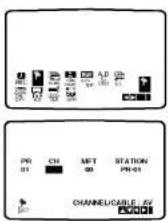
2 Press i. Press ▲ or ▼ to select the programme number you want to move (for example, PR 03). Press ▶.
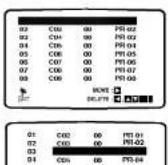
Deleting TV Stations
After tuning TV stations into your VCR you may wish to delete a station. The instructions given on this page will show you how easily delete any unwanted TV stations.
1 Press i. The main menu will appear on the TV screen. Press ◀ or ▶ to select the PR SET. Press OK.
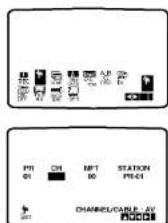
2 Press i. Press ▲ or ▼ to select the programme number you want to delete. (for example, PR 03)
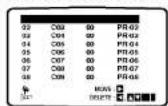
3 Press ◀ After a short while, the selected station will be deleted.

Before Operation - DVD part
General Explanation
This manual gives the basic instructions for operating this unit. Some DVDs require specific operation or allow only limited operation during playback. When this occurs, the symbol appears on the TV screen, indicating that the operation is not permitted by this unit or is not available on the disc.
On-Screen Display
The general playback status can be displayed on the TV screen. Some items can be changed on the menu.
On-screen display operation
1 Press DISPLAY during playback.
2 Press ▲ or ▼ to select an item. The selected item will be highlighted.
Press ◀ or ▶ to change the setting of an item. The number buttons can be also be used for setting numbers (e.g., title number). For some functions, press SELECT/ENTER to execute the setting.
Temporary Feedback Field Icons
? Title Repeat Title
? CHAPT Repeat Chapter
Repeat Track (non-PBC Video CDs only)
Repeat All Tracks (non-PBC Video CDs only)
Repeat A-B
Repeat Off
Resume play from this point
Action prohibited or not available
Notes
- Some discs may not provide all of the below On-
Screen Display. - If no button is pressed for 10 seconds, the On-Screen Display disappears.
| Items | Function (Press ▲▼ to select desired item) | Selection Method | |
| Title Number | 1/3 | Shows the current title number and total number of titles, and skips to the desired title number. | ◀/▶, or Numbers, SELECT/ENTER |
| Chapter Number | 1/12 | Shows the current chapter number and total number of chapters, and skips to the desired chapter number. | ◀/▶, or Numbers, SELECT/ENTER |
| Time search | Shows the elapsed playing time, and searches the point by the elapsed time directly. | Numbers, SELECT/ENTER | |
Before Operation (Continued) - DVD part
Initial Settings
You can set your own Personal Preferences on this unit.
Initial Settings General Operation
1 Press SETUP.
The setup menu appears.
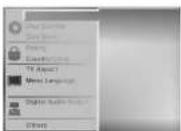
Press ▲/▼ to select the desired item.
The screen will show the current setting for the selected item, as well as alternate setting(s).
3 While the desired item is selected, press ▶, then ▲▼ to select the desired setting.
4 Press SELECT/ENTER to confirm your selection.
Some items require additional steps.
5 Press SETUP, RETURN or PLAY to exit the setup menu.
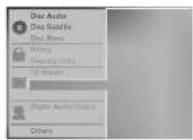
Language
Disc Language
Select a language for the disc's Menu, Audio, and Subtitle.
Original : The original language set for the disc is selected.
Other: To select another language, press number buttons to enter the corresponding 4-digit number according to the lan-
Menu Language
Select a language for the setup menu. This is the menu you see when you press SETUP.
Picture
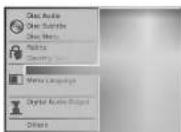
TV Aspect
4:3 Letterbox: Select when a standard 4:3 TV is connected. Displays theatrical images with masking bars above and below the picture.
4:3 Panscan: Select when a conventional TV set is connected. The video material formatted in the Pan & Scan style is played back in that style (Both sides of the picture are cut off).
16:9 Wide: Select when a 16:9 wide TV is connected.
Before Operation (Continued) - DVD part
Sound
Digital Audio Output
Each DVD disc has a variety of audio output options. Set the player's Digital Audio Output according to the type of audio system you use.
DOLBY DIGITAL/PCM: Select "DOLBY DIGITAL/PCM" if you connected this unit's DIGITAL OUT jack to a Dolby Digital decoder (or an amplifier or other equipment with a Dolby Digital decoder).
Stream/PCM: Select "Stream/PCM" if you connected this unit's DIGITAL OUT jack to an amplifier or other equipment with a DTS decoder, Dolby Digital decoder or MPEG decoder.
PCM: select when connected to a 2-channel digital stereo amplifier. This unit outputs sounds in the PCM 2ch format when you play a DVD video disc recorded on the Dolby Digital, MPEG1, or MPEG2 recording system.
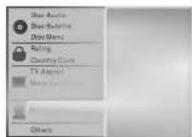
Sample Frequency
To change the Sample Frequency setting, first select the desired Digital Audio Output as indicated as above. If your receiver or amplifier is NOT capable of handling 96KHz signals, select 48KHz. When this choice is made, this unit will automatically convert any 96KHz
Others
The DRC, Vocal, PBC and Auto Play settings can be changed.
- Press ▲▼ to select the desired item and press SELECT/ENTER. The setting of the selected item is changed between On and Off.
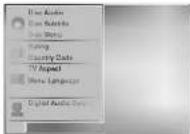
Dynamic Range Control (DRC)
With the DVD format, you can hear a program's sound-track in the most accurate and realistic presentation possible, thanks to digital audio technology. However, you may wish to compress the dynamic range of the audio output (the difference between the loudest sounds and the quietest ones). Then, you may listen to a movie at a lower volume without losing clarity of sound. Set DRC to On for this effect.
Vocal
Set Vocal to On only when a multi-channel karaoke DVD is playing. The karaoke channels on the disc will mix into a normal stereo sound.
PBC
Set Playback Control (PRC) to On or Off
Before Operation (Continued) - DVD part
Parental Control
Rating

Movies on DVDs may contain scenes not suitable for children. Therefore, discs may contain Parental Control information that applies to the complete disc or to certain scenes on the disc. These scenes are rated from 1 to 8, and alternatively, more suitable scenes are available for selection on some discs. Ratings are country-dependent. The Parental Control feature allows you to prevent discs from being played by your children or to have certain discs played with alternative scenes.
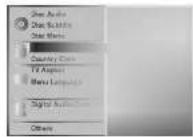
1 Select "Rating" on the Setup menu using the ▲ and ▼ buttons.
2 While "Rating" is selected, press ▶.
3 When you have not entered a password yet. Enter a 4-digit password using the numbered buttons to create a personal 4-digit security password, then press SELECT/ENTER. Enter the 4-digit password again and press SELECT/ENTER to verify. When you have already entered a password; Enter a 4-digit password using the numbered buttons to confirm the personal 4-digit security password, then press SELECT/ENTER.
Country Code

Enter the code of a country/area whose standards were used to rate the DVD video disc, referring to the list (See "Country Code List", page 36).
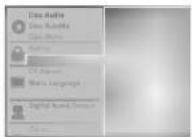
1 Select Country Code using the ▲▼ buttons on the setup menu.
2 While Country Code is selected, press ▶.
3 Follow step 3 of "Rating" on left.
4 Select the first character using the ▲▼ buttons.
5 Shift the cursor using ◀▶ buttons and select the second character using ▲▼ buttons.
6 Press SELECT/ENTER to confirm your country code selection, then press SETUP to exit the menu.
Note
Confirmation of the 4-digit password is necessary when the code is changed (see "Changing the 4-digit code" below).
Operation with tape
Playing a tape
You will only be able to load and eject video cassettes when your VCR is plugged into the mains. Your VCR may also playback recordings from NTSC tapes (on PAL TV).
Getting a better picture
When a cassette is inserted and playback started, the automatic tracking function works to get the best possible picture automatically. If the quality of the recording is poor, repeatedly press ▲ or ▼ on the remote control to manually adjust the tracking until any distortions have been removed. Press numbered 0 on the remote control to switch automatic tracking back on again.
1 Make sure that you have correctly connected your VCR as described earlier in this book. Turn on your TV. Press POWER to turn on your VCR. Insert the video cassette into your VCR. The video cassette should have the window side facing up and the arrow facing away from you.
2 Press PLAY to start playing your tape. If you load a video cassette which has had its record protection tab removed, playback of the cassette will start automatically.
AUTO TRACKING
Your VCR will automatically adjust the tracking to give the best picture quality.
Press PAUSE/STEP to still a picture
Slow motion playback, Shuttle :
During playing back or still picture press ◀ or ▶. You can reach the following playback speeds.
(-7xplay, -3xplay, -play, still, 1/19 slow, play, 2xplay, 7xplay)
To switch off the slow motion and shuttle, press the desired function.
During slow motion and shuttle, the noise bars may appear on the picture according to the status of tape.
If distortions can be seen in the picture, reduce them with ▲ or ▼.
Press STOP to end playback.
Press EJECT.
If the end of the tape is reached, your VCR will stop playback automatically, rewind, stop, eject the tape.
CM (Commercial Message) Skip:
This feature enables you during playback of a tape to skip a commercial break in a few seconds, then resume normal playback.
While tape is playing press CM SKIP on the remote control to skip commercial (or another programme material).
Repeatedly press CM SKIP to skip:
1 Press 30 seconds
2 Press 60 seconds
3 Press 90 seconds
4 Press 120 seconds
5 Press 150 seconds
6 Press 180 seconds
OPR (Optimum Picture Response)
This feature automatically improves playback picture quality by adjusting your VCR to the condition of the
Operation with tape
Instant Timer Recording (ITR)
Your VCR allows you to make recordings using a variety of simple methods: Instant Timer Recording (ITR) start recording immediately for a set period of time or until the video cassette runs out.
Your VCR incorporates Long Play (LP) which enables you to record up to twice the amount of time on a video cassette. For example an E-180 will record up to 180 minutes using Standard Play (SP); using LP you will be able to record up to 360 minutes. Please note there will be a slight loss in picture and sound quality when using LP.
1 Make sure that you have correctly connected your VCR as described earlier in this book. Press POWER to turn on your VCR.
2 Insert a video cassette with protection tab into your VCR. The video cassette should have the window side facing up and the arrow facing away from you.
3 Press ▲ or ▼ to select the programme number you wish to record. You may also directly select programme number using the numbered buttons on the remote control.
4 If you wish to record directly from the SCART or RCA sockets repeatedly press AV until the socket you wish to record from is displayed.
AV 1 for recording from EURO AV1 SCART socket
5 Press LP if you wish to record in Long Play or Standard Play. SP will produce improved picture and sound quality, however LP will provide twice as much recording time as SP.
6 Press REC/ITR to start recording. RECORD will appear on the TV screen. Press REC/ITR several times. Each successive press will increase the record time by 30 minutes until you reach a maximum of 9 hours.
7 Press PAUSE/STEP to avoid recording unwanted scenes. Press PAUSE/STEP to continue recording. Tapes can be paused for up to 5 minutes; RECP will be displayed when a tape is paused. After 5 minutes your VCR will stop recording to prevent damaging the tape or your VCR.
Press STOP twice within 5 seconds to end recording. Press EJECT. EJECT will appear on the TV screen for a 1 second.
Notes
- If you do not wish to record on a tape (this can happen quite easily by accident!) remove the protection tab on the back edge of the video cassette.
- It is possible to record on a video cassette with the record protection tab removed by covering the hole with self adhesive tape.
- Remember you can record one programme while watching another by starting your instant recording, press TV/VCR to appear TV indicator in the display window and then selecting a different channel on your
Operation with tape
Timer recording using On Screen
Display
You may set up to seven timer record events within one month of the current date.
Note
Before setting the timer make sure that you have set the VCR clock correctly and you know which stations you have tuned TV stations on your VCR.
1 Insert a video cassette with protection tab into your VCR.
The video cassette should have the window side facing up and the arrow facing away from you.
2 Press i. Press ◀ or ▶ to select REC.
Press OK. 3 Press OK to start setting the timer record event. If all timer record events are full press ▲ or ▼ to select the event that you wish to remove and replace.
Press ◀ to delete the event.
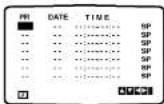
4 Press the numbered buttons to enter the station that you wish to record. When selecting stations 1 - 9, press 0 first, then the channel number; for example Stations 3 - 03. You may also select Channels by pressing ▲ or ▼. Once selected press ▶ If you wish to record from AUDIO IN (L/R) and VIDEO IN on the front or from the EURO SCART sockets on the back of your unit, press AV to select for correct display (AV1, AV2 or AV3).
6 Press the numbered buttons to enter the recording start and end times of the programme that you wish to record. Please note your VCR uses a 24 hour clock. e.g. 1pm will be displayed as 13:00. You may also select the start and end times by pressing ▲ or ▼.
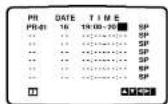
7 Press ▲ or ▼ to switch VPS/PDC on or off. Press ▶ to select the recording speed. Press ▲ or ▼ to select the desired tape speed (SP, IP, or LP). IP mode determines how much tape is left and switches speed from SP to LP, if necessary, to complete recording the program. IP mode is not selected when VPS/PDC is ON.
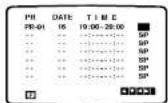
Check that the timer event details are correct. Press i twice. If PLEASE CHECK is displayed, you have entered incorrect and will need to re-enter the data. Press POWER to switch your VCR Standby. ① will appear in the display window while your VCR waits to make the recording. To watch a DVD during timer recording standby mode, press POWER and DVD/VCR to switch to DVD mode. Press POWER twice within 5 seconds to end recording.
Notes
- If at a later date you wish to delete or change any of the settings in timer event memory you may do so without
Operation with DVD and Video CD
Playing a DVD and Video CD

Playback Setup


- Turn on the TV and select the video input source connected to the DVD player.
- Audio system: Turn on the audio system and select the input source connected to the DVD player.

Press OPEN/CLOSE to open the disc tray.

Load your chosen disc in the tray, with the label facing up. When a double-sided DVD is inserted, make sure the side you want to play is facing down.

Press OPEN/CLOSE to close the tray. READING appears on the TV screen, and playback starts automatically. If playback does not start, press PLAY. In some cases, the disc menu might appear instead.

If a menu screen is displayed
The menu screen may be displayed first after loading a DVD or Video CD which contains a menu.

Use the ◀▶▲▼ buttons to select the title/chapter you want to view, then press SELECT/ENTER to start playback.
Press TITLE or DISC MENU to return to the menu screen.

General Features

Note
Unless stated otherwise, all operations described use the remote control. Some features may also be available on the Setup menu.
Moving to another TITLE


When a disc has more than one title, you can move to another title as follows:
- Press DISPLAY, then press the appropriate numbered button (0-9) to select a title number.
Moving to another CHAPTER/TRACK


When a title on a disc has more than one chapter or a disc has more than one track, you can move to another chapter/track as follows:
- Press I◄◄ or ►►I briefly during playback to select the next chapter/track or to return to the beginning of the current chapter/track.
- Press ◀ twice briefly to step back to the previous chapter/track.
- To go directly to any chapter during DVD playback, press DISPLAY. Then, press ▲▼ to select the chapter/track icon. Then, enter the chapter/track number using the numbered buttons (0-9).

Note
For two-digit numbers, press the numbered buttons (0.0) in rapid succession

Operation with DVD and Video CD
General Features (continued)
Still Picture and Frame-by-Frame Playback
1 Press PAUSE/STEP during playback.
The player will now go into PAUSE mode.
2 You can advance the picture frame-by-frame by pressing PAUSE/STEP repeatedly on the remote control.
Search
1 Press and hold ◀◀ or ▶▶ for about two seconds during playback. The player will now go into SEARCH mode.
2 Press and hold ◀◀ or ▶▶I repeatedly to select the required speed: ◀◀X2, ◀◀X4, ◀◀X16, ◀◀X100 (backward) or ▶▶X2, ▶▶X4, ▶▶X16, ▶▶X100 (forward).
With a Video CD, the Search speed changes: ◀◀X2, ◀◀X4, ◀◀X8 (backward) or ▶▶X2, ▶▶X4, ▶▶X8 (forward).
3 To exit SEARCH mode, press PLAY.
Random
1 Press RANDOM during playback or in stop mode. The unit automatically begins Random Playback and "RANDOM" appears on the TV screen.
2 To return to normal playback, press RANDOM until "NORMAL" appears on the TV screen.
Tips
By pressing ▶▶ during Random playback, the unit selects another title (track) and resumes Random play-back.
Note
Video CDs - Repeat Track/All/Off
1 To repeat the track currently playing, press REPEAT. The Repeat Track icon appears on the TV screen.
2 To repeat the disc currently playing, press REPEAT a second time.
The Repeat: All iccn appears on the TV screen.
3 To exit Repeat mode, press REPEAT a third time. The Repeat Off icon appears on the TV screen.
Note
On a Video CD with PBC, you must set PBC to Off on the setup menu to use the Repeat function. See page 18.
Repeat A-B

To repeat a sequence in a title:
1 Press A-B at your chosen starting point. A* appears briefly on the TV screen.
2 Press A-B again at your chosen end point.
A B appears briefly on the TV screen, and the repeat sequence begins.
3 To cancel the sequence, press A-B.
Time Search

The Time Search function allows you to start playing at any chosen time on the disc.
1 Press DISPLAY during playback. The on-screen display appears on the screen. The Time Search box shows the elapsed playing time of the current disc.
2 Within 10 seconds, press ▲▼ to select the Time Search icon in the on-screen display. The “-:-:-” appears in the Time Search box.
Operation with DVD and Video CD
General Features (continued)
Zoom


The Zoom function allows you to enlarge the video image and to move through the enlarged image.
1 Press ZOOM during playback or still playback to activate the Zoom function.
If you press ZOOM repeatedly, the magnification level increases up to six times.
2 Use the ◀▶ ▲▼ buttons to move through the zoomed picture.
3 Press CLEAR to resume normal playback or return to the paused image.

Note
- The zoom function may not work for some DVDs. - The zoom function may not work on multi-angle scenes.
Marker Search


You can start playback from a memorized point. Up to nine points can be memorized. To enter a mark, follow these steps.
1 During disc playback, press MARKER when playback reaches the spot that you want to memorize.
The Marker icon will appear on the TV screen briefly.
2 Repeat step 1 to enter up to nine Marker points on a disc.
To Recall a Marked Scene
- Dusing slice playbook, press SEARCH
Special DVD Features

Checking the contents of DVD Video discs: Menus
DVDs may contain menus that allow you to access special features. To use the disc menu, press DISC MENU. Then, press the appropriate number button to select an option. Or, use the ◀/▲▼ buttons to highlight your selection, then press SELECT/ENTER.
Title Menu

1 Press TITLE.
If the current title has a menu, the menu will appear on the screen. Otherwise, the disc menu may appear.
2 The menu can list camera angles, spoken language and subtitle options, and chapters for the title.
3 To remove the title menu, press TITLE again.
Disc Menu

1 Press DISC MENU.
The disc menu is displayed.
2 To remove the disc menu, press DISC MENU again.
Camera Angle


If the disc contains scenes recorded at different camera angles, you can change to a different camera angle during playback.
- Press ANGLE repeatedly during playback to select a desired angle.
The number of the current angle appears on the display.
Operation with Audio CD and MP3/WMA Disc
Playing an Audio CD and MP3/WMA Disc

The DVD Player can play MP3/WMA formatted recordings on CD-ROM, CD-R or CD-RW discs. Before playing MP3/WMA recordings, read the notes on MP3/WMA Recordings on right.
1 Insert a disc and close the tray. Audio CD; Audio CD menu appears on the TV screen go to step 4. MP3/WMA disc; The MP3/WMA-JPEG choice menu appears on the TV screen. Go to step 2

2 Press ▲▼ to select the MP3/WMA then press SELECT/ENTER. The MP3/WMA menu appears on the TV screen. Press RETURN to move to the MP3/WMA-JPEG choice menu.
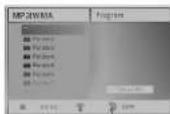
3 Press ▲▼ to select a folder, and SELECT/ENTER. A list of files in the folder appears.
4 Press ▲▼ to select a track then press PLAY or SELECT/ENTER. Playback starts.
Notes on MP3/WMA Recordings
About MP3
- An MP3 file is audio data compressed by using the MPEG1 audio layer-3 file-coding scheme. We call files that have the ".mp3" file extension "MP3 files".
- The player can not read an MP3 file that has a file extension other than ".mp3".
About WMA(Window Media Audio)
- An WMA file is a Microsoft audio compression technology.
- WMA(Windows Media Audio) offers double the audio compression of the MP3 format.
MP3/WMA Disc compatibility with this player is limited as follows:
- Sampling Frequency / only at 44.1 kHz (MP3), 22.05-44.1 kHz (WMA)
- Bit rate / within 32-320 kbps (MP3), 32-128 kbps (WMA)
- CD-R physical format should be "ISO 9660"
- If you record MP3/WMA files using the software which cannot create a FILE SYSTEM, for example "Direct-CD" etc., it is impossible to playback MP3/WMA files. We recommend that you use "Easy-CD Creator", which creates an ISO9660 file system.
- A single session disc requires MP3/WMA files in the first track. If there is no MP3/WMA file in the 1st track, it cannot playback MP3/WMA files. If you wish to playback MP3/WMA files, format all the data in the disc or use a new one.
- File names should be named using 8 letters or less and must incorporate ".mp3" or ".wma" extension e.g. "******.MP3" or "******.WMA".
Operation with Audio and MP3/WMA Disc (Continued)
Pause


1 Press PAUSE/STEP during playback.
2 To return to playback, press PLAY or press PAUSE/STEP again.
Moving to another Track


- Press ◀◀◀ or ▶▶◀ briefly during playback to go to the next track or to return to the beginning of the current track.
- Press ◀◀ twice briefly to step back to the previous track.
- In case of audio CD, to go directly to any track, enter the track number using the numbered buttons (0-9) during playback.
Repeat Track/All/Off


1 To repeat the track currently playing, press REPEAT. The Repeat icon and "TRACK" appears on the menu screen.
2 To repeat all tracks on a disc, press REPEAT a second time.
The Repeat icon and "ALL" appears on the menu screen.
3 To cancel Repeat mode, press REPEAT a third time. The Repeat icon and "OFF" appears on the menu screen.
Search


1 Press and hold ◀◀◀ or ▶▶◀ for about two seconds during playback.
The player will now go into SEARCH moce.
2 Press and hold I◀◀ or ▶▶I repeatedly to select the required speed: ◀◀X2, ◀◀X4, ◀◀X8 (backward) or ▶▶X2, ▶▶X4, ▶▶X8 (forward).
Search speed and direction are indicated on the menu
Repeat A-B
To repeat a sequence.
1 During disc playback, press A-B at your chosen starting point.
The Repeat icon and "A" appears on the menu screen.
2 Press A-B again at your chosen end point.
The Repeat icon and "A B" appears on the menu screen, and the sequence begins to play repeatedly.
3 To exit the sequence and return to normal play, press A-B again.
The Repeat icon and "OFF" appears on the menu screen.
3D Surround

This unit can produce a 3D Surround effect, which simulates multi-channel audio playback from two conventional stereo speakers, instead of the five or more speakers normally required to listen to multi-channel audio from a home theater system.
1 Press DISPLAY or AUDIO during playback.
2 Press ◀▶ to select "NORM." or "3D SUR".
3 Press ▲▼ repeatedly until the desired sound is selected.
Changing the Audio Channel

Press AUDIO repeatedly during playback to hear a different audio channel (STER., LEFT, or RIGHT).
Operation with JPEG Disc
Viewing a JPEG disc
This DVD Player can play discs with JPEG files and Kodak picture CD. Before playing JPEG recordings, read the notes on JPEG Recordings on right.
1 Insert a disc and close the tray. The MP3/WMA-JPEG choice menu appears on the TV screen.

2 Press ▲▼ to select the JPEG then press SELECT/ENTER. The JPEG menu appears on the TV screen.
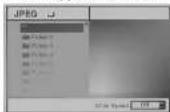
3 Press ▲▼ to select a folder, and SELECT/ENTER. A list of files in the folder appears. Press RETURN to move to the MP3/WMA-JPEG choice menu.
Tip If you are in a file list and want to return to the Folder list, use the ▲▼ buttons on the remote to highlight "■- * and press SELECT/ENTER to return to the previous menu screen.
If you want to view a particular file, press ▲▼ to
Moving to another File
Press ◀◀ or ▶▶ once during viewing a picture to advance to the next file or to the previous file.
Still Picture
1 Press PAUSE/STEP during slide show.
The player will now go into PAUSE mode.
2 To return to the slide show, press PLAY or press PAUSE/STEP again.
To flip the picture
Press ▲▼ during showing a picture to flip the picture horizontally or a vertically.
To rotate picture
Press ◄ during showing a picture to rotate the picture clockwise or counter clockwise.
Notes on JPEG Recordings
- Depending upon the size and number of the JPEG files, it could take a long time for the DVD player to read the disc's contents. If you don't see an on-screen display after several minutes, some of the files are too big — reduce the resolution of the JPEG files to less than 2 mega pixels and burn another disc.
- Total number of files and folders on the disc should be less than 650.
- Some disc may be incompatible due to different recording format or condition of disc.
- When you are using software such as "Easy CD Creator" to burn the jpeg files into the CD-R, ensure
Programmed Playback
Programmed Playback with Audio CD and MP3/WMA Disc
The Program function enables you to store your favorite tracks from any disc in the player memory.
Program can contain 30 tracks.
1 Press PROGRAM during playback or in the stop mode to enter the Program Edit mode. The E mark will appear to the right of the word Program on the right side of the menu screen.
Note
Press PROGRAM to exit the Program Edit mode; the ☐ mark will disappear.
2 Select a track, then press SELECT/ENTER to place the selected track on the Program list.
3 Repeat step 2 to place additional tracks on the Program list.
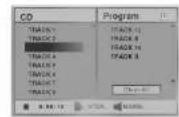
Audio CD menu
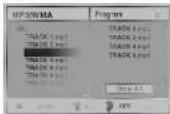
MP3/WMA menu
4 Press ▶. The programmed track you selected last is highlighted on the program list.
5 Press ▲/▼ to select the track you want to start
Programmed Playback with Video CD
Note
On a Video CD with PBC, you must set PBC to Off on the setup menu to use the Program function. See page 18.
1 Insert Video CD and close the tray.
2 Press PROGRAM while playback is stopped. The VCD Program menu will appear.
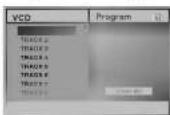
Note
Press RETURN or PROGRAM to exit the Program menu.
3 Follow steps 2-6 of "Programmed Playback with Audio CD and MP3/WMA disc" on left.
4 To resume normal playback from programmed playback, press PROGRAM.
"NORMAL" appears on the TV screen.
Repeat Programmed Tracks
- To repeat the track currently playing, press REPEAT. The Repeat icon and "TRACK" appears on the menu screen.
- To repeat all tracks on the program list, press REPEAT a second time.
Additional Operation - VCR part
On Screen Display
You may easily display the current time or tape counter, amount of tape left, day, month, year, day of week, programme channel, tape speed and operational mode of your VCR will appear on the TV screen. If a recording is taking place these On Screen Displays will not be recorded onto the tape.
1 Press CLK/CNT to display.
Press CLK/CNT repeatedly to cycle through the display options. The tape counter and amount of tape left will appear if there is a tape loaded.
2 After 3 seconds the majority of the On Screen Displays will clear leaving only the clock or tape counter and the amount of tape left on the screen. Press CLK/CNT again to remove all displays from the TV screen.
Tape Counter Memory Stop
The Digital Tape Counter can be displayed on the display window instead of the time by pressing CLK/CNT on the remote control. The Digital Tape Counter indicates the relative positions of recordings on the tape.
1 Press CLK/CNT.
Press CLEAR to set the counter to 0:00:00.
Press PLAY or start recording.
The tape counter will display the actual play time in hours, minutes and seconds.
Press STOP when playback or recording is complete.
Video Doctor (Self-Diagnosis)
This feature informs you that there is a problem with your VCR. These error messages will appear on the TV screen.
1 Press i.
Press ◀ or ▶ to select Dr. Press OK.
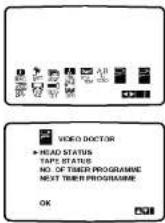
2 Press ▲ or ▼ to check a problem. HEAD STATUS
- PLEASE CLEAN: Clean your video heads.
TAPE STATUS
● NOT RECORDABLE: Insert a tape with its protection tab in place
NO. OF TIMER PROGRAMME
● 2 Shows the number of timer recording.
NEXT TIMER PROGRAMME
Additional Operation - VCR part
Hi-Fi Stereo Sound System
Your VCR will record and playback Hi-Fi stereo sound. This allows you to record and playback the sound in several different ways. Video cassettes recorded on your VCR will have a normal mono audio track and two VHS Hi-Fi stereo audio tracks. These stereo tracks allow you to make audio recordings in Hi-Fi stereo or bilingual mode from a TV broadcast, stereo audio system, video disc or another Hi-Fi VCR.
1 Your VCR's allows you to enjoy broadcasts with standard stereo, bilingual and mono sound. The particular type of sound received or that recorded will be briefly displayed on the TV screen for a couple of seconds:
STEREO Sound is automatically recorded on the Hi-Fi stereo and mono tracks of the video tape.
BIL Both audio channels will be recorded on the Hi-Fi stereo tracks. The primary language channel (left) will be recorded on the mono track of the video tape.
MONO
The sound is recorded on the Hi-Fi tracks and the mono track of the video tape without any separation.
2 Press AUDIO repeatedly until the desired audio mode appears.
3 The choice is STEREO, LEFT, RIGHT and MONO. In BIL playback the primary language is output on the left channel and the secondary channel is output simultaneously from the right channel when audio output is set to STEREO. The primary language
2 Press ▲ or ▼ repeatedly to select: AUTO, 4:3 or 16:9.
AUTO
Automatically plays back Wide-Screen programmes as Wide-Screen and Normal programmes as normal.
4:3
Only for playing back and recording Normal format recordings (4:3).
16:9
Only for playing back and recording Wide-Screen format recordings (16:9).
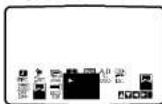
3 Press I to remove the menus from the TV screen. To enjoy Wide-Screen playback you must connect your VCR to the TV using a SCART cable.
To set the decoder
We have already described, how to connect a decoder for pay-TV station as CANAL+ or PREMIERE on page 9. For the recording of an encoded station you do not have to control anything. You just select the station and wait shortly until the decoding will start.
1 Press i.
The main menu will appear on the TV screen. Press ◀ or ▶ to select the DECODER. Press OK.
Additional Operation - DVD part
Last Condition Memory
-
This player memorizes the last condition for the last disc you have watched. Settings remain in memory even if you remove the disc from the player or switch off the player. If you load a disc that has its settings memorized, the latest stop position is automatically recalled.
Notes
- Settings are stored in memory for use any time. - This player does not memorize settings of a disc if you switch off the player before commencing to play it.
Screen Saver
The screen saver picture appears when you leave the DVD Player in stop mode for about five minutes.
Special Recording
Copying from DVD To VCR
This unit allows you to copy the contents of a DVD to a VHS tape with a press of the COPY button.
Note
- If the DVD you are attempting to copy is copy protected, you may not be able to copy the disc.

Insert Disc
Insert the disc you wish to copy in the DVD deck and close the disc tray.

Insert VHS Tape
Insert a blank VHS videotape into the VCR deck.

Copy the DVD to VHS Tape
Press the COPY button or REC/ITR button on the unit front panel.
- The DVD will go into Play mode and the VCR will go into Record mode.
- If the DVD disc menu appears, you may need to press the Play button manually to begin copying.

Stop the Copy Process
When the DVD is finished playing, press STOP twice within 5 seconds to end the copy.
- You must stop the Copy process manually when the DVD movie ends, or the unit may replay and record over and over again.
Recording from another video
recorder
With this video recorder you can make recordings from an external source, such as copying from another video recorder or a camcorder.

Note
In the following description, this video recorder will be one used for recording and will be referred to as VCR B. The other appliance will be used for playback and will be referred to as VCR A.

VCR A should be connected to the SCART socket on the rear panel of your unit or the AV sockets on the front panel of your unit.

Insert the recorded tape into VCR A and a blank tape into VCR B.

To start recording, press the REC/ITR on VCR B and PLAY on VCR A.

When you want to finish copying, press the STOP on both video recorders. Press STOP twice within 5 seconds at this unit.
Troubleshooting
Check the following guide for the possible cause of a problem before contacting service.
| Symptom | Cause | Correction |
| DVD or VCR do not work properly. | ● DVD or VCR button is not switched properly. | ● Refer to page 2. |
| No power. | ● The power cord is disconnected. | ● Plug the power cord into the wall outlet securely. |
| The power is on, but the DVD player does not work. | ● No disc is inserted. | ● Insert a disc. (Check that the DVD or, audio CD indicator in the display window is lit.) |
| No picture. | ● The TV is not set to receive DVD signal output. | ● Select the appropriate video input mode on the TV so the picture from the DVD player appears on the TV screen. |
| ● The video cable is not connected securely. | ● Connect the video cable into the jacks securely. | |
| No sound. | ● The equipment connected with the audio cable is not set to receive DVD signal outout. | ● Select the correct input mode of the audio receiver so you can listen to the sound from the DVD player. |
| ● The audio cables are not connected securely. | ● Connect the audio cable into the jacks securely. | |
| ● The power of the equipment connected with the audio cable is turned off. | ● Turn on the equipment connected with the audio cable. | |
| ● The Digital Audio Output is set to the wrong position. | ● Set the Digital Audio Output to the correct position, then turn on the DVD player again by pressing POWER. | |
| The picture is poor. | ● The disc is dirty.● The TV channels are not tuned in properly. | ● Clean the disc.● Check tuning, carry out tuning again. |
| The DVD player does not start playback. | ● An unplayable disc is inserted. | ● Insert a playable disc. (Check the disc type and Regional code.) |
| ● The disc is placed upside down. | ● Place the disc with the playback side down. | |
| ● The disc is not placed within the guide. | ● Place the disc on the disc tray correctly inside the guide. |
Language Code List
Enter the appropriate code number for the initial settings "Disc Audio", "Disc Subtitle" and/or "Disc Menu" (See page 17).
| Code | Language | Code | Language | Code | Language | Code | Language |
| 6566 | Abkhazian | 7074 | Fiji | 7678 | Lingala | 8373 | Singhalese |
| 6565 | Afar | 7073 | Finnish | 7684 | Lithuanian | 8375 | Slovak |
| 6570 | Afrikaans | 7082 | French | 7775 | Macedonian | 8376 | Slovenian |
| 8381 | Albanian | 7089 | Frisian | 7771 | Malagasy | 8379 | Somali |
| 6577 | Ameharic | 7176 | Galician | 7783 | Malay | 6983 | Spanish |
| 6582 | Arabic | 7565 | Georgian | 7776 | Malayalam | 8385 | Sudanese |
| 7289 | Armenian | 6869 | German | 7784 | Maltese | 8387 | Swahili |
| 6583 | Assamese | 6976 | Greek | 7773 | Maori | 8386 | Swedish |
| 6588 | Aymara | 7576 | Greenlandic | 7782 | Marathi | 8476 | Tagalog |
| 6590 | Azerbaijani | 7178 | Guarani | 7779 | Moldavian | 8471 | Tajik |
| 6665 | Bashkir | 7185 | Gujarati | 7778 | Mongolian | 8465 | Tamil |
| 6985 | Basque | 7265 | Hausa | 7865 | Nauru | 8484 | Tatar |
| 6678 | Bengali; Bangla | 7387 | Hebrew | 7869 | Nepali | 8469 | Telugu |
| 6890 | Bhutani | 7273 | Hindi | 7879 | Norwegian | 8472 | Thai |
| 6672 | Bihari | 7285 | Hungarian | 7982 | Oriya | 6679 | Tibetan |
| 6682 | Breton | 7383 | Icelandic | 8065 | Panjabi | 8473 | Tigrinya |
| 6671 | Bulgarian | 7378 | Indonesian | 8083 | Pashto, Pushto | 8479 | Tonga |
| 7789 | Burmese | 7365 | Interlingua | 7065 | Persian | 8482 | Turkish |
| 6869 | Byelorussian | 7165 | Irish | 8076 | Polish | 8475 | Turkmen |
| 7577 | Cambocian | 7384 | Italian | 8084 | Portuguese | 8487 | Twi |
| 6765 | Catalan | 7465 | Japanese | 8185 | Quechua | 8575 | Ukrainian |
Country Code List
Enter the appropriate code number for the initial setting "Country Code" (See page 19).
| Code | Country | Code | Country | Code | Country | Code | Country |
| AD | Andorra | ER | Enirates | LC | Saint Lucia | SC | Seychelles |
| AE | United Arab Emirates | ES | Spain | LI | Liechtenstein | SD | Sudan |
| AF | Afghanistan | ET | Ethiopia | LK | Sri Lanka | SE | Sweden |
| AG | Antigua and Barbuda | FI | Finland | LR | Liberia | SG | Singapore |
| AI | Anguilla | FJ | Fiji | LS | Lesotho | SH | Saint Helena |
| AL | Albania | FK | Falkland Islands | LT | Lithuania | SI | Slovenia |
| AM | Armenia | FM | Micronesia | LU | Luxembourg | SJ | Svalbard and Jan Mayen Islands |
| AN | Netherlands Antilles | FO | Faroe Islands | LV | Latvia | ||
| AO | Angola | FR | France | LY | Libya | SK | Slovak Republic |
| AQ | Antarctica | FX | France (European Territory) | MA | Morocco | SL | Sierra Leone |
| AR | Argentina | MC | Monaco | SM | San Marino | ||
| AS | American Samoa | GA | Gabon | MD | Moldavia | SN | Senegal |
| AT | Austria | GB | Great Britain | MG | Madagascar | SO | Somalia |
| AU | Australia | GD | Grensda | MH | Marshall Islands | SR | Suriname |
| AW | Aruba | GE | Georgia | MK | Macedonia | ST | Saint Tome and Principe |
| AZ | Azerbaijan | GF | French Guyana | ML | Mali | SU | Former USSR |
| BA | Bosnia-Herzegovina | GH | Ghana | MM | Myanmar | SV | El Salvador |
| BB | Barbados | GI | Gibraltar | MN | Mongolia | SY | Syria |
| BD | Bangladesh | GL | Greenland | MO | Macau | SZ | Swaziland |
| BE | Belgium | GM | Gambia | MP | Northern Mariana Islands | TC | Turks and Cacos Islands |
| BF | Burkina Faso | GN | Guinea | MQ | Martinique (French) | TD | Chad |
| BG | Bulgaria | GP | Guadeloupe (French) | MR | Mauritania | TF | French Southern Territories |
| BH | Bahrain | GQ | Equatorial Guinea | MS | Montserrat | ||
| BI | Burundi | GR | Greece | MT | Malta | TG | Togo |
| BJ | Benin | GS | S. Georgia & S. Sandwich Isls. | MU | Mauritius | TH | Thailand |
| BM | Bermuda | MV | Maldives | TJ | Tadjikistan | ||
| BN | Brunei Darussalam | GT | Guatemala | MW | Malawi | TK | Tokelau |
| BO | Bolivia | GU | Guam (USA) | MX | Mexico | TM | Turkmenistan |
| BR | Brazil | GW | Guinea Bissau | MY | Malaysia | TN | Tunisia |
| BS | Bahamas | GY | Guyana | MZ | Mozambique | TO | Tonga |
| BT | Bhutan | HK | Hong Kong | NA | Namibia | TP | East Timor |
| BV | Bouvet Island | HM | Heard and McDonald Islands | NC | New Caledona (French) | TR | Turkey |
| BW | Botswana | NE | Niger | TT | Trinidad and Tobago | ||
| BY | Belarus | HN | Honduras | NF | Norfolk Island | TV | Tuvalu |
| BZ | Belize | HR | Croatia | NG | Nigeria | TW | Taiwan |
| CA | Canada | HT | Haiti | NI | Nicaragua | TZ | Tanzania |
| CC | Cocos (Keeling) Islands | HU | Hungary | NL | Netherlands | UA | Ukraine |
Specification
| General | |
| Power requirements | AC 200-240V, 50 Hz |
| Power consumption | 23W |
| Dimensions (approx.) | 430 X 85 X 293 mm (w/h/d) |
| Mass (approx.) | 4.8 kg |
| Operating temperature | 5°C to 35°C (41°F to 95°F) |
| Operating humidity | 5 % to 90 % |
| Timer | 24 hours display tape |
| RF Modulator | UHF 22-68 (Adjustable) |
| System | |
| Laser | Semiconductor laser, wavelength 650 nm |
| Video Head system | Double azimuth 4 heads, helical scanning. |
| Signal system | PAL |
| Frequency response | DVD (PCM 96 kHz): 8 Hz to 44 kHzDVD (PCM 48 kHz): 8 Hz to 22 kHzCD: 8 Hz to 20 kHz |
| Signal-to-noise ratio | More than 100dB (ANALOG OUT connectors only) |
| Harmonic distortion | Less than 0.008% |
| Dynamic range | More than 100 dB (DVD)More than 95 dB (CD) |
| Inputs (VCR) | |
| Audio | -6.0dBm, more than 10 kohms (SCART)-6.0dBm, more than 47 kohms (RCA) |
| Video | 1.0 Vp-p, 75 ohms, unbalanced (SCART/RCA) |
| Outputs (DVD) | |
| VIDEO OUT | 1 Vp-p 75 ohms, sync negative |
| S VIDEO OUT | (0A) 1.0 Vp-p 75 ohms, negative tune, Mini Dip 4 psi |

LG Electronics Inc.
- Safety Precautions / Important notes on controlling this unit
- CAUTION:
- Notes on copyrights:
- Features:
- Important notes on controlling this unit
- Contents
- Introduction
- Preparation
- Operation
- Before Use
- Notes
- Notes on DVDs and Video CDs
- Disc-related terms
- Title (DVD only)
- Chapter (DVD only)
- Track (Video CD and audio CD only)
- Scene
- Types of video CDs
- Video CDs equipped with PBC (Version 2.0)
- Before Use (Cont'd)
- Precautions
- Handling the unit
- When shipping the unit
- When setting the unit
- To keep the surface clean
- Cleaning the unit
- To clean the cabinet
- To obtain a clear picture
- Storing discs
- Cleaning discs
- About Symbols
- About the Ⓧ symbol display
- Remote Control
- Connections
- Tips
- Caution
- Connecting to a TV & Decoder
- (or Satellite)
- Basic connection (AV)
- DVD exclusive out connection
- Connections (Cont'd)
- Connecting to Optional Equipment
- Digital Multi-channel sound
- Warning:
- Before Operation - VCR part
- Tuning in a video channel on your TV
- Using your VCR very first time
- Setting the clock Manually
- To set the colour system
- How to using the main menu
- Tuning in TV Stations Automatically
- Tuning in TV Stations Manually
- Changing the order of TV Stations
- Deleting TV Stations
- Before Operation - DVD part
- General Explanation
- On-Screen Display
- On-screen display operation
- Temporary Feedback Field Icons
- Before Operation (Continued) - DVD part
- Initial Settings
- Initial Settings General Operation
- Language
- Disc Language
- Menu Language
- Picture
- TV Aspect
- Sound
- Digital Audio Output
- Sample Frequency
- Others
- Dynamic Range Control (DRC)
- Vocal
- PBC
- Parental Control
- Rating
- Country Code
- Operation with tape
- Playing a tape
- Getting a better picture
- AUTO TRACKING
- Slow motion playback, Shuttle :
- Press STOP to end playback.
- CM (Commercial Message) Skip:
- OPR (Optimum Picture Response)
- Instant Timer Recording (ITR)
- Timer recording using On Screen
- Display
- Note
- Operation with DVD and Video CD
- Playing a DVD and Video CD
- Playback Setup
- If a menu screen is displayed
- General Features
- Moving to another TITLE
- Moving to another CHAPTER/TRACK
- General Features (continued)
- Still Picture and Frame-by-Frame Playback
- Search
- Random
- Video CDs - Repeat Track/All/Off
- Repeat A-B
- Time Search
- Zoom
- Marker Search
- To Recall a Marked Scene
- Special DVD Features
- Checking the contents of DVD Video discs: Menus
- Title Menu
- Disc Menu
- Camera Angle
- Operation with Audio CD and MP3/WMA Disc
- Playing an Audio CD and MP3/WMA Disc
- Notes on MP3/WMA Recordings
- About MP3
- About WMA(Window Media Audio)
- MP3/WMA Disc compatibility with this player is limited as follows:
- Operation with Audio and MP3/WMA Disc (Continued)
- Pause
- Moving to another Track
- Repeat Track/All/Off
- 3D Surround
- Changing the Audio Channel
- Operation with JPEG Disc
- Viewing a JPEG disc
- Moving to another File
- Still Picture
- To flip the picture
- To rotate picture
- Notes on JPEG Recordings
- Programmed Playback
- Programmed Playback with Audio CD and MP3/WMA Disc
- Programmed Playback with Video CD
- Repeat Programmed Tracks
- Additional Operation - VCR part
- On Screen Display
- Tape Counter Memory Stop
- Video Doctor (Self-Diagnosis)
- TAPE STATUS
- OF TIMER PROGRAMME
- Hi-Fi Stereo Sound System
- MONO
- AUTO
- 4:3
- 16:9
- To set the decoder
- Press i.
- Additional Operation - DVD part
- Last Condition Memory
- -
- Screen Saver
- Special Recording
- Copying from DVD To VCR
- Insert Disc
- Insert VHS Tape
- Copy the DVD to VHS Tape
- Stop the Copy Process
- Recording from another video
- recorder
Brand : LG
Model : DVS7920
Category : DVD Player / VCR