
Magnetic Trigger LW931 - Door/window sensor Lightwave - Free user manual and instructions
Find the device manual for free Magnetic Trigger LW931 Lightwave in PDF.


| Product Type | Door/Window Sensor |
| Model | LW931 |
| Brand | Lightwave |
| Sensor Type | Magnetic trigger (reed switch) |
| Dimensions (Sensor) | Approx. 50 x 25 x 15 mm |
| Dimensions (Magnet) | Approx. 30 x 15 x 10 mm |
| Weight (Total) | Approx. 30 g |
| Power Supply | 1x CR2032 3V lithium coin cell |
| Battery Life | Up to 2 years (typical usage) |
| Wireless Protocol | Lightwave RF (868 MHz) |
| Range (Indoor) | Up to 30 meters |
| Operating Temperature | 0°C to 40°C |
| Main Functions | Detects door/window open/close status; triggers alerts via Lightwave system |
| Compatibility | Works with Lightwave Link Hub and Smart Home app |
| Installation | Surface mount using adhesive tape or screws |
| Maintenance | Clean with dry cloth; replace battery when low |
| Safety | Low voltage; keep away from water and extreme heat |
| Spare Parts | Replacement battery CR2032; optional mounting kit |
| Repairability | Battery replaceable; no user-serviceable parts inside |
| Color | White |
| Certifications | CE, R&TTE |
| Warranty | 1 year |
Frequently Asked Questions - Magnetic Trigger LW931 Lightwave
User questions about Magnetic Trigger LW931 Lightwave
0 question about this device. Answer the ones you know or ask your own.
Ask a new question about this device
Download the instructions for your Door/window sensor in PDF format for free! Find your manual Magnetic Trigger LW931 - Lightwave and take your electronic device back in hand. On this page are published all the documents necessary for the use of your device. Magnetic Trigger LW931 by Lightwave.
USER MANUAL Magnetic Trigger LW931 Lightwave
Professional Series
www.lightwaverf.house
EC DECLARATION OF CONFORMITY
Responsible Authority:
LightwaveRF
PLC,
Innovation Campus Birmingham
Faraday
Wharf
Holt
Street
Birmingham
B7
4BB
Tel: +44 (0)121 250 3625
Email:
enquiries@lightwaverf.com
Model Number(s): JSJSLW931
Description: Magnetic Trigger
Directives this equipment
Complies with: 2006/95/EC The Low Voltage Directive N/A
2004/108/EEC The Electromagnetic Compatibility Directive
1999/5/EC R&TTE Directive
93/68/EEC CE Marking Directive
Standards Applied in order to verify compliance
Safety: BS EN 60730-1:2011
Health:
R&TTE: EN 301 489-1 V1.9.2: (2011-09), EN 301 489-3 V1.4.1: (2002-08)
EN 300 220-1 V2.1.1: 2006, EN 300 220-2 V2.1.2: 2007
EMC: EN 301 489-1 V1.9.2: (2011-09), EN 301 489-3 V1.4.1: (2002-08),
EN 55022: 2010, EN 61000-3-2: 2006 +A1: 2009 +A2: 2009 Class A,
EN 61000-3-3: 2008, EN61000-4-2: 2009,
EN 61000-4-3: 2006 +A1: 2008 +A2: 2010, EN 61000-4-4: 2012,
EN 61000-4-5: 2006, EN 61000-4-6: 2009, EN 61000-4-11: 2004
For and on behalf of LightwaveRF PLC
Name J Shermer
Position Managing Director

Get Started
LightwVe RF
How do I get started?
The following setup guide will explain how to install and use the Magnetic Trigger with other LightwaveRF heating devices.
How does it work?
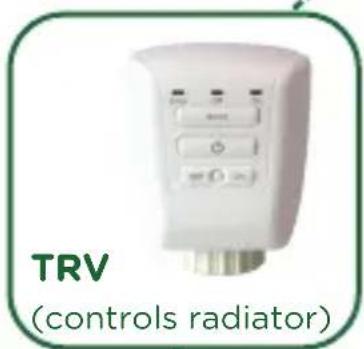
The Magnetic Trigger can directly link to and control LightwaveRF heating devices such as the Thermostatic Radiator Valve (TRV), Home or Room Thermostat or Electric Switch. When the door or window that the trigger is attached to is opened or closed, the radiator in the room will be turned off or on.
Help video & further guidance
For additional guidance, and to watch a video that will help guide you through the installation process, please visit the support section on www.lightwaverf.com


Installation
Lightwrve RF

IMPORTANT: Please retain these instructions for guidance on how to link other LightwaveRF devices to the Magnetic Trigger. For additional guidance please visit www.lightwaverf.com
Installation
Lightwrve RF
Inserting the batteries
2 x AAA batteries can be inserted under the battery cover at the rear of the device. This can be removed by pulling down on the catch and gently unhooking the cover from the hooks at the base of the unit.
IMPORTANT: In the battery compartment there is a slider switch marked A/B. Setting the switch to position A causes an 'off' command to be sent when a window or door is opened. Setting it to position B will cause an 'on' command to be sent.
Attaching to a door or window and frame
The Magnetic Trigger can be attached to a window frame using adhesive pads provided or by using suitable screws inserted through the mounting holes in the back cover.
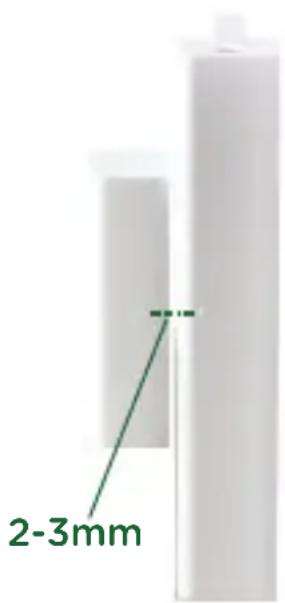
IMPORTANT: When mounting, the two dots on each sections must line up vertically with no more than 2-3mm between the sections (as in the picture). The two dots also need to be within 10mm of each other in terms of depth. The indicator LED will light up on opening / closing if the sections have been mounted correctly.

How to use the Magnetic Trigger
Each LightwaveRF Magnetic Trigger can be used to turn on and off a LightwaveRF TRV, Electric Switch or Thermostat if a window or door is opened or closed.
The trigger will automatically setback a TRV, an Electric Switch or Thermostat (default of 11 degrees) if a window is opened and return them to their previous set temperature when the window is closed again. The trigger will interrupt any set schedule for the LightwaveRF heating device if activated, but return to the schedule once closed.

Linking the trigger to a TRV, Electric Switch or Thermostat
To directly control a LightwaveRF TRV, Thermostat or Electric Switch using a Magnetic Trigger, you will need to 'link' them. The trigger can be linked to these devices using the following method:
- Press and release the 'Linking' button on the Magnetic Trigger (the LED will flash).
- Press and release the Linking button on the TRV, Electric Switch or Thermostat that you wish to link to. The 'on' LED should flash to indicate a successful link.
Note: linking mode lasts for 12 seconds; if no linking command is received within this time, then linking mode will time out and the process will have to be re-initiated.
To completely clear the memory of the Switch and unlink any linked devices, press and release the Linking button to enter linking mode (the LEDs will flash). Then, hold the Linking button until the LEDs flash rapidly. Finally, press and release the Linking button once more. The LED will flash more slowly to confirm that the memory has been cleared.


Add other heating devices
Lightwrve RF
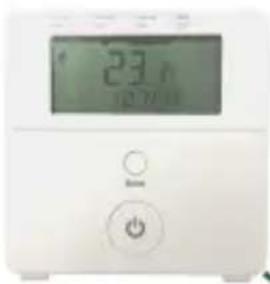
Home Thermostat
(monitors house temp.)
Boiler OR Electric Switch
(turns boiler on/off)
Lightwave App
(control from anywhere)

Heating Remote
(sets house temp.)


Lightwave Link
(runs the show)


Home or Away button
(turn house on/off)


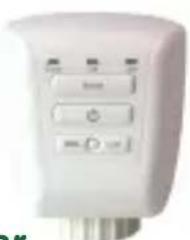
Magnetic Trigger
(open window turns off TRV)

Electric Switch
(controls electric radiators)
Room by room radiator control
Troubleshooting
Lightwrve RF
Problem: The LED does not illuminate when the window / door is opened.
Solution: The trigger is not mounted correctly. Ensure that the two dots line up on each section, that there is less than 10mm difference in the depth of the dots, and ensure that there is only a 2-3 gap (max) between the sections when closed.
Problem: The trigger no longer functions and the LED does not illuminate.
Solution: Check the batteries. The average battery life should be at least one year, although this will vary depending on use. The LED indicator will flash ten times to report a low battery status. If this measure fails, there may be a fault. Please contact technical support via www.lightwaverf.com.
Problem: The trigger turns the TRV on rather than off when opened.
Solution: This is because the A/B Switch inside the battery compartment is switched to position B rather than position A. Moving the slider to position A will reverse the on/off commands and turn the TRV off when the window is open.
FAQs
Lightwrve RF
Q. How do I know that the trigger will fit my window frame?
A. The Trigger can be mounted to most window or door frames and has a degree of flexibility to accommodate different types. As long as the two sections of the Trigger can be made to match up together, the device will work.
Q. Can I link more than one TRV to a trigger?
A. You can currently only link one TRV directly.
Q. Is it legal for me to install a LightwaveRF devices myself?
A. Yes, LightwaveRF products are fully legal to install in your own home.
Q. How long do the batteries last?
A. This can vary, but a minimum of one year can be expected with normal use.
Technical Specification
Lightwrve RF
Specification
RF frequency: 868 MHz
Batteries: 2 x 1.5V (AAA)
Warranty: 2 year standard warranty


Lightwave RF Comfy
MEGAMAN®
2 Quadrant Park
Mundells
Welwyn Garden City
Herts
AL7 1FS
01707 386035

www.lightwaverf.house


- PROFESSIONAL SERIES
- EC DECLARATION OF CONFORMITY
- GET STARTED
- HOW DO I GET STARTED
- HOW DOES IT WORK
- HELP VIDEO & FURTHER GUIDANCE
- INSTALLATION
- LIGHTWRVE RF
- INSERTING THE BATTERIES
- ATTACHING TO A DOOR OR WINDOW AND FRAME
- HOW TO USE THE MAGNETIC TRIGGER
- LINKING THE TRIGGER TO A TRV, ELECTRIC SWITCH OR THERMOSTAT
- ADD OTHER HEATING DEVICES
- TROUBLESHOOTING
- PROBLEM: THE LED DOES NOT ILLUMINATE WHEN THE WINDOW / DOOR IS OPENED
- PROBLEM: THE TRIGGER NO LONGER FUNCTIONS AND THE LED DOES NOT ILLUMINATE
- PROBLEM: THE TRIGGER TURNS THE TRV ON RATHER THAN OFF WHEN OPENED
- FAQS
- TECHNICAL SPECIFICATION
- SPECIFICATION
- LIGHTWAVE RF COMFY
- MEGAMAN®
Brand : Lightwave
Model : Magnetic Trigger LW931
Category : Door/window sensor