
NCV-6001 - Dash cam Naxa - Free user manual and instructions
Find the device manual for free NCV-6001 Naxa in PDF.


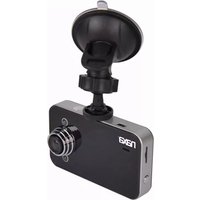
| Product Type | Portable HD Video Dash Cam |
| Brand | Naxa |
| Model | NCV-6001 |
| Recording Resolution | Up to 1280 x 960 pixels |
| Video Format | AVI |
| Loop Recording Intervals | 1, 3, 5, or 10 minutes |
| Motion Detection | Yes (auto record on movement) |
| Time Stamp | On/Off |
| Audio Recording | On/Off |
| Storage | MicroSD card (1GB to 32GB) |
| Display | 2.5" LCD, 270-degree swivel |
| Power Source | Rechargeable Li-ion battery or 12V/24V car charger |
| Input Voltage | DC 5V via USB cable |
| Microphone | Built-in |
| Speaker | Built-in |
| Lens | With IR LED for low-light recording |
| Mount | Included windshield mount |
| USB Connectivity | Disk drive or PC camera mode |
| Language Support | Multiple languages (English, Chinese, French, etc.) |
| Auto Power Off | Off, 1, 3, or 5 minutes |
| LCD Auto Off | Off, 1, 3, or 5 minutes |
| Light Frequency | 50Hz / 60Hz adjustable |
| Photo Resolution | 1.3M, 2M, VGA |
| Photo Quality | Fine, Standard, Economy |
Frequently Asked Questions - NCV-6001 Naxa
User questions about NCV-6001 Naxa
0 question about this device. Answer the ones you know or ask your own.
Ask a new question about this device
Download the instructions for your Dash cam in PDF format for free! Find your manual NCV-6001 - Naxa and take your electronic device back in hand. On this page are published all the documents necessary for the use of your device. NCV-6001 by Naxa.
USER MANUAL NCV-6001 Naxa
THE NEW GENERATION IN TECHNOLOGY
Portable HD Video Dash Cam
NCV-6001

natural_image
Rear view of a black-and-white navigation device with a red car on a desert terrain, displayed on a digital screen (no visible text or symbols)Instruction Manual
Please read carefully before use and keep for future reference.
Thank You In the Box
We know you have many choices when it comes to technology; thank you for choosing us here at Naxa Electronics. Established in 2001 in Los Angeles, CA, we are dedicated to delivering products that entertain and delight.
We trust that you will be happy with your purchase. Please read this manual carefully and save it for reference. You may also find the latest FAQ documentation, and other product material at our website. Come visit us on the web at www.naxa.com and see all that we have to offer!
Please take a moment to make sure that you have everything in the list below. Although we make every effort to ensure that each Naxa device is securely packed and sealed, we know a lot can happen in between us and you. If anything is missing, check back with your local retailer to get immediate assistance. If they cannot help you, please contact our Naxa Support Team at www.naxa.com/supportcenter.
• NCV-6001
- Mount
- USB Cable
- Car Charger
- Battery
• Instruction Manual
Warnings and Precautions

CAUTION
WARNING: SHOCK HAZARD. DO NOT OPEN. AVIS: RISQUE DE CHOC ELECTRIQUE. NE PAS OUVRIR

CAUTION: TO REDUCE THE RISK OF FIRE AND ELECTRIC SHOCK, DO NOT REMOVE THE COVER (OR BACK) OF THE UNIT. REFER SERVICING ONLY TO QUALIFIED SERVICE PERSONNEL.

The lightning flash with arrowhead symbol within an equilateral triangle is intended to alert the user to the presence of uninsulated "dangerous voltage" within the product's enclosure that may be of significant magnitude to constitute risk of electric shock
The exclamation point within an equilateral triangle is intended to alert the user to the presence of important operation and servicing instructions in the literature accompanying the appliance.
CAUTION
- Do not block the ventilation openings or holes.
- Do not place any naked flames (such as lighted candles) on the apparatus.
- When discarding batteries, follow all local rules and laws governing the disposal of batteries. Consider the environmental impact of your actions!
• To prevent fire or shock hazard, do not expose this appliance to rain or moisture.
Important Safety Information
- Read Instructions: All the safety and operating instructions should be read before the product is operated.
- Retain Instructions: The safety and operating instruction should be retained for future reference.
- Heed Warnings: All warnings on the product and in the operating instructions should be adhered to.
- Follow Instructions: All operating and usage instructions should be followed.
- Cleaning: Unplug this product from the wall outlet before cleaning. Do not use liquid cleaners or aerosol cleaners. Use a damp cloth for cleaning.
- Attachments: Use only attachments recommended by the manufacturer. Use of other attachments may be hazardous.
- Water and Moisture: Do not use this product near water (e.g., near a bathtub, washbowl, kitchen sink, laundry tub, in wet basements, or near a swimming pool and the like).
- Acc essories: Do not place this product on an unstable
cart, stand, tripod, bracket, or table. Use only with carts, stands, tripods, brackets, or tables recommended by the manufacturer or sold with the product. Any mounting of the product should follow the manufacturer's instructions and should use a mounting accessory recommended by the manufacture. A product and cart combination should be moved
Quick stops, excessive force, and uneven surfaces may cause the product and cart combination to overturn.

- Ventilation: Slots and openings in the cabinet are provided for ventilation to ensure reliable operation of the product and to protect it from overheating. These openings should never be blocked by placing the product on a bed, sofa, rug, or other similar surface. This product should not be placed in a built-in installation such as a bookcase or rack unless proper ventilation is provided or the manufacturer instructions have been adhered to.
- Power Sources: This product should be operated only from the type of power source indicated on the rating label. If you are not sure of the type of power supply to your home, consult your product dealer or local power company. For products intended to operate from battery power or other sources, refer to the operating instructions.
- Grounding or Polarization: This product may be equipped with a polarized alternating-current line plug that has one blade wider than the other. This plug will only fit into the power outlet in one direction. This is a safety feature. If you are unable to insert the plug fully into the outlet, try reversing the direction of the plug. If the plug should still fail to fit, contact an electrician to replace the obsolete outlet. Do not defeat the safety purpose of the polarized plug.
- Power-Cord Protection: Power supply cords should be routed so that they are not likely to be walked on or pinched by items placed upon or against them, paying particular attention to cords at plugs, convenience receptacles, and at the point which they exit from the product.
-
Protective Attachment Plug: The product may be equipped with an attachment plug with overload protection. This is a safety feature. See the operating instructions for replacement or directions to reset the protective device. If replacement of the plug is required, be sure the service technician has used a replacement plug that has the same overload protection as the original plug as specified by the manufacturer.
-
Lightning: For added protection for this product, unplug it from the wall outlet during a lightning storm or when it is left unattended and unused for long periods of time. This will prevent damage to the product due to lightning or power-line surges.
- Overloading: Do not overload wall outlets, extension cords, or integral convenience receptacles as this can result in a risk of fire or electric shock.
- Object and Liquid Entry: Never push objects of any kind into this product through openings as they may touch dangerous voltage points or short-out parts that could result in a fire or electric shock. Never spill liquid of any kind on the product.
- Servicing: Do not attempt to service this product yourself as opening or removing covers may expose you to dangerous voltage or other hazards. Refer all servicing to qualified service personnel.
- Damage Requiring Service: Unplug this product from the wall outlet and refer servicing to qualified service personnel under the following conditions: a) when the power-supply or plug is damaged; b) if liquid has been spilled or if objects have fallen into the product; c) if the product has been exposed to rain or water; d) if the product does not operate normally by following the operating instructions. Adjust only those controls that are covered by the operating instructions as improper adjustment of other controls may result in damage and will often require extensive work by a qualified technician to restore the product to its normal operation; e) if the product has been dropped or damaged in any way; f) when the product exhibits a distinct change in performance—this indicates a need for service.
-
Replacement Parts: When replacement parts are required, be sure that your service technician has used replacement parts specified by the manufacturer or have the same characteristics as the original part. Unauthorized substitutions may result in fire, electric shock, or other hazards.
-
Safety Check: Upon completion of any service or repairs to this product, ask the service technician to perform safety checks to ensure that the product is in proper operating condition.
- Wall or Ceiling Mounting: The product should be mounted to a wall or ceiling only as recommended by the manufacturer.
- Heat: The product should be situated away from heat sources such as radiators, heat registers, stoves, or other products (including amplifiers) that produce heat.
WARNING:
This product contains lead, a chemical known to the State of California to cause cancer and birth defects or other reproductive harm. Wash hands after handling.
At A Glance

- USB Slot
- Earphone Jack
- Memory Card Slot
- Speaker
- Mount hole
- Microphone
- Battery Cover
- Lens
- IR LED
- ON/OFF Switch
- REC/SNAP
- 2.5" LCD Display
- Menu
- Down
- UP
- Mode Button
Operating Instructions
The Naxa HD Dash Cam can record video, take photos, preview and and be utilized as a PC camera. Select the function you would like to use and please remember to insert a Memory card before using.
Power
A) Use supplied Li-ion battery and place in battery compartment [8]. Dash Cam can be activated after it has been placed on a vehicle by pressing the Power Switch [11] for 3 seconds and turn off by pressing it again.
B) Connect with Car Charger. Dash Cam will record automatically when the car starts. When the car turns off, it will save the last file and shut down.
Recording
The Dash Cam will enter the default recording mode when it is turned on. The work indicator will flash to let you know its recording. The recoding file will save to the Memory card. To stop, press the recrod [12] button.
Camera Mode
Turn on the Dash Cam and press the Mode Button [17] to enter the Camera Mode. Press the Snap button [12] to take a photo.
Preview & Delete
Turn on the Dash Cam and press the Mode Button [17] twice to enter Preview Mode. Press Up [16] or Down [15] to select the preview file. To playback a video, press the REC button [12] to pause or resume playback. If you want to delete the file, press the Menu button [14] to enter Delete mode and you can select All or specific files by using the UP/DOWN buttons and pressing REC to confirm deletion. You can also select Thumbnail Mode and Volume (from 1 to 6) under the Preview Mode.
Function Settings
Turn on the Dash Cam and press the Menu Button [17] under Video Mode or Camera Mode to enter the setting interface. Confirm by pressing the REC button [12] and selecting UP/DOWN for the following setting. Press the Menu Button again to exit when completed.
A. Video Mode
1) Size: Select [1280 x 960 / 720 x 480 / 640 x 480 pixels]
2) Time Stamp: Select On/Off
3) Motion Detect: Select On/Off
Note: When you select Motion Detect, it will automatically record when there is movement and stop recording when there is no movement.
4) Audio Record: On/Off
5) Recording Time: Select [1/3/5/10] minute intervals when recording the files.
B. Camera Mode
1) Size: 1.3M/2M/1.3M/VGA
2) Quality: FINE/STANDARD/ECONOMY
3) EV -2.0, -5/3, -4/3, -1.0, 0.0, +1/3, +2/3, +1.0, +4/3, +5/3, +2.0
4) ISO: AUTO/100/200
5) SATURATION: HIGH/NORMAL/LOW
6) SHARPNESS: HARD/NORMAL/SOFT
7) COLOR: STANDARD/MONOCHROME
C. Setting Mode
Whether under Video Mode or Capture Mode, press the Menu Button twice to enter the Setup interface.
1) Format: Select if you want to Erase the Memory Card
2) Language: Select [English, Simplified Chinese, Traditional Chinese, Japanese, French, Dutch, Korean, Portuguese, Russian, Spanish, Arabic]
3) LCD Auto Off: Function Off/ Auto Off 1 Min / Auto Off 3 Min / Auto Off 5 min
4) AUTO OFF: Camera Auto Off function: Function OFF/1 Min / 3 Min / 5 Min
5) SYSTEM RESET: Select [Cancel or Execute System] reset
6) Light Frequency: Set [50/60Hz]
7) Date Input: Set correct recording Date & Time by Rec button and UP/DOWN buttons.
8) Usb: DISk DRIVE / PC CAM
USB Mode
Connect the Dash Cam to a computer by using the supplied USB cable. A removable disk will appear on your PC and you can now transfer the files stored from the Dash Cam.
Note:
1) Please insert the Memory card before recording.
2) This Dash Cam records in cycles of 1/3/5/10 minute intervals. If storage is full, it will record from the beginning again and erase over the previously recorded faile auto-
matically. There will be a 3 second delay as it saves the file and during that lapse timeframe, nothing will be recorded
3) Since the Dash Cam is DC 5V input, please use the included
car charger. The adapter 12V/24V will convert to 5V automatically.
Specifications
1) Recording Resolution: [1280x960 / 720x480 / 640x480 pixels]
2) Video Format: AVI
3) Repeat Storage by selection: 1/3/5/10 minutes
4) Power Source: Rechargeable Battery or 12V/24V Car Charger
5) Supports Memory Card: 1GB to 32GB Max
6) Microphone: Built-in
7) 2.5" LCD: 270 Degree Swirl
System Reset
If the unit locks up or is not responding, press the Reset button and the unit will automatically reset.
Support
If you have problems with your device, please consult the instructions in this manual. Please also visit us on the web at www.naxa.com to get up to the minute news, alerts, and documentation for your device. For additional assistance, please contact Naxa Technical Support
NAXA Technical Support
2320 East 49th St.
Vernon, CA 90058
866-411-6292
http://www.naxa.com/supportcenter/
MADE IN CHINA
Brand : Naxa
Model : NCV-6001
Category : Dash cam