
RoboSHOT 12E HDBT - Video Conferencing System Vaddio - Free user manual and instructions
Find the device manual for free RoboSHOT 12E HDBT Vaddio in PDF.


| Product Type | Professional PTZ Camera System for Video Conferencing |
| Model | RoboSHOT 12E HDBT (also known as RoboSHOT 12E CAT-5) |
| Image Sensor | 1/2.8-type Exmor CMOS (back-illuminated, high-speed, low-noise) |
| Optical Zoom | 12x optical zoom (Super-Wide mode) |
| Resolution | Full HD 1080p/60 (native), supports 1080p/50, 720p/60, etc. |
| Video Output (via Quick-Connect) | Simultaneous HD-SDI, HDMI, and analog component (YPbPr) with QCCU; USB 2.0 or IP streaming with QUSB |
| Power Supply | 36 VDC, 2.78 A (with Quick-Connect Universal CCU) or 24 VDC, 2.0 A (with other Quick-Connect devices) |
| Camera Ports | EZPower Video (RJ-45), Network Control (RJ-45), RS-232 (RJ-45), 36 VDC for CCU Only (RJ-45) |
| Control Methods | IR remote, web interface, Telnet, RS-232 (VISCA protocol) |
| Mount | Thin Profile Wall Mount included (black or white); supports ceiling mount with image flip |
| Dimensions (Camera Body) | Approx. 160 mm (W) x 170 mm (H) x 180 mm (D) (estimated from typical PTZ) |
| Weight (Camera Only) | Approx. 1.5 kg (3.3 lbs) |
| Operating Temperature | 0°C to 40°C (32°F to 104°F) |
| Storage Temperature | -20°C to 60°C (-4°F to 140°F) |
| Maintenance | Clean lens with soft, dry cloth; avoid liquids. No user-serviceable parts inside. |
| Safety | Indoor use only; do not expose to liquids; always support base when handling. |
| Spare Parts / Repairability | Contact Vaddio Technical Support for RMA; repair by authorized service only. |
| Warranty | Standard warranty; advance replacement available for first year (dealer channel). |
Frequently Asked Questions - RoboSHOT 12E HDBT Vaddio
User questions about RoboSHOT 12E HDBT Vaddio
0 question about this device. Answer the ones you know or ask your own.
Ask a new question about this device
Download the instructions for your Video Conferencing System in PDF format for free! Find your manual RoboSHOT 12E HDBT - Vaddio and take your electronic device back in hand. On this page are published all the documents necessary for the use of your device. RoboSHOT 12E HDBT by Vaddio.
USER MANUAL RoboSHOT 12E HDBT Vaddio
natural_image
Three white and black industrial sensor units with camera lenses, displayed against a blue background (no text or symbols on devices)Complete Manual for
RoboSHOT CAT-5 Professional PTZ Camera Systems
Including
Contents
Overview 1.
What's in this Guide 2.
Camera Features 2
Quick-Connect Features.3
Quick-Connect Universal CCU (QCCU).3.
Quick-Connect USB (QUSB).3
Quick-Connect USB Mini (QMini).4.
Quick-Connect DVI/HDMI-SR (QDVI).4
Quick-Connect SR (QSR).4
Unpacking the Camera System.5....
A Quick Look at the Camera.... 15
Front of the Camera.... 15
Back of the Camera - RoboSHOT 12 and RoboSHOT.30.... 16
Back of the Camera - RoboSHOT 12E CAT-5 and RoboSHOT 30E.CAT-5.... 17
A (Quick) Look at the Quick-Connect Devices 18
Quick-Connect Universal CCU Interface 19
Quick-Connect USB Interface 21
Quick-Connect USB Mini Interface.... 22
Quick-Connect DVI/HDMI-SR Interface 23
Quick-Connect SR Interface 24
Installing the Camera and Quick-Connect Device 25
Don't Void Your Warranty! 25
Before You Start 26
Installing the Wall Mount 26
About Ceiling-Mounted Cameras 26
Video Resolution Setting 27
Complete Manual for RoboSHOT CAT-5 Professional IPTZ Camera Systems
Installing the Quick-Connect Device.38....
Powering Up the Camera 38....
Status Light.38....
Using the IR Remote.39....
IR Remote Cheat Sheet.39....
IR Remote Details.40....
Storing a Preset Using the Remote.40....
Clearing a Preset Using the Remote 40....
Web Interface.41....
Getting the Camera's IP Address.4.1....
Accessing the Web Interface.... 41
Browser Support 41
User Access 42
Administrative Access 43
Compact Menu View 43
Working with the Quick-Connect Device's Web Interface.... 44
Getting the Quick-Connect Device's IP Address 44
Quick-Connect USB Mini: Video Mode vs. Control Mode 44
Accessing the Web Interface for the Quick-Connect USB or Quick-Connect USB Mini .....45
Web Interface Cheat Sheet 46
System Administration....48
For Non-DHCP Environments: Configuring the Device with a Static IP Address for Initial Installation
Configuring the Quick-Connect USB Device with a Static IP Address 51
Changing the Camera's Hostname.... 53
Changing the Quick-Connect Device's Hostname.... 53
Optional For DHCP Environments: Changing from a DHCP Address to a Static IP Address ...54
Specifying Time Zone and NTP Server 55
Complete Manual for RoboSHOT CAT-5 Professional PTZ Camera Systems
Accessing the Diagnostic Logs.65....
Configuring Camera Behavior.66....
Setting the Custom Home Position and Other Preset .Shots.66....
Renaming Presets and Custom CCU Scenes.67....
Initial Lighting and Color Settings.68....
Lighting Adjustments.69....
Fine-Tuning Image Quality and Color.69....
Lighting and Image Quality Cheat Sheet.70....
Color Adjustment Cheat Sheet.7.1....
Saving Color and Lighting Settings.7.1....
Adjusting the Focus.
Speed Adjustments....
About Tri-Synchronous Motion....72
Setting the Speed for Manual Movements 73
Setting the Speed of Movements to Presels.... 73
Adjusting Tri-Synchronous Motion Speed.... 74
Setting the Direction for Camera Movements....75
Reading the Camera's Switches.... 76
Basic Camera Settings for RoboSHOT 12E CAT-5 and RoboSHOT 30E.CAT-5.....77
Software-Controlled Video Output Resolution Setting 78
Additional Camera Behavior Settings.... 78
Configuring Streaming (Quick-Connect USB or Quick-Connect USB.Mini)....80
Managing Lighting and Color Adjustments with the Universal.CCU.... 82
A Quick Look at the Menu Controls 82
Adjusting Color 84
Setting the Default Lighting Adjustments 84
Adjusting Light Level and Detail 84
Working with Custom Scenes 85
Complete Manual for RoboSHOT CAT-5 Professional PTZ Camera Systems
camera zoom.92....
camera focus.93....
camera preset.94....
camera ccu get.95....
camera ccu set.96....
camera ccu scene.97....
camera led.97....
camera standby.98
network settings get .98....
network ping..99....
system reboot.99
system factory-reset..100....
version 100
history .101....
help 101
exit 101
RS-232 Serial Command Reference 102
Camera Movement, Zoom, and Focus Commands 102
Movement, Zoom, and Focus Inquiry Commands 104
Color and Light Management Commands 105
Shutter Speed Values (CAM_Shutter) 107
Iris Values (CAM_Iris)....108
Iris Gain and Gain Limit Values (CAM_Gain) 108
Color and Light Management Inquiry Commands ....109
CCU Scene Commands for the Universal CCU 109
Other Commands....11
Other Inquiry Commands 11
Specifications 111
Complete Manual for RoboSHOT CAT-5 Professional PTZ Camera Systems
FCC Part 15 Compliance.120....
ICES-003 Compliance.120....
European Compliance.121....
Compliance and Conformity Statements for Quick-Connect Devices.122....
FCC Part 15 Compliance.122
ICES-003 Compliance.122
European Compliance.123
Warranty and Return Policy.124....
Photo Credits.128....
Index 129....
Overview
This guide covers the RoboSHOTAT-5 cameras. These cameras
must be used with a Quick-Connect device or with an AV Bridge MATRIX PRO.
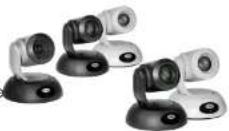
RoboSHOT QCCU systems:
■ RoboSHOT 12 QCCU, North America - 999-9907-000 (silver/black)
■ RoboSHOT 12 QCCU, Europe/UK - 999-9907-001 (silver/black)
■ RoboSHOT 12E QCCU, North America - 999-99070-000 (black), 999-99070-000 (white)
■ RoboSHOT 12E QCCU, Europe/UK - 999-99070-001 (black), 999-99070-001 (white)
■ RoboSHOT 30 QCCU, North America - 999-9917-000 (black), 999-9917-000W (white)
■ RoboSHOT 30 QCCU, Europe/UK - 999-9917-001 (black), 999-9917-001W (white)
■ RoboSHOT 30 QCCU, Australia/New Zealand - 999-99170-009 (black), 999-99170-009W (white)
■ RoboSHOT 30E QCCU, North America - 999-99170-000 (black), 999-99170-000W (white)
■ RoboSHOT 30E QCCU, Europe/UK - 999-99170-001 (black), 999-99170-001W (white)
■ RoboSHOT 30E QCCU, Australia/New Zealand - 999-99170-009 (black), 999-99170-009W (white)
RoboSHOT QUSB systems:
■ RoboSHOT 12 QUSB, North America - 999-9909-000 (silver/black)
■ RoboSHOT 12 QUSB, Europe/UK - 999-9909-001 (silver/black)
■ RoboSHOT 12 QUSB, Australia/New Zealand - 999-9909-009 (silver/black)
■ RoboSHOT 12E QUSB, North America - 999-99090-000 (black), 999-99090-000W (white)
■ RoboSHOT 12E QUSB, Europe/UK - 999-99090-001 (black), 999-99090-001W (white)
■ RoboSHOT 12E QUSB, Australia/New Zealand - 999-99090-009 (black), 999-99090-009W (white)
■ RoboSHOT 30 QUSB, North America - 999-9919-000 (black); 999-9919-000W (white)
■ RoboSHOT 30 QUSB, Europe/UK - 999-9919-001 (black): 999-9919-001W (white)
■ RoboSHOT 30 QUSB, Australia/New Zealand - 999-9919-009 (black); 999-9919-009W (white)
■ RoboSHOT 30E QUSB, North America - 999-99190-000 (black): 999-99190-000W (white)
■ RoboSHOT 30E QUSB, Europe/UK - 999-99190-001 (black); 999-99190-001W (white)
■ RoboSHOT 30E QUSB, Australia/New Zealand - 999-99190-009 (black); 999-99190-009W (white)
RoboSHOT QMini systems:
■ RoboSHOT 12 QMini, North America - 999-9901-000 (silver/black)
■ RoboSHOT 12 QMini, Europe/UK - 999-9901-001 (silver/black)
■ RoboSHOT 12 QMini, Australia/New Zealand - 999-9901-009 (silver/black)
Complete Manual for RoboSHOT CAT-5 Professional PTZ Camera Systems
RoboSHOT QSR systems:
■ RoboSHOT 12 QSR, North America – 999-9905-000 (silver/black)
■ RoboSHOT 12 QSR, Europe/UK - 999-9905-001 (silver/black)
■ RoboSHOT 30 QSR, North America – 999-9915-000 (black), 999-9915-000W (white)
■ RoboSHOT 30 QSR, Europe/UK - 999-9915-001 (black), 999-9915-001W (white)
RoboSHOT AVBMP:
■ RoboSHOT 12 AVBMP, worldwide – 999-9900-500 (silver/black)
■ RoboSHOT 12E AVBMP, worldwide - 999-99000-500 (black), 999-99000-500W (white)
■ RoboSHOT 30 AVBMP, worldwide – 999-9910-500 (black), 999-9910-500W (white)
■ RoboSHOT 30E AVBMP, worldwide - 999-99100-500 (black), 999-99100-500W (white)
What's in this Guide
This guide covers:
■ Unpacking
■ Physical features
■ Switch settings
■ Installation
■ Controlling the camera using the IR remote
■ Web interface: system administration and performance/behavior configuration
■ Telnet and RS-232 API references
■ Specifications
■ Troubleshooting
■ Warranty and compliance/conformity information
For your convenience, the information you need to install this product is also available in the smaller, standalone Installation Guide for RoboSHOT CAT-5 Professional PTZ Camera Systems, which covers unpacking, physical features, switch settings, installation, and initial power-up.
Download manuals, dimensional drawings, and other information from www.vaddio.com/support.
Camera Features
■ Powered by your choice of Quick-Connect device or by an AV Bridge MATRIX PRO for maximum
flexibility in installation and output connectivity
■ Full HD (native 1080p/60) resolution
■ RoboSHOT 12 and RoboSHOT 30: Exm102.8 type image sensor
- PohoSHOT 12F CAT 5 and PohoSHOT 30F CAT 5: Evmor DIM back lit 1/2.5 tune, high speed, low
Complete Manual for RoboSHOT CAT-5 Professional PTZ Camera Systems
Quick-Connect Features
Quick-Connect devices provide power and connectivity for the RoboSHOT 12 and RoboSHOT 30
cameras. Tailored to specific environments and situations, they give the RoboSHOT cameras unparalleled flexibility.
Quick-Connect Universal CCU (QCCU)
Best for environments where lighting and color management are priorities, and for installations requiring long cabling distances.
■ Full camera control unit functionality – manage lighting and color; store and recall up to 3 CCU scenes
■ Supports resolutions up to 1080p/60 from the camera
■ Simultaneous HD-SDI, HDMI and HD analog component (YPbPr) outputs
■ Up to 500 ft. (152 m) cabling distance
■ Tally light shows when the camera is on-air
■ Back-lit 8-line menu display
■ 1RU form factor; ships with rack mounting brackets

Quick-Connect USB (QUSB)
Versatile USB 2.0 device for environments using soft conferencing applications. Extends HDMI up to 100 ft. (30 m).
■ Choice of USB 2.0 MJPEG or IP (H.264) streaming
■ Simultaneous HDMI and HD analog component (YPbPr) outputs
■ Supports resolutions up to 1080p/60 from the camera
■ Up to 100 ft. (30 m) cabling distance
■ Standard UVC drivers
■ Web interface for network and streaming configuration
■ Half-rack form factor; mounting brackets available (not included)
Complete Manual for RoboSHOT CAT-5 Professional PTZ Camera Systems
Quick-Connect USB Mini (QMini)
Cost-effective USB 2.0 connectivity for soft conferencing applications, designed for environments where only one camera is needed.
■ USB streaming/capture only
■ Standard UVC drivers
■ Up to 100 ft (30 m) cabling distance
■ Compact form factor

Quick-Connect DVI/HDMI-SR (QDVI)
Connectivity solution for use with legacy equipment.
■ Supports resolutions up to 1080p/60 from the camera
■ DVI-D/HDMI and analog component (YPbPr) outputs
■ Up to 100 ft. (30 m) cabling distance
■ Push-button color space selection - sRGB for DVI-D or YCbCr for HDMI
■ IR output for codecs
■ Supports daisy-chaining
■ Half-rack form factor; mounting brackets available (not included)

Quick-Connect SR (QSR)
Basic connectivity for use with legacy equipment.
■ Supports resolutions up to 1080p/60 from the camera
■ Analog component YPbPr output
■ Up to 100 ft. (30 m) cabling distance
■ IR output for codecs

Complete Manual for RoboSHOT CAT-5 Professional PTZ Camera Systems
Unpacking the Camera System
Make sure you received all the items you expected. Here are the packing lists for the RoboSHOT camera systems.
Download manuals, dimensional drawings, and other information from www.vaddio.com/support.

Caution
Always support the camera's base when picking it up. Lifting the camera by its head of arm will damage it.

RoboSHOT 12E AVBMP, worldwide - 999-99000-500 (black), 999-99000-500W (white)
■ RoboSHOT 12E CAT-5 camera, black or white
- Thin Profile Wall Mount with mounting hardware, black white, depending on camera color
■ Vaddio IR Remote Commander
■ Quick-start guide

RoboSHOT 12 AVBMP, worldwide - 999-9900-500 (silver/black)
■ RoboSHOT 12 camera
■ Thin Profile Wall Mount with mounting hardware, black
■ Vaddio IR Remote Commander
■ Quick-start guide
RoboSHOT 30E AVBMP, worldwide - 999-99100-500 (black), 999-99100-500W (white)
■ RoboSHOT 30E CAT-5 camera, black or white
- Thin Profile Wall Mount with mounting hardware, black white, depending on camera color
■ Vaddio IR Remote Commander
■ Quick-start guide


Complete Manual for RoboSHOT CAT-5 Professional PTZ Camera Systems
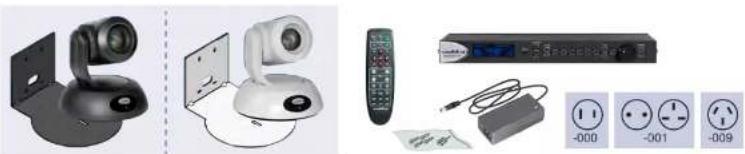
RoboSHOT 12E QCCU System, North America - 999-99070-000 (black), 999-99070-000W (white)
RoboSHOT 12E QCCU System, Europe/UK - 999-99070-001 (black), 999-99070-001W (white)
RoboSHOT 12E QCCU System, Australia/New Zealand - 999-99070-009 (black), 999-99070-009W
(white)
■ RoboSHOT 12E CAT-5 camera, black or white
■ Thin Profile Wall Mount with mounting hardware, black or white, depending on camera color
■ Vaddio IR Remote Commander
■ Quick-Connect Universal CCU Cat-5 Interface (QCCU)
■ 36V power supply with AC cord set(s)
■ Rack mounting brackets, qty. 2 (not shown)
■ Quick-start guides
Note
If you need an EZCamera RS-232 Control Adapter for use with this camera, please contact Vadc
Technical Support to obtain one.

natural_image
Product photos showing various electronic devices including a video camera, remote control, and power strip (no visible text or labels)RoboSHOT 12 QCCU System, North America - 999-9907-000 (silver/black)
RoboSHOT 12 QCCU System, Europe and UK - 999-9907-001 (silver/black)
RoboSHOT 12 QCCU System, Australia and New Zealand - 999-9907-009 (silver/black)
■ RoboSHOT 12 camera
■ Thin Profile Wall Mount with mounting hardware, black
■ Vaddio IR Remote Commander
■ Quick-Connect Universal CCU Cat-5 Interface (QCCU)
■ 36V power supply with AC cord set(s)
■ EZCamera RS-232 Control Adapter (998-1001-232)
■ Rack mounting brackets, qty. 2 (not shown)
■ Quick-start guides
Complete Manual for RoboSHOT CAT-5 Professional PTZ Camera Systems
RoboSHOT 30E QCCU System, North America - 999-99170-000 (black), 999-99170-000W (white)
RoboSHOT 30E QCCU System, Europe/UK – 999-99170-001 (black), 999-99170-001W (white)
RoboSHOT 30E QCCU System, Australia/New Zealand - 999-99170-009 (black), 999-99170-009W
(white)
■ RoboSHOT 30E CAT-5 Camera
■ Thin Profile Wall Mount with mounting hardware, black or white, depending on camera color
■ Vaddio IR Remote Commander
■ Quick-Connect Universal CCU Cat-5 Interface (QCCU)
■ 36V power supply with AC cord set(s)
■ Rack mounting brackets, qty. 2 (not shown)
■ Quick-start guides
Note
If you need an EZCamera RS-232 Control Adapter for use with this camera, please contact Vadc
Technical Support to obtain one.
natural_image
Product photos showing various electronic devices including a video camera, remote control, and power cord (no visible text or labels)RoboSHOT 30 QCCU System, North America - 999-9917-000 (black), 999-9917-000W (white)
RoboSHOT 30 QCCU System, Europe/UK-999-9917-001 (black), 999-9917-001W (white)
RoboSHOT 30 QCCU System, Australia/New Zealand - 999-9917-009 (black), 999-9917-009W
(white)
■ RoboSHOT 30 Camera
- Thin Profile Wall Mount with mounting hardware, black or white, depending on camera color
■ Vaddio IR Remote Commander
■ Quick-Connect Universal CCU Cat-5 Interface (QCCU)
■ 36V power supply with AC cord set(s)
■ EZCamera RS-232 Control Adapter (998-1001-232)
■ Rack mounting brackets, qty. 2 (not shown)
Complete Manual for RoboSHOT CAT-5 Professional PTZ Camera Systems
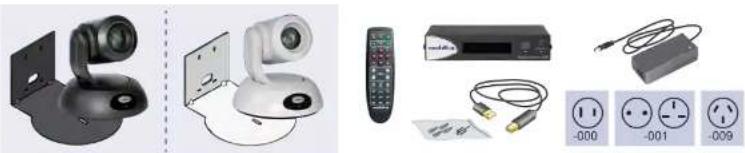
RoboSHOT 12E QUSB System, North America – 999-99090-000 (black), 999-99090-000W (white)
RoboSHOT 12E QUSB System, Europe/UK - 999-99090-001 (black), 999-99090-001W (white)
RoboSHOT 12E QUSB System, Australia/New Zealand - 999-99090-009 (black), 99-99090-009W
(white)
■ RoboSHOT 12E CAT-5 camera, black or white
■ Thin Profile Wall Mount with mounting hardware, black or white, depending on camera color
■ Vaddio IR Remote Commander
■ Quick-Connect USB interface (QUSB)
■ 24V power supply with AC cord set(s)
■ 6 ft. (1.8 m) USB 2.0 cable, type A to B
■ Rubber feet for QUSB unit, qty. 4 (not shown)
■ Quick-start guides
Note
If you need an EZCamera RS-232 Control Adapter for use with this camera, please contact Vadc
Technical Support to obtain one.

natural_image
Product catalog image showing various electronic devices including a video camera, remote control, and power cord (no visible text or labels)RoboSHOT 12 QUSB System, North America - 999-9909-000 (silver/black)
RoboSHOT 12 QUSB System, Europe/UK - 999-9909-001 (silver/black)
RoboSHOT 12 QUSB System, Australia/New Zealand - 999-9909-009 (silver/black)
■ RoboSHOT 12 camera
■ Thin Profile Wall Mount with mounting hardware, black
■ Vaddio IR Remote Commander
■ Quick-Connect USB interface (QUSB)
■ 24V power supply with AC cord set(s)
■ 6 ft. (1.8 m) USB 2.0 cable, type A to B
■ EZCamera RS-232 Control Adapter (998-1001-232)
Complete Manual for RoboSHOT CAT-5 Professional PTZ Camera Systems
RoboSHOT 30E QUSB System, North America - 999-99190-000 (black), 999-99190-000W (white)
RoboSHOT 30E QUSB System, Europe/UK - 999-99190-001 (black), 999-99190-001W (white)
RoboSHOT 30E QUSB System, Australia/New Zealand - 999-99190-009 (black), 999-99190-009W
(white)
■ RoboSHOT 30 camera
■ Thin Profile Wall Mount with mounting hardware, black or white, depending on camera color
■ Vaddio IR Remote Commander
■ Quick-Connect USB Interface (QUSB)
■ 24V power supply with AC cord set(s)
■ 6 ft. (1.8 m) USB 2.0 cable, type A to B
■ Rubber feet for QUSB unit, qty. 4 (not shown)
■ Quick-start guides
Note
If you need an EZCamera RS-232 Control Adapter for use with this camera, please contact Vadc
Technical Support to obtain one.
natural_image
Product collage showing various electronic devices including a video camera, remote control, and power cord (no visible text or symbols)RoboSHOT 30 QUSB System, North America – 999-9919-000 (black), 999-9919-000W (white)
RoboSHOT 30 QUSB System, Europe/UK - 999-9919-001 (black), 999-9919-001W (white)
RoboSHOT 30 QUSB System, Australia/New Zealand - 999-9919-009 (black), 999-9919-009W
(white)
■ RoboSHOT 30 camera
■ Thin Profile Wall Mount with mounting hardware, black or white, depending on camera color
■ Vaddio IR Remote Commander
■ Quick-Connect USB Interface (QUSB)
■ 24V power supply with AC cord set(s)
■ 6 ft. (1.8 m) USB 2.0 cable, type A to B
Complete Manual for RoboSHOT CAT-5 Professional PTZ Camera Systems
RoboSHOT 12E QMini, North America - 999-99010-000 (black), 999-99010-000W (white)
RoboSHOT 12E QMini, Europe/UK - 999-99010-001 (black), 999-99010-001W (white)
RoboSHOT 12E QMini, Australia/New Zealand - 999-99010-009 (black), 999-99010-009W (white)
■ RoboSHOT 12E CAT-5 camera
■ Thin Profile Wall Mount with mounting hardware, black or white, depending on camera color
■ Vaddio IR Remote Commander
■ Quick-Connect USB Mini interface (QMini)
■ 24V power supply with AC cord set(s)
■ 6 ft. (1.8 m) USB 2.0 cable, type A to B
■ Quick-start guides
Note
If you need an EZCamera RS-232 Control Adapter for use with this camera, please contact Vadc Technical Support to obtain one.

natural_image
Product catalog image showing various home security devices including a remote, switch, and power cord (no visible text or labels)RoboSHOT 12 QMini System, North America - 999-9901-000 (silver/black)
RoboSHOT 12 QMini System, Europe/UK - 999-9901-001 (silver/black)
RoboSHOT 12 QMini System, Australia/New Zealand - 999-9901-009 (silver/black)
■ RoboSHOT 12 camera
■ Thin Profile Wall Mount with mounting hardware, black
■ Vaddio IR Remote Commander
■ Quick-Connect USB Mini interface (QMini)
■ 24V power supply with AC cord set(s)
■ 6 ft. (1.8 m) USB 2.0 cable, type A to B
■ EZCamera RS-232 Control Adapter (998-1001-232)
■ Quick-start guides

Complete Manual for RoboSHOT CAT-5 Professional PTZ Camera Systems
RoboSHOT 30E QMini System, North America - 999-99110-000 (black), 999-99110-000W (white)
RoboSHOT 30E QMini System, Europe/UK - 999-99110-001 (black), 999-99110-001W (white)
RoboSHOT 30E QMini System, Australia/New Zealand - 999-99110-009 (black), 999-99110-009W
(white)
■ RoboSHOT 30 camera
■ Thin Profile Wall Mount with mounting hardware, black or white, depending on camera color
■ Vaddio IR Remote Commander
■ Quick-Connect USB Mini interface (QMini)
■ 24V power supply with AC cord set(s)
■ 6 ft. (1.8 m) USB 2.0 cable, type A to B
■ Quick-start guides
Note
If you need an EZCamera RS-232 Control Adapter for use with this camera, please contact Vadc
Technical Support to obtain one.

natural_image
Product catalog image showing various electronic devices including a remote, TV, and power cord (no visible text or labels)RoboSHOT 30 QMini System, North America - 999-9911-000 (black), 999-9911-000W (white)
RoboSHOT 30 QMini System, Europe/UK - 999-9911-001 (black), 999-9911-001W (white)
RoboSHOT 30 QMini System, Australia/New Zealand - 999-9911-009 (black), 999-9911-009W
(white)
■ RoboSHOT 30 camera
■ Thin Profile Wall Mount with mounting hardware, black or white, depending on camera color
■ Vaddio IR Remote Commander
■ Quick-Connect USB Mini interface (QMini)
■ 24V power supply with AC cord set(s)
■ 6 ft. (1.8 m) USB 2.0 cable, type A to B
■ EZCamera RS-232 Control Adapter (998-1001-232)
Complete Manual for RoboSHOT CAT-5 Professional PTZ Camera Systems
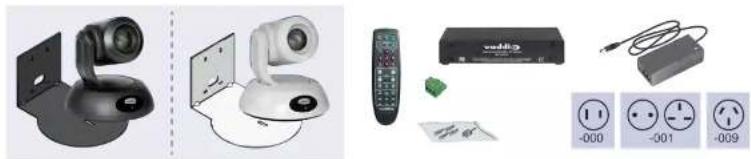
RoboSHOT 12E QDVI System, North America - 999-99060-000 (black), 999-99060-000W (white)
RoboSHOT 12E QDVI System, Europe/UK - 999-99060-000 (black), 999-99060-000W (white)
■ RoboSHOT 12E CAT-5 camera, black or white
■ Thin Profile Wall Mount with mounting hardware, black or white, depending on camera color
■ Vaddio IR Remote Commander
■ Quick-Connect DVI/HDMI SR interface (QDVI)
■ 24V power supply with AC cord set(s)
■ Phoenix-style connector, 3-position
■ Rubber feet for QDVI unit, qty. 4 (not shown)
■ Quick-start guides
Note
If you need an EZCamera RS-232 Control Adapter for use with this camera, please contact Vadc Technical Support to obtain one.
natural_image
Product collage showing various electronic devices and accessories including a video camera, remote control, and electrical outlets (no visible text or symbols)RoboSHOT 12 QDVI System, North America - 999-9906-000 (silver/black)
RoboSHOT 12 QDVI System, Europe/UK - 999-9906-001 (silver/black)
■ RoboSHOT 12 camera
■ Thin Profile Wall Mount with mounting hardware, black
■ Vaddio IR Remote Commander
■ Quick-Connect DVI/HDMI SR interface (QDVI)
■ 24V power supply with AC cord set(s)
■ EZCamera RS-232 Control Adapter (998-1001-232)
■ Phoenix-style connector, 3-position
■ Rubber feet for QDVI unit, qty. 4 (not shown)
■ Quick-start guides
Complete Manual for RoboSHOT CAT-5 Professional PTZ Camera Systems
RoboSHOT 30E QDVI System, North America - 999-9916-000 (black), 999-9916-000W (white)
RoboSHOT 30E QDVI System, Europe/UK - 999-9916-001 (black), 999-9916-001W (white)
■ RoboSHOT 30E CAT-5 camera
■ Thin Profile Wall Mount with mounting hardware, black or white, depending on camera color
■ Vaddio IR Remote Commander
■ Quick-Connect DVI/HDMI SR interface (QDVI)
■ 24V power supply with AC cord set(s)
■ Phoenix-style connector, 3-position
■ Rubber feet for QDVI unit, qty. 4 (not shown)
■ Quick-start guides
Note
If you need an EZCamera RS-232 Control Adapter for use with this camera, please contact Vadc Technical Support to obtain one.

natural_image
Product display image showing various electronic devices including a video camera, remote control, and charging unit (no visible text or labels)RoboSHOT 30 QDVI System, North America - 999-9916-000 (black), 999-9916-000W (white) RoboSHOT 30 QDVI System, Europe/UK - 999-9916-001 (black), 999-9916-001W (white)
■ RoboSHOT 30 camera
■ Thin Profile Wall Mount with mounting hardware, black or white, depending on camera color
■ Vaddio IR Remote Commander
■ Quick-Connect DVI/HDMI SR interface (QDVI)
■ 24V power supply with AC cord set(s)
■ EZCamera RS-232 Control Adapter (998-1001-232)
■ Phoenix-style connector, 3-position
■ Rubber feet for QDVI unit, qty. 4 (not shown)
■ Quick-start guides
Complete Manual for RoboSHOT CAT-5 Professional PTZ Camera Systems
RoboSHOT 12 QSR System, North America - 999-9905-000 (silver/black)
RoboSHOT 12 QSR System, Europe and UK - 999-9905-001 (silver/black)
■ RoboSHOT 12 camera
■ Thin Profile Wall Mount with mounting hardware, black
■ Vaddio IR Remote Commander
■ Quick-Connect SR interface (QSR)
■ 24V power supply with AC cord set(s)
■ EZCamera RS-232 Control Adapter (998-1001-232)
■ Phoenix-style connector, 3-position
■ Rubber feet for QSR unit, qty. 4 (not shown)
■ Quick-start guides

natural_image
Collection of electronic devices including remote, control panel, charging cable, and power cord (no visible text or symbols)RoboSHOT 30 QSR System, North America - 999-9915-000 (black), 999-9915-000W (white)
RoboSHOT 30 QSR System, Europe/UK - 999-9915-001 (black), 999-9915-001W (white)
■ RoboSHOT 30 camera
■ Thin Profile Wall Mount with mounting hardware, black or white, depending on camera color
■ Vaddio IR Remote Commander
■ Quick-Connect SR interface (QSR)
■ 24V power supply with AC cord set(s)
■ EZCamera RS-232 Control Adapter (998-1001-232)
■ Phoenix-style connector, 3-position
■ Rubber feet for QSR unit, qty. 4 (not shown)
■ Quick-start guides

natural_image
Collection of security camera and remote control devices with icons, no visible text or labelsComplete Manual for RoboSHOT CAT-5 Professional PTZ Camera Systems
A Quick Look at the Camera
The cameras in the RoboSHOT line are similar in appearance.
■ RoboSHOT 12 is silver, with a black base and stepped lens bezel
■ RoboSHOT 30 is available in black or white, and has a fluted lens bezel
■ RoboSHOT 12E CAT-5 and RoboSHOT 30E CAT-5 are available in black or white, and have smooth
lens bezels
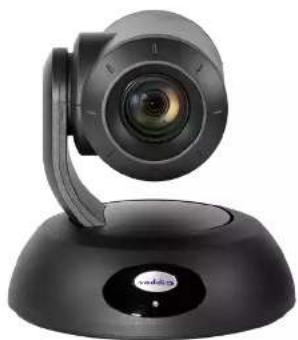
The image below shows a RoboSHOT 30 camera.
Front of the Camera
natural_image
Black video camera on a stand with a logo (no visible text or symbols on the device body)Camera and Zoom Lens
■ RoboSHOT 12: 12x optical zoom in Super-Wide mode, 10x optical zoom in normal mode.
Recommended for small to medium sized conference rooms.
■ RoboSHOT 12E CAT-5: 12x optical zoom; recommended for small to medium sized conference rooms.
Complete Manual for RoboSHOT CAT-5 Professional PTZ Camera Systems
Back of the Camera - RoboSHOT 12 and RoboSHOT 30
Rear panel connections are identical for the older RoboSHOT 12 and RoboSHOT 30 cameras.
natural_image
Close-up of a black remote control device with ports and cables (no visible text or symbols)■ Network Control: RJ-45 connector. Connect to the network for control via the web interface or Telnet session.
■ HD Video Select: Rotary switch to select the video output resolution. See Video Resolution Setting.
■ Camera Settings: DIP switches to set camera behaviors such as IR remote frequency, baud rate and image flip. See Camera Behavior Settings – RoboSHOT 12 and 30 for more information.
■ RS-232: RJ-45 connector. Connect to the RS-232 port (if any) on the Quick-Connect device to allow an external device to manage the camera using a modified VISCA protocol. See RS-232 Serial Communication Settings for RS-232 settings.
- EZPower Video: RJ-45 connector. Supplies power to the camera and delivers HD video back to the Quick-Connect interface using high speed differential signaling over Cat-5e cable. Connect to the EZPower Video port on the Quick-Connect device. (Color-coded orange or yellow, depending on the device.)
■ 36 VDC FOR CCU ONLY: RJ-45 connector. Power from the Quick-Connect Universal CCU, in RoboSHOT QCCU systems only. Do not use this port except when connecting to a Quick-Connect
Complete Manual for RoboSHOT CAT-5 Professional PTZ Camera Systems
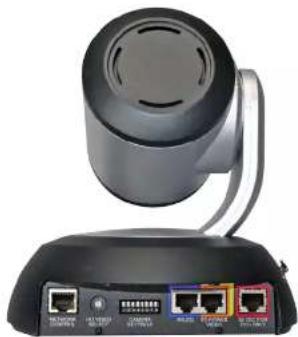
Back of the Camera - RoboSHOT 12E CAT-5 and RoboSHOT 30E CAT-5
Rear panel connections are identical for the RoboSHOT 12E CAT-5 and RoboSHOT 30E CAT-5 cameras.

natural_image
White remote control device with dual ports and a curved head (no visible text or symbols)■ Network Control: RJ-45 connector. Connect to the network for control via the web interface or Telnet session.
■ HD Video Select: Rotary switch to select the video output resolution. See Video Resolution Setting.
■ RS-232: RJ-45 connector. Connect to the RS-232 port (if any) on the Quick-Connect device to allow an external device to manage the camera using a modified VISCA protocol. See RS-232 Serial Communication Settings for RS-232 settings.
- EZPower Video: RJ-45 connector. supplies power to the camera and delivers HD video back to the Quick-Connect interface using high speed differential signaling over Cat-5e cable. Connect to the EZPower Video port on the Quick-Connect device. (Color-coded orange or yellow, depending on the device.)
■ 36 VDC FOR CCU ONLY: RJ-45 connector. Power from the Quick-ConnectUniversal CCU. Do not use this port except when connecting to a Quick-ConnectUniversal CCU.
Note
A label on the bottom of the camera lists the rotary switch settings.
A (Quick) Look at the Quick-Connect Devices
RoboSHOT 12, RoboSHOT 12E CAT-5, RoboSHOT 30, and RoboSHOT 30E CAT-5 cameras are not designed for stand-alone operation. These configurations are available:
- QCCU system – A camera with a Quick-Connect Universal CCU, a broadcast-quality CCU (camera control unit) for managing color and lighting adjustments. This system is typically used with a joystick camera controller.
- QUSB system – A camera with a Quick-Connect USB, a versatile solution with multiple connectivity options and choice of USB or IP streaming. This system is typically used in rooms that need conferencing capability, and may be used with a joystick camera controller.
■ QMini system – A camera with a Quick-Connect USB Mini, a basic USB connectivity solution with a small, unobtrusive form factor. This system is typically used for soft conferencing applications. - QDVI system – A camera with a Quick-Connect DVI/HDMI-SR, a connectivity solution for legacy equipment; provides DVI and analog component video outputs. Use with a DVI-to-HDMI adapter for HDMI output. Like the RoboSHOT QSR system, this system is typically used with older equipment; however, it provides more connectivity options. This system may be used with a joystick camera controller.
- QSR system – A RoboSHOT 12 or RoboSHOT 30 camera with a Quick-Connect SR, a short-range connectivity device for legacy equipment; provides analog component video output. This system is typically used with older displays, and may be used with a joystick camera controller. The Quick-Connect SR device has been discontinued and is not available for RoboSHOT 12E CAT-5 and RoboSHOT 30E CAT-5 cameras, though it will work with them.
The RoboSHOT 12, RoboSHOT 12E CAT-5, RoboSHOT 30, and RoboSHOT 30E CAT-5 cameras are also sold as RoboSHOT AVBMP cameras. These do not use Quick-Connect devices, but connect directly to a Vaddio AV Bridge MATRIX PRO, which provides connectivity for up to three cameras.
Complete Manual for RoboSHOT CAT-5 Professional PTZ Camera Systems
Quick-Connect Universal CCU Interface
This interface combines a versatile connectivity solution with a broadcast-quality camera control unit (CCU). It is the best choice for environments where lighting and color management are priorities and installations requiring long cabling distances.
Note
The Universal CCU supports resolutions with frame rates of 60, 59.94 and 50 frames per second lower.

Front panel features:
- 5-line display – Shows the current value for the parameter you are changing. The display shows up to 8 parameters at a time, so you can see how the controls and settings interact.
- Tally light – In a multi-camera/CCU installation, this indicator shows when this CCU and camera are the live program. When this light illuminates, the CCU also sends a tally command to the camera to light its tally indicator.
- Menu selector knob – Dial the desired setting or value for the selected function.
The buttons:
■ Scene A, Scene B and Scene C – Store and use three different sets of color and lighting adjustments (CCU scenes). F
■ W Bal OPWB (One Push White Balance) – Calibrate the color balance (Auto White Balance must be off). After the calibration is complete, you may want to activate Auto White Balance.
■ W Bal Auto (Auto White Balance) – Manage color levels automatically. Use the OPWB button to calibrate the white balance before activating Auto White Balance. - Red Gain and Blue Gain controls – Adjust the color balance. These controls are only active when Auto White Balance is off.
- Chroma - Controls the color intensity of the image.
■ Bright - Luminance control for the image. - Gamma Adjusts the mid tones to change the gray density of the image
Complete Manual for RoboSHOT CAT-5 Professional PTZ Camera Systems

natural_image
Front view of a network device rear panel showing ports, connectors, and external connectors (no readable text or symbols)Back panel features:
■ Power input – Connect only the 36 VDC, 2.78 Amp power supply provided with the Universal CCU.
- Recessed white button – Press to execute a factory reset; press and hold to enter boot loader mode.
■ 36 VDC to Camera (red) – Power to the RoboSHOT camera. Connect to the camera's port marked 36
VDC for CCU Only (color coded red). See Back of the Camera.
Caution
Connect this port ONLY to the camera port marked 36 VDC for CCU Only and color-coded red.
Connecting this port to any other port on the camera will result in equipment damage, and w warranty.
- RS-232 In (grey) – Control from an external device. If the camera and CCU will be controlled using a ProductionVIEW console or other camera control system, connect it to this port. Daisy-chain topology is not supported.
■ RS-232 to Camera (blue) – Camera control. Connect to the camera's RS-232 port. - Local – Install the 2-pin 5.0 mm Euro-style connector to use the tally function. In a multi-camera CCU installation, this lights the blue indicator on the front panel when this camera and Universal CCU combination is the live program. A tally command is also sent to the RoboSHOT camera via RS-232, illuminating its front indicator.
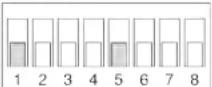
- 8-position DIP switch – The DIP switch lets you configure the way the camera and Universal CCU behave. The default position for all switches is DOWN. (Note that the default position for the DIP switch on the camera is all UP.)
- Switch 1: UP to load Scene A on power-up or reboot.
- Switch 5: UP to access adjustments for the display on the front panel.
■ Video from Camera (yellow and orange) – Receives the camera's differential video signals from the camera's EZ-POWER VIDEO connection.
- HD Video Outputs – The Universal CCU provides simultaneous video output in three formats, at the same resolution as the video input:
Complete Manual for RoboSHOT CAT-5 Professional PTZ Camera Systems
Quick-Connect USB Interface
This is a versatile USB 2.0 device for environments using soft conferencing applications. With simultaneous HDMI and HD analog component (YPbPr) video outputs and your choice of either USB or IP streaming, plus a web interface for ease of configuration, the Quick-Connect USB is an ideal connectivity solution for many environments.
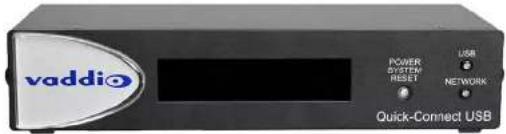
Front panel features:
- Back-lit LCD display – During normal operation, the display shows the MAC address and IP address for the Quick-Connect. When the Quick-Connect is booting, the display shows an initialization message.
■ Power System Reset button – Illuminates when the Quick-Connect is connected to power. Press and hold the button to reboot the Quick-Connect. - USB indicator – Illuminates when there is a USB connection to a computer. Blinks to show USB activity.
■ Network indicator – Illuminates when there is a network connection. Blinks to shown network activity.
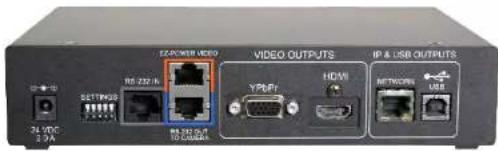
Back panel features:
■ 24 VDC 2.0 A power connector – Connect only the power supply shipped with the Quick-Connect.
Complete Manual for RoboSHOT CAT-5 Professional PTZ Camera Systems
Quick-Connect USB Mini Interface
This interface provides basic USB 2.0 connectivity for environments using soft conferencing applications.
Available input/camera resolutions are 720p/60, 720p/59.94, and 720p/50.
The Quick-Connect USB Mini is typically mounted with the connector panel facing up.

Front panel features:
- USB – Connect to a USB 2.0 port on the computer running the soft conferencing or video capture application.
■ Power – Illuminates when power is connected.

Back panel features:
■ 24 VDC 2.08 A power connector – Connect only the power supply shipped with the Quick-Connect.
■ Mode – Press to switch between USB streaming mode and web control mode. Press and hold to reset the Quick-Connect to its factory defaults.
■ EZ-Power Video – Power to the camera and video from the camera.
■ RS-232 to Camera - Control signals to the camera.
Complete Manual for RoboSHOT CAT-5 Professional PTZ Camera Systems
Quick-Connect DVI/HDMI-SR Interface
This interface provides connectivity to older equipment.

Back panel features:
■ Power – Illuminates when power is connected.
■ 24 VDC 2.0 A power connector – Connect only the power supply shipped with the Quick-Connect.
■ Color Space – Toggles between HDMI YCbCr and sRGB (RGBHV) color space to accommodate
either HDMI or DVI-D monitors.
■ RS-232 Control Input – Camera control input from a Vaddio joystick controller or other controller.
■ RS-232 Control Out to Camera – Control signals to the camera.
- Daisy Chain – Daisy Chain Control Emulation (DCCE) output to the next Quick-Connect DVI/HDMI-SR interface.
- IR Output – Forwards IR signals from the camera to third party equipment such as videoconferencing codecs. Use the MOD signal if the IR is from a remote or other IR emitter; use the NON-MOD signal for wired connections.
■ DVI-D/HDMI – HDMI 1.3 and DVI v 1.0 compliant. With a DVI to HDMI adapter, extends HDMI to an output device up to 100 ft. (30 m) away.
■ YPbPr – Analog component video output from the camera. Resolutions up to 1080p/60.
- EZ-Power Video – Power to the camera and video from the camera. Maximum cable distance 100 ft. (30 m).
Complete Manual for RoboSHOT CAT-5 Professional PTZ Camera Systems
Quick-Connect SR Interface
This interface provides basic connectivity to older equipment. The Quick-Connect SR interface has been discontinued and is not available for the RoboSHOT 12E CAT-5 and RoboSHOT 30E CAT-5 cameras, though it will work with them.

Back panel features:
■ 24 VDC 2.0 A power connector – Connect only the power supply shipped with the Quick-Connect.
■ EZ-Camera Power & HD Video – Power to the camera and video from the camera. On some units, this port is color-coded orange.
- HD Video Output YPbPr – Analog component video output from the camera. SD video resolutions (Y/C and CVBS formats) are not supported by the Quick-Connect SR Interface; however, analog component SD (high fps format - 480p/59.94 and 576p/50) video is supported.
- IR Output – Forwards IR signals from the camera to third party equipment such as videoconferencing codecs. Use the MOD signal if the IR is from a remote or other IR emitter; use the NON-MOD signal for wired connections.
- RS-232 Input and RS-232 Out to Camera – Route RS-232 control through the Quick-Connect device for ease of cabling. Connect RS-232 Input to an optional camera controller, and connect RS-232 Out to Camera to (you guessed it) the camera.
Complete Manual for RoboSHOT CAT-5 Professional PTZ Camera Systems
Installing the Camera and Quick-Connect Device
This section covers:
■ Selecting the location for the camera and Quick-Connect device
■ Installing the camera mount
■ Mounting the Quick-Connect device
■ Information on cables and RS-232 communication
■ Settings for the physical switches on the camera and the Quick-Connect devices
■ Connection diagrams
■ Mounting the camera
And a required safety note here:
Note
PoE type networks connected to this equipment are for intra-building use only and should not be to lines that run outside of the building in which this product is located.
Don't Void Your Warranty!


Caution
Always support the camera's base when picking it up. Lifting the camera by its head of arm will damage it.
Caution
This product is for indoor use. Use an appropriate protective enclosure if installing it outdoors or environment.
Do not install or operate this product if it has been dropped, damaged, or exposed to liquids. If things happen, return it to Vaddio for safety and functional testing.
Caution
If using a DC power supply with this product use the power supply included with it or recomme
Complete Manual for RoboSHOT CAT-5 Professional PTZ Camera Systems
Before You Start
Things to keep in mind when deciding where to install the camera:
- Consider camera viewing angles, lighting conditions, line-of-sight obstructions, and in-wall obstructions.
■ If the IR Remote Commander will be used, ensure that nothing blocks the IR lens in the camera's base.
■ Ensure that the camera body can move freely and point away from the ceiling and lights.
Prepare for a successful installation:
■ Be sure you can identify all cables correctly.
■ Check Cat-5 cables for continuity.
■ Ensure that the video resolution rotary switch and the DIP switches (if any) are set appropriately.
- Talk to the network administrator. If installing the camera in a non-DHCP network (one that does not automatically assign IP addresses), you may need to configure the camera with a static IP address as directed by the network administrator before connecting it to the network. Work with the network administrator to determine how to configure the equipment.
Installing the Wall Mount
The camera is shipped with a Thin Profile Wall Mount. Other mounting options are available as well.
Contact us if you don't have the camera mount you need.
You can install the camera wall mount to a 2-gang wall box or directly to the drywall.
■ If you mount it to drywall, use the wall anchors provided with the wall mount.
■ If you mount it to a wall box, use the cover plate screws supplied with the wall box.

Complete Manual for RoboSHOT CAT-5 Professional PTZ Camera Systems
Video Resolution Setting
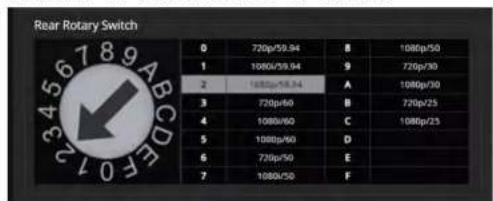
Non-architectural RoboSHOT cameras use a rotary switch to set output resolution.
Set the desired video output resolution with the rotary switch before installing the camera. Note that the video resolutions are mapped differently on the rotary switch for the newer Elite-series cameras.
RoboSHOT 12E CAT-5 and RoboSHOT 30E CAT-5 only: If the camera has been updated to version 3.1.0 firmware or later, Position 0 selects software control. Set video output resolution in the web interface. The default resolution is 720p/59.94. This capability is not available in earlier firmware versions or on the older RoboSHOT 12 and RoboSHOT 30 cameras.
See Software-Controlled Video Output Resolution Setting.
RoboSHOT 12 and RoboSHOT 30 cameras
RoboSHOT 12E CAT-5 and RoboSHOT 30E CAT-5 cameras

Note
The Quick-Connect Universal COII outnode frame rate of 50 line and above Switch selection.
Complete Manual for RoboSHOT CAT-5 Professional PTZ Camera Systems
Camera Behavior Settings - RoboSHOT 12 and RoboSHOT 30
Older RoboSHOT cameras use DIP switches to set camera behaviors; the RoboSHOT Elite series cameras set all camera behaviors in the web interface.
A label on the bottom of the camera provides a quick reference for setting the switches.
Set the switches appropriately before mounting the camera.
After the camera is installed, you can read the switches from the camera's web interface.
Note
When the camera is not inverted, DIP switches are in their default positions when they are up.
| Rear DIP Switches | |||||||||
| SW1 | SW2 | IR 1 | IR Out Off | Image Flip Off | BAUD 9600 bps | ||||
| IR 1 | UP | UP | |||||||
| IR 2 | DOWN | UP | SW1 | SW2 | SW3 | SW4 | SW5 | SW6 | SW7 |
| IR 3 | UP | DOWN | IR 2 | IR 3 | IR Out On | Image Flip On | BAUD 38400 bps | ||
(RoboSHOT 30 shown; Switch 5 is Super Wide Mode if the camera is a RoboSHOT 12.)
IR1, IR2, IR3 (Frequency Selection): If there are multiple cameras in the room, use switches 1 and 2 to configure each with a different IR frequency to allow the IR Remote Commander to control them independently. Then use the Camera Select buttons at the top of the remote to select the camera you want to control.
■ SW1 and SW2 up: IR frequency 1
■ SW1 down, SW2 up: IR frequency 2
■ SW1 up, SW2 down: IR frequency 3
IR Out: Leave switch 3 UP if the IR remote will be used. If the system will be controlled from another
device, set the switch DOWN. This turns off the IR sensors in the front of the camera, so that all control is via the RS-232 connection.
Image Flip: If mounting the camera upside-down, set switch 4 DOWN: IMAGE FLIP ON. This orients the video image correctly and sets the tilt motors to respond appropriately to tilt up and down commands from the remote. web interface. and connected control devices.
Complete Manual for RoboSHOT CAT-5 Professional PTZ Camera Systems
Switch Settings for the Universal CCU
The default position for DIP switches on the Universal CCU is down. On RoboSHOT cameras, the default position is up. Please double-check switch positions on both units if the camera does not perform as expected.
Switch 1:
- UP to load CCU Scene A on power-up (Custom Scene 1 must be defined on the camera) - DOWN to use the color and lighting settings associated with the camera's Home preset
Switch 5:
- UP to include the front panel display controls on the menu - DOWN to hide the display controls (all other menu items remain available)
The other switches are not used.
Switch Settings for the Quick-Connect USB
The default position for DIP switches on the Quick-Connect USB is up, as it is on RoboSHOT cameras.

Switch 3:
- UP for HDMI (YCbCr) color space - DOWN for DVI (sRGB) color space
Switch 4:
■ UP for normal operation ■ DOWN to enable firmware update
The other switches are not used.
Complete Manual for RoboSHOT CAT-5 Professional PTZ Camera Systems
RS-232 Serial Communication Settings
The RS-232 serial port (color-coded blue) provides a means of controlling the camera from a third-party device. Be sure the camera is set to the same baud rate as the external control device.
| Specification Value | |
| Communication Speed 9600 or 38400 baud, selectable | |
| Number of start bits 1 | |
| Number of stop bits 1 | |
| Number of data bits 8 | |
| Parity None | |
| Flow control None | |
The camera's default baud rate is 9600. The 38400 baud setting is optional if the connected device supports it.
RS-232 Connector Pin-Out
■ Pin 1: Not used
■ Pin 2: Not used
■ Pin 3: Not used
■ Pin 4: IR Output (Diff Signal to Quick-Connect SR)
■ Pin 5: IR Ground (Diff Signal to Quick-Connect SR)
■ Pin 6: GND (GND of IR Short Range - Pin 3)
■ Pin 7: RXD (from TXD of control source)
■ Pin 8: TXD (to RXD of control source)

Caution
Complete Manual for RoboSHOT CAT-5 Professional PTZ Camera Systems
Cabling Notes
Caution
When making cables, do not use pass-through RJ-45 connectors. If they are crimped incorrectly, they can damage the connectors on the product, cause intermittent connections, and degrade signal quality. Physical damage to the connectors may void your warranty.

Intact - will make reliable contact with cable connector

Damaged - Bent contact fingers will NOT make reliable contact with cable connector
Use Cat-5e or better cable. We recommend using high-quality connectors and a high-quality crimping tool.
We recommend shielded cabling if the cables will be coiled, run tightly with other cables, or placed close sources of electromagnetic interference such as power lines.
Caution
Check your cables. Connecting a cable to the wrong port or using the wrong pin-out can result damage and will void the warranty.

Pro Tip
To prevent tragic mishaps, label both ends of every cable.
Connecting the Camera
This section provides connection diagrams for each RoboSHOT system:
■ RoboSHOT QCCU (includes systems with RoboSHOT Elite cameras)
■ RoboSHOT QUSB (includes systems with RoboSHOT Elite cameras)
■ RoboSHOT QMini (includes systems with RoboSHOT Elite cameras)
■ RoboSHOT QDVI (includes systems with RoboSHOT Elite cameras)
■ RoboSHOT QSR (RoboSHOT 12 and RoboSHOT 30 only)
■ RoboSHOT AVBMP (includes RoboSHOT Elite cameras)
Note
Complete Manual for RoboSHOT CAT-5 Professional PTZ Camera Systems
Determine what you need to do to prevent IP address conflicts:
- Installing cameras with Quick-Connect USB devices on a non-DHCP network: configure each camera and each Quick-Connect USB device with static IP addresses before connecting them to the network.
- Installing cameras with other Quick-Connect devices on a non-DHCP network: configure each camera with a static IP address before connecting it to the network.
- Installing cameras with an AV Bridge MATRIX PRO on a non-DHCP network: configure each camera with a static IP address before connecting it to the network. The AV Bridge MATRIX PRO will also need a static IP address.
If you need to do any of these things, work with the network administrator to determine the appropriate network configuration.
See Configuring the Camera with a Static IP Address for step-by-step instructions to configure a static IP address.
Basic Connections: RoboSHOT QCCU System
RoboSHOT QCCU systems ship with the camera and a Quick-Connect Universal CCU (QCCU). The QCCU powers the camera and provides fine control over color and lighting (CCU) adjustments. This system is designed for a live production environment and is typically installed with a camera controller and multi-view preview monitor.
Caution
Connect the power cable from the QCCU to the camera's power port marked 36 VDC For QCCU Only. DO NOT connect it to the camera's EZ-Power Video port. Connecting the power cable from the (the wrong port on the camera will damage the camera and void your warranty.
Pro Tip
Use the color coding on the camera and the QCCU - blue goes to blue, yellow/orange goes to yellow/orange, red goes to red.
This diagram shows a RoboSHOT 12 camera. The RoboSHOT 30, RoboSHOT 12E CAT-5, and RoboSHOT 30E CAT-5 connect in the same way.

Complete Manual for RoboSHOT CAT-5 Professional PTZ Camera Systems
Basic Connections: RoboSHOT QUSB System
RoboSHOT QUSB systems ship with a USB 2.0 cable to connect the Quick-Connect USB to a computer running a soft conferencing application. The Quick-Connect USB provides connections for a camera controller or other control device, and HDMI and YPbPr (analog component video) outputs to display video from the camera (near-end video).
This diagram shows a RoboSHOT 12 camera. The RoboSHOT 30, RoboSHOT 12E CAT-5, and RoboSHOT 30E CAT-5 connect in the same way.

flowchart
graph TD
    A["Video Conferencing Device"] -->|Data Flow Path| B["Network Port"]
    B --> C["TV Server"]
    C --> D["Video Panel"]
    D -->|Data Flow Path| B
    B --> E["Internet"]
    E --> F["Video Panel"]
    F --> G["Video Panel"]
    G --> H["Internet"]
    H --> I["Video Panel"]
    I --> J["Internet"]
    J --> K["Internet"]
    K --> L["Internet"]
    L --> M["Internet"]
    M --> N["Internet"]
    N --> O["Internet"]
    O --> P["Internet"]
    P --> Q["Internet"]
    Q --> R["Internet"]
    R --> S["Internet"]
    S --> T["Internet"]
    T --> U["Internet"]
    U --> V["Internet"]
    V --> W["Internet"]
    W --> X["Internet"]
    X --> Y["Internet"]
    Y --> Z["Internet"]
    Z --> A
    style A fill:#f9f,stroke:#333
    style B fill:#ccf,stroke:#333
    style C fill:#cfc,stroke:#333
    style D fill:#fcc,stroke:#333
    style E fill:#cff,stroke:#333
    style F fill:#ffc,stroke:#333
    style G fill:#cfc,stroke:#333
    style H fill:#fcc,stroke:#333
    style I fill:#cfc,stroke:#333
    style J fill:#fcc,stroke:#333
    style K fill:#cfc,stroke:#333
    style L fill:#fcc,stroke:#333
    style M fill:#cfc,stroke:#333
    style N fill:#fcc,stroke:#333
    style O fill:#cfc,stroke:#333
    style P fill:#fcc,stroke:#333
    style Q fill:#cfc,stroke:#333
    style R fill:#fcc,stroke:#333
    style S fill:#cfc,stroke:#333
Complete Manual for RoboSHOT CAT-5 Professional PTZ Camera Systems
Basic Connections: RoboSHOT QMini System
RoboSHOT QMini systems ship with a USB 2.0 cable to connect the Quick-Connect USB Mini to a computer running a soft conferencing application. The Quick-Connect USB Mini provides power and connectivity to the camera, and brings the camera's video to the computer via USB connection. This diagram shows a RoboSHOT 12 camera. The RoboSHOT 30, RoboSHOT 12E CAT-5, and RoboSHOT 30E CAT-5 connect in the same way.

flowchart
graph TD
    A["VoBIO USB Mini"] -->|USB| B["24V USB 3.0mA MODE"]
    B --> C["Network Port"]
    C --> D["Laptop with video call"]
    D --> E["Network Port"]
    E --> F["Power"]
    style A fill:#f9f,stroke:#333
    style B fill:#ccf,stroke:#333
    style C fill:#cfc,stroke:#333
    style D fill:#fcc,stroke:#333
    style E fill:#cff,stroke:#333
Complete Manual for RoboSHOT CAT-5 Professional PTZ Camera Systems
Basic Connections: RoboSHOT QDVI System
The Quick-Connect DVI/HDMI-SR provides power and control to the camera, brings camera video to the connected display, and offers daisy-chaining capability for legacy equipment. DVI/HDMI and YPbPr (analog component video) outputs accommodate older displays.
If using the IR FORWARD connector:
■ Use the MOD and GND pins (1 and 2) for balanced (differential) IR. Because it is a differential signal, you can swap the two wires.
- Use the GND and NON-MOD pins (2 and 3) for unbalanced (single-ended) IR, for example if connecting to Polycom equipment. Because it is not a differential signal, pin 2 must go to the GND connection at the other end of the cable.
This diagram shows a RoboSHOT 12 camera. The RoboSHOT 30, RoboSHOT 12E CAT-5, and RoboSHOT 30E CAT-5 connect in the same way.

flowchart
graph TD
    A["VoAaD10"] -->|Data Flow| B["VoAaD20"]
    B --> C["VoAaD30"]
    C --> D["VoAaD40"]
    D --> E["Satellite Image"]
    style A fill:#f9f,stroke:#333
    style B fill:#ccf,stroke:#333
    style C fill:#cfc,stroke:#333
    style D fill:#fcc,stroke:#333
    linkStyle 0 stroke:#ff0000,stroke-width:2px
    linkStyle 1 stroke:#ff0000,stroke-width:2px
    linkStyle 2 stroke:#ff0000,stroke-width:2px
    linkStyle 3 stroke:#ff0000,stroke-width:2px
    linkStyle 4 stroke:#ff0000,stroke-width:2px
    linkStyle 5 stroke:#ff0000,stroke-width:2px
    linkStyle 6 stroke:#ff0000,stroke-width:2px
    linkStyle 7 stroke:#ff0000,stroke-width:2px
    linkStyle 8 stroke:#ff0000,stroke-width:2px
    linkStyle 9 stroke:#ff0000,stroke-width:2px
    linkStyle 10 stroke:#ff0000,stroke-width:2px
    linkStyle 11 stroke:#ff0000,stroke-width:2px
    linkStyle 12 stroke:#ff0000,stroke-width:2px
    linkStyle 13 stroke:#ff0000,stroke-width:2px
    linkStyle 14 stroke:#ff0000,stroke-width:2px
    linkStyle 15 stroke:#ff0000,stroke-width:2px
    linkStyle 16 stroke:#ff0000,stroke-width:2px
    linkStyle 17 stroke:#ff0000,stroke-width:2px
    linkStyle 18 stroke:#ff0000,stroke-width:2px
    linkStyle 19 stroke:#ff0000,stroke-width:2px
    linkStyle 20 stroke:#ff0000,stroke-width:2px
Complete Manual for RoboSHOT CAT-5 Professional PTZ Camera Systems
Basic Connections: RoboSHOT QSR System
The Quick-Connect SR interface provides power and control to the camera, and a YPbPr (analog component video) output. External control is via an RS-232 connected device.
If using the IR FORWARD connector:
- Use the MOD and GND pins (1 and 2) for balanced (differential) IR. Because it is a differential signal, you can swap the two wires.
- Use the GND and NON-MOD pins (2 and 3) for unbalanced (single-ended) IR, for example if connecting to Polycom equipment. Because it is not a differential signal, pin 2 must go to the GND connection at the other end of the cable.
This diagram shows a RoboSHOT 12 camera. The RoboSHOT 30camera connects in the same way. The Quick-Connect SR has been discontinued and is not available for the RoboSHOT 12E CAT-5 and RoboSHOT 30E CAT-5 cameras.

Basic Connections: RoboSHOT AVBMP
RoboSHOT AVBMP cameras ship with a remote and a wall mount. Connect the camera to an AV Bridge MATRIX PRO for power, control, and connectivity. Up to three cameras can be connected at once. This diagram shows a RoboSHOT 12 camera. The RoboSHOT 30, RoboSHOT 12E CAT-5, and
Complete Manual for RoboSHOT CAT-5 Professional PTZ Camera Systems
Installing the Camera
Be sure you have already set the camera's switches.
If you are installing the camera with a Quick-Connect USB or Quick-Connect USB Mini on a network that uses static IP addressing (a non-DHCP network), be sure you have already configured the camera appropriately for the network.
Caution
Check your cables. Connecting a cable to the wrong port or using the wrong pin-out can result damage and will void the warranty.
- Route the cables to the camera location.
- Route the cables through the mount, and install the mount on the wall or attach it to the wall box. Leave the screws loose enough to adjust the position of the mount.
- Level the mount and tighten the mounting screws.
-
Connect the cables to the camera.
-
If using a Quick-Connect Universal CCU, connect the 36 VDC To Camera output to the camera's 36 VDC From QCCU Only port.
- If connecting the camera to any other Quick-Connect device or to an AV Bridge Matrix Pro, connect power to the EZ Power Video port.
Be sure to connect the cables correctly. Connecting a cable to the wrong port could damage and void the warranty.
- Place the camera on the mount.

natural_image
Diagram showing two computer monitors connected by wires, with a separate black plug inserted (no text or symbols)C Attach the comers to the mount using the 1/1'00 v 275 mounting screw supplied with the comers
Complete Manual for RoboSHOT CAT-5 Professional PTZ Camera Systems
Installing the Quick-Connect Device
If you are installing the camera with a Universal CCU or other Quick-Connect device, mount the Quick-
Connect device appropriately. Follow the instructions provided with the mounting solution.
■ The Universal CCU may be mounted in a rack using the rack mounting brackets provided.
■ The Quick-Connect SR may be mounted directly to the camera wall mount.
■ Rack mounting brackets and under-table mounting brackets are available for the Quick-Connect USB.
■ Rack mounting brackets are available for the other Quick-Connect devices.
Contact us if you don't have the mount you need.
Powering Up the Camera
Connect power to the device that powers the camera – Universal CCU, Quick-Connect device, or AV Bridge MATRIX PRO. The device and the camera will initialize. This will take a few seconds. When the camera is initialized and ready, its front indicator is blue. At this point, it is ready to accept control information.
Note
Wait until the camera finishes initializing before trying to control it using the IR remote or other input.
Status Light
The light in the camera's base indicates its current state.
■ Blue: Normal operation (blinks once when the camera receives a command from the remote)
■ Red: On-air tally (signal provided by external device via serial connection)
■ Blinking red: Video is muted (UC color scheme only)
■ Purple: In standby mode or booting
■ Yellow: Firmware update in progress
Caution
Do not remove power or reset the camera while the indicator is yellow, showing a firmware upa progress. Interrupting a firmware update can make the camera unusable.
Note
By default, the camera's status light is active during normal operation; however, it can be configured to remain off when the camera is powered up. The camera may be sending video even if the inc off.
Using the IR Remote
The IR remote provides basic camera control.
IR Remote Cheat Sheet
| What do you need to do? Button(s) | |
| Power on or standby Power(green button at top right) | 3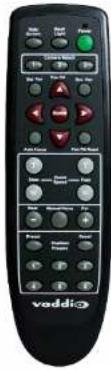 |
| Select the camera to control this remote controls more than one)Camera Select buttons 1 through (second row of buttons) | |
| Discover the camera's IP addressData Screen button (top left) - press and hold for 3 seconds. | |
| Move the camera Arrow buttons and Home button (dark red) | |
| Move the camera to a prese positionPosition Preset buttons 1 through (bottom two rows) | |
| Focus the camera Auto Focus button (near arrow buttons)Manual Focus buttons Near and Far (below Zoom Speed buttons) | |
| Control zoom speed ZoomSpeed buttons (light gray) - Slow T and W, Fast T and W for telephoto (zoom in) and wide-angle (zoom out) modes | |
| Adjust for excess light behind the camera's subjectBack Light button (top center) |
Complete Manual for RoboSHOT CAT-5 Professional PTZ Camera Systems
IR Remote Details
The Vaddio remote provides the following functions:
Power - Switch the selected camera on or off.
Power indicator - Lights momentarily when you press a button.
Back Light - Use or turn off Back Light Compensation.
Data Screen - Display the camera's IP address and MAC address. Press this again to dismiss the display.
Camera Select - In multi-camera installations, selects the camera to be contr For older cameras with DIP switches on the back, see DIP Switches: Camera Behavior Settings for information on configuring the camera as camera 1, 2, or the newer Elite series cameras, see Basic Camera Settings for RoboSHOT 12E 5 and RoboSHOT 30E CAT-5.
Pan/Tilt (arrow button) controls and Home button - Control the camera position.
Rev. Pan and Std. Pan- Control how the camera responds to the arrow by Helpful for ceiling-mounted cameras and for presenters who are controlling the camera.
Pan/Tilt Reset - Not used.
Auto Focus - Switch the camera to Auto-Focus mode.
Zoom Speed - Select Slow or Fast movements for telephoto and wide-angle shots.
■ T slow and T fast - Telephoto (zoom in)
■ W slow and W fast - Wide-angle (zoom out)
Manual Focus - Switch the camera to Manual Focus mode.
Near (-) adjustment - Moves the focus nearer when in manual focus mode.
Far (+) adjustment - Moves the focus farther when in manual focus mode.
Preset - Save the camera's current position as one of the numbered presets.
Reset - Clear a saved preset.
Position Presets 1 through 6 – Move the camera to a predefined position, or specify the preset to save or
clear.
The web interface offers greater control over camera movements to presets (such as setting the speed for

Complete Manual for RoboSHOT CAT-5 Professional PTZ Camera Systems
Web Interface
The camera's web interface allows control via a network connection, using a browser. Password-protected pages provide administrative access to tasks such as setting passwords, changing the IP address, viewing diagnostics, and installing firmware updates. The user login (or guest access, if it is enabled) provides access to camera controls similar to those available from the IR remote.
You will need to know the camera's IP address to use its web interface. If the network has a DHCP server, the camera will get its IP address, gateway and routing information automatically and you will be able to browse to it. If not, you will need to configure the camera to use a static IP address.
For cameras powered by a Quick-Connect USB or Quick-Connect USB Mini: These devices have network connectivity and web interfaces. In an network that does not automatically assign IP addresses, you will need to configure the camera with a different IP address to prevent IP address conflicts.
Getting the Camera's IP Address
You will need to be able to view the camera's video output.
-
Press the Data Screen button on the remote. The display presents the camera's IP address and MAC address.
-
Press the Data Screen button again to dismiss the information.
If the address is 169.254.1.1, the camera is using its default IP address. This usually means one of these things:
■ The network automatically assigns IP addresses, but the camera is not connected to the network.
- The network does not automatically assign IP addresses, and you need to configure the camera for the network. See Configuring the Camera with a Static IP Address.
Accessing the Web Interface
Enter the IP address or hostname in your browser's address bar. You may need to enter http://or https:// as a prefix to keep the browser from treating it as a search query.
(Example: http://10.30.200.125)
Note
The cameras in the RoboSHOT product line all have very similar web interfaces. Although some screen shots in this manual may be from different models of camera than the one you have, y
Complete Manual for RoboSHOT CAT-5 Professional PTZ Camera Systems
User Access
By default, the web interface opens to the Controls page, but the camera can be configured to require a user login. The default user password is password, but this can be changed. Check with the system administrator if the camera's web interface requires you to log in.
Only the Controls page is available with user-level access.

Your camera's Controls page will look somewhat different.
Complete Manual for RoboSHOT CAT-5 Professional PTZ Camera Systems
Administrative Access
If you are on the Controls screen, you're logged in at the user level, or guest access is enabled and you're not logged in at all.
Your camera's web interface will look somewhat different from this image.

Open the menu to log on as Admin. The default admin password is password, but this can be changed.
Note
For best security, Vaddio strongly recommends changing the user and admin passwords from the default. Using the default passwords leaves the product vulnerable to tampering.
The admin account has access to system administration tasks and performance/behavior configuration tasks. System administration tasks are on the following pages, listed in the lower portion of the left navigation panel:
■ Networking page – Configure date and time settings, hostname, and IP addressing.
■ Security page – Set passwords, manage guest access, and enable/disable Telnet access.
■ System page – View firmware version and switch settings, reboot, restore factory defaults, and update firmware.
■ Room Labels page – Information to display on the web interface screens, including the conference room
name and phone number and the in-house number for AV assistance.
■ Help page – Tech support contact information and a link to the product information library on the Vaddio website.
■ Diagnostics page – View or download the diagnostic log when troubleshooting issues.
Performance and behavior configuration tasks are on the following pages, listed in the upper portion of the left navigation panel:
■ Camera page – Control the camera, make adjustments, create and manage presets and CCU scenes.
0 1 1 1
Complete Manual for RoboSHOT CAT-5 Professional PTZ Camera Systems
Working with the Quick-Connect Device's Web Interface
Quick-Connect USB and Quick-Connect USB Mini devices have their own web interfaces. Other Quick-Connect devices have no network connectivity, so they do not have web interfaces and do not need to be configured for your environment.
In addition to the administrative control pages, the Quick-Connect USB and Quick-Connect USB Mini web interfaces provide minimal camera controls, which are normally used with older cameras. For full camera functionality, use the IR Remote Commander or the camera's web interface.
Because the web interfaces for the Quick-Connect USB and Quick-Connect USB Mini are very similar, in many cases only the Quick-Connect USB web interface is shown in this manual.
During initial set-up and configuration, you may find it convenient to access the web interfaces for the camera and the Quick-Connect USB or Quick-Connect USB Mini on separate browser tabs.
Getting the Quick-Connect Device's IP Address
To access the web interface of the Quick-Connect USB or Quick-Connect USB Mini device, you will need to know its IP address.
■ The Quick-Connect USB device displays its IP address on its front panel.
■ The Quick-Connect USB Mini device's IP address is 169.254.1.1, and is not configurable.
Note
If a RoboSHOT camera is used with a Quick-Connect USB or Quick-Connect USB Mini device in DHCP environment, the camera and the Quick-Connect device will default to the same IP address will need to configure the camera with a different IP address before connecting it to the network
Quick-Connect USB Mini: Video Mode vs. Control Mode
When you try to access the web interface for the Quick-Connect USB Mini, your browser may present an error message.
The Quick-Connect USB Mini has two operating modes:
■ Video mode – The Quick-Connect USB Mini passes camera control and video signals. The web
interface is not available.
- Control mode – The web interface for the Quick-Connect USB Mini is available. The device does not pass control or video signals.
Press the Mode button to switch between video mode and control mode.
Complete Manual for RoboSHOT CAT-5 Professional PTZ Camera Systems
Accessing the Web Interface for the Quick-Connect USB or Quick-Connect USB Mini
- Quick-Connect USB Mini only: If video is currently available on the connected display, press the Mode button on the Quick-Connect USB Mini.
- Access the Quick-Connect device's web interface the same way you access the camera's web interface: Enter the IP address or hostname in your browser's address bar.
- Select Admin to log in. The default admin password is password.
- Quick-Connect USB Mini only: After you have finished working with the web interface, press the Mode button again to return to video mode.
The Quick-Connect USB and Quick-Connect USB Mini web interfaces open to the Camera Controls page. From this page, you can log in as admin to manage the device.
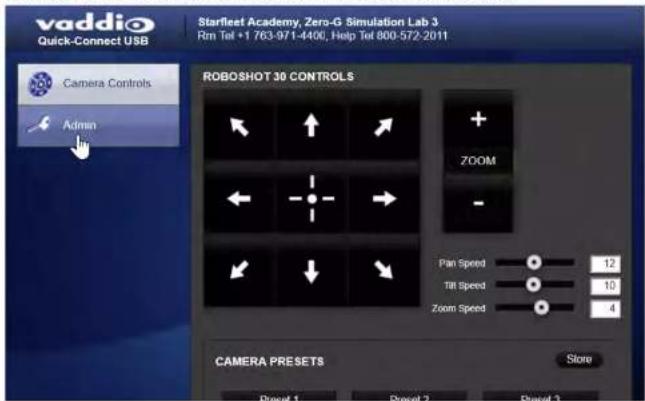
As admin, you have access to administrative and configuration pages similar to those available in the
Complete Manual for RoboSHOT CAT-5 Professional PTZ Camera Systems
Web Interface Cheat Sheet
Where to find the camera controls you need right now.
| What controls do you need? Go to this screen | |
| Camera operation■ Stop sending video (video mute)■ Enter or exit standby mode | (any page) |
| Camera operation■ Move or zoom the camera manually■ Move to a camera preset (Presets section, if available)■ Select the appropriate lighting adjustments (CCU Scenes section, if available) | Controls (user or guest access or Camera (admin access) |
| Camera behavior and adjustments■ Set or clear presets■ Set the speed for pan, tilt, or zoom motions■ Focus the camera■ Work with color and lighting adjustments (CCU scenes)■ Set motors for inverted operation (Settings button reveals the control) | Camera |
| Camera behavior settings – RoboSHOT 12E CAT-5 and RoboSHOT System (DIP Switches tab)30E CAT-5On older RoboSHOT cameras, these settings are on the rear panel DIP switches.■ IR1, IR2, IR3 (Frequency Selection) for controlling up to 3 cameras independently with the remote■ IR on/off for enabling/disabling control via the remote■ Image Flip for inverted camera installation■ Baud rate for RS-232 serial communication | |
| Advanced camera settings■ HDMI color space (YCbCr or sRGB; default is YCbCr)■ Super-wide field of view (not available on 12E and 30E models)■ Indicator light – select color scheme, enable/disable, set behavior in standby mode■ Codes control mode | System (DIP switches tab, General tab) |
Complete Manual for RoboSHOT CAT-5 Professional PTZ Camera Systems
| What controls do you need? Go to this screen | |
| Network settings■ Hostname■ DHCP or static addressing■ Static: IP address, subnet mask, gateway | Networking |
| Time zone and NTP server (source for system time/date) Networking | |
| Information about the camera locationHelp desk phone number for end users | Room Labels |
| Vaddio Technical Support contact information Help | |
| Diagnostic logs Diagnostics | |
The structure of the Quick-Connect USB and Quick-Connect USB Mini web interfaces is nearly identical to the structure of the camera's web interface.
Complete Manual for RoboSHOT CAT-5 Professional PTZ Camera Systems
System Administration
This chapter covers settings for managing the camera as an element of your network.
Administrative tasks are on these pages of the web interface:
■ Networking – Time settings, hostname, and other network configuration
■ Security – Passwords, guest access, other IT security-related settings
■ Room Labels – Helpful information to display in the web interface
- System – Controls to reboot, reset to factory defaults, and run firmware updates, read the rear panel switches, and access the soft DIP switches
■ Help – Contact information for Vaddio Technical Support and a link to the documentation for this product
■ Diagnostics – Logs to help Vaddio Technical Support troubleshoot issues
See Configuring Camera Behavior for information on image adjustments, streaming configuration, and other items related to camera behavior.
Note
Vaddio's RoboSHOT series cameras all have very similar web interfaces. Some of the screen shots manual may be from other models in the RoboSHOT series.
Note
Quick-Connect USB and Quick-Connect USB Mini devices provide a web interface that allows them configured and managed separately. The Quick-Connect web interfaces follow the same structure as camera's web interface, and present similar system administration pages. This chapter includes information about the camera and the Quick-Connect device.
Complete Manual for RoboSHOT CAT-5 Professional PTZ Camera Systems
For Non-DHCP Environments: Configuring the Device with a Static IP Address for Initial Installation
NETWORKING PAGE
Caution
Consult your IT department before editing network settings. Errors in network configuration can make camera inaccessible from the network. Do not change DHCP/Static addressing, IP address, subnet or gateway unless you are very familiar with the characteristics and configuration of the network install the camera.
By default, the camera is set to DHCP and you do not need to configure it with a static IP address. However, if no DHCP server is available to automatically assign an address, the camera will use the default IP address of 169.254.1.1. If this is the case, you may need to follow this procedure.
The Quick-Connect USB is also set to DHCP by default. If no DHCP server is available to automatically assign an address, the Quick-Connect USB uses the same default IP address as the camera: 169.254.1.1. If you install more than one camera on a network that does not automatically assign IP addresses (a non-DHCP network), follow this procedure to prevent IP address conflicts.
If you are installing in any of these environments, you will need to follow this procedure.
■ Installing cameras with Quick-Connect USB devices on a non-DHCP network: configure each camera and each Quick-Connect USB device with static IP addresses before connecting them to the network.
- Installing cameras with other Quick-Connect devices on a non-DHCP network: configure each camera with a static IP address before connecting it to the network.
- Installing cameras with an AV Bridge MATRIX PRO on a non-DHCP network: configure each camera with a static IP address before connecting it to the network. The AV Bridge MATRIX PRO will also need a static IP address.
Note
If the camera is currently at an IP address other than 169.254.1.1, skip this section unless you instructed to configure the camera with a static IP address.
Complete Manual for RoboSHOT CAT-5 Professional PTZ Camera Systems
To access the camera's Networking page during installation (skip this procedure if the camer has already been in service on this network):
- Connect the camera to the Quick-Connect device according to the appropriate connection diagram, but do not connect the camera to the network.
- Connect the network port on the camera to the network port on a computer. Depending on the computer, you may need a crossover cable.
- On the computer, open a browser and access the camera's web interface at http://169.254.1.1.
- Log in as admin. The default password is password.

- Navigate to the Networking page.

Complete Manual for RoboSHOT CAT-5 Professional PTZ Camera Systems
To configure the camera with a static IP address:
- Work with your IT department to determine the correct IP address, subnet mask, and gateway to assign.
If you are connecting a camera with a Quick-Connect USB device, get the same information I. The camera and the Quick-Connect device must have different IP addresses.
- On the Networking page, set IP Address to Static.
- Enter the IP address, subnet mask, and gateway as directed by the IT staffer; then save your work.

The camera is now ready to be connected to the network.
Configuring the Quick-Connect USB Device with a Static IP Address
NETWORKING PAGE, QUICK-CONNECT USB WEB INTERFACE
Caution
Consult your IT department before editing network settings. Errors in network configuration can make device inaccessible from the network. Do not change DHCP/Static addressing, IP address, subnet r, or gateway unless you are very familiar with the characteristics and configuration of the network install the camera.
Complete Manual for RoboSHOT CAT-5 Professional PTZ Camera Systems
- Work with your IT department to determine the correct IP address, subnet mask, and gateway to assign, if you have not done so already.
- Connect the network port on the Quick-Connect USB to the network port on a computer. Depending on the computer, you may need a crossover cable.
- On the computer, open a browser and access the Quick-Connect USB device's web interface.
- Log in as admin. The default password is password.
- Select Networking from the navigation pane.

- Set IP Address to Static.
- Enter the IP address, subnet mask, and gateway as directed by the IT staffer; then save your work.
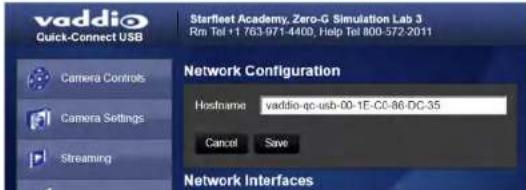
Complete Manual for RoboSHOT CAT-5 Professional PTZ Camera Systems
Changing the Camera's Hostname
NETWORKING PAGE
If your network supports hostname resolution, you may find it convenient to change the camera's hostname to something easy to remember, such as camera-center-boardroom.
Work with your IT department to ensure that the new hostname conforms to the organization's naming conventions.
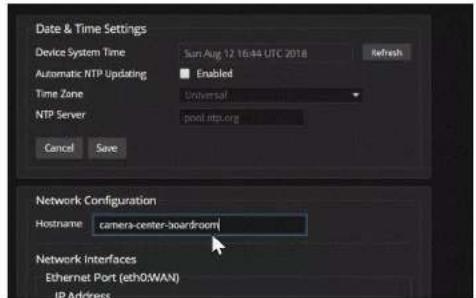
Changing the Quick-Connect Device's Hostname
NETWORKING PAGE, QUICK-CONNECT WEB INTERFACE
If the camera is connected to a Quick-Connect USB or Quick-Connect USB Mini, you can also assign a hostname to Quick-Connect device.
The Networking page in the web interface for the Quick-Connect USB Mini is similar to the one for the Quick-Connect USB shown here.

Complete Manual for RoboSHOT CAT-5 Professional PTZ Camera Systems
Optional For DHCP Environments: Changing from a DHCP Address to a Static IP Address
NETWORKING PAGE
In a network that assigns IP addresses automatically, the camera's IP address may change from time to time. To keep this from happening, set the IP address to Static. Do not change the IP address, subnet mask, or gateway unless the network administrator instructs you to do so.
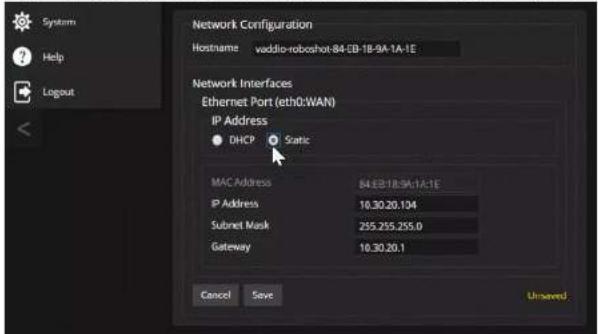
If you install the camera with a Quick-Connect USB device, you can make its IP address static also. This setting is on the Networking page of the Quick-Connect USB web interface.
Complete Manual for RoboSHOT CAT-5 Professional PTZ Camera Systems
Specifying Time Zone and NTP Server
NETWORKING PAGE
Using automatic NTP updating ensures that the timestamps in the camera's diagnostic log are accurate. Specifying your time zone may make it easier to match logged events with other actions and external events.
- To make the time zone and NTP server editable, enable Automatic NTP Updating.
- Select the desired time zone from the list.
- If desired, specify the NTP server to use. Otherwise, use the default.
You may need to refresh the system time display.

Complete Manual for RoboSHOT CAT-5 Professional PTZ Camera Systems
Managing Access and Passwords
SECURITY PAGE
Set the camera according to your organization's security policies:
- Allow or deny access to the Camera screen without logging on (Allow Guest Access) – this is enabled by default
- Set whether inactive sessions log off automatically or not (Automatically Expire Idle Sessions) – by default, inactive sessions expire after 30 minutes
■ Change the password for the admin account
■ Change the password for the user account
- Allow or disable access via Telnet (by default, access via Telnet is enabled)
- Require HTTPS for web access (by default, HTTP is also permitted)
■ Allow or deny device discovery (allowed by default)
Note
Consult your network security specialist before changing any of these settings.
Note
For best security, Vaddio strongly recommends changing the user and admin passwords from the default. Using the default passwords leaves the product vulnerable to tampering.
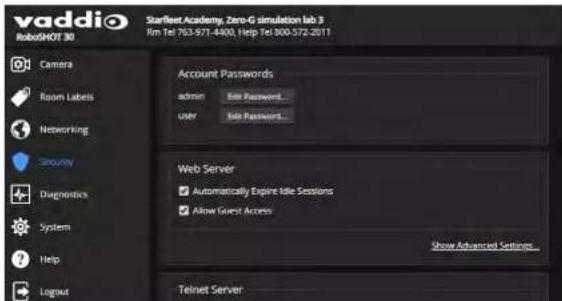
Complete Manual for RoboSHOT CAT-5 Professional PTZ Camera Systems
Enabling or Requiring HTTPS
SECURITY PAGE
By default, the web interface uses the HTTP protocol. You can configure the camera's web interface to require a secure HTTPS connection instead.
Caution
Consult your network security professional to manage the camera's SSL certificate. Do not make a changes in the Certificate or Private Key text boxes without guidance from your organization's net security professional.
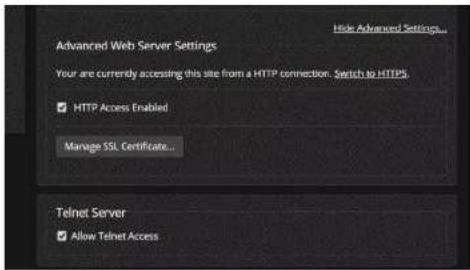
- Select Show Advanced Settings. The advanced options open.
- To switch to a secure HTTPS connection, select Switch to HTTPS.
Note
Your browser may present messages warning you that your connection is not secure, because site's certificate is not valid. This happens when HTTPS is used but no SSL certificate is ins
- To require HTTPS connections, clear the box labeled HTTP Access Enabled. The camera's web interface will only be available via an HTTPS connection.
Complete Manual for RoboSHOT CAT-5 Professional PTZ Camera Systems
Changing the Admin Password on the Quick-Connect Device
SECURITY PAGE, QUICK-CONNECT WEB INTERFACE
Default passwords for both User and Admin are password. At this time, the User password is not
required.
Note
For best security, Vaddio strongly recommends changing the user and admin passwords from
the default. Using the default passwords leaves the product vulnerable to tampering.
Be sure you have a way to remember the Admin password if you change it.
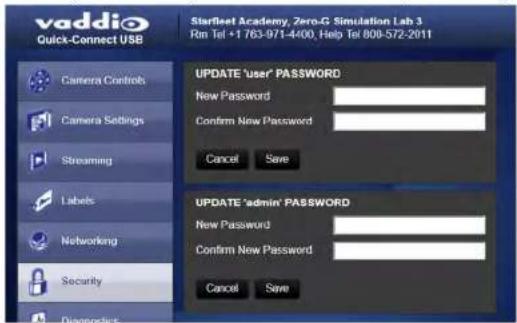
Complete Manual for RoboSHOT CAT-5 Professional PTZ Camera Systems
Adding Room Information to the Camera's Web Interface
ROOM LABELS PAGE
The information you enter on this page is displayed on every page of the web interface.
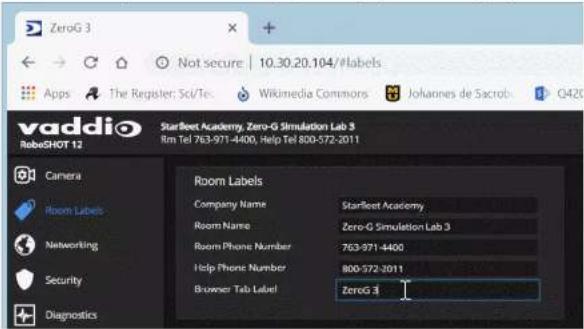
Adding Room Information to the Quick-Connect Device's Web Interface
ROOM LABELS PAGE, QUICK-CONNECT WEB INTERFACE
Use the Room Labels information to help you identify the Quick-Connect USB or Quick-Connect USB Mini connected to a specific camera.
The Room Labels page in the web interface for the Quick-Connect USB Mini is similar to the one for the Quick-Connect USB shown here.

Complete Manual for RoboSHOT CAT-5 Professional PTZ Camera Systems
Saving (Exporting) or Restoring (Importing) a Camera Configuration
SYSTEM PAGE, FIRMWARE TAB
You can import a configuration to several cameras if you need to configure them the same way. Cameras must be of the same model, and must have a compatible firmware version installed. Configuration data does not include passwords or unique information such as hostname.
- Configure the first camera.
- Export its configuration (Export Data button). The export downloads to your computer as a .dat file. The filename is the camera's hostname.

- Import the configuration to the other cameras (Import Data button in each camera's web interface). The web interface prompts you to browse to the .dat file that will be imported.

Complete Manual for RoboSHOT CAT-5 Professional PTZ Camera Systems
Installing a Camera Firmware Update
SYSTEM PAGE, FIRMWARE TAB
Caution
The camera must remain connected to power and to the network during the update. Interrupting could make the camera unusable.
- Download the firmware and its release notes.
- Select Choose File, then browse to the downloaded firmware and select it. The filename ends with .p7n.
- Select Begin Firmware Update.
- Read and understand the information in the Confirm dialog box. It's dull, but it could save you some time and aggravation.
- Select Continue. A progress message box opens and the indicator light on the front of the camera turns yellow. If the update process presents warnings or error messages, read them carefully.
The camera reboots when the update is complete.
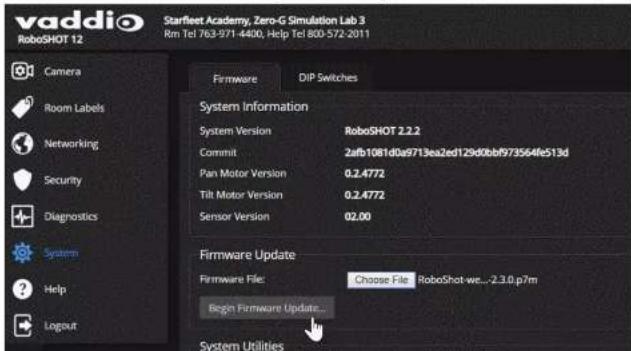
Complete Manual for RoboSHOT CAT-5 Professional PTZ Camera Systems
Installing a Quick-Connect USB or Quick-Connect USB Mini Firmware Update
SYSTEM PAGE, QUICK-CONNECT WEB INTERFACE
The procedure for updating the firmware on a Quick-Connect USB or Quick-Connect USB Mini device is similar to the procedure for updating the camera's firmware.
-
Download the firmware and its release notes.
-
Select Choose File, then browse to the downloaded firmware and select it. The filename ends with .p7a.
-
Select Begin Firmware Update.
-
Read and understand the information in the Confirm dialog box. It's dull, but it could save you some time and aggravation.
-
Select Continue. A progress message box opens. If the update process presents warnings or error messages, read them carefully.
The Quick-Connect device reboots when the update is complete.

Caution
The Quick-Connect device must remain connected to power and to the network during the update. Interrupting the update could make the camera unusable.
Note
For instructions on updating the Universal CCU, see Installing a Firmware Update on the Universal CCU.
Complete Manual for RoboSHOT CAT-5 Professional PTZ Camera Systems
Installing a Firmware Update on the Universal CCU
- Download the firmware and its release notes. The release notes include detailed instructions on installing the firmware.
- If you have Vaddio Loader installed on your computer, check the version (Help::About). If you have a version earlier than what is specified in the Universal CCU release notes, uninstall it.
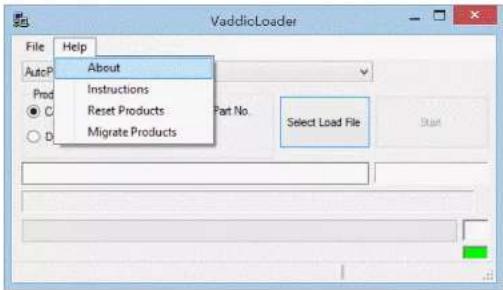
- If you do not already have the latest version of Vaddio Loader, download it from support.vaddio.com and install it on your computer.
- Disconnect power from the Universal CCU.
- Connect the Universal CCU's RS-232 IN port to your computer's serial port. Be sure you know which COM port it is. (For Windows operating systems, this information is available in the Device Manager.)
- On the Universal CCU, press and hold the recessed button near the power socket while reconnecting power. The Tally light will blink once, and the LCD screen will be black with no text.
Note
If the LCD screen displays information, the Universal CCU is NOT in boot-loader mode. Discon power and repeat this step.
- Follow the instructions in the release notes to install the firmware on the Universal CCU.
Complete Manual for RoboSHOT CAT-5 Professional PTZ Camera Systems
Rebooting the Camera
SYSTEM PAGE, FIRMWARE TAB
This can help if the camera stops responding as you expect.
In the System Utilities section, select Reboot.

Rebooting the Quick-Connect Device
SYSTEM PAGE, QUICK-CONNECT WEB INTERFACE
You can reboot the Quick-Connect USB or Quick-Connect USB Mini device the same way you reboot the camera. Select Reboot from the System page.

Complete Manual for RoboSHOT CAT-5 Professional PTZ Camera Systems
Contacting Vaddio Technical Support
HELP PAGE
If you can't resolve an issue using your troubleshooting skills (or the Troubleshooting table in this manual),
we are here to help.
You'll find information for contacting Vaddio Technical Support on the Help page. The model identifier and the link for support information vary depending on the camera model.
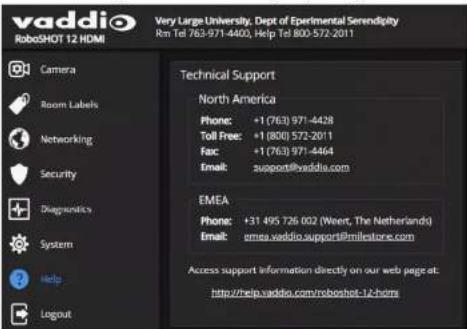
Accessing the Diagnostic Logs
DIAGNOSTICS PAGE
When you contact Vaddio technical support, your support representative may ask you to download and email the log file available from the Diagnostics page.

Complete Manual for RoboSHOT CAT-5 Professional PTZ Camera Systems
Configuring Camera Behavior
This chapter covers managing the camera as a part of the room's AV environment.
Camera configuration tasks are available on these pages:
- Camera – Color and lighting adjustments, presets (including custom Home), and real-time camera control
- System (DIP Switches tab) – Camera identification (Camera 1, 2, or 3 on the remote), status light behavior, codec control mode, and more
- Streaming (available with Quick-Connect USB and Quick-Connect USB Mini only) – - Quick-Connect USB Mini: USB device name and color space only; both are optional - Quick-Connect USB: Streaming mode (USB or IP); USB device name and color space; IP video quality, bandwidth, and more
Note
Vaddio's RoboSHOT series cameras all have very similar web interfaces. Some of the screen show manual may be from other models in the RoboSHOT series.
Setting the Custom Home Position and Other Preset Shots
CAMERA PAGE
The camera's default home position is 0^ pan and 0^ tilt; you can set a different home position.
You can also define other presets, for shots that you will want to use repeatedly.
Note
Storing a preset overwrites any information that was previously associated with that preset. The St Preset dialog does not show which presets have already been defined. Vaddio recommends rename presets when you store them.
Complete Manual for RoboSHOT CAT-5 Professional PTZ Camera Systems
To store a preset or custom home position:
- Set up the shot.
- Select Store to open the Store Preset dialog.
- Select the preset to define.
- Select Store with Current Color Settings to save the current CCU settings along with the camera position.
-
Select Save with Tri-Sync to allow the pan, tilt, and zoom motors to move simultaneously from other presets to this position.
-
Store the preset.
Note
Tri-Synchronous Motion works best for on-air shots requiring significant movement. It is not useful moving the camera less than 10^ or when the camera is not on the air.
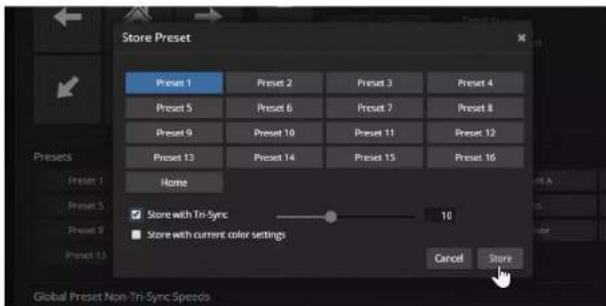
Renaming Presets and Custom CCU Scenes
You can rename presets and custom scenes. The process is the same for both. Right-click the button for the custom scene or preset, and edit the label.
Complete Manual for RoboSHOT CAT-5 Professional PTZ Camera Systems
Initial Lighting and Color Settings
CAMERA PAGE
No two rooms are exactly alike – but a lot of rooms are a lot alike. The technical folks at Vaddio (Scott, to be specific) have already set up presets for common lighting scenarios (CCU scenes) – Incandescent Hi, Incandescent Lo, Fluorescent Hi, Fluorescent Lo, and Outdoor. The Auto setting allows the camera to determine the appropriate adjustments.
Adjust the camera for the lighting in use by selecting the CCU scene that best fits your environment. Note
If the camera is connected to a Universal CCU, use the Universal CCU to manage lighting and adjustments when you are in the same room as the equipment. See Managing Lighting and Colc Adjustments with the Universal CCU.
You can still manage lighting and color adjustments from the camera's web interface, if you are same room with the equipment.
Some adjustments to lighting and color may be necessary.
Note
Color adjustments are not available when the Auto CCU scene is selected.
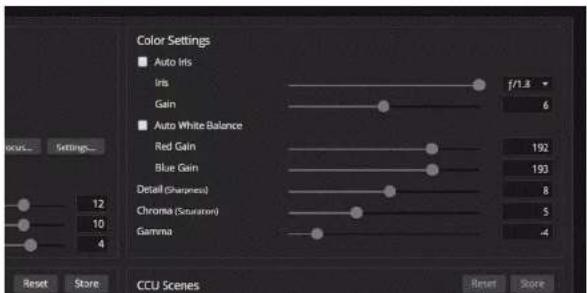
Complete Manual for RoboSHOT CAT-5 Professional PTZ Camera Systems
Lighting Adjustments
CAMERA PAGE
The camera provides settings to compensate for common lighting problems.
■ Auto Iris allows the camera to compensate automatically for the light level.
■ Backlight Compensation reduces contrast to adjust for bright light behind the main subject of the shot. Use this if the subject is in front of a window, projector screen, or other bright area and appears as a silhouette. This setting can't be used with Wide Dynamic Range.
- Wide Dynamic Range automatically darkens bright areas and brightens dark areas to provide a more properly exposed image in challenging lighting conditions. This setting can't be used with Backlight Compensation.
- Point Light Compensation reduces the intensity of small, extremely bright areas (point light sources) that would otherwise swamp the camera with light and make it difficult to see details in areas with less intense lighting. This setting is only available on the RoboSHOT 12E CAT-5 and RoboSHOT 30E CAT-5 cameras. It is on the General tab of the System page.

Depending on the camera's firmware version, additional settings may also be available on this tab. The Lighting and Image Quality Cheat Sheet may be helpful.
Fine-Tuning Image Quality and Color
CAMERA PAGE
Fine-tune the color and lighting as needed using the Color Settings controls.
■ Auto White Balance adjusts color automatically. Red gain and blue gain controls are not available
when Auto White Balance is selected.
■ Red Gain and Blue Gain provide manual color adjustment.
Complete Manual for RoboSHOT CAT-5 Professional PTZ Camera Systems
Lighting and Image Quality Cheat Sheet
Here are some tips for using the CCU settings for lighting and image quality. For more detailed information on each setting, see Lighting Adjustments and Fine-Tuning Image Quality and Color.
| What do you need to correct? Make | this adjustment: |
| The image is too dark Increase Iris (lower F-stop value) | |
| The image looks washed out or faded Decrease Iris (higher F-stop value) | |
| The subject is silhouetted against a bright background | Enable Backlight Compensation |
| Small sources of bright light (point sources) may hard to see details in areas with less intense lighting. | Enable Point Light Compensation (RoboSHOT and 30E CAT-5 only) |
| Highlights and shadows look right, but mid-toned are too dark. | Increase Gamma |
| Shadows are too dark Enable Wide Dynamic Range (WDR) | |
| The image looks grainy Decrease Detail | |
| Decrease Iris Gain | |
| "Soft focus" effect; the image looks unrealistically smooth | Increase Detail |
Complete Manual for RoboSHOT CAT-5 Professional PTZ Camera Systems
Color Adjustment Cheat Sheet
Here are some tips for using the color-related CCU settings. For more detailed information on each setting, see Fine-Tuning Image Quality and Color.
| What do you need to correct? Make this adjustment: | ||||
| Colors look less vivid than they should Increase Chroma | ||||
| Colors look too vivid Decrease Chroma | ||||
| Colors look wrong; white objects do not appea Enable Auto White Balance white | ||||
Too much red Not enough red Too much blue Not enough blue Balanced      |
Saving Color and Lighting Settings
CAMERA PAGE
If you are adjusting for lighting conditions that are likely to recur, you can save your adjustments as a custom scene.
- Adjust lighting, image quality, and color.
- When the scene looks the way you want it to, click Store CCU Scene.
- In the Store CCU Scene dialog box, select which custom scene to store (Custom A, B, or C) and select Save.
Complete Manual for RoboSHOT CAT-5 Professional PTZ Camera Systems
Adjusting the Focus
CAMERA PAGE
Open the Focus control to select Auto-focus, or set manual focus with the + (near) and - (far) buttons. I know you already understand this, but I'm going to say it anyway: The + and - buttons don't work when Auto Focus is selected.

For users who are not logged in as admin, focus control is available via the IR Remote Commander.
Speed Adjustments
CAMERA PAGE
The following speed adjustments are available:
- Manual pan, tilt, and zoom speeds – Used when you control camera movements with the IR Remote Commander or the arrow buttons in the web interface
Complete Manual for RoboSHOT CAT-5 Professional PTZ Camera Systems
Setting the Speed for Manual Movements
CAMERA PAGE
The Pan Speed, Tilt Speed, and Zoom Speed sliders control how fast the camera moves in response to the direction and zoom controls on the IR remote and in the web interface.
To set speeds for movements using the arrow buttons:
Use the speed sliders to adjust the speed of movements that you control with the buttons for pan, tilt, and zoom. For tight shots, slower is usually better.

Setting the Speed of Movements to Presets
CAMERA PAGE
To set speeds for movements to presets:
- Store presets at several points in the room, at different zoom levels, saving them without selecting the Tri-Sync option.
- Move among the presets using the preset buttons.
- Use the Global Preset Non-Tri-Sync Speed sliders to adjust as needed.

Complete Manual for RoboSHOT CAT-5 Professional PTZ Camera Systems
Adjusting Tri-Synchronous Motion Speed
CAMERA PAGE
The Tri-Synchronous Motion algorithm calculates the pan, tilt and zoom speeds needed for the camera to move from one preset to the next so that all three movements begin together and arrive at the same time. You may need to experiment to find the best Tri-Sync speed setting. Here is a simple method:
- Store a preset, checking Save with Tri-Sync and setting the speed slider about a third of the way along the scale.
- Move the camera to a different pan, tilt, and zoom position, and save this position as another preset. Again, check Save with Tri-Sync; but set the speed slider to about the halfway point.
- Move the camera from one preset to the other to evaluate which movement is closer to the speed you want. Use the Tri-Sync speed associated with that preset, or adjust it as needed.
- Store all the presets you will need.
- Switch among the presets to determine whether any of them should use different Tri-Sync speeds.
- Adjust the speeds as needed.

Complete Manual for RoboSHOT CAT-5 Professional PTZ Camera Systems
Setting the Direction for Camera Movements
CAMERA PAGE
By default, the arrow buttons on the remote and in the web interface show the direction you would see the camera move if you were looking the same direction as the camera. If a person facing the camera is controlling it with the remote, using the right arrow pans the camera to the person's left.
To make the arrow buttons indicate camera movement from the perspective of a person facing the camera, open the Settings control and invert the pan direction.

Complete Manual for RoboSHOT CAT-5 Professional PTZ Camera Systems
Reading the Camera's Switches
SYSTEM PAGE, DIP SWITCHES TAB
Open the DIP Switches tab to see the camera's current switch settings and configure certain camera
behaviors.
Note
Sorry, this tab only controls the soft DIP switches. If your camera has physical switches, you have physically move them to change the settings.
This screen shot shows the DIP Switches tab for the older RoboSHOT 30 camera. The lower array of DIP switches is a read-out of the physical DIP switches on the back of the camera.
Note
If your camera has been updated to firmware version 3.1.0 or later, most of the soft DIP switch now on the General tab.

Complete Manual for RoboSHOT CAT-5 Professional PTZ Camera Systems
Basic Camera Settings for RoboSHOT 12E CAT-5 and RoboSHOT 30E CAT-5
SYSTEM PAGE, DIP SWITCHES TAB
Basic settings for the RoboSHOT E-series cameras are on the lower row of soft DIP switches. These correspond to the physical switches on the older RoboSHOT cameras.
IR1, IR2, IR3 (Frequency Selection): If there are multiple cameras in the room, use these two switches
to configure each camera with a different IR frequency. Then use the Camera Select buttons at the top of the remote to select the camera you want to control. This allows the IR Remote Commander to control them independently.
■ Left and right IR switches up: IR frequency 1
■ Left IR switch down, right IR switch up: IR frequency 2
■ Left IR switch up, right IR switch down: IR frequency 3
IR On/Off: Leave this switch UP if the IR remote will be used.
Image Flip: If mounting the camera upside-down, set the Image Flip switch ON. This orients the video
image correctly and sets the tilt motors to respond appropriately to tilt up and down commands from the remote, web interface, and connected control devices.
Baud Rate: Set this switch to match the baud rate of the device connected to the RS-232 port.
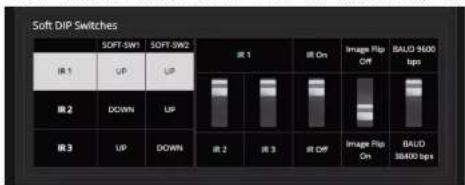
Complete Manual for RoboSHOT CAT-5 Professional PTZ Camera Systems
Software-Controlled Video Output Resolution Setting
RoboSHOT 12E CAT-5 and RoboSHOT 30E CAT-5 only: If the camera has been updated to version 3.1.0 firmware or later, Position 0 selects software control. The default resolution is 720p/59.94. This capability is not available in earlier firmware versions or on the older RoboSHOT 12 and RoboSHOT 30 cameras.
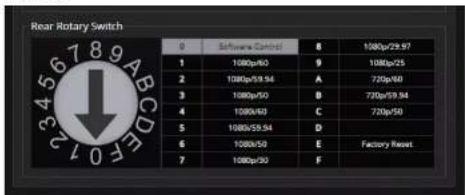
Set the video output resolution on the System page, General tab.

Additional Camera Behavior Settings
SYSTEM PAGE, DIP SWITCHES TAB AND GENERAL TAB
If your camera has not been undated to version 3.1v additional features are available on the under row of
Complete Manual for RoboSHOT CAT-5 Professional PTZ Camera Systems
Pre-3.1.0 firmware:

Version 3.1.0 and later firmware:
When the camera's rotary switch is at position 0, you can set video output resolution from this capability is not available when the switch is in any other position.

Complete Manual for RoboSHOT CAT-5 Professional PTZ Camera Systems
Configuring Streaming (Quick-Connect USB or Quick-Connect USB Mini)
STREAMING PAGE, QUICK-CONNECT WEB INTERFACE
The Quick-Connect USB and Quick-Connect USB Mini devices provide streaming capability for RoboSHOT cameras.
■ Quick-Connect USB Mini: USB 2.0 streaming only
■ Quick-Connect USB: USB 2.0 or IP (H.264) streaming; configurable
The Quick-Connect USB defaults to USB 2.0 streaming.
Most aspects of USB streaming are negotiated automatically between the Quick-Connect device and the conferencing application, and in many cases no configuration is needed for either USB or IP streaming.
To select the streaming mode (Quick-Connect USB only):
Select the desired streaming mode if necessary. USB streaming is the default. The settings for the selected streaming mode are highlighted.

To configure USB streaming (Quick-Connect USB or Quick-Connect USB Mini):
If desired, give the Quick-Connect device a device name that helps people to identify and select it when setting up their laptops for conferencing.
In most cases you do not need to set the color space; this is automatically negotiated with the conferencing application.

Complete Manual for RoboSHOT CAT-5 Professional PTZ Camera Systems
To configure IP streaming (Quick-Connect USB only):
- Select the desired video resolution. This cannot be higher than the video resolution set on the camera. Video resolution determines the size of the media player window displaying the stream on people's computers.
- Select the video quality. This determines how much bandwidth the stream uses.
Pro tip A higher bandwidth setting provides better video if the network can support it, but can result in quality video if the network has bandwidth limitations. A high video resolution setting combined high quality (bandwidth) setting requires the most network bandwidth. If the network cannot easily support this, video errors will be more likely and more obvious than at lower quality and/or settings.
- Select the streaming protocol if necessary. RTSP on port 554 is the default; the port number can be changed. Do not change the port number unless your IT staff directs you to do so. HLS is available for streaming to Apple iOS devices. HLS streaming is always on port 80.
- Optional: Change the streaming URL path to help people identify the URL in their media player's list of recent streams.
- Save the changes you make on this page.
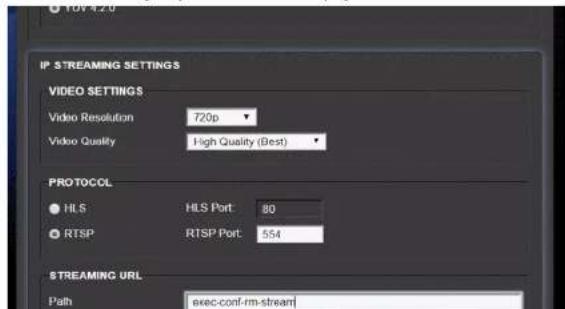
Complete Manual for RoboSHOT CAT-5 Professional PTZ Camera Systems
Managing Lighting and Color Adjustments with the Universal CCU
RoboSHOT cameras offer lighting and color adjustments through the web interface; the Universal CCU provides direct access to these adjustments at any time.
A Quick Look at the Menu Controls
- Scenes buttons – Press to select one of the camera's three custom scenes when Scene Config is selected.
■ Function buttons – Press to select an item to change while you are on the home menu. - Menu knob – Navigation and adjustment modes. Not used for navigating to items on the home menu.
- Select button – Press to change the menu knob from navigation to adjustment.
- Cancel button – Press to change the menu knob from adjustment to navigation. This does not cancel or undo the current adjustment.

The items on the home menu correspond to the function buttons to the left of the menu knob.
To work with an item on the home menu:
- Press the front panel button corresponding to the menu item. (On some older units, the Bright button is labeled Pedestal or Ped.)
- Turn the menu knob to adjust the selected item.
Exceptions:
- When the W Bal Auto button is illuminated, automatic white balance is selected and the Red and Blue settings cannot be adjusted. Press the W Bal Auto button to deselect automatic white balance.
- When the Iris Auto button is illuminated, Auto Iris is selected and the Iris and Gain settings cannot be adjusted. Press the Iris Manual button to deselect Auto Iris.
CAT-5 CCU ROBOSHOT 30
Complete Manual for RoboSHOT CAT-5 Professional PTZ Camera Systems
To work with items on other menus:
- Turn the knob to navigate from the home mer the item you need to change. The @ symbol indicates the menu item to which you have navigated.
- Press the Select button to change the menu to adjustment mode. The @ symbol changes > symbol.
- Turn the menu knob to adjust the selected item
- When the item is adjusted properly, do one of these things:
- Press the Cancel button to put the menu back into navigation mode. This will not set menu item back to its previous value.
- Do nothing. After a few seconds, the display blinks once to indicate that the Menu knob returned to navigation mode.

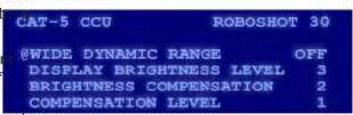

Available adjustments include:
- Shutter - Set the shutter speed. Range is 110000. This cannot be adjusted when Iris is in auto mode.
■ NR (Noise Reduction) - Range is 0 through
■ Wide Dynamic Range (WDR) – On or Off.
cannot be enabled when Iris is in manual mode, nor can it be enabled when Backlight Compensation is enabled. The next three items are WDR adjustments.
Display Brightness Level - Range is 0 (dark) through 6 (bright).
- Brightness Compensation - Range is 0 (dark) through 3 (bright).
Compensation Level - Range is 0 (low) through 2 (high).
- Skew – If the cables from the Universal CCU to the camera are not all the same length, video quality may be reduced. Change the skew setting to compensate for the difference in cable length. The optimum setting is usually in the middle of the range of skew values which pass acceptable video. Range is 1 through 16.

Complete Manual for RoboSHOT CAT-5 Professional PTZ Camera Systems
Adjusting Color
The Color Adjustment Cheat Sheet provides information on correcting specific issues.
To calibrate the camera and use the automated capabilities:
-
Ensure that Auto White Balance (the AUTO button under W BAL) is off.
-
Zoom in on a white object, such as a sheet of paper. At least 60% of the image area must be white for the calibration to work properly.
-
Press OPWB. When the Universal CCU completes the calibration and color balance adjustment, the reference object appears white in the image.
-
After the calibration and adjustment is complete, press the Auto White Balance button.
To adjust color manually:
-
Adjust the Chroma level to taste, so the colors are neither too intense nor too gray.
-
Adjust the red and blue levels. Adjusting for skin tones or using a color chart is an easy way to find a good baseline setup.
Setting the Default Lighting Adjustments
The Lighting and Image Quality Cheat Sheet provides information on correcting specific issues.
The Universal CCU includes six predefined lighting scenes to use as starting-points for fine-tuning:
■ AUTO – automatic lighting management
■ Incand Lo - incandescent, low intensity
■ Incand Hi - incandescent, bright
■ Fluor Lo – fluorescent, low intensity
■ Fluor Hi – fluorescent, bright
■ Outdoor - daylight
To specify a stored scene to use on power-up:
- Open the Cat-5 Adjustments menu on the display panel.
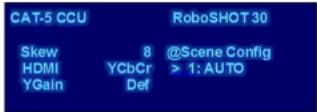
Complete Manual for RoboSHOT CAT-5 Professional PTZ Camera Systems
Working with Custom Scenes
You can store up to three customized sets of lighting and color adjustments (CCU scenes) so you can use them whenever you need them.
To store a scene:
-
Adjust color, lighting, and detail as needed.
-
Decide which scene to assign as the current set of adjustments - A, B, or C.
-
Press and hold the appropriate scene button until it blinks.
To select a stored scene:
Press the appropriate SCENES button - A, B, or C. The button illuminates to show that the scene is in use.
To delete a stored scene:
Press and hold the appropriate scene button (A, B, or C) while pressing the Cancel button.
Adjusting for Cable Length
Long runs of cable from the Universal CCU to the camera can result in poor signal quality. If the video quality is higher when you connect the camera to the Universal CCU with short cables, the skew adjustment may help.
- Open the Cat-5 Adjustments menu.
- Select Skew.
- Change the value as needed to produce the best video output from the Universal CCU. Available values range from 1 to 16; higher values correct for longer cable lengths.
- Press the SELECT button to save the change.
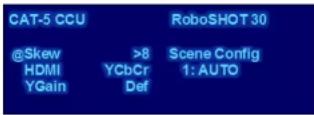
Pro Tip
For the best adjustment, start at the lowest skew value and increase to the first value that provisible improvement. Note the value, and increase the skew until the video begins to look worse. value about halfway between those two values
Complete Manual for RoboSHOT CAT-5 Professional PTZ Camera Systems
Adjusting the Front Panel Display
Depending on the lighting conditions where the Universal CCU is installed, you may choose to adjust the front panel display.
The display menu is only available when DIP switch 5 is up.
Note
Disconnect power before changing the position of the DIP switch.

To adjust the display:
-
Navigate to the display menu, which is after the version information.
-
Work with the settings in the same way you work with the other items that are not on the home menu.
Available settings are:
■ Display – Normal (light text on dark background) or Invert (dark text on light background).
■ Bias – Changes the overall brightness. Range is 1/9 (bright) to 1/11 (dim).
- Contrast – Changes the brightness of the background; settings below about 195 also dim the text.
Range is 180 to 230.
Note
The display menu does not time out and return you to the home menu.
Complete Manual for RoboSHOT CAT-5 Professional PTZ Camera Systems
Operating the Camera from the Web Interface
CONTROLS PAGE
The Controls page does not require administrative access. If guest access is enabled, you do not need to log in to access this page. If guest access is disabled, you will need to log in as user.
The Controls page provides most of the same controls as the IR Remote Commander. See Using the IR
Remote.
■ Move to camera presets, if any have been stored
■ Pan, tilt, zoom, or return it to its home position
■ Put the camera in standby or bring it back to the ready state
■ Select a custom lighting adjustment, if any have been stored
Since the web interface is specific to the camera you are working with, it does not offer camera selection.

Complete Manual for RoboSHOT CAT-5 Professional PTZ Camera Systems
Moving the Camera
Use the arrow buttons for camera pan and tilt. The center button moves the camera to the home position.
Zooming In or Out
Use the Zoom + button to zoom in and the Zoom - button to zoom out.

Moving the Camera to a Preset Position
Presets are camera shots that have been stored. They include pan, tilt, and zoom information, and may include color and speed information as well. If no presets are defined, the Controls page does not present the Presets section.
Use the Preset buttons to move the camera to any of its preset positions.
Adjusting the Color and Lighting
If any color and lighting adjustments (CCU scenes) have been saved, they are available in the Scenes area, along with the Auto setting. In most cases, the Auto setting is appropriate. This setting allows the camera to adjust to current conditions automatically.

Complete Manual for RoboSHOT CAT-5 Professional PTZ Camera Systems
Telnet Command Reference
Vaddio's Telnet command protocol allows external devices to control the camera. Network connectivity and a Telnet client are required; Telnet port 23 is used. Telnet sessions require the administrator account login.
In addition to the camera control commands, Telnet session management commands are available – help, history, and exit.
Note
If an AV Bridge MATRIX PRO is used, the Telnet session is with the AV Bridge MATRIX PRO, not the camera. The camera commands specify camera 1, camera 2, or camera 3, but are otherwise identical to the camera commands in this manual. Refer to the Telnet command information in the AV Bridge Matrix PRO manual for more detailed information.
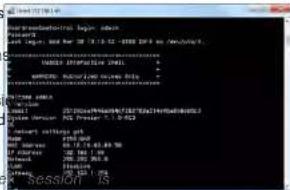
Things to know about Telnet:
■ The > character is the command prompt.
- Using a question mark as a command parameter will bring up a list of available subcommands or parameters. Example:
camera focus ?
camera focus
near Focus the camera near
far Focus the camera far
stop Stop the camera focus
mode Camera focus mode
■ CTRL-5 clears the current serial buffer on the device.
Typographical conventions used in this manual:
- {x | y | z} - Choose x, y, or z. Example: camera led {on | off | toggle}
– Substitute the desired value here. Example: camera ccu get - Valid range of values is from x through y. Example: camera ccu set detail <0-15>
Complete Manual for RoboSHOT CAT-5 Professional PTZ Camera Systems
camera home
Moves the camera to its home position.
RoboSHOT AVBMP only: Specify camera1, camera2, or camera3.
| Synopsis camera home | |
| Example | >camera homeOK> |
camera pan
Moves the camera horizontally.
RoboSHOT AVBMP only: Specify camera1, camera2, or camera3.
| Synopsis camera | pan {left [] | right [] | stop | get | set} | |
| Options | left | Moves the camera left. |
| right | Moves the camera right. | |
| speed <1 - 24> Optional: Specifies the pan speed as an integer (1 to 24). Default speed is 12. | ||
| stop | Stops the camera's horizontal movement. | |
| get Returns the camera's absolute pan position in degrees, as a floating point value between approximately -150.00 (left) and 150.00 (right) | ||
| setSets the camera's absolute pan position in degrees, as a floating point value between approximately -150.00 and 150.00. This is minimum range. Individual cameras may have an additional degree or two of travel before reach their physical limits. If the value is 0 range, the camera returns an error message and no motion occurs. | ||
| Examples | >camera pan left | |
Complete Manual for RoboSHOT CAT-5 Professional PTZ Camera Systems
camera tilt
Moves the camera vertically.
RoboSHOT AVBMP only: Specify camera1, camera2, or camera3.
| Synopsis camera tilt{ up [] | down [] | stop | get | set} | ||
| Options | up | Moves the camera up. |
| down | Moves the camera down. | |
| speed <1 - 20> Optional: Specificifies the tilt speed as an integer (1 to 20). Default speed is 10. | ||
| stop | Stops the camera's vertical movement. | |
| get Returns the camera's absolute tilt position in degrees, as a floating point value between approximately -30.00 (down) and 90.00 (up) Note that the range is roughly 30.00 to -9 Image Flip is selected. | ||
| setSets the camera's absolute tilt position in degrees, as a floating point value between approximately -30.00 and 90.00 (-90 to 30 camera is configured for inverted operation) This is the minimum range; individual camera may have an additional degree or two of t before they reach their physical limits. If the value is out of range, the camera returns error message and no motion occurs. | ||
| Examples | >camera tilt upOK>Tilts the camera up at the default speed.>camera tilt down 20OK> | |
Complete Manual for RoboSHOT CAT-5 Professional PTZ Camera Systems
camera zoom
Zooms the camera in toward the subject or out away from the subject.
RoboSHOT AVBMP only: Specify camera1, camera2, or camera3.
| Synopsis camera | zoom {in[] | out[] | stop | get | set} | |
| Options | in | Moves the camera in. |
| out | Moves the camera out. | |
| speed [1 - 7] Optional: Specifies the zoom speed as an integer (1 to 7). Default speed is 3. | ||
| stop | Stops the camera's zoom movement. | |
| get | Returns the camera's current zoom level as a floating point value. | |
| set <1 - n> Sets the zoom level as a floating point value.The value of n (maximum zoom) depends on the camera's capabilities. For example, the range is 1.00 to 12.00 for a 12x camera. If the value is out of range, the camera returns an error message and no zoom change occurs. | ||
| Examples | >camera zoom inOK.>Zooms the camera in at the default speed.>camera zoom out ?OK>Zooms the camera out using a speed of 7.>camera zoom stopOK>Stops the camera's zoom motion. | |
Complete Manual for RoboSHOT CAT-5 Professional PTZ Camera Systems
camera focus
Changes the camera focus.
RoboSHOT AVBMP only: Specify camera1, camera2, or camera3.
| Synopsis camera focus {near [] | far [] | stop | mode {get | auto | manual}} | ||
| Options | near | Brings the focus nearer to the camera. Can only be used when camera is in manual mode. |
| for | Moves the focus farther from the camera. Only be used when camera is in manual mode. | |
| speed <1 - 8> Optional: integer (1 to 8) specifies the focus speed. | ||
| stop | Stops the camera's focus movement. | |
| mode {get | auto | manual} | Returns the current focus mode, or specifies automatic or manual focus. | |
| Examples | camera focus nearOK>Brings the focus near at the default speed.camera focus far 7OK>Moves the focus farther from the camera at a speed of 7.camera focus mode getauto_focus: onOR>Returns the current focus mode. | |
Complete Manual for RoboSHOT CAT-5 Professional PTZ Camera Systems
camera preset
Moves the camera to the specified preset, or stores the current camera position and optionally CCU information, either with or without specifying that Tri-Synchronous Motion is to be used when moving to this position.
RoboSHOT AVBMP only: Specify camera1, camera2, or camera3.
This command corresponds to the CAM_Memory commands in the RS-232 command set.
| Synopsis camera | preset {recall | store} <1 - 16> [tri-sync <1 - 24>] [save-ccu] | |
| Options recall | <1 - 16> Moves the camera to | the specified preset,using Tri-Synchronous Motion if this was saved with the preset. If CCU information was saved with the preset, the camera switches to the CCU setting associated with the preset. |
| store <1 - 16> Stores the cur | rent camera position as the specified preset. | |
| tri-sync <1 - 24> Optional: $ | specifies that the camera uses Tri-Synchronous Motion to move to this position, using the specified speed. | |
| save-ccu | Optional: Saves the current CCU settings as part of the preset. If not specified, the last color settings are used when recalled. | |
| Examples | >camera preset recall 3OK>Moves the camera to preset 3.>camera preset store 1OK>Saves the camera's current position as preset 1.>camera preset store 4 tri-sync 15 | |
Complete Manual for RoboSHOT CAT-5 Professional PTZ Camera Systems
camera ccu get
Returns CCU (lighting and color) information.
RoboSHOT AVBMP only: Specify camera1, camera2, or camera3.
| Synopsis camera | ccu get | |
Options | all | Returns all current CCU settings. |
| auto_white_balance | Returns the current state of the auto white balance setting (on or off). | |
| red_gain | Returns red gain as an integer (0 to 255). | |
| t_ac_gain | Returns blue gain as an integer (0 to 255). | |
| backlight_compensation | Returns the current state for backlight compensation (on or off). | |
| auto_iris | Returns the current auto-iris state (on or off). | |
| iris | Returns the iris value as an integer (0 to 11). | |
| gain | Returns gain as an integer (0 to 11). | |
| detail | Returns detail as an integer (0 to 15). | |
| chroma | Returns chroma as an integer (0 to 14). | |
| wide_dynamic_range | Returns the current state for Wide Dynamic Range (on or off). | |
| Examples | >camera ccu get irisiris &OK>Returns the current iris value.>camera ccu get red_gainred_gain 20.OK>Returns the current red gain value. | |
Complete Manual for RoboSHOT CAT-5 Professional PTZ Camera Systems
camera ccu set
Sets the specified CCU (lighting and color) information.
RoboSHOT AVBMP only: Specify camera1, camera2, or camera3.
| Synopsis camera | ccu set | |
Options auto_white_balance {on | off} Sets the  | current state of the auto white balance setting (on or off). Auto white balance overrides red gain and blue gain manual settings. | |
| red_gain <0 - 255> Sets the | red gain value as an integer (0 to 255). Can only be used when auto white balance is off. | |
| blue_gain <0 - 255> Sets the | blue gain value as an integer (0 to 255). Can only be used when auto white balance is off. | |
| backlight_compensation {on | off} | Sets the current state of the backlight compensation setting (on or off). Can only be used when wide dynamic range mode is off. | |
| iris <0 - 11> Sets the iris value as an integer (0 to 11). Can only be used when auto-iris is off. | ||
| auto_iris {on | off} Sets the | auto-iris state (on or off). Auto-iris disables manual iris and gain when it is on. | |
| gain <0 - 11> Sets gain value | as an integer (0 to 11). Can only be used when auto-iris is off. | |
| detail <0 - 15> Sets the detail value as an integer (0 to 15). | ||
| chroma <0 - 14> Sets the chroma value as an integer (0 to 14). | ||
| wide_dynamic_range {on | off} Sets Wide Dynamic Range mode on or off. Can only be used when backlight compensation is off. | ||
| Examples | >camera ccu set auto_iris off | |
Complete Manual for RoboSHOT CAT-5 Professional PTZ Camera Systems
camera ccu scene
Stores the current CCU scene or recalls the specified ccu scene.
RoboSHOT AVBMP only: Specify camera1, camera2, or camera3.
| Synopsis camera | ccu scene {recall {factory <1 - 6> | custom <1 - 3>} | store custom <1 - 3>} | |
| Options recall | factory <1 - 6>recall custom <1 - 3> | Recalls the camera to the specified scene (factory 1 to 6 or custom 1 to 3). |
| store custom <1 - 3> Saves | the current scene as the specified custom scene. | |
| Examples | >camera ccu scene recall factory 2OK>Sets the camera to use factory CCU scene 2.>camera ccu scene store custom 1OK>Saves the current CCU scene as custom CCU scene 1. | |
camera led
Set or change the behavior of the indicator light.
RoboSHOT AVBMP only: Specify camera1, camera2, or camera3.
| Synopsis camera | led {get | off | on} | |
| Options | get | Returns the indicator light's current state (on or off). |
| off | Disables the indicator light. | |
| on | Enables the indicator light. | |
| Examples | >camera led offOK>Disables the indicator light. You cannot tell by looking at the camera whether it | |
Complete Manual for RoboSHOT CAT-5 Professional PTZ Camera Systems
camera standby
Set or change camera standby status.
RoboSHOT AVBMP only: Specify camera1, camera2, or camera3.
| Synopsis camera | standby {get | off | on | toggle} | |
| Options | go | Returns the camera's current standby state. |
| off | Brings the camera out of standby (low power) mode. | |
| mn | Stops video and puts the camera in standby mode. | |
| toggle | Changes the camera's standby state - if it was not in standby mode, it enters standby; if it was in standby mode, it "wakes up." | |
| Examples | >camera standby offOK>Brings the camera out of standby mode.>camera standby getStandby: onOK>Returns the current standby state. | |
network settings get
Returns the current network settings for MAC address, IP address, subnet mask, and gateway.
| Synopsis network | settings gel |
| Example | > network settings getName otho:WAFMAC Address 08:66:77:64:79:22IP Address 192.168.1.67Netmask 235.255.255.0 |
Complete Manual for RoboSHOT CAT-5 Professional PTZ Camera Systems
network ping
Sends an ICMP ECHO REQUEST to the specified IP address or hostname.
| Synopsis network | ping [count] [size] | |
| Options | The number of ECHO_REQUEST | packets to send. Default is five packets. |
| The size of each ECHO_ | REQUEST packet. Default is 56 bytes. | |
| The hostname or IP address where the ECHO_ REQUEST packets will be sent. | ||
| Examples | >network ping 192.168.1.66PNG 192.168.1.66; [192.168.1.66]; 56 data bytes64 bytes from 192.168.1.66; sec=0 ttl=64 time=0.476 ms64 bytes from 192.168.1.66; sec=1 ttl=64 time=0.416 ms64 bytes from 192.168.1.66; sec-2 ttl-64 time=0.410 ms64 bytes from 192.168.1.66; sec-3 ttl-64 time=0.410 ms64 bytes from 192.168.1.66; sec=4 ttl-64 time=3.112 ms--- 192.168.1.66 ping nlat mlicks ---5 packets transmitted, 5 packets received, 9% packet losseround-trip min/avg/max - 0.410/0.904/3.112 ms>Sends five ECHO_REQUEST packets of 56 bytes each to the host at 192. | |
| >network ping count 10 size 100 192.168.1.1Sends 10 ECHO_REQUEST packets of 100 bytes each to the host at 192. The command returns data in the same form as above. | ||
system reboot
Reboots the system either immediately or after the specified delay. Note that a reboot is required when resetting the system to factory defaults (system factory-reset).
| Synopsis system | reboot [] | |
| Options | The number of seconds to delay the reboot. | |
Complete Manual for RoboSHOT CAT-5 Professional PTZ Camera Systems
system factory-reset
Gets or sets the factory reset status. When the factory reset status is on, the system resets to factory defaults on reboot.
| Synopsis system | factory-reset {get | on | off} | |
| Options | get | Returns the camera's current factory reset status. |
| on | Enables factory reset on reboot. | |
| off | Disables factory reset on reboot. | |
| Examples | >system factory-reset getfactory-reset (software): offfactory-reset (hardware): offOK>Returns the factory reset status.This evaluates the most recent system factory-reset on or off comma one has been received, then reads the rear panel DIP switches and return status on if they are all in the down position.>system factory-reset onfactory-reset (software): onfactory-reset (hardware): offOK>Enables factory reset upon reboot.NoteThis command does not initiate a factory reset. The factory reset next reboot. | |
version
Returns the current firmware version.
Synopsis version
takes place o
Complete Manual for RoboSHOT CAT-5 Professional PTZ Camera Systems
history
Returns the most recently issued commands from the current Telnet session. Since many of the programs read user input a line at a time, the command history is used to keep track of these lines and recall historic information.
| Synopsis history | ||
| OptionsInteger value specifying the maximumnumber of commands to return. | ||
| Examples | historyDisplays the current command buffer.history 5Sets the history command buffer to remember the last 5 unique | |
| Additional information You | can navigate the command history using the up and down arrow keys.This command supports the expansion functionality from which pre commands can be recalled from within a single session. History expansion is performed immediately after a complete line is read.Examples of history expansion:* 11 Substitute the last command line.* 14 Substitute the 4th command line (absolute as per 'history' command)* 1-3 Substitute the command line entered 3 lines before (rela | |
 | ||
help
Displays an overview of the CLI syntax.
| Synopsis help | |
Example | help[IMAGE] |
Complete Manual for RoboSHOT CAT-5 Professional PTZ Camera Systems
RS-232 Serial Command Reference
The Vaddio RS-232 Serial Control Protocol is similar to the VISCA command set in order to be compatible with several popular control devices. Not all VISCA commands are supported, and there are Vaddio-specific commands in the following command and inquiry lists.
Be sure the camera is set to the same baud rate as the controller or other device originating the commands. For the older RoboSHOT cameras, see DIP Switches: Camera Behavior Settings. For the newer RoboSHOT 12E CAT-5 and RoboSHOT 30E CAT-5 cameras, see Basic Camera Settings for RoboSHOT 12E CAT-5 and RoboSHOT 30E CAT-5.
Camera Movement, Zoom, and Focus Commands
| Command Set | Command | Command | Packet Comments | |
| CAM_Zoom Stop | 8x 01 04 07 00 FF Variable speed: p = 0(low) to 7(high) | |||
| Tele (std) 8x | 01 04 07 02 FF | |||
| Wide (std) 8x | 01 04 07 03 FF | Direct: pqrs = zoom position (04000h for 12x, 0h-7AC0h for 3 | ||
| Tele (variable) | 8x 01 04 07 2p FF | |||
| Wide (variable) | 8x 01 04 07 3p FF | |||
| Direct | 8x 01 04 47 0p 0q 0r 0s FF | |||
| Corresponds to camera zoom in Telnet API | ||||
| CAM_Focus | Stop 8x 01 04 | 08 00 FF Variable speed: p | = 0 (low) to 7(high) | |
| Far (std) | 8x 01 04 08 02 FF | Direct and Near Limit: pqrs = focus position (1000h - F000h) | ||
| Near (std) | 8x 01 04 08 03 FF | |||
| Far (variable) | 8x 01 04 08 2p FF | |||
| Near (variable) | 8x 01 04 08 3p FF | |||
| Direct | 8x 01 04 48 0p 0q 0r 0s FF | |||
| One Push Trigger | 8x 01 04 18 01 FF | |||
Complete Manual for RoboSHOT CAT-5 Professional PTZ Camera Systems
| Command Set | Command Command Packet Comments | |
| Pan-TiltDrive Up | 8x 01 06 01 vv ww 03 01 FF vv= Pan speed (01h-18h) | ww=Tilt speed (01h-14h) |
| Down 8x 01 06 01 vv ww 03 02 FF | ||
| Left 8x 01 06 01 vv ww 01 03 FF | ||
| Right 8x 01 06 01 vv ww 02 03 FF | ||
| UpDown Left 8x 01 06 01 vv ww 01 01 FF | ||
| UpDown Right 8x 01 06 01 vv ww 02 01 FF | ||
| Down Left 8x 01 06 01 vv ww 01 02 FF | ||
| Down Right 8x 01 06 01 vv ww 02 02 FF | ||
| Stop 8x 01 06 01 vv ww 03 03 FF | ||
| Home 8x 01 06 04 FF | Returns the camera to its default position | |
| Pan-TiltDrive Absolute Position | 0Y0Y0Y0Y = Pan position (90E2h-6BD8h)0Z0Z0Z0Z = Tilt position (EB99h-3D59h) | |
| Pan-Tilt-ZoomDrive | Up 8x 01 06 0A vv ww rr 03 01 03 FF | vv= Pan speed (01h-18h)ww=Tilt speed (01h-14h)rr=Zoom speed (00h - 07h) |
| Down 8x 01 06 0A vv ww rr 03 02 03 FF | ||
| Left 8x 01 06 0A vv ww rr 01 03 03 FF | ||
| Right 8x 01 06 0A vv ww rr 02 03 03 FF | ||
| In 8x 01 06 0A vv ww rr 03 03 FF | 01 | |
| Out 8x 01 06 0A vv ww rr 03 03 | 02 | |
Complete Manual for RoboSHOT CAT-5 Professional PTZ Camera Systems
| Command Set | Command Command Packet Comments | ||
| CAM_Memory Reset | Set 8x 01 04 3F 00 0p FF Corresponds to camera preset in Telnet API. | ||
| Set standard 8x 01 04 3F 01 0p FF | |||
| Set standard with 'scene' | 8x 01 04 3F 21 0p FF | ||
| Set Tri-sync 8x 01 04 3F 11 0p 0q 0r FF | |||
| Set Tri-Sync with 'scene' | 8x 01 04 3F 31 0p 0q 0r FF | ||
| Recall 8x 01 04 3F 02 0p FF | |||
| Corresponds to camera preset in Telnet API. | |||
| CAM_PTZ_PresetSpeed | 8x 01 7e 01 0b pp qq rr FF | pp: pan speed (01h-18h)qq: tilt speed (01h-14h)rr: zoom speed (0h-07h) | |
Movement, Zoom, and Focus Inquiry Commands
| Inquiry Command | Command | Response Packet | Comments |
| Pan-TiltPosInq | 8x 09 06 12 FF | y0 50 0w 0w 0w 0w 0w 0w 0z Pan position 0z 0z FF | wwwzw0z Pan position zzzz=Tilt Position |
| CAM_ZoomPosInq | 8x 09 04 47 FF | y0 50 0p 0q 0r 0s FF | pqrs: Zoom position |
| CAM_FocusPosInq | 8x 09 04 48 FF | y0 50 0p 0q 0r 0s FF | pqrs: Focus position |
| CAM_FocusModelInq | 8x 09 04 38 FF | y0 50 02 FF | Auto focus |
| y0 50 03 FF | Manual focus | ||
| Corresponds to camera focus mode get in Telnet API. | |||
| CAM_MemoryInq 8x 09 04 | 3F FF y0 50 | pp FF pp: | Preset number recalled last (00h - 0Fh) |
| CAM_MemoryStatusInq | 8x 09 04 3F 0p FF | y0 50 0p 0q 0r 0s FF | p: Preset number (00h - 0Fh) |
Complete Manual for RoboSHOT CAT-5 Professional PTZ Camera Systems
Color and Light Management Commands
| Command Set | Command Command Packet Comments | ||
| CAM_WB Auto 8x | 01 04 35 00 | FF Normal auto | |
| Manual 8x 01 | 04 35 05 FF Manual control | mode | |
| Corresponds to carera ccu set auto_white_balance in Telnet API. | |||
| CAM_RGain Rese | 8x 01 04 03 | 00 FF Manual control of red | gainpq = red gain (00h - FFh) |
| Up 8x 01 04 | 03 02 FF | ||
| Down | 8x 01 04 03 03 FF | ||
| Direct | 8x 01 04 43 00 00 0p 0q FF | ||
| Corresponds to carera ccu set red_gain in Telnet API. | |||
| CAM_BGain | Reset 8x 01 | 04 04 00 FF Manual control of | blue gainpq = blue gain (00h - FFh) |
| Up 8x 01 04 | 04 02 FF | ||
| Down | 8x 01 04 04 03 FF | ||
| Direct | 8x 01 04 44 00 00 0p 0q FF | ||
| Corresponds to carera ccu set blue_gain in Telnet API. | |||
| CAM_AE | Auto 8x 01 04 | 39 00 FF Auto exposure mode | |
| Manual 8x 01 | 04 39 03 FF Manual control | mode | |
| Corresponds to carera ccu set auto_iris in Telnet API. | |||
| CAM_Shutter | Reset 8x 01 | 04 0A 00 FF Shutter settingpq = shutter position (00h - 15SeeShutter Speed Values-CAM_Shutter Command | |
| Up 8x 01 04 | 0A 02 FF | ||
| Down | 8x 01 04 0A 03FF | ||
| Direct | 8x 01 04 4A 00 00 0p 0q FF | ||
| CAM_Iris | Reset 8x 01 | 04 0B 00 FF Iris settingpq = iris position(0h, 05h-11h) | |
| Up 8x 01 04 | 0B 02 FF | ||
| Down | 8x 01 04 0B 03 FF | ||
Complete Manual for RoboSHOT CAT-5 Professional PTZ Camera Systems
| Command Set | Command Command Packet Comments | ||
| CAM_WD On 8x | 01 04 3D 02 FF Wide Dynamic Range On | ||
| Off 8x 01 04 | 3D 03 FF Wide Dynamic Range Off | ||
| Corresponds to camera ccu set wide_dynamic_range in Telnet API.May be unavailable on some cameras. | |||
| CAM_Aperture Reset | 8x 01 04 02 00 FF Aperture setting | pq = aperture position (0h-0fh) | |
| Up 8x 01 04 | 02 01 FF | ||
| Down | 8x 01 04 02 02 FF | ||
| Direct 8x 01 04 42 00 00 0p 0q FF | |||
| Corresponds to camera ccu set detail in Telnet API. | |||
| CAM_Chroma Direct | 8x 01 7E 55 00 00 0p 0q FF pq: 0h - 14h | ||
| Corresponds to camera ccu set chroma in Telnet API. | |||
| CAM_GammaOffset | Direct 8x 01 04 1E 00 00 00 0s 0t 0u FF | s: polarity offset (0 is plus, 1 minus)tu: offset s=0 (00h to 40h)offset s=1 (00h to 10h) | |
| Corresponds to camera ccu set gamma in Telnet API. | |||
Complete Manual for RoboSHOT CAT-5 Professional PTZ Camera Systems
Shutter Speed Values (CAM_Shutter)
| Value | 60/59.94/30/29.97 fps | 50/25 fps |
| 0x15 1/10000 | 1/10000 | |
| 0x14 1/6000 | 1/6000 | |
| 0x13 1/4000 | 1/3500 | |
| 0x12 1/3000 | 1/2500 | |
| 0x11 1/2000 | 1/1750 | |
| 0x10 1/1500 | 1/1250 | |
| 0x0F 1/1000 | 1/1000 | |
| 0x0E 1/725 | 1/600 | |
| 0x0D 1/500 | 1/425 | |
| 0x0C 1/350 | 1/300 | |
| 0x0B 1/250 | 1/215 | |
| 0x0A 1/180 | 1/150 | |
| 0x09 1/125 | 1/120 | |
| 0x08 1/100 | 1/100 | |
| 0x07 1/90 | 1/75 | |
| 0x06 1/60 | 1/50 | |
| 0x05 1/30 | 1/25 | |
| 0x04 1/15 | 1/12 | |
| 0x03 1/8 | 1/6 | |
| 0x02 1/4 | 1/3 | |
| 0x01 1/2 | 1/2 | |
| 0x00 1/1 | 1/1 |
Complete Manual for RoboSHOT CAT-5 Professional PTZ Camera Systems
Iris Values (CAM_Iris)
| Value Iris | |
| 0x11 F1.6 | |
| 0x10 F2 | |
| 0x0F F2.4 | |
| 0x0E F2.8 | |
| 0x0D F3.4 | |
| 0x0C F4 | |
| 0x0B F4.8 | |
| 0x0A F5.6 | |
| 0x09 F6.8 | |
| 0x08 F8 | |
| 0x07 F9.6 | |
| 0x06 F11 | |
| 0x05 F14 | |
| 0x00 CLOSED |
Iris Gain and Gain Limit Values (CAM_Gain)
| Iris Gain Iris Gain Limit | |||||
| Value Steps Gain in dB | Value Steps Gain in dB | ||||
| 0x0F 28 77.8 | 0x0F | 28 77.8 | |||
| 0x0E 26 44.4 | 0x0E | 26 44.4 | |||
| 0x0D 24 41.0 | 0x0D | 24 41.0 | |||
| 0x0C 22 37.5 | 0x0C | 22 37.5 | |||
Complete Manual for RoboSHOT CAT-5 Professional PTZ Camera Systems
Color and Light Management Inquiry Commands
| Inquiry Command Command Response Packet Comments | |||||
| CAM_WBModelnq 8x 09 04 | 35 FF y0 50 00 | FF Auto | |||
| y0 50 05 FF Manual | |||||
| CAM_RGainlnq 8x 09 04 43 | FF y0 50 00 00 | 0p 0q FF pq: Red gain | |||
| CAM BGainlnq 8x 09 04 44 | FF y0 50 00 00 | 0p 0q FF pq: Blue gain | |||
| CAM_AEmodelnq | 8x 09 04 39 FF y0 50 00 FF Auto | ||||
| y0 50 03 FF Manual | |||||
| CAM_ShutterPoslnq 8x 09 04 4A FF y0 50 00 00 0p 0q FF pq: Shutter position | |||||
| CAM_IrisPoslnq | 8x 09 04 4B FF | y0 50 00 00 0p 0q FF | pq: Iris position | ||
| CAM_GainPoslnq | 8x 09 04 4C FF | y0 50 00 00 0p 0q FF | pq: Gain position | ||
| CAM_WDModelnq | 8x 09 04 3D FF | y0 50 02 FF On | |||
| y0 50 03 FF Off | |||||
| CAM_BackLightModelnq | 8x 09 04 33 FF | y0 50 02 FF On | |||
| y0 50 03 FF Off | |||||
| CAM_Aperturelnq | 8x 09 04 42 FF | y0 50 00 00 0p 0q FF | pq: Aperture gain | ||
| CAM_Chromalnq | 8x 09 7E 55 FF | y0 50 05 00 00 00 0p FF | p: 0-Eh | ||
| CAM_GammaOffsetlnq | 8x 09 04 1E FF | y0 50 00 00 00 0s 0t 0u FF | s: Polarity offset (0 is plus, 1 is minus)tu: Offset s=0 (00h to 40h)Offset s=1 (00h to 10h | ||
CCU Scene Commands for the Universal CCU
This command is sent to the Universal CCU, not the camera.
| Command Set | Command | Command Packet | Comments |
Complete Manual for RoboSHOT CAT-5 Professional PTZ Camera Systems
Other Commands
| Command Set | Command Command | Command Packet Comments | |
| CommandCancel 8x 2p FF p= socket (1 or 2) | |||
| CAM_Power On 8x 01 04 00 02 | FF Power on | ||
| Off 8x 01 04 | 00 03 FF Power off | ||
| Corresponds to camera standby in Telnet API. | |||
| CAM_Tally On 8x | 01 7E 01 0A | 00 02 FF | |
| Off 8x 01 7E | 01 0A 00 03 FF | ||
| CAM_NR | -- | 8x 01 04 53 0p FF p = noise reduction level (0: off,1 -5) | |
| CAM_Mute | On 8x 01 04 | 75 02 FF Video mute on/off | |
| Off 8x 01 04 | 75 03 FF | ||
| Toggle | 8x 01 04 75 10 FF | ||
| Corresponds to video mute in Telnet API. | |||
Other Inquiry Commands
| Inquiry Command | Command | Response Packet | Comments |
| CAM_PowerInq | 8x 09 04 00 FF | y0 50 02 FF | On |
| y0 50 03 FF | Off (standby) | ||
| Corresponds to camera standby get in Telnet API | |||
| CAM_TallyInq 8x 09 7E 01 | 0A FF y0 50 02 FF On | ||
| y0 50 03 FF | Off | ||
| CAM_NRInq | 8x 09 04 53 FF | y0 50 0p FF | Noise reduction p: 00h to 05h |
| CAM_MuteModelInq | 8x 09 04 75 FF | y0 50 02 FF | On |
Complete Manual for RoboSHOT CAT-5 Professional PTZ Camera Systems
Specifications
Cameras
Camera and image
| Image device 1/2.8-Type Exmon | ©CMOS sensor |
| Video Resolutions 1080p/60, 59.94, 50, 30, 251080l/60, 59.94, 50720p/60, 59.94, 50, 30, 25 | |
| Video Aspect Ratio 16:9 for all resolutions | |
| Pan and tilt Pan ± 150°, tilt +90° -30°; speed 0.35°/sec to 120°/sec | |
| Lens and horizontal FOV | 12 model:Normal mode: 10x zoom, 67.3° (wide) to 7.6° (tele), f=3.8m38.0mm, F1.8 to F3.4Super Wide mode: 12x zoom, 73.0° (wide) to 6.6° (tele),f=3.91mm to 47.0mm, F1.8 to F3.412E model: 12x zoom, 70.2° (wide) to 6.8° (tele), f=4.4mm wide end to tele end, F2 to F3.830 model: 30x zoom, 65° (wide) to 2.3° (tele), F1.6 to F4.730E model: 30x zoom, 70.2° (wide) to 3.1° (tele), f=4.4mm wide end to tele end, F2 to F3.8 |
| Min. working distance RoboSHOT 12: 8 in. (0.2 m) wide, 30 in. (0.8 m) teleRoboSHOT 30: 10 in. (0.25 m) wide, 48 in. (1.2 m) tele RoboSHOTand 30E CAT-5: 3 in. (0.08 m) wide, 31 in. (0.8 m) tele | |
| Min. illumination Recommended: 100+ lux | |
| Gain Auto/Manual (28 steps) | |
| Backlight compensation On/off | |
| Aperture/detail 16 steps | |
| Focusing system Auto Focus, | Manual Focus, One Push Trigger Mode, Infinity Mode, Near Limit Mode |
| White balance | Auto, ATW, Indoor, Outdoor, One-push, Manual |
| Noise reduction | On/Off, 6 Steps |
| Sync system | Internal |
| S/N ratio | More than 50 dB |
| Remote management | IR Remote Commander, web interface, Telnet and VISCA/RS-232 |
Complete Manual for RoboSHOT CAT-5 Professional PTZ Camera Systems
Quick-Connect Devices
Universal CCU
| Video Outputs HD-YPb | Pr on DE-15-F connectorHDMI on HDMI-F connectorHD-SDI on Edge Mount Carrier Class, Gold BNC-F (3Gb/s Single Link 1080p/60 HD-SDI) | ||
| Compatible with RoboSHOT 12. RoboSHOT 30, PowerVIEW series, and ClearView series cameras. | |||
| Maximum Cable Length | 500 ft (152.4 m) Power | 36 VDC, 2.78 A | |
| Height | 1 RU / 1.72 in. (4.4 cm) | Width | 18.93 in. (48.1 cm) without rack mounting brackets |
| Depth 7 in. (17.8 cm) | Weight | ||
| Operating/storage temperature 0°C to +40°C (32°F to 104°F) | |||
| Operating/storage humidity | 20% to 80% RH, non-condensing | ||
Quick-Connect USB
| Video Outputs | |||
| Compatible with RoboSHOT 12, RoboSHOT 30, ZoomSHOT, WideSHOT SE, PowerVIEW series, and ClearView series cameras. | |||
| Maximum Cable Length | 100 ft (30 m) | Power 24 VDC, 2.08 A | |
| Height | 1 RU / 1.72 in. (4.4 cm) | Width | 8.38 in. (21.3 cm) |
| Depth | 6 in. (15.2 cm) | Weight | 1.4 lb. (0.64 kg) |
| Operating/storage temperature 0°C to +40°C (32°F to 104°F) | |||
| Operating/storage humidity: | 99% to 99% RH non-condensing | ||
Complete Manual for RoboSHOT CAT-5 Professional PTZ Camera Systems
Quick-Connect DVI/HDMI-SR
| Video Outputs | |||
| Compatible with RoboSHOT 12, RoboSHOT 30, ZoomSHOT, PowerVIEW series, and ClearView series cameras. | |||
| Maximum Cable Length | 100 ft (30 m) Power | 24 VDC, 2.08 A | |
| Height | 1.47 in. (3.7 cm) | Width | 8.0 in. (20.3 cm) |
| Depth | 6.66 in. (16.9 cm) | Weight | 1.2 lb. (0.55 kg) |
| Operating/storage temperature | 0°C to +40°C (32°F to 104°F) | ||
| Operating/storage humidity | 20% to 80% RH, non-condensing | ||
Quick-Connect SR
| Video Outputs | |||
| Compatible with RoboSHOT 12, RoboSHOT 30, PowerVIEW series, and ClearView series cameras. | |||
| Maximum Cable Length | 100 ft. (30 m) | Power 24 VDC, 2.08 A | |
| Height | 1.6 in. (4.1 cm) | Width | 5.5 in (14 cm) |
| Depth 3.25 in. (8.3 cm) Weight 0.45 lb. (0.2 kg) | |||
| Operating/storage temperature | 0°C to +40°C (32°F to 104°F) | ||
| Operating/storage humidity | 20% to 80% RH, non-condensing | ||
Specifications are subject to change without notice.
Complete Manual for RoboSHOT CAT-5 Professional PTZ Camera Systems
Troubleshooting and Care
Use this information to determine whether it's time to call Vaddio Technical Support.
Check the Status Light First
When the camera doesn't behave as you expect, check the indicator light before you do anything else.
■ Blue: Normal operation (blinks once when the camera receives a command from the remote)
■ Red: On-air tally (signal provided by external device via serial connection)
■ Blinking red: Video is muted (UC color scheme only)
■ Purple: In standby mode or booting
■ Yellow: Firmware update in progress
If the status light is off, check whether you can access the camera via its web interface or Telnet. If so, the status light is disabled.
Check the Cables Next
If the equipment behaves in a way that suggests even a remote possibility of a bad cable, please try a known good cable with the same pin-out.
Cables can be defective, whether they are purchased from a vendor or made at the installation site. Crimping tools can crimp unevenly, contacts can break internally, and individual conductors in the cable can break inside the jacketing material. Any of these can result in a cable that passes a continuity check but does not work reliably, or does not pass enough power to the connected device.
(The author would like to confess having made a certain number of almost-good cables. It happens.)
Power/Responsiveness Issues
| What is it doing? Possible causes Check and correct | ||
| Nothing.The status light is off, the is no video, and the cam does not respond to the remote. | Camera is not connected to a power source. | Verify that the camera is connected to the Universal CCU, Quick-Connect device, or AV Bridge MATRIX PRO installed with it. |
| No power to the device providing power to the camera. | Verify that the Universal CCU, Quick-Connect device, or AV Bridge MATRIX PRO is connected to power. | |
 | At least one of the cables is bad. | Check using known good cables |
| The wall outlet is not active.(Check by finding out if it powers something else, such as a laptop or phone charger.) | Use a different outlet. | |
| The device providing power is bad. | Contact your reseller or Vaddio Technical Support for help troubleshooting this issue if the camera is connected to a Quick-Connect SR or if it is connected to a device that appears to be bad. | |
| Universal CCU, Quick-Connect USB, or AV Bridge MATRIX PRO Buttons and display do not illuminate. | ||
| Quick-Connect USB Mini or Quick Connect DVI/HDMI-SR: Power light does not illuminate. | ||
| The camera is bad. Contact your | reseller or Vaddio Technical Support. | |
| The camera does not respond to the remote and the light is yellow. | A firmware update is in progress. | Wait a few minutes, and try again when the light turns blue. |
Video Issues
| What is it doing? Possible causes Check and correct | ||
| No video signal or black video. The camera's web interface is available and the camera responds to directional controls on the remote. | The camera is set to a resolution not supported on the Quick-Connect device (for example, the80p/60 on a camera with a Quick-Connect USB Mini). | Disconnect power, change the resolution to one that is supported of the Quick-Connect device, and reconnect power. |
| Camera connected to a Quick-Connect USB Mini: The Quick-Connect device is in control mode. | Press the white button on the QMini switch from control mode to video mode. Video is not available when device is in control mode. | |
| Blue or black video. The camera's web interface is available and the camera responds to the directional controls on the remote. | Video is muted. Select the Mute | button in the web interface. This button is available on every page of the web interface. |
| No H.264 video stream from the Quick-Connect USB. | The Quick-Connect USB is set for USB streaming. | for the Quick-Connect USB device's web interface, select IP streaming mode on the Streaming page. |
Complete Manual for RoboSHOT CAT-5 Professional PTZ Camera Systems
Camera Control and Other Issues
| What is it doing? Possible causes Check and correct | ||
| The camera does not respond to the remote, the web interface is available. | The remote and the camera are using the same IR channel. | Putt the Camera Select 1 butto the remote. Try the other Camera Select buttons if necessary. |
| The remote's batteries are dead. | Put new batteries in the remote. | |
| The camera responds to the remote but not to the web interface. | The web interface is controlling a different camera. (Check by removing power from the camera; the web interface should become unavailable.) | Check the camera's IP address. See Getting the camera's IP address. |
| More than one device is using this IP address. | ||
| The camera responds to the remote but the web interface is not available | The camera is not using the IP address you browsed to. | Press the Data Screen button on the remote to see camera information. |
| The camera is not connected to network. | Connect the network cable. | |
| The camera responds to the remote but the web interface is not available | The camera is not using the IP address you browsed to. | Press the Data Screen button on the remote to see camera information. |
| Camera connected to a Quick-Connect USB Mini: The Quick-Connect device is in video mode | Press the white button on the QMini switch from video mode to control mode. Web control is not available when the device is in video mode. | |
| The camera loses all its settings when power is cycled. | All the DIP switches are in the (down) position. | Sht the DIP switches to their proper positions. Default is all OFF (up). Se DIP Switches: Camera Behavior Settings for more information. |
Status Light
Complete Manual for RoboSHOT CAT-5 Professional PTZ Camera Systems
Restoring Factory Settings from the Web Interface
SYSTEM PAGE, FIRMWARE TAB
Sometimes it's easiest to just start over. To restore the original factory settings...click Restore Factory Settings. This will overwrite everything you have customized – custom CCU scenes and presets, soft DIP switch settings, passwords, room labels, and more. For this reason, you may want to back up (export) the camera's configuration after you set up the customizations you want. See Saving (Exporting) or Restoring (Importing) a Configuration.

Restoring Factory Default Settings Via Hardware
If the camera's administrative controls are not accessible, you can restore factory defaults using the switches on the back of the camera.
This procedure is also available for the Quick-Connect USB device. It is not available for the Universal CCU, which stores very little information other than CCU scenes A, B, and C.
To restore factory default settings on an older RohoSHOT camera:
Complete Manual for RoboSHOT CAT-5 Professional PTZ Camera Systems
Operation, Storage, and Care
For smears or smudges on the product, wipe with a clean, soft cloth. Use a lens cleaner on the lens. Do not use any abrasive chemicals.
Keep this device away from food and liquids.
Do not operate or store the device under any of the following conditions:
■ Temperatures above 40°C (104°F) or below 0°C (32°F)
■ High humidity, condensing or wet environments
■ Inclement weather
■ Severe vibration
■ Lunar environments not pressurized and climate-controlled to Earth-normal
■ Dry environments with an excess of static discharge
Do not attempt to take this product apart. There are no user-serviceable components inside.
And a friendly reminder from our Training department.
As much as you might love our gear, do not attempt to romance your camera. As a robot it cannot return your love.

Complete Manual for RoboSHOT CAT-5 Professional PTZ Camera Systems
Compliance and Conformity Statements
Applicable to RoboSHOT cameras and Quick-Connect USB extensions
Compliance testing was performed to the following regulations:
| FCC Part 15 (15.107, 15.109); Subpart B Class A | |
| ICES-003, Issue 54: 2012 Class A | |
| EMC Directive 2014/30/EU Class A | |
| EN 55032: 2015 Class A | |
| EN 55024: November 2010 Class A | |
| KN24 2008 (CISPR 24: 1997 + A1: 2000 + A2: 2002) Class A | |
| IEC 60950-1:2005 (2nd Edition); Am 1: 2009 + Am 2: 2013 Safety | |
| EN 60950-1: 2006 + A11: 2009 + A1: 2010 + A12: 2011 + A2: 2013 Safety |
FCC Part 15 Compliance
This equipment has been tested and found to comply with the limits for a Class A digital device, pursuant to Part 15, Subpart B, of the FCC Rules. These limits are designed to provide reasonable protection against harmful interference when the equipment is operated in a commercial environment. This equipment generates, uses, and can radiate radio frequency energy and, if not installed and used in accordance with the instruction manual, may cause harmful interference to radio communications. Operation of this equipment in a residential area is likely to cause harmful interference in which case the user will be required to correct the interference at his/her own expense.
Operation is subject to the following two conditions: (1) This device may not cause interference, and (2) This device must accept any interference including interference may cause undesired operation of the device.
Changes or modifications not expressly approved by Vaddio can affect emission compliance and could void the user's authority to operate this equipment.

ICES-003 Compliance
Complete Manual for RoboSHOT CAT-5 Professional PTZ Camera Systems
European Compliance
This product has been evaluated for Electromagnetic Compatibility under the EMC Directive for Emissions and Immunity and meets the requirements for a Class A digital device. In a domestic environment this product may cause radio interference in which case the user may be required to take adequate measures.
Standard(s) To Which Conformity Is Declared:
CE
EMC Directive 2014/30/EU
EN 55032: 2015 Conducted and Radiated Emissions
EN 55024: November 2010 Immunity
EN 61000-4-2: 1995 + Amendments A1: 1998 + A2: 2001 Electrostatic Discharge
EN 61000-4-3: 2006 + A1: 2008 Radiated Immunity
EN 61000-4-4: 2004 + Corrigendum 2006 Electrical Fast Transients
EN 61000-4-5: 2006 Surge Immunity
EN 61000-4-6: 2009 Conducted Immunity
EN 61000-4-8: 2010 Power Frequency Magnetic Field
EN 61000-4-11: 2004
Voltage Dips, Interrupts and
Fluctuations
KN24 2008 (CISPR 24: 1997 + A1: 2000 + A2: 2002) IT Immunity Characteristics
EN 61000-4-2 Electrostatic Discharge
EN 61000-4-3 Radiated Immunity
EN 61000-4-4 Electrical Fast Transients
EN 61000-4-5 Surge Immunity
EN 61000-4-6 Conducted Immunity
EN 61000-4-8 Power Frequency Magnetic Field
EN 61000-4-11
Voltage Dips, Interrupts and
Fluctuations
IEC 60950-1: 2005 (2nd Edition); Am 1: 2009 + Am 2: 2013 Safety
EN 60950-1: 2006 + A11: 2009 + A1: 2010 + A12: 2011 + A2:
2013
Complete Manual for RoboSHOT CAT-5 Professional PTZ Camera Systems
Compliance and Conformity Statements for Quick-Connect Devices
Applicable to Universal CCU, Quick-Connect USB Mini, Quick-Connect DVI/HDMI-SR, and Quick-Connect SR power/connectivity solutions.
Compliance testing was performed to the following regulations:
| FCC Part 15 (15.107, 15.109), Subpart B Class A | |
| ICES-003, Issue 54: 2012 Class A | |
| EMC Directive 2004/108/EC Class A | |
| EN 55022: December 2010 Class A | |
| EN 55024: November 2010 Class A | |
| KN22 2008 (CISPR 22: 2006) Class A | |
| KN24 2008 (CISPR 24: 1997 + A1: 2000 + A2: 2002) Class A | |
| IEC 60950-1:2005 (2nd Edition); Am 1: 2009 + Am 2: 2013 Safety | |
| EN 60950-1: 2006 + A11: 2009 + A1: 2010 + A12: 2011 + A2: 2013 Safety |
FCC Part 15 Compliance
This equipment has been tested and found to comply with the limits for a Class A digital device, pursuant to Part 15, Subpart B, of the FCC Rules. These limits are designed to provide reasonable protection against harmful interference when the equipment is operated in a commercial environment. This equipment generates, uses, and can radiate radio frequency energy and, if not installed and used in accordance with the instruction manual, may cause harmful interference to radio communications. Operation of this equipment in a residential area is likely to cause harmful interference in which case the user will be required to correct the interference at his/her own expense.
Operation is subject to the following two conditions: (1) This device may not cause interference, and (2) This device must accept any interference including interference may cause undesired operation of the device.
Changes or modifications not expressly approved by Vaddio can affect emission compliance and could void the user's authority to operate this equipment.

ICES-003 Compliance
Complete Manual for RoboSHOT CAT-5 Professional PTZ Camera Systems
European Compliance
This product has been evaluated for Electromagnetic Compatibility under the EMC Directive for Emissions and Immunity and meets the requirements for a Class A digital device. In a domestic environment this product may cause radio interference in which case the user may be required to take adequate measures.
Standard(s) To Which Conformity Is Declared:
CE
EMC Directive 2004/108/EC
EN 55022: 2010 Conducted and Radiated Emissions
EN 55024: November 2010 Immunity
EN 61000-4-2: 1995 + Amendments A1: 1998 + A2: 2001 Electrostatic Discharge
EN 61000-4-3: 2006 + A1: 2008 Radiated Immunity
EN 61000-4-4: 2004 + Corrigendum 2006 Electrical Fast Transients
EN 61000-4-5: 2006 Surge Immunity
EN 61000-4-6: 2009 Conducted Immunity
EN 61000-4-8: 2010 Power Frequency Magnetic Field
EN 61000-4-11: 2004
Voltage Dips, Interrupts and
Fluctuations
KN22 2008 (CISPR 22: 2006) Conducted and Radiated Emissions
KN24 2008 (CISPR 24: 1997 + A1: 2000 + A2: 2002) IT Immunity Characteristics
EN 61000-4-2 Electrostatic Discharge
EN 61000-4-3 Radiated Immunity
EN 61000-4-4 Electrical Fast Transients
EN 61000-4-5 Surge Immunity
EN 61000-4-6 Conducted Immunity
EN 61000-4-8 Power Frequency Magnetic Field
EN 61000-4-11
Voltage Dips, Interrupts and
Fluctuations
IEC 60950-1: 2005 (2nd Edition); Am 1: 2009 + Am 2: 2013 Safety
EN 60950-1: 2006 + A11: 2009 + A1: 2010 + A12: 2011 + A2:
Complete Manual for RoboSHOT CAT-5 Professional PTZ Camera Systems
Warranty and Return Policy
Hardware warranty: Two (2) year limited warranty on all parts and labor for Vaddio manufactured products.
Vaddio warrants its manufactured products against defects in materials and workmanship for a period of two years from the day of purchase, to the original purchaser, if Vaddio receives notice of such defects during the warranty. Vaddio, at its option, will repair or replace products that prove to be defective. Vaddio manufactures its hardware products from parts and components that are new or equivalent to new in accordance with industry standard practices.
Exclusions: The above warranty shall not apply to defects resulting from improper or inadequate maintenance by the customer, customers applied software or interfacing, unauthorized modifications or misuse, mishandling, operation outside the normal environmental specifications for the product, use of the incorrect power supply, modified power supply or improper site operation and maintenance. OEM and special order products manufactured by other companies are excluded and are covered by the manufacturer's warranty.
Vaddio Customer Service: Vaddio will test, repair, or replace the product or products without charge if the unit is under warranty. If the product is out of warranty, Vaddio will test then repair the product or products. The cost of parts and labor charge will be estimated by a technician and confirmed by the customer prior to repair. All components must be returned for testing as a complete unit. Vaddio will not accept responsibility for shipment after it has left the premises.
Vaddio Technical Support: Vaddio technicians will determine and discuss with the customer the criteria for repair costs and/or replacement. Vaddio Technical Support can be contacted by email at support@vaddio.com or by phone at one of the phone numbers listed on support.vaddio.com.
Return Material Authorization (RMA) number: Before returning a product for repair or replacement request an RMA from Vaddio's technical support. Provide the technician with a return phone number, e-mail address, shipping address, product serial numbers and original purchase order number. Describe the reason for repairs or returns as well as the date of purchase. See the General RMA Terms and Procedures section for more information. RMAs are valid for 30 days and will be issued to Vaddio dealers only. End users must return products through Vaddio dealers. Include the assigned RMA number in all correspondence with Vaddio. Write the assigned RMA number clearly on the shipping label of the box when returning the product. All products returned for credit are subject to a restocking charge without exception. Special order products are not returnable.
Complete Manual for RoboSHOT CAT-5 Professional PTZ Camera Systems
General RMA Terms and Procedures: RMA's are valid for 30 days and will be issued to Vaddio dealers only.
■ End users must return products through Vaddio dealers.
■ Before a defective product can be authorized to send in for repair, it must first go through the
troubleshooting process with a member of the Vaddio Technical Support team
■ Products authorized for repair must have a valid RMA (Return Material Authorization) number.
• Vaddio RMA Team will issue the RMA number.
- An RMA number is to be included in all correspondence with Vaddio.
- The RMA number must appear clearly on the shipping label (not the box) when the product is
returned - A packing slip must be included on the inside of the box with the RMA number listed and reason for RMA return.
■ Products received at Vaddio that do not have a valid RMA number clearly marked on the outside of the shipping container may be refused and returned to sender.
- Boxes showing external damage will be refused and sent back to the sender regardless of the clearly marked RMA number and will remain the responsibility of the sender.
RMA Charges (Restocking): All qualified returns must be made in unopened, original packaging with all original materials.
■ Initial shipments of equipment that are refused upon attempted delivery, for any reason, are subject to restocking charges.
■ The Dealer has up to 60 days from the date of purchase to return Vaddio product for credit for future purchases of Vaddio product only.
■ The Dealer has 61 to 90 days from the date of purchase to return Vaddio product with a 15% restocking fee or \$50.00 fee, whichever amount is greater
- The Dealer has up to 30 days from the date of purchase to return OEM and other manufacturer's products with a 15% restocking fee or \$50.00 fee, whichever amount is greater.
NOTE: Special Order products from other manufacturers (identified in the Vaddio Price Guide as noncancelable, nonreturnable and not refundable) are not eligible for advance replacement from Vaddio.
Advance Replacement Policies: For Vaddio manufactured products, advance replacement will be provided for up to one (1) year after the initial shipment of products.
NOTE: OEM and other manufacturer's products are excluded from the Vaddio advance replacement policy. Advance replacement will be provided for up to 30 days after initial shipment of OEM products. Thereafter, a return to Vaddio and factory repair is offered during the other manufacturer's warranty period. Vaddio will determine if the returned product is qualified for the OEM warranty.
Complete Manual for RoboSHOT CAT-5 Professional PTZ Camera Systems
Advance Replacement Procedures: The Vaddio Dealer must submit a non-revocable purchase order for advance replacement equipment at normal dealer pricing. Credit shall be issued upon complete product return (including all accessories) for dealers with Net 30 terms. For credit card accounts, charges will be assessed to the credit card for the replacement and credited back upon complete product return.
■ Returns must be made in the original Vaddio packaging with all original materials if at all possible. Vaddio products with missing original materials will be billed to the dealer at dealer price.
NOTE: OEM products must be returned in the original packaging with all materials and the RMA number written on the shipping label only and not on the OEM box. If the return is incomplete and/or the OEM box is defaced, the product shall be returned to the dealer and the RMA will not be credited.
- Equipment returned with "No Trouble Found" after advanced replacement will be assessed a full 15% or \$50.00 restocking fee (whichever is greater) for each item and may also be assessed for additional charges to compensate for wear, damages and reconditioning.
- All returns must be accompanied by RMA # as stated above.
- All Advanced Replacement products are sent via 2-day service in the continental USA. If the product is requested to be sent via priority or overnight shipping, the Dealer shall pay shipping costs. The dealer can elect to supply their preferred shipping account number.
■ International customers are responsible for all freight charges for equipment returned to Vaddio, including international shipping, taxes, and duties, insurance and all other associated logistic charges.
Warranty Repair Terms and Procedures: Vaddio will repair any product free of charge, including parts and labor, within the terms outlined in the warranty agreement for that product.
- Customers must provide proof of the product's purchase date.
■ Product that is within the warranty period will be repaired under the non-warranty terms if:
The equipment has been damaged by negligence, accident, act of God, mishandling, used with the incorrect, modified or extended power supply or has not been operated in accordance with the procedures described in the operating and technical instructions.
The equipment has been altered or repaired by other than the Manufacturer or an authorized service representative.
Adaptations or accessories other than those manufactured or provided by the Manufacturer have been made or attached to the equipment, which in the determination of the Manufacturer, shall have affected the performance, safety of reliability of the equipment; or the equipment's original serial number has been modified or removed.
- Customer is responsible for shipping charges to send defective product under warranty to Vaddio.
Vaddio will pay ground service return shipping charges during the 2nd year of the warranty period.
■ Standard return shipping method for products under warranty, but out of the advance replacement
Complete Manual for RoboSHOT CAT-5 Professional PTZ Camera Systems
Non-Warranty Repair Charges: Total repair charges (per unit) for a non-warranty repair consist of the following:
■ Cost of any replacement parts needed to repair the defect.
■ Labor costs billed per hour after minimum charges/time.
■ Labor charges include troubleshooting and repair time only.
■ Burn-in time and final test time is not included in the labor charges.
■ Labor time is rounded to the nearest quarter hour.
■ Labor charges are billed at the prevailing rate for the category of equipment repaired, after minimum charges/time. For prevailing labor rates, please contact the Vaddio technical support.
■ All shipping and handling costs are the responsibility of the customer for non-warranty repairs.
Minimum Labor Charges: All non-warranty repairs are subject to a minimum evaluation/repair labor
charge even if there is no problem found. Please contact Vaddio technical support for the current applicable rate.
Repair Charge Estimates: Estimates on repair charges for a specific problem will not be given before an
RMA is issued and the actual product has been evaluated by a Vaddio technician. Repair estimates will be given after the repair department receives and evaluates the unit.
■ Customers requesting an estimate on repair charges must do so up front when they call in for an RMA.
The RMA team will call or email with the estimate after evaluating the unit and before proceeding with the repair.
■ Any product evaluated for a repair estimate is still subject to the minimum labor charges even if the customer decides not to proceed with the repair.
■ Vaddio does not guarantee estimates given on repair charges. Actual repair costs may exceed the estimate.
- Customer is responsible for actual repair charges, regardless of estimate.
Repair Policy Notes:
- Duration of Repair: Products are repaired on a first come first serve basis. The turn-a-round time of a particular repair is dependent upon circumstances such as product type, the nature of the problem and current repair volumes. Requests for expedited repair service will be considered on a case-by-case basis.
- Repair Warranty: Vaddio guarantees all of its repair work, performed on non-warranty items, for 90 days from the day the repaired product is shipped back to the customer. If the original problem described was not resolved or reoccurs within the 90-day period, Vaddio will repair the unit free of labor charges. However additional material charges may apply unless the parts used to affect the repair are again deemed defective.
Complete Manual for RoboSHOT CAT-5 Professional PTZ Camera Systems
Photo Credits
This manual may include some or all of these photos.
European Space Agency (ESA) astronaut Samantha Cristoforetti, a Flight Engineer with Expedition 42,
photographs the Earth through a window in the Cupola on the International Space Station
By NASA - https://blogs.nasa.gov/ISS_Science_Blog/2015/03/06/women-in-space-part-two-whats-
gender-got-to-do-with-it/, Public Domain, https://commons.wikimedia.org/w/index.php?curid=38834990
Carl Sagan, Bruce Murray, Louis Friedman (founders) and Harry Ashmore (advisor), on the occasion of signing the papers formally incorporating The Planetary Society
By credit NASA JPL - JPL, Public Domain, https://commons.wikimedia.org/w/index.php?curid=1180927
Main Control Room / Mission Control Room of ESA at the European Space Operations Centre (ESOC) in Darmstadt, Germany
By European Space Agency - ESOC flickr, Credit: ESA - Jürgen Mai, CC BY-SA 3.0-igo, https://commons.wikimedia.org/w/index.php?curid=36743173
Expedition 42 on orbit crew portrait, International Space Station, Mar. 7, 2015 – Barry Wilmore
(Commander) Top, Upside down, to the right cosmonaut Elena Serova, & ESA European Space Agency
Samantha Cristoforetti. Bottom center US astronaut Terry Virts, top left cosmonauts Alexander
Samokutyaev and Anton Shkaplerov.
By NASA - https://www.flickr.com/photos/nasa2explore/16166230844/, Public Domain,
https://commons.wikimedia.org/w/index.php?curid=38931301
European Space Agency astronaut Luca Parmitano, Expedition 36 flight engineer, outside the International Space Station
By NASA - http://spaceflight.nasa.gov/gallery/images/station/crew-36/html/iss036e016704.html, Public
Domain, https://commons.wikimedia.org/w/index.php?curid=27263573
Chris Cassidy, Luca Parmitano, and Karen Nyberg, ISS, 2013. Photo Credit: NASA
Nicolas Altobelli, Rosetta Scientist at ESA's European Space Astronomy Centre, Villanueva de la
Cañada, Madrid, Spain
By European Space Agency - Nicolas Altobelli talks to the media, CC BY-SA 3.0-igo,
https://commons.wikimedia.org/w/index.php?curid=36743144
Andrea Accomazzo, ESA Rosetta Spacecraft Operations Manager, providing a live update from the Main
Control Room at ESA's European Space Operations Centre, Darmstadt, Germany during the Rosetta
wake-up day.
Index
A
admin login 43, 45, 56, 58
changing 56
changing on Quick-Connect device 58
default 43
QUSB or QMini 45
anatomy of the camera 15-17
anatomy of the Quick-Connect device 21-24
Quick-Connect DVI/HDMI-SR (QDVI) 23
Quick-Connect SR (QSR) 24
Quick-Connect USB (QUSB) 21
Quick-Connect USB Mini (QMini) 22
anatomy of the Universal CCU (QCCU) 19
API 89-102, 104-105, 107-110
RS-232 (VISCA) 102, 104-105, 107-110
Telnet 90-101
auto focus 72, 93
auto iris 69, 95-96
auto white balance 69, 71, 82, 95-96
automatic NTP updating 55
B
backing up a configuration 60
backlight compensation 69-70, 95-96
Baud Rate setting 28, 77
behavior on power-up 66
blue gain 69, 71, 82, 95-96
Brightness compensation adjustment
(QCCU) 83
capabilities 2-4, 111-113
Quick-Connect DVI/HDMI-SR (QDVI) 4, 113
Quick-Connect SR (QSR) 4, 113
Quick-Connect USB (QUSB) 3, 112
Quick-Connect USB Mini (QMini) 4, 112
Universal CCU (QCCU) 3, 112
CCU scenes 66-68, 71, 83-85, 88, 97
custom 67, 71, 97
custom (UCCU) 85
recalling 97
RS-232 commands for QCCU 109
CCU settings 70-71, 94-96
ceiling-mounted cameras 26
cheat sheet 39, 46, 70-71
color adjustment 71
lighting and image quality 70
Vaddio IR Remote Commander 39
web interface 46
chroma setting 69-71, 82, 95-96
cleaning 119
Codec Control Mode setting 78
color codes for status light 38, 114, 117
color settings 68-69, 71, 84, 95-96
adjusting 84
command history 101
command set, RS-232 (VISCA) 102, 104-
105, 107-110
compatibility, browsers 41
Compensation level adjustment (QCCU) 83
configuration, saving or restoring 60
connection example 33-36
RoboSHOT QDVI system 35
Pakashot Mini system 24
Complete Manual for RoboSHOT CAT-5 ProfessionalPTZ Camera Systems
D
damage, preventing 25, 30
default 41-43, 100, 118
admin password 43
IP address, camera 41
settings, restoring 100, 118
user password 42
detail setting 69-70, 82, 95-96
DHCP 51
diagnostic logs 65
Diagnostics page (web) 65
DIP switch settings 28, 76-78
reading from web interface 76
directional controls 39-40, 88
Display brightness level adjustment
(QCCU) 83
E
Enable LED in Standby setting 78
F
factory defaults, restoring 100, 118
fault isolation 114-117
firmware update 61-63
camera 61
QUSB or QMini 62
Universal CCU (QCCU) 63
firmware version 61-62, 100
focus 39-40, 72, 93
front panel display adjustments (QCCU) 86
G
gain 60.74 05
QUSB or QMini 53
HTTPS, enabling or requiring 57
|
Image Flip setting 28, 77
importing a configuration 60
inactive sessions (web interface) 56
indicator light 15, 38, 78, 97, 114, 117
color scheme 78
enabling/disabling 97
location 15
meaning of colors 38, 114, 117
information, conference room 59
installation, typical 33-36
RoboSHOT QDVI system 35
RoboSHOT QMini system 34
RoboSHOT QSR system 36
RoboSHOT QUSB system 33
inverted installation 26
IP address 31, 39-41, 44, 49, 51, 54
camera 41
camera, default 41
camera, discovering 41
default 49, 51, 54
preventing conflicts 31, 51
Quick-Connect USB Mini 44
Quick-Connect USB, discovering 44
static 51
static, configuring before installation 31,
49, 51
IP streaming 80-81
configuring (QUSB) 81
selecting (QUSB) 80
- 0...04 ... 11... 77
Complete Manual for RoboSHOT CAT-5 Professional PTZ Camera Systems
location 15
meaning of colors 38, 114, 117
lighting settings 68-69, 84, 88, 95-97
adjusting 84
default 84
locations of connectors 16-17, 19, 21-24
Quick-Connect DVI/HDMI-SR (QDVI) 23
Quick-Connect SR (QSR) 24
Quick-Connect USB (QUSB) 21
Quick-Connect USB Mini (QMini) 22
Universal CCU (QCCU) 19
log files 65
login 42-43, 45
admin 43
admin (QUSB or QMini) 45
user 42
low-power (standby) state 87, 98
M
making a scene 85
manual focus 39-40, 72, 93
Mode button (QMini) 44
mounting cameras 26, 37
mounting the Quick-Connect device 38
muting video 87
N
navigation buttons, hiding/showing 43
network configuration 41, 49, 51, 53-54, 98
current 98
default 51
Networking page (web) 49, 51, 53-55
Networking page (web), QUSB or QMini 53
Networking 49, 51, 53-55
Networking (QUSB or QMini) 53
Room Labels 59
Security 56-57
Streaming (QUSB or QMini) 80-81
System 61, 64, 78
System (QUSB or QMini) 62, 64
pan 73, 75, 90
direction 75
speed 73
pan/tilt/zoom controls 39-40, 88
passwords 42-43, 45, 56, 58
admin, default 43
admin, default (QUSB or QMini) 45
user, default 42
pedestal 82
performance specifications 111-113
physical and environmental
specifications 111-113
pin-out, RS-232 connector 30
ping command 99
point light compensation 69-70
power 16-17, 39-40, 115
issues, troubleshooting 115
on and off 39-40
power-up settings 66
presets 39-40, 67, 88, 94
clearing 40
moving to 88
recalling 94
renaming 67
setting 40, 94
privacy 87
Complete Manual for RoboSHOT CAT-5 Professional PTZ Camera Systems
updating 63
Quick-Connect 3-4, 16-17, 19, 21-24, 33-36, 38, 44-45, 80-86, 109, 112-113
DVI/HDMI-SR (QDVI) 4, 23, 35
mounting options 38
specifications 112-113
SR (QSR) 4, 24, 36
Universal CCU (QCCU) 3, 19, 82-86, 109
USB (QUSB) 3, 21, 33, 44-45, 80-81
USB Mini (QMini) 4, 22, 34, 44-45, 80
quick reference 39, 46, 70-71
Vaddio IR Remote Commander 39
web interface 46
R
ready state 87, 98
rebooting the camera 64, 99
rebooting the Quick-Connect device 64
red gain 69, 71, 82, 95-96
remote control 39-40
reset See also rebooting the camera; restoring default settings
resolution 27, 78
setting in web interface 78
restoring a configuration 60
restoring default settings 100, 118
room information 59
Room Labels page (web) 59
rotary switch 27
RS-232 commands 102, 104-105, 107-110
setting values 107-108
RS-232 connector 16-17, 30
S
solving problems 85, 114-117
specifications 111-113
speed 73, 90-93
focus 93
pan/tilt/zoom 73, 90-92
SSL certificate 57
Standard Control/Codec Control setting 78
standby (low-power) state 87, 98
start-up behavior, setting 66
static IP address 49, 51, 54
status light 15, 38, 78, 97, 114, 117
color scheme 78
enabling/disabling 97
location 15
meanings of colors 38, 114, 117
storage environment 119
storing a configuration 60
Streaming page (web, QUSB or QMini) 80-81
Super-Wide Mode setting 28
supported web browsers 41
switch settings 26-29, 61, 76-78
3G Level A/Level B 78
Baud Rate 28, 77
Camera ID 28, 77
Enable LED in Standby 78
for Quick-Connect USB 29
for Universal CCU 29
Image Flip 26, 28, 77
IR On/Off 77
IR Out 28
LED Color Scheme 78
LED On/Off 78
reading from web interface 61
Complete Manual for RoboSHOT CAT-5 Professional PTZ Camera Systems
Telnet API 89-101
command help 89
syntax help 101
temperature, operating and storage 119
tilt 73, 75, 91
direction 75
speed 73
time zone 55
typical installation 37
U
UC LED Color Scheme setting 78
Universal CCU (QCCU) 19, 63, 82-86
connector identification 19
DIP switches 19
front panel display adjustments 86
front panel features 19
menu navigation 82-83
updating 63
update 61-63
camera 61
QUSB or QMini 62
Universal CCU (QCCU) 63
USB device name (QUSB or QMini) 80
USB streaming 80
selecting (QUSB) 80
user login 42, 56
changing 56
default 42
V
web interface 41, 43-45, 49-51, 53-57, 59, 61-
62, 64-65, 68-69, 78, 80-81, 87
accessing 41
accessing via direct connection 50
Camera page 68-69
Controls page 87
Diagnostics page 65
Help page 65
navigation button labels 43
Networking page 49, 51, 53-55
Networking page (QUSB or QMini) 53
QUSB or QMini 44-45
Room Labels page 59
Security page 56-57
Streaming page (QUSB or QMini) 80-81
System page 61, 64, 78
System page (QUSB or QMini) 62, 64
white balance auto/manual 82
wide dynamic range setting 69-70, 83, 95-96
Y
Y gain adjustment (QCCU) 83
Z
zoom 88, 92
zoom speed 39-40, 73, 92
Vaddio is a brand of Legrand AV Inc. - www.legrandav.com - Phone 800.572.2011 / +1.763.971.4400 - Fax +1.763.971.4464 - Email av.vaddio.support@legrand.com
Visit us at support.vaddio.com for firmware updates, specifications, drawings, manuals, technical support information, and more.
©2019 Legrand AV Inc.
Vaddio is a registered trademark of Legrand AV Inc. All other brand names or marks are used for identification purposes and are trademarks of their respective owners. All patents are protected under existing designations. Other patents pending.
A brand of legrand
Commercial AV Brands Chief | Da-Lite | Middle Atlantic | Projecta | Vaddio
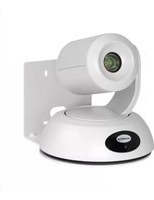
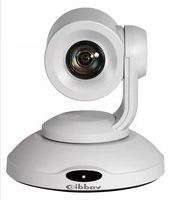
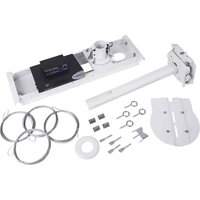
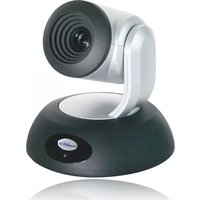
- RoboSHOT CAT-5 Professional PTZ Camera Systems
- Contents
- Overview
- What's in this Guide
- Camera Features
- Quick-Connect Features
- Quick-Connect Universal CCU (QCCU)
- Quick-Connect USB (QUSB)
- Quick-Connect USB Mini (QMini)
- Quick-Connect DVI/HDMI-SR (QDVI)
- Quick-Connect SR (QSR)
- Unpacking the Camera System
- (white)
- Note
- A Quick Look at the Camera
- A (Quick) Look at the Quick-Connect Devices
- Quick-Connect Universal CCU Interface
- Quick-Connect USB Interface
- Quick-Connect USB Mini Interface
- Quick-Connect DVI/HDMI-SR Interface
- Quick-Connect SR Interface
- Installing the Camera and Quick-Connect Device
- Don't Void Your Warranty!
- Caution
- Before You Start
- Installing the Wall Mount
- Video Resolution Setting
- Camera Behavior Settings - RoboSHOT 12 and RoboSHOT 30
- Set the switches appropriately before mounting the camera.
- Switch Settings for the Universal CCU
- Switch Settings for the Quick-Connect USB
- RS-232 Serial Communication Settings
- RS-232 Connector Pin-Out
- Cabling Notes
- Pro Tip
- Connecting the Camera
- Basic Connections: RoboSHOT QCCU System
- Basic Connections: RoboSHOT QUSB System
- Basic Connections: RoboSHOT QMini System
- Basic Connections: RoboSHOT QDVI System
- Basic Connections: RoboSHOT QSR System
- Basic Connections: RoboSHOT AVBMP
- Installing the Camera
- Installing the Quick-Connect Device
- Powering Up the Camera
- Status Light
- Using the IR Remote
- IR Remote Details
- Web Interface
- Getting the Camera's IP Address
- Accessing the Web Interface
- User Access
- Administrative Access
- Working with the Quick-Connect Device's Web Interface
- Getting the Quick-Connect Device's IP Address
- Quick-Connect USB Mini: Video Mode vs. Control Mode
- Accessing the Web Interface for the Quick-Connect USB or Quick-Connect USB Mini
- Web Interface Cheat Sheet
- System Administration
- For Non-DHCP Environments: Configuring the Device with a Static IP Address for Initial Installation
- To configure the camera with a static IP address:
- Configuring the Quick-Connect USB Device with a Static IP Address
- Changing the Camera's Hostname
- Changing the Quick-Connect Device's Hostname
- Optional For DHCP Environments: Changing from a DHCP Address to a Static IP Address
- Specifying Time Zone and NTP Server
- Managing Access and Passwords
- Enabling or Requiring HTTPS
- Changing the Admin Password on the Quick-Connect Device
- Adding Room Information to the Camera's Web Interface
- Adding Room Information to the Quick-Connect Device's Web Interface
- Saving (Exporting) or Restoring (Importing) a Camera Configuration
- Installing a Camera Firmware Update
- Installing a Quick-Connect USB or Quick-Connect USB Mini Firmware Update
- Installing a Firmware Update on the Universal CCU
- Rebooting the Camera
- Rebooting the Quick-Connect Device
- Contacting Vaddio Technical Support
- Accessing the Diagnostic Logs
- Configuring Camera Behavior
- Setting the Custom Home Position and Other Preset Shots
- CAMERA PAGE
- Initial Lighting and Color Settings
- Lighting Adjustments
- Fine-Tuning Image Quality and Color
- Lighting and Image Quality Cheat Sheet
- Color Adjustment Cheat Sheet
- Saving Color and Lighting Settings
- Adjusting the Focus
- Speed Adjustments
- Setting the Speed for Manual Movements
- Setting the Speed of Movements to Presets
- Adjusting Tri-Synchronous Motion Speed
- Setting the Direction for Camera Movements
- Reading the Camera's Switches
- Basic Camera Settings for RoboSHOT 12E CAT-5 and RoboSHOT 30E CAT-5
- Software-Controlled Video Output Resolution Setting
- Additional Camera Behavior Settings
- Pre-3.1.0 firmware:
- Version 3.1.0 and later firmware:
- Configuring Streaming (Quick-Connect USB or Quick-Connect USB Mini)
- To configure IP streaming (Quick-Connect USB only):
- Managing Lighting and Color Adjustments with the Universal CCU
- A Quick Look at the Menu Controls
- To work with an item on the home menu:
- To work with items on other menus:
- Available adjustments include:
- Adjusting Color
- Setting the Default Lighting Adjustments
- Working with Custom Scenes
- Adjusting for Cable Length
- Adjusting the Front Panel Display
- To adjust the display:
- Operating the Camera from the Web Interface
- Moving the Camera
- Zooming In or Out
- Moving the Camera to a Preset Position
- Adjusting the Color and Lighting
- Telnet Command Reference
- camera home
- camera pan
- camera tilt
- camera zoom
- camera focus
- camera preset
- camera ccu get
- camera ccu set
- camera ccu scene
- camera led
- camera standby
- network settings get
- network ping
- system reboot
- system factory-reset
- version
- history
- help
- RS-232 Serial Command Reference
- Specifications
- Quick-Connect Devices
- Troubleshooting and Care
- Check the Status Light First
- Check the Cables Next
- Restoring Factory Settings from the Web Interface
- Restoring Factory Default Settings Via Hardware
- Operation, Storage, and Care
- Compliance and Conformity Statements
- FCC Part 15 Compliance
- European Compliance
- Compliance and Conformity Statements for Quick-Connect Devices
- Warranty and Return Policy
- Photo Credits
- Index
- A
- B
- D
- E
- F
- G
- |
- M
- N
- R
- S
Brand : Vaddio
Model : RoboSHOT 12E HDBT
Category : Video Conferencing System