
H10 - Video projector 3M - Free user manual and instructions
Find the device manual for free H10 3M in PDF.


| Product Type | Video Projector |
| Brand | 3M |
| Model | H10 |
| Display Technology | LCD |
| Native Resolution | SVGA (800x600) |
| Brightness | 1200 ANSI Lumens |
| Contrast Ratio | 400:1 |
| Lamp Type | UHP 150W |
| Lamp Life (Normal Mode) | 2000 hours |
| Dimensions (W x D x H) | 300 x 220 x 100 mm |
| Weight | 2.8 kg |
| Power Consumption | 200 W (standby <1 W) |
| Input Connectors | VGA, Composite, S-Video |
| Output Connectors | VGA pass-through |
| Audio | Built-in speaker (1W) |
| Keystone Correction | Vertical ±15° |
| Zoom Ratio | 1.2x manual |
| Projection Distance | 1.5 - 10 m |
| Screen Size | 40 - 200 inches |
| Operating Temperature | 5°C - 35°C |
| Maintenance & Cleaning | Clean air filter every 100 hours; lens with soft cloth |
| Safety Features | Auto power-off, overheat protection |
| Spare Parts & Repairability | Replaceable lamp module; compatible with 3M spare parts |
Frequently Asked Questions - H10 3M
User questions about H10 3M
0 question about this device. Answer the ones you know or ask your own.
Ask a new question about this device
Download the instructions for your Video projector in PDF format for free! Find your manual H10 - 3M and take your electronic device back in hand. On this page are published all the documents necessary for the use of your device. H10 by 3M.
USER MANUAL H10 3M
natural_image
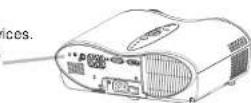
Line drawing of a projector with ventilation grille and control panel (no text or symbols)Thank you for purchasing this projector.
CAUTION Before using, read the "Product Safety Guide" and these manuals to ensure correct usage through understanding. After reading, store them in a safe place for future reference.
NOTE • The information in this manual is subject to change without notice.
- The manufacturer assumes no responsibility for any errors that may appear in this manual. - The reproduction, transmission or use of this document or contents is not permitted without express written authority.
TRADEMARK ACKNOWLEDGMENT :
Contents
Projector Features 3
Preparation 3
Part Names 4
The Projector 4
Attaching The Base 4
The Remote Control 6
Setting Up 7
Arrangement 7
Adjusting The Projector's
Elevator 8
Connecting Your Devices....9
Connecting Power Supply ……11
Remote Control 12
Putting Batteries 12
Operating The Remote Control…13
Power ON/OFF 14
Turning On The Power 14
Selecting An Input Signal ……15
Turning Off The Power 16
Operating 17
Adjusting The Volume ……17
Temporarily Muting The Sound…17
Adjusting The Position ……18
Using The Automatic
Adjustment Feature....19
Correcting Keystone
Distortions 19
Using The Magnify Feature ……20
Freezing The Screen 20
Signal Searching 21
Selecting The Aspect Ratio ……21
Temporarily Blanking
The Screen 21
Multifunctional Settings 22
Using The Menu Functions ……22
MAIN Menu 23
PICTURE-1 Menu 24
PICTURE-2 Menu 26
INPUT Menu 27
AUTO Menu 29
SCREEN Menu 30
OPTION Menu 31
Lamp 32
Replacing The Lamp 33
Air Filter 34
Caring For The Air Filter……34
Replacing The Air Filter 35
Other Care 36
Caring For The Inside
Of The Projector 36
Caring For The Lens 36
Caring For The Cabinet
And Remote Control 36
Troubleshooting 37
Related Messages 37
Regarding
The Indicator Lamps 39
Phenomena That May Easily Be
Mistaken For Machine Defects …41
Specifications 43
Accessories 44
Projector Features
This multimedia projector is used to project various computer signals as well as NTSC / PAL / SECAM video signals onto a screen. Little space is required for installation and large images can easily be realized.
Ultra High Brightness
Crisp, ultra-bright presentations is achieved by using a UHB (ultra high brightness) lamp and a highly efficient optical system.
Whisper Mode Equipped
Special mode is available for reducing projector noise to achieve quieter operation.
User Memory Function
This projector can memorize 4 settings by MY MEMORY function.
Partial Magnification Function
Interesting parts of images can be magnified for closer viewing.
Keystone Distortion Correction
Quick correction of distorted images electrically.
Preparation
Please see the "Quick Start Guide". Your projector should come with the items shown there. Contact your dealer anything is missing.
NOTE • Keep the original packing material for future reshipment.
Part Names
The Projector
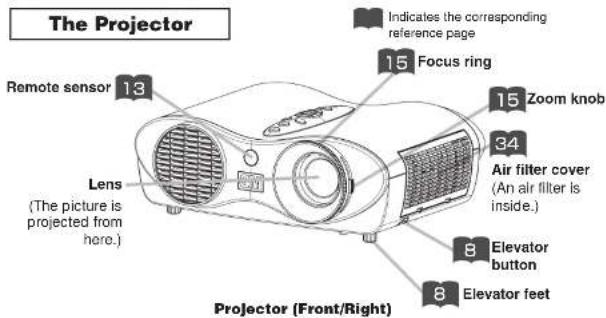
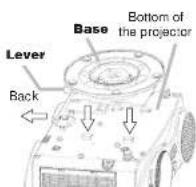
Attaching The Base

CAUTION • Be careful not to pinch your finger on the occasion of the handling of se.
- Do not hold the base, lens or other project part to move the projector.
- Do not use the base to suspend the projector.
- Do not push or put anything on the both sides of the top of the projector.

Turn off the projector, and unplug the power cord. Allow the lamp bulb to cool for at least 45 minutes.

After making sure that the projector has cooled adequately, slowly flip over the projector, so that the bottom is facing up.

Put the base on the bottom of the projector, as shown in the fugure. Then slide it to the back of the projector until it locks into position. To remove it, slide the base to the front of the projector pinching the
Part Names (continued)
The Projector (continued)
Part Names (continued)
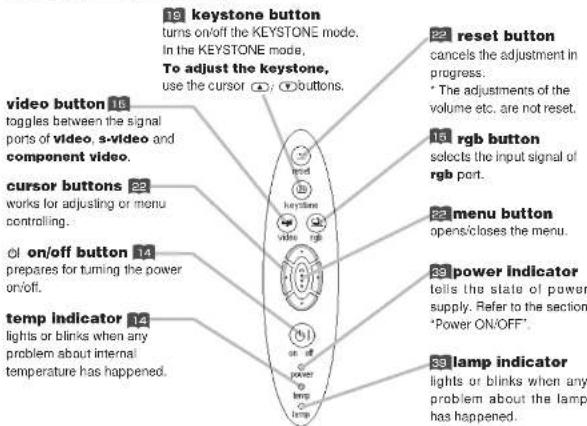
The Remote Control
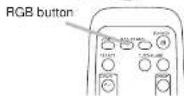
RGB button 16
selects the input signal of rgb port.
VIDEO button 15
toggles between the signal ports of video, s-video and component video.
ASPECT button 21
toggles between the modes for aspect ratio.
MAGNIFY ON/OFF 20
buttons
turns on/off the MAGNIFY mode.
In the MAGNIFY mode,
To move the
magnified area,
(1) Press the POSITION button.
(2) Use the cursor buttons to move the picture. (3) Press the POSITION button again to finish.
To shift the magnify level, use the cursor 🔊; ↗ buttons.
FREEZE button 20
froozes/reactivates the picture.
POSITION button 18
turns on/off the POSITION mode. (for RGB input) In the POSITION mode,
21 SEARCH button searches for an input signal between the following signal ports of rgb, video, s-video and component video.
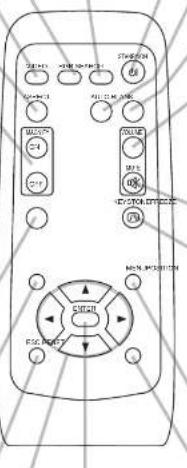
22 ENTER button proceeds to the next
14 STANDBY/ON button
prepares for turning the power on/off.
19 AUTO button
executes automatic adjustment.
21 BLANK button
blanks the screen temporarily.
17 VOLUME button
turns on/off the VOLUME mode. In the VOLUME mode.
To adjust the volume, use the cursor 🔊/ 🔒 buttons.
17 MUTE button
mutes/restores the sound.
19 KEYSTONE
button
turns on/off the KEYSTONE mode.
In the KEYSTONE mode.
To adjust the
keystone,
use the cursor 🔊: 🔒 buttons.
22 MENU button
opens/closes the menu.
22 RESET button
cancels the adjustment in
Setting Up
Arrangement
WARNING • Install the projector in a suitable environment according to instructions of the "Product Safety Guide" and this manual.
• The power outlet should be close to the projector and easily accessible.
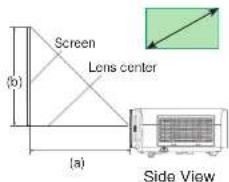
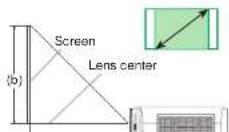
Refer to the illustrations and tables below to determine the screen size and projection distance.
The values shown in the table are calculated for a full size screen:854×480
(a):Distance from the projector to the screen (±10%)
(b):Distance from the lens center to the top of the screen (±10%)
Reference for
the 16:9 aspect ratio
| Screen size[inch [cm]] | (a) | [inch [cm]] | (b) | ||||
| Min. | Max. | [inch [cm]] | |||||
| 30 | (0.8) | 35 | (0.9) | 43 | (1.1) | 15 | (37) |
| 40 | (1.0) | 48 | (1.2) | 67 | (1.5) | 20 | (50) |
| 50 | (1.3) | 60 | (1.5) | 72 | (1.8) | 25 | (62) |
| 60 | (1.5) | 72 | (1.8) | 87 | (2.2) | 29 | (75) |
| 70 | (1.8) | 85 | (2.2) | 101 | (2.6) | 34 | (87) |
| 80 | (2.0) | 97 | (2.5) | 116 | (3.0) | 39 | (100) |
| 90 | (2.3) | 109 | (2.8) | 131 | (3.3) | 44 | (112) |
| 100 | (2.5) | 122 | (3.1) | 146 | (3.7) | 49 | (125) |
| 120 | (3.0) | 146 | (3.7) | 175 | (4.4) | 59 | (149) |
| 150 | (3.8) | 183 | (4.7) | 219 | (5.6) | 74 | (187) |
| 200 | (5.1) | 245 | (6.2) | 293 | (7.4) | 98 | (249) |
| 250 | (6.3) | 306 | (7.8) | 366 | (9.3) | 123 | (311) |
| 300 | (7.5) | 368 | (9.3) | 440 | (11.2) | 147 | (374) |
Reference for
the 4:3 aspect ratio
| Screen size[inch [m]] | (a) | [inch [m]] | (b) | ||||
| Min. | Max. | [inch [cm]] | |||||
| 30(0.8) | 89(1.0) | 47(1.2) | 18 | (46) | |||
| 40 | (1.0) | 52 | (1.3) | 63 | (1.6) | 24 | (61) |
| 50 | (1.3) | 66 | (1.7) | 79 | (2.0) | 30 | (76) |
| 60 | (1.5) | 79 | (2.0) | 95 | (2.4) | 36 | (91) |
| 70 | (1.8) | 92 | (2.4) | 111 | (2.8) | 42 | (107) |
| 80 | (2.0) | 106 | (2.7) | 127 | (3.2) | 48 | (122) |
| 90 | (2.3) | 119 | (3.0) | 143 | (3.6) | 54 | (137) |
| 100 | (2.5) | 133 | (3.4) | 159 | (4.0) | 60 | (152) |
| 120 | (3.0) | 159 | (4.1) | 191 | (4.8) | 72 | (183) |
| 150 | (3.8) | 200 | (5.1) | 239 | (6.1) | 90 | (229) |
Setting Up (continued)
Adjusting The Projector's Elevator
CAUTION • If you press the elevator buttons without holding the projector, the projector might crash down, overturn, smash your fingers and possibly result in malfunction. To prevent damaging the projector and injuring yourself, ALWAYS HOLD THE PROJECTOR whenever using the elevator buttons to adjust the elevator feet.
You can use the elevator feet to make adjustments if the surface on which you need to set the projector is uneven or if you otherwise need to adjust the angle of projection. The adjustment range of the elevator feet is 0 to 9 degrees.
1 Press and hold in the elevator buttons.
2 Raise or lower the projector to the desired height and then release the elevator buttons. When you release the elevator buttons, the elevator feet will lock into position.
3 As necessary, you can also finely adjust the height of the projector by twisting the elevator feet by hand.
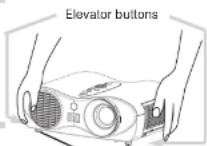
Elevator feet
Setting Up (continued)
Connecting Your Devices

WARNING • Incorrect connecting could result in fire or electrical shock.
Whenever attempting to connect other devices to the projector, please thoroughly read the 'Product Safety Guide', this manual and the manual of each device to be connected.
CAUTION • TURN OFF ALL DEVICES prior to connecting them to the projector.
Attempting to connect a live device to the projector may generate extremely loud noises or other abnormalities that may result in malfunction and/or damage to the device and/or projector.
ATTENTION • Make sure that you connect devices to the correct port. Incorrect
connection may result in malfunction and/or damage to the device and/or projector. Refer to the section "TECHNICAL" of this manual for the pin assignment of connectors and RS-232C communication data.
- Some cables have to be used with core set. Use the accessory cable or a designated-type cable for the connection. For cables that have a core only at one end, connect the core to the projector.
- Secure the screws on the connectors and tighten.
- Whenever attempting to connect a laptop computer to the projector, be sure to activate the laptop's RGB external image output (set the laptop to CRT display or to simultaneous LCD and CRT display). For details on how this is done, please refer to the instruction manual of the corresponding laptop computer.
NOTE About Plug-and-Play Capability
• This projector is compatible with VESA DDC 1/2B. Plug-and-Play can be achieved by connecting this projector to computers that are VESA DDC (display data channel)
compatible. Please take advantage of this function by connecting the accessory RGB cable to the rgb port (DDC 1/2B compatible). Plug-and-Play may not work properly if any other type of connection is attempted.
- Plug-and-Play is a system composed of the computer, its operating system and peripheral equipment (i.e. display devices).
- Please use the standard drivers in your computer as this projector is a Plug-and-Play monitor.

NOTE • Some computers may have multiple display screen modes. Use of some of these modes will not be possible with this projector.
- For some RGB input modes, the optional Mac adapter is necessary.
- When the image resolution is chatted on a computer, depending on an input
Setting Up (continued)
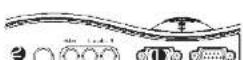
Please refer to the following for connecting your devices.
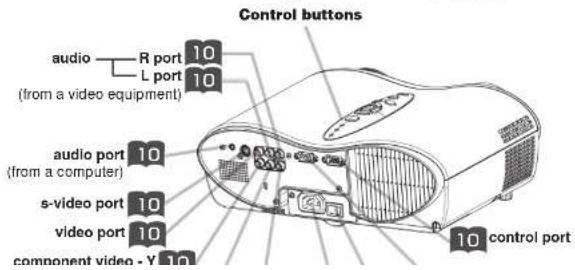
See the rear of the projector. You can see the ports.
Connecting to a computer

Connecting to a DVD/VCR player

If using a SCART RGB input,
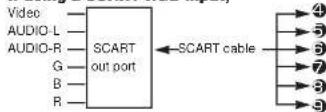
If using a \$-video input,

If using a component input,
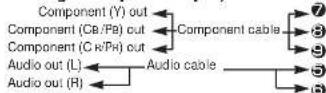
If using a component input from rgb port,

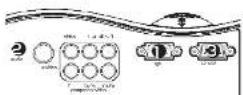
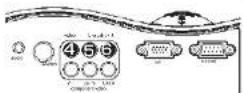
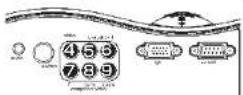
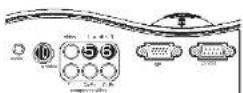
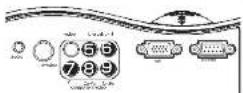
Setting Up (continued)
Connecting Power Supply
WARNING • Please use extra caution when connecting the power cord as incorrect or faulty connections may result in FIRE and/or ELECTRICAL SHOCK. Please adhere to the "Product Safety Guide" and the following.
- Only plug the power cord into outlets rated for use with the power cord's specified voltage range.
- Only use the power cord that came with the projector. If it is damaged, contact your dealer to newly get correct one.
- Never modify the power cord. Never attempt to defeat the ground connection of the three-pronged plug.
• Make sure that you firmly connect the power cord to the projector and wall outlet.
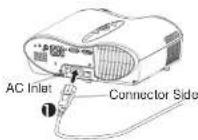
1 Connect the connector of the power cord to the AC inlet of the projector. ①
2 Firmly plug the power cord's plug into the outlet.
Remote Control
Putting Batteries
CAUTION Always handle the batteries with care and use them only as directed. Improper use may result in battery cracking or leakage, which could result in fire, injury and/or pollution of the surrounding environment.
- Keep the battery away from children and pets.
- Be sure to use only the batteries specified for use with the remote control. Do not mix new batteries with used ones.
- When inserting batteries, verify that the plus and minus terminals are aligned correctly (as indicated in the remote control).
- When you dispose the battery, you should obey the law in the relative area or country.
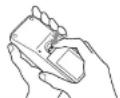
1
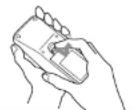
Remove the battery cover.
Slide back and remove the battery cover in the direction of the arrow.
2
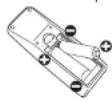
Insert the batteries.
Align and insert the two AA batteries according to their plus and minus terminals (as indicated in the remote control).
3
Close the battery cover.
Replace the battery cover in the direction of the arrow and snap it back into place.
Remote Control (continued)
Operating The Remote Control
ATTENTION • Do not drop or otherwise expose the remote control to physical impact.
- Do not get the remote control wet or place it on wet objects. Doing so may result in malfunction.
- Remove the batteries from the remote control and store them in a safe place if you won't be using the remote control for an extended period.
- Replace the batteries whenever the remote control starts to malfunction.
- When strong lights, such as direct sunlight or light from an extremely close range (such as from an inverter fluorescent lamp), hit the projector's remote sensor, the remote control may cause to function. Adjust the direction of the projector to keep light from directly hitting the projector's remote sensor.
- The remote control works with the projector's remote sensor.
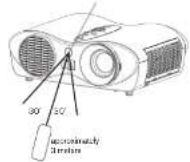
- The range of the remote sensor is 3 meters with a 60-degree range (30 degrees to the left and right of the remote sensor).
Also a remote signal reflected in the screen etc. may be available. If it is difficult to send a remote signal to the sensor directly, please try.
- Since the remote control uses infrared light to send signals to the projector (Class1 LED), be sure to use the remote control in an area free from obstacles that could block the remote control's output signal to the projector.
Remote sensor
Power ON/OFF
Turning On The Power
WARNING • When the power is ON, a strong light is emitted. Do not look into the lens or vents of the projector.
NOTE • Turn the power on/off in right order. Please power on the projector before the connected devices. Power off the projector after the connected devices.
1 Make sure that the power cord is firmly and correctly connected to the projector and outlet.
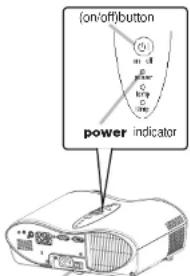
2 Set the power switch to [1] (ON).

Power switch (ON position)
The power indicator will light orange.
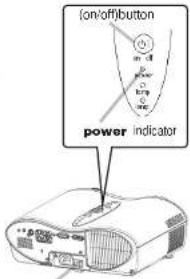
Power switch
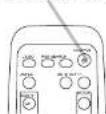
3 Press the button of the projector or the remote control.
The projector lamp will light up and the power indicator will begin blinking green.
According to a setup, the projector lamp may light up and the power indicator may begin blinking green, without pressing this button.
When the power is completely on, the indicator will stop blinking and light green.
(STANDBY/ON) button
Power ON/OFF (continued)
Selecting An Input Signal
1
Selecting a RGB signal
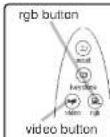
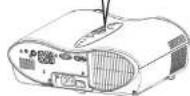
Press the RGB button of the remote control or rgb button of the projector.
When the button is pressed, the projector switches to the rgb port.
Selecting a video signal
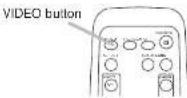
Press the VIDEO button of the remote control or video button of the projector.
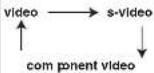
As illustrated below, each time you press the button, the projector switches between its input signal ports. Select the signal you wish to project.
2
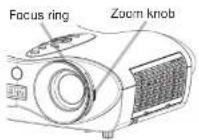
Use the zoom ring to adjust the screen size.
3
Use the focus ring to focus the picture.
Power ON/OFF (continued)
Turning Off The Power
NOTE • Turn the power on/off in right order. Please power on the projector before the connected devices. Power off the projector alter the connected devices.
1 Press the button of the projector or the remote control.
The message "Power off?" will appear on the screen for approximately 5 seconds.
2 Press the STANDBY/ON button again while "Power off?" the message is visible.
The projector lamp will go off, and the power indicator will begin blinking orange. Then the power indicator will stop blinking and light to solid orange when the lamp cooling is complete.
2 Switch the power switch to [O] (OFF).
![3M H10 - Switch the power switch to [O] (OFF). - 1](/content/2026/05/925746/images/8e8e12275d5c74bd57b8f2bd2a997a622ff24ca6f1816d23e2779d38b53028b0.jpg)
Power switch (OFF position)
The power indicator will go off.
Power switch
dl(STANDBY/ON) button
![3M H10 - Switch the power switch to [O] (OFF). - 3](/content/2026/05/925746/images/e328fc94c0243ed811c99bc19a34f675526a54b29e8e1a6c6b288ddea24c1a14.jpg)
Operating
Adjusting The Volume
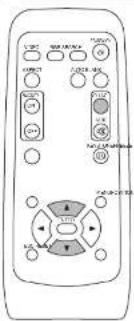
1
Press the VOLUME button.
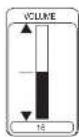
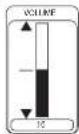
As illustrated on the right, a dialog will appear on the screen to aid you in adjusting the volume.

2
Use the ▲/▼ buttons to adjust the volume.
Press the VOLUME button again to close the dialog and complete this operation.
(Even if you don't do anything, the dialog will automatically disappear after a few seconds.)

Press this to increase the volume Press this to decrease the volume
Temporarily Muting The Sound
1
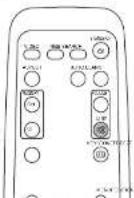
Press the MUTE button.
Press the MUTE button.
As illustrated on the right, a dialog will appear on the screen indicating that you have muted the sound. (If you don't do anything, the dialog will automatically disappear after a few seconds.)
Press the MUTE or VOLUME button to restore the sound.


- Contents
- Projector Features
- Ultra High Brightness
- Whisper Mode Equipped
- User Memory Function
- Partial Magnification Function
- Keystone Distortion Correction
- Preparation
- Part Names
- The Projector
- Attaching The Base
- Part Names (continued)
- The Remote Control
- RGB button 16
- VIDEO button 15
- ASPECT button 21
- MAGNIFY ON/OFF 20
- buttons
- To move the
- FREEZE button 20
- POSITION button 18
- STANDBY/ON button
- AUTO button
- BLANK button
- VOLUME button
- MUTE button
- KEYSTONE
- button
- To adjust the
- MENU button
- RESET button
- Setting Up
- Arrangement
- Setting Up (continued)
- Adjusting The Projector's Elevator
- Connecting Your Devices
- NOTE About Plug-and-Play Capability
- Connecting Power Supply
- Remote Control
- Putting Batteries
- Remove the battery cover.
- Insert the batteries.
- Close the battery cover.
- Remote Control (continued)
- Operating The Remote Control
- Power ON/OFF
- Turning On The Power
- Power ON/OFF (continued)
- Selecting An Input Signal
- 1
- Selecting a RGB signal
- Selecting a video signal
- 2
- 3
- Turning Off The Power
- Press the button of the projector or the remote control.
- Press the STANDBY/ON button again while "Power off?" the message is visible.
- Switch the power switch to [O] (OFF).
- Operating
- Adjusting The Volume
- Press the VOLUME button.
- Use the ▲/▼ buttons to adjust the volume.
- Temporarily Muting The Sound
- Press the MUTE button.
Brand : 3M
Model : H10
Category : Video projector