OCD7C - Tumble dryer OMEGA - Free user manual and instructions
Find the device manual for free OCD7C OMEGA in PDF.


| Product Type | Tumble Dryer |
| Brand | Omega |
| Model | OCD7C |
| Rated Capacity | 7.0 kg |
| Dimensions (L x W x H) | 615 x 595 x 845 mm |
| Weight | 41 kg |
| Rated Voltage | 220-240 V~ |
| Rated Frequency | 50 Hz |
| Rated Input Power | 2000 W |
| Ambient Temperature Range | +5°C to +35°C |
| Drying Programmes | Cotton (Extra, Standard, Iron), Quick, Baby Care, Synthetic (Extra, Standard), Jeans, Bed Linen, Mix, Sports, Shirts, My Cycle, Time (Warm, Cool, Refresh) |
| Additional Functions | Delay Start (up to 24h), Time Adjust, Intensity (4 dryness levels), Speed Dry, Signal, Anti-Crease (30/120 min), My Cycle save, Child Lock |
| Lint Filter | Clean after each use; wash with water and dry thoroughly |
| Air Condenser | Clean every 3 months; open maintenance cover, remove and rinse |
| Water Container | Empty after each use; do not drink condensate |
| Safety Features | Child lock, overheating protection, filter and water container warnings |
| Installation Requirements | Level surface, free air circulation, not behind lockable door, indoor use only |
| Warranty | 24 months (Australia/New Zealand); additional 36 months on sealed system parts |
| Energy Efficiency Test Programme | Standard Cotton programme per EN 61121 |
Frequently Asked Questions - OCD7C OMEGA
User questions about OCD7C OMEGA
0 question about this device. Answer the ones you know or ask your own.
Ask a new question about this device
Download the instructions for your Tumble dryer in PDF format for free! Find your manual OCD7C - OMEGA and take your electronic device back in hand. On this page are published all the documents necessary for the use of your device. OCD7C by OMEGA.
USER MANUAL OCD7C OMEGA
Read all instructions and explanations before use.
Follow the instructions carefully.
Keep the operation instructions handy for later use.
if the appliance is sold or passed on then ensure
that the new owner always receives these operation
instructions.
CONTENTS
SAFETY INSTRUCTIONS
■ Safety Instructions ....2
INSTALLATION
■ Product Description ....7
■Installation 7
OPERATIONS
■ Quick Start ....9
■Before Each Drying 10
■Control Panel 12
■Other Functions....14
■ Drying Programmes Table ....17
MAINTENANCE
■ Cleaning And Care.... 19
■ Trouble Shooting 20
■Technical Specifications....22
SAFETY INSTRUCTIONS
■ Safety Instructons
To prevent damage to your appliance and preven personal injury, please read and follow the following safety information.
-
This appliance is not intended for use by persons (including children) with reduced physical, sensory or mental capabilities, or lack of experience or knowledge, unless they have been given supervision or instruction concerning the use of the appliance by a person responsible for their safety. Children should be supervised to ensure that they do not play with the appliance.
-
In certain circumstances electrical appliances may be a danger hazard. Check the conformity of voltage and power settings, which are specified on the information plate attached to the appliance and/or packaging, with the usage conditions available.
-
Do not place heavy objects in or on these appliances, or use for storage, or let children play or swing from the door. Do not use the appliances until fully installed.
-
The electrical connection must be accessible after installation. The appliance must be electrically isolated before any maintenance can be performed. The appliance is not intended to be operated by means of an external timer or separate remote control system.
SAFETY INSTRUCTIONS
- The appliance is not intended for use by persons (including children) with reduced physical, sensory or mental capabilities, or lack of experience and knowledge, unless they have been given supervised or instruction concerning the use of the appliance by a responsible person for their safety. Young children should be supervised to ensure that they do not play with the appliance.
- If the supply cord is damaged, it must be replaced by the manufacturer or its service agent or a similarly qualified person in order to avoid a hazard.
- The tumble dryer is not to be used if industrial chemicals have been used for cleaning.
- WARNING: Clean the lint trap regularly.
- Lint must not be allowed to accumulate around the dryer. Not applicable for appliances intended to be vented.
- Adequate ventilation has to be provided to avoid the back flow of gases into the room from appliances burning other fuels, including open fires.
- CAUTION - If this appliance is supplied from a cord extension set or an electrical portable device, the cord extension set or electrical portable device must be positioned so that it is not subjected to splashing or ingress of moisture.
- Items that have been spotted or soaked with vegetable or cooking oil constitute a fire hazard and should not be placed in a tumble dryer. Oil-affected items can ignite spontaneously, especially when exposed to heat sources such as a tumble dryer. The items become warm, causing an oxidation reaction in the oil. Oxidation creates heat. If the heat cannot escape, the items can become hot enough to catch fire. Piling, stacking or storing oil-affected items can prevent heat from escaping and so create a fire hazard.
- If it is unavoidable that fabrics that contain vegetable or cooking oil or have been contaminated by hair care products be placed in a tumble dryer they should first be washed in hot water with extra detergent – this will reduce, but not eliminate, the hazard. The “cool down” cycle of tumble dryers should not be used to reduce the temperature of the items. They should not be removed from
SAFETY INSTRUCTIONS
- Items that have been previously cleaned in, washed in, soaked in or spotted with petrol/gasoline, Dry-cleaning solvents or other flammable or explosive substances should not be placed in a tumble dryer. Highly flammable substances commonly used in domestic environments include acetone, denatured alcohol, petrol/gasoline, kerosene, spot remover (some brands), turpentine, waxes and wax removers.
- Item containing foam rubber (also known as latex foam) or similarly texture rubber-like materials should not be dried in a tumble dryer on a heat setting. Foam rubber materials can, when heated, produce fire by spontaneous combustion.
- Fabric softeners or similar products should not be used in a tumble dryer to eliminate the effects of static electricity unless this practice is specifically recommended by the manufacturer of the fabric softener or product.
- Undergarments that contain metal reinforcements should not be placed in a tumble dryer. Damage to the tumble dryer can result if metal reinforcements come loose during drying. When available a drying rack could be used for such items.
- Plastic articles such as shower caps or babies' waterproof napkin covers should not be placed in a tumble dryer.
- Rubber-backed articles, clothes fitted with foam rubber pads, pillows, galoshes and rubber-coated tennis shoes should not be placed in a tumble dryer.
- Do not cover the air inlet or exhaust openings.
- If appliances has ventilation openings in base, ensure carpet does not obstruct the openings.
- The appliance must not be installed behind a lockable door, a sliding door or a door with a hinge on the opposite side to that of the tumble dryer in such a way that a full opening of the tumble dryer door is restricted.
- The maximum mass of dry load is 7kg.
SAFETY INSTRUCTIONS
- Always remove items from pockets (especially flamables like matches).
- This appliance is for indoor use only.
Correct Disposal of this product:
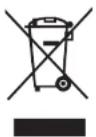
This marking indicates that this product should not be disposed with other household wastes throughout the EU. To prevent possible harm to the environment or human health from uncontrolled waste disposal, recycle it responsibly to promote the sustainable reuse of material resources. To return your used device, please use the return and collection systems or contact the
SAFETY INSTRUCTIONS
Electric shock hazard
- Do not draw the power cord forcefully to pull out the mains plug.
-
Please do not plug/draw the mains plug with wet hands.
3.Do not damage the power cord and the power plug. Injury danger -
Do not disassemble and install the dryer under no instruction or supervision.
- Do not stack this dryer on washing machine without stacking kits. (if want stacking on washing machine, please purchase the Independent parts and it must be installed by the manufacturer, its service agent or similarly qualified persons in order to avoid a hazard.)
- Do not lean on the opened door of the dryer.
- Do not place hot or burning items (for example candles) on this appliance.
Damage danger
- Do not dry over the rated capacity.
2.Do not operate the dryer without the filter door and filter base.
3.Do not dry the clothes before being spun. - Do not expose the dryer directly under the sun, and indoor use only.
- Do not install the dryer in the humid and drenching environment.
- At the cleaning and maintenance, please do remember to pull out the power plug and do not directly wash the dryer with water.
INSTALLATION
■ Product Description
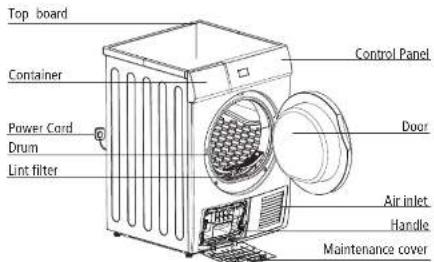
Accessories
The following parts are optional for specific models. If your dryer has following parts, please wear gloves and then install following the instruction below.
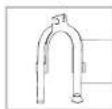
Hose holder(optional)
Condensing drain hose(optional)
■ Installation
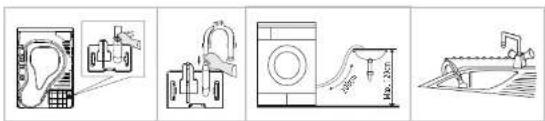
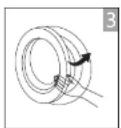
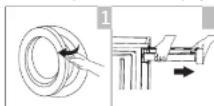
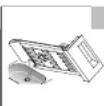
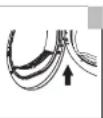
Use nliers to remove
Insert the
Put the hose holder on the washing
INSTALLATION
Transport
Move cautiously. Do not grasp any salient parts of machine. The machine door can not be used as the handle for delivery. Installation Position
- It is recommended that, for your convenience, the machine is positioned close to your washing machine.
- The tumble dryer must be installed in a clean place, where dirt does not build up. Air must be able to circulate freely all round the appliance. Do not obstruct the front air inlet or the air intake grilles at the back of the machine.
- To keep vibration and noise to a minimum when the dryer is in use, it should be placed on a firm and level surface.
- The feet must never be removed. Do not restrict the floor clearance through deep pile carpets, strips of wood or similar. This might cause heat built-up which would interfere with the operation of the appliance.
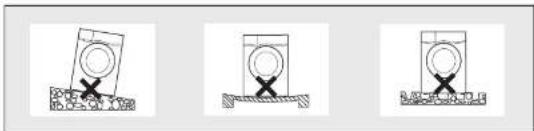
natural_image
Three identical diagrams showing a washing machine on a surface, with no text or symbols present.Level Adjusting
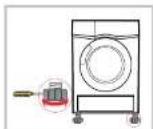
Once in its permanent operating position, check that the dryer is absolutely level with the aid of a spirit level. If it is not, adjust the feet with a tool.
Power Supply Connection
- Make sure that the voltage of the power supply is the same as the electric specification of the dryer.
- Do not connect the dryer with the power connection board, the universal plug or socket.
OPERATIONS
Quick Start
Note!
Before using, please make sure it's installed properly.
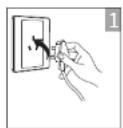
plug in
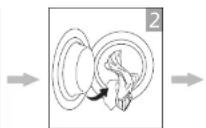
load
close door
Drying

on

select program


select function or default


start
After Drying
Buzzer beep or "0:00" on display.
open the door and take out laundry
pull out the container
pour out
condensate water
clean the filter power off
Note!
- If use the socket with a switch, please press the switch to turn off the power directly.
OPERATIONS
■ Before Each Drying
① Attention!
Before the first cycle, the dust and grease may remain in this dryer during the period of manufacture and transportation, to avoid contaminating your clothes, please follow these steps:
- Put some clean rags into the drum.
- Plug the power.
- Select the "Quick" Programme, press "Start/Pause" button.
-
After finishing this programme, please follow the "cleaning and routine maintenance" to clean the lint filter and air condenser on page 14.
-
Before drying, thoroughly spin the laundry in washing machine. High spin speed can be studying time and save energy consumption.
- For uniform drying result, sort the laundry according to fabric type and drying programme.
- Before drying, please close zips, hooks and eyelets, button up, tie fabric belts, etc.
- Do not over dry the clothes, because over dried clothes can easily get creases.
5.Do not dry the articles containing rubber or similar elastic materials. - The door can be opened only after the programme of the drying machine finishes to prevent unsatisfied by hot steam or over heated drying machine.
- Clean the lint filter and empty container after each use to avoid extension of drying time and energy consumption.
- Do not dry these clothes after dry-clean process.
The reference weight of dry clothes (each)
| Jacket (about 800g cotton) | Jeans (about 800g) | |||
| Wark clothes (about 1120g) | Sleepwear (about 260g) | |||
| Short pants (about 70g cotton) | Socks (about 50g mixed-weave) |
Note!
OPERATIONS OPERATIONS
Please pay attention to use the drying machine if the materials of your clothes can not be dried by it or contain the symbols as follows:
| Dry | Normal | Not turns dry normal | Do not dry |
| Live dry / hang to dry | Grip dry | Dry Fat | In the shade |
| Dry clean | Be not dry clean | Dry clean normal cycle with any solution | Dry clean normal cycle set to clean solution only |
Control Panel
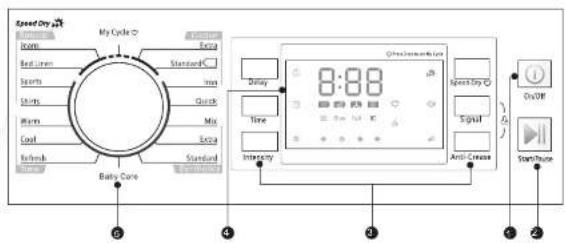
OPERATIONS OPERATIONS
1 On/Off
Product is switched on or off.
2 Start/Pause
Press the button to start or pause the drying cycle.
3 Specialty function
These buttons are used for setting additional functions.
4 Display
This display shows the setting, estimated remaining time and status messages of your dryer.
5 Programmes
Different Dryer cycle can be selected according to the user's needs to make the clothes have more effective drying results.

Fliter
Please clean the filter when the" is lighting, after the dryer stops.

Tank
Please empty the container when the" is lighting, after the dryer stops.

Delay start

Time

Child lock

Remaining Time indicator/Error message

Cycle phase status
由Filter
Clean filters (waming)
Full
Empty water container (warning)

Dryness level (four grades)

Speed dry indicator
/
Signal indicator
Programme selector
- Press the 【On/Off】button, when the LED display screen brightens up, rotate the programme knob to select the desired programme.
- Select the 【Delay】, 【Time】, 【Intensity】, 【Speed Dry】, 【Signal】or 【Anti-Crease】functions for additional option.
- Press the【Start/Pause】button.
Programme start
The drum will keep rotating after the programme starts, the state light in the display area will flash in sequence, the remaining time displayed will change automatically.
Programme end
- The drum will stop running after the programme ends, the buzzer will beep, the display will show "000" last cycle phase status light will flash. The dryer will start Anti-3 software user doesn't remove the load in 1 minute (refer to page 13). Please press key [On/Off] power and pull the plug out.
- Deal with the problem according to "Malfunction display and solutions, if there is a unexpected stop during the drying procedure and the dryer show information(refer to page 16).
■ Other Functions
- Instructions of the 【Delay】 function
This function is used for delaying clothes drying time within 24 hours. The delay time means the programme will start after x hours. When the delay programme starts, the time starts to decrease on the display and the delay icon blinks. Steps in details
- Load your laundry and make sure the machine door is closed.
- Press the 【On/Off】button, then to turn the programme selector knob and select a desired programme.
- You can select the 【Anti-Crease】 or 【Signal】 functions according to your need.
- To press the 【Delay】 key.
- Continue to press the 【Delay】to select the delay time.
- After the 【Start/Pause】 button is pushed, the door is at the run condition The
OPERATIONS OPERATIONS
- Instructions of the 【Time】function
When the warm or cool or refresh programme is selected, the 【Time】 button can be used to adjust the drying time in 10 min. steps.
- Instructions of the 【Intensity】 function
Used to adjust the dryness level of the laundry. The level has four grades.
The drying time increases 3 minutes in every grade.
-
The intensity function can be activated only before the programme start.
-
Press the 【Intensity】 button repeatedly to select the drying time.
-
Except the 【Cotton Iron】 【Quik】 【Synthetic Iron】 【Baby Care】 【Warm】
【Cool】【Refresh], all the other programmes can be the 【Intensity】 function.
- Instructions of the 【Speed dry】
Set up the buzzer on or off. In the general condition, the buzzer is on. Please press it if needed. When the buzzer on:
-
The dryer will give the leading sound if press the extra function buttons.
-
If the dryer is running, rotate the function choosing knob, the dryer will remind the operator it is an invalid choose.
-
When the drying programme is end, the buzzer will also remind the user
- Instructions of the【Anti-Crease】function
At the end of the drying cycle, the anti-crease operation time is 30 minutes (default) or 120 minutes (selected).
The 【Anti-Crease】 light shall illuminate when the anti-crease function is selected. This function prevents the laundry from creases. The laundry can be removed during the anti-crease phase. Except 【Cool】, 【Refresh】 and 【Baby Care】, all the other programmes have this function.
- Instructions of the 【My Cycle】 function
Used to define and save your favorite proragmmes that are used frequently.
- Use the programme selector to select the required programme and other drying functions.
-
Press and hold the 【Intensity】button for 3 seconds until the beep and the required programme has been saved.
-
Turn the programme selector to the 【My Cycle】position, you can start your favorite proragmmes. If you want to change the 【My Cycle】settings, repeat the steps 1 and 2.
- Instructions of the 【Child Lock】 feature
-
This machine incorporates a special child safety lock, which can prevent children from carelessly pressing keys or making the faulty operation.
-
When the dryer is at the operation state, press the 【Anti-Crease】 and 【Signal】 buttons at the same time for over 3 seconds to start child lock function. When child lock function is set, the display will show child lock icon and no key can effect to the dryer except 【On/Off】 button.
Under the start state of the child lock, the【Anti-Crease】and【Signal】buttons shall be pressed at the same time for over 3 seconds to release the child lock function.
OPERATIONS
■ Drying Programmes Table
| Programme | Weight (max) | Application/Properties | Delay | Time | |
| 7.0kg | |||||
| Cotton | For cottons and coutures made of cotton or linen. | ||||
| Extra | To dry cotton pieces of cothing. Drying level: extra dry. | Y | N | ||
| Standard | 7.0kg | To dry cotton pieces of cothing. Drying level: capillary dry. | |||
| Iron | To dry cotton pieces of cothing. Drying level: applicable to iron. | Y | N | ||
| Quick | Quick | 3.0kg | For washing synthically above the quick vinylgrades of electric fibers or for natural air, also for reduced drying. | Y | N |
| Baby Care | For tomorrow washing made of synthetic and blended fabric cotton. | ||||
| Extra | 3.5kg | To dry thick or multilayered synthetic fabrics. Drying level: extra dry. | Y | N | |
| Standard | To dry in synthetic fabrics which are not tailored, such as easy wire shells, table men, baby clothes, socks. | ||||
| Baby Care | 1.0kg | To dry the clothes of the baby at greater temperature. | Y | N | |
| Special | Jean | 5.0kg | Indy plans or store defined that accounts high speeds in treating machine. | Y | N |
| Bed linen | 5.0kg | To dry bed linen and similar large clothes. | |||
| Mix | 3.5kg | To dry can not determine that clothing materials, glucose chase Mix. | |||
| Sports | 3.0kg | To dry sportswear, chain fabrics, polyester, which are not ironed. | |||
| Shirts | 1.0kg | For next care centers were there and become much one-meter mechanism for minimum cutting after. Place clothes possess in the dye. Once dried, Hang on a clothes harge. | |||
| My Cycle | My Cycle | — | Define and save your favorable programme. | Y | — |
| Time | Warm | — | To warm cotton from minimum 18 min. to maximum 120 min (in 10 min. steps) | Y | Y |
| Cool | — | To cool better without blowing out air from minimum 10 min to maximum 20 min in 10 min. attached. | |||
| Red ash | To refresh the clothes that have been kept at close measurements for a ring price from minimum 28 min to maximum 120 min in 10 min. copyd. | ||||
OPERATIONS
Note!
- This symbol means the energy efficiency test programme "standard cotton programme", which is accordance with the applicable EN 61121 standard and most suitable to dry normal cotton load at rated load capacity.
- Thick or multi-layered fabrics, e.g. bedlinen, jeans, jackets etc, are not easy to dry.
You'd better choose Cotton Extra programme. - As the uneven material, thick and multi-layered clothes are not easy to dry, it is better to choose the appropriate time drying programme to dry them. If some parts of the clothes still damp after programme finished.
MAINTENANCE
■ Cleaning And Care
Clean the lint filter
Leave the dryer to cool down.
1.Open the machine door.
2. Take out the lint filter, pull upward to take it out.
3. Clean the lint filter; wipe off the scrap threads accumulated on the lint filter, with your hand or rinse with water and dry thoroughly.
4.Reinstall the lint filter.
Note!
- The lint filter accumulated on the filter will block the air circulation, which will cause the extension of drying time and energy use; therefore, the scrap thread filter shall be cleaned after each use.
- Do disconnect the power cord before cleaning!
- Do not operate the dryer without the lint filter!
- Clean the lint filter after each use to prevent lint accumulation inside the dryer.
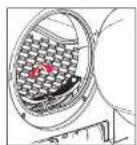
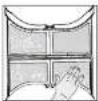
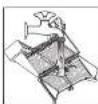
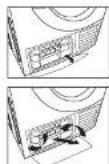
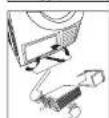
Wash air condenser
Leave the dryer to cool down.
Residual water may escape, place an absorbent
cloth under the maintenance cover.
1. Unlock the maintenance cover.
2. Completely open maintenance cover.
3. Screw both locking levers towards each other.
4. Pool out the air condenser.
5. Clean the air condenser completely, drain thoroughly.
6. Clean the seals.
7. Re-insert the air condenser, handle at the button!
8. Unscrew both locking levers.
- Cloth the maintenance cover until it locks into position. Please clean the air condenser approx, once every 3 months if frequently used.
Do not damage the air condenser!
MAINTENANCE
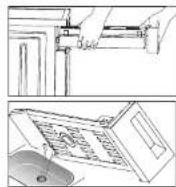
Empty the water container
1.Hold and pull out the water container with two hands.
2. Tilt the water container, pour out the condensate water.
3. Insert the water container.
⚠ Warning!
- Empty the water container after each use, the programme will be paused and the " ☐" icon will light if the water container is full during the drying process. After the container is emptied, the dryer can be restarted by pressing
【Start/Pause】 button. - Do not drink the condensate water.
- Do not use the dryer without the water container.
■ Trouble Shooting
| Alarm Problem Alarm Reason Release | ||
| " "E30 | Heating problem | P lease contact your local service center if the problem persists. |
| " "E32 | Humidity sensor error | |
| " "E33 | Temprature sensor error | |
MAINTENANCE

Warning!
- Only authorised technicians can carry out repairs.
• Before you call service, please check if you have dealt with the
fault yourself or if you have followed the user instructions. - A technician will charge you for advice, even during the warranty period.
| Problem | Solution |
| •Display does not on | • Check if the power supply works.• Check if the mains plug is inserted.• Check the selected programme .• Press the 【On/Off】button. |
| • " ☐ "is lighting | • Empty water container.• If the light is still on, please call the service. |
| • " ☐ "is inglight | • Clean heat exchanger.• Clear lint filter. |
| •Dryer does not start | • Check time has closed.• Check the programme has set.• Check the start button has selected. |
| •Degree of dryness was not reached or drying time too long | • Clean lint filter and .heat exchanger• Empty container.• Check drain hose.• Dryer installation place is too restricted.• Clean the moisture sensors.• Keep the Air inlet clean.• Use higher drying intensity level programme or time programme. |

Warning!
If you cannot deal with the fault by yourself and need help:
- Press the 【On/Off】button.
• Pull out the mains plug and call the service.
MAINTENANCE

Technical Specifications
| ModelParameter | 1%&C% | |
| Dimension(L*W*H) | 615^595*845(mm) | |
| Ambient temperature | + 5°C ~ +35°C | |
| Rated input power | 2000W | |
| Rated voltage | 220-240V~ | |
| Rated frequency | 50Hz | |
| Weight of product | 41kg | |
| Rated capacity | 7.0kg |

- The rated capacity is the maximum capacity, make sure that the dry clothes which are loaded to the appliance do not exceed the rated capacity each time.
- Do not install the tumble dryer in a room when there is a risk of frost occurring. At temperatures around freezing point the tumble dryer may not be able to operate properly.
- There is a risk of damage if the condensate water is allowed to freeze in the pump, hoses and / or condensate water container.
omega
AUSTRALIAN & NEW ZEALAND PRODUCT WARRANTY
STATEMENT OF STANDARD WARRANTY CONDITIONS
AUSTRALIAN CUSTOMERS
Our goods come with guarantee that cannot be excluded under the Australian Consumer Law. You are entitled to a replacement or refund for a major failure and for compensation for any other reasonably foreseeable loss or damage. You are also entitled to have the goods repaired or replaced if the goods fail to be of reasonable quality and the failure does not amount to a major failure.
NEW ZEALAND CUSTOMERS
Nothing herein contained shall be construed in any way as excluding or limiting your rights under the Consumer Guarantee Act 1963. OUR WARRANTY
This product is also covered by the manufacturer's warranty set out in this document (Our Warranty).
Our Warranty is for a period of twenty four (24) months from the date of purchase and for refrigeration appliances will have an additional thirty-six (30) months after the first twenty four (24) months on the Sealed System (PARTS only) Compressor & condenser etc. The labour cost to replace these parts is the responsibility of the customer.
This is in addition to (and does not exclude, restrict or modify) any rights or remedies to which you may already be entitled to under the Australian consumer law or the New Zealand Consumer Guarantee act 1993 relating to this product.
Our warranty (which is subject to the conditions below) covers rectification free of charge of any fault arising from defective materials or components, or faulty workmanship. The product will be repaired or replaced at the option of Omega, and all costs of installation, removal, cartage, freight travelling and insurance are to be paid by the customer. Our warranty is a point to the following conditions:
-
That the employees certified Person rates in pay
-
That the purchaser carefully follows all instructions provided with the product and complies with all relevant electrical & plumbing regulations in this State when installing the product.
-
That the purchaser carefully follows the instructions provided in the owner's handbook relating to the proper use and care of the product and does not use the product for any purpose other than the DOMESTIC use for which it has been designed. If the appliance is used in commercial applications or for rental purposes, Our Warranty is limited to a warranty of Twahs (12) months covering all parts with Three (3) months on any labour cost of service or repair.
SERVICE AREA
The provision of service under Our Warranty is limited by the boundary / territory area of the nearest service centre. Travelling cost incurred for service outside this area is not covered by Our Warranty and service will incur commercial cost to be paid by the customer regulated by the number of kilometres traveled beyond the service area. These costs will be disclosed to you for acceptance by you prior to your claim being processed.
Microwave ovens must be returned to your nearest Authorised Service Centre for repair as they are a carry in serviceable appliance. WHAT IS COVERED: By Our Warranty
During the warranty period, Omega or its authorized Service Centre will, at no extra charge, if your appliance is readily accessible without the need of special equipment and subject to the terms and conditions of this warranty, repair or replace any parts which it considers defective.
WHAT IS NOT COVERED: By Our Warranty
-
Products installed damaged or incomplete or not in compliance with the relevant electrical & plumbing regulations in their State
-
Normal wear and tear o.g. cleaning, light gloves, fibers etc.
-
Failure resulting from power surges and electrical storms.
-
Insect power infestation
-
Insect of vermin irradiation.
-
Unauthorised repairs or use of non-genuine Omega parts.
-
Any failure caused by the product not being used in accordance with the instruction and the installation manual provided with the product.
-
Misuse or abuse, including failure to properly maintain or service;
-
The clearing of blockages in pumps and hoses.
-
Damage which occurs during delivery or installation.
-
Claims to product surface coating due to liquid or solid spill-overs, accidental damage or damage caused from cleaning products not recommended by Omega.
HOW TO CLAIM OUR WARRANTY
You will need to contact Omega in Australia or New Zealand by using the contact details below.
IN AUSTRALIA
Omega is a division of Shire Australia Pty Ltd
ABN 28 002 386 129
Locked Bag 5002, Kingsgrove, NSW, 2208
Phone: 1300 795 572 Fax: 1800 686 413
Email: customercare@shiro.com.au
Web: www.ormegaappliances.com.au
Note: Please complete the following details when you have unpacked the product:
- CONTENTS
- SAFETY INSTRUCTIONS
- INSTALLATION
- OPERATIONS
- MAINTENANCE
- ■ Safety Instructons
- Electric shock hazard
- Damage danger
- Accessories
- Transport
- Level Adjusting
- Power Supply Connection
- Quick Start
- Note!
- Drying
- After Drying
- ■ Before Each Drying
- ① Attention!
- OPERATIONS OPERATIONS
- On/Off
- Start/Pause
- Specialty function
- Display
- Programmes
- Programme selector
- Programme start
- Programme end
- ■ Other Functions
- ■ Cleaning And Care
- Clean the lint filter
- Wash air condenser
- Empty the water container
- ⚠ Warning!
- ■ Trouble Shooting
- Warning!
- omega
- AUSTRALIAN & NEW ZEALAND PRODUCT WARRANTY
- STATEMENT OF STANDARD WARRANTY CONDITIONS
- AUSTRALIAN CUSTOMERS
- NEW ZEALAND CUSTOMERS
- SERVICE AREA
- WHAT IS NOT COVERED: By Our Warranty
- HOW TO CLAIM OUR WARRANTY
- IN AUSTRALIA
Brand : OMEGA
Model : OCD7C
Category : Tumble dryer