
BRS61X - Range hood BLANCO - Free user manual and instructions
Find the device manual for free BRS61X BLANCO in PDF.


| Product Type | Range Hood |
| Brand | BLANCO |
| Model | BRS61X |
| Width | 60 cm (23.6 inches) |
| Depth | 50 cm (19.7 inches) |
| Height | 10 cm (3.9 inches) recessed |
| Weight | 10 kg (22 lbs) |
| Power Supply | 220-240 V, 50 Hz |
| Motor Power | 200 W |
| Extraction Rate (max) | 600 m³/h |
| Noise Level (max) | 65 dB(A) |
| Lighting | LED, 2 x 3 W |
| Controls | Touch control panel |
| Speed Levels | 3 speeds + intensive |
| Grease Filter | Aluminum, washable |
| Charcoal Filter | Optional, replace every 3-6 months |
| Ducting | 150 mm diameter, top or rear outlet |
| Energy Class | A |
| Installation Type | Built-in / Under cabinet |
| Maintenance | Clean grease filters monthly; replace charcoal filter periodically |
| Safety Features | Auto shut-off timer, thermal overload protection |
| Repairability | Replaceable motor, control board, and filters |
Frequently Asked Questions - BRS61X BLANCO
User questions about BRS61X BLANCO
0 question about this device. Answer the ones you know or ask your own.
Ask a new question about this device
Download the instructions for your Range hood in PDF format for free! Find your manual BRS61X - BLANCO and take your electronic device back in hand. On this page are published all the documents necessary for the use of your device. BRS61X by BLANCO.
USER MANUAL BRS61X BLANCO
Instructions for the Use and Care and Installation of
BRS61X
Slide Out Rangehood.
Dear Customer
You will find that the modern look of your Blanco rangehood blends in perfectly with your kitchen décor. It is easy to use and performs to a high standard.
Blanco also makes a range of products that will enhance your kitchen – such as cooktops, ovens, dishwashers, microwaves, sinks and taps. There are models to complement your new Blanco rangehood. Blanco now has a range of laundry products to choose from.
Of course, we make every effort to ensure that our products meet all your requirements, and our Customer Service Department is at your disposal, to answer your questions and to listen to your suggestions.
Please complete the warranty section of this manual and keep your receipt as proof of purchase. Retain all documents relating to the purchase of Blanco product.
Blanco is committed to providing increasingly efficient products that are easy to use, respect the environment and are attractive and reliable.
BLANCO
Fig.1
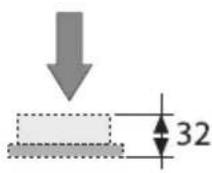


Fig.2


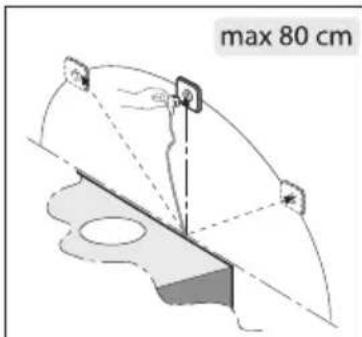
Fig.3


natural_image
Technical line drawing of a rectangular electronic component with a circular top and labeled H (no text or symbols beyond labels)

flowchart
graph TD
    A["A"] --> B["○"]
    A --> C["○"]
    A --> D["○"]
    A --> E["○"]
    F["A1"] --> G["A2"]
    G --> H["○"]
    I["○"] --> J["○"]
    K["○"] --> L["○"]
    M["○"] --> N["○"]
    O["○"] --> P["○"]
    Q["B1"] --> R["○"]
    S["B2"] --> T["○"]
    U["B3"] --> V["○"]
    W["B4"] --> X["○"]
    Y["C"] --> Z["○"]
    style A fill:#f9f,stroke:#333
    style I fill:#f9f,stroke:#333
    style Q fill:#f9f,stroke:#333
    style R fill:#f9f,stroke:#333
    style S fill:#f9f,stroke:#333
    style T fill:#f9f,stroke:#333
    style U fill:#f9f,stroke:#333
    style V fill:#f9f,stroke:#333
    style W fill:#f9f,stroke:#333
    style X fill:#f9f,stroke:#333
    style Y fill:#f9f,stroke:#333
    style Z fill:#f9f,stroke:#333

GENERAL
Carefully read the following important information regarding installation safety and maintenance. Keep this information booklet accessible for further consultations. The appliance has been designed for use in the ducting version (air exhaust to the outside), filtering version (air circulation on the inside) or with external motor.
SAFETY PRECAUTION
- Take care when the rangehood is operating simultaneously with an open fireplace or burner that depend on the air in the environment and are supplied by other than electrical energy, as the rangehood removes the air from the environment which a burner or fireplace need for combustion. The negative pressure in the environment must not exceed 4Pa (4x10⁻⁵ bar). Provide adequate ventilation in the environment for a safe operation of the rangehood. Follow the local laws applicable for external air evacuation.
Before connecting the model to the electricity network:
Inspect the data plate (positioned inside the appliance) to ascertain that the voltage and power correspond to the network and the socket is suitable. If in doubt ask a qualified electrician.
General Warnings.
■The appliance is not intended for use by young children or infirm persons without supervision.
■Young children should be supervised to ensure that they do not play with the appliance.
If the supply cord is damaged, it must be replaced by the manufacturer or its service agent or a similarly qualified person in order to avoid a hazard.
There shall be adequate ventilation of the room when the range hood is used at the same time as appliances burning gas or other fuels.
- Ensure that the range hood is cleaned frequently.
There is a risk of fire if cleaning is not carried out in accordance with the instructions.
■Do not flambé under the range hood.
Warnings for Installation:
☐ The exhaust air must not be discharged into a flue which is used for exhausting fumes from appliances burning gas or other fuels.
☐The minimum distance between the support surfaces of the cooking pots on the cooker top and the lowest part of the rangehood must be at least 65 cm.
■The regulations concerning the discharge of exhaust air have to be fulfilled.
INSTALLATION INSTRUCTIONS
NOTE: Any electrical work MUST be completed by an authorised person.
• Electric Connection
The appliance has been manufactured as a class II, therefore no earth cable is necessary. The connection to the mains is carried out as follows: BROWN = L line BLUE = N neutral If not provided, connect a plug for the electrical load indicated on the description label. Where a plug is provided, the rangehood must be installed in order that the plug is easily accessible. An omnipolar switch with a minimum opening of 3mm between contacts, in line with the electrical load and local standards, must be placed between the appliance and the network in the case of direct connection to the electrical network.
- The minimum distance between the support surfaces of the cooking pots on the cooker top and the lowest part of the rangehood must be at least 65 cm . If a connection tube composed of two parts is used, the upper part must be placed outside the lower part. Do not connect the rangehood exhaust to the same conductor used to circulate hot air or for evacuating fumes from other appliances generated by other than an electrical source. In the case of assembly of the appliance in the exhausting version prepare the hole for evacuation of the air.
INSTALLATION
The following instruction should be followed to carry out the correct installation of the rangehood.
1) Mounting of the rangehood on the lower side of the cupboard.
2) Selection of the version (extraction or filtration)
Mounting the rangehood on the lower side of the cupboard. This appliance must be fitted to a cupboard or other suitable support. For fixing use 4 screws suitable for the cupboard, using the hole
in Fig.8. When mounting align the front of the rangehood to the door of the cupboard and regulate the L wall spacer through the screws marked P (Fig. 3). The rear of the appliance must then align with the cupboard.
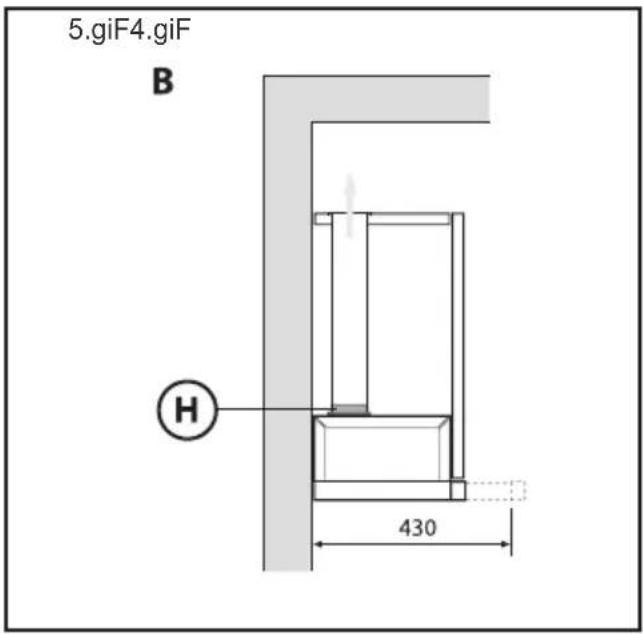
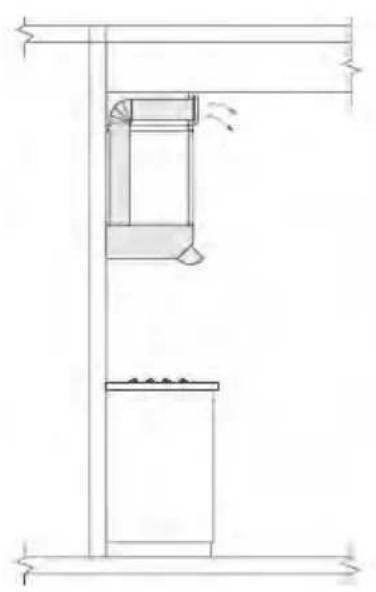
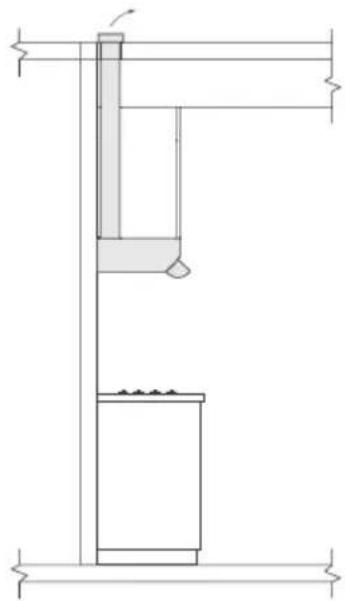
EXTRACTION THROUGH AN OUTSIDE WALL The appliance expels the fumes through an outside wall or a duct. It is necessary to buy a telescopic pipe in accordance with the standards in use and connect it to flange H (Fig.3).
RECIRCULATION.
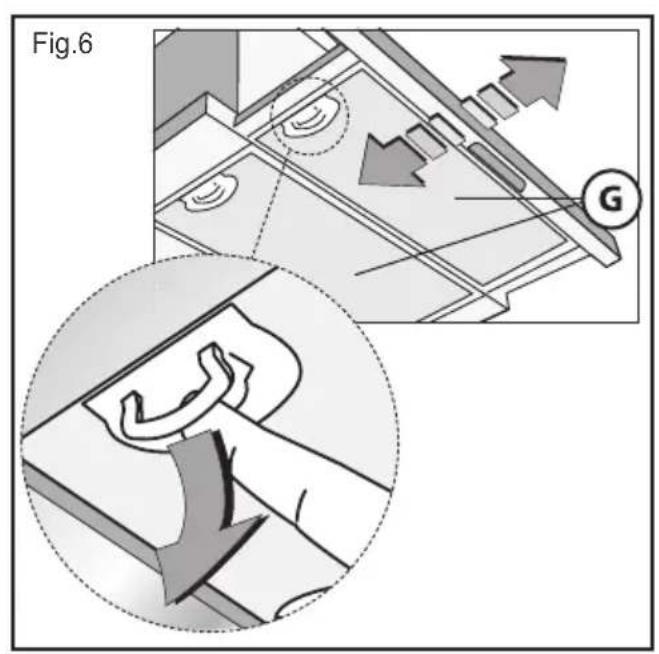
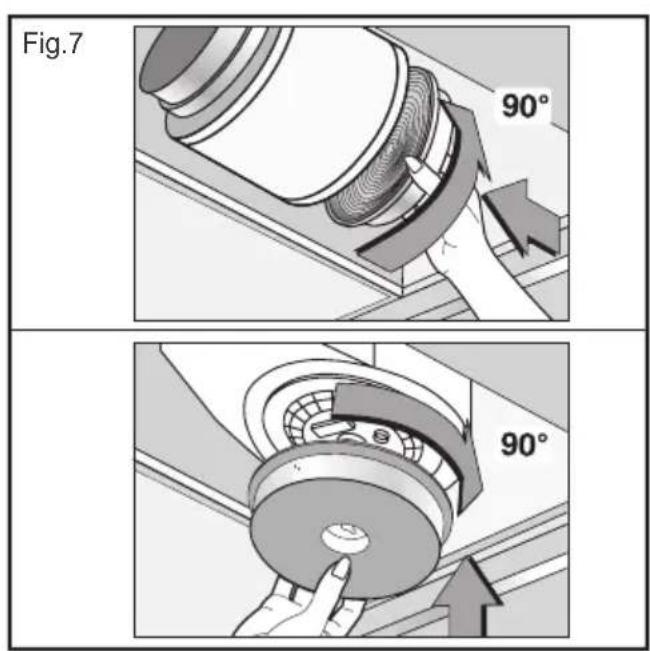
To transform the rangehood from the extraction version to the re circulating one ask your supplier for an activated carbon filter. The activated carbon filter cleans the air of the room. This filter is not washable or re-usable and must be substituted at least every 4 months. Saturation of the activated carbon depends on how often the appliance is used, the type of kitchen and how regularly the grease filter is cleaned. The filter must be fitted to the motor in the centre of the fan grille by twisting it by 90 degrees until it is gripped securely. Remove the grill (G) fig. 6 to carry out this operation. The clean air is returned into the room through a connecting tube passing inside the cupboard and connected to the ring H (Fig.3).
natural_image
Technical line drawing of a mechanical assembly with no visible text or symbolsRecirculated to room via cupboard

natural_image
Technical line drawing of a mechanical assembly with no visible text or symbolsRecirculated to room via ceiling

natural_image
Technical line drawing of a mechanical assembly with no visible text or symbolsDucted outside via wall Ducted outside via ceiling
natural_image
Technical line drawing of a mechanical assembly with no visible text or symbolsNOTE: Not fitting the appliance as per the instructions can result in an electrical hazard.
Installation
Exercise care when a rangehood is installed in an area where a gas burner is operating. Depending on the size of the room, the rangehood may draw from the room air that is necessary for proper combustion of the burner. All Blanco rangehoods are used for indoor application only.
Rangehoods may be installed in two ways:
-
Ducted to the atmosphere (outside).
-
Recirculating.
We recommend ducting to the atmosphere to ensure optimum performance. Recirculating the air back into the room should only be used when outside extraction is not possible. To ensure maximum performance when ducting it is important the ducting that carries the fumes away, be as short and as straight as possible.
When incorporating a rangehood in the design of a kitchen the following points need to be considered to achieve the most benefit from the rangehood.
- Ducting from a rangehood carrying the exhaust air, should not exceed a length of three (3) metres.
- For ducted installation we recommend using galvanised or similar metal type flue pipe. PVC pipe is not recommended.
- Ducting containing a 90° degree bend will encounter a loss in efficiency of approximately 35%. Additional 90° degree bends can cause losses of up to 15% per bend.
- Ducting size should always comply with the manufacturers specification.
- We recommend carbon filters be used when re-circulating the air into the room. There will be some loss of air movement when carbon filters are fitted.
USE AND MAINTENANCE
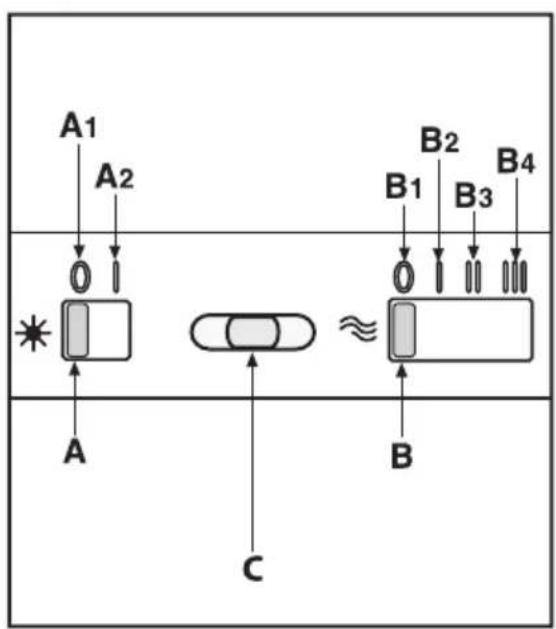
The controls are shown on Fig. 9. Select position A1 on switch A to turn off halogen lamps and position A2 to turn them on.
Switch B controls the fan speed. Select position B1 to turn fan off, B2 for low speed, B3 for medium speed and B4 for maximum speed.
Light C will be lit when the appliance is in use.
- It is recommended to operate the appliance prior to cooking. It is recommended to leave the appliance in operation for 15 minutes after cooking is terminated in order to completely eliminate cooking vapours and odours. The proper function of the rangehood is conditioned by the regularity of the maintenance operations, in particular, the active carbon filter.
- The aluminium filters capture the grease particles suspended in the air, and are therefore subject to clogging according to the frequency of the use of the appliance.
In order to prevent fire hazard, it is recommendable to clean the aluminium filter at a maximum of 2 months by carrying out the following instructions:
-Remove the aluminium filters from the rangehood and wash them in a solution of water and neutral liquid detergent, leaving to soak.
- Rinse thoroughly with warm water and leave to dry.
-The filters may also be washed in the dishwasher. The aluminum panels may alter in colour after several washes. This is not cause for customer complaint nor replacement of panels.
- The active carbon filters purify the air that is replaced in the environment. The carbon filters are not washable nor re-useable and must be replaced at maximum every four months. The saturation of the active carbon filter depends on the frequency of use of the appliance, by the type of cooking and the regularity of cleaning the aluminium filters.
- Clean the fan and other surfaces of the rangehood regularly using a cloth moistened with a non abrasive liquid detergent.
- The rangehood lighting is designed for use during cooking and not for prolonged general illumination of the environment. Prolonged use of the lighting notably reduces the duration (life) of the bulb.
- Halogen lamp bulb replacement: Use a small, flat screwdriver to remove the glass cover (Fig. 8). Remove old bulb and replace with a new one with the same ratings (fig. 10) - take care not to touch bulb with bare fingers. Replace cover.

natural_image
Symbolic logo featuring a stylized plant with leaves and a circle of euro symbol, surrounded by stars (no text or numbers present)Printed on recycled paper
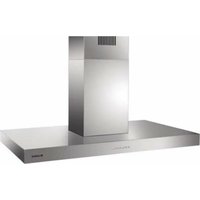
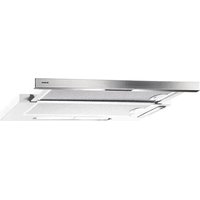

Brand : BLANCO
Model : BRS61X
Category : Range hood