
BFD10XP - Dishwasher BLANCO - Free user manual and instructions
Find the device manual for free BFD10XP BLANCO in PDF.


| Type | Freestanding Dishwasher |
| Capacity | 13 place settings |
| Dimensions (W x D x H) | 60 x 60 x 85 cm (estimated) |
| Weight | Approx. 45 kg (estimated) |
| Power Supply | 220-240 V, 50 Hz, 10 A minimum |
| Water Hardness Adjustment | Yes, levels H0 to H6 |
| Energy Efficiency Class | Not specified (estimated A++) |
| Water Consumption (per cycle) | 11 to 19 liters (depending on program) |
| Energy Consumption (per cycle) | 0.02 to 1.8 kWh (depending on program) |
| Programs | Intensive 70°C, Universal 65°C, Normal 55°C, Normal Eco 45°C, Quick 45°C, Soaking, AUTO |
| Delayed Start | Yes, programmable end time |
| Control Panel | Electronic with display, buttons and indicator lights |
| Baskets | Upper basket (height adjustable), lower basket, cutlery basket |
| Salt and Rinse Aid Indicators | Yes, with option to disable for multi-purpose tablets |
| Multi-purpose Tablet Option (Auto 4/1) | Yes, with Sparkling Clean and Extra Dry settings |
| Filter System | Three-part filter (micro, main, waste), cleanable monthly |
| Safety Systems | Anti-overflow, anti-leak, door open protection, child lock |
| Noise Level | Not specified (estimated 49 dB) |
| Installation Requirements | New hose sets, accessible socket, water supply |
| Maintenance | Clean filters monthly, run maintenance program every 3-4 months |
| Spare Parts Availability | Original parts from manufacturer/service agent |
| Repairability | Repairs by qualified technician only; use original parts |
| Warranty | Standard manufacturer warranty (details not provided) |
Frequently Asked Questions - BFD10XP BLANCO
User questions about BFD10XP BLANCO
0 question about this device. Answer the ones you know or ask your own.
Ask a new question about this device
Download the instructions for your Dishwasher in PDF format for free! Find your manual BFD10XP - BLANCO and take your electronic device back in hand. On this page are published all the documents necessary for the use of your device. BFD10XP by BLANCO.
USER MANUAL BFD10XP BLANCO
INSTRUCTIONS FOR USE
Dishwasher
BLANCO
BFD10XP Free Standing Dishwasher.
1/ FOR THE USER'S ATTENTION
- Safety instructions 4
- Protection of the environment 5
• Economical, environmentally friendly washing 5
2/DESCRIPTION OF YOUR APPLIANCE
- General presentation of the dishwasher 6
- Presentation of the control panel 7
3/ INFORMATION 8
4/ WHAT TO DO BEFORE FIRST USING THE MACHINE
- Measure the water hardness and select the type of detergent _ 9
- Hardness table 9
5/ DETERGENT PRODUCTS AND ADJUSTING THE WATER SOFTENER
- For traditional products 10
- For multi-purpose products ____ 11
6/LOADING OF REGENERATING SALT 12
7/LOADING OF RINSING PRODUCT 13
8/ YOUR DISHWASHER'S EQUIPMENT
• The lower basket 14
• The upper basket 15
• The cutlery basket 16
9/ SETTING THE PARAMETERS 17
10/ WASHING PROGRAMS TABLE \_\_\_\_ 18
11/PROGRAMMING 20
12/ YOUR DISHWASHER'S SAFETY SYSTEMS 22
13/ CLEANING YOUR APPLIANCE
- Cleaning the waste filters 23
14/ IF OPERATING ABNORMALITIES OCCUR ____ 25
15/ AFTER-SALES SERVICE 30
16/ INDICATIONS FOR THE TESTING LABORATORIES 31
EN
1/ FOR THE USER'S ATTENTION

Important :
Keep this user's manual with your appliance. If the appliance is sold or transferred to someone else, ensure that the manual is with it. Please take note of these instructions before installing and using your appliance. They have been drawn up for your own and other people's safety.
• SAFETY INSTRUCTIONS
- Installation
- When you receive your appliance, unpack it or have it unpacked immediately. Check that it has not suffered any damage during transport. Express any reservations in writing on the delivery note, of which you keep a copy. Never connect up a damaged machine. If your appliance is damaged, please contact your dealer. - Before proceeding to connect up your machine, please refer to the instructions in your Installation Guide.
- Your dishwasher must be kept disconnected from the mains supply throughout the whole of the installation process.
- The electrical connection details on your appliance's description plate must comply with those for the mains supply.
- The socket must still be accessible once your appliance has been installed.
- Do not alter or attempt to alter the appliance's characteristics. This could put you at risk.
- If your installation has to be altered, only entrust the electrical and plumbing work to a qualified electrician or plumber respectively.
- Your appliance is designed for normal domestic use. Do not use it for industrial or commercial purposes or for any other purpose than that for which it has been designed.
- The dishwasher's walls must not be pierced under any circumstances.
• Children's safety
- This appliance is not intended for use by young children or infirm persons unless they have been adequately supervised by a responsible person to ensure that they can use the appliance safely.
- This appliance must only be used by adults. Ensure that children do not touch it and do not use it as a toy. Ensure that they do not operate the appliance's controls.
- Keep young children away from the appliance when it is operating.
- Detergents contain irritant and abrasive substances. These products can have caustic effects on the eyes, the mouth or the throat. They can be extremely dangerous if ingested. Avoid any contact with the skin and the eyes. Ensure that the appliance's detergent container is empty at the end of the washing cycle.
- Place detergents out of children's reach and do not put any detergent in the machine until just before you start the washing programme.
- The water in your dishwasher is not drinking water; this is why children must not go near the appliance when its door is open.
- Do not let your children play or sit on the door when it is open.
- Once you have unpacked your appliance, place the packaging out of children's reach.
- Keep all the packaging materials (e.g. plastic bags, polystyrene, etc.) out of children's reach because they can be dangerous for children (ie. risk of suffocation).
- Use
- This appliance is not intended for use by persons (including children) with reduced physical, sensory or mental capabilities, or lack of experience and knowledge, unless they have been given supervision or instruction concerning use of the appliance by a person responsible for their safety.
- When machine is running, do not open door. This may provoke steam leakage or splattering of water.
- If the dishwasher is not being used for long periods of time, turn the electricity and water supply to the dishwasher off.
- If the supply cord is damaged, it must be replaced by the manufacturer or its service agent or a similarly qualified person in order to avoid a hazard.
EN
1/ FOR THE USER'S ATTENTION
- The dishwasher must always be connected to the water system using new hose sets.
- If the appliance is installed on a carpet floor, take care that the openings in its base are not obstructed
- Only use products specially designed for your dishwasher (water softening salt, detergent and rinsing products).
- As far as possible, avoid opening the dishwasher's door when it is operating, and in particular during the heating phases, because scalding steam may escape or you may be splashed with hot water. The machine is fitted
with a safety system that immediately blocks the dishwasher's operation if the door is opened. - Never use chemical solvents in your appliance because these could cause an explosion.
- Always close your appliance's door after loading or removing your items.
- Do not lean or sit on your appliance's door when it is open.
- You are strongly advised to disconnect the machine after use and turn off the water supply.
- Unplug your machine before carrying out any technical work on it.
- Avoid placing your machine immediately next to a cooking or heating appliance to prevent any risk of heat damage:
- Do not place any items in your machine, which are not certified as dishwasher safe.
- If you have removed an item before the end of the washing programme, it is important to rinse it carefully to remove any residual washing products.
- If your appliance breaks down, never attempt to repair it yourself. Any repairs made by non-qualified personnel can cause significant damage or lack of control.
- The machine complies with applicable safety regulations. Any repairs should be carried out by qualified technicians. Repairs or changes that do not conform may be dangerous for the users. In case of replacement, only use original parts.
- If the machine malfunctions due to other causes than those mentioned in this booklet, disconnect the machine (remove the plug) or break the circuit concerned and contact your nearest service provider.
• ENVIRONMENTAL PROTECTION
This appliance's packaging material is recyclable. Help recycle it and protect the environment by dropping it off in the municipal receptacles provided for this purpose.
Your appliance also contains a great amount of recyclable material. It is marked with this label to indicate that in countries that are a members of the European Union the used appliances should not be mixed with other waste. This way, the appliance recycling organised by your manufacturer will be done under the best possible conditions, in compliance with European Directive 2002/96/EC on Waste Electrical and Electronic Equipment.
Contact your town hall or your retailer for the used appliance collection points closest to your home.
We thank you doing your part to protect the environment.
• ECONOMICAL, ENVIRONMENTALLY FRIENDLY WASHING
- Remove any food residue from your crockery (bones, pips, etc.)
- Do not pre-wash your items by hand (useless waste of water).
- Utilise your dishwasher's capabilities to the full for an economical, environmentally friendly wash.
- Always select a washing programme suitable for the crockery type and how dirty they are.
- Avoid overdosing with detergent, regenerating salt and rinsing liquid. Follow the recommendations in this guide (pages 9-10-11) and the instructions on the product packs.
- Ensure that the water softener is correctly set (see pages 10-11).
EN 2/DESCRIPTION OF YOUR APPLIANCE
• GENERAL PRESENTATION OF THE DISHWASHER

A Upper basket
B Washing products dispenser
© Anti-blocking gauge wire
D Lower sprinkler arm
E Regenerating salt tank

Advice:
This user's guide is applicable to several models. There may be some slight differences in the details and the equipment between your appliance and the descriptions provided here.
F Waste filter
G Main filter
H Rinsing product dispenser
Description plate (After-Sales Ref)
EN 2/DESCRIPTION OF YOUR APPLIANCE
• PRESENTATION OF THE CONTROL PANEL
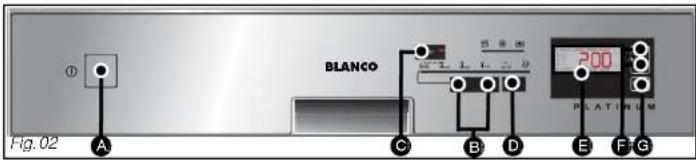
On/Off:
Press this button to start your dishwasher.
B Choosing a programme:
briefly press one button or the other in succession to select your programme.
© AUTO:
Press this button to select an automatic programme.
D Set:
- A long press: Access to the Settings menus;
- Set the current time,
- Set the water softener,
- Activate or deactivate the "Regenerating Salt" and/or "Rinsing Product" lights, or the "AUTO 4/1" function (depending on the water softener setting on the following pages).
- Beep at end of programme,
- Set screen brightness.
The screen shows you the current time, the finishing time, the remaining time for the programme and the parameter settings.
This shows you the programme's progress.
F Delaying the end of a programme:
Press one of the buttons or the other to select the time for the programme to end.
Start/Cancel: Briefly press this button to start your programme.
If you make an error, to cancel a selection or cancel a programme while it is running, hold down this button for 3 seconds.
The indicator lights:
Salt:
When lit, it indicates lack of regenerating salt

Rinsing liquid:
When lit, it indicates lack of rinsing product
Multipurpose products:
lit; shows you that the "AUTO 4/1" feature is turned on and that the programmes are now automatically adjusted if a multi-function tablet is used.

Advice:
A short audible signal (beep) confirm the button's selection, except for the "On/Off" button.
EN

Important:
To obtain impeccable washing and drying results from your dishwasher without any marks, you must set it carefully using the water softening system, which utilises regenerating salt (rock salt).
As rainwater infiltrates into the ground it picks up mineral salts; some minerals are found in solid form and are commonly called 'lime'. This reduces the detergent's washing performance and leaves white marks on the crockery.
The more lime there is in the water, the 'harder' the water is.
- Use the most suitable washing products for the hardness of your town's water supply.
- There are several types of products:
For an impeccable clean, opt for using traditional products together:
① Washing product for a perfect clean (standard powder, liquid or tablets).
② Regenerating salt (rock salt) for your dishwasher's water softener to work correctly.
③ Rinsing liquid to assist drying and eliminate drip marks.

Important:
Never use normal washing-up liquid.
For ease of use and in certain water hardness conditions only (< 25°F), multi-purpose products can make the use of regenerating salt and rinsing liquid unnecessary.
- "Two-in-one" tablets contain detergents and rinsing liquid or an agent serving the function of the salt.
- "Three-in-one" tablets contain detergents and rinsing liquid as well as an agent serving the function of the salt.
- "Four-in-one" tablets also contain additives that prevent wear on poor quality glasses or the risk of stainless items corroding.

Important:
Follow the instructions in the user's manual and the recommendations on the multi-purpose detergent's pack.

NB:
If in any doubt, please contact the detergent's manufacturer if the items are very wet at the end of the programme or if chalky deposits appear.
EN
4/ WHAT TO DO BEFORE FIRST USING THE MACHINE 3/ INFORMATIO
- MEASURE THE WATER HARDNESS AND SELECT THE TYPE OF DETERGENT: TRADITIONAL OR MULTI-PURPOSE
In one simple action, you can test the your water's lime content using the testing strip supplied with your dishwasher. Alternatively, contact your local water utility to ascertain your water's hardness.
- Let the water run from the tap for a few moments.
- Fill a glass with water.
- Take the test strip from its holder and immerse it for 3 seconds.
- Wait 1 minute, shake it and look at the colours to ascertain your water's hardness.


- HARDNESS TABLE
| Test strip | □□□□□ | ■□□□□ | ■□□□□ | ■□□□ | ■□□□□ | ■□□□□ | ■□□□□ |
| Hardness | 0-10°F | 10-18°F | 18-25°F | 25-40°F | 40-55°F | 55-70°F | >70°F |
| Water | Soft | Slightly hard | Slightly hard | Hard | Hard | Hard | Very hard |
| Water softening and use of salt | Optional | Essential if using traditional products | Essential if using traditional products | Mandatory | Mandatory | Mandatory | Mandatory |
![Possible use of traditional products ① ① [P or L or ] + S + R - or ② Multi-purpose ②](/content/2026/05/923520/images/367b4574cbe611c7c1859f83f1ddba6b12d34eca7f0c975930d94711c3cfe5c0.jpg)
1 Traditional products: P: Powder detergent or Li: Liquid detergent or single tablet
• S3 Regenerating Salt • R : Rinsing product
② Multi-purpose products: Multi-purpose tablets
EN 5/ DETERGENT PRODUCTS AND ADJUSTING THE WATER SOFTENER
• FOR STANDARD WASHING PRODUCTS
- Your machine must be specially adjusted to use standard washing products.
-
Proceed as follows to adjust the water softener on the control panel:
-
This feature is adjusted using the "SET"; button; hold down this but-
ton to access the menu. Then press twice to set the softener level.
—The softener level is then shown on the screen from HO to HH6The
default level is HHY - To change the level from H-H-C, depending on the water hardness, press either arrow button several times the screen displays the level you have set.
- The setting is validated automatically after 10 seconds if the "SET" button in not pressed again.
- Pressing "SET" enables you to validate the setting and move on to the next parameter.
| Testing strip | □□□□□ | ■□□□□ | ■□□□□ | ■□□□□ | ■□□□□ | ■□□□□ | ■□□□□ |
| Hardness | 0-10°F | 10-18°F | 18-25°F | 25-40°F | 40-55°F | 55-70°F | >70°F |
| Traditional product | H0 | H1 | H2 | H3 | H4 | H5 | H6 |
Factory setting : H144

Important:
It is very important to set the water softener correctly.
- If the setting is too low, there is the risk of chalky marks appearing.
- if the setting is too high, there is the risk of causing clouding of the glasses.
If you relocate, adjust the water softener setting as required.
Standard washing tablets
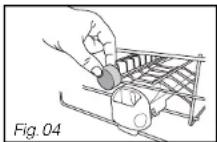
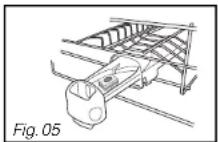
Non-multipurpose tablets should be placed in the external compartment (Fig 04) or, for optimum performance, pull out the dispenser drawer and lay the tablet inside (Fig 05).
• Powders or liquids (Fig 13)
Fill at least up to the minimum mark for slightly dirty crockery and to the maximum mark for dirty crockery. If the crockery is very dirty and for programmes with a pre-wash we recommend that you add 5g of detergent (a dessert spoonful) into your dishwasher's tub in accordance with the programmes table.

Important:
Keep these products out of children's reach and away from dampness. Only use products specially designed for dishwashers.

EN 5/ DETERGENT PRODUCTS AND ADJUSTING THE WATER SOFTENER
• FOR MULTI-PURPOSE PRODUCTS (Water hardness less than at 25°F)
- Your appliance automatically adapts to using multipurpose products when the water hardness is less than 25ircF .
• Proceed to set the water softener
- This feature is adjusted using the "SET"; button; hold down this button to access the menu. Then press twice to set the softener level.
- The softener level is then shown on the screen from H0 to H6. The default level is H49
- In order to use multi-function tablets, you need to adjust the setting. To do this, press either arrow button several times until you have selected H1 or H2 depending on the water hardness.
- Proceed to set the "☐" function (optional)
- Hold down the "SET" button until the "AUTO 4/1" light flashes, then press one or other of the selection buttons
- OFF: deactivates the "Auto 4/1" option.
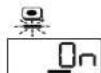
_ On : corresponds to activation of the "AUTO 4/1" function with the setting for "Sparkling Clean". This enables you to prioritise a brilliant finish for your crockery. - n : corresponds to activation of the "AUTO 4/1" function with the setting for "Extra Dry". "Extra dry" enhances the drying results if performance is reduced.
- The setting is validated automatically after 10 seconds if the "SET" button in not pressed again.
- The "Auto 4/1 🔒" light then illuminates permanently if this option has been selected.

| Testing strip | |||
| Hardness | 0-10°F 10- | 8°F 18-25°F | |
| Multi-purpose products Function Deactivated | |||
| Multi-purpose products Sparkling Clean | |||
| Multi-purpose products Extra Dry | |||

NB:
You can deactivate the "Salt" and "Rinsing" product lights if you are using multi-purpose products; this is done by using the "SET" button (page 17)
- Loading the multi-purpose tablet dispenser
To assist in loading the detergent, the distributor is situated on the front of the upper basket. It is compatible with all the products recommended for dishwashers.
- Place the tablet in the external compartment (Fig 04 on previous page) or, for optimum results, pull out the distributor's drawer and lay the tablet inside (Fig 05 on previous page).
- Close the dispenser.

6/ LOADING OF REGENERATING SALT
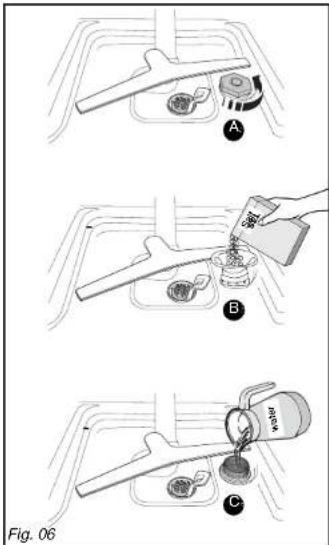
- Loading of regenerating salt (Fig 06)
Filling with salt is essential for providing a good wash without marks. It regenerates the resins that soften the water, by removing its lime content (unless the mains water supply is soft enough). Refer to "Settling the water softener".

Important :
Only use special dishwasher regenerating salt. Do not use table salt or any type of cooking salt, this could damage your appliance's water softener.

A. Unscrew and remove the stopper on the salt tank.

B Fill the tank with regenerating salt specially designed for dishwashers.

Use the funnel supplied with your dishwasher. The first time, top up with water up to the rim of the tank.
• Regenerating salt indicator: \$
This illuminates when salt must be added. After the tank has been filled with regenerating salt, the indicator light may remain lit until the salt has dissolved sufficiently, usually after one cycle (of if the tank has not been filled completely; for example, when first putting the machine into service using the sample).
This can be deactivated as indicated in the paragraph "For multi-purpose products" setting table.

Important
If the salt overflows when filling the tank, to avoid oxidization of the tub it is advisable to remove the salt crystals or to run a Prewash programme (or Rapid programme - depending on the model).

7/ LOADING OF RINSING PRODUCT
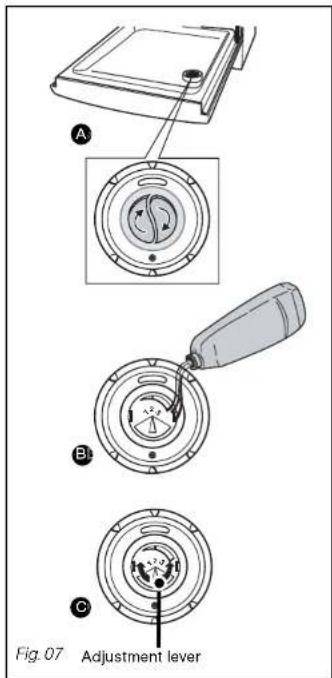
- Loading of rinsing product (Fig. 07)

Important :
Only use a rinsing product designed for dishwashers. The rinsing product ensures your items shine and are well dried.

● B When first putting the machine into service, fill the tank until the level is flush with the top of the adjustment lever. Pour in at least all the rinsing product provided.
The tank contains 120 ml (approximately one glass)
The original setting is in the centre (middle position: reference mark 2). If you encounter marks or poor drying after a few cycles, you can adjust the setting using the adjustment lever (fig 07 C; Reference mark 3 will increase the setting).
- Close the tank lightly
• Rinsing liquid indicator light:
This illuminates when rinsing product is required.
It can be deactivated as shown in the paragraph "For multi-purpose products" setting table.

Important :
If any of the product overflows during filling, sponge up the excess to avoid producing foam.
EN
8/ YOUR DISHWASHER'S EQUIPMENT

Very important
Items not suitable for washing in a dishwasher:
- Wooden cutting boards
- Stainless steel utensils or plastic utensils that are not heat-resistant
- Copper or pewter items
- Glued crockery and cutlery
- Cutlery with wooden, horn or mother-of-pearl handles
- Antique or hand-painted porcelain
When purchasing crockery, glasses or cutlery, ensure that it is dishwasher-safe
• THE LOWER BASKET
Arrange your items so that the water can circulate freely and spray over all the utensils.
Place large diameter dishes and pans at the sides.
Do not intersperse, jam together or superimpose flat plates and concave dishes (Fig. 08). The flexible racking spikes makes it easier to arrange your large dishes (Fig. 09).

Advice:
When you re-insert the lower basket, ensure that nothing catches on the oversize plate barrier to avoid blocking the rotating spray arm.
Unloading your items
Empty the lower basket to avoid drips from the upper basket falling onto the lower basket.

natural_image
Line drawing of a kitchen sink with plates and a basket (no text or symbols)
natural_image
Illustration of hands using a tool to cut or install a grid structure, with no visible text or symbols.EN
8/ YOUR DISHWASHER'S EQUIPMENT
• THE UPPER BASKET
This basket is particularly designed to take glasses, cups, ramekins, small salad bowls, bowls and saucers.
Arrange your items methodically to save on space (arranging glasses, cups or bowls together).
You can also arrange cups, ladles, etc. on the folding cup racks (Fig. 10)

Advice:
Position the cavities of glasses, cups or bowls facing downwards.
- Adjusting the height of the upper basket
For large dishes to be loaded in the lower basket, the upper basket must be set the to high position. This can be done with the basket fully loaded (Fig. 11)
① Setting in HIGH POSITION:
Gently raise your basket on each side until it engages.
② Setting in LOW POSITION:
Raise your basket completely on both sides to unlock it and then lower it to the low position.

Important :
Check that the two slides are set to the same height and the basket is horizontal.


SETYOKETESPARAMETERS EQUIPMENT
• THE CUTLERY BASKET
The cutlery basket slides to allow flexible loading.
It can be placed anywhere in the lower basket. You can therefore make a variety of loads depending on the items (Fig. 12).
If your cutlery items or your dishes are too large, alter the height setting for the upper basket.
Movable grills are available for if you wish to load your cutlery in an orderly manner (Fig. 13).
For optimum washing and drying, use these separation grills partially or totally.
Point the handles on the cutlery downwards.

Important :
For safety reasons, we recommend that you place knives with pointed ends with the point facing downwards in the cutlery basket (to avoid the risk of an accident).
Long-bladed knives and other sharp kitchen utensils must be placed flat in the upper basket.
Avoid washing cutlery with horn handles in your dishwasher.
Separate silverware from other metals using the separation grill.

natural_image
Line drawing of a kitchen sink with dish, plate, and drawer (no text or symbols)
natural_image
Line drawing of two woven baskets with handles and woven patterns, labeled Fig. 13 (no text or symbols on the baskets themselves)
- SETTINGS POSSIBLE USING THE "SET" AND SELECTION BUTTONS:
- 1 long press on the "SET" button and then a short press enables you to move on to the following parameters.
Set the parameters by pressing one of the programme selection buttons or the other.
Move on to the next parameter by pressing "SET".
1 long press

Briefly
press the "SET" button once and then press one
or other of the selection buttons
> Setting the clock (hour)
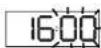
To do this, hold down the "SET" button. When the time starts to flash, press one of the selection buttons or the other until you reach the desired time. Press SET to move on to the next parameter.
> Setting the clock (minutes)
Proceed in the same way as above; press one of the selection buttons or the other to set the minutes.
> Setting the water softener
Set to the level corresponding to the hardness of your water: H100H65
> Product use
You can cancel display of the relevant indicators, depending on the products used:
- Salt Set to OFF if you do not use salt or f you are using multi-purpose tablets.
- Rinsing product Set to OFF if you do not use a rinsing product or if you are using multi-purpose tablets.
> Multipurpose tablets and the "AUTO 4/1" function
- For optimum product performance (depending on the water softener setting table on page 11), set:
- Be deactivate the "AUTO 4/1" function
- Activate the "AUTO 4/1" "Extra Dry" function (default selection)
- On to activate the "AUTO 4/1" Sparkling Clean function.
> Beep at the end of the programme
00to activate the function:OFF if you do not wish not to hear the beep at the end of the program.
> Screen brightness
Set the screen brightness to suit yourself from Lu1 minimum to Lu5 maximum.


Display







Advice:
The setting is confirmed automatically when you move on to the next parameter or if the "Set" button is not pressed again within the next 10 seconds.
EN
/ WASHINGTON PROGRAMS
EN
• PROGRAMS TABLE
| ITEM TYPE (porcelain, pans, cut- lery, glasses) | Resistant | Mixed | Mixed | Mixed | Mixed | Mixed | Mixed |
| FOOD RESIDUE: Quantity, type and amount | Very dirtyA large amount of dried-on residue, baked-on stains, grease, residue from frying, cooked cheese, sauce, etc. | Normally dirtyA normal amount of dried-on and greasy residue on everyday items.Faster, but consumes more energy. | Normally dirtyA normal amount of dried-on, adhering residue on every-day items. | Normally dirtyRecommended for normally soiled load, less consum-ing in energy. | Very short 30-minute wash specially designed for a small amount of daily items with a limited amount of non-greasy residue, not dried on | Very short cycle (with no detergent) for rinsing and re-dampening the items while waiting for a wash expected the following day or even the day after | Automatically detects the amount of washing up and the level of soiling. Normal amount of dried on residue on everyday items.Faster, but consumes more energy. |
| PROGRAMS | Intensive70°C | Universal65°C | Normal55°C | Normal Eco45°C | Quick45°C→ | Soaking | AUTO |
| PROGRAM SEQUENCE | Hot pre-washWashing at 70°C | Pre-washWashing at 65°C | Pre-washWashing at 55°C | Pre-washWashing at 45°C | Washing at 45°C | Pre-washWashing at 55/65°C | |
| RinseHot rinse | RinseHot rinse | RinseHot rinse | RinseHot rinse | RinseHot rinse | RinseHot rinse | ||
| Air Drying | Air Drying | Air Drying | Air Drying | Air Drying | |||
| As an indication only: | |||||||
| Duration in min | 130'-150' | 90'-120' | 130'-150' | 110'-145' | 30' | 15' | 100'-130' |
| Water (l) | 17-19 l. | 17-19 l. | 15-17 l. | 12.1-15 l. | 11 l. | 4.5 l. | 17-19 l. |
| Energy (kWh) | 1,7-1,8 kWh | 1,5-1,6 kWh | 1,3-1,4 kWh | 0.55-1,3 kWh | 0,8 kWh | 0,02 kWh | 1,4-1,6 kWh |
These values refer:
- to normal usage conditions with separated products (detergents, salt, rinsing product).
- only to multifunction product usage conditions
They may vary depending on the load, the water temperature, the softener setting, the presence of rinsing product and the supply voltage.
EN


Advice:
Consult the Programmes table on the preceding pages to determine the programme you need for the type of items, the quantity and the amount of food residue.
• Starting the appliance
Press the "On/Off" button A switch the machine on.
- Starting a programme immediately Select your programme by pressing one of the selection buttons B
- The Auto programme can be accessed by pressing the "AUTO" button Ⓒ
- The ☑ fbutton scrolls the programmes to the left (if the "INTENSIVE" programme is selected, pressing this button causes the "Rapid" programme to be selected).
- The → button scrolls the programmes to the right (if the "Rapid" programme is selected, pressing this button causes the "INTENSIVE" programme to be selected).
- When a programme is selected, the relevant indicator light illuminates. The screens show the envisaged time that the programme will end.
Press "Start/C"; the programme starts and the screen shows the amount of time remaining for the programme.
Finishing time
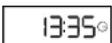
Programme time remaining, progress

End of programme

EN
11/PROGRAMMING11/PROGRAMMING
- Delaying the end of a programme F
Programme the finishing time, in quarter of an hour stages, by pressing the + or - buttons until you reach the desired time.
Confirm by pressing "Start" G
The screen counts down hour by hour until the programme starts.
Waiting for delayed start
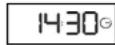
Programme time remaining, progress

End of programme

• Cancelling a programme
Hold down the "Start / Cancel" G button for a few seconds.
- Stopping the appliance
When the programme has finished, press the "On/Off" button A
- Setting the audible signal
The setting enables you to activate or de-activate the beep at the end of the programme.
- Access the setting holding down the "SET" button Dili you hear a double signal (long beep). Keep on pressing "Set" successively until you have access to the parameter:
The setting is confirmed automatically after 10 seconds or by pressing "SET" (switching to the next parameter "Screen brightness").
Beep activated
Beep de-activated
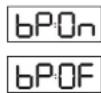
A short audible signal (beep) confirm the button's selection, except for the "On/Off" button.
EN 12/BOURG ISCUAISPEIANGAFETY SYSTEMS
• SAFETY SYSTEMS
• Door poorly closed
After confirming the programme ("Start" button), your dishwasher issues three short high-pitched beeps to indicate that the door is not closed and the light for the selected programme flashes.
- Programme access lock
Throughout the period the programme is running, or the full duration of the programme, the programme selector and the buttons are automatically protected from any kind of manipulation. This unlocks automatically at the end of the programme or when the programme is cancelled by holding down the "Start" button for 3 seconds.
• Advice on cleaning the filters
F.1 E Approximately every month, your dishwasher advises you to proceed to service the filters (see Section "Cleaning the waste filters" - Fig. 14-15).
• Anti-overflow system
This system activates the drain pump automatically if the water in the tank reaches an abnormal level.
• Anti-leak protection system
This system cuts off the water supply if a leak is detected under the appliance.
• Total safety
This supply pipe is fitted with a device to cut off the water supply directly at the tap if there is a leak.
Alarm light
For programme errors or incidents (please refer to Section 14 "If an operating abnormality occurs").

NB:
To unlock, hold down the Start / Cancel button for three seconds.
EN
• CLEANING THE WASTE FILTERS
The filtration system consists of several elements:
A -The waste filter
B -The large main filter
© -The micro filter
The filters are located in the centre of the tub and must be washed regularly to obtain optimum washing results.
Actions :
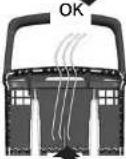
① Before removing the filters, remove any waste on the large main filter ② with a sponge so that the waste does not block the sprinkler arms. Rotate the spray arm as shown in the drawing. (Fig. 14)
② Boosen the waste filter a quarter of a turn and then remove it A
③ Remove the main filter B
④ Remove the micro filter
⑤ Carefully clean filters A, B and C
under running water (Fig. 15)
Re-installation:
Proceed in reverse order, inserting filters C and ● and t(A)
Important :
Remember to lock the waste filter in place by pushing it in fully and turning it a quarter turn.

EN
- Periodically
Every 3 or 4 months, in order to remove any deposits, run a special maintenance programme, without any items in the machine, using a special dishwasher cleaning product.

Important :
Keep this product out of children's reach.
- If not using your dishwasher for a prolonged period:
Clean your dishwasher completely and then unplug it from the electricity supply and close the water tap. Protect your machine from potential frost.

Advice :
Do not use abrasive powders, metal sponges and alcohol-based or thinner-based products.
Use a cloth or a sponge.
If you are moving house, run a soaking programme first of all, in order to avoid any water escaping.
EN
14/ IF OPERATING ABNORMALITIES OCCUR13/ CLEANING YOUR APPLICANC
• SUMMARY OF THE FAULTS
| ↓ Flashing LED(s) ↓ for models without a display ↓ Flashing LED(s) ↓ | |||
| ●○○○ | d01 : water supply fault (tap) | d07 : overflow / anti-leak fault | ●●●○ |
| ○●○○ | d02 : draining fault | d08 : sprinkling distribution fault | ○○○● |
| ●●○○ | d03 : heating fault | d11 : pressure sensor fault | ●●○● |
| ○○●○ | d04 : temperature fault | d12 : filling fault (water inlet detection system) | ○○●● |
| ●○●○ | d05 : faulty motor | d13 : faulty heating | ●○●● |
| ○●●○ | d06 : faulty motor | d14 : installation fault (incorrect drainage connection or inadequate flow rate and tap). | ○●●● |

Tip:
If one of the above faults occurs and you need to call a repair man, remember to tell him
the message displayed (d01, d02...) as this information will help him.
• BEFORE CALLING FOR SERVICE
| Problem Possible causes What to do? | ||
| The door falls heavily when opened (integratable model) | - Door springs not tensioned enough to compensate for the weight of the panel. | - Tighten the two tensioning screws accessible in the bot-tom section above the front feet. |
| The door does not stay horizontal when open or returns too quickly (integratable model) | - Door springs tensioned too much.- No wooden panel. | - Loosen the two tensioning screws accessible in the bot-tom section above the front feet.- Fit a temporary wooden panel on the appliance and adjust the springs. |
| The door catches when closing | - Appliance not stable- Door not centred on the tub | - Adjust the feet.- Re-centre by adjusting the rear feet. |
| The upper basket does not stay in the high position | - Poor manipulation (the basket is being pulled upwards too quickly) | - Act more progressively (see instructions), one side and then the other. |
| Small leak around or under the appliance (move the appliance to locate the leak) | - Leak from the tap.- Leak from the appliance.(Cf. table fault d07). | - Check that a seal is fitted and retighten the nut.- Close the water tap and call a technician. |
| Small leak at the door | - Appliance not stable or not level- Door not centred on the tub. | - Adjust the feet.- Re-centre by adjusting the rear feet. |
EN 14/ IF OPERATING ABNORMALITIES OCCUR
• THE INDICATOR LIGHTS
| Problem Possible causes What to do? | ||
| The salt light does not go out - No salt or an insufficient quantity of salt in the tank to trigger the float. | - Refill the tank and wait for the cycle to end. If you have soft water that requires no salt, the light is constantly lit. | |
| The lights all light up one after the other | - Wrong programme. | - Cancel the current programming by holding down the Start button for 3 seconds and then re-programme. |
| A light flashes and the programme does not start | - Programme selector wrongly positioned (between two notches) | - Reposition the selector on a programme. |
• RELATING TO PROGRAMMING, DISPLAY
| Problem Possible causes What to do? | ||
| The cycle lasts too long - The energy-saving programmes last longer because the agitation and drying times are longer to compensate for the lower washing and drying temperatures | - Use these programmes preferably at night when it is not so important how long the programme lasts or when it ends. | |
| The appliance trips the circuit breaker | - Insufficient amperage to supply all the appliances being operated simultaneously.- Internal fault in the appliance. | - Check the socket's amperage (10A minimum) and the meter's capacity.- Call a technician. |
| The appliance does not start - No mains power to the socket.- Tap closed (Cf. table fault d01).- Water supply hose kinked.- Selection error or programme blocked.- Start button pressed too long (greater than 2 secs).- Appliance in Safety mode (anti-leak) (Cf. table fault d07). | - Check the socket and the fuse- Check the tap is open.- Check the hose line is OK.- Cancel by holding down Start for 3 secs and re-programme.- Just press Start briefly to start the programme.- Call a technician. | |
EN 14/ IF OPERATING ABNORMALITIES OCCUR
| Problem Possible causes What to do? | ||
| The appliance will not restart - D | Dor opened during a washing cycle. | - Wait for the time delay to end (controlled internally by the appliance). |
| The appliance does not drain (Cf. table fault d02). | - The cover has not been removed from the sink's U-bend.- Drain hose kinked.- Filters totally blocked.- Pump blocked. | - Remove the cover.- Check the drain hose line behind the machine is OK.- Remove and clean the filters and the drain.- Initiate a Soaking programme If the fault persists, call a technician. |
| The appliance will no longer function (see table, fault 14). | - installation of non-compliant drainage system: drainage too low down or pipe pushed too far in.- siphoning: the appliance is emptying as the same time as it is filling up. | - adhere to the drainage tube installation dimensions. |
• POOR WASHING RESULTS
| Problem Possible causes | What to do? | |
| Food traces and deposits in the glasses | - Items poorly arranged (masked by another larger item or situated underneath it, items nested or jammed together).- Upper spray arm blocked by cutlery or a dish etc.- Filter poorly locked and lifting during washing.- Micro filter screen clogged.- One or more holes in the spray arm blocked. | - Arrange the items properly. Use the most appropriate areas and accessories for each type of item (see instructions).- Check that the spray arm rotates freely. Set the basket in the high position if necessary.- Check the filter's facing and that the filter is locked in place (push it in fully, turning it to the right).- Remove all the filters and clean them (in warm water), including the micro filter's screen (once a month).- Remove the spray arm by turning the lever a quarter of a turn and clean it under the tap (do not use any tool that could damage the holes). Re-install the spray arm. |
| Traces of grease - Detergent dose too low; inefficient detergent; stale product.- Inappropriate programme (temperature too low; duration too short). | - Increase the dose; try another detergent.- Select a programme with a higher temperature. | |
EN 14/ IF OPERATING ABNORMALITIES OCCUR
• POOR WASHING RESULTS...
| Problem Possible causes What to do? | ||
| White marks(identify what type) | - Chalky film (removable with vinegar).- Traces of salt (items have salty taste). | - Check that there is salt in the tank (light unlit = OK).- Check the water hardness at the tap and that the water softener is set correctly. Adjust it to a higher level if necessary.- Water too hard for using a "4-in-1" detergent without the addition of salt. Check that the stopper on the salt container is closed correctly. |
| White marks(identify what type) | - Glass cloudy because water too soft (cannot be removed). | - Check the water hardness at the tap and that the water softener is set correctly. Some detergents in pellet form are more aggressive to glasses and decorations (change the product and use a protective product if necessary). |
| Coloured marks (tea, wine, coffee) | - Items poorly arranged- Detergent dose too low; inefficient detergent- Programme temperature too low.- If you use a multifunction product. | - Turn the cavities in the items towards the jets.- Increase the dose; try another detergent.- Select a more suitable programme with a higher temperature.- Use the "4-in-1" option (depending on the model). |
| Streaks or dried droplets on glasses | - Lack or insufficient amount of rinsing product.- Rinsing product out-of-date or inefficient.- If you use a multifunction product. | - Check the indicator light and fill the tank completely. Adjust the dispensing unit to a higher position if necessary.- Use a recent product (a good product dilutes easily and foams in cold water).- Use the "4-in-1" option with a setting prioritizing drying (parametering from the menu - depending on the model). |
| Dried-on marks on glasses, dullness. | - If you use a multifunction product. | - Use the "4-in-1" option with a setting prioritizing brilliance (parametering from the menu - depending on the model). |
EN 14/ IF OPERATING ABNORMALITIES OCCUR
• POOR OPERATION
| Problem Possible causes What to do? | ||
| Constant fillingA lot of waste on the large filter at the end of the cycle. | - Drain hole situated too low for the appliance (Cf. table fault d012).- The filters and drain outlets are blocked with too much residue. | - Drain wand has fallen on the floor.- Remove and clean the filters and the bottom of the drain outlets. Remove large residue from the plates before putting them in the machine. |
| Traces of rust on stainless steel | - Quality of the stainless steel; not dishwasher-safe (knives in particular) | - Use "special dishwasher-safe" cutlery.- Check that the lid on the salt container is closed correctly. |
• POOR DRYING RESULTS
| Problem Possible causes What to do? | ||
| A lot of droplets on the glasses | - Lack or insufficient amount of rinsing product.- The dose has not been distributed.- Positioning of the items. | - Check the indicator light and fill the tank completely.- If the tank is not empty after approximately 60 washings, call a technician.- Arrange the items to restrict water retention as much as possible. Leave the door ajar for a few minutes, if possible |
| Droplets on plastic items, Tefal coatings, etc. | - These items have a low calori-fic mass. | - Arrange the items in the upper basket. |
| Poorer drying on rapid programmes | - On rapid programmes, the drying temperature and drying period are reduced to cut down the duration of the cycle as much as possible. | - Leave the door ajar for a few minutes. |
| Condensation on the wall of the inside door or the tub. | - Condensation may form on the walls, particularly after the appliance has cooled down (sound insulation increases this occurrence) | |
EN
15/ AFTER-SALES SERVICE
• INTERVENTION WORK
Any intervention work on your appliance must be performed by a qualified professional approved by the manufacturer. When you call, please mention the full reference for your appliance (model, type and serial number). This information is shown on the description plate (see Fig. 16)
ORIGINAL PARTS
When maintenance is being carried out, ask for only certified original spare parts to be used.

EN
16/ INDICATIONS FOR THE TESTING LABORATORIES
ENERGY EFFICIENCY TESTS ACCORDING TO AS/NZS 2007 PROGRAMME : Normal Eco 45°C
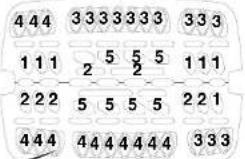
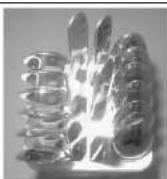
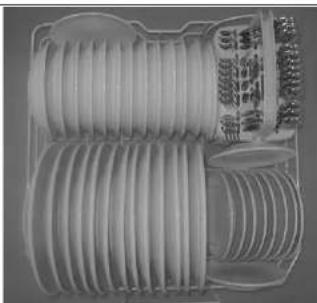
- Washing capacity 13 standard place settings - Arrangement of the items Figs. A-B-C; IEC load (next page)
- Loading as per the indications on next page, with one or two side shelves, without stemmed glass support, and with 5 cup/saucer supports (4 for 13 saucers & 1 for 2 cups)
- Setting for upper basket ---- Low position
- Dosage of detergent 5 + 26.25 g of detergent
- Setting for rinsing product distributor 3
- The water softener must be set to 0-10°F instructions in the paragraph on "Adjusting the water softener".
- Door ajar 100 mm upon completion of dry test.
For more information on the comparison tests in accordance with AS/NZS 2007, please contact the manufacturer of the machine before commencing testing.
NB: When conducting tests using a multi-function tablet:
- Check that the water softener is correctly set for the water hardness (Chapter 5 / DETERGENT PRODUCTS AND ADJUSTING THE WATER SOFTENER • FOR MULTI-FUNCTION PRODUCTS) - Pull out the detergent distribution drawer and place the tablet in the interior compartment.
EN
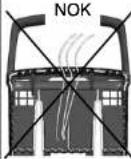
16/ INDICATIONS FOR THE TESTING LABORATORIES : IEC LOAD
A

natural_image
Interior view of a food delivery box containing various items including tomatoes and condiments (no visible text or labels)B



C

natural_image
Stacked cylindrical plastic components with a patterned top section, no visible text or symbols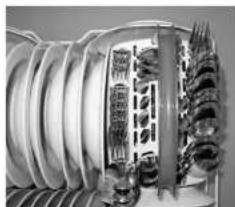
natural_image
Interior view of an industrial electrical insulator with visible internal components and wiring (no text or symbols)EN
16/ INDICATIONS FOR THE TESTING LABORATORIES : AS/NZS LOAD
A

natural_image
Top-down view of a plastic tray with stacked circular components and a small inset showing a battery (no visible text or symbols)B


C
natural_image
Close-up of a plastic cup with coiled white insulation, no visible text or symbols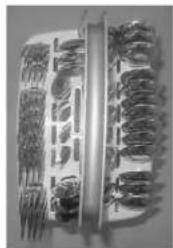
natural_image
Close-up of a decorative object with floral patterns and a curved base (no visible text or symbols)

- BLANCO
- 1/ FOR THE USER'S ATTENTION
- 2/DESCRIPTION OF YOUR APPLIANCE
- 3/ INFORMATION 8
- 4/ WHAT TO DO BEFORE FIRST USING THE MACHINE
- 5/ DETERGENT PRODUCTS AND ADJUSTING THE WATER SOFTENER
- 6/LOADING OF REGENERATING SALT 12
- 7/LOADING OF RINSING PRODUCT 13
- 8/ YOUR DISHWASHER'S EQUIPMENT
- 9/ SETTING THE PARAMETERS 17
- 10/ WASHING PROGRAMS TABLE \_\_\_\_ 18
- 13/ CLEANING YOUR APPLIANCE
- Important :
- • SAFETY INSTRUCTIONS
- - Installation
- • Children's safety
- - Use
- • ENVIRONMENTAL PROTECTION
- • ECONOMICAL, ENVIRONMENTALLY FRIENDLY WASHING
- EN 2/DESCRIPTION OF YOUR APPLIANCE
- • GENERAL PRESENTATION OF THE DISHWASHER
- • PRESENTATION OF THE CONTROL PANEL
- EN
- Important:
- For an impeccable clean, opt for using traditional products together:
- NB:
- 4/ WHAT TO DO BEFORE FIRST USING THE MACHINE 3/ INFORMATIO
- - MEASURE THE WATER HARDNESS AND SELECT THE TYPE OF DETERGENT: TRADITIONAL OR MULTI-PURPOSE
- EN 5/ DETERGENT PRODUCTS AND ADJUSTING THE WATER SOFTENER
- • FOR STANDARD WASHING PRODUCTS
- Standard washing tablets
- • Powders or liquids (Fig 13)
- • FOR MULTI-PURPOSE PRODUCTS (Water hardness less than at 25°F)
- • Proceed to set the water softener
- - Proceed to set the "☐" function (optional)
- - Loading the multi-purpose tablet dispenser
- 6/ LOADING OF REGENERATING SALT
- - Loading of regenerating salt (Fig 06)
- • Regenerating salt indicator: \$
- Important
- 7/ LOADING OF RINSING PRODUCT
- - Loading of rinsing product (Fig. 07)
- • Rinsing liquid indicator light:
- Very important
- • THE LOWER BASKET
- Advice:
- Unloading your items
- • THE UPPER BASKET
- - Adjusting the height of the upper basket
- SETYOKETESPARAMETERS EQUIPMENT
- • THE CUTLERY BASKET
- - SETTINGS POSSIBLE USING THE "SET" AND SELECTION BUTTONS:
- Briefly
- > Setting the clock (hour)
- > Setting the clock (minutes)
- > Setting the water softener
- > Product use
- > Multipurpose tablets and the "AUTO 4/1" function
- > Beep at the end of the programme
- > Screen brightness
- • Starting the appliance
- - Starting a programme immediately Select your programme by pressing one of the selection buttons B
- 11/PROGRAMMING11/PROGRAMMING
- - Delaying the end of a programme F
- • Cancelling a programme
- - Stopping the appliance
- - Setting the audible signal
- EN 12/BOURG ISCUAISPEIANGAFETY SYSTEMS
- • SAFETY SYSTEMS
- • Door poorly closed
- - Programme access lock
- • Advice on cleaning the filters
- • Anti-overflow system
- • Anti-leak protection system
- • Total safety
- Alarm light
- • CLEANING THE WASTE FILTERS
- Actions :
- Re-installation:
- - Periodically
- - If not using your dishwasher for a prolonged period:
- Advice :
- 14/ IF OPERATING ABNORMALITIES OCCUR13/ CLEANING YOUR APPLICANC
- Tip:
- EN 14/ IF OPERATING ABNORMALITIES OCCUR
- 15/ AFTER-SALES SERVICE
- • INTERVENTION WORK
- ORIGINAL PARTS
- 10.000
- 16/ INDICATIONS FOR THE TESTING LABORATORIES
Brand : BLANCO
Model : BFD10XP
Category : Dishwasher